A TOUR OF THE EXPO FLOOR
Macworld for Photographers
 By MIKE PASINI
Editor
The Imaging Resource Digital Photography Newsletter
SAN FRANCISCO -- In some respects Macworld Expo upstaged the much larger Consumer Electronics Show held in the same week, at least as far as those of us interested in digital photography are concerned. It wasn't the effect so much of a product announcement or two (although there were those) as much as a display of new directions in several areas.
|
|
NIKON CAPTURE NX | Back to Contents
Nikon (http://www.nikonimaging.com), which did not have a booth at CES, was a popular spot on the Expo floor. In addition to their dSLR and Coolpix digicam lines, the company also had a few monster lenses set up apart from the display counters for their fans to peer through.
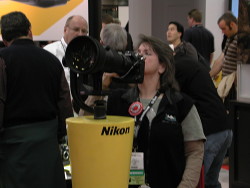
Nikon Glass. You don't need a quarter.
But the big news from Nikon was a new version of Capture NX, their flagship image editing software that's equally adept at manipulating Raw NEF images and JPEGs.
Highlights of the new release include:
- Resizable and larger windows for Levels & Curves and Histograms
- Overall speed is faster
- Universal Binary running natively on PPC and Intel chips
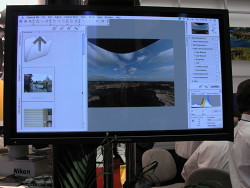
New NX. Faster, Universal Binary, coming "soon."

Improved Dialogs. Levels & Curves, Histogram
And there are a few other tidbits that "will be announced as we go along." When can you get it? "We're shipping sometime soon."
In the course of our show coverage, we turned the odometer over on our Average digicam's file counter. Which means we've shot over 10,000 images with it. And no, we don't have 10,000 images in our iPhoto library or our Lightroom database or our Aperture database or even on our hard disk.
We store them on a series of CDs (when cameras didn't have more than 3.1 megapixels) and DVDs (for larger sensors). And we store them on an external drive. But we keep replacing the external with a larger version every year or so. And we suspect you're in the same boat. Lots of images, where to store them?
At CES, Kodak's Nancy Carr argued that the best place for them was in the sky. She meant Kodak Gallery. And Kodak has an intriguing new project called Golden Eye that can get them there the second you press the shutter button using Bluetooth technology.
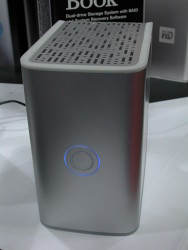
My Book (front)
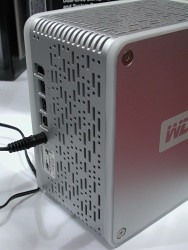
My Book (back)
The problem with that approach, despite its convenience, is that Kodak has the key, not you. And recent developments (a change in compression or full resolution availability, say) don't encourage much confidence in that arrangement.
We've been looking into network storage devices, which are essentially hard disks you plug into your network hub so everybody on the network can see them and backup important files (like our pictures) to them. And while they work with Macs, they are 1) pricey and 2) dicey (getting to work with Mac filenames, etc. since they aren't Macs). We weren't very surprised to see not a single network storage solution on the floor (but see Apple's intriguing solution below), although a couple of vendors promised one "sometime soon."
Instead, we saw much beefier versions of our external drive, starting with Western Digital's $550 My Book Pro Edition II (http://www.wdc.com), which provide a terabyte of storage in a dual-drive system. This is a handsome unit that stands up somewhat like a fat aluminum dictionary.
It ships configured as a one-terabyte striped array but you can reconfigure it as a RAID 1 array, turning it into a 500-GB external drive that backs itself up. With a RAID 1, when a drive goes down, you still have your data (about 142,000 digital photos, according to Western Digital). Just swap out the dead drive to get back your redundancy. The case has two large screws you remove to get inside and fool around with the two 500-GB SMART drives. If one goes down during the three-year warranty period, you take it out, leaving it on its rails and send it back to Western Digital for a replacement.
You connect it to a Mac via any of its three interfaces: FireWire 800, FireWire 400 or USB 2.0. There's also a capacity gauge on the drive to tell you how full it is. It ran warm to the touch but was quiet (at least in noisy Moscone).
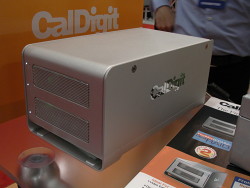
CalDigit S2VR (front)

CalDigit S2VR (back)
A few booths away we found a cooler competitor from CalDigit (http://www.caldigit.com). Their S2VR dual-drive enclosure really was cool to the touch with a fan drawing air from the front across the drives and out the back.
It was quiet too. But a lot more expensive, running $474 for 500-GB and $949 for a terabyte. They also offer five and eight drive towers but these have SATA interfaces only. The smaller dual-drive model offers a triple interface: FireWire 800, FireWire 400 and USB 2.0. But that also knocks the warranty down from three years to two.
A switch on the back configures the drive for RAID 0 or RAID 1 mode. RAID 0, the striped approach, writes one track to one drive and another to the other drive, enhancing performance. RAID 1 mirrors the data of one drive on the other.
CalDigit claims is has "the only real hardware FireWire RAID 1 solution" because when a mirrored drive fails, only their drive lets you swap out the dead drive, replace it and rebuild it. We asked an engineer how silly it would be to rely on that feature for offsite backups, pulling a mirrored drive and swapping in a third one so you can take the first offsite. "That would work," he nodded, but it would take a couple of hours to rebuild the new drive.
Apple announced a somewhat limited solution to this issue with its new Airport Extreme (http://www.apple.com/airportextreme). The $179 unit will include a USB port when it ships in February. And that port can handle either a printer or a USB drive (or both if you attach them to a USB hub). The company claims that whatever's on the drive can become instantly available to anyone on the network. But a USB drive isn't going to have the kind of performance an Ethernet network storage device would, nor would it offer the RAID options network backup box should. It is a welcome storage option, of course, but even there, apparently not visible to Apple TV.
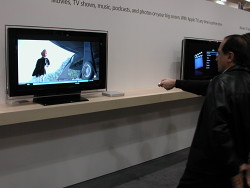
In our Dec. 22 newsletter last year, we discussed several ways to show your digital photos on HDTV. And we weren't real happy with any of them. "The video world is still not very accommodating when it comes to still photography," we warned, suggesting your best bet may be nothing more exciting than a CD.
Apple TV. Point and shoot.
What a difference a new calendar makes. Two weeks into the new year, Apple introduces its $299 Apple TV (http://www.apple.com/appletv) to display the photos on any computer on your network (among other things). Suddenly it's simple to use that big screen in the living room to show the images you just copied off your camera onto your computer, which you'd do anyway, right?
The trim box, which looks like a thin-crust Mac mini, includes an Intel processor, 40-GB hard drive, Wireless B/G/N and Ethernet. In addition to a power port, it has one HDMI interface, component video, optical audio, analog RCA stereo audio. There's also a built-in infrared receiver to talk to the remote control.
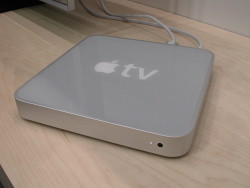
Front

Back
The specs say it talks to HDTV capable of "1080i 60/50Hz, 720p 60/50Hz, 576p 50Hz (PAL format), or 480p 60Hz" but the tech on the show floor told us it was limited to 720p output.
It won't replace your DVR, though. The internal drive's job is to hold data from your networked computers, syncing whatever audio, video or photos you tell it to sync. You can alternately stream content from up to five networked computers to the device. And it's all done through iTunes.
What's that remind you of? Right, an iPod. It's an iPod driven by iTunes that uses the networked computers for its input and an HDTV for its output. So, if you can get your content into iTunes, you can get it on your HDTV. Apple says it will also display images collected in Photoshop Elements or Adobe Album on a Windows machine.
Much as we'd enjoy whining about what's missing and what might have been (like some access to our collection on external storage), Apple TV is no more disappointing than any other AV box we've looked into and it has the virtue of showing our stuff on the big screen.
THE LITTLE SCREEN | Back to Contents
Then, of course, there's the problem of the little screen. The one on your camera. Actually, it isn't so much a question of "the" problem as it is the problem_s_ of the little screen.
LCDs, commonly the only viewfinder on a digicam, are hard to see in sunlight and they scratch easily. dSLRs have their own issues, forcing you to squint, flip up your glasses or just approximate a composition.
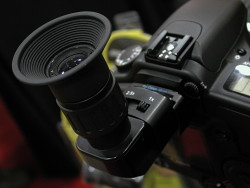
H-RAV
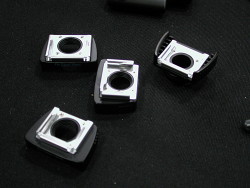
Adapters
At the Hoodman booth (http://www.hoodmanusa.com) we found solutions for all of these problems. The company's Hoodskins are clear protective overlays for 1.5 to 4-inch digicam LCDs. You get 12 for $10.99. Hoodman, whose claim to fame are those hoods you see on the cameras at NFL games, also takes care of the sunlight issue with small hoods, flip-up LCD caps and hooded loupes.
But what caught our attention was its $130 H-RAV universal right angle viewfinder with a built-in 1x and 2x diopter. The device lets you get the camera off your nose and even compose a shot at floor level. But you don't have to look down to appreciate it, really. It's just a more convenient way to compose through your dSLR's viewfinder -- especially considering the view is magnified.
We were a little skeptical about the universal claim, but Hoodman knows what its doing. Four mounts are included, each one labeled for the kind of camera it works with. And four really did seem to cover it.
Good guys, good products, solutions that work.
Screens are not the only place images inhabit, of course. The print has always had a special place in the hearts of photographers (and collectors of the art). And now that even digicams can capture enough data to print 13x19 images without artifacts, the industry is delivering a new stable of 13x19 printers to create that special image in a format that's hard to ignore.
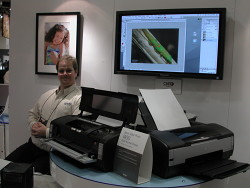
Epson 1400 booth
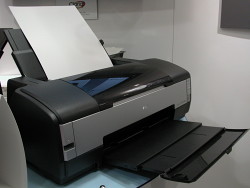
Epson 1400 Printer
We recently reviewed Canon's latest entry, the Pro9000 (http://www.imaging-resource.com/PRINT/CP9K/CP9KA.HTM), and have HP's B9180 in the wings. But Epson has just announced its $399 Stylus Photo 1400, a replacement for the 1280 due in early February. We got a peek at one on the Expo floor.
The 1400 uses Epson's Claria hi-definition dye-based inks to reproduce the Adobe RGB color gamut, a wider gamut than the 1280. It's a six-color set that rates 98 years longevity under glass on Epson papers, according to the company. The ink set includes cyan, magenta, yellow, light cyan, light magenta and one black cartridge that does not swap out.
Using Epson's Micro Piezo print heads, the 1400 prints variable droplet sizes to optimized detail in the highlights, the company said.
It can handle specialty media like canvas and watercolor paper and, with a special tray, also print directly on special CDs and DVDs. And it includes USB 2.0 and PictBridge connections. And a wireless Ethernet option is available, too.
But the 1400's biggest attraction may be its price. The Canon Pro9000 lists at $500, $100 more. And the HP, a pigment printer, lists at $700 (although you can save $105 on it through the end of the month). We noticed a trend toward very low prices on fairly competent digicams at CES and it looks like Epson is applying the same strategy to this large format printer.
There's been quite an expansion in products designed to remove dust from dSLR sensors. Having interchangeable lenses is great, but it exposes the inside of the camera to dust that eventually intrudes on the image path, settling on the glass cover of the sensor. Even if you're careful (meticulous let's say), you can expect to see dark blodges appear one day on your images. The only way to avoid it is to avoid removing the lens, which takes the fun out of a dSLR.
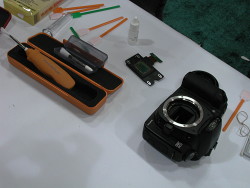
Visible Dust booth
We've seen a variety of solutions. Green Clean (http://www.green-cleanusa.com) relies on the Venturi effect and a can of compressed air. Dust-Aid (http://www.imaging-resource.com/NEWS/1167931526.html) taps into the technology of sticky notes that leave no residue. And then there's inevitable slightly moistened swab. Cooper Hill (http://copperhillimages.com) has a nice tutorial on the process and sells its own product, SensorSwipe, which is what we use in the lab at Imaging Resource.
The various approaches are meant to handle various kinds of "dust." Those range from the floating sort that merely lands on the sensor glass, attracted by some static charge to the oily residue of some shutter mechanisms that glob on to the glass.
Green Clean exhibited at photokina last year, but we were surprised to see the granddaddy of them all, Visible Dust (http://www.visibledust.com) at Macworld. And they drew quite a crowd. Its Sensor Brush has a motor in the handle that spins the brush fibers so they acquire an electrical charge that attracts dust from the sensor surface to the brush. You don't push the dust around with this brush, the company said, but attract it. The company also offers a wet cleaning swab for more reticent debris.
Frankly, we find all of these products both effective and overpriced. Our Sept. 16, 2005 article on dSLR sensor cleaning (http://www.imaging-resource.com/IRNEWS/index-arch.html) describes our experience cleaning a sensor on a review unit. But we'd caution you not to be too cavalier about what touches your sensor glass. Don't improvise with a cosmetics brush, for example.
If you're nervous about that at all, you can send your camera to the manufacturer to be cleaned, of course. Or use software to map the dust spots and magically eradicate them.
Speaking of software, we ran across a couple of interesting niche products.
We mentioned Vertus' $200 Fluid Mask (http://www.vertustech.com) in our photokina coverage, charmed by its ability to extract a gnarly head of hair from the sky. Image editing software continues to improve its object extraction capability. We saw some easy-to-use tools in Elements, which seem to have migrated to Photoshop CS3, for example. But it remains a nasty problem, primarily because it takes some judgement to know where to draw the line between what's background and what's foreground, what to discard and what to keep. The improvements have been mainly in making a credible mask quickly -- and to be credible you have to clip inside the object, featuring it a bit.
Fluid Mask
New Sky
Fluid Mask automatically identifies object edges but also provides pixel level mask control with its Region Editor, so you can refine just where the line is drawn. You can easily switch from the mask to a preview of your image to evaluate the results.
Once again the demo impressed us. We hope to have a review copy shortly to see just how easy it is to extract objects with Fluid Mask. If you do a lot of masking, a tool like this can quickly pay for itself.
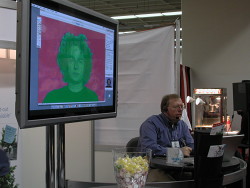
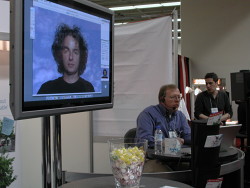
In a small booth behind the huge Apple booth, we found Digital Film Tools (http://www.digitalfilmtools.com). The company, an off-shoot of a Los Angeles visual effects lab for the movie industry, sells filters for After Effects, Avid, Final Cut Pro and Photoshop.
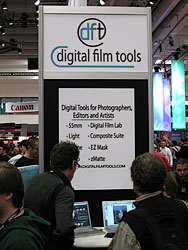
Digital Film Tools
The Photoshop plug-ins include:
- 55mm with glass camera filter simulation, specialized lenses, optical lab processes, film grain, matte generation, exacting color correction as well as natural light and photographic effects
- Digital Film Lab to transform crisp, harsh looking video into the softer, more organic look of film using the included 135 preset film looks
- Light! which taps into a pre-built light and texture library that includes windows, doors, leaves and abstract patterns to add realistic lighting and shadow to scenes as if you were adding a light at the time of shooting
- Ozone, inspired by the Zone System, allows you to manipulate the color of an image using a Digital Zone System that divides the spectrum of image values into 11 discrete zones in which the color, brightness, contrast and gamma of each zone can be independently adjusted
- zMatte, intelligent blue and green screen keying that for even challenging shots, including DV and HD de-artifacting, color suppression, matte manipulation, color correction, edge treatment and light wrapping
- EZ Mask, an easy-to-use interactive image masking tool capable of extracting almost any object in an image -- even if you are dealing with fine hair detail, smoke, or reflections.
- Snap, an easy-to-use interactive image cutout tool designed to extract solid or opaque objects
We watched a few of these tools being demonstrated at the booth and were impressed with the interface and performance. The Web site has an excellent description of each tool with great Before and After shots.
Mikkel Aaland
One of the best reasons to attend a show like this is the chance to sit down. We did that at the O'Reilly booth (http://www.oreilly.com) where three rows of directors chairs faced a podium for one or another of the publisher's well-regarded authors to talk about their work. When we dropped by Mikkel Aaland was talking about Lightroom.
At photokina we used Photoshop's Web gallery option to build our slide shows, but as nice as we thought they formatted Web pages, we had to edit the CSS ourselves to add captions. For CES and Macworld (http://www.imaging-resource.com/EVENTS/MWSF07/gallery/), we relied on Lightroom to do the job, adding our captions in the IPTC Caption field while we ranked our shots in the Library module. We were also able to make some quick exposure and white balance adjustments at the same time. Then it was just a quick trip to the Web module to create the pages for our galleries of images.
Lightroom doesn't replace Photoshop, as Mikkel pointed out at the end of his presentation. But Photoshop is like a four-wheel drive vehicle, he said. It can go anywhere, but it can be less than a pleasant trip. Lightroom, in contrast, is like a Porsche. You can't go everywhere in a Porsche but it's a much smoother experience.
All that talk of seated operations was getting to us, so we grabbed an empty director's chair when the crowd dispersed (simultaneously with the end of the presentation). From that vantage point we were able to observe the master divulging workflow secrets as two or three people came up to ask questions.
Interestingly enough, Mikkel revealed to one curious questioner his directory structure for archiving his images. He groups them in folders named for the year and then into folders named by date.

Secret Code
But that logical and common practice wasn't what grabbed our attention. No, we just happened to notice he relies on pictographs seemingly derived from ancient Chumash Indian cave paintings to indicate with dry erase markers the remaining capacity on his external hard drive. Familiar with cracking code ourselves, we deciphered "300GB" and "15m BF trip" on the big box attached to his 17-inch PowerBook. We thought about it a minute and realized the "300GB" indicated capacity while the "15m BF trip" surely showed the remaining free space before he left for Macworld.
"What do you do, Mikkel?" we asked. "You going to erase that and write '10m AF trip' when you copy today's images to it?"
He refused to admit we'd figured it out, revealing only that if we really wanted to know, we'd have to buy his next book, which covered the subject indelibly.
Normally, we would have given him a standing ovation, delighted to hear he's deep in another of his apparently ghost-written wonders, but we were too tired from our trek in the CES desert and our dash to Macworld to get up. "Send me a review copy?" we asked for the last time that day.
Then, our job done, we closed our eyes and took a little nap.
We normally publish show news concurrently with the show, but this year we tried to cover both Macworld and the Consumer Electronics Show in the same week. That delayed our coverage of Macworld until this roundup. Apologies for the delay.