HP SCALABLE PRINTING TECHNOLOGY
HP D7160 -- Quick & Quiet
 By MIKE PASINI
Editor
The Imaging Resource Digital Photography Newsletter
Review Date: August 2006
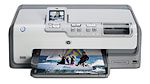
The HP Photosmart D7160, based on what HP calls its "scalable printing technology," is a $149 six-color inkjet that prints high quality photos that "last for generations." Unlike HP printers of the past, this generation of Photosmart printers packs each ink in an individual high-capacity ink cartridge. Solidly built, the D7160 is capable of high-volume printing of 4x6-inch photos in about 14 seconds each.
The Photosmart D7160 has an automated 4x6-inch built-in photo tray in its letter-sized paper tray and features automatic photo enhancements using the company's "Real Life technologies." A card reader, PictBridge port and color LCD complete the standalone package.
It isn't a compact printer, taking up most of a desk, but it is a bit lower than competing models. All printer features and controls are accessible from the front. And you don't need to give it any elbow room in the back for the paper path, which starts and ends up in front.
Let's take a look at the printer's feature list first.
- Six-ink color (cyan, magenta, yellow, photo cyan, photo magenta, black) with HP Vivera Inks that resist fading for generations
- Print lab-quality photos without a computer directly from PictBridge- enabled cameras using convenient USB port
- The 2.4-inch LCD tilts upwards to adjust the viewing angle and allows you to select, rotate, crop, zoom and remove red-eye directly from the display without using a computer
- A PhotoFix button allows for one-touch cropping, zoom and red-eye removal, along with automatic photo corrections -- all without a computer
- Efficiently designed individual ink cartridges allow users to replace only the ink colors used, particularly helpful for high-volume printing and photo printing (which tends to go through photo cyan and photo magenta much more quickly than other colors)
- HP Real Life technologies allow users to edit photos directly on the printer to remove red-eye and enhance photos with adaptive lighting for professional quality photos at home
- Automated 4x6-inch tray for dedicated photo printing
- HP Photosmart Premier software allows users to edit, organize, print, share, archive and create digital photo projects
- Print panoramic images in any size up to 8.5 x 24-inch with or without borders
- Photo printing with HP Auto Sense ensures correct paper loading and optimal quality settings
- Produce water and smudge resistant photos when printing with HP Advanced Photo Paper
- Optional HP Bluetooth Wireless Printer Adapter (http://www.hp.com/support/bluetooth) enables wireless printing from camera phones, handheld PCs or other Bluetooth enabled devices
- Print on both sides of the page with optional two sided printing accessory
- Memory card slots for CompactFlash, MultiMedia Card, Secure Digital, Memory Stick, Memory Stick Duo and XD-Picture Card

Kiosk. No computer needed.
TECHNICAL SPECIFICATIONS | Back to Contents
- Six-ink printing with HP Vivera Inks
- Print speeds of up to 32 pages per minute in black and up to 31 ppm in color when printing from a computer
- Photo-quality resolution up to 4800x1200-optimized dots per inch
- Dimensions/Weight: 18.2x15.3x6.8 inches (WxDxH), 17.0 lbs.
- USB Hi-Speed 2.0
- Microsoft Windows® 98 SE, ME, 2000 (SP3 or later), XP Home Edition, XP Professional, XP Media Center Edition, XP Tablet PC Edition, XP Professional X64; Mac OS X v 10.3 and higher
- HP offers a support package for the HP Photosmart D7160 Photo Printer that includes one-year limited hardware warranty backed by HP Customer Care, service and support.
- Estimated U.S. street price of $149
- Expected to be available for purchase August 2006 in North America
SCALABLE PRINTING TECHNOLOGY | Back to Contents
Although this is the first HP printer featuring the company's Scalable Printing Technology I've reviewed, the technology has been around about a year now after fives years in the lab at a cost of $1.4 billion. HP calls it "a whole new thermal inkjet technology," but it strikes us as evolutionary rather than revolutionary.
The scalable part of SPT is that the technology is equally applicable to both home and business products. Not, that is, scalable for you but for HP.
At the heart of the system is the printhead, which HP manufactures in their own silicon wafer fabrication facility. With 3,900 nozzles, this printhead is about four times faster than HP's previous technology. The company claims it can print a 4x6 photo in 14 seconds. Full-bleed letter-sized prints take anywhere between a minute to five minutes, depending on the subject. The LCD reports estimated printing time.
Printhead components are fabricated as a single unit using a photolithographic process, rather than welded together in post-production. This allows precise alignment of the chamber, nozzles and heating element to improve the accuracy of ink drop placement.
The printhead delivers the speed, but HP's Vivera inks and HP's Advanced photo paper play vital roles in delivering quality. The ink formulas are designed to deliver instantly dry, water-resistant photos on the company's Advanced photo paper, which is a porous surface that sucks the ink in rather than a swellable surface that encapsulates the ink. The new surface makes the paper both instant drying and water resistant. It does feel tacky at first, but HP told us that's because the surface is actually sucking moisture from your fingers. The paper also features Auto Sense technology to eliminate wasted ink or paper by scanning a barcode on the back of the sheet to indicate the size, orientation and type of photo paper.
I asked HP about the longevity of both their swellable photo papers and the new porous sheet. The new Advanced sheet is still in testing, but HP said preliminary results from the Wilhelm Institute show over 40 years with Vivera inks. The older swellable sheet, which is not instant dry or water resistant, is rated at 103 years. Note, however, that the Advanced paper when matched to HP's pigment inks in the Photosmart Pro B9180 provide a print life of over 200 years, according to the Wilhelm Institute.
HP has posted a three-minute video on how they developed SPT (http://www.hp.com/hpinfo/newsroom/feature_stories/video/index.html#blazing).
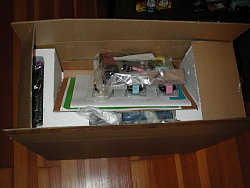
The Box
The retail package for the D7160 contains:
- HP Photosmart D7160 printer
- HP Photosmart software CD
- User Guide and Quick Start Guide printed documentation
- Photo paper storage bag (for some regions)
- Paper sampler
- Six starter ink cartridges
- Power cord and power supply
- HP CD/DVD Tattoos (for some regions)
A TOUR OF THE HARDWARE | Back to Contents
The D7160 is an attractively designed box with a pale gray and off-white color scheme. Its very cleanly laid out dashboard requires no more than a glance (well, maybe a double take) to master.
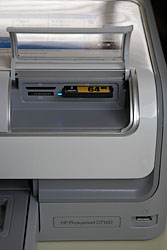
Card Reader, PictBridge Port
The top of the printer is unpopulated except for the front edge where the control panel and card reader sit above the paper trays. On the left is the Power button that lights up in blue when on. In a panel to its right is the color LCD with its navigation and control buttons right below it and two sets of buttons to its right. Right of them is a clear hood to protect the card reader ports from dust. In the lower right, the PictBridge port sits in a recessed alcove.

Paper Trays
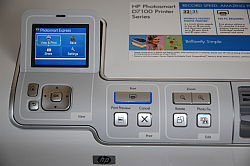
Control Panel

Back
The paper trays below all are not removable, but do slide out a bit for access. The small lid also lifts up to make it easy to load either tray. You can put about 100 sheets of letter-size paper in the lower tray and 20 sheets of 4x6 photo paper in the little tray that sits right on top of it to the right. Above them both in the lid is a silver bar you pull out to catch the output. There's also a small window in the lid so you can tell when you're out of photo paper.
It's a very compact paper path that requires the sheet, loaded upside down, to make a U-turn in the printer, rather than run straight through. Paper jams can be cleared by removing the back cover. We didn't have a single jam, however.
The Control Panel hosts the LCD with the Back button, Home button and navigation arrows with an OK button in the middle to deal with the menus. The menus are very well designed and smartly integrated with the buttons. You never wonder what you have to do to get something accomplished (and that even includes printing two 5x7s on a lettersized sheet). You always, for example, press the Print button to print. And the LCD reminds you when it's time. You can even have the Wizard function guide you through every possible print option, if you prefer. You won't miss a trick. And if you don't know what your options are, a Help function explains it. Very nicely done.
A Print Preview button previews your photos, a Print button prints the image and the Cancel button stops printing. The last cluster of buttons includes the Rotate button, the Zoom button and a Photo Fix button, which automatically enhances the images by applying lighting, contrast, focus and red eye removal operations.
The back of the printer is where you'll find the power cord connection and the computer USB port in top left corner. A large rear access door opens to install the optional two-sided printing accessory or to simply clear paper jams.
The sides of the printer are unpopulated with anything but nice indents at the bottom to grip the unit when you have to move it.
INSTALLATION | Back to Contents
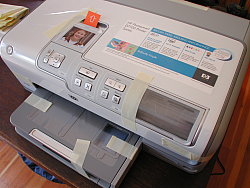
Taped. The usual packing tape was a bit sticky.
I knew enough to remove the packing materials. The tape was unusually high tack, so be careful pulling it off. There's also quite a bit of plastic whose sole job is to protect against scratches during installation (you know, when you absent mindedly put the box cutter on top of the printer and pile a bunch of manuals on top of that and forget all about the box cutter). But there wasn't anything inside the printing area to remove, although the documentation suggested there might be. I looked and looked and finally gave up. But if I'd actually bought the thing, I'd have been nervous about turning it on without finding something in the printing area to remove.
Some of this might be explained by the newness of this model. As I write, it still isn't available for sale and it's likely there really will be some cardboard in the printing area and better documentation in units that don't come from the public relations equipment pool.
Another confusion was the paper tray. It doesn't actually come out. It slides part way out, but it's really part of the printer. I gave it a few yanks before I lifted the whole printer up and saw that the bottom plate extended out under the tray.
Power. With the printer finally stripped of its packing material, I was ready to connect the power cord and install the ink cartridges.
The power cord is an oddity. A very, very short cord with a three-prong plug runs from your outlet to the power brick (someone tell me why a printer this big can't swallow its own brick). You'll be lucky if it rests on the floor, the cord is so short. But a very long thin cord runs from the brick to the printer, where it attaches with a proprietary connection rarely seen outside electronic equipment cases. And at the printer end, a small green LED on the side of the plug confirms you have power. You won't, in short, find a replacement at Office Depot.
Cables, Ports. No, there's no USB cable. It's a plot. Cameras come with them but very, very few printers (Hi-Touch comes to mind and outright prolonged applause for them). You don't need a computer to print with the D7160 but, ah, it's a not like the computer is the peripheral.
Yet another oddity, the PictBridge port is actually recessed. That's too bad for some USB drives (unless you have an extension cable). Apparently it isn't a problem for HP's Bluetooth adapters. And if you happen to have a Canon WiFi printer adapter, that should work, too (if it fits).
Duplex Printing. Double-sided printing is available if you buy an $80-$100 duplexing accessory that sits on the back of the printer to turn the paper over.
I was disappointed to discover duplex printing isn't built into the printer. Canon's entire PIXMA line features built-in double-sided printing. And it works so well, I miss it on other printers. The bar has been raised.
HP's commitment to the environment (http://www.hp.com/hpinfo/globalcitizenship/environment) is serious. The company realizes its "largest impact on the environment is through its products." In 1992 HP established a Design for Environment program (http://www.hp.com/hpinfo/globalcitizenship/environment/productdesign/design.html) to foster consideration of the environment-related aspects of a product in its design stage.
So why not build duplex printing into the D7160? The thinking here may be that Photosmart printers are designed to make photos, so they don't need two-sided printing. But the D7160 is really a multipurpose printer, which will be printing plenty of (and perhaps primarily) plain paper in addition to 4x6 photos and the occasional lettersize enlargement.
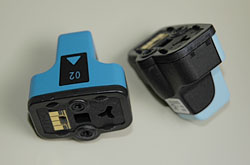
Vivera Cartridges. No print head, you just clamp them in.
Inks. After generations of printers featuring cartridges with more than one ink in them, HP has begun to design single-ink cartridges. But like their older cartridges, these are big opaque ones, not the slim transparent little things you find in Epsons and Canons.
The cartidges for the D7160 do not themselves have a print head. In fact, there is a special set you have to install when you first use the printer to properly lubricate the print head in the printer. If you don't install this set first, you get an error message. I've never seen that before but I really couldn't tell from the first print this was the starter ink. It looked fine.

Initialization. You have to install special inks the first time.
Installing the cartridges wasn't hard but it did seem sloppy. They don't quite click into place. You release a spring-loaded harness, push them into a bay that has a lot of elbow room (so they never seem seated) and secure them by snapping the harness back down. There didn't seem to be a wrong way to do it, nor a right one.
The D7106 is unusually frugal when it comes to ink. Unlike other inkjets, when the D7106 cleans its printhead, it captures the ink it flushes and recycles it back to the cartridge for reuse.

Inks Installed
Alignment. Once the inks were installed, I was ready to fire it up. The LCD told me it would take about five minutes to complete setup and it was a noisy five minutes. Don't worry, it isn't broken and you didn't forget to take any packing materials out. It's just noisy. Not in actual operation, but during setup.
It finishes setup by running an alignment procedure that prints a sheet of paper with black and blue patterns.
After it printed the alignment pattern, I poked around the menu system to see what was available. There were a couple of Preferences that caught our attention. The Print Quality option was set to Best but it also warned us not to stack our output without choosing the lower quality option. Apparently Best lays down a lot more ink. The printer also offers a couple of color spaces: sRGB and Adobe RGB -- or you can just select Auto.
I like a printer that knows what kind of paper has been loaded into it without being told and the D7160 is nearly that. But it relies on special paper printed with tell-tale marks to figure it out. That's the Auto-Sense Technology. If you don't buy HP Avanced photo paper with the simple bar codes on the back, you don't get Auto-Sense Technology.
You don't need a computer to print photos from the D7160. You can connect your PictBridge camera directly to it, or pop its memory card into the D7160's card reader. But say you have a computer lying around with images on it. You can print them directly from the computer to the D7160! All you need is a USB printer cable (ahem) and printer driver software.
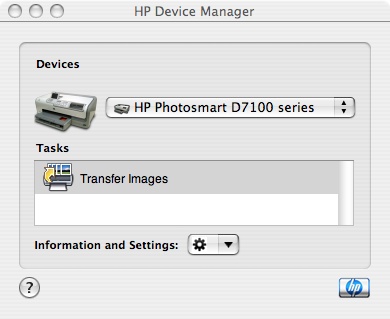
HP Device Manager
HP installs a rather comprehensive printing system that includes the particular driver your operating system needs to work with the printer, utility software to manage the printer, and application software to enhance and print your photos (and shop for supplies). The HP Device Manager is the simple face of it. The HP Photosmart Studio is the full-featured part.
That's great, but do note it can be an anchor when you update your operating system. We have spent long hours hunting down pieces of the printing system to delete, stop and destroy after an OS update. HP promises more prompt driver updates and over the past year they've been keeping up.
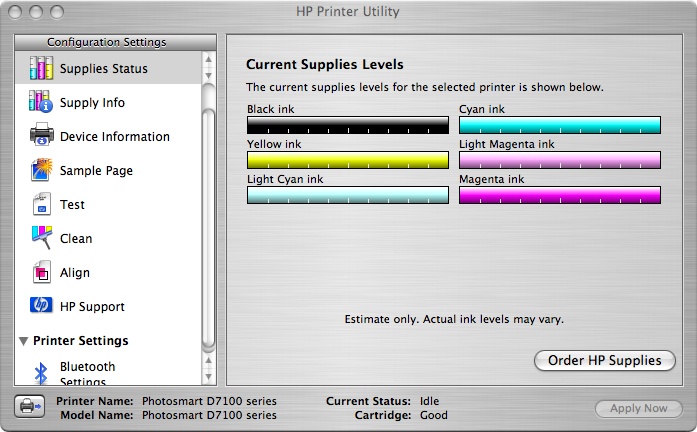
HP Utility. You can monitor ink capacity (roughly) from the HP printer utility or the LCD menu.
But even a compatible install is problematic for Mac users. If you install HP's software on your Mac, you should immediately run Disk Repair to correct permissions on the HP installation. There are just short of 2,000 corrections made to the permissions of files copied by the HP installer.
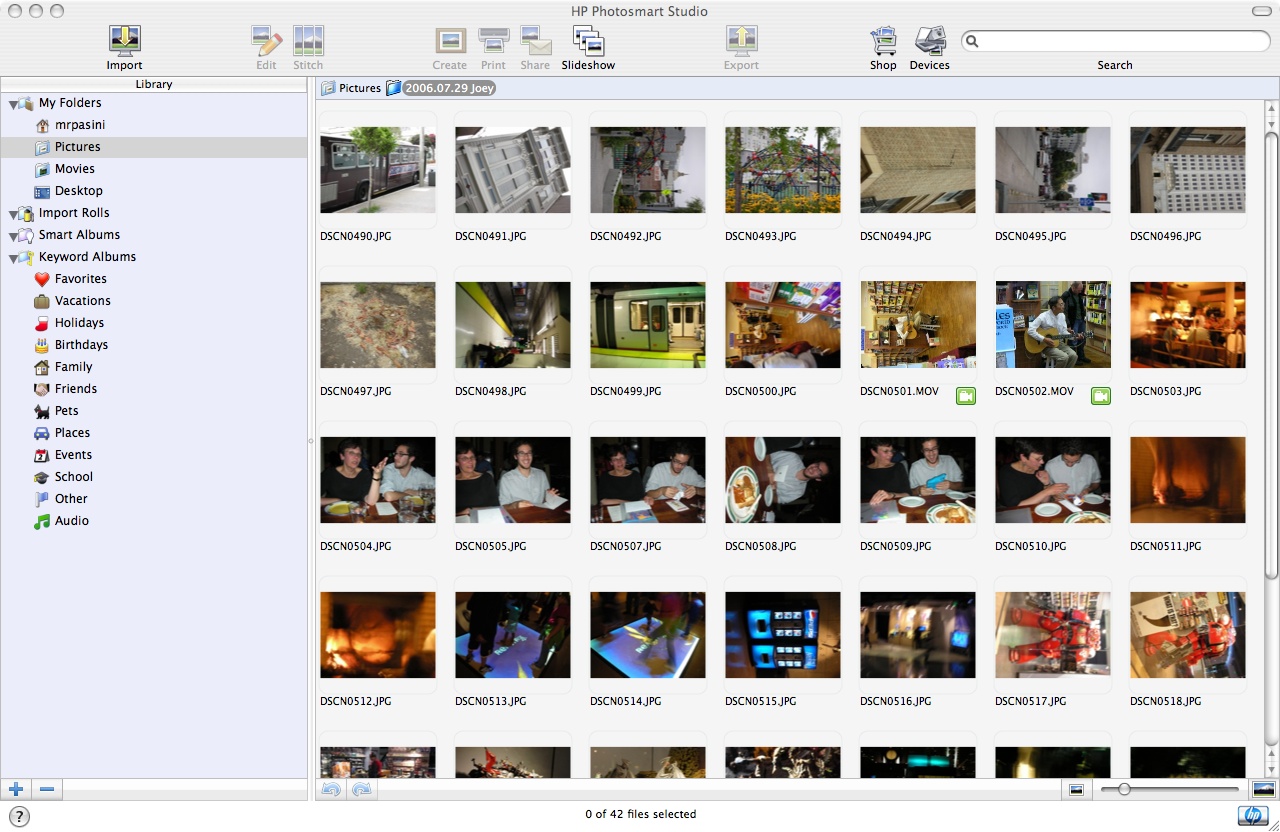
HP Studio. HP's printing application.
The Vivera 02 ink cartridges are available on the HP site for $9.99 each, except the larger black cartridge. A single black cartridge is $17.99 with a twinpack going for $32.99.
The company also sells Photo Value Packs, which include cartidges and photo paper. For $35.99, you can get 150 sheets of 4x6 HP Advanced glossy photo paper with an ink set that works out to about 24 cents a photo.
A package of 100 sheets of 3x6 Advanced glossy photo paper itself costs $11.99 retail (or $12.99 from HP direct). The 8.5x11 sheet comes in packs of 25 for $10.98 at retail ($11.99 from HP, where you can also get it in 50 sheet packs for $19.99 or 100 sheet packs for $29.99).
Specialty papers like transparencies, labels, card stock, stickers and iron-on transfers are also supported.
Accessories were a bit of problem, since the printer is so new. I wasn't able to find a duplexer specifically for this printer or a replacement print head. HP confirmed a duplexer is available. The print head should last the life of the printer, an HP spokesperson told me.
GETTING TO WORK | Back to Contents
So what did the prints look like? I printed from the card reader and the computer using HP's Advanced photo paper, a third party paper and printing color as well as black and white prints.
My first print was of an image taken of the garden on a foggy day. It was printed on 4x6 HP Advanced photo paper from the card reader. Colors were delightfully natural, not oversaturated. And yes, the print came out fast. It also came out quietly, which was a nice surprise.
Next I tried some routine page prints of Web pages and other documents with very pleasant results. My page printing did make me wonder just why the letter-sized tray has such a small capacity (it's quite shallow, holding only 100 sheets plain paper at a time). The accessory duplexer would have the effect of increasing that capacity, another reason to build in duplex printing.
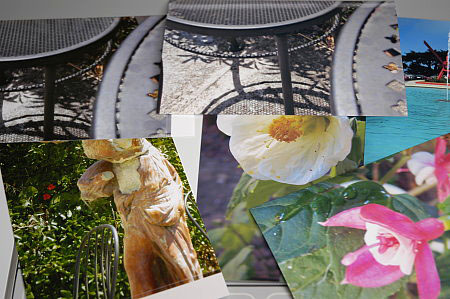
Saturation. The top left and bottom right color images show the over-saturation problem. The Black and whites at the opposite corner have different color casts, although it's hard to appreciate in the photo.
Black and White. With only one black cartridge, I didn't expect rich black and white printing. But I used the Wizard option on the LCD to print an 8x10 in black and white from the card reader.
HP must have shared my concern about the single black cartridge, because it used more than black to print the image. Highlights in one print were rendered, I noticed under magnification, with cyan and magenta. It was impossible to deconstruct midtones or shadows, but black and white printing is achieved with the color inks, too.
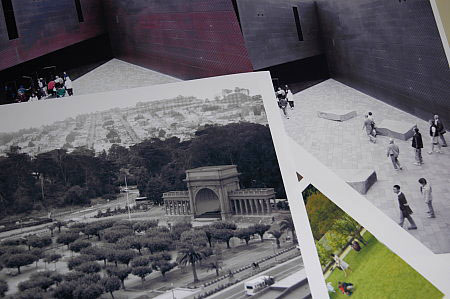
As the prints came out of the printer, I noticed a predominant tint in the shadows. A shot of park greenery was greenish, a shot of the de Young museum's copper exterior was redish. That's probably just an effect of the multi-color printing, the heaviest tones absorbing more slowly into the paper, I think. After a while the effect modulates a bit, although there's still a slight color cast in the shadows.
But trying to achieve a neutral color balance across a number of images would be a frustrating experience.
Print Settings. When I launched Photoshop to print some 8x10s, I got a surprise. My first print looked nothing like a photo. It shot out of the printer in about three minutes looking for all the world like a water color. I checked all my print settings, thinking I'd neglected to cancel some special effect, but no, everything was just the way I thought it should be.
The one clue to the problem was that the ink was pooled on the page, easily smearing. A second print gave the same effect, but wasn't an exact duplicate. It was as if the printer was spraying the ink from well off the sheet, expecting a thicker piece of paper.
And indeed, that was the problem. I'd told the driver I was using HP's Advanced thick photo paper, but in fact, had substituted a third-party sheet that was a bit thinner. I put a thicker third-party glossy photo paper in the printer and changed the paper specification in the driver to a generic photo paper and finally got reasonable results.
I normally test with whatever materials the company sends with the printer and then with a set of third-party papers to see how well the printer adapts to other supplies. Using the manufacturer's inks and papers yields the best longevity, independent testing proves over and over. But sometimes you just don't need longevity.
Prints. The two on the left are from a Kodak EasyShare dye sub. The ones on the right were all printed by the D7160. The photo mutes the oversaturation a bit.
Oversaturation. Another surprise awaited me when I popped an SD card in the reader and made a series of 4x6 prints on HP Advanced photo paper from images shot by a Nikon Coolpix S6. Despite my earlier success with the garden shot, these prints were disappointing. Any bright object in them was oversaturated.
One thing to remember with any inkjet is to wait a bit before evaluating the results. The ink is encapsulated in the paper surface in the case of swellable papers and the vehicle has to evaporate and the paper surface shrink back down before the image can be evaluated. A porous paper like HP's Advanced sheet also takes a while to stabilize. If you print four of the same images out at once, and lay them side by side, you'll see they don't all match for a while as the ink stabilizes.
HP told me they actually wait overnight to evaluate results. The Wilhelm Institute waits two weeks. I saw a noticeable difference in a few minutes, so routinely waited half an hour before evaluating a print.
Waiting really didn't help, though, with the saturation problem.
Was it Photo Fix? With the Photo Fix button enabled or disabled, my card reader images with bright colors printed oversaturated and unrealistic. A pink fuschia was particularly dreadful but even a reflecting pool under a blue sky looked like a garishly printed postcard. A shot of a construction site taken on an overcast day, printed oversaturated blues on the beat-up crane and dusty port-o-john and oversaturated orange on the hardly pristine site barriers.
Those are some pretty strange results and they delayed this review while I printed more and more to see if I'd just hit some unfortunate combination of factors. In fact, I found the more neutral images (a cafe table casting shadows on a concrete patio) to be comparable to 4x6 dye sub output -- and it took a 10x magnifier to see any evidence of inkjet FM screening (dots, that is).
But, in the end, I had to admit you don't have this kind of problem with other printers these days. Average in the inkjet world is Very Good in any other. But I wasn't seeing Average. I was seeing Poor. I can't explain it, but the results just weren't nearly as good as what other brands delivered.
While I found the saturation issue disturbing, I suspect others may not be bothered by it at all and some may even actually like it.
Solidly built with a new ink set and the ability to detect paper type based on a simple barcode scheme, the D7160 promises very fast (and quiet) prints with its large printhead from either its card reader, PictBridge port or USB connection. HP's Advanced photo paper comes out dry and isn't ruined by a little water, either.
Unfortunately, I found print quality (even with Photo Fix enabled) to be oversaturated compared to similar Canon and Epson printers. And less compelling than hassle-free 4x6 dye sub printing on Kodak EasyShare, Hi-Touch and Canon printers.
On the plus side, the small LCD displayed images accurately and the menu and button system made it easy to tap into special features like sepia printing and arrange multiple images on a larger sheet of paper. Startup was quick and so was shutdown. My only complaint, sadly, was image quality.