PART II: 5300 DIARY
Getting Down to Business
 By MIKE PASINI
Editor
The Imaging Resource Digital Photography Newsletter
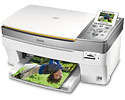
SAN FRANCISCO -- If our first full week with Kodak's Easyshare 5300 All-in-One wasn't a honeymoon, at least we got acquainted.
|
Part II Previously |
One thing that surprised us was the color scheme. After years slaving behind beige boxes, we expected to feel some aversion to the white, silver, gray, beige, whatever-it-is color. But we kind of like it. It's not going to win any industrial design awards, but it strikes a friendlier tone than we expected. You might even say it's relaxing on the eyes.
Of course, when you open the scanner top, you're greeted by a very large "Kodak" behind the glass. Modesty was never one of the company's strengths.
A TOUR OF THE HARDWARE | Back to Contents
Our installation photo gallery probably revealed enough details about the 5300's hardware, but here's the big picture.
There's nothing of note on either the left or right sides of the printer. We'll skip the bottom, too (no tripod socket or battery compartment).
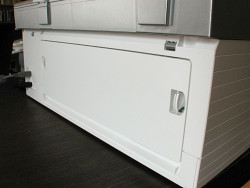
Back. The Rear Access Door lets you clear paper jams or install the optional duplexer for double-sided printing.
The very back of the printer has the USB-to-computer port and the power connection along with a removable panel, no doubt to get at paper jams, officially called the Rear Access Door. Actually, it has a higher calling. Remove it and you can install the optional duplexer (Kodak EasyShare 5000 Series Two-Sided Printing Accessory) that enables printing on both sides of the paper. Automatically detected by the printer, it's limited to plain paper, so it won't print on the back of photo paper. It accepts sheet sizes from 6.9 to 8.5 inches wide and from 9.8 to 11.7 inches long.
We've bemoaned printers that don't build duplexing into the printer (like Canon's PIXMA printers) and we are bemoaning again. But at least Kodak makes it an option. If you print a lot of Web pages or text documents, it's a bright idea.

Card Reader. Only two slots but they're versatile. Green lamp indicates the reader is accessing the card.
The front of the unit is dominated by the dual but not removable (easily anyway) paper tray at the bottom. You can get 100 sheets of ordinary copy paper in the letter-size tray and 20 sheets of photo paper in the 4x6 photo tray. A small drawer on the front edge of the tray slides out and flips open to catch the output of letter-sized sheets. To the right of the tray is the dual USB port, two USB ports for PictBridge or Bluetooth connections as well as thumbdrives. Above that is the card reader, which handles an xD Picture card, Memory Stick, Memory Stick Pro, Secure Digital/MultiMediaCard and Compact Flash Type I and II (including microdrives). With an adapter, you can also use a Memory Stick Duo, miniSD and MicroSD (TransFlash).
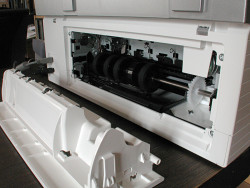
Above the card reader is the Printer Access Door. In fact, the whole top lifts up when you raise this door. That's how we got inside to install the print head and the two ink cartridges, in fact.
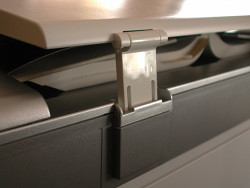
Expandable Lid. We've got a book in there.
On the very top of the printer is the scanner lid (which lifts about an inch to accommodate thick material like books) and the LCD display to its right with the Control Panel. The Control Panel has a row of small operation buttons (Rotate, Zoom Minus, Zoom Plus, Proofsheet, Transfer) and set of three mode buttons (Scan, Photo, Copy). A set of four arrow buttons surrounds an OK button. To the left of that is a Menu button and to the right of the arrows a Help button. At the bottom of the Control Panel the Start buttons is surrounded by a Cancel button to its left, an On/Off button (startup takes about 30 seconds) to its right and an Attention light below it which flashes when the printer needs attention.
As we mentioned in our first report, the power brick is really brick size, the largest we've ever seen.
PHOTOCOPIES | Back to Contents
It so happened that after our installation and test prints, the first real task we threw at the 5300 was a pretty simple one. We had a library book due that day and wanted to copy a few pages from the otherwise unavailable book.
Sharp Text. But even the gray looks good.
Kodak claims the 5300 can print 32 pages a minute in black (22 in color), but that's the same page over and over. We had about 35 pages to scan and print. So we weren't expecting to match that pace.
The first mistake we made was printing our black and white image in color. The original wasn't quite neutral, but the copy had a yellow glare to it, an overreaction to the cream colored sheet, apparently. But the LCD menu let us switch easily to black and white mode.
That made very nice, crisp copies. We were able to see the scanner finish scanning the page, so we opened the lid all the way up to perpendicular so it would stay up and loaded our next page as the current scan was printing. By the time we got the lid back down, it was time to scan the next sheet. Pretty efficient.
Scans were excellent quality. Sharp and uniformly dark. It's almost a luxury to use an inkjet all-in-one as a photocopier (instead of using less expensive toner-based copiers) because the ink is so expensive. But Kodak's low-priced pigment inks promise to let you copy guilt-free. In fact, our black cartridge hardly showed a hit after we finished copying.
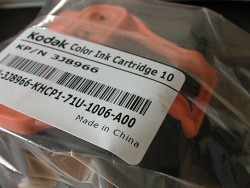
Inexpensive Ink. Made in China, BTW.
We did notice the printer doing a little maintenance on the printheads every dozen pages or so. We weren't used the color cartridge at all, but that doesn't mean it doesn't have to be flushed. Same with the black cartridge, even though we were using it. Neither cartridge showed much usage, though.
One other oddity was an occasional mark across the sheet as if it had been scuffed. We couldn't find any reason for it and it came and went as it pleased. We saw it twice in our 35 pages.
We noticed our black and whites also had a nice gray to them. At our introduction to the line, we observed that plain black text was printed not just with the black cartridge but also with the photo gray of the color cartridge (you can see this when you interrupt a sheet in the middle of printing). The gray adds some richness to the black. While not strictly necessary for our photocopy, it was a nice touch.
The whole thing took about half an hour to copy. About a minute a page, really, including refilling the 100 sheet tray (which seems a bit parsimonious). We weren't hustling very much, but that was a comfortable pace.
The inks are the part of the story making the most noise because 1) they're inexpensive and 2) they're pigments, not dyes.
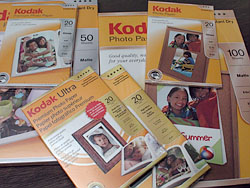
Where's Waldo. The Ultras are to the left, the Premiums in the middle and the least expensive Photo papers to the right.
But Kodak's harnessed the other half of the cost-per-print formula: the paper. We used our own stock to do the photocopy, but as soon as we started printing photos, we started using the three new lines of Kodak photo paper introduced with this printer.
Unfortunately it's very hard to keep these three lines straight. Not only are the names confusing, but they come in various surfaces (like glossy or matte). So pay close attention.
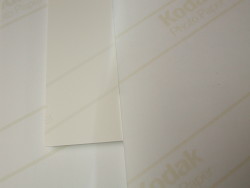
Barcoded Backs. Three different sheets in several surfaces each with different codes on the back (note the thickness of lines and distance between them).
The main difference between the sheets is the cost (the lighter the less expensive) and the surface (glossy, matte or luster -- but not all options at every level). They run from a very lightweight sheet to a heavy sheet. And the printer knows which sheet you've loaded because on the back side, they have a series of gold lines that identify them.
The three lines -- all of which are porous, instant dry sheets -- are:
- You can get a 10 cent 4x6 photo by printing on the lightweight Kodak Photo Paper with a glossy surface. It's a 44 lb. stock (6 mil.) A matte surface that is 39 lb. (7 mil.) is also available.
- A 15 cent 4x6 print can be achieved on the medium weight Kodak Premium Photo Paper which is offered in both a matte and glossy surface. It's a 64 lb. stock (9 mil.).
- Finally, the heavy-weight Kodak Ultra Premium Photo Paper is available in a high gloss and what Kodak calls a Studio Gloss finish. Studio Gloss is more of semi-gloss or lustre finish on a 76 lb. (10.5 mil) sheet. High Gloss is a glossy surface on a 74 lb. (10 mil) surface.
We plan to print on all of them. If we can tell them apart.
PHOTOSHOPPING | Back to Contents
When we print photos, we usually print from Photoshop after optimizing the image in one way or another. So naturally, we launched Photoshop and opened an image we thought would make a nice 4x6 on the stock included with the printer. And that stock is Ultra (five sheets each of High Gloss and five of Studio Gloss).
Since the printer knows all about the paper (it even turns itself on when you engage the 4x6 tray), there really aren't many options in the printer dialogs. It can't tell you what's been loaded, unfortunately, because it hasn't looked yet. And how Photoshop can manage the color give that the surface isn't known is a mystery to us.
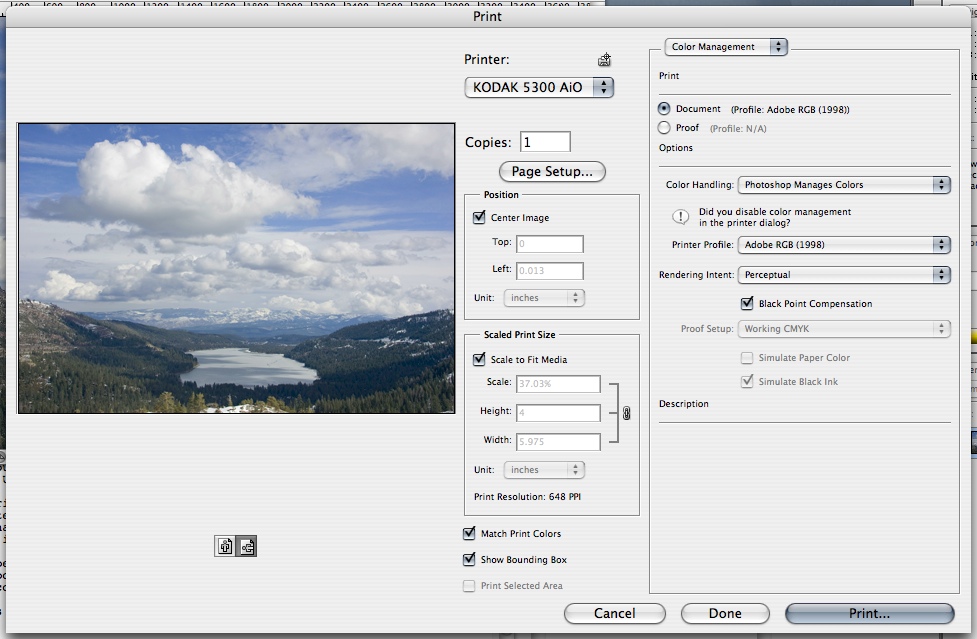
Photoshop Print Dialog. We're all set to print a 4x6.
Our landscape image had an Adobe RGB ICC profile attached to it rather than the more common sRGB most cameras assign. We set our page for a borderless 4x6, then set the Photoshop print dialog to let Photoshop manage the color (as we always do), set the profile to Adobe RGB and intent to Perceptual. Our standard approach.
That took us to the printer dialog box. The options there are very spare with no paper type to identify. All we had to do was tell it to make its Best print. That was it.
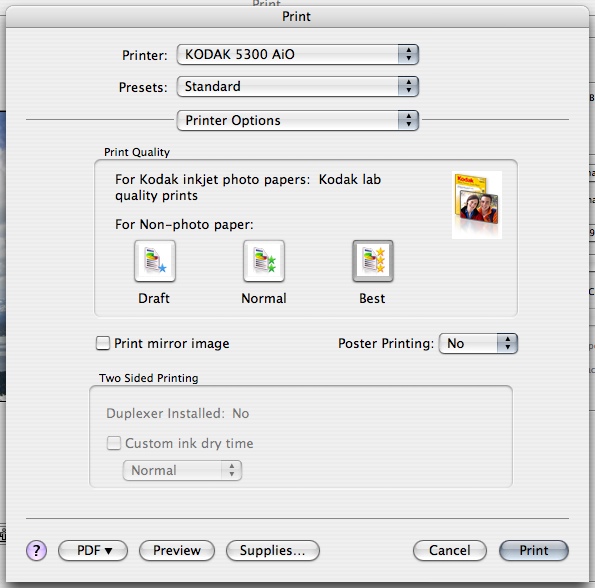
Printer Dialog. Just pick the quality (Best).
The print came out just seconds later (Kodak says 28 seconds and we won't argue).
Kodak calls its porous papers "Instant Dry." The ink is absorbed into the pores of the surface much like butter into those nooks and crannies of an English muffin.
The alternative, for inkjets, is a swellable sheet that swells up when the ink hits it, encapsulating the dye as the vehicle evaporates and the surfaces returns to its normal size. You can't touch a swellable sheet when it comes out of the printer (as you probably know) without ruining it. After all, it's still working.
But a porous sheet can be touched immediately, although you may see marks from your fingers. Those marks, we've been told, are actually the moisture of your fingers being sucked into the sheet. They disappear, unlike the ink.
The rap on instant dry, porous papers is that when you print them with dye inks they really don't last very long. Swellable sheets with the same inks last significantly longer, in fact.
But remember that Kodak isn't using dye-based inks. It's using pigment inks. So you get both instant dry performance and archival quality.
There's one more aspect of this ink-paper combination worth mentioning. Kodak claims its color gamut exceeds that of pigments like Vivera, not just its own chromogenic dye prints from film. That's in the order of several hundred years, so it's noteworthy.
More noteworthy, though, is how our landscape print looked. Sorry for keeping you in suspense. With all our ducks in a row, the print was an excellent match with what we were working with on screen. Among the best we've seen, period.
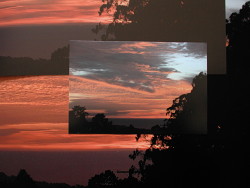
Widest Gamut. The 4x6 print is from the 5300, a pigment print from the HP B9180 is above it, a dye print from the Canon Pro9000 below it. Note that the 5300 print is achieved with only three colors.
But we had a test we were dying to try: a sunset we'd printed on both the Canon Pro9000 and the HP 9180. We liked it better on the dye-based Canon than on the pigment HP. The saturation of the sky and the deeper blacks of the Canon won us over. How would the Kodak fare with its wide-gamut pigments?
Well, it was a very interesting comparison. The blacks (silhouetted trees) are darker and glossier on the Kodak than on the HP, but the Canon beats them both. The saturated reds of the sunset sky are more saturated on the larger 13x19 prints than on the 4x6 Kodak. There is nothing really wrong with the Kodak print, but this image simply printed better on the other two printers.
Of the three printers, the dye-based Canon, not the Kodak, evidenced the larger color gamut. But the Canon had the advantage of quite a few more inks.
Notice we still hadn't opened (or found for that matter) the manual. But there is one: 5300_AiO_MacUG_EN.pdf. This PDF is how we found out about AiO Home Center, tucked away in a subfolder of the folder our applications are housed.
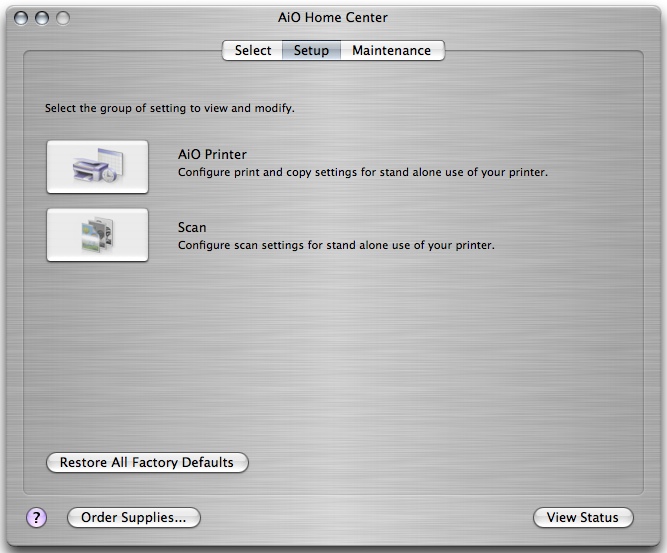
AHC isn't really a scanning or printing application itself, so it's not for nothing it was stored in our Utilities folder. It has three panels: Select, Setup (for stand-alone Print or Scan settings) and Maintenance.
AiO Home Center
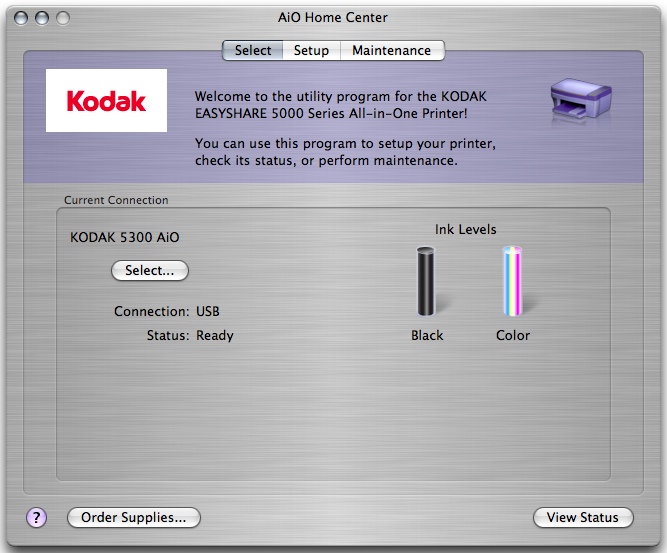
Select
Setup

Maintenance
Select is pretty simple. You point AHC to your AiO printer (no need when it's the only one online) and see its ink levels. Kodak makes much of the low price of its ink cartridges, but we have to say you won't be buying many unless you print for the neighborhood. Our ink levels dropped very, very slowly.
Setup lets you configure the printer or scanner part of the 5300 for stand-alone use (see the Scan setup options below).
Maintenance offers calibration and printhead cleaning. And all of these options are clearly explained with a sentence or two of text.
Setup: Scan

General
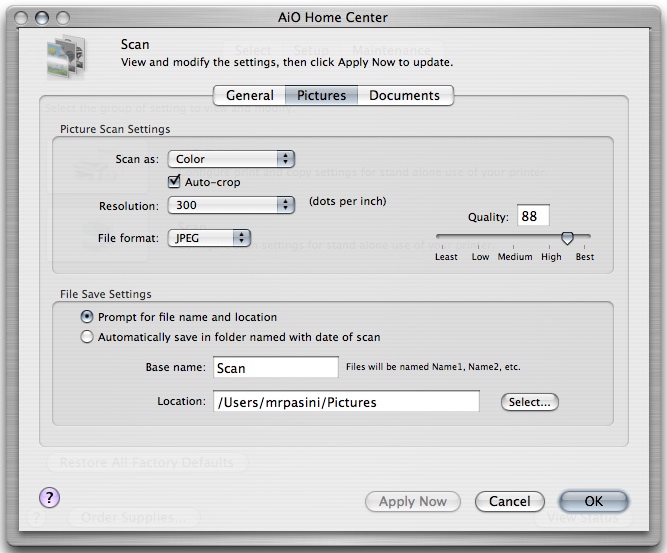
Pictures
Two buttons are always available at the bottom of the screen: Order Supplies and View Status. View Status just queries the printer and reports the configuration (accessories installed), last paper used and ink levels.
DOCUMENT SCANNING | Back to Contents
So if there's no application to run the thing, how do you scan documents, say? Back to Photoshop, apparently.
One day perhaps VueScan will know about this little box, but in the meantime, your options are limited to what you already have. You are simply stuck if you want to do any optical character recognition. None is provided. This is a real pity for a machine that can scan documents because with the right software, you can create fully formatted PDFs with live HTML links automatically.
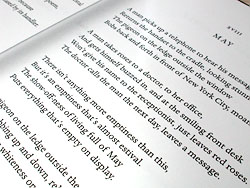
Color Scan. Just a crop at full size.
We had a few old handwritten letters we wanted to scan. Four pages on two sheets complete with folds and colored ink.
We opened up Photoshop's Import flyout menu and saw the 5300 listed, so we engaged the driver. To our delight we saw one option was to scan a Color Document, so we selected that. When we clicked the Preview button, we saw the first page of our letter. When we hit the Scan button, it crashed.
Next time we launched Photoshop and brought up the Import dialog we left the setting on Color Photo, the default. No crash. We scanned four JPEGs of our four pages and used Acrobat to resize them into one four-page PDF, cropped to the size of the letter. We didn't see a way to do that in the 5300, although there must be one.
The quality of the scans was excellent. The scan dialog did confirm that the scanner's resolution maxes out at 1200 dpi, presumably optical, but that's all you really need for scanning reflective material. Maybe, though, that's why Kodak didn't bother with a transparency adapter on any of these AiOs, even with all those Kodak negatives out there.
That's something to think about while you're waiting for our next installment.
Continue to Part III of the Diary