| Kodak Personal Picture Maker 200 The second generation of the Kodak/Lexmark Personal PictureMaker line makes bright, sharp prints! (Review first posted 01/28/2001) |
 |
|
Up to 1200x1200 dpi, 6 color process for smooth gradations. |
|
|
Kodak Color Rich technology for brilliant color | |
|
|
Built in CompactFlash and SmartMedia card slots for standalone operation. | |
|
|
USB interface supports Zip drive connection for printing and image storage. |
For more than 100 years, Eastman Kodak Company has been a pioneer in photographic and digital imaging technology, as well as an acknowledged leader in many aspects of organic and digital color science. Since 1888, when it introduced the first consumer camera and coined the phrase, "You push the button, we do the rest," Kodak has pursued its mission to develop and deliver cutting edge imaging technology to the consumer, providing new product innovations that are both easily accessible and pushbutton friendly.
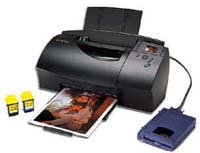
A little more than a year ago, Kodak teamed with Lexmark International, an industry-leading developer and manufacturer of color inkjet printing solutions, to introduce the first home version of Kodak's popular Kodak Picture Maker retail kiosk. The Personal Picture Maker 120 combined Kodak's new Color Rich Technology (an outgrowth of Kodak's color management solutions) with advanced six color inks and high-quality papers, to make digital color inkjet printing a simple, pushbutton affair. This second offering in the line, the Personal Picture Maker 200, is just as easy to use, with or without a computer. Consumers can insert CompactFlash or SmartMedia cards directly from their digital cameras into the printer, and view stored images on a 1.8-inch LCD color monitor. An easy-to-use menu system enables them to print their images in dozens of different formats and configurations, without having to worry about color and quality. The PPM200 also connects to the USB port of a PC or Zip drive to offer extended capabilities and resolution.
While it's not intended to compete with professional-quality inkjet printers costing $500 or more, or the faster business color printers in terms of speed, the Personal Picture Maker delivers outstanding consumer-quality photographs at a very affordable price.
High Points
- Six-color inkjet printing, using two ink cartridges.

- Color Rich Technology for more accurate, dynamic color.
- 1,200 x 1,200-dpi resolution when printing from a computer, or 600 x 600-dpi in standalone mode.
- 8 x 10-inch maximum printable area (203.2 x 254 mm).
- Three print quality and speed settings.
- Two USB ports, one for connection to a computer and one for an external USB device (USB cable not included).
- CompactFlash and SmartMedia memory card slots.
- Supports JPEG and TIFF file formats, plus FlashPix, Photo CD, and bitmap images with Photo Print software.
- Accommodates a variety of paper sizes, including A4, postcard, and special Kodak inkjet papers.
- Cropping, borders, text, panoramic, and borderless print options available, as well as brightness and color enhancement options.
- 1.8-inch, color LCD preview screen with brightness control, rotates upward 30 degrees for better viewing.
- Power supply, Photo and Color Inkjet cartridges, sample paper packet, user's guides, and software CD included.
Executive Overview
The Personal Picture Maker 200, manufactured by Lexmark for Eastman Kodak Company,
offers high-quality inkjet printing, using a six color, two-cartridge process.
Designed primarily for photo enthusiasts who want a simple and inexpensive way
to print digital images from their cameras, Kodak and Lexmark have built an
impressive, no-nonsense machine, with features and print quality that will appeal
to a broad range of users, from family shutterbugs and photo hobbyists, to small
business owners who want a versatile color printer for brochures, business cards,
and illustrated reports.
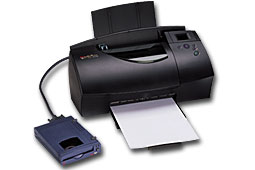
Lightweight and compact, the Personal Picture Maker 200 (PPM200) should fit
on most desktops, with space-saving sliding paper trays that retract when not
in use. The printer measures 18.2 x 9.2 x 10.9 inches (463 x 234 x 195mm) with
the paper trays retracted and 18.2 x 18.7 x 10.9 inches (463 x 475 x 278mm)
with the trays extended. The highlight of the smooth, black exterior is a brilliant
1.8-inch color LCD for viewing stored images and navigating through printer
menus. The easy-to-use graphic interface allows you to browse, select, edit,
and print multiple photographs, using a distinct menu design that is similar
to the menus found on Kodak's consumer digicams.
Two memory card slots, one for SmartMedia and one for CompactFlash, allow the
user to print images directly from flash media storage, without the need for
a computer. Two USB ports on the back panel provide computer access for more
demanding printing jobs, as well as connection to a USB-driven Iomega Zip drive.
When connected to one of these two devices, the printer can also serve as a
card reader, transferring images from a memory card to the computer or Zip cartridge.
(A USB cable must be supplied, as it does not come standard with the printer.)
Included in the box with the PPM200 are two Kodak inkjet cartridges (one Color
and one Photo), a CD-ROM containing the Kodak Photo Print software, printer
driver, sample images, and clip art; plus a user's manual, quick-start guide,
power supply, and a small sample packet of Kodak inkjet papers. Unfortunately,
the Photo Print software is compatible with Windows 98/2000 only; although you
can download a Macintosh printer driver from the Kodak website, along with a
PDF version of the Macintosh User's Manual. The Mac printer driver provides
many basic printing functions, but not the extended options available through
the Photo Print software.
The two-cartridge printing process is designed to produce the best possible
color results for the type of document or image being printed. By combining
the Color and Photo cartridges, the PPM200 produces richer photographic colors.
To print color documents with text, Kodak advises that you use the Color cartridge
with an optional Black inkjet cartridge, which produces a deeper black for text
areas and saves on Photo ink usage.
Printing speed for the Picture Maker 200 varies depending on the file size,
print quality, and dimensions of the image. Uncompressed TIFF files require
more processing time than JPEGs, as do larger prints, and those printed at the
Best quality setting. (Our minimum print time for a 9.5 x 7.6-inch print was
12 minutes, with a maximum print time of 31 minutes at the highest quality setting.)
When the printer is operating standalone, the maximum resolution is 600 x 600
dots per inch (dpi), with Good, Better, and Best print quality settings. Printing
from a computer increases the maximum resolution to 1,200 x 1,200 dpi.
Depending on the file source, the printer can produce an index print of all
the images on the media card (or selected drive), a single print of all the
images on the card, or a copy of each selected image. The PPM200 is also compatible
with the Digital Print Order Format (DPOF), identifying and interpreting print
orders that have already been selected through a digital camera, including print
quantity, size, and date/time stamp.
The color LCD preview screen allows you to preview images in full color and
to navigate through a series of interconnected setup menus. Basic printing controls
include paper type, image size, number of prints, and layout. There are also
image adjustment menus that allow you to crop or rotate images, add borders
and text, and control contrast and brightness; or you can choose an Auto Enhance
option, based on Kodak Color Rich Technology, that automatically corrects image
color, saturation, contrast, brightness, and quality. From the printer's Utilities
menu, you can check ink levels and clean and align ink cartridges.
When printing from a memory card or ZIP drive, the PPM200 offers a broad selection
of image layout options designed to work with Kodak specialty inkjet papers.
These include 12 preset photo templates for Kodak's single-print and perforated
multi-print papers, six standard layout options for use with any 8.5 x 11-inch
photo inkjet paper, and three panoramic templates for use with letter and A4
(210 x 297mm or 8.26 x 11.69-inch) paper sizes. There are also options for printing
color transparencies and T-shirt transfers.
The Windows-based Kodak Picture Page software provides all of the options available
when the printer is in standalone mode (with an additional 1,200 x 1,200 dpi
quality setting), plus it handles more difficult printing jobs, such as two-sided
documents, booklets, posters, greeting cards, business cards, and brochures.
Kodak also sells an optional Inkjet Picture Kit with a selection of specialty
photo papers to make borderless wallet-size, 3.5 x 5-, 4 x 6-, and 5 x 7-inch
prints. The accompanying Photo Print software (Windows-only) provides additional
image-editing tools, such as sepia-tone, oil-painting, watercolor, caricature,
and emboss effects; increased frame and text selections; and "photo album"
creation, complete with clip-art.
The downloadable Macintosh printer driver operates like a standard photo printer
driver, with three quality settings (600 dpi Quick Print, 600 dpi Normal, and
1,200 dpi High Quality), an option to print multiple images per page (1, 2,
or 4), booklet printing, variable paper and card sizes, double-sided printing,
and a choice of Kodak ColorSync or built-in color matching systems. The Page
Setup box also provides watermarking and Adobe Photoshop options when used with
Photoshop files, which include halftone screening, borders, crop marks, and
other printing commands.
The Personal Picture Maker 200 lists for $199 on Kodak's Online Store, with
inkjet cartridges priced from $30 to $40 each. Kodak photo paper is available
in several grades, from Premium high-gloss paper, which has the weight and feel
of a conventional photograph (both plain and preset perforated sheets), to lighter-weight
soft gloss and matte papers for printing photos, brochures, and reports. Based
on prices for the individual 12-sheet packets of perforated papers, as well
as prices for standard full-size sheets, the cost per print ranges from 13 to
66 cents, depending on picture size, paper quality, and quantity purchased.
You can also use plain photocopy paper for "economy" prints.
Imaging Resource conducted its own standardized cost-per-print test for printer
consumables, running a variety of test images (with a mix of heavy and light
ink coverage) through the PPM200 to determine the average price of a 9.5 x 7.6-inch
print on 8.5 x 11-inch paper. Based on a 30-print capacity for one set of ink
cartridges, the cost per print was $2.46, which is about ballpark for most photo
inkjet printers. Of course, your mileage may vary, and some smart shopping could
bring that price down a bit. At any rate, the $2.49 price is significantly lower
than what you would pay by ordering the same size print through a retail printing
service.
Design, Functions, and Controls
 The
Personal Picture Maker 200 is a compact printer, with a sleek black exterior
that appears less bulky than most photo-quality printers we've seen. With its
paper feeder and support trays retracted, it measures only 18.2 x 9.2 x 10.9
inches (463 x 234 x 195mm), small enough to fit on any desktop designed for
a complete computer/printer configuration. When in use, the paper feeder tray
extends above the printer about six inches, and the exit tray extends forward
from the bottom of the printer about 12 inches, increasing its footprint to
18.2 x 18.7 x 10.9 inches or 463 x 475 x 278mm (though the exit tray can be
partially extended to save space). The PPM200 is also lightweight and easy to
maneuver, weighing only 5.8 pounds (2.6 kilograms).
The
Personal Picture Maker 200 is a compact printer, with a sleek black exterior
that appears less bulky than most photo-quality printers we've seen. With its
paper feeder and support trays retracted, it measures only 18.2 x 9.2 x 10.9
inches (463 x 234 x 195mm), small enough to fit on any desktop designed for
a complete computer/printer configuration. When in use, the paper feeder tray
extends above the printer about six inches, and the exit tray extends forward
from the bottom of the printer about 12 inches, increasing its footprint to
18.2 x 18.7 x 10.9 inches or 463 x 475 x 278mm (though the exit tray can be
partially extended to save space). The PPM200 is also lightweight and easy to
maneuver, weighing only 5.8 pounds (2.6 kilograms).
Paper feeds into the printer from the top, with plastic guides to help align
the sheets correctly, and an adjustable left guide to accommodate various paper
and cut card sizes, from 8.5 x 11 inches to 4 x 6 inch postcards. Two memory
slots (one for SmartMedia and one for CompactFlash) are located on the top panel,
in front of the paper feeder. A hinged front cover lifts up to access the dual
print cartridges, and a separate translucent black dust cover lifts up to access
the memory card slots.
To the right of the paper feeder is the 1.8-inch LCD preview screen. The LCD
itself lifts up about 30 degrees for better viewing, and allows you to preview
-- in full color -- all the images on the memory card. A notched, rotating wheel
on the LCD casing adjusts the monitor's brightness. Using the LCD monitor, you
can choose images for printing, select print sizes and formats, and crop or
add borders and text to the images, by scrolling through a set of relatively
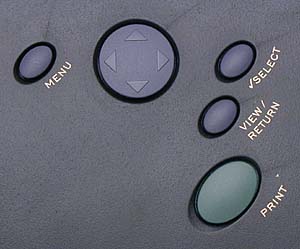
easy-to-navigate menus. The printer control buttons are located on a Control
Panel just below the LCD screen. They include a Menu button, a four-way arrow
rocker, Select button, View/Return control, and Print button.
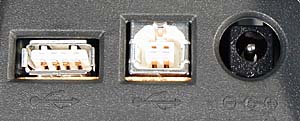
The lower back panel houses the DC-In port for power, as well as two USB ports,
one for connecting to a computer and one for connecting to external USB devices.
The printer has no on/off button, relying on the plug being disconnected, or
the printer shutting down automatically after a period of inactivity.
Paper is loaded into the feeder with the printable side facing front and the
top edge of the paper loaded first. The paper feeder can hold up to 10 photo
cards, 25 sheets of standard photo paper, 100 sheets of plain custom size paper,
or 25 iron-on transfers at a time. The PPM200 feeds the paper, one sheet at
a time, through the printer, applying ink through bottom jets in the inkjet
cartridges. A carrier ribbon transports the cartridges back and forth across
the paper (automatically centering them when you open the printer cover to install
replacements). Once the actual printing process is finished, the remaining portion
of the paper is ejected very quickly.
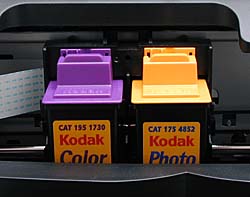
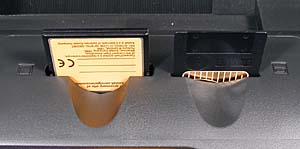
The printer comes equipped with two Kodak printing cartridges, used simultaneously
to create full-color images. The Color Inkjet cartridge (purple cover) includes
the three primary printing colors: cyan, magenta, and yellow. The Photo Inkjet
cartridge (yellow cove) contains the light cyan, light magenta, and black inks
typically used in six-ink systems to enhance photo quality. Kodak recommends
using the Color and Photo Inkjet cartridges for printing straight photographs,
and switching to a combination of Color and Black inkjet cartridges for printing
photographs with text, as the second combination produces more saturated blacks,
and also saves greatly on ink costs. (The Black cartridge is sold separately.)
Both inkjet cartridges are loaded from the front of the printer by matching
their cap colors to the cartridge carrier colors. Once snapped into place, they
should be properly aligned using the printer's Utilities menu. An Align Cartridges
option guides you through the alignment process, using a test print to help
determine the necessary adjustments. After the cartridges have been aligned,
you're ready to print. It's a good idea to follow this process each time new
cartridges are installed, and the printer will prompt you to align the cartridges
when it detects a new one.
Operation
 Standalone Printing
The Personal Picture Maker 200 operates in standalone mode or when connected
to a computer. Printing in standalone mode begins by inserting either a CompactFlash
or SmartMedia card into one of the memory slots on the printer's top panel.
Standalone printing is also available when a ZIP drive is connected to the printer's
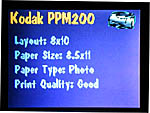
second USB port (the printer supports both 100 and 250MB drives). When you plug
in the printer, the LCD screen will display a list of the printer default settings,
including Layouts, Paper Sizes, Paper Type, and Print Quality.
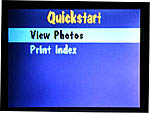
 Once a memory card is inserted (or the ZIP drive is connected) the LCD monitor
will indicate that it is reading the card and tell you how many photos are stored
on the media. After it's processed all of the images, a Quick Start menu pops
up on the LCD preview screen, allowing you to set all of the basic printing
options without navigating through the Main Menu. Within the Quick Start menu
you can: 1) print all of the images on the card (with an option to select only
DPOF processed images, if they are available); 2) review all of the photos and
select only the ones you want to print (which automatically launches you into
the Main Menu); 3) set up the PC Card Reader, which enables your computer to
read images off the memory card (available only if the computer is connected);
4) print an index of thumbnail size images; and 5) change the printing layout.
Once a memory card is inserted (or the ZIP drive is connected) the LCD monitor
will indicate that it is reading the card and tell you how many photos are stored
on the media. After it's processed all of the images, a Quick Start menu pops
up on the LCD preview screen, allowing you to set all of the basic printing
options without navigating through the Main Menu. Within the Quick Start menu
you can: 1) print all of the images on the card (with an option to select only
DPOF processed images, if they are available); 2) review all of the photos and
select only the ones you want to print (which automatically launches you into
the Main Menu); 3) set up the PC Card Reader, which enables your computer to
read images off the memory card (available only if the computer is connected);
4) print an index of thumbnail size images; and 5) change the printing layout.
 If you want to select specific images on the media card, you simply select View
Photos, and use the right and left arrow keys to scroll through the images.
Press the Select button to mark each image you want for printing. A checkmark
appears in the lower left corner of the image. While the image is on-screen,
you can also specify how many copies you want printed by using the up and down
arrow buttons (pressing the Select button automatically sets the number to one).
If you want to select specific images on the media card, you simply select View
Photos, and use the right and left arrow keys to scroll through the images.
Press the Select button to mark each image you want for printing. A checkmark
appears in the lower left corner of the image. While the image is on-screen,
you can also specify how many copies you want printed by using the up and down
arrow buttons (pressing the Select button automatically sets the number to one).
After selecting the images you'd like to print, you'll need to set the basic
printing options, such as paper size, layout, and print quality. Press the Menu
button to pull up the Main Menu display, and navigate through the options with
the arrow rocker buttons. Use the Select button to set your choices. You can
return to the Main Menu by pressing the Menu button, or return to the previous
menu screen by pressing the View/Return button. Pressing one of these two buttons
can also take you to an image preview screen showing the selections you've made
and how they will be arranged on the paper for printing. (We noticed after working
through these menus several times, that the back-and-forth nature of the review
process it difficult to keep up with the order of appearance of the next screen.
Sometimes it's necessary just to keep pressing the buttons until you get the
view you want!) From this point on, you will be working off the printer's Main
Menu.
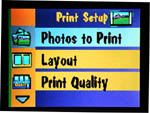
The first menu item in the Main Menu is Print Setup, which establishes which
images will be printed, how they will be laid out, quality settings, and how
many sets of each you want (many of the same options that were available in
the Quick Start menu). If you start with the Print Setup sub-menu, skip over
the Photos to Print option in the beginning, as any of the three options will
start the printing process immediately, based on existing print parameters.
Wait until you've set all of the other parameters before going back to print.
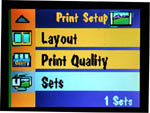
The second Print Setup sub-menu, Layout, lets you choose between Print Sizes,
Kodak Formats, and Panoramics. Print Sizes gives you a series of single-page
layout choices, with one to 16 images per page. Kodak Formats gives you a selection
of 12 preset paper formats with code numbers that match the codes on the Kodak
paper packaging. Many of these include perforated papers for making multiple
full-bleed prints. Panoramic is a page layout format with two vertical panoramic
prints. The sub-menu gives you various choices as to how the images can be cropped.
Print Quality is the third option under the Print Setup menu. The choices are
Best, Better (default), or Good. The Best quality setting gives you the slowest
printing speed, but also the best results. Resolution values include: 300 x
300 dpi, with medium ink coverage, for the Good setting; 600 x 600 dpi, with
medium ink coverage, for the Better setting; and 600 x 600 dpi, with high ink
coverage, for the Best setting. The final option under Print Setup is Sets.
This simply establishes the number of "sets" of prints you want to
make with your chosen print options -- up to 99.
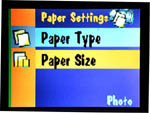
The Paper Settings option controls the paper type and size. Paper Type choices
include Photo, Plain, Kodak Formats, T-Shirt, and Transparencies. Photo is for
printing on glossy photo paper. Plain is for printing on matte-finish or plain
copy papers. Kodak Formats gives you the same options as in the Layout menu
described above. The T-Shirt option works with a special iron-on transfer paper
that is heat activated to transfer images onto fabric. Transparencies is for
printing on acetate transparency media for use in overhead projectors. Under
the Paper Size sub-menu, your choices include 8.5 x 11-inch letter; A4 paper
(210 x 297mm or 8.26 x 11.69 inches); 4 x 6-inch postcard; A6 card stock (105
x 148mm or 4.13 x 5.82 inches), Iron-On Transfer, and Hagaki postcard (a Japanese
format).
Of all the menu options you have to set on the PPM200, the Layout option is
the most complicated. A detailed chart in the User's Manual (page 19) lists
all of the available Print Sizes, Kodak Templates, and Panoramic cropping options.
This chart can be very helpful, because scrolling through the options on the
LCD screen can be a bit confusing (though we applaud the use of miniature page
layout graphics on the LCD monitor to show you how each page selection will
look after it's printed). Particularly useful is the list of Kodak Templates.
Only there do you see that there are two Photo Print options for stickers (EK-STK-001
and 101), which are not listed in the LCD menu when using the printer in standalone
mode. (They are replaced by two formats not listed in the manual).
 Once you've set up all of the basic printing options, you can either press the
Print button to begin the printing process immediately, or select the Photos
to Print menu option under Print Setup. This option will allow you to print
only Selected Photos, which are any photos previously set up for DPOF printing
through a digital camera; Print All photos on the card, or make an Index Print.
Printing begins immediately after a print option is selected, and can be canceled
by pressing the Select button at any time during the printing process. (Depending
on the stage of printing, the cancel command may take a few seconds to complete.)
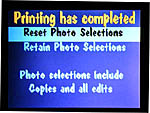
When the printing is complete, the printer will give you the option of resetting
or retaining the photo selections that you've made. If you choose to reset them,
all photo edits will be erased.
Once you've set up all of the basic printing options, you can either press the
Print button to begin the printing process immediately, or select the Photos
to Print menu option under Print Setup. This option will allow you to print
only Selected Photos, which are any photos previously set up for DPOF printing
through a digital camera; Print All photos on the card, or make an Index Print.
Printing begins immediately after a print option is selected, and can be canceled
by pressing the Select button at any time during the printing process. (Depending
on the stage of printing, the cancel command may take a few seconds to complete.)
When the printing is complete, the printer will give you the option of resetting
or retaining the photo selections that you've made. If you choose to reset them,
all photo edits will be erased.
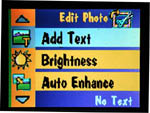
For more creative printing controls, the Personal Picture Maker 200 provides
a number of image adjustment tools, all available through the printer's Edit
Photo sub-menu. Edits apply to the photo currently displayed on the LCD preview
screen only, so you must exit the menu and scroll to the next image to change
more than one image. The Crop command displays a cropping window over the image,
which can be moved up, down, right, or left by pressing the arrow buttons. Though
the cropping window can be moved, the actual window size remains fixed. Once
the crop area has been established, press the Select button to apply the change.
Once selected, Undo Crop appears at the bottom of the screen, and pressing the
Select button again removes the crop.
Images can also be rotated clockwise (in 90-degree increments) in the Edit Photo
sub-menu, as well as given a border and text, in the Edit Photo sub-menu. The
Border selection prints the image in the shape of a Heart, Oval, Cloud, or Sunburst,
with the "border" consisting of the light area around the image. (The
border actually prints as a light gray instead of white, so the printer is applying
ink to the border area instead of leaving it plain.) Under the Text option,
the printer offers several preset titles such as "New Year," "Vacation,"
and "Christmas," which print centered at the bottom of the image.
If these titles aren't descriptive enough, the Modify Text option lets you change
the existing text by adding one letter at a time after the phrase.
Also under the Edit Photo sub-menu are the Brightness and Auto Enhance functions.
Brightness controls the amount of contrast in the image, while Auto Enhance
automatically adjusts the image to the color, contrast, saturation, and quality
levels that the printer estimates as correct. One drawback to these image adjustments
is that the LCD preview screen does not reflect any changes, showing only the
original image. For example, you can see the effect of cropping while you are
making the adjustment, but upon returning to the image display, the crop area
is not shown. Edit menu options can be canceled by selecting the Undo All Edits
option in the Edit Photo sub-menu, or by resetting all of the printer's default
settings through the Utilities sub-menu.
There are three additional "housekeeping" sub-menus under the Main
Menu. Storage allows you to copy images from your CompactFlash or SmartMedia
card to a Zip drive, which is connected via a USB cable. Once you've transferred
the images, you can erase the memory card to make room for more photos.
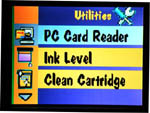
The Utilities sub-menu provides several vital printer functions. PC Card Reader
enables you to view images on, or copy images to, your Windows computer (with
accompanying software). Ink Level provides a reading of how much ink is left
in each of the two cartridges, while Clean and Align Cartridges perform necessary
maintenance. Finally, Reset Defaults returns all of the printer settings to
factory defaults. The Preferences option performs the simple task of choosing
the printer's language (which on our test unit had only one selection, English).
Printing from a Computer
In addition to a USB port for connecting compatible USB devices, the Personal
Picture Maker 200 has a USB port for connecting to a computer. (A USB cable
is not included with the printer, so you'll need to obtain one separately as
an accessory.) A software CD packaged with the printer (inside the back cover
of the User's Manual) provides the necessary printer drivers and Kodak's Picture
Page software. All applications and drivers are compatible with Windows 98/2000
systems only, with a Macintosh driver available as a download from the Kodak
website. Printing from a computer extends the Personal Picture Maker 200's capabilities,
increasing quality options, and allowing you to print booklets, posters, or
two-sided documents.
The Windows printer driver features a Print Properties application, which can be activated through any image-editing program (such as Kodak's Photo Print or Picture Page software), or directly through Windows (using the Printers settings menu). Print Properties controls the basic printing setup functions, such as paper type, paper size and print quality, and also enables special features. For example, the Job Finishing option sets up the printer to handle posters, handouts, booklets, or two-sided documents. With the Handouts setting, multiple images are consolidated onto one sheet of paper. The Poster, Booklet, and Two Sided Document options provide specific directions for loading paper in a special order, depending on the type of document to be printed. Another feature is Web Smoothing, which "smooths" the appearance of images printed from the Internet, reducing the amount of artifacts and pixelization.
As in standalone mode, the Paper option of Print Properties sets the Paper Size, with the same Letter, A4, A6, Post Card, Iron-On Transfer, and Hagaki options, as well as a few others. It also sets the Orientation (Portrait or Landscape) and the number of copies to be printed. In the Copies box, you have the option to collate or reverse the print order of document pages, placing the first page of a document on top of the stack in the exit tray.
The Document/Quality option sets the Paper Type (Kodak Premium, Plain Paper, Transparency, and Iron-On Transfer), and Print Quality (Normal or High). Normal quality is the default and equivalent to the Better setting in standalone operation, printing at 600 x 600 dpi with medium ink coverage. High quality prints at 1,200 x 1,200 dpi, with high ink coverage. Kodak's website mentions a 300 dpi "draft" mode with low ink coverage, but we didn't find it in the driver while working with our test unit. (There is a 300 dpi option in the Windows print driver, but that appears to refer to the resolution of the image data sent to the printer, not the engine resolution itself.) The driver software also allows you to check ink levels in cartridges, and clean and align cartridges, just as in standalone mode.
The Macintosh printer driver features many of the same adjustments through its Page Setup dialog box (comparable to Print Properties in Windows). You can choose several standard paper sizes (only three Kodak templates, compared to the 12 templates available in standalone mode), plus four postcard options, and an Edit Custom Sizes option. A Scale option allows you to adjust image size from 25 to 400 percent. Orientation gives you a choice of portrait (vertical) or landscape (horizontal) print modes, and a Watermark option enables you to add a watermark across the center of the print -- with multiple phrases from "Personal" to "Do Not Copy." Photoshop users can access a Photoshop option under the General menu, which gives you screening capabilities, borders, bleeds, registration marks, crop marks, and many other professional printer options.
The remaining Mac printing functions are accessed through the PPM200 Print dialog box. These include the number of copies, which images to print, and a delay option that allows a print to dry before the next one is printed. General setup options include: Paper Type/Quality with three quality options (Quick Print 600 x 600 dpi, Normal 600 x 600 dpi, and High 1,200 x1,200 dpi); Layout, which includes the number of prints per page and all of the abovementioned booklet printing options; Color, with a choice of ColorSync or Built-in color matching (recommended for Kodak papers); Background printing; and a Photoshop Color menu (when printing from a Photoshop file), which allows you to select from more than 40 different color spaces (RGB is the default).
Also included on the Windows driver CD is a copy of Kodak's Picture Page software, which provides minor image editing and organization capabilities. You can organize images into albums, make borderless prints (for printing on Kodak micro-perforated paper), or enlarge images. Picture Page also provides basic correction tools, such as cropping, brightness, and automatic enhancement, similar to what the printer provides in standalone operation. A few templates for photo projects like greeting cards and calendars are also included in the application, and new templates are always available as downloads from the Kodak website.
Our evaluation model of the Personal Picture Maker 200 was accompanied by another software CD, containing Kodak's Photo Print software. Photo Print enables many of the same capabilities as Picture Page, but offers a more extensive selection of borders and creative effects filters. You can simulate a picture frame around the image, convert an image to black-and-white or sepia tones, or apply an artistic effect such as Watercolor, to simulate a watercolor painting. An entire library of clip art is also available for enhancing images. According to the Kodak website, Photo Print is not available in Macintosh or Windows NT compatible versions.
While the PPM200 Macintosh driver does not have any supporting software at this time (we hope it will eventually be available), you can still set up multiple prints on a single page. We tried to match these to the perforated papers that Kodak provides for borderless prints, but it was basically an exercise in futility. Our suggestion, if you want to make small, album-size prints, is to open the Page Setup dialog box (under the File menu settings) and make sure the Scale is set at 100 percent and the Orientation is in Portrait mode (these are the default settings). When you select Print, choose Layout under the General menu on the left of the Print dialog box. Use the Pages per Sheet option to select either two or four prints per page. If you want to print one image per page, but at varying sizes, you have to make those adjustments in your image-editing software.
The Personal Picture Maker 200 also serves as a card reader, allowing you to transfer images from a memory card to your computer. The printer must first establish a connection with the computer before the memory card is inserted. Once the card is in place, you can access the PC Card Reader function through the Quick Start menu or the Utilities sub-menu on the printer. The card slots should show up on the computer as removable drives until the card reader mode is canceled through the printer interface. The printer will not be able to print while working in Card Reader mode.
Performance
Kodak makes no statements regarding the Personal Picture Maker 200's print speed in its literature or specifications. (Perhaps a good thing, given how inflated inkjet print speed claims tend to be.) We tested the PPM200 in both host-connected and standalone modes, at each of its image quality settings.
As with other photo inkjets we're testing, we found the PPM200 to be pretty slow in outputting pages of photos, particularly in its highest-quality operating modes. (Compared to business-oriented inkjet printers, photo-quality units tend to trade off print time quite lavishly in favor of print quality.) This could be annoying in situations where you are trying to meet an important deadline. (A critical homework project, perhaps?) For most personal usage though, print time may not be a terribly critical parameter. In our own usage, we tend to just queue up a batch of prints and walk away (usually going to bed), and let the printer finish its work while we're away. You'll have to decide how fast you need your prints. If you need them in a hurry, and are content with adequate image quality, get a business-oriented inkjet. If you want the highest photo quality, get a photo-specific unit and resign yourself to waiting for your prints.
As shown in the table below, print times for the Personal Picture Maker 200 ranged from a low of 12 minutes to a high of 31 minutes. (That's right: For a full-page print, 12 minutes is the fastest you can expect to get a print out.) Print time when operating standalone was generally a bit faster than when driven from a computer, but the highest print quality (1,200 dpi) apparently is only achieved when driven by a PC. (In the Computer-Driven figures below, the two Quality Setting numbers refer to the resolution set in the Windows print dialog box and in the printer setup dialog box, respectively. Kodak's literature provides no description of these numbers, but from our test results it appears that the first is the resolution at which the image is rendered by the print driver, while the second is the resolution at which the print head lays down the ink droplets. As noted earlier, Kodak's web site for the printer makes reference to a "draft" mode, with a printing resolution of 300/300 dpi, but we couldn't find any setting like that on the software that came with our evaluation unit.
| Quality Setting |
|
|
| Best | 24 minutes | |
| Better | 13 minutes | |
| Good | 12 minutes | |
| 600/1200 dpi | |
31 minutes |
| 600/600 dpi | |
20 minutes |
| 300/600 dpi | |
20 minutes |
For a detailed evaluation of print quality in the various resolution/quality,
see the Test Results section below. To briefly summarize those findings, we
found noticeable differences between the three quality settings in each printing
mode. At the lowest quality settings, the images still looked fairly crisp,
but we felt that tonal reproduction suffered somewhat. Bottom line, (in our
opinion anyway), if you're going to wait this long for a print, you may as well
wait a little longer for a better one.
Media Cost
People are often surprised by the actual cost of inkjet prints, once all the
consumables have been added up. Cost figures published by the manufacturers
are often based on lower levels of ink coverage, more representative of printing
reports and business graphics than full-page, full-coverage photos. To give
you a fair idea of how much you could expect your photo printing to cost, we
kept track of how many test prints we got out of a set of cartridges, and did
the math for you.
As they say in the car commercials, "your mileage may vary," but our
results should be representative of what most users printing photos will encounter.
We run a pretty wide range of test images through the printers. Some have very
heavy ink coverage, others have less. Our standard print size is set to 9.5
x 7.6 inches, as that's about the largest size we can count on being able to
print on any printer we might test. We also use list prices for the supplies
below. By shopping smart, you can often save quite a bit relative to list price.
| (Total Prints = 30) Consumable |
Amount Used | Cost Each | Cost/Print |
| Paper | 30 | $29.99/50 | $0.60 |
| Color Ink | 100% | $37.99 | $1.33 |
| Photo Ink | 40% | $39.99 | $0.53 |
|
|
$2.46 | ||
These figures seem fairly typical, compared to numbers we've seen in other photo inkjet printers. If you factor in typical savings you might find at retail, per-print cost could be as low as $2.00 for a full-page photo. (Not bad, compared to what you'd pay at the corner camera store for an 8x10 photo print!)
Print Longevity and Durability
This is a rather uncertain area, but one of great concern to our readers, thanks in part to the bad name inkjet technology has earned for itself, and arising from some manufacturer's prints fading noticeably in less than a year, even in brightly lit home and office interiors. (Some excuse could perhaps be made for fading in direct sunlight, but just hanging on the wall in a home or office? Really!)
Unfortunately, no data has been published on the Personal Picture Maker 200's projected print life as yet, so we can't comment one way or the other. Most current inkjet printers are rated as having a print life between 6 months and 3 years in normal residential viewing conditions. Print fading is caused by light and environmental contaminants. Prints from even a low-rated printer could easily last a decade or two in a photo album, kept out of sunlight and away from polluted air. On the other hand, a print left in a sunny window could show noticeable fading in as little as a week or two. Without any specific information about print life for the Picture Maker, about all we can suggest is to take the usual precautions in storing and displaying them, and you shouldn't fare any worse than with other inkjets.
In terms of durability, it is also important to note that most inkjet prints (at least those made with consumer printers) are very susceptible to moisture. We waited 24 hours after our test prints were made and subjected them to both light (a few very small droplets) and heavy (held under running water) contact with moisture. While Kodak's Premium grade paper might survive a few small drops, there was noticeable bleeding in the running water test, and blotting the lightly wetted print with a paper towel picked up spots of wet ink. This is yet another good argument for keeping your prints well-protected!
Operation and User Interface
The Personal Picture Maker 200's user interface is relatively straightforward to navigate when operating in standalone mode, with just a handful of control buttons on the printer's top panel. The LCD menu system controls the printer's standalone operation, with a design that is very similar to Kodak's digital camera menus. The accompanying User's Manual offers step-by-step guidelines for operating the printer, and also includes a well-rounded troubleshooting section. We found the driver software simple to use, and had no trouble operating the printer from a computer. The following list outlines the printer controls and their functions, as well as a detailed description of the printer's operating menus.
Control Enumeration
Menu Button: Located to the left of the large arrow rocker button, the Menu button pulls up the printer's main operating menu.
Arrow Rocker Button: The largest button on the printer control panel, this button has four arrows, one each pointing up, down, right, or left. All four arrow buttons navigate through the LCD menu screens. The left and right buttons scroll through images on the memory card when in normal image review mode. In View Photos mode, the up and down arrows select the number of print copies to be made for each image selected.
Select Button: Just to the right of the arrow rocker button, this button confirms menu choices. In View Photos mode, this button marks images on the memory card for printing. It also cancels the printing process once it has been started.
View/Return Button: Directly below the Select button, this button returns the LCD display to the main image preview screen from any other screen. It also backs out of sub-menus without making changes.
Print Button: Positioned below the View/Return button, the Print button starts the printing process from any LCD menu screen. Printing can be canceled by pressing the Select button.
Printer Menus
Main Menu: Accessed by pressing the Menu button, the Main Menu controls all operations and is navigated by the four-way arrow buttons.
 Print
Setup: Pulls up the printer setup sub-menu, with the following options:
Print
Setup: Pulls up the printer setup sub-menu, with the following options:
- Photos to Print: Specifies which images from the memory card to print. Options are: Selected Photos, Print All, and Index Print.
- Layout: Establishes the layout for prints, with the following options:
- Print Sizes: Sets the print size. Options include 8 x 10, 3.5 x 5, 1.75 x 2, 2 x 3, 4 x 6, and 5 x 7 inches.
- Kodak Formats: Selects from a list of 12 preset layout templates, designed to work with Kodak specialty inkjet papers.
- Panoramics: Available with 8 x 10 and A4 paper sizes only, this option sets the position of the panoramic image, with options of Center, Lower Center, Lower, Top, and Upper Center.
 Print
Quality: Sets the print quality to Best (600 x 600 dpi, high ink coverage),
Better (600 x 600 dpi, medium ink coverage), or Good (300 x 300 dpi, low
ink coverage).
Print
Quality: Sets the print quality to Best (600 x 600 dpi, high ink coverage),
Better (600 x 600 dpi, medium ink coverage), or Good (300 x 300 dpi, low
ink coverage).
- Sets: Designates how many sets of each image to print.
 Paper Settings:
Displays the paper settings sub-menu:
Paper Settings:
Displays the paper settings sub-menu:
- Paper Type: Identifies the type of paper being used. Choices are: Photo, Plain, Kodak Formats, T-Shirt, and Transparencies. When the Kodak Formats option is selected, a list of 14 Kodak specialty papers appears on the display.
- Paper Size: Sets the size of the printing paper. Options are 8.5 x 11, A4, 4 x 6, A6, and Hagaki.
 Edit Photo:
Calls up the image adjustment sub-menu (all edits apply to the image currently
displayed on the preview screen only):
Edit Photo:
Calls up the image adjustment sub-menu (all edits apply to the image currently
displayed on the preview screen only):
- Crop: Displays a cropping window on the preview screen, which is positioned over the photo with the arrow buttons.
- Rotate: Rotates the image clockwise in 90-degree increments.
- Add Border: Cycles through several border options, including No Border, Heart, Oval, Cloud, and Sunburst.
 Add
Text: Prints a text message in the bottom center portion of the image.
Preset messages include: New Year, Vacation, Birthday, Christmas, Graduation,
Wedding, New Baby, My Family, and Thank You. The Modify Text option allows
you to personalize or alter a preset message, one letter at a time. Reset
Messages resets any modified messages to their original defaults.
Add
Text: Prints a text message in the bottom center portion of the image.
Preset messages include: New Year, Vacation, Birthday, Christmas, Graduation,
Wedding, New Baby, My Family, and Thank You. The Modify Text option allows
you to personalize or alter a preset message, one letter at a time. Reset
Messages resets any modified messages to their original defaults.
- Brightness: Adjusts the image contrast by increasing or decreasing the brightness level. Five adjustment levels range from -2 to +2.
- Auto Enhance: Automatically adjusts the color, contrast, brightness, saturation, and quality of an image.
- Undo All Edits: Removes all image edits. (This menu option not shown)
- Storage: Allows you to copy or erase a memory card. (This menu option not shown)
 Utilities:
Routes to the Utilities sub-menu:
Utilities:
Routes to the Utilities sub-menu:
- PC Card Reader: Only available when the printer is connected to a computer, this allows the printer to be used as a card reader, transferring images from a memory card to the computer.
- Ink Level: Reports the current ink level for both printing cartridges.
- Clean Cartridge: Cleans the print nozzles and realigns them. The printer generates a test print for checking the alignment. (This menu option not shown)
- Align Cartridge: Prints a sample print for checking the alignment according to a numerical system, which the printer guides you through step-by-step.
- Reset Defaults: Resets all the printer settings to their factory defaults. (This menu option not shown)
- Preferences: Allows you to change the printer menu language. (Our evaluation model only offered English)
Quick Start Menu: Displayed whenever a new memory card is inserted into the printer, or an external USB device is connected. (This menu not shown) Options are:
- Print All: Prints one copy of all images on the memory card (at the default settings).
- View Photos: Allows you to scroll through images and mark them for printing.
- PC Card Reader: Places the printer in PC Card Reader mode, for transferring images from a memory card to a computer.
- Print Index: Prints a thumbnail index of the images on the memory card.
- Change Layout: Changes the layout option for printing images, with the same options as above.
Test Results
The Kodak Personal Picture Maker 200 (PPM200) produced beautiful prints in our
testing, with rich, deep colors, and a wide tonal range that extended into very
dark blacks. We felt that the images were a bit overly contrasty and somewhat
oversaturated, but if you like very rich, bright colors, and photos with a lot
of "snap," you'll be very pleased with the prints turned out by the
PPM200. Since the printer is clearly aimed at home and business users (rather
than professional photographers or graphic artists), the high color saturation
is probably a good choice. (Pros generally prefer more subdued, accurate colors.)
You could easily achieve more subtle tones with the PPM200 by employing ICC
color profiles and color management software, but those tools are not germane
to it's intended market. Prints made on Kodak's Premium Glossy paper have a
very pleasing "feel," only distinguishable from actual photographs
with close scrutiny.
As noted above, the tonal range of the PPM200 is very broad, producing delicate
highlights and extending into very rich blacks in the shadow areas. The combination
of inkjet technology (which permits a lot of dye to be laid down in a given
area) with a true six color process (including pure black ink) makes for a very
rich tonal scale.
Color gamut was very good overall, significantly outperforming the standard
web offset (SWOP) color space, which is used for professional printing of high-quality
magazines and other four-color materials (CMYK). You can see in the 3-D gamut
plot below that the color gamut comes in only a little behind a high-quality
dye-sublimation printer we tested previously. Darker shades hold color very
well, a frequent weakness of inkjet printers. The PPM200 did particularly well
with dark shades of blue and purple, generating a very large color space in
that area.
Like all inkjet printers, the Personal Picture Maker 200 uses "dithering"
to build up subtle colors from its basic set of six inks. The PPM200 has two
"engine" printing resolutions, 600 or 1,200 dpi, defining the pitch
on which the printer lays down its individual dots of ink. These numbers specify
the size and spacing of the individual dots of ink the printer can lay down.
When printing from a memory card, only the 600 dpi option is available, according
to Kodak's literature. When printing from a host computer, 1,200 dpi is the
default (although 600 dpi can be specified for shorter print times), and image
data is sampled and sent to the printer at either 300 (Quick Print) or 600 (Normal)
dpi (600 is the default).
In our tests, we found the printer produced noticeably better results at 1,200
dpi than it did at either 600 dpi setting, but to be honest, we had to squint
a little to see the difference. The most evident difference in the 1,200 vs.
600 dpi prints was that those at 600 dpi showed a slight patterning in the medium-gray
areas, with a faint banding evident across the narrow dimension of the paper.
As you'd expect, the ink dots in highlight areas were also more evident at the
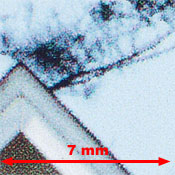
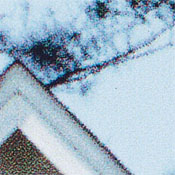
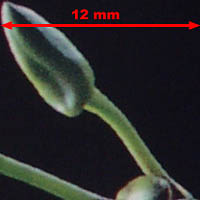
coarser setting. Detail was surprisingly good at all settings, even the 300/600
dpi option when printed from the computer. The ultra-macro shots below show
results obtained when printing from a computer using the three quality options
provided.
 |
 |
 |
|
|
|
|
When printing from a memory card, and using the printer in standalone mode,
we found more obvious differences in image quality, particularly in the area
of tonal reproduction: The lowest ("Good") quality setting showed
rather poor shadow detail, with dark shadow areas plugging up completely or
showing little detail. As we progressed through "Better" to "Best"
quality, this phenomena became much less pronounced. Unless you're in a hurry,
we'd recommend printing in "Best" mode all the time. Quality at all
three settings was quite high though, despite the tendency to be slightly contrasty,
and more color saturated than we normally would prefer.
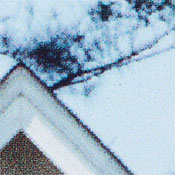
For a printer that builds its images up from discrete drops of ink, edge detail
and resolution were very good, as seen in the photo below left. We saw no tendency
to produce stair steps on the edges of objects when working with high-resolution
files from a host computer. When printing from memory cards, however, we did
find some fairly obvious "jaggies," as seen in the righthand image
below.
 |
 |
|
|
|
Colorimetrically, the PPM200 seems pretty accurate, although overall color reproduction is more saturated than in the original files (perhaps due in part to the rather high contrast we observed). We suspect both these factors are deliberate choices, arising from Kodak's desire to create a printer that would be popular with consumers. The film world has proven that consumers like bright, highly saturated, contrasty prints, and the Personal Picture Maker is designed to produce just that sort of image. Visually, the printer seems to do quite well across the color spectrum, and is particularly adept at rendering deep blue and purple tones with amazing richness and vitality. Its color balance is neutral to slightly cool, and most color hues look quite accurate.
The illustration below shows a projection of the Personal Picture Maker 200's color gamut map onto a two-dimensional color plane. This gives a basic idea of how broad a range of colors different printers can reproduce, particularly in relation to the RGB color spaces employed by digital cameras and image-editing programs. In the figure, the elongated colored area represents the total range of colors that can be seen by the human eye. (For the techies out there, this "Yxy" color space is plotted on a two-dimensional xy color plane, in which equal distances correspond to equal differences in perceived color value. Thus, it fairly accurately represents the range of human vision.)
|
(Yxy perceptually uniform color space, 2-D projection onto xy plane) |
||
 |
 |
 |
|
|
|
|
In each panel of the table, we compare the range of color the
PPM200 can reproduce with the range of another device. In the first panel, we
see a comparison relative to the "sRGB" color space used by many computer
monitors. In the middle panel, we compare the PPM200's performance with a competing
(but considerably more costly) dye-sublimation printer, the Olympus P400. Finally,
in the third panel, we compare the PPM200's color range with that of a commercial
printing press, the so-called "SWOP" standard.
Overall, the Personal Picture Maker 200 performs pretty well in the two-dimensional
plots, although we can see where it appears to lose some of the bright greens
and cyans. It also looks here to be somewhat deficient in the extreme purples,
a difficulty apparently shared with many print devices. It's important to note
though, that the 2-D plot above only shows the ultimate limits of the printer's
gamut, and tells nothing about how well it does across the full tonal range.
If you think about it, it's obvious that color rendition will certainly vary
as a function of the tone or brightness of an image. Thus, to obtain a complete
view of what a printer can do color-wise, you need to look at a three-dimensional
plot of its gamut.
 |
|
|
The illustration above shows a three-dimensional plot of the PPM200's color
gamut in "Lab" color space, again with the SWOP gamut overlaid on
it. In this view, the printer's gamut is shown by the colored lines, while the
SWOP gamut appears in white. (Even animated like this, it's still hard to see
all the details of the graph. Ideally, this would be a VR object that you could
twirl around in your browser, to see it from all angles. We don't have the software
to do that yet, but as an alternative, Mac users can download the 3D
data file in Rotator
format. The freeware Rotator
program will let you view the gamut map interactively.
The 3-D plot above shows just how good the Personal Picture Maker 200 is compared
to a conventional printing press: The green/cyan limitation appears mainly in
the midtone region (admittedly an important area, for accurate rendition of
sky colors). In comparison, we can now see how much more total color "volume"
is covered by the Olympus P-400 than by the printing press. In the deep blues
and purples, there's a significant volume of color space covered by the PPM200
that's outside the range of normal offset printing. (No surprise really, but
the magnitude of the difference was unexpected.) Overall, the PPM200 has a very
wide color gamut, much more so than is revealed in the simplistic 2-D gamut
plots above.
Conclusion
Overall, the Personal Picture Maker 200 provides outstanding print quality for
such an inexpensive consumer photo printer. It demonstrates excellent detail
in the highlights and shadows, and when printed on Kodak's Premium Inkjet papers,
the high-resolution prints are barely discernible from conventional photographs.
Although it trades speed for print quality, we feel that the PPM200 is a good
option for consumers who want a quality color inkjet printer that is capable
of printing both illustrated text documents and photo-quality digital images.
These features also make it attractive to small business owners who want to
be able to do short-run (but not speedy) brochure, poster, and business printing
in their own offices.
The ability to print directly from SmartMedia and CompactFlash cards is just
an added bonus, enhanced by the availability of high-quality perforated templates
that allow you to make your own hassle-free, standard-format, photographic prints.
The adjustable quality settings, combined with multi-format image compatibility,
make the Personal Picture Maker 200 a good match for most consumer needs, at
a very reasonable price.