Back
to Full Epson PhotoPC 3000Z Review
Back
to Full Epson PhotoPC 3000Z ReviewGo to Epson PhotoPC 3000Z Data Sheet
Go to Epson PhotoPC 3000Z Pictures Page
Up to Imaging Resource Cameras Page
Use your browser's "Back" button to return to the previous page, or the links at the top and bottom of this page to navigate to related information. If you have difficulty fitting the text on this page onto your printer output, simply resize your browser window to a narrower width and print again.
Remember us when it's time to buy!
Dave here: Have our reviews been helpful to you? (Is this article you're reading right now useful?) Preparing this level of information on as many products as we do is incredibly hard work, not to mention expensive. Things on the Internet may look like they're free, but they're not. (As a lot of big dot.com companies are finding out these days.) Somewhere, somebody has to pay to produce worthwhile content. YOU can help us though, by remembering us when it comes time to make your purchase. Would you consider coming back to our site and clicking-through to one of our advertisers to make your purchase? Every dollar you spend with one of our advertisers helps us directly (in affiliate fees) or indirectly (the advertiser will keep renewing their ad contract with us). To make it easy for you to support us, here's a URL you can visit, to see all our current advertisers, with links to click on that will register your visit to them as having come from our site. It's up to you where you buy, but Mike, Mike, Kim, Yazmin, Marti and I would be really grateful if you'd help us out by choosing one of our advertisers to purchase from.
Thank you for your support!
Dave Etchells, Founder & Publisher
Visit our "Buy Now" Page:
https://www.imaging-resource.com/buynow.htm
Back
to Full Epson PhotoPC 3000Z Review
Go to Epson PhotoPC 3000Z
Data Sheet
Go to Epson PhotoPC 3000Z
Pictures Page
Up to Imaging Resource Cameras
Page
Epson PhotoPC 3000ZEpson's first three-megapixel design boasts great image quality and loads of "enthusiast" features Review First Posted: 10/01/2000 |
|
 |
|
3.3 megapixel CCD for images to 2048x1536 (2544x1904 in interpolated HyPict mode)
|
|
|
3x optical zoom lens, 34-102mm effective range
|
|
|
|
Many manual-control options
|
|
|
|
Multimedia video and sound recording
|
|
| * | External flash via hot shoe connector | |
Executive Overview
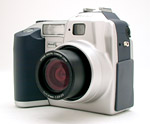
The Epson 3000Z packs quite a punch with its tight design and versatile exposure control. While the camera is a little chubby at 4.3 x 3.5 x 2.6 inches (108 x 89 x 65 mm), the its light weight of 12.9 ounces (365 g) and accompanying neck strap make it very portable. The camera features a telescoping lens design, which extends the lens once the camera is powered on (and in a capture mode) and retracts the lens when the camera is shut down. A well thought out combination of control buttons and LCD menus drive the camera, and provide a straightforward user interface.
The 3000Z is equipped with both a real image optical viewfinder (complete with dioptric adjustment dial) and a 1.8 inch color LCD monitor for composing images. The LCD monitor is activated by the mode dial, and features a very efficient menu system. Instead of calling up settings menus and sifting through screen after screen of settings and options, this LCD menu works much more simply. When the LCD is in use, an information display lines the bottom and right sides of the LCD, with features corresponding to adjacent buttons. Through this setup, you can quickly change the white balance or ISO setting and resume shooting with practically no hassle.
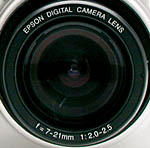
A 3x, 7 to 21 mm lens (equivalent to a 34 to 102 mm lens on a 35 mm camera) is built into the camera, with manually or automatically adjustable apertures ranging from f/2.0 to f/8.0. Focus is automatically controlled, although a small selection of preset focal distances is available when in Manual capture mode. In normal shooting mode, focus ranges from 20 inches (50 cm) to infinity, and in macro mode, from 2.36 to 20 inches (5.9 to 50 cm). Lens filter threads and an accompanying lens adapter accommodate a range of accessory lens kits from wide angle to macro. There's also a 2x digital telephoto function, controlled through the LCD on-screen menu, but remember that digital zoom degrades the quality of the image in direct proportion to the magnification achieved.
When it comes to exposure, the 3000Z gives you as much or as little control as you need. The Program capture menu lets you select from a list of exposure presets for a variety of shooting conditions: Normal, Sports, Portrait and Landscape. The Full Automatic mode puts the camera in charge of everything, leaving you only in control of flash, zoom, macro mode, the self-timer, image quality and digital zoom. Finally, the Manual capture mode gives you three levels of exposure control: Auto Exposure, Aperture Priority or Manual Exposure. Under Manual Exposure, you can set the shutter speed from eight to 1/750 seconds and the aperture from f/2.0 to f/8.0. White balance can be set to Auto, "Fix" (5,200 Kelvin, about a typical daylight color) or Custom (manual setting). You also have control over ISO (100, 200 or 400) and metering (Spot or Matrix). Exposure compensation can be adjusted from -2 to +2 in either 1/2 or 1/3 EV increments, depending on the camera's capture mode. The built-in flash operates in five modes: Auto, Forced, Off, Red-Eye Reduction or Slow Synchronized (which features Leading or Trailing shutter options). When you need more flash power, a top mounted hot shoe lets you connect an external flash head, which automatically disables the internal flash.
The 3000Z also allows you to capture up to 25 second movies with sound, at approximately 15 frames per second, with the majority of the exposure controls available. The Continuous Shooting mode lets you capture up to 37 images at up to two frames per second, depending on the image quality setting and the amount of CompactFlash space. There's also an Interval photography mode, which lets you set shutter intervals from 10 seconds to 24 hours, for time-lapse photography. The time-lapse images can be put together as a movie with the QuickTime software. In addition to recording sound for movies, the 3000Z also lets you record short sound clips to accompany captured images. Image sounds can be played back and deleted through the Playback menu, without affecting the captured still image. Additionally, a "panoramic" mode allows you to capture wide/short images, great for landscapes.
Images are stored on CompactFlash cards, and a 16 megabyte card is packaged with the camera. Five image size and quality settings are available: Standard JPEG (640 x 480), Fine JPEG (2048 x 1536), Super Fine JPEG (2048 x 1536), HyPict JPEG (interpolated 2544 x 1904) and Uncompressed TIFF (2048 x 1536). Through the image playback menu, up to nine images can be displayed as thumbnails on the LCD monitor, images can be magnified and played back in a slide show. An NTSC cable comes with US and Japanese 3000Z models (PAL for European models), for connection to a multimedia projector, television set or any other video playback device. Thus, the camera can be used as a presentation tool by combining the playback features with a multimedia projector. An internal program, called Print Mark, lets you set up images for printing on a DPOF (Digital Print Order Format) device.
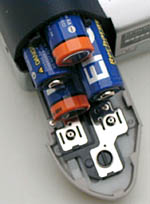
A software CD loaded with Sierra Imaging's Image Expert, Epson's Photo!3, Epson File Converter and Epson's Photo! Print2 is compatible with both Windows and Macintosh operating systems. A USB cable, as well as Mac and PC serial cables also accompany the camera. The software packages allow you to download images from the camera and organize them, as well as perform minor image editing and set up images for printing to DPOF devices. The Epson File Converter converts presentation files (such as slides) into a format that the 3000Z can read, for use in presentations with the camera. (This is a handy, seldom-found option.) For power, the 3000Z utilizes four AA NiMH rechargeable batteries, which are included in the package along with a battery charger (four AA lithium or alkaline batteries can also be used). (Big kudos to Epson on this one: You really need rechargeable batteries with digicams, so its nice to find a manufacturer who provides them.) An AC adapter is available as an accessory, and is recommended for tasks such as image playback and downloading.
Overall, we found the 3000Z to be an extremely versatile camera, with flexible exposure control and a large variety of options. With nice image quality from its 3.3 megapixel CCD (which can be interpolated to 4.8 megapixels), the 3000Z exhibited good results in the majority of our testing. It's light weight, portable and loaded with features. Its solid picture quality and extensive feature set place it comfortably in the top echelon of 3 megapixel consumer digicams.
Design
From a design standpoint, Epson's 3000Z is very reminiscent of a traditional film-based 35mm camera, with its hefty handgrip and overall shape. While its stocky frame (4.3 x 3.5 x 2.6 inches or 108 x 89 x 65 mm) probably won't easily slip into your shirt pocket, the 3000Z could potentially fit into a large coat pocket or purse. The sturdy neck strap Epson provides helps in the portability department. The camera also comes with a soft carrying case. Despite its chubby appearance, the 3000Z only weighs 12.9 ounces (365 g) without batteries, strap and CompactFlash card.

From the front of the camera, the lens, flash, optical viewfinder window and the self-timer LED are all visible. The telescoping lens extends from the lens barrel when the camera is powered on and the mode dial is turned to one of the capture modes. Likewise, when the camera is turned off, the lens retracts. A plastic lens cap protects the lens when the camera is not in use and features a small strap to attach it to the camera.
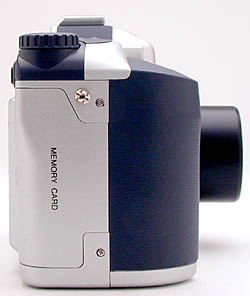
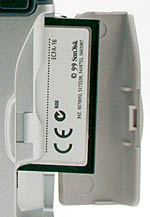
The handgrip side of the camera holds the CompactFlash slot, which is covered by a hinged, plastic door that snaps securely into place. The size of the handgrip is large enough to provide a good, firm hold and the textured covering gives your fingers something to cling to.
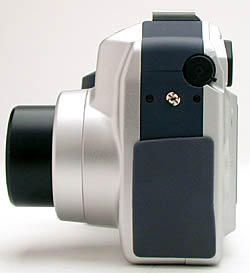
The opposite side of the camera holds the dioptric adjustment dial for the optical viewfinder and the digital, USB, video and DC connections, all beneath a flexible rubber flap. We have to admit that this flap is somewhat awkward in that it doesn't really slide out of the way when opened. Instead, it just flips over on top of itself, because it's actually attached at one corner. This makes it a little annoying when trying to plug in cables, since you have to hold the flap out of the way. We also foresee that after frequent use, the thin rubber could break in two.
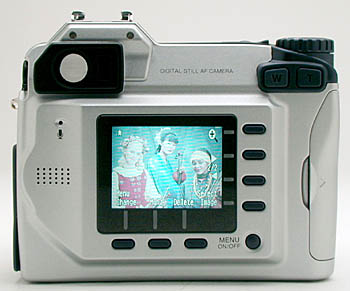
The 3000Z's back panel features the optical zoom controls, optical viewfinder, microphone, speaker and LCD display, along with a few other control buttons. The LCD monitor is probably one of our favorite design elements on this camera, as it features an ever present menu along the bottom and right sides of the display that corresponds to adjacent control buttons. What this means is that you no longer need to take the time to sort through menu screens, you just change the setting as you shoot. We found ourselves really liking this user interface design.
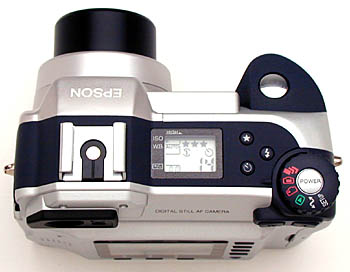
On top of the camera is an external flash hot shoe, small status display panel, a few more control buttons, the shutter button, mode dial and power button. All of the top panel controls are within easy reach of your right hand, enabling a fair amount of one-handed operation.

Finally, the 3000Z features a flat bottom, holding the plastic tripod mount and the battery compartment. We're glad to report that the spacing between the battery compartment and the tripod mount is just enough to allow you to change batteries while working with a tripod. Given the amount of studio work we do, we always pay attention to this area. Our only complaint here is that the battery compartment door is a little tough to close. The motion isn't very fluid and it's easy to get the door out of alignment when you're trying to slide it back.
 Viewfinder
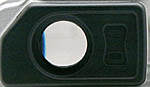
The 3000Z features both a real-image optical viewfinder and an LCD monitor for composing images. The optical viewfinder has a dioptric adjustment dial on the side, to adjust the focus for eyeglass wearers. Two LEDs on the right side of the viewfinder report the camera's status, such as when the lens is focused or the flash is ready. For framing, a set of central focus crosshairs inside the viewfinder help you line up shots. In our testing, we found the optical viewfinder to be a little tight, showing 85 percent frame accuracy at the wide angle setting, and 82 percent at the telephoto end.
A 1.8 inch color LCD monitor on the back panel can also be used as a viewfinder, and offers a very unique menu display. We should point out here that the mode dial on top of the camera actually controls the LCD monitor as well. There's a stop for working with the optical viewfinder only (the red camera with the tiny square), and for working with the LCD monitor (the red camera with the larger square). A menu button in the lower right corner of the back panel controls the on-screen menu display. What's so interesting about this menu is that it doesn't consist of a separate screen that must be called up and sorted through. Instead, a list of options line the bottom and right margins of the screen, and line up with corresponding buttons that line the outside of the monitor. If you want to change your white balance setting (for instance), you simply press the button next to that menu option repeatedly until you get to the desired selection. The great part of this is the amount of time you save, since you're not sifting through various screens and scrolling through different selections. It took us a little getting used to at first (and, we must admit, a good study of the manual), but in the end we really appreciated this simplified system. Our only complaint with this information display is that it doesn't report the battery power until the batteries get too low (neither does the small status display panel), so you don't really have an idea of how much battery time you have left until it's almost too late.
The menus work the same way in Playback mode. There's also an option for a nine-image thumbnail display and a playback zoom for closer inspection of captured images.
We found the LCD monitor to be very accurate in framing, showing approximately 97 percent of the frame at wide angle and about 98 percent at telephoto. We generally like to see LCD monitors as close to 100 percent accuracy as possible, so the 3000Z comes through with flying colors in this area.
 Optics
A 3x, 7 to 21 mm lens (equivalent to a 34 to 102 mm lens on a 35 mm camera) is built into the 3000Z, with a focal range from 20 inches (50 cm) to infinity in normal mode. A macro mode adjusts the focal range to 2.36 to 20 inches (5.9 to 50 cm). Apertures can be manually or automatically adjusted from f/2.0-2.5 to f/8.0-9.9. With a maximum aperture of f/2.0-2.5, this is a very fast lens.(The range at each setting results from the variation in effective aperture as you zoom the lens.) There's also a manual focus option, with three distance settings to choose from: three feet (0.9 m), 10 feet (3 m) and infinity. The lens itself features a telescoping design. When the camera is powered on, the lens extends from the body and then retracts once the camera is turned off. A plastic lens cap protects the lens from accidental scratches, and attaches to the camera body with a small strap (so you don't have to worry about it). Metal filter threads around the lens accommodate a lens adapter, which ships with the camera. This lens adapter fits a variety of Epson accessory lens kits, including wide angle, telephoto and macro lenses.
A 2x digital telephoto function is controlled by a small button at the top right of the LCD screen, meaning that you can digitally enlarge the image to twice its size at any point in the optical zoom range (since the two are independent of each other). Remember, though, that image quality suffers in the form of lower resolution and increased noise, when using digital zoom.
During our testing, we found a moderate amount of barrel distortion at the furthest wide angle setting, measuring approximately 0.76 percent. The telephoto end produced much better results, with a minimal 0.13 percent pincushion distortion. We also found very little chromatic aberration, at only about three pixels of coloration on each side of the black target lines. (This distortion is visible as a very slight colored fringe around the objects at the edges of the field of view on the resolution target.)
Exposure
For the most part, exposure control on the 3000Z is pretty straightforward. The majority of the time, you can change exposure settings without having to call up various menu screens and scroll through long lists of options. As we mentioned earlier, the design of the LCD screen and its menu display is an excellent time-saver. Without resorting to a complicated menu system, you can change exposure settings, such as ISO and white balance, by simply pressing a button. We did find changing the camera's capture mode a little confusing at first though. The camera has three main capture modes: Full Automatic, Program and Manual, which are controlled through the Setup menu. Two of these (Program and Manual) offer a variety of sub-settings controlled through the on-screen LCD menu.
Full Automatic capture mode means exactly what it sounds like, as the camera controls everything except image quality, digital zoom, macro mode and panoramic mode. The Program capture mode lets you choose between four exposure presets: Normal, Sports, Portrait and Landscape. The Normal preset adjusts the camera to handle most daylight shooting situations. Sports utilizes a high shutter speed to capture fast moving subjects. Portrait fixes the aperture a f/2.0 and switches the metering mode to spot, so that your subject is the primary focus. Landscape sets the aperture to f/8.0 (f/2.0 in dim light) for capturing broad landscapes and scenery. Depending on the preset, exposure compensation, ISO, white balance and flash are all adjustable. Finally, the Manual capture mode lets you select the amount of control you need by offering Automatic Exposure, Aperture Priority and Full Manual shooting options. In all three, you have control over exposure compensation, ISO, white balance, metering, flash, etc. Automatic Exposure lets you control all the exposure variables except aperture and shutter speed. In Aperture Priority, you can set the aperture value from f/2.0 to f/8.0 while the camera selects the shutter speed. Full Manual gives you control over both aperture and shutter speed (from eight to 1/750 seconds).
Exposure compensation is adjustable from -2 to +2 in different increments, depending on the camera's capture mode. In Program, exposure compensation varies in 0.5 EV increments (nine available settings), while in Manual mode, the increments decrease to 1/3 EV steps (21 available settings). This strikes us as a nice feature, as we've found that 1/3 EV steps are really needed for good exposure control on digicams, but many casual users prefer the convenience of larger steps. ISO can be set to 100, 200 or 400 equivalents, by pressing the button corresponding to the setting beneath the LCD monitor. Metering can also be adjusted through the on-screen LCD menu, with options for Matrix and Spot. Matrix metering takes readings from areas throughout the image and averages them to judge the proper exposure. Spot metering bases the exposure on a reading from the very center of the image. The 3000Z also allows you to save a grouping of settings from one image and use them on another. For example, you can save your white balance, exposure compensation, sensitivity, shutter speed and aperture through the FixSet option on the Setup menu. (You must be in Manual capture mode to do so though.) Once a group of settings is saved, the Fixed Setting option appears in the selection of exposure settings on the LCD menu. This is a good way to get a group of images to have a consistent appearance.
A black and white monotone option is available through the Setup menu, as well as an option to enable or disable a confirmation screen that appears after each image capture, which gives you the option of deleting the image rather than saving it to the CompactFlash card. This confirmation screen also allows you to display an image once it's been saved (without having to change the camera mode), quickly review other captured images, and record a ten second sound clip to accompany the image.
Self-Timer
A 10 second self-timer can be accessed through the Self-Timer button on the camera's top panel, which is then activated by fully pressing the shutter button. Once activated, the self-timer symbol on the LCD screen and the small LED on the front of the camera flash slowly for eight seconds, and then flash rapidly for the remaining two. The timer can be canceled by pressing the shutter button or the Self-Timer button a second time. The Self-Timer mode is also accessible in the Continuous, Interval and Movie recording modes.
Flash
The 3000Z features a built-in flash with five operating modes (Auto, Forced, Off, Redeye Reduction and Slow Synchronized), all controlled by pressing the flash button on the top panel. The Automatic setting tells the camera to fire the flash based on existing light levels. The Forced setting fires the flash with every exposure, regardless of the existing light and Off does the opposite, by simply disabling the flash. The Redeye Reduction setting fires a small pre-flash before firing the full flash, to eliminate the Redeye Effect. Finally, the Slow Synchronized setting works with a slower shutter speed, to allow more ambient light into the image. The 3000Z actually has two Slow Synchronized choices, Leading and Trailing, adjustable through the Setup menu. Leading fires the flash at the beginning of the exposure and Trailing fires the flash at the end of the exposure. (The "Trailing" setting is useful for shooting pictures of moving objects with flash, as it will produce "motion trails" behind the subject, as opposed to in front of it as would a flash at the beginning of the shutter time.) The Slow Synchronized setting is only available in Program and Manual capture modes.
Epson doesn't provide a flash range in the camera's documentation, but in our testing, we found the flash effective all the way to 14 feet without getting too dark. When a more powerful flash is needed, the 3000Z features a hot shoe for connecting an external flash. An external flash can only be used when the camera is in the Manual capture mode, and the External Flash setting must be selected in the Setup menu.
White Balance
White balance is also adjusted through the on-screen LCD menu, with Auto, Fix and Custom modes available. The Automatic white balance setting lets the camera assess the lighting and determine the white value on its own. The Fix mode sets the camera's white balance to match 5,200 degrees Kelvin, which produces a warmer image under fluorescent lights, or a slightly cool cast in normal sunlight. The Custom white balance mode is only available when the camera is in Manual capture mode, and bases the white value on a user-selected reference. This setting is created through the Setup menu, under the Shot Setup option. By selecting New W/B, you can then focus the camera on a white sheet of paper and press the shutter button to set the white balance and save the selection. This is a slightly tricky way to manually adjust the white balance. We'd rather see the ability to adjust the setting combined with the Custom mode, where you would select the Custom white balance and the camera would then allow you to set the white value without changing modes.
Movie Mode
The 3000Z allows you to record 25 second movies with sound at 15 frames per second. Movie images are saved as 320 x 240 in the Motion JPEG file format, which can be played back with QuickTime on a computer. The mode is accessed by turning the mode dial on top of the camera to the multi-shot symbol. From here, you choose between Video Clip, Continuous and Interval shooting modes. You can change the white balance and ISO settings by turning the mode dial to the LCD single capture mode, adjusting the settings, then turning the dial back to the multi-shot symbol. Like the movie modes on many digicams we've tested, the 3000Z's movie option provides you with relatively limited control while the camera is recording: While you're "filming", you can't vary the zoom settings, and the camera as only limited autoexposure and no autofocus adjustment.
Continuous Shooting
Accessed in the same manner as the Movie mode, Continuous Shooting lets you capture either 37 standard quality images at up to two per second, seven fine quality images at up to one image per second or three super fine images at up to one image per second. (In our testing, the 3000Z actually managed a rate of 1.49 frames per second for the first four frames in high-res mode. As with the Movie mode, you can adjust exposure settings by setting the mode dial to the LCD single capture mode and then reentering the Continuous Shooting mode. The flash is unavailable in this mode, as are the HyPict and TIFF image formats.
Interval Shooting
Interval Shooting is accessed and controlled through the same method as Movie and Continuous Shooting. Like time-lapse photography, Interval Shooting sets up the camera to snap images at a set interval of time, from 10 seconds to 24 hours. The total number of photos taken depends on the amount of CompactFlash space available. Interval photos can be strung together with software such as QuickTime Pro or Macromedia Flash to create time-lapse movies.(Note that such software is not included with the camera though.)
Panorama Mode
The panoramic frame size is available in any of the camera's capture modes, simply press the button corresponding to the Frame setting on the LCD menu until the "P" appears. The top and bottom of the image are cropped to make a long, narrow image, but the image is not taken at a wider angle than normal.(This is the same basic approach used in APS film cameras for their "panorama" features.) Frankly, we don't see the benefit of this shooting mode, as you can always just crop an image after the fact, once you have it in the computer.
Shutter Lag/Cycle Times
When you press the shutter release on a camera, there's usually a lag time before the shutter actually fires. This time allows the autofocus and autoexposure mechanisms time to do their work and can amount to a fairly long delay in some situations. Since this number is almost never reported on, and can significantly affect the picture taking experience, we now routinely measure it using a special electronic test setup.
|
|
||
|
|
|
|
| Power On -> First shot |
|
Start with lens retracted. Time is delay until first shot captured. |
| Shutdown |
|
Time until lens is retracted, camera is powered down. (No pending image processing though.) |
| Play to Record, first shot |
|
Time is delay until first shot captured. |
| Record to play (max/min res) |
|
Slower for max res images |
| Shutter lag, full autofocus |
|
|
| Shutter lag, continuous autofocus |
|
|
| Shutter lag, manual focus |
|
3 foot mode |
| Shutter lag, prefocus |
|
Very fast! (Prefocus means half-pressed shutter before shot.) |
|
|
|||
|
|
|
|
|
| TIFF Autofocus |
|
|
No memory buffering in TIFF mode. |
| HyPict Autofocus |
|
|
No memory buffering in HyPict mode. |
| Small Normal Autofocus |
|
|
|
| Manual Focus |
|
|
First 4 shots LF, 65(!) shots SN. |
| Manual Focus |
|
|
After first 4 shots LF, 65(!) shots SN, until next shot. |
| Autofocus |
|
|
First 4 shots LF, 65(!) shots SN. |
| Autofocus |
|
|
After first 4 shots LF, 65(!) shots SN, until next shot. |
Operation and User Interface
We found the user interface on the 3000Z a little confusing at first because it was so different than what we'd become used to on other digicams. A quick read of the manual though soon made everything clear. We applaud Epson's attempt to simplify LCD menus by setting up the grid-like system of control buttons around the LCD monitor. This setup definitely saves time by allowing you to quickly change the exposure compensation, white balance, etc. without referring to a structured LCD menu and sorting through various screens and options. That said, we still found some of the settings a bit of a nuisance to change. For example, to change the camera's capture mode (Auto, Program, Manual), you have to go into the Setup menu via the mode dial to change the option. It seems far more sensible to keep the mode dial in control of camera mode. As it is on the 3000Z, the mode dial controls whether you're using the LCD monitor or just the optical viewfinder, as well as the Multi-Shot, Playback, PC and Setup modes. We would have preferred to see the various camera modes remain on the mode dial, and use a simple display button to control the LCD monitor. Aside from the various exposure settings buried in the Setup menu, overall exposure control was quite straightforward once we got used to the cameras controls. Now, we'll go through each of the controls and their functions.

Shutter Button: Located on the very top of the hefty handgrip, the shutter button sets focus and exposure when halfway pressed, and fires the shutter when fully pressed.

Power Button: Situated on the right side of the top panel and encircled by the mode dial, this button turns the camera on and off, signaling the lens to extend or retract, depending on the mode setting.
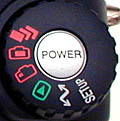
Mode Dial: Surrounding the power button on the top right of the camera, this notched dial sets the camera's operating mode:
![]()
Flash Button: Positioned to the left of the mode dial, this button controls the flash mode:
![]()
Quality Button: Diagonally just to the left of the Flash button, this button sets the image quality and size to Standard JPEG (640 x 480), Fine JPEG (2048 x 1536), Super Fine JPEG (2048 x 1536), HyPict JPEG (2544 x 1904 interpolated) or Uncompressed TIFF (2048 x 1536).
![]()
Self-Timer Button: Located just below the Quality button, this button activates the Self-Timer mode, which starts a 10 second self-timer when the shutter button is fully pressed.
![]()
Dioptric Adjustment Dial: Hidden away on the left side of the optical viewfinder, this small dial adjusts the viewfinder focus to accommodate eyeglass wearers.
![]()
"W" and "T" Zoom Buttons: Situated on the top right of the back panel, these buttons control the optical zoom in any capture mode.
![]()
LCD Buttons: This series of seven unmarked buttons lines the top and right side of the LCD monitor. Depending on the camera's mode, these buttons control various menu items on the LCD screen. Each button corresponds to a menu option, which is displayed on the LCD screen directly above or to the side of the button itself.
![]()
Menu On/Off Button: Positioned at the very bottom right corner of the LCD monitor, this button controls the on-screen menu display in Playback mode and any capture mode.
![]()
"Push" Battery Compartment Button: Located in the center of the battery compartment door, this button releases the door and allows it to be slid open.
Camera Modes and Menus
Program: This mode is accessed through the Setup menu, and provides four preset shooting options to choose from:
The on-screen menu in Program mode offers the following options, reading clockwise from top right:
 Digital Telephoto: Digitally enlarges the image to 2x (image quality will suffer with digital zoom, showing more noise and less resolution).
Manual: Also controlled through the Setup menu, Manual exposure mode lets you control all of the camera's exposure settings, including sensitivity, white balance, shutter speed, aperture, metering and manual focus. Within Manual mode, you can choose from three levels of exposure control:
While in the Manual capture mode, the on-screen menu changes to offer the following settings, again reading clockwise from top right:
 Exposure Mode: Cycles through the Auto Exposure, Aperture Priority and Manual Exposure modes.
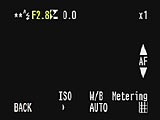 Digital Telephoto: Digitally enlarges the image by 2x (as always, quality suffers with digital zoom, showing more noise and less resolution).
Full Automatic: (No screen shot for this one, there's not much there.) This mode is also accessed through the Setup menu, and puts the camera in charge of just about all of the exposure settings. The user only has control over the self-timer, flash mode, image quality, digital zoom, macro and panorama modes.
Mode Dial Choices
Several camera operating modes are selected via the "Mode Dial" on the top, right-hand side of the camera. The available modes are listed below.
 Multi Mode: This mode is entered by turning the mode dial to the red, multi-shot symbol. Because this mode is controlled by the mode dial, the available exposure settings are determined by the capture mode set in the Setup menu. The exposure options are accessible by turning the mode dial to the LCD position. In this mode, the on-screen LCD menu gives the following quick shooting modes:
LCD Mode: Marked on the mode dial with a red camera outline containing a large, red rectangle (representing the LCD monitor on the back of the camera), this mode activates the LCD monitor for use in image composition.
Viewfinder Mode: Similarly noted on the mode dial with a red camera outline containing a small, red square (representing the viewfinder window on the back of the camera), this mode deactivates the LCD monitor for shooting with the optical viewfinder only.
Playback Mode: Accessed by turning the mode dial to the green playback symbol, this mode allows you to review captured images, protect them or delete them. The on-screen LCD menu offers the following choices:
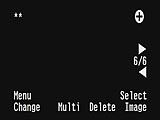 Magnify: Allows you to zoom in and out of a captured image, to check the details.
 Info: Pulls up an image information screen that reports the exposure settings used.
PC Mode: Noted on the mode dial with a double ended arrow, this mode allows the camera to connect to a computer and download images. This mode also provides access to the Print Mark settings menu, which allows you to set up images for printing on a DPOF compatible printer.
Setup Mode: This mode controls all of the basic camera settings, and is marked on the mode dial as "Setup" in white letters. Immediately upon entering this mode, the Setup menu is displayed on the LCD monitor with these options:
 Time/Date Set: Takes you to a screen where you can set the camera's internal clock to the current date and time.
 Image
Storage and Interface
Image
Storage and Interface
The 3000Z utilizes a CompactFlash card for image storage, with a 16 megabyte
card accompanying the camera. Third-party upgrades are currently available up
to 192 megabytes in size. Image quality and size are controlled through a single
button on the top panel of the camera. Standard JPEG quality creates a 640 x
480 JPEG file with a standard compression level. Fine and Super Fine JPEG both
create 2048 x 1536 file sizes with decreasing compression levels. HyPict JPEG
produces interpolated 2544 x 1904 images with a moderate compression level.
Finally, Uncompressed TIFF creates a 2048 x 1536 image with no compression at
all. The Image Quality button cycles through four quality settings: all three
of the basic JPEG settings and either the HyPict JPEG or Uncompressed TIFF options.
Select the SHQ file format via the Shot Setup option in the Setup menu.
Images can be individually protected through the Playback menu, under the Select
Image option. You can also remove the protection through this menu setting.
Write protection prevents the file from accidentally being erased, except through
card formatting. CompactFlash cards are formatted through the Setup menu, under
the Memory Setup option. File numbering is reset with each new card inserted
into the camera, with no option to force the camera to remember file numbers.
With each image captured, the 3000Z creates an image information file that reports
the exposure settings used for that image. This file is accessible through the
Playback menu. The camera also contains an internal program, called Print Mark,
that allows you to set up images for printing the DPOF (Digital Print Order
Format) devices. You can drop off the CompactFlash card at a photo lab or insert
the card into a DPOF compatible printer to print the images. Print Mark is accessible
through the PC mode setting on the mode dial. Here, you can select files for
printing, specify the number of prints and choose a printing layout.
The table below shows the number of images, and their approximate compression
levels, that can be stored on a 16 megabyte CompactFlash card:
|
Resolution/Quality |
|
|
|
|
|
| 2544 x 1904 | Images | N/A | N/A | N/A | 12 |
| Approx. Compression |
N/A | N/A | N/A | 7:1 | |
| 2048 x 1536 | Images | 1 | 15 | 31 | N/A |
| Approx. Compression |
1:1 | 9:1 | 18:1 | N/A | |
|
|
Images |
|
|
|
|
| Approx. Compression |
|
|
|
|
|
 Power
Power
|
|
|
| Capture Mode, w/LCD |
|
| Capture Mode, no LCD |
|
| Half-pressed shutter w/LCD |
|
| Half-pressed w/o LCD |
|
| Memory Write (transient) |
|
| Flash Recharge (transient) |
|
| Image Playback |
|
Overall, these are excellent power-consumption numbers for a three megapixel camera. The maximum capture-mode drain of 500 mA is quite a bit less than the 800 mA we frequently see. Power consumption in capture mode with the LCD off is very low indeed: With normal power-saving precautions (leaving the LCD display off unless absolutely necessary), you should easily be able to shoot all day on one set of freshly-charged batteries.
Included Software
Packaged with the 3000Z is a software CD containing Sierra Imaging's Image Expert, Epson Photo!3, Epson File Converter and Epson Photo! Print2, compatible with both Windows and Macintosh operating systems. Sierra Imaging's Image Expert software allows you to download and organize your captured images, as well as perform minor editing corrections. Image Expert also includes QuickTime Player for viewing your captured video clips. Epson Photo!3 is another application for downloading captured images, without having to access Image Expert. The Epson File Converter allows you to convert presentation slides and files into a format that can be uploaded into the camera for presentations. Finally, Epson Photo! Print2 works with the Print Mark software in the camera for setting up images for printing on DPOF devices.
Test Results
In keeping with our standard policy, our comments here are rather condensed, summarizing our key findings. For a full commentary on each of the test images, see the 3000Z's "pictures" page.
As with all Imaging Resource camera tests, we encourage you to let your own eyes be the judge of how well the devices performed. Explore the images on the pictures page, to see how well the 3000Z performed, and how its images compare to other cameras you may be considering buying.
Overall, the 3000Z produced good-quality shots, with good color balance the majority of the time. The camera's white balance system did get tripped up a little with our Outdoor Portrait test, which is very high contrast, and produced slightly muddy colors in that particular image. Both of the automatic and fix white balance settings usually produced rather warm results, leading us to choose the manual setting in most scenarios. Still, color balance looked pretty good on our Davebox target, with the 3000Z distinguishing tough tonal variations and reproducing the large color blocks with a nice level of brightness and accuracy.
Resolution was a bit soft on the 3000Z, placing the camera among the average in the 3.3 megapixel category, with a resolution that we "called" as 600 lines per picture height in both the horizontal and vertical directions.
The 3000Z offers excellent exposure control, from a full manual mode to a manually adjustable white balance setting and control over ISO and metering options. The camera performed extremely well in our low light tests, producing bright, usable images as low as 1/16 foot candles (0.67 lux) at the 100 ISO setting, with little noise. We also shot with the 200 and 400 ISO settings, which did produce brighter images, but also increased the noise level with exposure times from four to eight seconds. (We direct readers to Mike Chaney's excellent Qimage Pro program, for a tool with an amazing ability to remove image noise without significantly affecting detail.) To put the 3000Z's low light performance into perspective, an average city night scene under modern street lighting corresponds to a light level of about one foot candle.
We found the 3000Z's optical viewfinder to be very tight, showing approximately 85 percent accuracy at wide angle, and 82 percent at telephoto. (Note that we've changed our nomenclature on this to better reflect what you see when looking into the viewfinder. We previously would have referred to the 3000Z's viewfinder as "loose.") These numbers were consistent with all three image sizes. The LCD monitor turned in a much more accurate performance, showing approximately 97 percent accuracy at wide angle, and about 98 percent at telephoto. We did notice that images framed with the LCD monitor often resulted in an image shifted towards the top. Since we generally prefer LCD monitors to be as close to 100 percent accuracy as possible, the 3000Z does a very good job.
The 3000Z performs very well in the macro category, capturing a minimum area of just 2.89 x 2.17 inches (73.51 x 55.13 mm). This is a slightly better than average performance among the digicams we've tested, and the filter threads and lens adapter allow you to capture even smaller areas with the accessory macro kit.
Overall, the 3000Z performs moderately well for its 3.3 megapixel class, providing excellent exposure control and nice image quality, although the resolution tends to be a bit soft. Still, the camera's fine macro and low light capabilities are excellent qualities.
Conclusion
Epson's 3000Z offers excellent exposure control, with the option for a full manual or full automatic setting to match any skill level. Good image quality and a very quick, timesaving user interface give this camera an edge over many in its 3.3 megapixel class. There's also the benefit of an uncompressed TIFF mode and an interpolated, 4.8 megapixel CCD producing 2544 x 1904 image sizes. Definitely deserving of consideration by anyone looking for a full-featured "enthusiast" camera in the three megapixel range.
<<PhotoPC 3000Z Test Shots | Additional Resources and Other Links>>
Reader Comments!
Questions, comments or controversy on this product? Click
this link to see what other Imaging Resource readers have had to say about
the Epson PhotoPC 3000Z, or add comments of your own!