Back
to Full Olympus C-4000 Zoom Review
Back
to Full Olympus C-4000 Zoom ReviewGo to Olympus C-4000 Zoom Data Sheet
Go to Olympus C-4000 Zoom Pictures Page
Up to Imaging Resource Cameras Page
Use your browser's "Back" button to return to the previous page, or the links at the top and bottom of this page to navigate to related information. If you have difficulty fitting the text on this page onto your printer output, simply resize your browser window to a narrower width and print again.
Remember us when it's time to buy!
Dave here: Have our reviews been helpful to you? (Is this article you're reading right now useful?) Preparing this level of information on as many products as we do is incredibly hard work, not to mention expensive. Things on the Internet may look like they're free, but they're not. (As a lot of big dot.com companies are finding out these days.) Somewhere, somebody has to pay to produce worthwhile content. YOU can help us though, by remembering us when it comes time to make your purchase. Would you consider coming back to our site and clicking-through to one of our advertisers to make your purchase? Every dollar you spend with one of our advertisers helps us directly (in affiliate fees) or indirectly (the advertiser will keep renewing their ad contract with us). To make it easy for you to support us, here's a URL you can visit, to see all our current advertisers, with links to click on that will register your visit to them as having come from our site. It's up to you where you buy, but Mike, Mike, Kim, Yazmin, Marti and I would be really grateful if you'd help us out by choosing one of our advertisers to purchase from.
Thank you for your support!
Dave Etchells, Founder & Publisher
Visit our "Buy Now" Page:
https://www.imaging-resource.com/buynow.htm
Back
to Full Olympus C-4000 Zoom Review
Go to Olympus C-4000 Zoom
Data Sheet
Go to Olympus C-4000 Zoom
Pictures Page
Up to Imaging Resource Cameras
Page
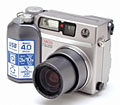
Olympus C-4000 ZoomOlympus introduces a top-of-the-line four-megapixel model with superb *configurability* great image quality, and an impressively low price. Review First Posted: 8/27/2002 |
|
 |
|
4.0-megapixel sensor, delivering 2,288 x 1,712-pixel
images |
|
|
3x optical zoom lens |
|
|
|
Improved user interface |
|
|
|
Excellent image quality and low-light capability |
Manufacturer Overview
Olympus has long been a dominant player in the digicam marketplace. They boast one of the broadest lineups of digicams in the industry, with numerous models ranging from pure entry-level point-and-shoot digicams to the exceptional "near-professional" E-20 SLR.
For quite a while now, Olympus has followed a practice of first bringing out a higher-end, fully-featured model, and then following it with a slightly de-featured version at a significantly lower price. By leveraging the development costs across two similar models, they've often managed to bring remarkably cost-effective cameras to market. One of their most notable successes with this approach was their C-3000 Zoom model, a variation on the theme established by their 3030 Zoom a bit prior to it. When it was introduced a bit over two years ago, the C-3000 stood out as an amazing bargain for digital shooters looking for maximum capability at a minimum price.
In 2002, Olympus has returned to this successful strategy, with the introduction of the C-4000 Zoom, a four megapixel that's another "variation on a theme," this time a melding of their higher-end four megapixel C-4040 Zoom and their already affordable three megapixel C-3020 Zoom. The result is a camera that I predict great success for in the marketplace: It's a four megapixel design with just about every "enthusiast" feature you could ask for, excellent image quality, and an amazing $499 estimated "street" price as of its introduction. As of this writing (mid-August, 2002), there's really nothing on the market that touches it for a combination of features and value. If you're shopping for a true "enthusiast" camera at an unusually affordable price, the C-4000 Zoom deserves your close scrutiny! Read on for all the details!
High Points
Executive Overview
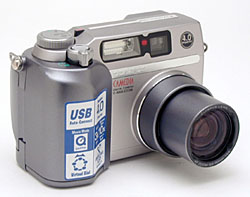
Following in the footsteps of previous Camedia C-Series digicams, Olympus presents the C-4000 Zoom, an only slightly scaled-down version of the previous C-4040 Zoom model. Besides its four-megapixel CCD, the C-4000 Zoom also offers a 3x zoom lens and wide range of creative exposure options. The C-4000 Zoom maintains the classic rangefinder-style body that's the hallmark of Oly's C-Series cameras, measuring only 4.3 x 2.9 x 2.6 inches (110 x 76 x 66.5 millimeters) and weighing just a bit over 10 ounces (295 grams). While it's more of a handful than Olympus' D-series compact models, the C-4000 Zoom is still fairly easy to stash in a large pocket or purse. I do highly recommend purchasing a soft cover or small camera bag for better protection, though.
Like its slightly more advanced cousin, the C-4040 Zoom, the C-4000 Zoom offers a wide range of user controls, including a Multi-Spot metering mode that averages up to eight selectable spot readings, a one-touch white balance function (with a very useful white balance adjustment feature for minor color adjustments), spot autofocus, wide-ranging contrast and sharpness adjustment, and QuickTime movies. It also incorporates an advanced Noise Reduction System, which uses dark-frame subtraction to minimize background noise in long exposures shot under low light conditions. An "Optimum Image Enlargement" mode boosts file sizes to 3,200 x 2,400 pixels -- creating files large enough for 16 x 20-inch prints, although there's little actual increase in detail relative to the C-4000's uninterpolated 2,288 x 1,712 pixel images. Finally the C-4000 adopts Oly's new "virtual dial" menu navigational system for convenient access to a variety of camera shooting modes.
The C-4000 Zoom features both an optical, real-image viewfinder and a rear panel, 1.8-inch, color TFT LCD monitor, with 114,000 pixels. When the LCD monitor is engaged, it automatically displays detailed exposure information, with the current exposure mode, f/stop setting, shutter speed, and exposure compensation overlaid on top of the viewfinder display (a nice feature not found on every digicam) and the number of images available in the current resolution setting, at the bottom of the monitor. Two options are provided for the information display, letting you choose whether more or less information is shown. The C-4000 also provides a very helpful numeric/bargraph distance display when using the Manual Focus option, as well as a digital zoom bar (activated when digital zoom is on) that shows the camera's 3x optical zoom in operation, and the progress of the digital zoom whenever you zoom past the range of the optical telephoto.
The 6.5-19.5mm 3x zoom lens is equivalent to a 32-96mm lens on a 35mm camera, with a f/2.8 maximum aperture. In addition to the C-4000's 3x optical zoom, images can be enlarged up to 3.5x with the digital zoom, depending on the image size you've selected. (Users should be aware that digital zoom is not the same as optical zoom, since the digital zoom is merely cropping and enlarging the center portion of the CCD. As a result, digitally enlarged images are invariably "softer" than ones enlarged via a zoom lens.)
The C-4000's image file sizes include: 2,288 x 1,712; 2,048 x 1,536; 1,600 x 1,200; 1280 x 960; 1024 x 768; and 640 x 480 pixels in normal mode, and 3,200 x 2,400 pixels when using the Optimum Image Enlargement (interpolated) setting. Image quality options include two JPEG compression ratios, plus an uncompressed TIFF format that produces full-resolution images free of compression artifacts.
The C-4000 Zoom offers all the exposure control you could ask for, including Program (P), Aperture Priority (A), Shutter Speed Priority (S), and Manual (M) exposure modes. Program mode controls both aperture and shutter speed, with exposure times as long as one second. Aperture and Shutter Priority modes give you control over aperture or shutter speed, while the camera chooses the best corresponding settings. When used in A or S modes, apertures range from f/2.8 to f/11.0 and shutter speeds from 1/1,000 to four seconds. The Manual exposure mode provides the same aperture range, but offers shutter times as long as 16 seconds. There's also a selection of preset Scene modes, to make it easy to snap good-looking photos in what might otherwise be challenging conditions. Scene Program modes include Self-Portrait, Night Scene, Landscape / Scene, Landscape / Portrait, Sports, and Portrait modes (all accessed via the "virtual dial" mentioned earlier). Finally, the My Mode feature provides for up to four custom setups for the camera, letting you select complex combinations of settings with a single menu choice.
The C-4000 provides four ISO options (light sensitivity settings) of Auto, 100, 200, and 400 in all modes, automatic exposure bracketing, Digital ESP and Spot metering modes, Single and Multi-Spot Metering AE Lock modes, plus exposure compensation from +2 to -2 exposure values (EV) in one-third-step increments. White balance can be set to Auto, Daylight, Overcast, Tungsten, Daylight Fluorescent, Neutral Fluorescent, Cool Fluorescent, or Quick Reference (aka custom or manual white balance adjustment) to accommodate a variety of lighting conditions, while a white balance color adjustment function lets you fine-tune the color balance across a wide range from red to blue.
Image contrast, sharpness, and saturation adjustments are available through the Shooting menu, and a Function menu option allows you to capture images in black and white or sepia tone (with additional White Board and Black Board settings for capturing text). There's also a 12-second self-timer option for self-portraits.
Having just mentioned them, I want to call special attention to the various image adjustments provided by the C4000. With the ability to manually "tweak" color balance, contrast, color saturation, and in-camera sharpening, the C4000 lets you customize it to fit your specific preferences and shooting style to an really exceptional degree. For people who care about the particulars of color & exposure, the value of this sort of flexibility is hard to overstate.
The C-4000 Zoom's Movie mode records QuickTime movies without sound, for maximum times dictated by its internal buffer memory, in either SQ (160 x 120 pixels, maximum duration ~148 seconds) or HQ (320 x 240 pixels, maximum duration ~35 seconds) modes. A Sequence mode is available for capturing multiple images at up to 1.6 frames per second in HQ mode (based on my own measurements, actually a bit faster than Olympus' spec of 1.5 frames/second), and a Panorama mode allows you to take up to 10 formatted shots for merging with Camedia's Panorama Stitch software in the computer. (Note that the panorama option is only available when you're using Olympus-branded SmartMedia cards.) The "2 in 1" mode captures two individual images, saved as a single split-screen image.
The camera's internal flash offers four operating modes (Flash Off, Auto-Flash, Forced Flash, Red-Eye Reduction, and Slow Sync), with flash range extending to approximately 11.8 feet (6.3 meters). The Slow Sync flash mode uses a slower shutter speed with the flash, to allow more of the ambient lighting into the photo, and includes the option to fire the flash at either the beginning or end of the exposure, as well as add a Red-Eye Reduction pre-flash. A proprietary sync socket lets you connect an Olympus-branded external flash unit when additional flash power is needed, and Olympus offers an accessory adapter cable with a standard PC-sync connector on it for use with generic strobes. You also can increase or decrease the internal flash power from -2 to +2 EV in one-third-step increments through the Shooting menu.
The Olympus C-4000 Zoom ships with a 16MB SmartMedia memory card for image storage (larger capacity cards are available separately). You can connect the camera directly to your computer via a high-speed USB interface to download images, and the Olympus "Auto Connect USB" interface means the camera will automatically appear on your computer's desktop, if you're using Windows Me, XP, or 2000, or Mac OS 8.6 or later. A video output jack and cable let you play your images back on an external video monitor, which can also be used as a super-sized viewfinder in capture mode. Software shipped with the unit includes Olympus' Camedia Master 4.0 utility package, which provides minor organization and editing tools, in addition to a panorama "stitching" application. Apple QuickTime and USB drivers for Macintosh and Windows are also supplied.
While not offering quite the range of capabilities of the C-4040 Zoom (primarily in the form of a "slower" lens and slightly slower continuous-mode operation), the Camedia C-4000 Zoom offers exceptional creative control, great low-light capabilities, and large file sizes for maximum print output. When you factor in its excellent image quality, the C-4000 amounts to one of the best deals in the entire digicam marketplace, at least as of this writing, in mid-August, 2002.
Design
Continuing the familiar Olympus Camedia C-Series design, the C-4000 Zoom's outward appearance is very similar to previous "C" models. Size and shape are somewhere between a traditional 35mm film point & shoot and a compact SLR, measuring 4.3 x 3.0 x 2.6 inches (109.5 x 76.5 x 66.5 millimeters). The C-4000 is just slightly lighter than the previous C-4040 Zoom model, at 10.1 ounces (290 grams), with a body design that combines structural plastic and aluminum decorative panels. A two-toned silver camera body sets the C-4000 Zoom apart from other members of the C series, though control layout is much the same.
Just like previous C-Series digicams, the C-4000 Zoom looks and feels very much like a small film-based SLR camera, substantial enough for a good hold (due to the large hand grip on the right side of the camera), but small enough to slide into a large purse or coat pocket when you're done shooting. A comfortably wide neck strap comes with the camera, enabling you to keep the C-4000 out and ready to shoot on a moment's notice.
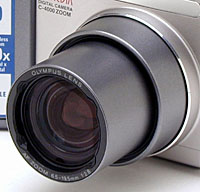
The telescoping lens extends approximately 1.75 inches beyond the front of the camera body when powered on in either Still Shooting (Record) or Movie capture modes. A body flange projects about 3/4 of an inch from the camera's front panel, just slightly further than does the hand grip. When the camera is powered on, the lens telescopes out an additional inch beyond the body flange , retracting again when the camera is switched off. The lens is protected by a spring-lock, removable plastic lens cap that can be tethered to the camera with an included strap.

From the front of the camera, the edge of the zoom lever (upper left corner) is visible, as well as the flash, self-timer alert light, and viewfinder window. The inside lip of the exterior lens barrel has a set of 41mm filter threads that accepts a lens adapter tube for attaching auxiliary lenses to the camera. (It doesn't seem to be mentioned in the manual, but these threads accept Olympus' standard CLA-1 filter thread adapter, which has been available since the inception of the C-series.)

Featuring a similar control layout to other C-Series digicams, the C-4000 Zoom's back panel has all of the control buttons positioned above or to the right of the 1.8-inch LCD color monitor. The four-way Arrow Pad serves multiple functions, and is located above the upper right corner of the display. Just to the left of the Arrow Pad are the Flash / Erase and Spot / Macro buttons, with the latter also playing a role in the C-4000's DPOF print feature. Below the Arrow pad are the OK / Menu, Monitor / Quick View, and Custom buttons, the last of which also serves as the Protect / Rotation button in playback mode. The optical viewfinder in the upper left corner of the camera zooms in and out with the lens, and a pair of LED lamps next to the eyepiece report the camera's status. The SmartMedia memory card slot door is also partially visible on the righthand side of the back panel. A third LED lamp to the left of the compartment door lights whenever the camera accesses the memory card.

The large hand grip, housing both the battery and SmartMedia compartments, makes up the right side of the camera. The grip is sculpted to fit comfortably in your hand, with a subtly recessed finger hold on the front and a dimpled plastic thumb grip on the back. The SmartMedia compartment is covered by a hinged plastic door which opens from the back. Just above the SmartMedia compartment door is a neck strap eyelet, a second one of which is located on the left side of the camera. (I like that the neck strap eyelets are positioned such that the camera hangs level when suspended from them. This makes carrying the camera around your neck much more comfortable.)

Adjacent to the left side neck strap eyelet is the connector compartment cover, a second hinged plastic door that covers the DC-In, Video Out, and USB connector ports. A proprietary five-pin external flash sync connector is set in the lower left corner of the side panel, concealed by a small (and easily lost!) black plastic cover. (Olympus sells an optional accessory cable that adapts this flash connection to a standard PC-sync connector for use with generic flash units.) Diagonally from that is a diopter adjustment control for the optical viewfinder.

The top of the camera holds only the Zoom Lever, Shutter button (surrounded by the Zoom Lever) and Mode dial.

The bottom of the camera holds the battery compartment cover and a plastic screw-mount tripod socket, which is just a little too close to the battery compartment to make battery changes easy when mounted on a tripod. (One way around this is to use the optional AC adapter, or an external battery pack like the Maha NiMH PowerBank when working in the studio or downloading lots of images to your computer.) The tripod socket is also a bit off-center from the lens, making panorama shots with foreground objects more difficult. - The socket is pretty close to the camera's center of gravity though, which makes for less stress on the threads.
Viewfinder
 The
C-4000 Zoom offers both a real-image optical viewfinder and a rear panel, 1.8-inch,
114,000 pixel, TFT color LCD screen. The optical viewfinder accommodates eyeglass
wearers with a diopter correction adjustment and a comfortably high eyepoint,
leaving a reasonable amount of room between your eye and the finder for an eyeglass
lens to fit. Although the optical viewfinder zooms along with the lens, it does
not show the operation of the digital zoom, which can only be enabled when the
LCD monitor is on. A set of four lines in the center of the field of view mark
the autofocus area, and help you center your subjects. Two LED indicators (one
orange and one green) are adjacent to the viewfinder window, indicating camera
status with either glowing or blinking lights. If the green LED blinks, the
camera is either having trouble focusing, or there's a problem with the SmartMedia
card. A solid green LED indicates that focus is set and the camera is ready
to snap the picture. A flashing orange LED means that the flash is still charging
or there is a potential of camera shake, while a solid orange LED shows that
the flash is fully charged and ready to fire.
The
C-4000 Zoom offers both a real-image optical viewfinder and a rear panel, 1.8-inch,
114,000 pixel, TFT color LCD screen. The optical viewfinder accommodates eyeglass
wearers with a diopter correction adjustment and a comfortably high eyepoint,
leaving a reasonable amount of room between your eye and the finder for an eyeglass
lens to fit. Although the optical viewfinder zooms along with the lens, it does
not show the operation of the digital zoom, which can only be enabled when the
LCD monitor is on. A set of four lines in the center of the field of view mark
the autofocus area, and help you center your subjects. Two LED indicators (one
orange and one green) are adjacent to the viewfinder window, indicating camera
status with either glowing or blinking lights. If the green LED blinks, the
camera is either having trouble focusing, or there's a problem with the SmartMedia
card. A solid green LED indicates that focus is set and the camera is ready
to snap the picture. A flashing orange LED means that the flash is still charging
or there is a potential of camera shake, while a solid orange LED shows that
the flash is fully charged and ready to fire.
 The
C-4000 Zoom's LCD monitor provides detailed information about a number of exposure
settings, including the currently selected f/stop, shutter speed, and exposure
compensation adjustments across the top of the screen. In Aperture and Shutter
Priority modes, the chosen aperture or shutter speed appears as a manually-set
constant, while the second, automatically determined exposure value updates
continuously in response to scene lighting and the exposure compensation setting.
In Manual mode, the camera displays both the selected f/stop and shutter speed
values (adjustable with the left / right and up / down Arrow buttons, respectively),
while the exposure compensation readout serves as an exposure display, showing
the amount the camera thinks your settings will over- or underexpose the subject.
(The exposure display turns red if your chosen exposure is more than 3 EV units
away from what the camera calculates to be correct.)
The
C-4000 Zoom's LCD monitor provides detailed information about a number of exposure
settings, including the currently selected f/stop, shutter speed, and exposure
compensation adjustments across the top of the screen. In Aperture and Shutter
Priority modes, the chosen aperture or shutter speed appears as a manually-set
constant, while the second, automatically determined exposure value updates
continuously in response to scene lighting and the exposure compensation setting.
In Manual mode, the camera displays both the selected f/stop and shutter speed
values (adjustable with the left / right and up / down Arrow buttons, respectively),
while the exposure compensation readout serves as an exposure display, showing
the amount the camera thinks your settings will over- or underexpose the subject.
(The exposure display turns red if your chosen exposure is more than 3 EV units
away from what the camera calculates to be correct.)
 The
C-4000 Zoom also offers a "live" histogram display, which automatically
appears in the LCD display in any automatic exposure mode (that is, in Program,
Aperture, or Shutter Priority exposure modes), when enabled through the LCD
menu. The histogram gives you an idea of how over- or underexposed the captured
image is, by graphing the tonal distribution from highlights to shadows. You
can also view the histogram in Playback mode, along with the exposure information
for each previously-captured image.
The
C-4000 Zoom also offers a "live" histogram display, which automatically
appears in the LCD display in any automatic exposure mode (that is, in Program,
Aperture, or Shutter Priority exposure modes), when enabled through the LCD
menu. The histogram gives you an idea of how over- or underexposed the captured
image is, by graphing the tonal distribution from highlights to shadows. You
can also view the histogram in Playback mode, along with the exposure information
for each previously-captured image.
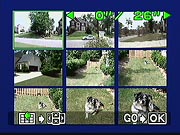
 When
using the LCD monitor to review captured images, you can zoom in on displayed
images up to 4x, and then scroll around the enlarged image using the Arrow buttons.
This is very handy for checking focus, small details, or precise framing. There's
also an Index display option, which shows either four, nine, or 16 thumbnail
images at a time. A very handy "Quick View" function also lets you
switch quickly from shooting to playback mode by pressing the Display button
twice in rapid succession. The camera will display the most recently captured
image on the LCD screen, but you have essentially all of the playback-mode options
available to you, and can scroll back and forth to other images, zoom in and
out on them, and call up the information display. You can revert to shooting
mode either by pressing the Display button again, or simply by half-pressing
the shutter button.
When
using the LCD monitor to review captured images, you can zoom in on displayed
images up to 4x, and then scroll around the enlarged image using the Arrow buttons.
This is very handy for checking focus, small details, or precise framing. There's
also an Index display option, which shows either four, nine, or 16 thumbnail
images at a time. A very handy "Quick View" function also lets you
switch quickly from shooting to playback mode by pressing the Display button
twice in rapid succession. The camera will display the most recently captured
image on the LCD screen, but you have essentially all of the playback-mode options
available to you, and can scroll back and forth to other images, zoom in and
out on them, and call up the information display. You can revert to shooting
mode either by pressing the Display button again, or simply by half-pressing
the shutter button.
A Record View function, enabled through the Shooting menu (Setup sub-menu), displays the most recently captured image on the LCD screen while the image is being recorded to the memory card. This feature gives you the option of deleting an image instantly by pressing the Flash / Delete button while the review image is still onscreen. It's a great way to check your images without spending time switching back and forth between Playback and Shooting modes.
Optics
 The
Olympus C-4000 Zoom is equipped with 3x, 6.5-19.5mm lens, providing a range
of angular coverage equivalent to that of a 32-96mm zoom on a 35mm film camera.
(This is slightly biased toward wider angle focal lengths, as compared to the
35-105mm equivalent range offered by most 3x zoom digicams.) The glass lens
has eight elements in six groups, and a maximum aperture of f/2.8 (depending
on the zoom position).
The
Olympus C-4000 Zoom is equipped with 3x, 6.5-19.5mm lens, providing a range
of angular coverage equivalent to that of a 32-96mm zoom on a 35mm film camera.
(This is slightly biased toward wider angle focal lengths, as compared to the
35-105mm equivalent range offered by most 3x zoom digicams.) The glass lens
has eight elements in six groups, and a maximum aperture of f/2.8 (depending
on the zoom position).
Focus ranges from 0.7 inches (2.0 centimeters) to infinity, including the Macro and Super Macro modes. Normal Macro mode focuses on subjects from 0.6 to 2.6 feet from the camera (20 to 80 centimeters), while Super Macro mode lets you get as close as 0.7 inches (2.0 centimeters). You enter either macro mode by pressing the macro/spot metering button on the C-4000's back panel, but super macro mode must first be enabled through the LCD menu system. In normal Macro mode, you can zoom the lens back and forth across its range of available focal lengths, but Super Macro mode restricts the lens to a single, slightly wide-angle setting. The camera's TTL (through the lens) autofocus system uses a contrast-detect method to gauge focus, which means that it should work properly with auxiliary lenses. The green LED next to the optical viewfinder glows solid as soon as the subject is in focus. (A flashing green LED generally means there's a problem focusing, so you may need to switch to Macro mode, back away from the subject, or get more light on it for the AF system to "see" by.) Though the C-4000 doesn't feature an automatic focus lock, you can manually lock it by centering the desired portion of the subject in the frame, half-pressing the Shutter button, and then recomposing the image while continuing to half-press the Shutter button.
For slightly faster shutter response (it doesn't seem to make a huge difference in shutter lag) or as an assist with subjects in constant motion, you can force the camera to autofocus continuously by activating the Full-Time AF option in the Shooting menu. Full-Time AF means that the autofocus is constantly engaged as you move the camera from subject to subject, instead of waiting for the Shutter button to be depressed halfway. This is useful for action photography like fast-paced sports or children playing, but it will also slightly shorten battery life because the focusing mechanism is constantly at work. You can also designate whether the camera determines focus from the center of the image (Spot) or the entire image area (iESP), by choosing the appropriate AF Mode option in the Shooting menu. In Spot AF mode, the C-4000 Zoom lets you select autofocus areas offset from center. A total of nine AF area options are provided, two each above, below, left, and right of center, plus the default center position.
Low light focusing is often a bugaboo for digital cameras. I was thus very pleased to see that the C-4000 focused well (if a bit slowly) in light levels as low as 1/4 foot-candle at ISO 100, and could generally at least get in the ballpark as low as 1/8 foot-candle. Performance at ISO 400 was somewhat better yet. This a pretty good performance for a digicam AF system, since one foot-candle corresponds to typical city street lighting at night.
 A
manual focus option is available by pressing and holding the OK / Menu button
on the back panel, which displays the manual focus distance scale on the LCD
monitor. The up and down arrow keys adjust the focus distance, and the right
and left keys select between MF and AF focus modes. When you adjust the focus
manually, the LCD viewfinder display changes to show a 2x magnified view of
the central portion of the image while you're actually adjusting the focus,
to make it easier to see whether or not your subject is in focus. The display
returns to normal size once you release the up or down arrow button. I found
the enlarged view pretty helpful in setting focus when the lens was at or near
its telephoto position, but less so with the lens at wide angle focal lengths.
(This is almost certainly due to the much greater depth of field obtained with
the lens set to wide angle.) I really like the C-4000's use of a bargraph focusing
distance display, combined with numbers indicating specific distances. Some
cameras offer only a bargraph display, with no numeric information, a much less
useful arrangement, IMHO. Having specific numbers to refer to can be invaluable
in low-light situations, where there's not enough light to see whether the subject
is in focus on the LCD screen, and your only option is to estimate the distance
to your subject.
A
manual focus option is available by pressing and holding the OK / Menu button
on the back panel, which displays the manual focus distance scale on the LCD
monitor. The up and down arrow keys adjust the focus distance, and the right
and left keys select between MF and AF focus modes. When you adjust the focus
manually, the LCD viewfinder display changes to show a 2x magnified view of
the central portion of the image while you're actually adjusting the focus,
to make it easier to see whether or not your subject is in focus. The display
returns to normal size once you release the up or down arrow button. I found
the enlarged view pretty helpful in setting focus when the lens was at or near
its telephoto position, but less so with the lens at wide angle focal lengths.
(This is almost certainly due to the much greater depth of field obtained with
the lens set to wide angle.) I really like the C-4000's use of a bargraph focusing
distance display, combined with numbers indicating specific distances. Some
cameras offer only a bargraph display, with no numeric information, a much less
useful arrangement, IMHO. Having specific numbers to refer to can be invaluable
in low-light situations, where there's not enough light to see whether the subject
is in focus on the LCD screen, and your only option is to estimate the distance
to your subject.
The C-4000 Zoom's exterior lens barrel incorporates 41mm filter accessory threads that couple to Olympus' lens adapter tube, the CLA-1. This optional adapter extends the threads outward (and increases their diameter to 43mm), so they are flush with the front of the lens when it's fully extended. It's important to note though, that this adapter is made to work with Olympus' own accessory lenses, all of which use an additional adapter ring to step up the threads to the diameter needed by the auxiliary lens itself. The consequence of this is that the CLA-1 design requires another threaded adapter ring, because it doesn't extend far enough for standard 43mm filters to clear the lens barrel. Normal 43mm filters will interfere with proper lens operation, and could damage the lens mechanism itself! Therefore, if you buy a CLA-1 adapter unit, be sure to also buy a step-up ring to whatever filter size you plan on using, just to give you the extra millimeter or two necessary for the filters to clear the front of the lens barrel. (If you carry your camera hanging from your neck with the lens extended very much, a CLA-1 also provides excellent protection against accidental damage to the delicate telescoping mechanism, should the front of the camera bump against anything. - I'd recommend it to any C-4000 owner as "standard equipment.")
As much as 3.5x of digital zoom is available in addition to the 3x optical zoom, increasing the C-4000's total zoom range to 10x. Digital zoom is only accessible when the LCD monitor is engaged; when the LCD is turned off, the digital zoom returns to the 1x setting. It also cannot be used with the uncompressed TIFF mode. As always, remember that digital zoom just "stretches" the image from the central portion of the CCD, which directly trades off resolution for magnification. Digital zoom images will always be softer and less sharp than those with equivalent magnification delivered entirely by an optical zoom lens.
|
Exposure
|
Like other Olympus C-Series digicams, the C-4000 Zoom offers a lost of exposure control, including Program, Aperture Priority, Shutter Priority, and Manual exposure modes. Additional exposure options include four ISO settings (Auto, 100, 200 and 400); exposure compensation up to +/- 2 EV, auto bracketing, internal and external flash adjustment, and two metering modes, in addition to a handful of other creative image settings.
In Program mode, the camera selects both the aperture and shutter speed(to a maximum of 1 second), while you control the remaining exposure options such as ISO, Exposure Compensation, White Balance, and metering mode. Aperture Priority lets you set the aperture from f/2.8 to f/11.0, while the camera chooses the best corresponding shutter speed, to a maximum exposure time of 1 second. In Shutter Priority, you can select shutter speeds from 1/1,000 to four seconds, and the camera selects the best corresponding aperture setting. (Note that in program and aperture-priority modes, the default "Auto" setting of the flash will restrict the maximum exposure time to between 1/20 and 1/100 seconds. Slower shutter speeds will only be available if you either turn off the flash, or set it to slow sync mode.)
In Manual mode, you control both aperture and shutter speed, the latter of which can extend to 16 seconds. In Manual mode the exposure compensation display at the top of the LCD screen changes into an exposure meter, a helpful feature. As you scroll through various shutter speed/aperture combinations, the camera indicates whether or not it thinks the current setting will give you a correct exposure. It does this by showing the f/stop and shutter speed in green, and the difference between your settings and the "correct" exposure in white numerals, across a range of +/- 3 EV. If the differential exceeds 3 EV, the numbers turn red and stay fixed at a +/- 3 EV reading.
In addition to the four basic exposure modes, a "My Mode" option lets you save up to four separate sets of exposure settings that can be accessed via the virtual mode dial. Thus, if you shoot under the same conditions frequently, you can save the settings and instantly recall them when needed. This can be very handy when you're moving back and forth between indoor and outdoor scenes, as at a party, wedding, or reception. You could set up one My Camera setting for outdoor shooting, with ISO 100 and daylight white balance, and a separate My Camera setting for indoor work, with incandescent or custom white balance and ISO 400. Very slick!
 A
Scene Program stop on the Mode dial offers a "virtual dial" selection
of preset "scene" shooting modes, for specific shooting situations.
Included are Movie (described shortly), Self-Portrait, Night Scene, Landscape
/ Scene, Landscape / Portrait, Sports, and Portrait modes. Each selection appears
in a circular menu pattern on the LCD screen, and the left and right arrow keys
rotate this "virtual dial" around to the desired setting. Self-Portrait
mode lets you take a picture of yourself by holding the camera in front of you.
Night Scene mode optimizes the camera for darker shooting situations, keeping
the exposure under automatic control but adjusting the ISO and shutter speed
for the best exposure. The two Landscape modes are set up for capturing broad
vistas of scenery with or without people in the foreground. In Sports mode,
the exposure system is biased toward faster shutter speeds to freeze the action,
while Portrait mode sets up the camera to capture individual portraits with
wider aperture settings, leaving the subject in focus in front of a slightly
blurred background.
A
Scene Program stop on the Mode dial offers a "virtual dial" selection
of preset "scene" shooting modes, for specific shooting situations.
Included are Movie (described shortly), Self-Portrait, Night Scene, Landscape
/ Scene, Landscape / Portrait, Sports, and Portrait modes. Each selection appears
in a circular menu pattern on the LCD screen, and the left and right arrow keys
rotate this "virtual dial" around to the desired setting. Self-Portrait
mode lets you take a picture of yourself by holding the camera in front of you.
Night Scene mode optimizes the camera for darker shooting situations, keeping
the exposure under automatic control but adjusting the ISO and shutter speed
for the best exposure. The two Landscape modes are set up for capturing broad
vistas of scenery with or without people in the foreground. In Sports mode,
the exposure system is biased toward faster shutter speeds to freeze the action,
while Portrait mode sets up the camera to capture individual portraits with
wider aperture settings, leaving the subject in focus in front of a slightly
blurred background.
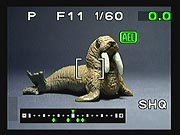 Three
metering systems are available on the C-4000 Zoom: Spot, Multi-Spot, and ESP
multi-patterned metering. Spot and ESP are accessed by pressing the Spot / Macro
/ Print button on the camera's back panel. Under the default ESP multi-patterned
setting, the camera takes readings from a number of areas across the field of
view, and evaluates them to determine the best exposure. Spot metering reads
the exposure from the very center of the image, so you can pinpoint the specific
area of the subject you want properly exposed and lock in on that exposure by
depressing the Shutter button halfway and holding it down while you recompose
the scene. The Multi-Meter function is activated through the Shooting menu in
Aperture or Shutter Priority modes only. Once this menu option is activated,
the Spot / Macro button must be set to Spot mode, and the Function / Protect
button depressed to take individual meter readings from the center of the frame
(inside the exposure brackets). You can take up to eight readings, each of which
will be marked on a relative exposure bar across the bottom of the LCD panel,
and then averaged into the overall reading. The screen shot above right shows
the display after four exposure measurements have been made. You can cancel
the Multi-Spot reading by holding the Function / Protect button down for one
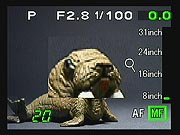
second (the word "Memo" appears in the LCD display).
Three
metering systems are available on the C-4000 Zoom: Spot, Multi-Spot, and ESP
multi-patterned metering. Spot and ESP are accessed by pressing the Spot / Macro
/ Print button on the camera's back panel. Under the default ESP multi-patterned
setting, the camera takes readings from a number of areas across the field of
view, and evaluates them to determine the best exposure. Spot metering reads
the exposure from the very center of the image, so you can pinpoint the specific
area of the subject you want properly exposed and lock in on that exposure by
depressing the Shutter button halfway and holding it down while you recompose
the scene. The Multi-Meter function is activated through the Shooting menu in
Aperture or Shutter Priority modes only. Once this menu option is activated,
the Spot / Macro button must be set to Spot mode, and the Function / Protect
button depressed to take individual meter readings from the center of the frame
(inside the exposure brackets). You can take up to eight readings, each of which
will be marked on a relative exposure bar across the bottom of the LCD panel,
and then averaged into the overall reading. The screen shot above right shows
the display after four exposure measurements have been made. You can cancel
the Multi-Spot reading by holding the Function / Protect button down for one
second (the word "Memo" appears in the LCD display).
In the main exposure modes (Program, Aperture Priority, Shutter Priority, and Manual modes), the C-4000 Zoom provides the usual range of ISO (light sensitivity) settings: An ISO adjustment offers Auto, 100, 200, and 400 ISO equivalents. (Note that when ISO is set to Auto in Program exposure mode, it automatically resets to 100 when you switch to Aperture Priority, Shutter Priority, or Manual exposure modes.)
Camera light meters assume that the world averages out to a medium gray, and make their exposure decisions accordingly. This works well most of the time, but subjects that are very bright or dark overall can trick the metering system. Light subjects will tend to be underexposed, while dark ones can be overexposed. In these situations, you need to be able to adjust the camera's default exposure to compensate for the subject's overall tone. This is the function of the "exposure compensation" adjustment. To adjust the exposure compensation on the C-4000 Zoom, simply press either the right or left Arrow buttons (in any exposure mode except Manual) to increase or decrease the exposure values (EV) in one-third-step increments, up to +/- 2 EV. The current compensation setting is displayed in the upper right corner of the LCD. (The LCD viewfinder must be enabled to adjust this setting, but once it is set, you can turn the LCD off to conserve power, and the setting will remain in effect.)
Sometimes you aren't sure how best to adjust the exposure for a given subject, and don't want to take the time to adjust the exposure compensation manually. (The subject might move or go away while you're fiddling with the camera's controls.) The answer to this dilemma is found in the C-4000's Auto Bracketing (BKT) function. Selected through the Shooting Mode Menu, this feature makes camera automatically "bracket" the exposure for each shot by as much as +/- 2 EV in either three- or five-step increments (0.3, 0.6, or 1.0 EV units each). For example, with a setting of five 0.3 EV steps, the camera will automatically snap five shots, at exposure adjustments of -0.7, -0.3, 0, +0.3, and +0.7 EV, insuring that at least one shot would be exposed just right. The bracketing function centers its efforts around whatever exposure you've previously selected as the starting point, including any exposure compensation adjustments you've made.
White Balance is also set in the Mode Menu, with Auto, One Touch (Manual), or one of six Preset options: Daylight, Overcast, Tungsten, Daylight Fluorescent, Neutral Fluorescent, or Cool Fluorescent, to accommodate a variety of lighting situations. In One Touch mode, white balance is calculated by placing a white card in front of the lens and pressing the OK button. You can also fine-tune the white balance setting with the "WB+/-" setting under the Picture submenu. An adjustment bar appears on the LCD screen, with options to increase or decrease the red or blue tones. (I really like this idea of fine-tuning the white balance. Most digicams tend to have slight biases in their white balance systems under various lighting conditions. Once you get used to how a particular camera shoots, it would be very helpful to have this sort of "tweaking" adjustment available to modify the color shift. - More on this shortly.)
The C-4000 Zoom has a 12-second Self-Timer for self-portraits or those occasions when you don't want to risk camera shake by pressing the Shutter button to make the exposure.
The Function menu option lets you capture images in Black & White or Sepia modes, or use the White and Black Board settings for capturing text on white or black backgrounds respectively. (These modes appear to adjust image contrast and default exposure levels to maximize contrast and force the background toward the appropriate tonal value.)
The "Tweak" Adjustments
To my mind, one of the most powerful and unique capabilities of the C-4000 is embodied in what I call it's "tweak" functions. These are menu options that let you adjust several key exposure characteristics across a fair range of variation, in relatively small steps. I mentioned the white balance "tweak" above, that lets you vary the overall color balance of any selected white balance mode, pushing it toward either the red or blue ends of the spectrum. This can be enormously helpful in adjusting the camera's response to a specific light source, or simply for adjusting the minor color biases that always seem to be present in digicams to more closely match your personal preferences.
The C-4000's "tweaking" options don't end with color balance though, but go on to include contrast, color saturation, and in-camera sharpening as well.
Contrast is an exposure parameter that doesn't get a lot of attention in most camera reviews, but that can have a major impact on image quality. A lot of consumer-level digicams have their contrast artificially boosted to produce the bright, "snappy" images many consumers prefer. This makes for pictures with bright, vibrant colors and lots of "snap," but often leads to blown-out highlights, with lost detail in bright areas of the image. (The C-4000 itself exemplifies this common practice.) Many pros and advanced amateurs prefer images with well-controlled contrast, capturing the full tonal range of the subject and preserving detail in both highlights and shadows, albeit at the cost of images that may seem a little flat. A lot of people (myself included) fall somewhere in between. The C-4000 Zoom's Picture menu provides 11 steps of contrast adjustment, covering a fairly wide range in very small steps. This means you've got a pretty good chance of finding exactly the contrast level you're looking for somewhere among its settings. (I really do wish though, that Olympus either provided a wider range of variation, or centered the range around a less-contrasty setting. The C-4000's default contrast is fairly high, with the result that my personal preference was to set the contrast to -4 or -5 most of the time.)
Another critical image-quality parameter is color saturation. Here again, most consumers prefer brighter, more saturated colors in their photos, even if that's a less faithful reproduction of the original than a more subdued rendering would be. Here again, the C-4000 Zoom offers a wide range of variation, in relatively small steps. Rather than the "special effect" that saturation adjustments end up being on some competing camera models, the saturation menu on the C-4000 lets you precisely tailor the camera to suit your day to day picture-taking preferences.
Finally, there's the matter of in-camera sharpening. This represents a more difficult "tweak" to build into a camera's user interface, since there are actually a couple of different parameters that need to be adjusted to cover the range of possible variations. (Without going into any of the gory details, the two relevant variables are the radius of the sharpening operator, and the amount that's applied.) Nonetheless, the single adjustment provided in the C-4000 Zoom's Picture menu does a pretty good job of offering a range of variation that's both meaningful and useful.
It may seem that I'm spending a lot of time and energy on the C-4000 Zoom's "tweak" adjustments, given their sometimes subtle effect. For people who really care about the details of how their digicams record images though, their importance is hard to overstate. To find this level of control on a camera priced as affordably as the C-4000 Zoom is a double blessing. (You'll find a similar range of "tweak" adjustments in the Minolta Dimage 7i, but that's a considerably more expensive camera.)
Flash
The C-4000 Zoom has a fairly standard built-in flash unit, with four basic operating modes: Auto, Red-Eye Reduction, Forced Flash, and Flash Off modes. Flash range extends to approximately 11.8 feet (3.6 meters) at ISO 100, not only a respectable distance, but one that agrees with my own test results. (At ISO 400, the range would be twice as great, nearly 24 feet.) A Slow Synchro mode (set through the Shooting menu) combines a slow shutter speed with the flash to let more ambient light into the image. This results in more natural lighting behind flash-illuminated subjects. When photographing moving subjects, Slow Synchro will record some motion blur because of the longer exposure time, with the initial or final image frozen by the flash exposure. I say "initial or final," because the Slow 1 menu option fires the flash at the beginning of the exposure (producing a blur in front of the subject), while Slow 2 fires the flash at the end of the exposure (producing a blur behind the subject, where you'd generally expect to see it). There's also a Slow Red-Eye Reduction mode, for portraits.
A five-pin proprietary flash sync socket lets you connect an external flash to the camera for more powerful flash needs. Olympus offers the (very nice) FL-40 external flash as an accessory, which can be controlled through the camera. Both the internal and external flash units can be used together or separately. I have only one small, ergonomic gripe about the external flash (that I've also had with earlier Olympus models): The sync socket is protected by a tiny plastic cover that is very easy to lose. There's nothing attaching it permanently to the camera and it is very small and difficult to grasp.
Another nice feature of the C-4000 Zoom's internal flash system is its Flash Brightness adjustment, which allows you to change the flash brightness from +2 to -2 EV in one-third-step increments. When using the built-in flash with an external unit, you can use this feature to adjust the balance of light between the two.
While the C-4000 Zoom (and most other Olympus digicams) uses a proprietary flash sync connector, Olympus offers several adapter cables and brackets that make it easy to use generic strobes with the camera. (These are very difficult to find at retail, your best bet will probably be to buy them directly from Olympus here.)
Special Exposure Modes
Movie Mode
The C-4000 Movie mode is accessed via the Scene Program setting on the Mode dial on top of the camera. Movies can be recorded in either HQ (320 x 240-pixel) or SQ (160 x 120-pixel) resolution modes. Both record at approximately 15 frames per second. Movies are recorded without sound, but one benefit of this is that the zoom lens can be used while recording. (Zoom lenses generally aren't usable when recording movies with sound because the motors that actuate the zoom lens are too loud, interfering with the audio.) Maximum recording time per clip is limited by the C-4000 Zoom's buffer memory, but is fairly generous, as shown in the table below. Here's a copy of the recording time table from the manual:
|
|
|
|
|
|
||
|
|
(15 frames/sec) |
|
|
|
(15 frames/sec) |
|
The available seconds of recording time available on the memory card appear on the LCD monitor if it's activated, based on the quality mode selected. Note though, that regardless of the total amount of space available on the memory card, individual clips cannot be longer than the times shown in the table above.) You can use the zoom control while recording movies, but the motion of the zoom is somewhat slower than in still recording. Exposure Compensation, Focus Lock, Self-Timer, ISO setting, White Balance, and Function (B&W and Sepia) are also available while in Movie mode.
 First
seen in the Camedia C-3030 (February 2000), the C-4000 Zoom again offers in-camera
"editing" of movies in Playback mode. This capability is accessed
via the Playback menu, Movie Play submenu, and Edit option. In this mode (see
screen shot above), you can scroll forward and backward in the movie, and set
cut points at the beginning and end of a sequence of interest. Movie content
between the two cut points will be preserved, the rest discarded. In a nice
touch though, Olympus allows you to choose whether to modify the original movie
file, or just save a new copy of it, reflecting the effect of the edit you've
made, while the original file remains untouched. - This in-camera editing of
movies makes the function much more useful.
First
seen in the Camedia C-3030 (February 2000), the C-4000 Zoom again offers in-camera
"editing" of movies in Playback mode. This capability is accessed
via the Playback menu, Movie Play submenu, and Edit option. In this mode (see
screen shot above), you can scroll forward and backward in the movie, and set
cut points at the beginning and end of a sequence of interest. Movie content
between the two cut points will be preserved, the rest discarded. In a nice
touch though, Olympus allows you to choose whether to modify the original movie
file, or just save a new copy of it, reflecting the effect of the edit you've
made, while the original file remains untouched. - This in-camera editing of
movies makes the function much more useful.
 Another
very nice feature of the C-4000's movie mode is its "Index" capability,
a great way of quickly seeing what's "inside" a movie file. In Movie
Playback mode, selecting Index calls up a display similar to that shown in the
screenshot above right. Nine individual frames are shown, equally spaced throughout
the movie. You can change the part of the movie that's shown in the thumbnails
by moving the starting and ending frames shown. When you first enter the mode,
a green outline highlights the first frame. Pressing the right arrow key plays
the movie in slow motion. As the first frame advances, the seven intermediate
frames (between the first and the last) change to maintain their equal spacing
throughout the movie segment that remains. Pressing the left arrow key reverses
the playback, moving the first frame back toward the beginning of the movie.
Hitting the down arrow key switches the highlight to the last frame, letting
you change its position within the movie the same way. Once you've selected
the start and end frames you want, hitting the menu button again lets you save
the index display as a separate image file on the card. Index files for HQ-mode
movies are saved as 1024x768 images, while those for SQ-mode movies are saved
at a resolution of 640x480. These index files go a long way toward solving the
problem of knowing what's recorded in your movie files. About the only feature
I'd like to see added to the movie index display would be a way to "jump"
to one of the intermediate frames shown, as an enhancement to the editing capability
mentioned above. (This is the first time I've seen this particular function
on a digicam, so kudos to Olympus for thinking of it. Hopefully we'll see it
in more cameras as time goes on.)
Another
very nice feature of the C-4000's movie mode is its "Index" capability,
a great way of quickly seeing what's "inside" a movie file. In Movie
Playback mode, selecting Index calls up a display similar to that shown in the
screenshot above right. Nine individual frames are shown, equally spaced throughout
the movie. You can change the part of the movie that's shown in the thumbnails
by moving the starting and ending frames shown. When you first enter the mode,
a green outline highlights the first frame. Pressing the right arrow key plays
the movie in slow motion. As the first frame advances, the seven intermediate
frames (between the first and the last) change to maintain their equal spacing
throughout the movie segment that remains. Pressing the left arrow key reverses
the playback, moving the first frame back toward the beginning of the movie.
Hitting the down arrow key switches the highlight to the last frame, letting
you change its position within the movie the same way. Once you've selected
the start and end frames you want, hitting the menu button again lets you save
the index display as a separate image file on the card. Index files for HQ-mode
movies are saved as 1024x768 images, while those for SQ-mode movies are saved
at a resolution of 640x480. These index files go a long way toward solving the
problem of knowing what's recorded in your movie files. About the only feature
I'd like to see added to the movie index display would be a way to "jump"
to one of the intermediate frames shown, as an enhancement to the editing capability
mentioned above. (This is the first time I've seen this particular function
on a digicam, so kudos to Olympus for thinking of it. Hopefully we'll see it
in more cameras as time goes on.)
Panorama Mode
The C-4000 Zoom offers a Panorama exposure mode when using an Olympus brand panorama-enabled SmartMedia memory card. (All Olympus-branded SmartMedia cards incorporate this feature.) In this mode, the exposure and white balance for a group of shots are determined by the first exposure in the series, making them easier to stitch together in the computer later. The Panorama function is accessed in the Shooting menu through the Camera submenu, but only in the four main exposure modes. (P, A, S, or M) When activated, it provides light blue guide lines at the edges of the pictures to help you align successive shots, leaving enough overlap between them for the stitching software to do its job. Up to 10 shots can be taken in a panoramic series. Note that this function is only enabled by SmartMedia cards with built-in panorama-related firmware found on Olympus brand memory cards. Images are saved individually and then assembled on a computer after they've been downloaded.
Sequence Mode
Taking advantage of its relatively generous buffer memory, the C-4000 Zoom offers a Sequence mode that mimics the motor drive on a film camera, continually recording images for as long as the Shutter button is held down, or until the buffer memory is full (this varies with the image quality and subject, as well as available SmartMedia space). Available with all compression settings except uncompressed TIFF, the slowest available shutter speed in Sequence mode is 1/30 second, to prevent blurring from camera movement, or interference between the image-acquisition time and the demands of the continuous-mode processing. One notable limitation of the Sequence mode is that the camera's internal flash cannot be used, since it can't cycle fast enough to keep up with the camera's shooting. However, if you have an external flash capable of recycling at nearly two frames per second, and you shoot in Aperture Priority mode, an external flash may work just fine. (This limitation on flash recycling in continuous mode is a common constraint, faced by all consumer-level digicams that I'm aware of.) You can also set the camera to base all exposure and focus settings on the first shot taken, or to adjust the exposure and focus with each image (which decreases capture speed).
Shooting speed and sequence length in Sequence Mode are governed by the image size/quality settings you've selected. The frame rate varies between 1.5 and 1.8 frames/second, and the number of images you can record without pausing ranges from 3 at 2288x1712 and high image quality to 200 at 640x480 and normal quality. In "HQ" mode (2288x1712, normal quality), you can snap up to 15 frames before having to wait for the buffer memory to empty, although the cycle time slows to 0.84 seconds (1.19 frames per second) for the last shot. Even more impressive is what happens when you drop down to three megapixel resolution (2048x1536). In that mode, you can snap up to 11 shots at high image quality, or 40 (!) in normal quality, although the cycle time for the last three shots in the series stretches to 0.81 seconds (1.23 frames/second). These are really long sequence lengths, able to capture even extended action sequences.
"2 in 1" Mode
Also accessed through the camera's shooting menu, "2 in 1" mode captures a split-screen image. Once the mode is enabled, the camera guides you capture two sequential images, which it then assembles side by side as a single image. The first image takes up the left half of the screen, and the second is on the right. Because images are divided vertically, this mode will work best with vertical ("portrait") format subjects
Noise Reduction/Low Light
This isn't really a separate shooting mode, but deserves separate mention because of the impact it has on low light performance. All digital cameras are plagued by image noise on long exposures, particularly the "hot pixel" kind caused by leakage currents on the CCD array. This noise appears as isolated bright pixels of varying colors. Like many current higher-end cameras, the C-4000 Zoom employs a "dark frame subtraction" technique to remove the hot pixels. This means that when the noise reduction option is turned on, it takes the camera twice as long to complete an exposure, since it's actually taking two shots, one of the subject, and the other with the shutter closed. The second of these will contain only the CCD noise, which the camera then subtracts from the image of the subject. The results are pretty dramatic, making even the maximum 16 second exposures from the C-4000 quite usable, and easily extending the usable light range of the camera down to the 1/16 foot-candle (0.67 lux) limit of my testing.
Shutter Lag/Cycle Times
When you press the shutter release on a camera, there's usually a lag time before the shutter actually fires. This time is to allow the autofocus and autoexposure mechanisms time to do their work, and can amount to a fairly long delay in some situations. Since this number is rarely reported on, and can significantly affect the picture taking experience, I routinely measure it using a test setup I designed and built for the purpose. (The test system has a resolution of 0.001 second, and is crystal-controlled for long-term accuracy.) The results of my tests are listed in the following chart.
|
|
||
|
|
|
|
| Power On -> First shot |
|
Quite slow, even for a camera with a telescoping lens. |
| Shutdown |
|
Time until lens retracted and ready to put away. Also rather leisurely. |
| Play to Record, first shot |
|
Time until first shot is captured, from playback mode. About average. |
| Record to play (max/min res) |
3.4/1.0 |
Top set of numbers for large/fine images, bottom set for small/normal. First time in each set is for immediate switch to record after shutter release in highest res mode. Second time is for switch to play after image saved to card. Slow on immediate switch, average after camera has saved image to card. BUT, camera displays just-captured image instantly, while it's being saved to the memory card, so the need for separate image review is greatly reduced. |
| Shutter lag, full autofocus |
|
About average. Interestingly, wide angle and telephoto AF speed is virtually identical. (Usually, Tele is slower than Wide.) |
| Shutter lag, continuous autofocus |
|
Very slightly faster than normal autofocus, but not much of a benefit. |
| Shutter lag, manual focus |
|
Slower than average |
| Shutter lag, prefocus |
|
A little faster than average across all cameras, a bit slower than average for full-featured models. |
| Cycle Time, max/min resolution |
2.1-15.1 18.3 |
Faster than average. Full speed for first 3 shots, then wait about 6 seconds for buffer to clear, then 3 shots fast again. BUT, in large/normal (HQ) mode, you can shoot till the cows come home: I gave up trying to fill the buffer memory after 40 shots at a long-term average of one every 2.39 seconds. Quite impressive. Longest time shown is for full-resolution TIFF files. (There's no buffer when shooting TIFF format, you have to wait for the camera to finish saving each image before you can shoot the next.) |
| Cycle time, continuous mode |
(1.84-1.54 fps) |
Pretty fast for a 4 megapixel camera. Bursts range from 3 frames at max res/quality to 200 frames in lowest res/quality mode. Dropping from SHQ to HQ mode (large/normal resolution) increases buffer capacity from 3 to 15 shots, a very respectable number. (2048x1536/normal resolution/quality gives up to 40 shots in sequence.) Buffer clearing times range from 6 seconds in large/fine mode to 63 seconds for 200-shot sequence in lowest res/quality mode. |
Overall, the C-4000 Zoom is an about an average performer speed-wise. It starts up and shuts down rather slowly, but cycle time is pretty good, and buffer capacity is excellent for any size/quality setting other than SHQ mode. (In SHQ mode, you can snap 3 shots before waiting for the buffer to empty.) Shutter lag is on the slow side of average, particularly in manual-focus mode. Prefocus lag is just slightly faster than average across all cameras I've tested, but a bit slower than average when compared to current higher-end models.
Operation and User Interface
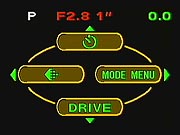
 One
of the most noticeable changes implemented with the C-4000 is the newly designed
user interface. A "virtual dial" lets you quickly scroll through Scene
Program modes or A/S/M (aperture/shutter/manual/my camera) options, using the
left and right arrow keys to move the on-screen dial. The screen shot above
right shows the virtual mode dial options for the Scene Program modes.
One
of the most noticeable changes implemented with the C-4000 is the newly designed
user interface. A "virtual dial" lets you quickly scroll through Scene
Program modes or A/S/M (aperture/shutter/manual/my camera) options, using the
left and right arrow keys to move the on-screen dial. The screen shot above
right shows the virtual mode dial options for the Scene Program modes.
 Here's
another shot of the virtual dial interface, this time showing options for A/S/M
mode.
Here's
another shot of the virtual dial interface, this time showing options for A/S/M
mode.
 Like
previous Olympus digicams, the C-4000 Zoom's menu system has an initial menu
screen with four shortcut buttons on it that lead to sub-menus for quick access
of frequently-used menu items. These shortcuts are displayed on the screen as
three or four buttons, each selected using the arrow key that corresponds to
its position on the screen. The right button generally takes you to the Mode
menu, which includes all of the sub-menus available for that particular Shooting
or Playback mode. The Mode menu itself is divided into four subject tabs --
Camera, Picture, Card, and Setup -- with sub-menus associated with each. The
other two or three buttons (top, left, and bottom) on the initial menu screen
are shortcuts to the most frequently used sub-menus, such as ISO, White Balance,
and Quality settings. (In the P and A / S / M modes, two of the Shortcut buttons
are user programmable, a nice feature. No fewer than 24 different functions
may optionally be assigned to the left and bottom short cut buttons.) Though
it can take a little getting used to, this dual-level menu system does let you
make adjustments to three of the most often used camera settings quite quickly.
Like
previous Olympus digicams, the C-4000 Zoom's menu system has an initial menu
screen with four shortcut buttons on it that lead to sub-menus for quick access
of frequently-used menu items. These shortcuts are displayed on the screen as
three or four buttons, each selected using the arrow key that corresponds to
its position on the screen. The right button generally takes you to the Mode
menu, which includes all of the sub-menus available for that particular Shooting
or Playback mode. The Mode menu itself is divided into four subject tabs --
Camera, Picture, Card, and Setup -- with sub-menus associated with each. The
other two or three buttons (top, left, and bottom) on the initial menu screen
are shortcuts to the most frequently used sub-menus, such as ISO, White Balance,
and Quality settings. (In the P and A / S / M modes, two of the Shortcut buttons
are user programmable, a nice feature. No fewer than 24 different functions
may optionally be assigned to the left and bottom short cut buttons.) Though
it can take a little getting used to, this dual-level menu system does let you
make adjustments to three of the most often used camera settings quite quickly.
 The
C-4000's external control layout is very similar to previous Olympus Camedia
digicam setups. The Custom Function / Protect button (which normally activates
the virtual mode dial in A/S/M and Scene modes) can have a special function
assigned to it through the Setup sub-menus. This can create a short cut to circumvent
the menu system completely for a frequently-used adjustment. For example, if
you use the Quality adjustment a fair amount, you could assign it to the Custom
Function button as a short cut. No fewer than 17 different functions can be
assigned to this button, including the Virtual Dial. (Note that the AEL (auto
exposure lock) function must be assigned to this button, before the
multi-exposure metering mode will work.)
The
C-4000's external control layout is very similar to previous Olympus Camedia
digicam setups. The Custom Function / Protect button (which normally activates
the virtual mode dial in A/S/M and Scene modes) can have a special function
assigned to it through the Setup sub-menus. This can create a short cut to circumvent
the menu system completely for a frequently-used adjustment. For example, if
you use the Quality adjustment a fair amount, you could assign it to the Custom
Function button as a short cut. No fewer than 17 different functions can be
assigned to this button, including the Virtual Dial. (Note that the AEL (auto
exposure lock) function must be assigned to this button, before the
multi-exposure metering mode will work.)
Control Enumeration
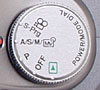
Mode Dial: The most obvious control on top of the C-4000 is the Mode
Dial, which turns the camera On or Off, and selects the various camera operating
modes: Playback, Off, Program, Aperture / Shutter Speed / Manual (A/S/M), and
Scene-Program / Movie modes. Program and A/S/M are the Still Shooting or Record
modes. Scene Program / Movie mode accesses the Movie, Self-Portrait, Night Scene,
Landscape / Scene, Landscape / Portrait, Sports, and Portrait modes.
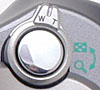
Zoom Lever: Also on top of the camera, in front of the Mode Dial, the
Zoom Lever controls the optical zoom in all exposure modes, and the digital
zoom when enabled through the Shooting menu. In Playback mode, the lever switches
between Index view, normal image display, and playback zoom.
Shutter Button: Located in the center of the Zoom Lever, the Shutter button sets focus and exposure settings when depressed halfway and triggers the shutter when fully pressed.
![]()
Flash / Erase Button: Located on the top, central portion of the camera's
back panel, this button controls the Flash mode in all exposure modes for which
flash is available. Pressing it cycles through Auto-Flash, Red-Eye Reduction,
Forced Flash, Flash Off, and Slow Sync modes. In Playback mode, this button
calls up the Erase menu, which allows you to erase the currently displayed image.
![]()
Spot / Macro / Print Button: Directly beneath the Flash / Erase button
on the back panel is the Spot / Macro / Print button. In all Shooting modes,
this button cycles between normal metering (Digital ESP), Spot metering, Macro
(Closeup) focus mode, and Macro with Spot Metering modes. In Playback mode,
this button accesses the Digital Print Order Format (DPOF) print settings menu,
which allows you to tag the current image, or all of the images on the card,
for printing. Once the image is selected, you can set the number of copies,
whether or not to print the date and time stamp on the photo, or to print a
cropped area of the image.
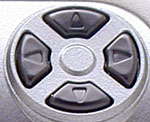
Four-Way Arrow Pad: The largest control on the back panel, the Arrow
Pad controls many of the C-4000's operations. In all Shooting modes except Manual,
the left and right Arrow keys increase or decrease the exposure compensation
setting (provided the LCD monitor is active). In Aperture or Shutter Priority
exposure modes, the up and down Arrow keys adjust the lens aperture or shutter
speed settings, depending on which mode you've selected. In Manual mode, the
up and down Arrows control shutter speed, while the left and right Arrows control
aperture.
In Playback mode, the left and right Arrows move forward or backward through the pictures stored on the card, or scroll around portions of the expanded image in Zoom Playback mode.
In the LCD menu system, the Arrow keys navigate through menu screens and select settings.

OK / Menu Button: Located below the four-way Arrow pad, this button activates
the menu system on the rear panel LCD monitor and confirms selected menu settings
in the LCD menu screens. If the LCD monitor is turned on when you press the
Display button, it will call up the menu options and display them over the image.
If the LCD monitor is off when you press Display, it brings up the camera's
menu system with no viewfinder image. Holding this button down for approximately
two seconds brings up the Manual Focus distance display, along with the AF and
MF icons. Highlighting the MF icon with the right Arrow button engages the Manual
Focus mode, after which the up and down Arrow buttons adjust the focus.

Display / Quick View Button: Just to the right of the LCD monitor, encircled
by a raised plastic lip, this button turns the LCD monitor on or off. If pressed
twice in quick succession, it activates the Quick View function, which displays
the previously captured image on the screen, and lets you access most playback-mode
functions. A third press returns the LCD to its normal display.

Custom / Protect Button: Located on the camera's back panel, below the
Display button, this button normally actuates the "Virtual Dial" display
in Scene or A/S/M exposure modes. It can be programmed to serve any one of 16
other functions though, via an option in the Setup menu. Available functions
include Virtual Dial, AE Lock, self-timer, drive (continuous or single shot
options), ISO, Flash, Slow Sync, Noise Reduction, Digital Zoom, Full Time AF,
AF Mode, Super Macro, Function, Info, Histogram Display, Size/Quality, and White
Balance. If the AE Lock function is selected, the camera is in spot metering
mode, and the Multi Metering option is enabled in the Shooting menu, you can
take up to eight spot meter readings with this button, which the camera will
then average to determine the final exposure. In Playback mode, pressing this
button write-protects individual images against accidental erasure (except from
card formatting).

Diopter Adjustment Dial: Located on the left side of the optical viewfinder's
eyepiece, this dial adjusts the viewfinder optics to accommodate eyeglass wearers.
I don't have any way of quantifying the action of such adjustments, but can
say that it wasn't quite enough to adjust for my normal 20:180 (!) vision, although
it works fine when I'm wearing my "computer" glasses, which correct
my vision to somewhere around 20:80 or so. Since I'm not farsighted, I don't
have any idea of the range it might cover for farsighted people, but would guess
it provides a similar range of adjustment in that direction as well.
Camera Modes & Menus
![]()
Scene Program / Movie Mode: Accessed by turning the Mode dial to the
movie camera symbol, this mode allows you to capture movies without sound for
up to 33 seconds in high-quality mode, or 148 seconds in low-quality mode. Shutter
speed is automatically set from 1/8,000 to 1/30 second Movie mode, depending
on light levels. This dial position also lets you select between a range of
preset Scene shooting modes, including Self-Portrait, Night Scene, Landscape
/ Scene, Landscape / Portrait, Sports, and Portrait modes. Limited exposure
options are available in each mode. You select the various sub-modes via the
C-4000's "Virtual Dial" LCD-based interface.
![]()
Aperture Priority: Lets you select the desired lens aperture (in varying
increments, from f/2.8 to f/11), while the camera adjusts the shutter speed
to achieve the correct exposure. If the required shutter speed is beyond the
camera's capabilities, the shutter speed / aperture status numbers in the LCD
will flash red.
Shutter Priority: Lets you select the desired shutter speed (in varying increments, from 1/1,000 to four seconds), while the camera adjusts the aperture to achieve the correct exposure. If the required aperture is beyond the camera's capabilities, the shutter speed / aperture status numbers in the LCD will flash red.
Manual Mode: Lets you select both the desired aperture (f/2.8 to f/11) and shutter speed (1/1,000 to 16 seconds) settings. The onscreen display that normally shows exposure compensation adjustments becomes an exposure meter, showing the amount of under- or overexposure the settings you've selected will result in. If the amount of over or underexposure exceeds +/- 3 EV units, the settings displayed on the LCD screen turn red instead of green, and the display remains at -3 or +3 EV.
"My" Modes 1-4: An interesting feature, which Olympus has brought further than I've seen from other camera manufacturers. You can create up to four custom groups of settings, drawing on the full range of the C-4000's capabilities, and assign them to special "My Camera Modes." These can then be selected in A/S/M/My mode via the Virtual Dial, just like Aperture or Shutter Priority or Manual modes. This strikes me as being very useful, if you're in situations where you're likely to switch quickly between very different shooting conditions. (Indoors vs outdoors at a party or reception, for instance.) I could also see these "My" modes being very handy when used in conjunction with the fine-grained "customization tweak" settings that I mentioned earlier in the review, letting you get just the right combination of contrast, exposure compensation, color saturation, and white balance adjustment dialed in ahead of time, ready for use with a flick of the Virtual Dial. Very slick.
![]()
Programmed Exposure: The camera selects both shutter speed and lens aperture,
based on existing light conditions and certain camera functions. For example,
it uses a faster shutter speed when the lens is in the telephoto position and
a slower shutter speed when the lens is in the wide-angle position.
![]()
Playback Mode: This mode allows the user to view previously captured
images using the Arrow Pad to scroll through frames stored in memory. The Zoom
Lever switches the image display to Index mode when moved in the wide-angle
direction, and enlarges a single image when moved in the telephoto direction,
by zooming in to a maximum of 4x magnification. While zoomed in on an image,
the Arrow buttons can be used to move the enlarged view around the full image
area, allowing you to inspect all parts of it.
Camera Menus
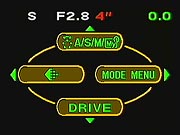 Shooting
Menus
Shooting
Menus
When the Menu / OK button is pressed in any shooting mode, the menu screens
shown below appear. Menu options vary depending on the actual shooting mode.
Depending on the shooting mode you're in and whether you've chosen to reassign
their functions or not, three of the top-level menu items are Short Cuts to
menu options controlling by default (clockwise from the bottom) Drive, Image
Size/Quality, and Aperture/Shutter/Manual (or Self-Timer in Program mode) exposure
control. The fourth option takes you to the main Mode Menu itself. Since the
destinations of the short cut options are simply sub-levels inside the main
mode menu, I'll only show the main Mode Menu screens here.
 Camera:
 Picture:
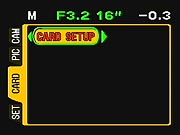 Card:
Card:
 Set
Up:
Set
Up:
Playback Mode
Playback Mode is available by turning to the green Playback symbol on the camera's Mode dial, or by depressing the Display button twice in rapid succession in any Shooting mode. The Playback Top Menu has three options, which differ slightly between Shooting (Record) playback and Movie playback:
Still Playback:
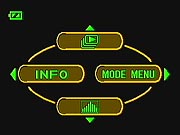 Info:
Changes the amount of exposure information that is displayed with each recorded
image. Full information includes battery power (shown only if the batteries
are low), image quality, resolution, shutter speed, aperture, exposure compensation,
white balance, ISO, and file number. Minimum information includes only the
frame number, battery power, and quality setting. Movie files display only
the file number until you select the Movie Playback option.
Info:
Changes the amount of exposure information that is displayed with each recorded
image. Full information includes battery power (shown only if the batteries
are low), image quality, resolution, shutter speed, aperture, exposure compensation,
white balance, ISO, and file number. Minimum information includes only the
frame number, battery power, and quality setting. Movie files display only
the file number until you select the Movie Playback option.
 Edit:
Edit: Crop:
Card:
Crop:
Card:
 Setup:
Image Storage and Interface
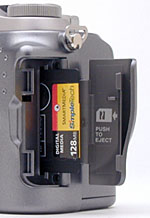 The
C-4000 Zoom uses 3V (3.3V) SmartMedia memory cards and comes with a 16MB card.
Extra cards currently can be purchased in sizes as large as 128 MB from either
Olympus or third parties. Only Olympus-branded SmartMedia cards will enable
the camera's panorama function, but third party models should otherwise be identical.
The
C-4000 Zoom uses 3V (3.3V) SmartMedia memory cards and comes with a 16MB card.
Extra cards currently can be purchased in sizes as large as 128 MB from either
Olympus or third parties. Only Olympus-branded SmartMedia cards will enable
the camera's panorama function, but third party models should otherwise be identical.
The C-4000 Zoom can store images in both uncompressed TIFF and compressed JPEG
file formats. The TIFF setting can be assigned to any one of seven(!) resolutions
through the camera's Mode Setup menu. JPEG compression levels include Super
High Quality (SHQ), High Quality (HQ), and Standard Quality (SQ1 & SQ2).
The myriad size options can be assigned to the camera's TIFF, SHQ, HQ, SQ1,
and SQ2 quality levels via the record setup menu, as shown in the table below.
(Green table cells indicate image size options that can be assigned to each
named quality setting. Whatever image size/quality options are assigned to the
five named quality settings can be quickly selected either by the "shortcut
button" (see the description of the user interface later) or via the record
setup menu.
|
Size Options |
(Interpolated) |
|
2288x1520 |
|
|
|
|
|
|
|
|
• |
|
|
|
|
|
|
|
|
|
|
• | |||||
|
|
|
|
• | |||||
|
|
|
|
|
|||||
|
|
|
|
|
I appreciated the C-4000 Zoom's file naming protocol, which includes the month and day at the beginning of the file name, and provides the option of numbering images progressively from one card to the next, or of resetting the naming sequence for each card. The C-4000 Zoom lets you write-protect individual images from accidental erasure through the Playback menu. Entire SmartMedia cards can be write-protected by placing a write-protection sticker over a specified spot on the card. While individually protected images can still be erased by a card format operation, cards that are write-protected with a sticker are also protected against card formatting. Write-protect stickers can only be used once and must be clean to be effective.
As just mentioned, the C-4000 Zoom offers a verging-on-absurd range of resolution and image compression settings, including one interpolated size. The table below shows all the available size/quality options, the number of each that can be stored on the included 16MB memory card, and the amount of image compression employed for each.
|
Resolution/Quality 16MB Memory Card |
|
|
|
|
| Interpolated 3200x2400 |
Images (Avg size) |
N/A | 2 5.8MB |
8 1.9MB |
| Approx. Compression |
N/A | 4.4:1 | 12:1 | |
| 2288x1712 | Images (Avg size) |
1 | 6 2.7MB |
16 1MB |
| Approx. Compression |
1:1 | 4:1 | 12:1 | |
| 2288x1520 | Images (Avg size) |
1 | 6 2.6MB |
18 0.9MB |
| Approx. Compression |
1:1 | 4:1 | 12:1 | |
| 2048x1536 | Images (Avg size) |
|
2.3MB |
0.8MB |
| Approx. Compression |
|
|
|
|
|
|
Images (Avg size) |
|
1.4MB |
0.5MB |
| Approx. Compression |
|
|
|
|
|
|
Images (Avg size) |
|
0.9MB |
0.3MB |
| Approx. Compression |
|
|
|
|
| 1024x768 | Images (Avg size) |
6 | 26 0.6MB |
76 0.2MB |
| Approx. Compression |
1:1 | 4:1 | 11:1 | |
| 640x480 | Images (Avg size) |
16 | 66 0.2MB |
166 0.09MB |
| Approx. Compression |
1:1 | 4:1 | 9.6:1 | |
The following table shows the maximum seconds of movie recording time (with sound) that can be recorded on the included 16MB memory card. NOTE that the maximum time per clip is fixed, regardless of the memory card size.
| Movie Time in Seconds | |||
|
Recording Mode
|
Resolution
|
Per Clip
|
Total (16MB card) |
|
|
(15 frames/sec) |
33 |
|
|
|
(15 frames/sec) |
148 |
|
The C-4000 Zoom comes with interface software and cables for both Macintosh and Windows computers. It employs a USB Auto-Connect interface for high-speed computer connection. Like all of Olympus' most recent digicams, the C-4000 is a USB "storage class" device. This means it can connect directly to Mac OS Version 9.1 or later, or Windows Me or 2000 computers, without separate driver software. Storage-class or Auto-Connect connections are generally faster than device-class ones. I clocked the C-4000 at a transfer rate of 546 KBytes/second on my G4 Mac. This is a good bit faster than the average USB-connected camera although not quite at the top of the charts. (Close, though.) While it's becoming more commonplace now, Olympus was one of the first companies to pioneer storage-class camera connections. - I really like not having to load driver software to connect the camera!
Lost Images? - Download this image-recovery program so you'll have it when
you need it...
Since we're talking about memory and image storage, this would be a good time
to mention the following: I get a ton of email from readers who've lost photos
due to a corrupted memory card. It's tragic when it happens, there are few things
more precious than photo memories. Corrupted memory cards can happen with any
card type and any camera manufacturer, nobody's immune. "Stuff happens,"
as they say. A surprising number of "lost" images can be recovered
with an inexpensive, easy to use piece of software though. Given the amount
of email I've gotten on the topic, I now include this paragraph in all my digicam
reviews. The program you need is called PhotoRescue, by DataRescue SA. Read
our review of it if you'd like, but download the program now,
so you'll have it. It doesn't cost a penny until you need it, and even then
it's only $29, with a money back guarantee. So download PhotoRescue for
Windows or PhotoRescue for
Mac while you're thinking of it. (While you're at it, download the PDF
manual and quickstart
guide as well.) Stash the file in a safe place and it'll be there when you need
it. Trust me, needing this is not a matter of if, but when... PhotoRescue
is about the best and easiest tool for recovering digital photos I've seen.
(Disclosure: IR gets a small commission from sales of the product, but I'd highly
recommend the program even if we didn't.) OK, now back to our regularly
scheduled review...
Video Out
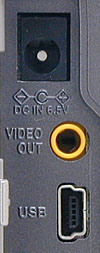 The
C-4000 Zoom has a Video Out port that supports the NTSC timing format. (PAL
systems are available for European customers.) The video output can be used
for reviewing previously captured images and movies, or running slide shows
from the camera. It also shows all of the LCD menu screens, as well as the preview
display from the LCD viewfinder.
The
C-4000 Zoom has a Video Out port that supports the NTSC timing format. (PAL
systems are available for European customers.) The video output can be used
for reviewing previously captured images and movies, or running slide shows
from the camera. It also shows all of the LCD menu screens, as well as the preview
display from the LCD viewfinder.
Power
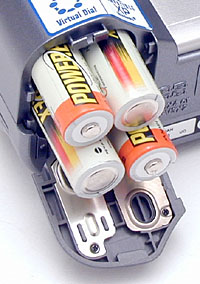 The
C-4000 Zoom is powered by two CR-V3 lithium battery packs, four AA batteries
(alkaline, lithium, NiMH, or NiCd), or by an optional AC adapter that can significantly
extend battery life if you're doing a lot of downloads on the computer or working
in a studio environment.
The
C-4000 Zoom is powered by two CR-V3 lithium battery packs, four AA batteries
(alkaline, lithium, NiMH, or NiCd), or by an optional AC adapter that can significantly
extend battery life if you're doing a lot of downloads on the computer or working
in a studio environment.
|
|
(@ 6.8 v) |
(Four 1600 mAh NiMH AA cells) |
| Capture Mode, w/LCD |
|
132 |
| Capture Mode, no LCD |
|
90 hours (!) |
| Half-pressed shutter w/LCD |
|
132 |
| Half-pressed w/o LCD |
|
207 |
| Memory Write (transient) |
|
|
| Flash Recharge (transient) |
|
|
| Image Playback |
|
213 |
Like other Olympus cameras I've tested, the C-4000 Zoom is fairly conservative in its use of battery power. You should be able to get at least two hours of continuous operating time out of a freshly charged set of high-capacity NiMH AA cells, even with the LCD enabled. Even running in the absolute worst case operating mode, with both LCD and continuous autofocus operation, you should get a good hour and a half The biggest news with Olympus cameras though, is that they consume almost no power when the LCD is turned off and they're just waiting for the next picture. I've always felt this was a great feature, since it means you can comfortably leave the camera turned on and ready to go all day long, without worrying about draining the batteries. Being able to snap a photo in just a couple of seconds, rather than 7 or 8 seconds (as required when starting up from a power-off condition) could mean the difference between getting that once-in-a-lifetime vacation shot or missing it entirely.
Even though it's fairly conservative in its battery usage, the C-4000 Zoom really does need high-capacity rechargeable NiMH AA cells to be happy. Do yourself a favor and buy two or three sets and a good charger to go with them. Keep at least one set fully charged in addition to the one that's in the camera at all times. (Murphy's law says that your batteries will run out the moment the best shot of the day appears.) You can read my Great Battery Shootout article for the latest rundown on which batteries are the best, and/or read my review of my favorite battery charger, the Maha C-204F.
Included Software
The C-4000 Zoom comes with a nice complement of software on the supplied CD. Direct camera control and image downloading are provided by Olympus' Camedia Master software package (Version 4.0) for both Mac and Windows platforms (Macintosh OS 8.6 and higher, Windows 98v2/Me/2000 Pro). USB drivers for both platforms and an Apple QuickTime reader are also included.
Camedia Master lets you download and organize images, as well as perform minor image correction and enhancement functions (such as adjusting contrast, sharpness, and color balance). For panoramic images, Camedia Master supplies a "stitching" utility to piece together shots vertically or horizontally. A complete printing utility works with the DPOF settings and lets you print images directly to Olympus or other DPOF-compliant photo printers.
In the Box
The following items are included in the box:
Test Results
In keeping with our standard test policy, the comments given here summarize only our key findings. For a full commentary on each of the test images, see the C-4000 Zoom's "pictures" page.
As with all Imaging Resource product tests, we encourage you to let your own eyes be the judge of how well the camera performed. Explore the images on the pictures page, to see how C-4000 Zoom's images compare to other cameras you may be considering.
The C-4000 Zoom generally produced very good to excellent color in my test shots, and white balance was generally pretty accurate. It did a surprisingly good job with the very difficult incandescent lighting of my Indoor Portrait test, leaving only a slight pink tint to the image. (This common light source is a serious problem for many digicams.) Color balance was very good on the Davebox target, with the C-4000 distinguishing tough tonal variations and reproducing the large color blocks with good saturation and accurate hue. The C-4000 reproduced the blue flowers in the Outdoor test shot very well, without the strong purple tints that plague many cameras with that particular target. The flowers were much darker in the Indoor shots, but that's a fairly natural consequence of the very warm-toned lighting. Really very good color overall.
The C-4000 generally exposed the test images well, its meter responding to high- and low-key shots with the expected slight under- and overexposure respectively. Its default tonality is quite a bit more contrasty than I personally prefer, but its contrast "tweak" adjustment worked beautifully. With the contrast adjustment set all the way down to -5 units, even the very harshly lit Outdoor Portrait test showed good detail in the highlights of Marti's shirt. I'd really like to see the contrast range be centered about the value that corresponds to the -5 level, so you'd have adjustment both above and below that point, but the bottom line is I was able to get the sort of tonal response I was looking for with the available adjustment. - Well-executed "tweak" adjustments as on the C-4000 are a highly desirable feature in a camera intended for the "enthusiast" market. Big kudos to Olympus on this point!
The C-4000 performed well on the "laboratory" resolution test chart, though it started showing artifacts in the test patterns at resolutions as low as 600 lines per picture height horizontally and around 800 lines vertically. I found "strong detail" out to at least 1,150 lines horizontally and 1050 lines vertically. "Extinction" of the target patterns occurred at approximately 1,450 lines.
Geometric distortion on the C-4000 is lower than average at the wide-angle end, as I measured a 0.35 percent barrel distortion. The telephoto end fared very slightly better, with a 0.27 percent pincushion distortion. (This is a pretty good performance: Most digicams I test average around 0.8 percent barrel at wide angle, although pincushion at telephoto is generally almost nonexistent. Olympus seems to have opted to trade off more pincushion at tele for less barrel at wide, but the net result is less distortion overall.) Chromatic aberration is a bit higher than average, showing 4-5 pixels of coloration on either side of the target lines. (This distortion is visible as a very slight colored fringe around the objects at the edges of the field of view on the resolution target.) That amount of chromatic aberration is a but high, but not unusual. More bothersome was the fact that it persists fairly far into the central portion of the frame, as there were a couple of pixels of color around the numbers marking the high-frequency resolution wedges, fairly close to the target's center. The strongest optical distortion I noticed was increased softness and "coma" (a smearing of high-contrast edges) on the left side of the frame.
The C-4000 Zoom's maximum shutter speed of 16 seconds and variable ISO settings provide excellent low-light shooting capabilities. Images remained bright and usable at light levels as low as 1/16 foot-candle (0.67 lux), at both 200 and 400 ISO settings. Shooting at ISO 100, the target was visible at the 1/16 foot-candle light level, though results were better at 1/8 foot-candle (1.3 lux) level. The dim lighting resulted in a faint pink cast, but overall color was still better than average for such low light levels. The camera's Noise Reduction system did a good job controlling image noise, although it doesn't use as sophisticated algorithm for eliminating "hot" pixels as does Mike Chaney's Qimage Pro software program. (But then, I may be a little biased, since Mike uses an algorithm I suggested. ;-) Given that average city street lighting at night corresponds to approximately one foot-candle (11 lux), the C-4000 Zoom should capture good-looking photos in light levels about as dim as you can comfortably see in. (Although it's autofocus system runs out of light sooner, able to focus well only in light levels of 1/4 foot-candle (0.26 lux) or brighter.)
The C-4000's optical viewfinder was quite tight, showing approximately 80 percent of the frame at both wide angle and telephoto. Images framed with the optical viewfinder were also slanted toward the lower left corner, indicating a slightly shifted CCD in our evaluation unit. The camera's LCD monitor fared much better, showing approximately 99 percent of the frame at wide angle and telephoto. Given that I generally prefer LCD monitors to be as close to 100 percent accuracy as possible, the C-4000 performed well in that regard. (I really wish digicam manufacturers would stop making their optical viewfinders so doggone tight though - Can't we please have something more reasonable, at least 90% of full frame coverage?)
The C-4000 Zoom also did an excellent job in the macro category, capturing a tiny minimum area of only 1.68 x 1.25 inches (42.57 x 31.85 millimeters). Resolution was very high, with excellent detail on the dollar bill. (Dust was even visible on top of the smaller coin in the frame.) The limited depth of field that comes with such close-focusing blurred the larger coin and brooch, but printing details remained quite sharp on the bill. Exposure and color were also good. The camera's flash was too close to the subject to be of any use, given the C-4000 Zoom's Super Macro capabilities.
Overall, I was very pleased with the C-4000 Zoom's performance. It showed excellent color, and the "tweak" adjustments provided enough control that I could customize the camera's response to pretty much exactly match my personal preferences. Macro and low light performance were both excellent, and resolution was very high. About the only serious gripe I have is that the lens shows a bit more chromatic aberration than average, and that it also persists further into the center of the frame than is commonly the case. While I really don't like chromatic aberration, I'd have to say that the C-4000 Zoom's genuinely excellent performance in so many other areas does a lot to make up for it. Overall, this looks like a superb camera for an enthusiast on a budget. (Perhaps the ideal digicam for budget-constrained photography students?) I predict this is going to be a very popular model.
Conclusion
With the C-4000 Zoom, Olympus has set another benchmark for image quality, camera performance, and features, at an impressively low price. (MSRP of $499 as of its introduction in August, 2002.) In particular, the ability to "tweak" many of the camera's key image-quality characteristics (white balance, contrast, and color saturation) gives users a nearly unprecedented ability to customize the camera to fit their specific needs and preferences. (Minolta pioneered this sort of flexibility in their original Dimage 7, and continues the tradition in the Dimage 7i. Those cameras sell for a good bit more money than the C-4000 Zoom though.) It's been almost two years since Olympus' last barn-burner of a bargain "enthusiast" camera, the C-3000 Zoom, and the C-4000 shows not only the benefits of two years of advancing technology, but also many thoughtful touches in its user interface. The best part? Olympus included an external flash sync socket on the C-4000, a first on a "value priced" digicam from them. All in all, the C-4000 Zoom represents an exceptional value for the "enthusiast" on a budget. (This looks to me like an ideal camera for photography students. - It gives them all the control they could ask for, at a very affordable price.) A big thumbs up to Olympus for this one!
<<C-4000 Sample Images | Additional Resources and Other Links>>
Reader Comments!
Questions, comments or controversy on this product? Click
this link to see what other Imaging Resource readers have had to say about
the Olympus C-4000 Zoom, or add comments of your own!