Olympus C-5060 Wide ZoomOlympus makes a strong update to the top of their prosumer lineup<<Operation & User Interface :(Previous) | (Next): Image Storage & Interface>> Page 9:Camera Modes & MenusReview First Posted: 11/21/2003 |
![]() Sports Mode: Next in line on the Mode dial, this mode biases the exposure system toward fast shutter speeds to "freeze" action, good for sporting events or any fast-moving subject.
Sports Mode: Next in line on the Mode dial, this mode biases the exposure system toward fast shutter speeds to "freeze" action, good for sporting events or any fast-moving subject.
![]() Landscape Portrait Mode: This mode is intended for portraits in front of scenery, where you want both the foreground and background in focus. The camera uses a smaller aperture setting to increase the depth of field.
Landscape Portrait Mode: This mode is intended for portraits in front of scenery, where you want both the foreground and background in focus. The camera uses a smaller aperture setting to increase the depth of field.
![]() Landscape Scene Mode: Just like Landscape Portrait mode, this mode also uses a small aperture to keep the foreground and background in focus. However, it also enhances blue and green tones for more vibrant nature shots.
Landscape Scene Mode: Just like Landscape Portrait mode, this mode also uses a small aperture to keep the foreground and background in focus. However, it also enhances blue and green tones for more vibrant nature shots.
![]() Night Mode: This mode is best for capturing night portraits or night scenery, such as cityscapes. A slower shutter speed lets more ambient light into the image, but the exposure compensation and image contrast are dialed down somewhat, preserving color in neon signs or sunsets.
Night Mode: This mode is best for capturing night portraits or night scenery, such as cityscapes. A slower shutter speed lets more ambient light into the image, but the exposure compensation and image contrast are dialed down somewhat, preserving color in neon signs or sunsets.
![]() Movie Mode: Accessed by turning the Mode dial to the movie camera symbol, Movie mode allows you to capture movies with or without sound for as long as the memory card allows. Shutter speed is automatically set depending on light levels, although Olympus doesn't specify the range of shutter speeds the camera uses in movie mode.
Movie Mode: Accessed by turning the Mode dial to the movie camera symbol, Movie mode allows you to capture movies with or without sound for as long as the memory card allows. Shutter speed is automatically set depending on light levels, although Olympus doesn't specify the range of shutter speeds the camera uses in movie mode.
![]() My Mode: Sets up the camera according to a set of user-defined camera settings, specific to shooting conditions. A huge range of exposure variables such as aperture, shutter speed, white balance, etc. can all be saved. You can even save the lens zoom position. My Mode settings are made through the Setup menu.
My Mode: Sets up the camera according to a set of user-defined camera settings, specific to shooting conditions. A huge range of exposure variables such as aperture, shutter speed, white balance, etc. can all be saved. You can even save the lens zoom position. My Mode settings are made through the Setup menu.
![]() Manual Mode: Allows the user to select both the desired aperture (f/2.8 to f/8.0) and shutter speed (1/4,000 to 16 seconds, with a Bulb setting, speeds higher than 1/2,000 only available at f/8.0) settings independently. The camera meters the scene, and indicates how over or underexposed it thinks the shot will be by displaying the number of EV units over or under in green numerals. If the settings are beyond the camera's metering capabilities or would result in more than a +/- 3EV exposure error, the display is fixed at plus or minus 3 EV, and the numerals turn red.
Manual Mode: Allows the user to select both the desired aperture (f/2.8 to f/8.0) and shutter speed (1/4,000 to 16 seconds, with a Bulb setting, speeds higher than 1/2,000 only available at f/8.0) settings independently. The camera meters the scene, and indicates how over or underexposed it thinks the shot will be by displaying the number of EV units over or under in green numerals. If the settings are beyond the camera's metering capabilities or would result in more than a +/- 3EV exposure error, the display is fixed at plus or minus 3 EV, and the numerals turn red.
![]() Shutter Priority: Allows the user to select the desired shutter speed (in varying increments, from 1/2,000 to four seconds at ISO 64 and 100, two seconds at ISO 200 and one second at ISO 400), while the camera adjusts the aperture to achieve the correct exposure. If the required aperture is beyond the camera's capabilities, the shutter speed / aperture status numbers in the LCD will flash red.
Shutter Priority: Allows the user to select the desired shutter speed (in varying increments, from 1/2,000 to four seconds at ISO 64 and 100, two seconds at ISO 200 and one second at ISO 400), while the camera adjusts the aperture to achieve the correct exposure. If the required aperture is beyond the camera's capabilities, the shutter speed / aperture status numbers in the LCD will flash red.
![]() Aperture Priority: Allows the user to select the desired lens aperture (in varying increments, from f/2.8 to f/8.0), while the camera adjusts the shutter speed to achieve the correct exposure. If the required shutter speed is beyond the camera's capabilities, the shutter speed / aperture status numbers in the LCD will flash red.
Aperture Priority: Allows the user to select the desired lens aperture (in varying increments, from f/2.8 to f/8.0), while the camera adjusts the shutter speed to achieve the correct exposure. If the required shutter speed is beyond the camera's capabilities, the shutter speed / aperture status numbers in the LCD will flash red.
![]() Programmed Exposure: The camera selects both shutter speed and lens aperture, based on existing light conditions and certain camera functions. For example, it uses a faster shutter speed when the lens is in the telephoto position and a slower shutter speed when the lens is in the wide-angle position.
Programmed Exposure: The camera selects both shutter speed and lens aperture, based on existing light conditions and certain camera functions. For example, it uses a faster shutter speed when the lens is in the telephoto position and a slower shutter speed when the lens is in the wide-angle position.
![]() Playback
Mode: This mode allows the user to view previously captured images
using the Arrow Pad to scroll through frames stored in memory. The Zoom
lever switches the image display to Index mode when moved in the wide-angle
direction, and enlarges a single image when moved in the telephoto direction,
zooming in to a maximum of 4x magnification. While zoomed in on an image,
the Arrow buttons can be used to move the enlarged view around the full
image area, allowing you to inspect all parts of it.
Playback
Mode: This mode allows the user to view previously captured images
using the Arrow Pad to scroll through frames stored in memory. The Zoom
lever switches the image display to Index mode when moved in the wide-angle
direction, and enlarges a single image when moved in the telephoto direction,
zooming in to a maximum of 4x magnification. While zoomed in on an image,
the Arrow buttons can be used to move the enlarged view around the full
image area, allowing you to inspect all parts of it.
Camera Menus
(Note that in the following, the menus shown will normally
appear over the top of the live LCD viewfinder display, if the LCD is
enabled. In the screen shots here, I've shown the menus with no viewfinder
image, for the sake of clarity.)
Shooting Mode Menus
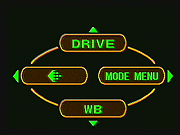 When the camera is in any of the shooting modes, pressing the Menu /
OK button brings up the Shooting Top Menu. Three of the top-level menu
items are Short Cuts to menu options controlling White Balance, Image
Size/Quality, and Drive control. (In Movie mode, the Sound option takes
the place of Drive.) The fourth option takes you to the main Mode Menu
itself. Since the destinations of the short cut options are simply sub-levels
inside the main mode menu, I'll only show the main Mode Menu screens
here.
When the camera is in any of the shooting modes, pressing the Menu /
OK button brings up the Shooting Top Menu. Three of the top-level menu
items are Short Cuts to menu options controlling White Balance, Image
Size/Quality, and Drive control. (In Movie mode, the Sound option takes
the place of Drive.) The fourth option takes you to the main Mode Menu
itself. Since the destinations of the short cut options are simply sub-levels
inside the main mode menu, I'll only show the main Mode Menu screens
here.
Mode Menu
The shooting mode menu has four sub-menus associated with it, accessed via tabs on the left side of the display.
Camera:
 Drive:
Sets the camera's capture mode to Single Shot, Hi-Speed Continuous, Continuous,
Continuous Auto Focus, and Auto Bracketing.
Drive:
Sets the camera's capture mode to Single Shot, Hi-Speed Continuous, Continuous,
Continuous Auto Focus, and Auto Bracketing.
- ISO: Sets the camera's ISO sensitivity to Auto, 64, 100, 200 or 400.
- My Mode: Selects one of the previously-saved "My" modes setups to be applied when shooting in My Mode. (A total of four detailed camera configurations can be saved in separate "My" mode setups. You choose one of them here, and that setup is then applied whenever the Mode dial is set to the "My" position.)
- External Flash Mode: Sets the external flash unit to fire alone or in conjunction with the built-in flash unit. You can also set up the flash to work with slave units when the camera is set to Manual exposure mode. The "Slave" option causes the internal flash to fire, using a single flash per exposure (eliminating the metering pre-flash that normally appears). When operating in Slave mode, the strength of the camera's internal flash can be adjusted over a range of 1-10, in arbitrary units, to help balance the lighting between the external slave strobe and the camera's internal flash.
- Slow Synchro: Selects between Slow Synchro 1, Slow Synchro with Red-Eye
Reduction, and Slow Synchro 2. (The difference between the two slow synchro
settings is whether the flash fires at the beginning or the end of the shutter-open
time.)
 Noise
Reduction: When turned on, this function reduces the background noise
in long exposures. (Evidently through the use of dark-frame subtraction.)
Noise
Reduction: When turned on, this function reduces the background noise
in long exposures. (Evidently through the use of dark-frame subtraction.)
- Digital Zoom: Turns the Digital Zoom function On or Off.
- Full-time AF: Sets the camera's autofocus mechanism to operate continuously (On) or only when the Shutter button is halfway pressed (Off).
- AF Mode: Sets the camera to Digital ESP (a multipoint or matrix-metering mode) or Spot autofocus modes.
- Accessory: Adjusts the camera's autofocus system to work
with an accessory lens, or underwater, for use with an underwater housing.
 Sound:
Turns the camera's voice caption recorder On or Off.
Sound:
Turns the camera's voice caption recorder On or Off.
- Panorama: Activates the Panorama shooting mode.
- 2-in-1: Enables the 2-in-1 shooting mode.
- Function: Allows you to select between Black-and-White, Sepia, White Board, and Black Board exposure options.
- Histogram: Turns the live histogram display on or off.
This option also offers the +/- On and Direct settings, which extend the capabilities
of the camera's histogram option a great deal.
 Framing:
Activates the grid framing guidelines, or one of three black outlines for
portraits or centrally-located subjects.
Framing:
Activates the grid framing guidelines, or one of three black outlines for
portraits or centrally-located subjects.
- My Mode: Turns My Mode on or off.
Picture:
 Quality:
Sets the camera's image quality to SQ1 (Standard Quality), with a choice of
2,288 x 1,712-, 2,048 x 1,536-, or 1,600 x 1,200-pixel resolutions, High or
Normal compression ratio; SQ2 (Standard Quality 2), with a choice of 1,280
x 960-, 1,024 x 768-, and 640 x 480-pixel resolutions, High or Normal compression
ratio; HQ (High Quality), with a choice of 2,592 x 1,944, 2,592 x 1,728 (3:2),
or (Enlarge) 3,264 x 2,448 pixels; SHQ (Super High Quality), with a choice
of 2,592 x 1,944, 2,592 x 1,728 (3:2), or (Enlarge) 3,264 x 2,448; TIFF (Uncompressed
Tiff), with a choice of all resolutions (except the Enlarge size); or RAW
format. Movie options are SHQ (640 x 480 pixels), HQ (320 x 240 pixels) and
SQ (160 x 120 pixels).
Quality:
Sets the camera's image quality to SQ1 (Standard Quality), with a choice of
2,288 x 1,712-, 2,048 x 1,536-, or 1,600 x 1,200-pixel resolutions, High or
Normal compression ratio; SQ2 (Standard Quality 2), with a choice of 1,280
x 960-, 1,024 x 768-, and 640 x 480-pixel resolutions, High or Normal compression
ratio; HQ (High Quality), with a choice of 2,592 x 1,944, 2,592 x 1,728 (3:2),
or (Enlarge) 3,264 x 2,448 pixels; SHQ (Super High Quality), with a choice
of 2,592 x 1,944, 2,592 x 1,728 (3:2), or (Enlarge) 3,264 x 2,448; TIFF (Uncompressed
Tiff), with a choice of all resolutions (except the Enlarge size); or RAW
format. Movie options are SHQ (640 x 480 pixels), HQ (320 x 240 pixels) and
SQ (160 x 120 pixels).
- White Balance (WB): Sets the camera's white balance to Auto, Preset 1 (Shade, Cloudy, Sunny, or Evening Sun), Preset 2 (Fluorescent settings 1 through 4, Incandescent), Custom, or Manual white setting options. (It's on a menu level below that shown here, but note that you can store up to four different custom white balance settings.)
- White Balance Adjustment: Lets you adjust the Blue and Red levels for any white balance setting.
- Custom White Balance: Selects from among as many four Custom white balance settings. (Once you've manually set the white balance, you can save it as a Custom option for future use. This is great if you plan on shooting often under a unique light source, or want to switch back and forth between light sources without having to shoot a new white reference each time.)
- Scene Modes: Applies Scene mode properties to P, A, S,
M, My, and Movie modes. Options are Normal, Portrait, Landscape, or Night.
 Sharpness:
Sets the picture sharpness from +5 to -5 in arbitrary units
Sharpness:
Sets the picture sharpness from +5 to -5 in arbitrary units
- Contrast: Sets the picture contrast from +5 to -5 in arbitrary units.
- Saturation: Sets the picture saturation from +5 to -5 in arbitrary
units.
 Card:
Card:
- Card setup: Formats the currently-selected memory card (either the
CF or xD cards), erasing all images, even the write-protected or Locked images.
Set Up:
 All
Reset: Lets you Reset the camera to the factory default settings or to
your own custom default settings if you've set them up via the My Mode Setup
option.
All
Reset: Lets you Reset the camera to the factory default settings or to
your own custom default settings if you've set them up via the My Mode Setup
option.
- EV Step: Sets the exposure compensation step size to one-third or one-half EV units.
- Menu Language: Sets the menu language to one of several.
- Power On Setup: Specifies which startup screens and sounds play as the camera starts up.
- Power Off Setup: Just as with Power On, you can choose
a screen display and sound for power off.
 Rec
View: Turns Rec View On or Off. Rec View displays the most recently recorded
image while it is being written to the memory card.
Rec
View: Turns Rec View On or Off. Rec View displays the most recently recorded
image while it is being written to the memory card.
- Volume: Sets the camera's speaker volume to Low, High, or Off.
- Sound: Turns the camera's beep sound On or Off. You can choose between two beep sounds and High or Low volume settings.
- Shutter Sound: Specifies one of two different shutter sounds, with volume adjustments, or turns the shutter sound off.
- My Mode Setup: Sets up the My Mode settings, or resets
them to the defaults.
 File
Name: Lets you choose between Auto or Name
Reset for recording file names. S
File
Name: Lets you choose between Auto or Name
Reset for recording file names. S
- Pixel Mapping: Checks the CCD and image processing circuit for errors.
- Monitor Adjustment: Adjusts monitor brightness using an on-screen scale.
- Date and Time: Sets the camera's internal calendar and clock.
- Meters / Feet: Allows you to choose between feet and meters for distance
measurement.
 Video
Out: Assigns the video signal to NTSC or PAL.
Video
Out: Assigns the video signal to NTSC or PAL.
- Short Cut: Lets you set the three short cut arrows to whatever menu items you want them to represent.
- Custom Button: Lets you set the Custom button to whatever menu item you want it to represent.
- Dual Control Panel: If on, displays the same information in the small LED status panel on top of the camera as in the LCD monitor.
- AF Illuminator: Turns the AF assist lamp on or off.
 USB: Sets the USB mode to PO or Print/Direct Copy.
Playback Mode
Playback Mode is available by turning to the green Playback symbol on the camera's Mode dial, or by depressing the Quick View button in any Shooting mode. The top level of the Playback Menu has three options, which differ slightly between Shooting (Record) playback and Movie playback:
Still Playback:
 Info:
Changes the amount of exposure information that is displayed with each recorded
image. Maximum information includes battery power, image quality, resolution,
shutter speed, aperture, exposure compensation, white balance, ISO, and file
number. Minimum information includes only the frame number, battery power,
and quality setting. Movie files display only the file number until you select
the Movie Playback option.
Info:
Changes the amount of exposure information that is displayed with each recorded
image. Maximum information includes battery power, image quality, resolution,
shutter speed, aperture, exposure compensation, white balance, ISO, and file
number. Minimum information includes only the frame number, battery power,
and quality setting. Movie files display only the file number until you select
the Movie Playback option.
- Slide Show: Sets up the camera to run an automatic slide show playback
of all single-frame recorded images.
- Mode Menu:
The main playback mode menu has four sets of controls, organized and accessed via tabs on the left side of the display.- Play
 Sound:
Activates the sound recording option, which lets you record a sound
byte with the image file. This is not available in the Movie Playback
menu.
Sound:
Activates the sound recording option, which lets you record a sound
byte with the image file. This is not available in the Movie Playback
menu.
- Histogram: Calls up a histogram display, along with limited exposure information about the image. Also offers the Direct setting.
- Frame Assist: Turns Frame Assist on or off. If
on, a grid display appears over the captured image.
 Edit:
Edit:
- RAW Data Edit: Lets you edit RAW data files in-camera, adjusting white balance, sharpness, etc. You can then save a copy of the new file in JPEG format. This is a very unusual feature, that extends the usefulness of the RAW format to in-camera modifications of the files, as well as later changes on a computer. I'm not sure just how useful it will be in practice (as the camera really lacks the ability to show you the results of changes you might make), but it still seems like a nice feature to have.
- Resize: Reduces the resolution of the image and saves it as a new file. Resolution options are 640 x 480 and 320 x 240 pixels.
- Crop: Lets you crop part of the image and save it as a new file.
- Copy: Copies the selected image to or from another
memory card. (Useful for transferring images between CF and xD Picture
Cards, that may be in the camera at the same time.)
- Card:
- Card Setup: (No screen shot.) Allows you to erase all images
on the memory card, except write-protected files, or format the memory
card, erasing all images, even the write-protected or Locked images.
- Card Setup: (No screen shot.) Allows you to erase all images
on the memory card, except write-protected files, or format the memory
card, erasing all images, even the write-protected or Locked images.
 Setup:
- All Reset: Allows you to Reset the camera to its default settings or to set your own custom default settings.
- Menu Language: Sets the menu language to your choice of English, French, German, Spanish, Italian, Russian, Portuguese, or Japanese.
- Power On Setup: Specifies which startup screens and sounds play as the camera starts up.
- Power Off Setup: Just as with Power On, you can set the screen display and sound for power off.
- Screen Setup: Lets you save a captured image to
be used as the startup screen display.
 Volume:
Sets the camera's speaker volume for audio playback to Low, High,
or Off.
Volume:
Sets the camera's speaker volume for audio playback to Low, High,
or Off.
- Beep: Sets the sound and volume for button actuation.
- Sound: Turns the camera's beep sound for warnings On or Off. You can choose between two beep sounds and High or Low volume settings.
- Monitor Adjustment: Adjusts monitor brightness.
- Date and Time: Sets the camera's internal calendar and clock.
 Video
Out: Assigns the video signal to NTSC or PAL.
Video
Out: Assigns the video signal to NTSC or PAL.
- Index Display: Sets the index display to 4, 9, or 16 frames.
- USB: Sets the USB mode to PO or Print/Direct Copy.
- Play
Movie Playback:
- Info: As in normal Playback, this option selects the amount of image
information shown on the screen with the file. Initially, the information
is very limited, with only the battery power icon, Movie icon, and either
the frame number or the file number. Exposure information is displayed only
briefly when a movie playback begins.
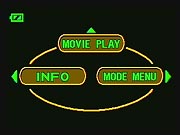 Movie
Play: (No screen shot.) This replaces the Play option in the Playback
mode's top menu:
Movie
Play: (No screen shot.) This replaces the Play option in the Playback
mode's top menu:
- Movie Playback: Plays the movie currently displayed on the LCD
monitor.
- Frame by Frame: Sets up manual movie playback in which you can scroll through the movie with the left and right arrow buttons.
- Exit: Takes you out of the Movie Playback function.
- Index: Creates an index of individual frames from the movie and displays it in a 3x3 matrix on the screen. This makes it easy to see what's contained in the current clip. By pressing the right and left arrow buttons, you can move "virtual cursors" to set the beginning and end of a portion that you're interested in. You then have the ability to extract the action lying between the two end points as a separate file.
- Edit: Allows you to scroll through the movie and clip frames
off the beginning and end of the file. This function works a lot like
the Index option described above, but you view only the beginning and
end frames of the clip that you're interested in, full-screen. Index is
good for getting an idea of what's coming next, or what went before the
time of your cut, while Edit is better for seeing the details of what's
going on in the specific moment in time where you're making the cut.
- Movie Playback: Plays the movie currently displayed on the LCD
monitor.
- Mode Menu:
- Card Setup: Allows you to erase all images on the active memory card, except write-protected files, or format the card, erasing all images, even the write-protected or Locked images.
- Setup:
(Movie-mode playback setup options are essentially identical to those of the normal playback mode.) - USB: Sets the USB mode to PO or Print/Direct Copy.

Follow Imaging Resource: