 Back
to Full Olympus C-700 Ultra Zoom Review
Back
to Full Olympus C-700 Ultra Zoom ReviewGo to Olympus C-700 Ultra Zoom Data Sheet
Go to Olympus C-700 Ultra Zoom Pictures Page
Up to Imaging Resource Cameras Page
Use your browser's "Back" button to return to the previous page, or the links at the top and bottom of this page to navigate to related information. If you have difficulty fitting the text on this page onto your printer output, simply resize your browser window to a narrower width and print again.
Remember us when it's time to buy!
Dave here: Have our reviews been helpful to you? (Is this article you're reading right now useful?) Preparing this level of information on as many products as we do is incredibly hard work, not to mention expensive. Things on the Internet may look like they're free, but they're not. (As a lot of big dot.com companies are finding out these days.) Somewhere, somebody has to pay to produce worthwhile content. YOU can help us though, by remembering us when it comes time to make your purchase. Would you consider coming back to our site and clicking-through to one of our advertisers to make your purchase? Every dollar you spend with one of our advertisers helps us directly (in affiliate fees) or indirectly (the advertiser will keep renewing their ad contract with us). To make it easy for you to support us, here's a URL you can visit, to see all our current advertisers, with links to click on that will register your visit to them as having come from our site. It's up to you where you buy, but Mike, Mike, Kim, Yazmin, Marti and I would be really grateful if you'd help us out by choosing one of our advertisers to purchase from.
Thank you for your support!
Dave Etchells, Founder & Publisher
Visit our "Buy Now" Page:
https://www.imaging-resource.com/buynow.htm
Back
to Full Olympus C-700 Ultra Zoom Review
Go to Olympus C-700 Ultra Zoom
Data Sheet
Go to Olympus C-700 Ultra Zoom
Pictures Page
Up to Imaging Resource Cameras
Page
Olympus C-700 Ultra ZoomOlympus packs a 10x zoom lens into an amazingly small body, for an amazingly low price. Review First Posted: 5/31/2001 |
|
 |
|
2 megapixel resolution for 1600x1200 images |
|
|
10x zoom lens |
|
|
|
Surprisingly compact body for a long-zoom camera |
|
|
|
Inexpensive for a long-zoom camera |
Executive Overview
The Olympus C-700 Ultra Zoom is a very innovative and welcome addition to the Camedia line, with a completely redesigned, customizable user interface. Its advanced features include a 10x optical zoom lens, increased ISO sensitivity (as high as 800 ISO), a fast 1/1,000-second shutter speed, and AutoConnect Storage Class USB -- providing plug-and-play transfer of images to Windows 2000, Windows Me, and Mac OS 8.6 and higher computers, without the need for additional driver software. The most notable aspect of this digicam, however, is its broad versatility. While it's targeted at experienced digital photographers -- those who want to step up to a camera with expanded capabilities -- it can also be set in a fully Programmed mode for point-and-shoot simplicity, or in one of four preset shooting modes for achieving optimum results in Portrait, Sports, and Landscape photography. (There's also three Slow-Synchro flash modes for evenly exposed night scenes.)
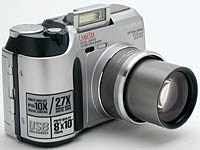
Size, design, and portability are the other really "hot" features of the C-700. It sports the same compact SLR-style design as the C-2040 and C-3040 -- Olympus' recently updated 3x zoom Camedia models -- with nearly identical dimensions except for a slightly longer zoom lens. In fact, compared to other 10x zoom digicams currently on the market (May 2000), the C-700 is remarkably compact, measuring only 4.2 x 3.0 x 3.1 inches (107.5 x 76.0 x 77.5 mm) with the lens retracted, and less than an inch added with the lens fully extended. It weighs just 11.2 ounces (310.5 grams) without batteries, light enough to fit into a large purse or waist pack, but its classic silver and champagne color combination, enhanced by a satin finish, makes it deserving of its own protective camera bag or pouch.
For image preview and playback, the C-700 features a 0.55-inch electronic optical viewfinder (EVF) and a 1.5-inch, rear-panel, color TFT LCD monitor, with 114,000-pixel resolution. Both the EVF and LCD monitors share the same image and information display, including menu options. The monitors' continuous information displays can be set to show limited specifications, such as exposure mode, f/stop setting, shutter speed, sound recording (when on), exposure compensation, resolution, and the number of images remaining. (Shutter speed and f/stop are not displayed in Auto or Preset modes.) Or, the continuous display can be expanded through the Setup menu to show more detailed information such as battery power, flash mode, auto or manual focus, drive, metering, macro, white balance, ISO, and exposure lock, depending on which options are available in the current shooting mode. (This information is also displayed briefly at startup when the expanded Info option is off.)
The 5.9-59mm 10x zoom lens (38-380mm equivalent on a 35mm camera), features 10 high-quality aspherical glass elements in seven groups, with a fast f/2.8 maximum aperture at wide-angle and an f/3.5 maximum aperture at telephoto. Images can be enlarged an additional 2.7x with the Digital Zoom, bringing the total zoom range to more than 1,000mm. (Users should be aware, however, that digital zoom is not the same as optical zoom, since it merely crops and enlarges the center portion of the CCD. As a result, digitally enlarged images often result in higher image noise and/or softer resolution.) The C-700 provides a very helpful on-screen distance display when using the Manual Focus option, as well as a white zoom bar that shows the camera's 10x optical zoom operation. A red zoom bar is added to show the digital zoom progress when Digital Zoom is engaged.
The C-700's default image resolution is 1,600 x 1,200 pixels, but lower resolutions of 1,280 x 960, 1,024 x 768, and 640 x 480 pixels are also available. Image Quality options include two JPEG compression ratios, plus an uncompressed TIFF mode that produces full-resolution images.
The C-700 offers extensive exposure control, including Program (P), Aperture Priority (A), Shutter Speed Priority (S), and Manual (M) exposure modes. Program mode controls both aperture and shutter speed, while the user controls the remaining exposure variables. Aperture and Shutter Priority modes give the user control over aperture or shutter speed, while the camera chooses the best corresponding settings. When used in Aperture or Shutter Priority modes, apertures range from f/2.8 to f/8.0 at the wide-angle lens position, and f/3.5 to 8.0 at maximum telephoto. Shutter speeds range from 1/1,000 to 1/2 second in one-third-stop increments. The Manual exposure mode provides the same aperture range, but the shutter speed extends all the way to 16 seconds, and both shutter and aperture are under the user's control. In addition to these standard exposure modes, the C-700 also offers an Auto mode, which places the camera in complete control over the exposure settings, as well as three preset shooting modes (Portrait, Sports, and Landscape) and three Slow-Synchro flash modes for night exposures (Slow1, Slow2, and Slow Synchro with Red-eye reduction).
The C-700 provides five ISO options (Auto, 100, 200, 400, and 800), Auto Exposure Bracketing (BKT), Digital ESP and Spot metering modes, Single and Multi-Spot Metering AE Lock modes, plus Exposure Compensation from +2 to -2 exposure values (EV) in one-third-step increments. White balance can be set to Auto, Daylight, Overcast, Tungsten, Fluorescent, or Quick Reference (manual adjustment) to accommodate a variety of lighting conditions, and a White Balance color adjustment function enables you to alter red and blue color shifts in the image.
Image Contrast and Sharpness adjustments are available through the Mode Setup menu, and a Function menu option allows you to capture images in Black and White or Sepia (with additional White Board and Black Board settings for capturing text). An adjustable Automatic Exposure Lock (AEL) button locks an exposure reading, without having to hold down the shutter button halfway while you reframe the image. AEL can be based on a single exposure reading or up to eight averaged spot readings for more accurate exposures. The AEL button can also be customized to access other image adjustment settings through the camera's Setup menu.
The C-700's Movie mode records QuickTime movies with or without sound, for as long as the SmartMedia card has memory space available. Resolution options include: Standard Quality (SQ), at 160 x 120 pixels, or High Quality (HQ), at 320 x 240 pixels. Four-second sound clips can be recorded to accompany still images, either with image capture, or later during image playback. A Sequence mode is available for capturing multiple images at up to 1.4 frames per second (with or without continuous autofocus), and a Panorama mode allows you to take up to 10 formatted shots for merging with Camedia's Panorama Stitch software in the computer. A 12-second Self-Timer option is also available for self-portraits.
The camera's built-in, pop-up flash offers five operating modes (Flash Off, Auto-Flash, Forced Flash, Red-Eye Reduction, and Slow Synchronization). The Slow Synchro option can be changed through the Mode menu, allowing you to time the flash at the beginning or end of an exposure, as well as add the Red-Eye Reduction pre-flashes. A proprietary five-pin sync socket allows you to connect an external flash unit when additional flash power is needed. You can also increase or decrease the internal flash power from -2 to +2 EV in one-third-step increments through the Mode menu.
The Olympus C-700 ships with an 8MB SmartMedia memory card for image storage (larger capacity cards are available separately). You can connect the camera directly to your computer via a high-speed USB interface to download images, and if you want a larger viewfinder display (or image playback), Olympus has provided a video output cable for connection to a television. Software shipped with the unit includes Olympus' Camedia Master 2.5 utility package, which provides minor organization and editing tools, plus a panorama "stitching" application. Apple QuickTime and USB drivers for Macintosh and Windows are also supplied.
We've always been big fans of the Olympus Camedia line of digicams, but we were particularly impressed with the C-700 Ultra Zoom. The flexibility of the 10x optical zoom and the more user-friendly interface give the camera an edge over previous models. The electronic viewfinder provides more accurate framing, while the combination of the 800 ISO equivalent setting and f/2.8 maximum aperture gives the camera great low-light shooting capabilities. With the same great image quality as the other Camedia digicams, plus some outstanding new features, the C-700 Ultra Zoom should be just as popular, if not more so, than preceding models.
Design
The C-700 Ultra Zoom has virtually the same compact look and feel that we've
enjoyed with other Olympus Camedia digicams, including the current 3x zoom models,
the C-2040 and C-3040. At first glance, one might be unimpressed with the lack
of obvious differences (other than color and control placement). However, if
you examine the expanded feature set and navigate through the completely redesigned
interface, you can't help but be impressed with the versatility this camera
has to offer in such a small, attractive package. Foremost is the addition of
a 10x optical zoom lens -- more than triple the other cameras' zoom capabilities
in virtually the same space and weight! Add an electronic optical viewfinder
(EVF), increased light sensitivity (up to 800 ISO), faster shutter speeds, and
easy-to-use scene presets for special shooting situations, and you've got an
"Ultra Slick" Camedia at the same price point as the 2.1-megapixel
C2040 ($700 list / $600 street). The only real tradeoffs are the one-stop loss
of aperture, from f/1.8 on the 2040 to f/2.8 on the C-700, and the somewhat
greater optical distortion that accompanies the extended zoom range.
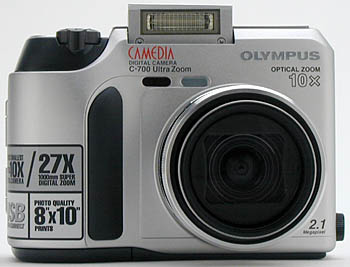
Though the body style is virtually identical to previous Olympus models, the
C-700 features some significant design differences. For example, the typically
all-black body is now a brushed silver, with champagne color accents and black
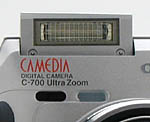
points along the top, bottom and edges of the camera. The pop-up flash sits
a little higher off the lens, and the electronic optical viewfinder displays
a miniature version of the LCD monitor -- providing greater framing accuracy
than standard optical viewfinders. Most of the control buttons are similar to
previous models (though slightly rearranged), except for the bright red Power
button, which is much easier to access than an On / Off function on the Mode
dial. Finally, the C-700's LCD user interface has been redesigned to reflect
a more user-friendly format. (We were a little thrown off at first, but after
we became accustomed to the changes, we found the new menu system to be much
more efficient.)
The C-700 body measures 4.2 x 3.0 x 3.1 inches (107.5 x 76.0 x 77.5 mm) with
the lens retracted, and weighs 11.2 ounces (310.5 grams) without the batteries
or SmartMedia card installed. Fully extended, the 10x zoom lens adds less than
an inch to the overall camera depth. While the C-700 won't fit into a shirt
pocket, it should slip into a large purse or even a coat pocket, but we highly
recommend investing in a small protective case to avoid surface scratches on
the camera body or LCD screen. The camera is amazingly compact, especially with
a 10x zoom lens, and it maintains the comfortable 35mm styling indicative of
the Camedia line. The C-700 does come with a long nylon neck strap, which attaches
to only one end of the body, and an optional carrying case is available as an
accessory.
Extending approximately 1.25 inches from the camera surface when not in use,
the 10x lens barrel dominates the front of the C-700, adding just under an inch
in length when the camera is powered on in a Record mode. A ridged ring around
the inside tip of the lens barrel hides a set of filter threads on its inner
surface, which accommodates Olympus' accessory lens converter kits and filters.
The lens is protected by a large plastic lens cap, with a spring-loaded pushbutton
that clamps it securely around the outside of the lens. A small retainer cord
attaches the lens cap to the camera body, to prevent tit from being misplaced.
Above the lens, on the left side, is the Self-Timer lamp, which blinks as the
timer counts down. Also visible from the front is the Zoom lever, which sits
at the top of the right hand grip, and the front of the pop-up flash compartment,
which is released by a small button on top of the camera. A sculpted, soft rubber
pad extends along the inside edge of the hand grip, providing a firm support
for your fingers.
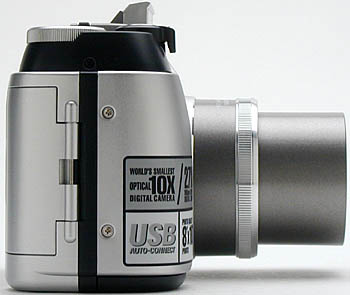
The right side of the camera houses the SmartMedia card slot, which is covered
by a hinged, plastic door. (The center of this door hinge is where the carrying
strap attaches.)

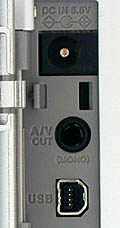
On the opposite side of the camera are the connector terminals and the external
flash socket. The five-pin flash socket is covered by a very small (and easily
lost) threaded plastic cap that unscrews to reveal the connector pins. A hinged,
plastic door covers the remaining connector terminals, which include DC In,
AV Out, and USB jacks.

Only a few controls are located on the camera's top panel, including the Flash
Release button, Shutter button, Zoom lever, and Mode dial. Also on top of the
camera are the pop-up flash compartment and microphone for recording audio clips.
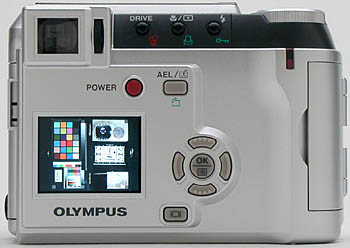
The remaining camera controls are on the C-700's back panel, along with the
LCD monitor and electronic viewfinder. Across the top are three buttons, which
control Drive/ Erase, Macro / Metering / Print, and Flash / Protect. The optical
viewfinder display is actually a smaller version of the LCD monitor, and features
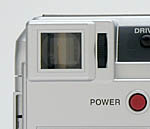
a diopter adjustment dial on the right to adjust focus. The red Power button
is above the LCD display, next to the AE Lock / Custom / Rotate button. The
Four-Way Arrow pad, located near the bottom of the back panel, consists of four
buttons surrounding a Menu / OK button in the middle. A Monitor On / Off button
sits at the very bottom. Directly beneath the Mode dial is a small, red LED
lamp, which lights whenever the camera is accessing the memory card (meaning
you should never open the SmartMedia compartment when the light is on).
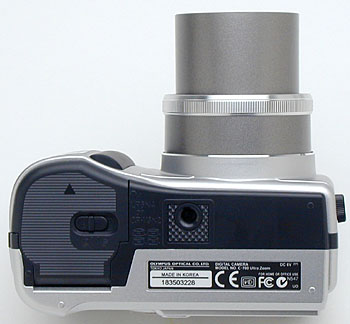
The C-700 features a fairly flat bottom panel, with a plastic, threaded tripod mount and battery compartment door that take up the right side. The battery compartment and tripod mount are unfortunately too close to one another to allow for quick battery changes while shooting with a tripod, though we are glad to see side access to the DC In jack, so you can plug in the AC adapter when shooting in the studio.
 Viewfinder
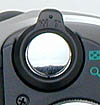
The C-700 offers both a color LCD monitor and an electronic optical viewfinder (EVF) for composing images. The EVF is actually a tiny version of the LCD monitor, complete with settings menus and information readouts. In Record mode, the viewfinder is active at all times, even when the larger LCD monitor is enabled. The viewfinder is designed with a fairly high eyepoint, so you can see the complete view at a good distance from the eyepiece. On the right side of the viewfinder is a diopter adjustment dial, which adjusts focus of the viewfinder image.
The 1.5-inch, TFT color LCD monitor and 0.55-inch EVF feature approximately 114,000-pixel resolution. Pressing the Monitor button turns the LCD monitor on or off, but does not control the information display. The level of information displayed is changed through the settings menu (Mode menu, Setup sub-menu, Info option). If the camera is left inactive for more than 30 seconds, both monitors automatically shut off. (The "Sleep" time is also adjustable through the same Setup sub-menu, under the Sleep option. Choices are 30 seconds or 1, 3, 5, or 10 minutes.) When using the optical viewfinder to compose images, the LCD monitor automatically turns on when the Menu button is pressed, and shuts itself off when you've finished making adjustments. This is very helpful for navigating through the menu system, as looking through the tiny eyepiece can be very tedious.
The information display on both viewfinders reports the shutter speed and aperture settings (in the Program, Aperture Priority, Shutter Priority, and Manual exposure modes), as well as the exposure compensation setting, flash mode, exposure mode, number of available images, and the file quality setting in all exposure modes. An autofocus bracket in the center of the frame indicates the autofocus and autoexposure area. The continuous information display can be expanded through the Setup menu to show more detailed information such as Auto or Manual Focus, Drive, Metering, Macro, White Balance, ISO, and Exposure Lock, depending on which options are available in the current shooting mode. (This information is also displayed briefly at startup and during adjustments, when the expanded Info option is off.)
In Playback mode, the Monitor button switches between the EVF and LCD monitor displays, enabling only one at a time. The Info function briefly reports the image size, capture date and time, and the Record sequence number on the LCD screen as you scroll to each new image. You can expand that information to include the Quality setting, Resolution, F/stop, Shutter Speed, Exposure Compensation, White Balance, ISO, Date and Time, and File Number through the Info option of the Playback menu. The Index Display mode -- activated with the wide-angle side of the Zoom lever -- can be set to 4, 9, or 16 thumbnail images through the Playback Setup menu (Index submenu), and a Playback Zoom feature enlarges the captured image as much as 3x. Once an image is enlarged, you can use the arrow keys to scroll around within the image to check details.
 Optics
The C-700 is equipped with a 10x, 5.9-59mm lens (equivalent to a 38-380mm lens on a 35mm camera) made up of 10 aspherical glass elements in seven groups. Aperture can be set automatically through the Auto exposure system, or manually adjusted in Aperture Priority or Manual modes, ranging from f/2.8 to f/8.0 at wide angle and from f/3.5 to f/8.0 at maximum telephoto. The C-700 employs a contrast-detection autofocus system, with an effective focal range from 4 inches (10 cm) at maximum wide angle to infinity, including the Macro range.
Holding down the Menu / OK button for more than one second pulls up the AF / MF menu as well as a distance scale, which reports the focus distance in meters or feet (adjustable in the Setup sub-menu). Once "MF" is selected (via the right or left arrow key), the up and down arrow keys are used to select the actual focus distance, which extends over two screens. Because manually focusing on an object can be difficult, the C-700 automatically enlarges the LCD display to help determine when the subject is in sharp focus. As soon as you've finished the focus adjustment, the LCD monitor returns to the normal display. The C-700 also offers a Fulltime AF mode (enabled through the Record menu, Camera sub-menu, Fulltime AF option), which sets the camera to continually adjust focus as it changes positions or scenes. In the normal AF mode, the camera judges focus only when the Shutter button is halfway depressed.
While the C-700 features a separate AE Lock button for locking exposure, focus can only be locked via the shutter button, by framing the portion of the subject you want focused in the center of the frame, and then halfway depressing and holding down the Shutter button while recomposing the shot. This manual focus lock can be combined with the camera's manual focus mode, to provide the effect of a separate focus lock option. If you half-press the shutter button, and then while still holding the shutter button halfway down, press the OK button on the camera's back, the camera will switch into manual focus mode, with the focusing distance preset to whatever distance the autofocus system had found was best. Once in manual focusing mode, you can reframe your photo or change the exposure parameters without losing the focus setting you selected.
In addition to the C-700's impressive 10x optical zoom capabilities, the camera also has a 2.7x Digital Zoom, which must be turned on through the Record menu (Camera sub-menu, Digital Zoom option). A zoom indicator appears on the LCD screen whenever the Zoom toggle is pressed, reporting the current position of the lens in the Optical and Digital Zoom ranges (optical is white and digital is red). Continuing to press the telephoto side of the Zoom lever after reaching the end of the optical telephoto limit activates the Digital Zoom. When enabled, the 2.7x digital zoom increases the C-700's zoom range to approximately 1000mm, though image quality suffers as a result of digital enlargement. (Digital zoom merely crops and enlarges the center portion of the CCD image, decreasing resolution.)
In our lab tests, barrel distortion was slightly higher than average (0.89%) at the wide angle of the lens' range, but not as high as might be expected from such a long-ratio zoom lens. At the telephoto end, pincushion distortion was almost unmeasurable. The lens did show more corner softness and chromatic aberration than its 3x cousins on Olympus' other camera models though.
Exposure
The C-700 offers a full range of exposure control options, from a completely automatic mode to fully manual control. The basic exposure modes include Auto, Program (P), Aperture Priority (A), Shutter Priority (S), and Manual (M) modes, in addition to a handful of preset modes for specific shooting situations (Landscape, Sports, and Portrait). The Mode dial on top of the camera offers a variety of exposure mode settings, and makes it easy to quickly change from one mode to another when shooting on the fly.
In full Auto mode, the camera remains in charge of all exposure options, leaving the user to set only the image quality. (This is thus a true "point & shoot" mode, suitable for use when handing the camera to a non-photographer spouse or friend, or for those times when you really don't care to worry about exposure parameters.) The only available flash mode is Auto, and Macro and Sequential Shooting modes are not available. In Program mode, the camera controls only the shutter speed and lens aperture settings. Flash mode, White Balance, Metering, etc. are all available for adjustment, or can be set to their automatic settings. Aperture Priority, Shutter Priority, and Manual modes are all accessed at one stop on the Mode dial, indicated by the "A / S / M" mark. Upon turning the Mode dial to this position, you'll need to specify through the Record menu which mode you'd like to use (Camera sub-menu, A / S / M option). In Aperture Priority mode, the user controls the aperture setting (from f/2.8 to f/8.0, depending on the zoom position), while the camera selects the best corresponding shutter speed. Shutter Priority mode works along similar lines, although the user selects the shutter speed (from 1/1,000 to 1/2 second) and the camera chooses the lens aperture. Manual mode turns over all exposure control to the user, from Aperture and Shutter speed to Flash mode and White Balance.
In addition to the basic exposure modes, there are three preset shooting modes, also accessible via the Mode dial. These include Portrait, Sports, and Landscape modes. In Portrait mode, the camera uses a smaller aperture setting to decrease the depth of field, capturing the subject in sharp focus in front of a blurred background. Sports mode employs faster shutter speeds to freeze action. Landscape uses a smaller aperture setting to increase the depth of field, so both the foreground and background are in sharp focus. In all three modes, the only settings available to the user are image Quality, Exposure Compensation, and Flash Off (by closing the pop-up Flash). In Sports and Landscape modes, the Flash On setting is always set on Auto. In Portrait mode, the Flash On setting is always set to Fill Flash.
The C-700 uses a Digital ESP metering system to determine exposure in its normal shooting mode. Under the default Digital ESP setting, the camera takes an exposure reading from the center of the image as well as the surrounding area, and chooses the best averaged reading for the entire scene. A Spot Metering option is also available, accessed by pressing the Macro / Spot Metering button on the back panel until the Spot Metering symbol appears in the LCD display. A set of target brackets appears in the center of the screen to help with framing. With Spot Metering, the camera bases the exposure on a reading from the very center of the subject, which works well with the C-700's AE Lock function. AE Lock freezes the exposure reading when the AE Lock button is pressed, allowing you to recompose the shot without holding down the Shutter button. A Multi-Metering function allows you to take up to eight individual exposure readings from various locations in the frame. These readings are then averaged together to gauge the exposure. Once activated through the Record menu, Multi-Metering works with the AE Lock button to gather the exposure data (in Spot Metering mode). An exposure bar appears in the LCD display to help track your progress. You can save the set of readings by holding down the AE Lock button for more than one second. Once a multi-exposure setting has been locked, a "Memo" icon appears on the LCD displays. This exposure setting will apply to all subsequent photos, until you cancel it by again hitting the AE Lock button briefly. Locked multi-exposure readings aren't saved when the camera is turned off.
In all exposure modes except for Manual and Auto, you can adjust exposure with the camera's Exposure Compensation setting, which lightens or darkens the scene from -2 to +2 exposure equivalents (EV) in one-third-step increments. To access the setting, just press the right or left buttons on the Four-Way Arrow pad while in Record mode. You'll see the EV readings changing in the upper right corner of the monitor. In Program, Aperture Priority, Shutter Speed, and Manual modes, the C-700 offers an automatic light sensitivity (ISO) setting, or you can set the ISO to 100, 200, 400, or 800 equivalents, depending on the shooting conditions. White Balance is also adjustable in these modes, with options for Auto, Daylight, Overcast, Incandescent, and Fluorescent light sources, as well as a Quick Reference, or manual adjustment. A White Balance compensation adjustment in the Mode menu (Picture sub-menu) allows you to correct a red or blue color shift in the image.
A 12-second Self-Timer mode provides a small window of time between pressing the Shutter button and the camera making the actual exposure, a great feature for self-portraits. The Drive button on the back of the camera enables the Self Timer mode, and a full press of the Shutter button triggers the countdown. As the camera counts down the seconds, the Self-Timer lamp on the front panel lights solid red for the first 10 seconds, then flashes for the remaining two.
The C-700 also enables you to capture images in black and white or sepia tones, or to use the White and Black Board settings for capturing text on white or black backgrounds respectively. (These modes appear to adjust image contrast and default exposure levels to maximize contrast and force the background toward the appropriate tonal value.) The C-700 also features Sharpness and Contrast adjustments.
 Flash
Flash
The C-700 is equipped with a built-in, pop-up flash, which operates in either Auto, Red-Eye Reduction, Fill-In Flash, or Slow Synchro modes. Pushing the Flash Release button on top of the camera releases the flash from its compartment. Another Flash button on the back panel controls the operating mode. Closing the flash automatically disables the unit. The Auto flash mode sets the flash to fire when subjects are backlit or the light level is low. In Red-Eye Reduction mode, the camera fires approximately 10 small pre-flashes before firing the flash at full power. This eliminates the occurrence of red-eye effect, caused when light from the flash reflects off of a person's pupils. Fill-In Flash mode sets the flash to fire with every exposure, regardless of the light level. Slow Synchro mode times the flash with a slower shutter speed, which allows more ambient light in to balance the exposure. Through the Mode menu, Slow Synchro can be set to fire either at the beginning or end of the exposure, or at the beginning of the exposure with the Red-Eye Reduction pre-flashes. Using any of these settings with a moving object produces interesting light or motion trails in front of or behind the subject.
The Record menu also offers a flash intensity control, which adjusts the flash power from -2 to +2 EV in one-third-step increments. Coupled with the external flash sync socket, the C-700 provides very flexible control over flash exposure. The external flash sync socket is covered by a threaded, plastic cap that screws into place (and in our opinion, is easily lost). The plastic cover protects a five-pin socket, which accepts the Olympus FL-40 external flash unit, as well as compatible third-party flash units. There isn't a flash mounting on the camera, but Olympus offers a mounting bracket as an optional accessory.
The C-700's onboard flash is unusually powerful: Olympus rates it for a range of up to 14.4 feet (4.4m) when the lens is set to its telephoto position, and 18 feet (5.5m) with the lens at its wide angle setting. This agreed well with our own tests, in which we found the flash perfectly bright at 14 feet.
Sequential Shooting and AF Sequential Shooting
In addition to the Self-Timer mode, the Drive button also activates the two Sequential Shooting modes. Both modes take a rapid series of images, with the AF Sequential Shooting mode adjusting the focus before each shot, and the normal Sequential Shooting mode locking the focus with the initial shot. Resetting the focus before each exposure slows down the cycle time between shots a fair amount. In normal Sequential Shooting mode, the camera captures as many as 37 images (at the lowest size/quality setting, decreasing 2-3 at maximum quality), at approximately 1.4 frames per second. The cycle times and the number of images in a series vary depending on the image quality setting and the amount of SmartMedia storage space available. The flash is available in both modes, but also slows down the shooting time (the average flash recharge time is six seconds).
Auto-Exposure Bracketing
Also accessible via the Drive button, the Auto-Exposure Bracketing mode takes a series of images at different exposure levels, to ensure that you get the best possible exposure. The Auto-Exposure Bracketing mode can be set through the Mode menu (Camera sub-menu) to capture either three or five images at a time, with exposure variations of 0.3, 0.6, or 1.0 exposure equivalents (EV) in each direction. For example, in a three-image series, the camera takes one image at the normal exposure reading, plus one at the underexposed setting, and one at the overexposed setting.
Panorama Mode
The C-700 offers a Panorama exposure mode when using an Olympus brand panorama-enabled SmartMedia memory card. The Panorama function is accessed in the Mode menu through the Panorama option of the Camera sub-menu. When activated, it provides light blue guidelines at the edges of the pictures to help you align successive shots, leaving enough overlap between them for the stitching software to be able to do its job. Exposure and white balance are determined for a series of shots by the first exposure, and as many as 10 shots can be taken in a panoramic series. (Note that this function is only enabled by SmartMedia cards with built-in panorama-related firmware found on Olympus brand memory cards.) Images are saved individually and then compiled on a computer after they've been downloaded to Olympus' Stitching Software application.
Movie and Sound Recording
The C-700 also features a Movie mode for recording moving images with sound. The movie camera symbol on the Mode dial designates the Movie mode. QuickTime movies are recorded in either HQ (320 x 240 pixels) or SQ (160 x 120 pixels) resolution. Both resolutions record at approximately 15 frames per second. Sound recording can be turned On or Off via the Record menu. Aperture and shutter speed are automatically determined in Movie mode, with shutter speeds ranging from 1/10,000 to 1/30 second. Recording begins and ends with a full press of the Shutter button, and the amount of available recording time shows up on the LCD display. A memory gauge also appears on the display, reporting how much SmartMedia memory is available for recording.
The sound recording function is activated through the Mode menu (Camera sub-menu, "microphone" icon). You can also activate sound recording for still images, which allows you to record a short sound clip (approximately four seconds) to accompany the captured image.
A feature that was first seen in the Camedia C-3030 and again in the C-3040 is the C-700's in-camera movie "editing" capability in Playback mode. (Accessed via the Playback menu, Movie Play option.) In this mode, you can scroll forward and backward within the movie, and set cut points at the beginning and end of the sequence. Movie content between the two cut points will be preserved, the rest discarded. Olympus also allows you to choose whether to modify the original movie file, or to save a new copy of it, reflecting the edit you've made -- a feature that makes the Movie mode much more useful.
Shutter Lag/Cycle Times
When you press the shutter release on a camera, there's usually a lag time before
the shutter actually fires. This time is to allow the autofocus and autoexposure
mechanisms time to do their work, and can amount to a fairly long delay in some
situations. Since this number is almost never reported on, and can significantly
affect the picture taking experience, we now routinely measure it using Imaging
Resource proprietary testing.
|
|
||
|
|
Normal Card |
|
| Power On -> First shot |
|
Time is total time from power on to first picture, not just time to telescope lens. Fairly fast for a camera with a telescoping lens.
|
| Shutdown |
|
Time to retract lens, ready to put away.
|
| Play to Record, first shot |
|
Time to first shot when switching from playback mode. (Fairly fast)
|
| Record to play (max/min res) |
|
First time is for switch from record to play with no image being processed, second time is measured from shutter press to image ready to display.
|
| Shutter lag, full autofocus |
|
A bit slower than average in high-end cameras. (Average in high-end consumer cameras is about 0.8 seconds) |
| Shutter lag, manual focus |
|
A bit slower than average. (Average for manual focus in high end consumer cameras is about 0.5 seconds.) |
| Shutter lag, prefocus |
|
About average. |
| Cycle time, large/fine files |
|
Shorter time is for first 2-3 shots, then need to wait for the buffer to clear before taking next shots. Fairly fast for first 2-3 shots. |
| Cycle time, small/basic files |
|
Fairly fast. No slowdown due to buffer fill for at least 30 shots. (See below, likely 50 shot buffer limit.) |
| Cycle time, Continuous Mode |
|
Minor pause between first two shots, then faster for third. 6.7 seconds for buffer to clear. (3 max-res shots buffer capacity, ~50 on small/basic quality.) |
Overall, the C700 UltraZoom is a fairly speedy camera, with cycle times of just over two seconds, even for full resolution files, and a buffer that lets you shoot two or three images before having to wait for it to empty. The shutter delay is a bit slower than normal among higher-end cameras, but the prefocus delay (lag time when the camera is prefocused by half-pressing the shutter button prior to the exposure itself) is about average. Startup and shutdown times are also fairly fast for a camera having a telescoping lens design.
Operation and User Interface
One of the most noticeable changes implemented with the C-700 is the newly designed user interface. Previous Olympus digicams had a somewhat tedious LCD menu system, requiring you to scroll through pages of options and additional menus to change some settings. The C-700's menu system has been greatly simplified. Though there are still several pages of options, the main menu (known as the "Top Menu") is divided into smaller sub-menus, displayed on the screen as three or four buttons, each selected using the Arrow button that corresponds to its position on the screen. The right button is the Mode menu, which includes all of the sub-menus available for that Record or Playback mode. The Mode menu is divided into four subject tabs -- Camera, Picture, Card, and Setup -- with sub-menus appropriate to that subject tab. The other two or three buttons (top, left, and bottom) are "Short-Cut" menus that provide shortcuts to the most frequently used sub-menus, such as ISO, White Balance, and Quality settings. In the P and A / S / M modes, all of these are user programmable. Though it takes some getting used to, this setup is much more efficient than previous models, as you can make fast adjustments to three of the most often used settings.
The C-700's external control layout is not much different from previous Olympus Camedia digicam setups. We were glad to see the addition of the AE Lock / Custom Function button. You can assign a specific adjustment to this button through the Mode menu (Setup sub-menu), creating a short cut to circumvent the menu system completely. For example, if you use the Quality adjustment a fair amount, you could assign it to the AE Lock / Custom Function button as a short cut.
Control Enumeration
Shutter Button: Nestled in the center of the Zoom lever, this button locks focus when halfway pressed, and fires the shutter when fully pressed.
Zoom Lever: Encircling the Shutter button, this lever controls the optical and digital zoom. In Playback mode, pushing the lever toward the telephoto end enables the playback zoom feature, which enlarges captured images as much as 3x. Pushing the lever toward the wide-angle end enables the index display mode, which displays either 4, 9, or 16 thumbnail images on the screen at one time.
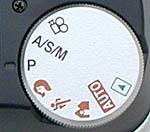
Mode Dial: Just behind the Zoom lever and Shutter button, this dial controls the camera's operating mode, with choices of Movie, Aperture Priority (A) / Shutter Speed Priority (S) / Manual (M), Program, Portrait, Sports, Landscape, Auto, and Playback.
![]()
Flash Release Button: Located at the bottom right corner of the pop-up flash compartment, this button releases and activates the built-in flash.
![]()
Diopter Adjustment Dial: On the right side of the viewfinder eyepiece, this dial adjusts the focus of the viewfinder display to accommodate eyeglass wearers.

Drive / Erase Button: The first in a series of three buttons along the top of the camera's back panel, this button selects the camera's Drive mode. While in Program and A / S / M capture modes, pressing the button cycles through Single Frame (default), Sequential Shooting, AF Sequential Shooting, Self-Timer, and Auto Bracketing options. When shooting in Portrait, Sports, or Landscape mode, the options are limited to Single Frame, Sequential Shooting, and Self-Timer. Auto exposure mode provides only the Single Shot option. In Playback or Quick View mode, this button erases the current frame, with an option to cancel.

Macro / Spot Metering / DPOF Settings Button: To the right of Drive / Erase, this button controls the Macro and Spot Metering modes in any Record mode. The button cycles through normal Digital ESP Metering, Spot Metering, Macro Focus, and Macro Focus with Spot Metering. In Playback mode, this button calls up the DPOF Settings menu, which is also accessible through the Playback menu.

Flash / Protect Button: The final button in this series of three, the Flash / Protect button cycles through the available flash modes in any Record mode. (The availability of specific flash modes depends on the exposure mode.) Flash options include Auto, Red-Eye Reduction, Fill-In Flash, Slow Synchro, and Off. In Playback mode, this button enables or removes write protection for the currently displayed image.
![]()
Power Button: Situated just above the top right corner of the LCD display, this red button turns the camera on or off.

AE Lock / Custom Function / Rotation Button: Directly to the right of the Power button, this button is customizable in Program and A / S / M modes. The factory default setting is to perform the AE Lock function, (i.e., holding down the button for more than one second locks the current exposure reading). However, by using the Mode menu (located in the Setup sub-menu, Control Button option), you can reassign it to perform one of a variety of functions, including: Info, ISO, A / S / M, Slow Synchro, Digital Zoom, Fulltime AF, Microphone, Function, image Quality, and White Balance. In Playback mode, this button rotates the captured image 90 degrees clockwise and counterclockwise.
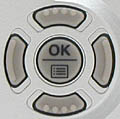
Four-Way Arrow Pad: This series of four buttons is arranged in a circle on the back panel, to the right of the LCD monitor. Each button corresponds to a specific direction (the top button is the Up Arrow, the bottom button is the Down Arrow, etc.). Serving as directional keys, these buttons scroll through menu items and pages. In all exposure modes except Auto, the Right and Left Arrow buttons control Exposure Compensation. In Manual mode, the Right and Left Arrows adjust the aperture setting and the Up and Down Arrows control the shutter speed. In Program mode, the Up and Down Arrows control Manual focus, when enabled. In Aperture and Shutter Priority modes, the Up and Down arrows control the adjustable exposure value.
In Playback mode, all four arrows navigate the settings menus. When captured images are displayed, the Right and Left Arrow buttons scroll through each individual image on the card. The Up and Down Arrows jump ahead or backward 10 frames.

Menu / OK Button: Positioned in the center of the Arrow pad, this button pulls up the menu screen in any camera mode. It also acts as the "OK" button for confirming menu selections. In Program, Aperture Priority, Shutter Priority, and Manual modes, holding down the button for more than one second activates the Manual Focus mode.

Monitor Button: Controls the LCD monitor display, turning the image display on or off.
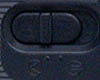
Battery Lock Switch: This sliding switch on the battery compartment door locks and unlocks the door.
Camera Modes and Menus
Movie Mode: Marked on the Mode dial with a movie camera symbol, this mode records moving images with sound for as long as the SmartMedia card has available memory space.
A / S / M Mode: Setting the Mode dial to this position allows the user to work in Aperture Priority, Shutter Priority, or Manual exposure modes (selection is made through the Mode menu, Camera sub-menu). In Aperture and Shutter Priority modes, the user selects one of the exposure variables (either aperture or shutter speed) while the camera chooses the best corresponding variable. In Manual mode, the user has control over both shutter speed and aperture. The Right and Left Arrows adjust the aperture setting and the Up and Down Arrows control the shutter speed.
Program Mode: Noted with a "P" on the Mode dial, this mode places the camera in control of both shutter speed and aperture, while the user controls all other exposure features.
Portrait Mode: Indicated on the Mode dial with a head icon, this mode optimizes the camera for capturing portraits. The camera uses a larger aperture setting to decrease the depth of field, placing the subject in sharp focus in front of a softly focused background.
Sports Mode: Designated on the Mode dial with an action figure icon, this mode employs faster shutter speeds to capture action shots.
Landscape Mode: A mountain icon marks this mode on the Mode dial. Landscape mode uses a smaller aperture to increase the depth of field, which keeps both the foreground and background in sharp focus.
Auto Mode: This mode puts the camera in charge of all exposure variables, from shutter speed to White Balance. The user can only activate the flash and change the image Quality setting.
Playback Mode: Indicated by the traditional green playback symbol (a triangle within a rectangle), this mode allows the user to review captured images on the SmartMedia card. Images can be deleted or protected, set up for printing on DPOF devices, or rotated.
Record Menu: Pressing the Menu / OK button in any Record mode pulls up the following sub-menus (some settings are not available in all modes):
Mode Menu
 ISO: Adjusts the camera's light sensitivity. Options are Auto or 100, 200, 400, or 800 ISO equivalents.
 Quality: Sets the file quality setting. Options are TIFF, Super High Quality (SHQ), High Quality (HQ), or Standard Quality (SQ). The TIFF setting can be set to record images at 1,600 x 1,200, 1,280 x 960, 1,024 x 768, or 640 x 480 pixels. SQ can be set to 1,280 x 960, 1,024 x 768, or 640 x 480 pixels, with High or Normal compression levels. Both SHQ and HQ settings record images at the 1,600 x 1,200-pixel size.
 Card Setup: Formats the SmartMedia card, erasing all files, even protected ones.
 All Reset: Specifies which camera settings are saved or reset to defaults. Options are Off, On, or Custom, which allows you to choose individual settings to be saved.
Playback Menu: Like the Record menu, the Playback menu is called up by pressing the Menu / OK button while in Playback mode. The following sub-menus and options are available:
Slide-Show: Identified by multiple frame playback symbols. Activates or deactivates the automated slide-show.
Movie Play: (For movie files only) Plays back movie files, and allows you to edit frames or display each frame in an index.
Info: Controls the amount of image information reported on the LCD screen.
Mode Menu:
 Play:
Play:
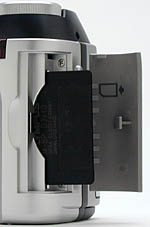 Image Storage and Interface
The C-700 stores uses 3V (3.3V) SmartMedia memory cards and comes equipped with
an 8MB card. Currently, you can upgrade to card sizes as large as 128MB.
The C-700 can store images in both uncompressed TIFF and compressed JPEG file
formats. The TIFF setting can be assigned to any one of four resolutions through
the Record menu (1,600 x 1,200, 1,280 x 960, 1,024 x 768, or 640 x 480 pixels).
JPEG compression levels include Super High Quality (SHQ), High Quality (HQ),
and Standard Quality (SQ). Both SHQ and HQ settings record files at the 1,600
x 1,200 pixel size, while the SQ compression level has a few options. SQ records
files at either 1,280 x 960, 1,024 x 768, or 640 x 480 pixel sizes, with High
and Normal quality options.
As we have with Olympus digicams in the past, we greatly appreciated the C-700's
file naming protocol, which includes the month and day at the beginning of the
file name, and provides the option of numbering images progressively from one
card to the next, or of resetting the naming sequence for each card. The Camedia
allows you to write-protect individual images from accidental erasure through
the Playback menu. Entire SmartMedia cards can be write-protected by placing
a write-protection sticker over a specified spot on the card. While individually
protected images can still be erased by a card format operation, cards that
are write-protected with a sticker are also protected against card formatting.
Write-protect stickers can only be used once and must be clean to be effective.
The table below summarizes the compression ratios and number of images which
can be stored on the included 8MB memory card with each size/quality combination.
|
Resolution/Quality 8MB SmartMedia Card |
|
|
|
|
| High Resolution 1600x1200 | Images | 1 |
|
|
| Approx. Compression |
1:1 |
|
|
|
| Standard Resolution 1280x960 | Images |
|
|
|
| Approx. Compression |
|
|
|
|
|
|
Images |
|
|
|
| Approx. Compression |
|
|
|
|
|
|
Images |
|
|
|
| Approx. Compression |
|
|
|
|
The following table shows the maximum seconds of movie recording time for various sized memory cards. These measurements represent the amount of time that can be recorded by depressing the shutter button one time and shooting continuously. The remaining available shooting time on the card will be displayed on the LCD monitor or LED control panel following the recording.
| Resolution Sizes |
|
|
| (HQ) 320 x 240 |
|
|
| (SQ) 160 x 120 |
|
|
The C-700 comes with interface software and a USB cable for high-speed connection
to both Macintosh and Windows computers. Like all of Olympus' most recent digicams,
the C-700 is a USB "storage class" device. This means it can connect
directly to Mac OS Version 8.6 or later, or Windows Me or 2000 computers, without
separate driver software. Storage-class connections are also generally faster
than device-class ones. We clocked the C-700 at a download speed of 479 KBytes/second
on our PowerMac G4. This is well toward the upper end of the range of digicams
we've tested.
![]() One
of the first things any new digicam owner will need is a larger memory card
for their camera: The cards shipped with the units by the manufacturers should
really be considered only "starter" cards, you'll definitely want a higher capacity
card immediately. - Probably at least a 32 megabyte card for a 1.3 or 2 megapixel
camera, 64 megabytes or more for a 3, 4, or 5 megapixel one. (The nice thing
about memory cards is you'll be able to use whatever you buy now with your next
camera too, whenever you upgrade.) To help you shop for a good deal on memory
cards that fit the C-700, we've put together a little memory locater, with links
to our price-comparison engine: Just click on the "Memory Wizard" button above
to go to the Olympus memory finder, select your camera model , and click the
shopping cart icon next to the card size you're interested in. You'll see a
list of matching entries from the price-comparison database. Pick a vendor &
order away! (Pretty cool, huh?)
One
of the first things any new digicam owner will need is a larger memory card
for their camera: The cards shipped with the units by the manufacturers should
really be considered only "starter" cards, you'll definitely want a higher capacity
card immediately. - Probably at least a 32 megabyte card for a 1.3 or 2 megapixel
camera, 64 megabytes or more for a 3, 4, or 5 megapixel one. (The nice thing
about memory cards is you'll be able to use whatever you buy now with your next
camera too, whenever you upgrade.) To help you shop for a good deal on memory
cards that fit the C-700, we've put together a little memory locater, with links
to our price-comparison engine: Just click on the "Memory Wizard" button above
to go to the Olympus memory finder, select your camera model , and click the
shopping cart icon next to the card size you're interested in. You'll see a
list of matching entries from the price-comparison database. Pick a vendor &
order away! (Pretty cool, huh?)
Video Out
 The C-700 has a Video Out port that supports the NTSC timing format. (We assume
that PAL systems are available for European customers.) The video output can
be used for reviewing previously captured images and movies, or running slide
shows from the camera. It also shows all of the LCD menu screens, as well as
the preview display from the LCD viewfinder.
The C-700 has a Video Out port that supports the NTSC timing format. (We assume
that PAL systems are available for European customers.) The video output can
be used for reviewing previously captured images and movies, or running slide
shows from the camera. It also shows all of the LCD menu screens, as well as
the preview display from the LCD viewfinder.
Power
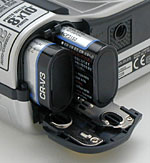 The C-700 is powered by two CR-V3 lithium battery packs, four AA batteries (alkaline,
lithium, NiMH, or NiCd), or by an optional AC adapter that can significantly
extend battery life if you're downloading lots of images on the computer or
working in a studio environment. Through the Setup menus, the C-700 also offers
a Battery Save mode, which reduces the amount of battery consumption after the
camera has been left unattended for a while. You can also set the camera to
go to sleep after 30 seconds or 1, 3, 5, or 10 minutes of inactivity.
The C-700 is powered by two CR-V3 lithium battery packs, four AA batteries (alkaline,
lithium, NiMH, or NiCd), or by an optional AC adapter that can significantly
extend battery life if you're downloading lots of images on the computer or
working in a studio environment. Through the Setup menus, the C-700 also offers
a Battery Save mode, which reduces the amount of battery consumption after the
camera has been left unattended for a while. You can also set the camera to
go to sleep after 30 seconds or 1, 3, 5, or 10 minutes of inactivity.
|
|
|
| Capture Mode, w/LCD |
|
| Capture Mode, no LCD |
|
| Half-pressed shutter w/LCD |
|
| Half-pressed w/o LCD |
|
| Memory Write (transient) |
|
| Flash Recharge (transient) |
|
| Image Playback |
|
| Sleep Mode |
|
Because of its electronic viewfinder, the C-700 doesn't sport the incredibly
low power drain of other Olympus cameras, running with their rear-panel LCDs
off. It does seem to power down to a virtually no-power "sleep" mode
quite well though, although we couldn't actually measure the power consumption
in that mode, as it refused to "sleep" when plugged into an external
power source. Overall though, the C-700's power consumption is a good bit better
than average, and you can expect a good couple of hours of capture-mode operating
time on a set of high-capacity NiMH rechargeable AA cells, or up to 3 hours
of operation in playback mode. We saw very little decrease in battery capacity
when the camera was left in "sleep" mode for long periods of time.
- This is good, because it meansyou can blithely leave the camera "on"
all day, ready for instant picture-taking, without worrying about depleting
your batteries.
 About
Batteries
About
Batteries
We've gotten so many emails about power issues for digicams, that we're now
inserting this standard notice in the reviews of all AA-powered cameras on our
site: Don't even *think* about using alkaline AA batteries in a digicam!
Despite their being packed in the box with many cameras, they simply don't have
the juice to handle typical digicam demands. (Even the "high power"
ones the battery manufacturers say are designed for devices like digital cameras.)
Spend the $35-40 or so it takes to get a set (or two) of high-capacity NiMH
rechargeable batteries and a good charger! The few dollars up front will save
you literally hundreds of dollars in the long run, not to mention the hassle
of wimpy batteries running out in the middle of the action. We suggest you buy
two sets of batteries, so one can always be in the charger, ready to go, and
so have two sets available for longer excursions. Good brands of batteries include
Maha (our favorite), GP, Kodak, and Nexcell. Also, buy the highest capacity
AAs the manufacturer makes, the few extra dollars for the extra capacity is
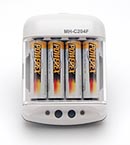
usually well worth it. Getting a good charger is critical though, almost more
so than buying good batteries. We recommend the Maha C-204F (see the photo at
right), the charger we use the most in our own studio. - Read our review
of it for all the details. Or, just click
here to buy one, you won't regret it.
Included Software
|
The C-700 comes with a nice complement of software on the supplied CD-ROM.
Direct camera control and image downloading are provided by Olympus' Camedia
Master software package (Version 2.5) for both Mac and Windows platforms (Macintosh
OS 8.6 and higher, Windows 98v2 / Me / 200 Pro). USB drivers for both platforms
and an Apple QuickTime reader are also included.
Camedia Master allows you to download and organize images, as well as perform
minor image correction and enhancement functions (such as adjusting contrast,
sharpness, and color balance). For panoramic images, Camedia Master supplies
a "stitching" utility to piece together shots vertically or horizontally.
A complete printing utility works with the DPOF settings and allows you to print
images directly to Olympus or other DPOF-compliant photo printers.
In the Box
Included in the box with the C-700 Ultra Zoom digital camera are the following
items:
Test Results
In keeping with our standard test policy, the comments given here summarize only our key findings. For a full commentary on each of the test images, see the C-700 Ultra Zoom's "pictures" page.
As with all Imaging Resource product tests, we encourage you to let your own eyes be the judge of how well the camera performed. Explore the images on the pictures page, to see how the C-700's images compare to other cameras you may be considering.
Throughout our testing, the C-700 produced great color, with accurate saturation and tone. The C-700's white balance system handled most of our lighting situations well, though we often noticed that the manual setting produced less than accurate results. (A little surprising, since you'd think the manual adjustment would be the most accurate.) The C-700 did a better than average job with our tough indoor portrait test, with both the manual and incandescent white balance settings producing good (if slightly different) color balances. The indoor flash shots turned out good too, although we found that we had to boost the exposure compensation a fair bit to get the right lighting. Color-wise, the large color blocks of our Davebox test target are accurate and well saturated, though the yellow block is a little weak. The difficult red and magenta separation came out great great, with accurate color in both squares (many digicams reproduce these squares with an orange tint). The awkward blues in the flower bouquet of our outdoor test shot also came out pretty good, thoughthere was a noticeable purplish tinge (this is a common problem area for many cameras we've tested). Overall, the C-700 produced accurate, pleasing color under a wide variety of conditions, although we found its images slightly noisy relative to some of its two-megapixel competitors.
The C700's resolution test results were about average for a two megapixel camera. In the horizontal direction, artifacts begin at about 550 lines per picture height, while in the vertical direction, they don't begin until 600 lines. Strong detail is visible in both directions out to about 650 lines. We did notice fairly severe softness in the extreme corners of the image though - This didn't extend very far at all into the image area, but roughly a 100x100 pixel area in the corners of the test shots was quite soft.
Optical distortion on the C-700 is a bit high at the wide angle end, where we measured an approximate 0.89 percent barrel distortion. The telephoto end fared much better, as we saw less than a pixel of pincushion distortion. Chromatic aberration is moderate in this target, showing about two or three pixels of coloration around the target elements at the edges of the frame. (This distortion is visible as a very slight colored fringe around the objects at the edges of the field of view on the resolution target.)
We had a little trouble measuring the accuracy of the C-700's electronic viewfinder and LCD monitor, as our standard lines of measurement were outside of the final frame. At the wide angle setting, the bottom target line is cut off, making the viewfinder a little loose. At telephoto, the image is slanted, cutting off parts of the top and bottom target lines. Since we generally like to see LCD monitors as close to 100 percent accuracy as possible, we'd have to say that the C-700 does a good job in this respect. We would like to see it just a *hair* tighter though, to make sure you don't miss part of the subject when framing.
The C-700 provides excellent exposure control, and thus did well in our low-light testing. The maximum shutter speed of 16 seconds enables the camera to capture bright, useable images at light levels as low as 1/16 foot-candle (0.67 lux), at all four ISO settings. The higher ISO settings produced brighter images at these low light levels, but the 100 ISO setting does a good job as well. Color is good in all of the images, though the slightly darker exposure of the 100 ISO setting produced a faint yellow cast. Noise is moderate at 100 ISO, increasing steadily with each higher ISO setting to a very high level at 800 ISO. To put the C-700's low-light performance into perspective, an average city night scene under modern street lighting corresponds to a light level of about one foot-candle, so the camera should easily handle much darker situations.
The C-700's macro capabilities are about average, as the camera captures a minimum area of 4.31 x 3.23 inches (109.42 x 82.06 millimeters). Resolution is moderately high, with good detail visible throughout the image. Details are also fairly sharp, though the brooch came out a little soft (possibly due to the limited depth of field when working this close). We also noticed corner softness in this shot. The C-700's built-in flash had some trouble up close, overexposing the subject and washing out color. The lens blocks the flash as well, causing a dark shadow in the lower left portion of the frame. Overall, the C-700 is a good but not spectacular macro performer, and you'll need to plan on external lighting for macro shot.
With its extensive exposure control and very good color, the C-700 performed well throughout our testing. Its low-light capabilities are excellent, and the camera captures images with great resolution and detail. We'd like to see slightly lower image noise, and would have preferred the lens to hold sharpness into the extreme corners a bit better, but overall it's a great performer, and a great bargain for a camera with a 10x zoom lens.
Conclusion
Incorporating all of the great features we've come to appreciate in the Olympus Camedia line of digital cameras, the C-700 Ultra Zoom has enhanced their traditional compact SLR design with a high-quality 10x optical zoom lens, electronic optical viewfinder, higher light sensitivity, faster shutter speeds, and a selection of preset shooting modes that makes it simple to take foolproof images under a variety of shooting situations. The redesigned LCD menu system takes some getting used to, but once conquered, provides more flexibility and user-customizable controls than any digicam user interface we've previously encountered. The C-700's image quality definitely lived up to the Camedia's excellent reputation, especially when shooting in low-light situations and indoor lighting. As both the most compact and (at introduction at least), the least expensive digicam equipped with a 10x zoom lens, the C700 seems destined for even greater popularity than its predecessors.
<<C-700 Ultra Zoom Sample Images | Additional Resources and Other Links>>
Reader Comments!
Questions, comments or controversy on this product? Click
this link to see what other Imaging Resource readers have had to say about
the Olympus C-700 Ultra Zoom, or add comments of your own!
