Back
to Full Nikon CoolPix 885 Review
Back
to Full Nikon CoolPix 885 ReviewGo to Nikon CoolPix 885 Data Sheet
Go to Nikon CoolPix 885 Pictures Page
Up to Imaging Resource Cameras Page
Use your browser's "Back" button to return to the previous page, or the links at the top and bottom of this page to navigate to related information. If you have difficulty fitting the text on this page onto your printer output, simply resize your browser window to a narrower width and print again.
Remember us when it's time to buy!
Dave here: Have our reviews been helpful to you? (Is this article you're reading right now useful?) Preparing this level of information on as many products as we do is incredibly hard work, not to mention expensive. Things on the Internet may look like they're free, but they're not. (As a lot of big dot.com companies are finding out these days.) Somewhere, somebody has to pay to produce worthwhile content. YOU can help us though, by remembering us when it comes time to make your purchase. Would you consider coming back to our site and clicking-through to one of our advertisers to make your purchase? Every dollar you spend with one of our advertisers helps us directly (in affiliate fees) or indirectly (the advertiser will keep renewing their ad contract with us). To make it easy for you to support us, here's a URL you can visit, to see all our current advertisers, with links to click on that will register your visit to them as having come from our site. It's up to you where you buy, but Mike, Mike, Kim, Yazmin, Marti and I would be really grateful if you'd help us out by choosing one of our advertisers to purchase from.
Thank you for your support!
Dave Etchells, Founder & Publisher
Visit our "Buy Now" Page:
https://www.imaging-resource.com/buynow.htm
Back
to Full Nikon CoolPix 885 Review
Go to Nikon CoolPix 885
Data Sheet
Go to Nikon CoolPix 885
Pictures Page
Up to Imaging Resource Cameras
Page
Nikon CoolPix 885More Pixels, More Features, (a little) More Money - Nikon extends their sub-compact Digicam line! Review First Posted: 9/19/2001 |
|
 |
|
2,048 x 1,536-pixel resolution |
|
|
3x optical zoom, 2.5x digital zoom | |
|
|
One-Touch image upload to the Internet | |
|
|
256-segment through-the-lens metering |
Manufacturer Overview
Long a powerhouse in the world of film-based photography, Nikon has made an equally significant impact on the digital imaging world. Combining Nikon's famous high-precision optics with innovative design, the Coolpix digicams are among the most popular digital camera models in recent memory, as are its Coolscan film scanners, which continue to set the highest quality standards in the professional imaging community. The Coolpix 885 provides a wide range of exposure options, including a fully Automatic mode for beginning digital photographers, 12 preset Scene modes for shooting under specific lighting conditions, and a Custom mode for more experienced users. It also incorporates Nikon's new "One Touch" access to the Internet, which can automatically upload images to your computer or to Nikon's image sharing website (www.nikonnet.com.) via an external "Transfer" button. Combine these features with a high-quality 3-megapixel CCD and 3x Nikkor Zoom lens, and you have a very inviting package for both the beginning and experienced digital photographer.
High Points
Executive Overview
The Coolpix 885 is a versatile digital camera designed to appeal to users at both ends of the experience spectrum. Its 3.21-megapixel CCD delivers images as large as 2,048 x 1,536 pixels, more than enough resolution for razor-sharp 8 x 10-inch prints. The high-quality 3x Nikkor Zoom lens is equivalent to a 38-114mm zoom on a 35mm film camera, providing plenty of flexibility for composing shots. It features a fully Automatic mode, in which the camera makes all exposure decisions, plus 12 preset Scene modes and a Custom Shooting Mode (CSM) that allows photographers to choose from a wide variety of exposure settings. Its jet black body has the look and feel of a conventional film camera, but measures a scant 3.7 x 2.7 x 2.0 inches (95 x 69 x 52mm) with the lens closed, and weighs less than 10 ounces with the battery and memory card installed. While it's a bit bulky for a shirt pocket, it should fit easily into a large coat pocket, purse, or waist pack.
An upgrade to the Coolpix 775 model introduced earlier this year (2001), this model incorporates several features Nikon introduced just this year. Most notable is the Transfer button, which is billed as a "One-Touch Upload to the Web." Functionally, it's similar to the Digital Print Order Format (DPOF), which marks specific images in-camera for digital output on a DPOF-compatible printer. In this case, One-Touch Transfer marks the images for automatic upload to the computer as soon as a USB connection is made, or if used when the camera is connected, immediately uploads each selected image to the computer or the Internet, using the supplied NikonView software. Images are automatically sent to Nikon's photo-sharing website: www.nikonnet.com, where they can be emailed to friends and family or stored in online photo albums, or you have the option of emailing images through your own Internet service provider.
In addition to the four standard modes -- Auto, Movie, Setup, and Playback -- the camera's Mode dial also offers a Scene mode selector and Custom (CSM) option. In Scene mode, you can access 12 image presets through the on-screen menu, all optimized for special shooting situations. Scene modes cover many common (and some rather tricky) exposure challenges, including: Portrait, Party / Indoor, Night Portrait, Beach / Snow, Landscape, Sunset, Night Landscape, Museum, Fireworks, Close Up, Copy, and Backlight. The Scene modes are a great for photographers who want to get the good shots in difficult lighting conditions, without learning all the ins and outs of shutter speeds, f-stops, ISO settings, etc. By contrast, the CSM mode provides access to a full array of exposure settings and options, including White Balance, Metering, Frame-Advance Rate, Best-Shot Selector, Image Adjustment (Contrast and Brightness), Image Sharpening, Lens Converter settings, Image Size and Quality, ISO, Exposure Options, Focus Options, Auto Bracketing, Noise Reduction, and Card Formatting.
The 885's optical viewfinder zooms along with the lens and the 1.5-inch LCD monitor can be set to turn on automatically when the camera is powered on (or for specified functions), or it can be turned on and off manually. When the LCD is turned on with the full information display engaged, it shows camera settings in the form of icons distributed around the edges of the screen. These include Auto, Scene, or Movie mode indicators, Flash mode, Image Size and Quality, and the number of remaining images. Other settings are displayed as they are engaged, for example Digital Zoom, Self-Timer, Best Shot Selection, Continuous Shooting, Exposure Compensation, White Balance, and Image Sharpening are all indicated on the monitor when they are in use. The low-battery indicator only appears when the battery is nearly drained.
The Coolpix 885 has three Image Size options for still captures: Full (2,048 x 1,536 pixels), XGA (1,024 x 786) pixels, and VGA (640 x 480 pixels), plus three JPEG compression levels: Fine (4:1), Normal (8:1), and Basic (16:1). There's also an uncompressed TIFF option, labeled "Hi", that's available for Full size images only. As part of the one-touch Transfer function, the 885 can also create "small picture" files for e-mail and Web use. This takes place in the Playback mode, where you can mark normal size images to be copied and saved in one of four file sizes for quick transfer over the Internet: 640 x 480, 320 x 240, 160 x 120, and 96 x 72 pixels. (This is very handy, and answers one of the most common questions we receive in our in-box, namely how best to resize images for emailing.) The Movie mode records video clips (without sound) at 15 frames per second, at 320 x 240-pixel (QVGA) resolution. Movie files are stored on the memory card as QuickTime files (designated by .MOV at the end of the name).
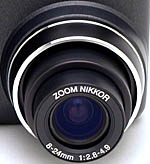
The 3x Zoom Nikkor lens has an 8-24mm focal length range (equivalent to 38-114mm lens on a 35mm camera), and an f/2.8-4.9 maximum aperture, which varies depending on the focal setting. By default, focus is automatically set by the camera's autofocus system, which reads the distance between the camera and subject using a through-the-lens (TTL) contrast detection system. In Normal (default) mode, the camera focuses on subjects 12 inches (30cm) or more from the lens. By pressing the Focus Self-Timer button under the LCD monitor, you can change the focus mode to Infinity or Macro. Inside the lens barrel is a set of filter threads for attaching optional lens converters and / or the Coolpix Slide Copy Adapter for copying mounted 35mm transparencies. A Lens menu in the CSM mode allows you to set up the camera for each converter, with options for a Wide Adapter, Telephoto 1, Telephoto 2, Fisheye 1, and Slide Copy Adapter. The Self-Timer function is available in Normal or Macro Focus modes, with a shutter release delay of 3 or 10 seconds.
The camera's Autofocus system operates in one of two modes: Single AF or Continuous AF. Single AF, which is activated by default when the LCD monitor is turned off, sets focus whenever you depress the Shutter button halfway. Continuous AF, which is automatically engaged when the LCD monitor is turned on, adjusts focus continuously as you move the camera around, or as the subject changes position within the frame. In CSM mode, you can change the focus mode to AF Area, which divides the scene into five focus areas, or you can focus manually by selecting one of 49 preset focus distances, from 0.10 feet (0.03 meters) to infinity, by holding down the Focus / Self-Timer button and adjusting the Zoom control.
The 885 has five Metering modes (Matrix, Spot, Center-Weighted, and Spot AF Area) and seven White Balance settings (Auto, Preset, Fine, Incandescent, Fluorescent, Cloudy, and Speedlight). The CCD's light sensitivity (ISO equivalency) can be set externally or through the CSM mode's on-screen menu to Auto, 100, 200, or 400 ISO. Exposure Compensation can also be adjusted externally or through the CSM mode menu, from +2 to -2 exposure values (EV) in one-third-step increments. Additional exposure options include: Program or Manual Exposure modes, AE Lock, Auto Bracketing using three or five exposures, and White Balance (WB) Bracketing in three exposures.
The 885 offers a choice of five "Continuous" shooting modes, including Single frame, Continuous, Multi-Shot 16, VGA Sequence, and Ultra HS. Single capture is the default setting, in which the camera records a single exposure at a time. The Continuous option records a rapid sequence of images at a rate of about three photos every two seconds. Multi-Shot 16 records 16 consecutive 400 x 300-pixel thumbnail images and combines them into a single-frame collage. VGA Sequence is similar to an animation sequence in which the camera records multiple 640 x 480-pixel images at approximately two frames per second. Ultra HS takes up to 70 320 x 240-pixel images at approximately 30 frames per second.
Coolpix cameras are well known for their Best Shot Selection (BSS) feature, which records up to 10 continuous exposures of the same subject with one press of the Shutter button. The camera then analyzes the series and chooses only the sharpest image to record to the memory card. This is particularly useful in situations where there is an increased potential for camera shake, such as in Macro mode, at maximum telephoto range, or when lighting is poor. The 885 model also provides a Noise Reduction option, which reduces the "noise" or artifacts that are typically seen in long low-light exposures.
An Image Adjustment menu allows you to control the amount of image contrast and brightness compensation that is applied to each image before it's written to the memory card. You can set the camera to automatically adjust contrast and brightness to produce optimum results, or ask for standard adjustments, more or less contrast, more or less brightness, or convert the image to black-and-white. Image Sharpening is also adjustable, controlling the degree of in-camera sharpening, with one of five options: Auto, High, Normal, Low, and Off. Auto Sharpening makes adjustments based on the subject and its surroundings, so the amount of sharpening will vary from shot to shot; Normal applies the same level of sharpening to all images; High increases image sharpness, making edges more distinct; Low reduces the amount of sharpening normally applied; and Off shuts down the sharpening function completely. These options are only available in the Auto exposure mode. In Scene modes, the camera determines the level of sharpening based on the subject matter.
Coolpix models offer a unique Quick Review function, which enables you to view thumbnails of previously captured images while still observing the live action taking place on-screen. You can scroll through stored images just as you would in Playback mode, without having to switch the Mode dial. Quick Review is activated by pressing the Quick button on the back panel while in any image capture mode. Pressing the button twice expands the review image to full screen size. Another unique feature is the Pic / Data Transfer option, which automatically saves a text file with every image, including such pertinent information as the date the image was recorded, the camera model and firmware version, metering mode, shutter speed, EV, white balance, aperture, focal length, ISO, and image size and quality. Each Pic / Data file is stored in the same folder as the image file and can be opened in a text editor or word processing program when copied to your computer.
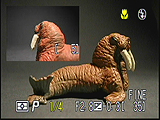
In Playback mode, the LCD monitor displays captured images as single, full-screen shots or in multiple thumbnails (Index mode). Single images can be viewed with or without the normal information display, which includes the date and time the image was captured, the image size and quality, file number and type, and current frame number / total picture count. When engaged, the Playback screen also displays the low-battery, image transfer, print-order, and protect icons. By pressing the Information button below the LCD monitor, you can bring up three more pages of picture information, including all of the information stored in the Pic / Data file (above), plus a thumbnail preview of the image with a histogram to show distribution of tones.
The Coolpix 885 is powered by a single 2CR5 (DL245) lithium battery, included with the camera, or by Nikon's EN-EL1 LiIon rechargeable battery pack. Take our advice and just buy the LiIon battery/charger kit. It only costs as much as 4 or 5 of the non-rechargeable batteries and will last for hundreds of charge cycles. Nikon also sells an optional AC adapter that can power the camera directly from wall current. All images are saved to a standard CompactFlash Type I storage card; a 16MB card is provided with the camera (you can third-party cards as large as 512MB).
The camera connects directly to Windows and Macintosh computers via a USB cable supplied in the box. The 885 also comes with a Video Out port and video cable for viewing images on a TV or VCR. (An NTSC cable is supplied with US and Japanese models, and a PAL-compatible cable is shipped with European models.)
The 885 ships with a robust set of software programs for managing and manipulating images, including NikonView 4, which enables you to upload images to your computer and distribute them via the Internet; Canto Cumulus 5.0 Trial and iView Media Pro (Mac only) for image storage and management; plus a full suite of ArcSoft digital imaging programs: PhotoImpression 2000, for editing, retouching, and applying special effects to your images; VideoImpression for viewing and editing QuickTime movies; PhotoPrinter Pro 2000 for preparing images for printing; and Panorama Maker 2000, which allows users to stitch together multiple images to create panoramic photographs.
All in all, the Coolpix 885 offers impressive capabilities in a very compact camera. Its scene modes let even novice photographers take good photos under challenging conditions, while its full-auto mode is great for people who don't want even that level of complexity. At the same time the "custom" mode lets you take full control of camera operation for creative photography.
Design
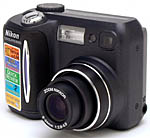
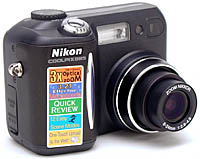
The Nikon Coolpix 885 is very similar in design to its predecessors, the Coolpix 880 and 775. The all-black camera body is constructed of high-impact polycarbonate, with aluminum reinforcements along the top and around the lens barrel. A large hand grip on the right and a telescoping zoom lens on the left, contribute to the 885's "miniature SLR" appearance. The body is very compact, measuring only 3.7 x 2.7 x 2.0 inches (95 x 69 x 52mm) and lightweight (7.9 ounces / 225 grams without the battery), making it a very comfortable camera to carry in one hand and nearly weightless when dropped into a coat pocket or purse. At the same time though, the large hand grip on the right provides a comfortable grip, and easy access to the controls.
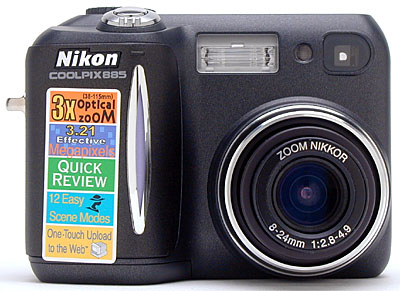
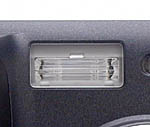
The front of the camera features the flash, optical viewfinder window, Red-Eye reduction lamp and 3x zoom lens. When the camera is powered on, and the Mode dial is set to any of the capture modes, the lens extends about an inch from the camera body. It likewise retracts when the camera is powered off. The lens is protected by a removable plastic lens cap, which features a spring-loaded lock and a small strap to attach it to the camera (to prevent loss). Also part of the camera front is the hand grip, which wraps around the battery compartment inside.
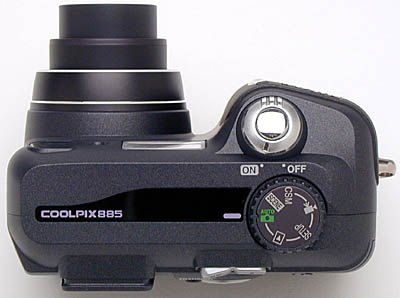
The top panel contains the Shutter button, surrounded by the On / Off switch, and a large Mode dial with six settings: Playback, Movie, Auto, Scene and Custom (CSM). Missing is the black-and-white LCD display that was provided on the 880 -- always helpful for cutting back on monitor use.
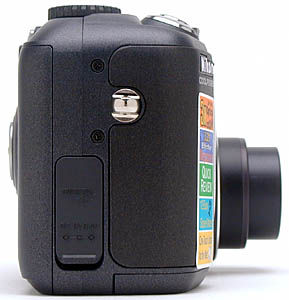
The memory card compartment resides on the right side of the camera, with a set of ridges on the back panel to push open the plastic cover. Inside the compartment, at the bottom, is a small black button that when pushed, pops out the CompactFlash card far enough to easily grab the edge and pull it out. (Well, "easily" is relative: We again complain about the orientation of the memory card, which places the small lip at the back of the card against the body of the camera. No problem removing the card if you have good fingernails, but could be quite a bit of trouble otherwise.) A small rubber flap next to the memory card door covers the DC In connector, and the wrist strap eyelet is located at the top of the panel. We liked the way the flap can be swung aside to access the connectors, alleviating concerns about fatigue of rubber flaps that must constantly be flexed to access the ports they protect.
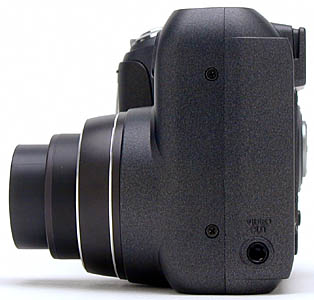
The left side of the camera is relatively smooth and featureless, except for a small Video Out port at the bottom.
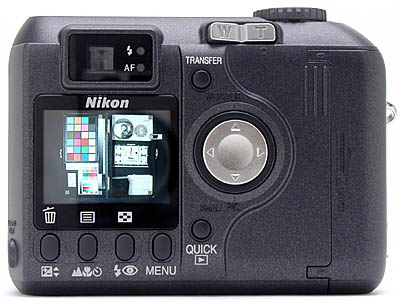
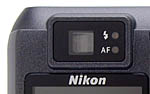
The majority of controls reside on the camera's back panel. At the top left is a real-image optical viewfinder with two LED status lights on the right side: one to indicate flash power and the other to show the status of the autofocus, digital zoom, and images being written to the memory card. To the right of the viewfinder is a four-way arrow pad designated as the Multi Selector button. It serves many functions, such as scrolling through saved images, adjusting focus areas, and navigating menu selections. In shooting modes, the top button scrolls through monitor display options. Above the arrow pad is the Transfer button, which automatically uploads images to your computer or the Internet, and at the very top of the back panel is the lens Zoom button. On the right side is the CompactFlash compartment door, which is opened by pushing the raised ridges in the middle of the door to the right.
Below the viewfinder on the left side is the 1.5-inch color LCD monitor, with four external control buttons underneath. The EV / Trash button (left) is used to control Exposure Compensation; Shutter Speed, ISO, and Aperture settings (in CSM mode only), and to delete single images. The Focus / Self-Timer / Info button (center, left) switches between Focus modes (including Self-Timer), adjusts Manual Distance (CSM mode only), and scrolls through the information display in Playback mode. The Flash / Index button (center, right) controls the built-in flash while in Record mode, and switches from full-frame to Index preview in Playback mode. The Menu button (right) calls up the on-screen menu for the current operating mode and scrolls through multiple pages. A Quick Review button, located under the four-way arrow pad, brings up the most recently recorded image and displays it as a thumbnail in the upper left corner of the monitor.
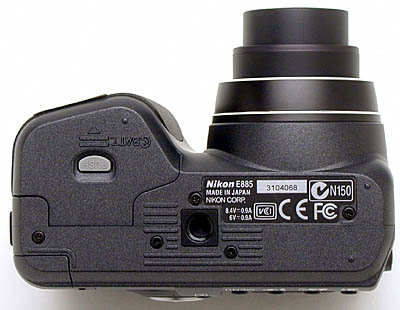
The bottom panel houses a plastic threaded tripod mount and the battery compartment door, which are too close to allow for quick battery changes while the camera is mounted on a tripod (something we pay close attention to when working in the studio, although it may not be much of an issue for the average user). The tripod socket is also made of plastic. We normally strongly prefer metal tripod sockets, but recognize that the light weight of the Coolpix 885 makes a metal socket less necessary.
 Viewfinder
The 885 offers both an optical viewfinder and LCD monitor to assist in image composition. The optical viewfinder zooms along with the lens, but does not provide any center target brackets or framing guidelines. The LCD monitor turns on automatically when you power up the camera (in all Record modes except CSM), but it can be turned off by pressing the top arrow button twice, or letting it sit idle for more than 30 seconds to 30 minutes, depending on the Auto Off setting (adjustable in the camera's Setup menu). This same button also controls the information display on the monitor. When the LCD is turned on, it shows a full information display in the form of icons distributed around the edges of the screen. Pressing the top arrow button once turns off the information display, but leaves the image display turned on.
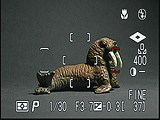 When the 885 is in Scene mode, the LCD information display includes the appropriate Scene mode indicator in the top left corner. Flash mode is displayed in the upper right corner, and the image quality and number of remaining images in the lower right corner. Other camera settings are displayed on screen as they are engaged, for example the Current Folder name (unless it's "Nikon," the default), Digital Zoom, Self-Timer, Best Shot Selection, Exposure Lock, Bracketing, Metering, ISO, Shutter Speed, Aperture, Continuous Shooting, Exposure Compensation, White Balance, and Image Sharpening are all indicated on the monitor when they are in use. (Manual settings are only displayed in CSM mode.) The battery power level is only displayed when the power level is low.
In Playback mode, the LCD monitor displays captured images as single, full-screen shots or in multiple thumbnails (Index mode). Single images can be viewed with or without the normal information display, which includes the date and time the image was captured, (top left of the screen), the image size and quality (bottom left), file number and type (top right), and current frame number / total picture count (bottom right). Transfer, Print Order, and Protect icons are displayed when engaged.
 By pressing the Information button below the LCD monitor, you can bring up four more pages of picture information. Page 2 includes the camera model and firmware version, metering mode, exposure mode, shutter speed, aperture, EV, focal length, and focus mode. Page 3 displays flash status, image adjustment ISO, white balance, sharpening, digital zoom, lens converter status, and file size in kilobytes (KB). Page 4 includes a thumbnail preview of the image with a histogram to show distribution of tones, along with a short list of exposure settings. Page 5 is the Focus Confirmation screen, which shows a full-size image with the active focus area highlighted in red brackets (when AF Area is used), and "focused" areas in the image are sharply outlined.
 In any Record mode, pressing the Quick Review button enables you to view thumbnails of previously captured images in the upper left corner of the monitor, while still observing the live action taking place on-screen. You can scroll through stored images just as you would in Playback mode, without having to switch the Mode dial to the Playback icon. If you press the button twice, the review image expands to full screen size.
Nikon reports the viewfinder coverage at 80 and 97 percent accuracy (respectively) for the optical and LCD viewfinders, but we found the optical viewfinder to be quite a bit less accurate, showing only 75 - 76 percent of the final image area. True to Nikon's specs though, the LCD viewfinder was quite accurate, as we measured its coverage at between 97 and 99 percent. We like the accuracy of the LCD, but really feel that the optical viewfinder needs some improvement.
 Optics
The Coolpix 885 features a 3x Zoom Nikkor lens with an 8-24mm focal length (equivalent to 38-114mm lens on a 35mm camera), and an f/2.8-4.9 maximum aperture, which varies depending on the focal length setting. Protected by a removable plastic lens cap, the lens barrel telescopes outward from the camera body when the camera is powered on in any Record mode and retracts back into the camera when powered off, or when set to Playback or Setup modes. The optical glass lens consists of nine elements in eight groups, with a focal range of 12 inches (30cm) to infinity in normal shooting mode, and 1.6 inches (4cm) to infinity in Macro mode. Minimum coverage area in Macro mode is an impressive1.61 x 1.21 inches (40.82 x 30.62 millimeters).
In Auto, Scene, and Movie modes, Focus is automatically set by the camera's autofocus system, in either Single or Continuous AF modes, using a through-the-lens (TTL) contrast detection system. Single AF, which is activated when the LCD monitor is turned off, sets focus whenever you depress the Shutter button halfway. Continuous AF, which is automatically engaged when the LCD monitor is turned on, adjusts focus continuously as you move the camera around, or as the subject changes position within the frame.
You can adjust the camera's focal range by pressing the Focus / Self-Timer / Info button below the LCD monitor. The default setting automatically focuses on subjects 12 inches (30cm) or more from the lens. By pressing the Focus button twice, you can fix the focus at Infinity (indicated by the mountain range icon), which automatically disables the camera's flash. Infinity fixes the lens on the furthest possible focal point, so objects in the distance will remain in focus. Pressing the button a third time activates the Macro (close-up) mode (indicated by the flower icon), which allows the camera to focus on subjects as close as 1.6 inches. (Note though, that the minimum focusing distance is only attainable with the lens set fairly far toward the wide angle position. The little tulip icon on the LCD screen that indicates macro mode turns yellow when the lens is set to the position that permits maximum closeups.) The focus/self-timer button also activates the Self-Timer function in Normal or Macro Focus modes, with a shutter release delay of 3 or 10 seconds, depending on how you press the shutter button. (See the subsection on the self-timer option in the Exposure section below for more details.)
In CSM ("custom") mode, you can use the Focus button to select one of 49 preset focus distances, from 0.10 feet (0.03 meters) to infinity, by holding down the button while you adjust the Zoom control. To access the Manual Focus mode, you have to enable it in the CSM menu. (Why? - It's hard enough to find & access that we doubt anyone would accidentally turn it on, so why the added complexity of forcing a menu selection to enable it?) The focus distance is displayed in the top right corner of the LCD monitor. In certain Scene modes, the Focus button can only be used to set the Self-Timer function, and in Movie mode, it sets only the Macro and Infinity functions.
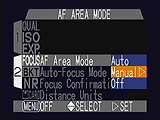 Perhaps the most complicated set of features on the Coolpix 885 is the "Focus Options" sub-menu in the CSM mode. Focus Options has four choices: AF Area Mode, Autofocus Mode, Focus Confirmation, and Distance Units. When engaged, AF Area Focus divides the scene into five focus areas -- one center area and four surrounding the center area (above, below, left, right) -- each marked by a set of brackets. AF Area "Auto" automatically selects the focus area based on the subject. It chooses the area with the closest object to the lens. AF Area "Manual" allows you to manually select one of the five focus areas by pressing the Arrow buttons on the Four-Way Arrow pad. In both cases, the "active" focus area is indicated by red brackets on the LCD monitor. While it adds some complexity to the camera, the AF Area Mode option can be invaluable for dealing with off-center subjects.
Autofocus allows you to choose between Single or Continuous AF modes while you have the LCD monitor on (it automatically reverts to Single AF when the monitor is turned off). This is a particularly important menu item, because unless you designate Single AF, the Autofocus default is Continuous AF, when the monitor is turned on, which produces an extra drain on the battery. Focus Confirmation adjusts the screen image to reflect areas of focus by sharpening the outline around the focused object(s). (This one takes a keen eye to be able to view it on such a small screen, but we found it surprisingly effective at providing visual feedback during manual focus operations.) Finally, Distance Units simply sets the Manual Focus units to feet or meters.
The Digital Zoom function is activated by zooming out to the maximum telephoto position (3x) and then continuing to hold down the "T" Zoom button for two seconds until Digital Zoom is engaged. As you continue to press down on the "T" button, the image magnification increases to a maximum of 4x. However, it achieves this magnification by interpolating data from the center portion of the CCD's active area, rather than enlarging the scene optically, thereby decreasing image quality and increasing image "noise" and artifacts. Digital Zoom can be useful for low-resolution imaging, like Web pages, but it does not provide the quality magnification of an optical zoom lens.
Exposure
Exposure control on the Coolpix 885 is pretty extensive. Not only do you have the benefit of a Manual exposure mode (available in the CSM menu), but you also have a large selection of "Scene" modes (available in the Scene menu), which set up the camera for specific shooting environments. There's also fully Automatic, Programmed, and Custom exposure modes as well. The Auto Exposure mode is self-explanatory, in that the camera controls the aperture and shutter speed settings, along with all other exposure options except Flash and Image Quality and Size settings. This is a great option for someone who wants a purely "point & shoot" camera, and Nikon's Matrix Metering delivers accurate exposures under a wide variety of conditions. Under the Programmed Auto exposure mode (also available in the CSM menu), the camera sets the shutter speed and aperture values, but unlike the Auto mode, you have control over ISO, white balance, contrast, brightness, sharpening, exposure compensation, etc. The Manual exposure mode gives you the same level of control, but with access to both aperture and shutter speed. (Note: the preset, electronically controlled aperture has only two steps: f/2.8 and f/7.6 at wide-angle; ranging up to f/4.9 and f/7.6 at telephoto. This is one of the few areas of significant limitation relative to the higher-end Coolpix 995.) Shutter speeds range from 1/1,000 to 8 seconds in normal mode, and can be as long as 60 seconds when set to the Bulb exposure.) The Custom mode simply means that you can select a variety of exposure settings and then save them as a "mode" to be used again under the same shooting conditions. For example, if you take a lot of pictures with the same lighting conditions, you might want to save the exposure settings to be used whenever you shoot in that environment.
The Scene mode is pretty unique among digicams in our experience (although we're starting to see more and more cameras offer some version of it), embodying Nikon's concept of "Assisted Creative Photography." Nikon has created a menu of preset "scenes" for you to choose from, which set up the camera to photograph specific shooting environments. Preset scenes include Portrait, Party / Indoor, Night Portrait, Beach / Snow, Landscape, Sunset, Night Landscape, Museum, Fireworks Show, Closeup, Copy (for text or drawings) and Back Light (for backlit subjects). These modes relieve users from needing deep understanding of exposure dynamics, and let them focus instead on capturing the moment. If you can distinguish the basic scene type you're dealing with (pretty easy, in situations like Beach / Snow vs. Party / Indoor), your chances of getting a good photo are greatly increased. You'll find a more complete description of the 885's Scene modes in the Camera Modes and Menus section.
ISO: The standard ISO setting is 100, which the camera can automatically increase as it sees fit when the ISO setting is set to the "Auto" option. ISO can be manually adjusted through the CSM menu while shooting in Programmed or Custom modes, with fixed options of Auto, 100, 200 and 400 ISO available. ISO can also be set by holding down the EV / Delete button and pressing the "T" button on the Zoom control.
Metering: The camera's metering mode can be changed to one of four options: Matrix, Spot, Center-Weighted, and Spot AF Area. Matrix metering is the default mode for Auto Exposure mode. It measures the exposure in 256 areas of the frame and then evaluates those values to determine the proper exposure for the entire image. Spot metering simply takes a reading from the very center of the image. Center-Weighted metering measures a small area around the center of the image, and Spot AF Area measures the light in the current autofocus target area (either in the center or from one of the five target areas, and established through the Focus menu option).
Exposure Compensation: Exposure compensation on the Coolpix 885 is controlled by the EV / Delete button on the back panel, and is adjustable from -2.0 to +2.0 exposure values in one-third-step increments. The setting is not available in full Manual exposure mode, and automatically reverts back to 0.0 EV when a new mode is entered or when the camera is turned off. Exposure compensation is primarily used to adjust for extreme lighting situations, such as very bright or dark subjects / scenes, or when shooting in high-contrast settings. The general rule-of-thumb is to select positive values when photographing very bright scenes (such as snow, water, or sand), or when the background is much lighter than the subject, and to use negative values when photographing very dark scenes (such as deep forest settings), or when the background is much darker than the subject.
White Balance: White Balance compensates for the different color casts produced by various light sources. White Balance is selectable in the CSM menu with the following options: Auto (the camera determines WB), White Balance Preset (manual adjustment), Fine (sunlight), Incandescent, Fluorescent, Cloudy, and Speedlight (flash). The manual Preset adjustment is determined by selecting the White Bal. Preset option in the White Balance menu, highlighting the Measure option, holding a bright white sheet of paper in front of the camera lens, and pressing the right Arrow button. The camera will zoom out, release the shutter, and take a reading of the light coming from the paper. It then makes whatever adjustments are required to render that particular color pure white in subsequently captured images. All White Balance settings except Auto and Preset can be fine-tuned by pulling down a sub-menu after making the selection, which allows you to raise or lower the white balance and thereby make the image cooler or warmer. We found this fine-tuning invaluable in getting good exposures under indoor lighting. - We really wish more manufacturers would adopt this feature! In the case of Fluorescent lighting, the pulldown menu has three types of Fluorescent light, identified by FL1, FL2, and FL3.
Auto Bracketing: Auto Exposure Bracketing is used in situations where you're not sure of the best exposure. It allows you to take three or five photographs of the same subject at different exposure values (EV). The amount of variance between exposures is selected through the Exposure Bracketing menu in the CSM Shooting menu. Choices are +/- 0.3, +/- 0.7, and +/- 1.0 EV. While shooting in this mode, the amount of exposure variance appears in the lower left corner of the LCD monitor. WB Bracketing follows the same format, but is applied to the White Balance setting instead of exposure. When the Shutter is depressed in this mode, the camera records one exposure at the chosen WB setting, one with slightly more red, and one with slightly more blue. The Bracketing options are not available in all shooting modes. (When you're taking critical photos, the ability to automatically and routinely bracket like this is very valuable!)
Image Adjustment: The Image Adjustment menu allows you to increase or decrease the image brightness and contrast, as well as lighten or darken the image. You can also choose a black and white setting for shooting monochrome images. (Note that this is quite different than the usual exposure compensation adjustment, in that it affects primarily the midtones of the image, rather than the highlight or shadow values. Another useful feature that we'd like to see on more digicams.
Image Sharpening: The Image Sharpening menu provides several options for sharpening images in-camera. Auto Sharpening makes adjustments based on the image, so the amount of sharpening will vary from shot to shot; Normal applies the same level of sharpening to all images; High increases image sharpness, making edges more distinct (but possibly obscuring some of the finest detail in the process); Low reduces the amount of sharpening normally applied; and Off shuts down the sharpening function completely. These options are only available in Program, Manual, and CSM exposure modes. In Scene modes, the camera determines the level of sharpening based on the subject matter. (Note: The effects of Image Sharpening are not visible on the LCD monitor.) We did essentially all our shooting with the 885's sharpening option set to "auto", with good results. The low and no sharpening options are useful for photographers planning on extensive photo manipulation in the computer after the fact, or those wanting to optimize sharpening in their imaging software for particular printout requirements.
 Flash
Flash
The 885 features a built-in flash with five operating modes, each of which is accessed by pressing the Flash / Index button centered under the LCD monitor. Flash mode options include: Auto, which automatically triggers the flash when the camera determines that additional lighting is needed; Flash Cancel (flash off), which prevents the flash from firing under any conditions; Redeye Reduction, which emits a pre-flash before unleashing the full flash power to reduce the effects of red-eye in the subjects' eyes, Anytime Flash (fill flash), which automatically fires the flash, regardless of lighting conditions; and Slow Sync, which combines flash and a slow shutter speed to let in more ambient light (best used for nighttime shots and backlit subjects, tripod recommended). A small icon indicating each flash mode appears at the top of the LCD monitor.
Nikon reports the flash range for the 885 to be 1.3 to 12.1 feet (40 to 370 cm) at wide angle, and 1.3 to 7.5 feet (40 to 230 cm) at telephoto. This is a rather limited flash range, but agrees with our own tests, which we shoot primarily with the lens in the telephoto position. - Under that condition, we found that the flash brightness decreased steadily from the 8 foot minimum of our test on out. Thus, a 7.5 foot range with the lens in the telephoto position seems like a reasonable rating, albeit a short one.
Special Exposure Modes
Movie
The Coolpix 885 features a Movie recording mode, accessed by turning the Mode dial to the movie camera icon. Real time action is recorded at 15 frames per second, with 320 x 240-pixel (QVGA) resolution, without sound, and stored on the memory card as QuickTime files (designated by .MOV at the end of the name). Recording begins by pressing the Shutter button once and continues for 15 seconds, or until the memory card runs out of space. You can end the recording before the 15 seconds are up by pressing the Shutter button a second time. Flash, Macro, and Infinity Focus, and Digital Zoom options are not available in Movie mode.
In Playback mode, Movie files are displayed as single image frames with a movie camera icon in the lower left corner of the LCD display. To start the movie playback, press the Quick Review button once to begin playback and press it a second time to pause. While in pause mode, the left and right arrow keys can be used to rewind or advance the movie one frame at a time.
Self-Timer
Controlled by the Focus / Self-Timer / Info button on the camera's back panel, the Self-Timer function is used to set up the camera for delayed exposures. The 885 offers two countdown durations -- 3 or 10 seconds -- determined by the number of times you press the Shutter button (once for 10 seconds and twice for 3 seconds). The shorter countdown is ideal for triggering the shutter quickly, without risking camera shake when your finger comes in contact with the Shutter button. (Very useful for low-light and macro shooting with a tripod or other camera support.) The longer countdown time enables you to frame a shot, depress the Shutter button, and quickly take up a position in front of the camera before the shutter fires. This is particularly helpful when taking group photos (just remember to bring the tripod!)
In most shooting modes, the Self-Timer is activated by scrolling through the Focus / Self-Timer / Info button options: Autofocus (no icon), Autofocus / Self-Timer (clock icon), Infinity Focus (mountain icon), Macro Focus (flower icon), and Macro Focus / Self-Timer (flower + clock icon). Only those options that display a Self-Timer icon will activate the countdown. Once the Shutter button is depressed, a Self-Timer lamp on the camera's front panel starts blinking, and will continue to blink until one second before the shutter is released, when it will glow steadily until the shutter fires. You can also track the countdown by watching the Self-Timer icon on the camera's LCD monitor, which displays the seconds remaining until the exposure is complete.
Continuous Shooting
The Coolpix 885 offers a Continuous menu, for shooting consecutive and sequenced images with the Single, Continuous, Multi-Shot 16, VGA Sequence, and Ultra HS options. In Continuous Shooting mode, the camera takes continuous exposures, at a rate of three photos / two seconds, as long as you hold down the shutter button or until the memory is full. (This mode is unavailable with the Hi (uncompressed TIFF) quality setting.) In Multi-Shot 16 mode, the camera takes 16 consecutive thumbnail images and combines them into one large image. (Image Size must be set to Full.) VGA Sequence takes a series of 640 x 480 photographs at approximately two frames per second, for as long as the shutter button is held down, great for capturing moving subjects. The Ultra HS mode takes up to 70 320 x 240 photographs each time the shutter button is pressed, shooting at approximately 30 frames per second. (Image Quality must be set to Normal for VGA Sequence and Ultra HS.)
Best Shot Selection
The Best Shot Selection (BSS) feature records continuous exposures in the same manner as the Continuous mode, except that the camera then analyzes the series and chooses only the sharpest image to record to the memory card. This is particularly useful in situations where there is an increased potential for camera shake, such as in Macro mode, when the lens is zoomed out to maximum telephoto range, or when the lighting is poor and you can't use the flash. The sequence is limited to a maximum of10 shots (but may well be less, depending on the resolution/quality mode that's selected), and Focus, White Balance, and Exposure are all set with the first image in the series. Flash is not available in BSS mode. BSS is exceptionally useful for getting sharp photos under low light conditions, but does have the disadvantage that you can lose fleeting expressions on your subjects' faces, since the sharpest image in the series may not correspond to the particular moment in time that caught the subjects with the particular expression you were looking for. - If that sort of critical "moment in time" is important to you, consider using some form of camera support and/or simply using Continuous Shooting mode to record all the images to the memory card.
Shutter Lag/Cycle Times
When you press the shutter release on a camera, there's usually a delay
or lag time before the shutter actually fires. This time is to allow the autofocus
and autoexposure mechanisms time to do their work, and can amount to a fairly
long delay in some situations. Since this number is almost never reported on,
and can significantly affect the picture taking experience, we now routinely
measure it using a proprietary Imaging Resource test apparatus. We also test
for routine timings, such as startup/shutdown times, and the "cycle time",
or minimum interval between successive pictures. The results are listed in the
following chart.
|
|
||
|
|
(secs) |
|
| Power On -> First shot |
|
Rather slow.
|
| Shutdown |
|
Pretty fast. (This is time to retract lens. Allow longer
if file being saved to card, before card can be removed.)
|
| Play to Record, first shot |
|
A little slow.
|
| Record to play (max/min res) |
|
Longer time is for max res JPEG, immediate switch to
quick review. Shorter time is for quick review, with camera already
done saving image to card.
|
| Shutter lag, full autofocus |
|
First time is for wide angle, second for telephoto. A good bit slower than average. |
| Shutter lag, prefocus |
|
A fair bit faster than average. (Average is about 0.3) |
| Cycle time, large/fine files |
|
Shorter time is for first four shots, then need to wait for the buffer to clear. A bit slower than average for the category. |
| Cycle time, small/basic files |
|
A bit slower than average for small/basic files. |
| Cycle time, TIFF files |
|
TIFF mode files are huge, take a long time to write. Longer time is for conventional card, shorter time for "12x" high speed card. |
| Continuous mode, large files |
|
First time is for first four shots, then slower after buffer is full. |
| Continuous mode, small files |
|
Stays this fast for up to ~60 shots, thanks to large buffer. |
| VGA Sequence |
|
|
| Ultra High Speed |
(30 frames/sec) |
Small files, but *man* is that fast! (Shoots a total
of ~70 frames at this rate, without pausing.)
|
Overall, we found the Coolpix 885 to be a little slow relative to competing models. Startup is quite leisurely. - Despite the lens racking out fairly quickly, it seems to take the camera a while to get itself sorted out and ready to take a picture. The total time from power on to first picture is thus a fairly long 8.2 seconds. Once operating, shutter delays are fairly lengthy, 1.43 seconds with the lens at its wide angle setting, 1.77 seconds at its telephoto position. These are quite long, given that most digicams we test come in at one second or less. On a positive note though, the 885 captures images quite quickly if you prefocus the lens by half-pressing and holding the shutter button prior to the exposure itself. Shot to shot cycle times are also a little slow (although not terribly so), at 3.3 seconds for either large or small image sizes. On a positive note, the 885's continuous mode frame rate is quite good at 0.95 seconds between shots for full-sized files.
Operation and User Interface
The Coolpix models all have a very similar user interface, with the main controls accessed via external buttons and dials, and the less frequently used adjustments available through the on-screen menu system. Because the 885 has such an extensive selection of "fine-tuning" options, its Custom menus are longer than normal and, in some cases, more difficult to navigate. Fortunately, you don't have to delve into those menus unless you want to. (They are also rather small and difficult to read, especially for users who are visually challenged by small typefaces.) The Auto and Movie modes have no on-screen menus at all, and the Scene mode simply provides you with a list of 12 possible shooting scenarios for which you only have to find the appropriate selection -- portraits, sunsets, night scenes, even ski slopes -- and the camera does all the adjusting for you, automatically compensating for darkness, bright sunlight, interiors, and much more. A series of five buttons around the LCD monitor -- each well-marked with its multiple functions -- provides a wide range of fingertip controls. As a group, they cover just about all of the bases: Flash, Self-Timer, Delete, Macro or Infinity focus, Quick Review, and the Menu button. The Multi-Selector control (what we normally refer to as a four-way arrow pad) is a little trickier to navigate, as the arrows often change operations from one mode to the next. However, this is a relatively minor gripe, since it doesn't take long to learn the protocol.
The User Manual is huge, more than 140 pages. As is the case with all Nikon manuals, it is very detailed and leaves very few questions unanswered (if you can take the time to go through it), and the Quick-Start sheet fills in when you just want to learn the bare basics. We did notice a few inconsistencies in the 885 manual though, such as button graphics that don't match the copy, but these are not likely to cause too much confusion. (Most likely a result of rewriting the 880 manual rather than starting from scratch.)
Overall, we were pleased with the 885's operation and layout. Here is a brief rundown of the buttons and menus and how they all fit into the camera's operation.
Control Enumeration
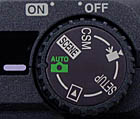
Mode Dial: Located on top of the camera, on the far right side, the Mode dial offers four Shooting modes, a Setup mode, and a Playback mode. Shooting modes include Auto Exposure, Scene, Custom, and Movie.
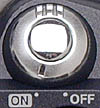
Power Switch: Positioned in front of the Mode dial, surrounding the Shutter button, the Power Switch turns the camera on or off.

Shutter Button: Encircled by the Power Switch, the Shutter button sets focus when halfway depressed and triggers the shutter when fully depressed. Pressing the Shutter button once in Self-Timer mode triggers a 10-second countdown, and pressing it twice triggers a 3-second countdown.
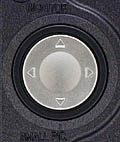
Multi Selector: This "rocker toggle" with four arrow directions marked on it, located near the center of the back panel, performs a variety of functions, including scrolling through images in Quick Review and Playback modes, navigating through camera menus, and controlling the monitor display. Individually, the four buttons perform the following functions:
![]()
Flash Indicator: The top LED lamp next to the eye-level viewfinder is the red Flash Indicator, which glows steadily when the Flash is charged and ready to fire. When the lamp blinks red, the Flash is charging, and when the lamp is off, the Flash is turned off, or the Auto Flash has determined that a flash is not required.
![]()
Autofocus Indicator: The bottom LED lamp next to the viewfinder glows a steady green color when the subject is in focus. If it flickers, the camera is having trouble focusing on the subject. If the green light flashes after one or more exposures, it means the camera is recording images to the memory card. If the light flashes slowly, the Digital Zoom is activated.

Zoom Button: In Shooting mode, this button controls the optical zoom and digital zoom when engaged. Pressing the "W" side zooms the lens out to the wide-angle position, and pressing the "T" side zooms the lens in to the telephoto position. In Playback mode, pressing the "T" side enlarges the image on screen and pressing the "W" side cancels the enlargement.
![]()
Transfer Button: To the right of the eye-level viewfinder, the Transfer button is used to select images for transfer, and to transfer selected images from the camera to the computer while running NikonView software. When the camera is in Playback mode, the Transfer button is used to select images and movies for transfer to a computer at a later time.

Quick Review Button: Directly below the Multi Selector button, this control is used to view results of previously recorded images while still in Shooting mode. Pressing the button once brings up a thumbnail size review image in the upper left corner of the LCD monitor, while keeping the current, active LCD view on-screen. Pressing the button twice brings up a full-page review image.

EV / Delete Button: The first button in a series (left to right) under the LCD monitor, this button performs several functions when used in combination with other camera controls. Depending on the Shooting mode, it adjusts: Exposure compensation, shutter speed, aperture, and ISO. In Playback mode or Quick Review it is used to delete the currently displayed image.

Focus Mode / Self-Timer / Info Button: The second button under the LCD monitor, it functions as the Focus and Self-Timer selector in Auto, Scene, and Custom Shooting modes. Options include Autofocus (no icon), Landscape (mountain icon), Macro (flower icon), and Self-Timer (clock), which can be combined with Autofocus or Macro. In Playback mode, this button brings up information pages for individual images.

Flash Mode / Index Button: The third button under the LCD monitor, this controls the built-in Flash when the camera is in Shooting mode. Flash options include:
In Playback mode, this button activates the image Index Display.

Menu Button: Located on the right side under the LCD monitor, the Menu button brings up the on-screen menu for the current operating mode. If the menu has more than one page, pressing the Menu button a second time displays the next page of the menu. When the last menu page is displayed, pressing the Menu button exits from the on-screen menu.
Battery Cover Latch: Pushing this sliding gray button opens the battery compartment door.
Camera Modes
![]()
Auto Mode: The Auto Shooting mode controls all exposure settings except Flash, Image Quality, and Image Size.
![]()
Scene Mode: The 885 offers 12 Scene exposure modes, which are preset for specific shooting situations.
![]()
Movie Mode: This Shooting option records movies (without sound) at 320 x 240-pixel resolution, for a maximum of 40 seconds each. Recording begins when the Shutter button is fully depressed, and ends when the Shutter button is depressed a second time (or when the 40 seconds is up or the memory card runs out of space). As the movie is recording, a countdown display is shown on the LCD monitor, indicating the number of seconds remaining in the exposure. Movies are stored as QuickTime files, with .MOV at the end of the file name. The Flash is turned off in this mode, and the Focus is set on Autofocus.
![]()
Playback Mode: The Playback mode displays the most recently recorded image or movie as a full-size still image on the LCD monitor. In single-image playback, you can scroll through stored images using the Left and Right Arrow buttons on the Multi-Selector control panel; adjust the information display by pressing the Focus / Info button; play a movie by pressing the Quick Review button (when the movie is displayed on-screen) and pause it with the same button; and you can select the currently displayed image for transfer to the computer by pressing the Transfer button on the camera's back panel. You can also Delete the currently displayed photo with the EV / Delete button, view multiple images in Index mode by pressing the Flash / Index button, zoom in on the currently displayed still image with the Zoom button, and bring up the Playback menu by pressing the Menu button.
In single-image playback mode, images are displayed briefly as low-resolution photos while they are being read from the memory card (indicated by the appearance of an hourglass icon on the monitor). By pressing the Left and Right Arrow buttons quickly, you can scroll through the low-resolution images without having to wait for each image to load at full resolution, or you can hold down the Arrow buttons and view the image numbers flashing in the lower right corner of the screen. Releasing the Arrow button at a particular frame number will bring up that photo.
Camera Mode Menus
Custom Mode Menu: This mode allows you to establish custom shooting modes for specific shooting situations. Pressing the menu button brings up two Shooting Menus:
 Shooting Menu 1 (CSM)
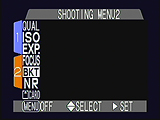 Shooting Menu 2 (CSM)
 Scene Menu: The Scene menu is comprised of the 12 Scene modes discussed in the "Camera Modes" section (above).
Auto Menu: The camera maintains complete control over all exposure options in Auto mode, with the exception of Image Size and Quality and Flash mode. No on-screen menus are provided.
Playback Menu: The Playback menu includes options for deleting pictures, playing slide shows, protecting images from accidental erasure, and marking images for DPOF or for automatic transfer to the computer. Playback menu options are:
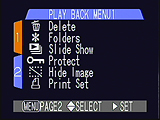 Playback Menu 1
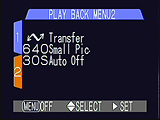 Playback Menu 2
Setup Menu: The Setup menu adjusts the camera's basic operating parameters and consists of two pages:
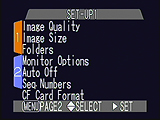 Setup Menu 1
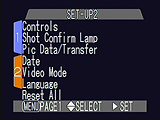 Setup Menu 2
Movie Mode: Records moving images without sound at 15 frames per second. There is no menu provided for the Movie mode.
 Image
Storage and Interface
Image
Storage and Interface
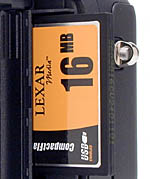
The Coolpix 885 uses standard CompactFlash Type I storage media for image capture.
A 16MB card comes with the camera, but we suggest buying a second, larger card
to handle the Full size images files. Resolution options include: Full 2,048
x 1,536; XGA 1,024 x 768; and VGA 640 x 480 pixels, and they can be saved at
one of three JPEG compression levels: Fine (4:1), Normal (8:1), and Basic (16:1).
(Note though, that these are the nominal compression levels claimed by Nikon
in their literature. The table below shows the actual compression ratios, determined
by the camera's actual file sizes.) The approximate sizes of the image files,
as well as the approximate number of images that can be stored on a 16MB card
are listed in the chart below:
|
Resolution/Quality 16MB Memory Card |
|
|
|
|
|
| Full Resolution 2048x1536 | Images (Avg size) |
1 9.4 MB |
10 1.6 MB |
0.8 MB |
0.4 MB |
| Approx. Compression |
1:1 | 6:1 |
|
|
|
| XGA Resolution 1024x768 | Images (Avg size) |
|
0.42 MB |
0.23 MB |
0.13 MB |
| Approx. Compression |
|
|
|
|
|
|
|
Images (Avg size) |
|
0.18 MB |
0.11 MB |
0.07 MB |
| Approx. Compression |
|
|
|
|
|
You can write-protect individual images on the CompactFlash card to prevent them from being accidentally erased in the Playback Menu. You can also format the entire card via the Setup menu, which erases all images on the card, including write-protected images.
The Coolpix 885 connects to Windows or Macintosh computers via a USB interface. We clocked the 885's transfer download speed at 515 KB/second on our G4 Macintosh. This is a pretty good rate, at the upper end of the scale among digicams we've tested.
![]() One
of the first things any new digicam owner will need is a larger memory card
for their camera: The cards shipped with the units by the manufacturers should
really be considered only "starter" cards, you'll definitely want a higher capacity
card immediately. - Probably at least a 32 megabyte card for a 1.3 or 2 megapixel
camera, 64 megabytes or more for a 3, 4, or 5 megapixel one. (The nice thing
about memory cards is you'll be able to use whatever you buy now with your next
camera too, whenever you upgrade.) To help you shop for a good deal on memory
cards that fit the C885, we've put together a little memory locater, with links
to our price-comparison engine: Just click on the "Memory Wizard" button above
to go to the Nikon memory finder, select your camera model , and click the shopping
cart icon next to the card size you're interested in. You'll see a list of matching
entries from the price-comparison database. Pick a vendor & order away! (Pretty
cool, huh?)
One
of the first things any new digicam owner will need is a larger memory card
for their camera: The cards shipped with the units by the manufacturers should
really be considered only "starter" cards, you'll definitely want a higher capacity
card immediately. - Probably at least a 32 megabyte card for a 1.3 or 2 megapixel
camera, 64 megabytes or more for a 3, 4, or 5 megapixel one. (The nice thing
about memory cards is you'll be able to use whatever you buy now with your next
camera too, whenever you upgrade.) To help you shop for a good deal on memory
cards that fit the C885, we've put together a little memory locater, with links
to our price-comparison engine: Just click on the "Memory Wizard" button above
to go to the Nikon memory finder, select your camera model , and click the shopping
cart icon next to the card size you're interested in. You'll see a list of matching
entries from the price-comparison database. Pick a vendor & order away! (Pretty
cool, huh?)
Lost Images? - Download this image-recovery program so you'll have it when
you need it...
Since we're talking about memory and image storage, this would be a good time
to mention the following: I get a ton of email from readers who've lost photos
due to a corrupted memory card. It's tragic when it happens, there are few things
more precious than photo memories. Corrupted memory cards can happen with any
card type and any camera manufacturer, nobody's immune. "Stuff happens,"
as they say. A surprising number of "lost" images can be recovered
with an inexpensive, easy to use piece of software though. Given the amount
of email I've gotten on the topic, I now include this paragraph in all my digicam
reviews. The program you need is called PhotoRescue, by DataRescue SA. Read
our review of it if you'd like, but download the program now,
so you'll have it. It doesn't cost a penny until you need it, and even then
it's only $29, with a money back guarantee. So download PhotoRescue for
Windows or PhotoRescue for
Mac while you're thinking of it. (While you're at it, download the PDF
manual and quickstart
guide as well.) Stash the file in a safe place and it'll be there when you need
it. Trust me, needing this is not a matter of if, but when... PhotoRescue
is about the best and easiest tool for recovering digital photos I've seen.
(Disclosure: IR gets a small commission from sales of the product, but I'd highly
recommend the program even if we didn't.) OK, now back to our regularly
scheduled review...
Video Out
The camera's USB connector doubles as a Video Out port for viewing images on
a TV or VCR. An NTSC cable is supplied with the camera in the US and Japan, while
a PAL compatible cable is shipped with European models. The video mode can be
set to either NTSC or PAL in the camera's Setup menu.
 Power
Power
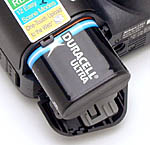
The Coolpix 885 is powered by a 2CR5 (DL245) lithium battery, one of which is
provided with the camera. It may also be powered with Nikon's (optional) EN-EL1
lithium-ion rechargeable battery, which can be purchased separately. We strongly
recommend that anyone buying a Coolpix 885 also purchase the EN-EL1 battery
& the associated charger kit, and save the provided non-rechargeable battery
as a backup in case the rechargeable runs low on a trip. (Lithium batteries
make good backup batteries because they offer long life and stability and do
not discharge when not in use.) Really, the 885 simply shouldn't be sold without
the rechargeable battery, and any purchasers should add the $50-100 or so cost
of the battery/charger kit to the cost of the 885 when comparing it to other
models. (Note that Nikon sells the battery/charger kit on their web site for
only $50, but we've seen the same kit selling for $100 at various resellers.)
Don't be fooled, this isn't a $599 camera (at the time of this writing), but
actually a $649 one.)
|
|
(@ 8.4 v) |
(Nikon LiIon pack) |
| Capture Mode, w/LCD |
|
|
| Capture Mode, no LCD |
|
|
| Half-pressed shutter w/LCD |
|
|
| Half-pressed w/o LCD |
|
|
| Memory Write (transient) |
|
|
| Flash Recharge (transient) |
|
|
| Image Playback |
|
|
Well, we've already given Nikon a hard time for not including the rechargeable LiIon battery in the box with the Coolpix 885, but we'll say it again: You really need this to use the camera! Using non-rechargeable batteries at $10-12 apiece is a quick way to poverty! That said, if you dopurchase the optional battery/charger kit, you'll get very good run times. In the worst-case condition, in record mode with the LCD running, you'll see run times of 2 1/2 hours or more. With the LCD off, the camera can stay powered up for days (literally) without appreciably draining the batteries. Overall, a pretty power-thrifty camera, just be sure to buy the battery/charger kit.
Included Software
The camera's bundled software offers a robust set of programs for managing and manipulating images from the 885, including Nikon's auto transfer program, NikonView 4, which enables you to upload images to your computer and distribute them to family and friends via e-mail or through Nikon's image sharing website: www.nikonnet.com. Selected images can also be copied to a floppy disk directly from the camera's memory card and delivered to a photofinisher for processing. In addition to NikonView, users are provided with Canto Cumulus 5.0 Trial and iView Media Pro (Mac only) for image storage and management, plus a full suite of ArcSoft digital imaging programs, including: PhotoImpression 2000, for editing, retouching, and applying special effects to your images; VideoImpression for viewing and editing QuickTime movies; PhotoPrinter Pro 2000 for preparing images for printing; and Panorama Maker 2000, which allows users to stitch together multiple images to create panoramic photographs.
In the Box
Test Results
In keeping with our standard policy, our comments here are rather condensed, summarizing our key findings. For a full commentary on each of the test images, see the Coolpix 885's "pictures" page.
As with all Imaging Resource camera tests, we encourage you to let your own eyes be the judge of how well the devices performed. Explore the images on the pictures page, to see how well the Coolpix 885 performed, and how its images compare to other cameras you may be considering buying.
Throughout our testing, the Coolpix 885 produced pretty accurate color, though we sometimes noticed rather high saturation in some colors, and bright yellows were a bit muddy. The camera's White Balance system responded well to our test lighting, though it occasionally required some "tweaking" with the white balance adjustment utility. (Specifically, the Davebox target and our no-flash Indoor Portrait.) We really liked the ability to make fine adjustments to the white balance that the 885 provides in many of its modes. The Coolpix 885 distinguished tough tonal variations on the Davebox target and reproduced the large color blocks there fairly accurately, although it was on this target that we most noticed the tendency toward slightly muddy yellows. We also felt that skin tones were a bit too magenta in our Outdoor and Indoor portraits, and that the blue flowers of the model's bouquet took on a purplish hue (a common problem among digicams). Despite these minor concerns, the Coolpix 885 performed quite well.
The Coolpix 885 performed nicely on our "laboratory" resolution test chart. It started showing artifacts in the test patterns at resolutions as low as 600 lines per picture height, in both horizontal and vertical directions. We found "strong detail" out to at least 1,000 lines. "Extinction" of the target patterns didn't occur until about 1,250 lines.
Optical distortion on the Coolpix 885 was about average at the wide-angle end, where we measured an approximate 0.7 percent barrel distortion. The telephoto end fared much better, as we found only two pixels of barrel distortion. Chromatic aberration was low in its extent, showing only about two or three pixels of coloration on either side of the target lines, but the coloration from the aberration was quite strong. Outdoor shots showed fairly pronounced chromatic aberration, particularly in the "Far Field" shot of the house, visible in the tree limbs against the sky in the upper corners of the image. We liked the sharpness of the Nikkor lens on the 885, but would really like to see less chromatic aberration.
With its manual exposure adjustments, the Coolpix 885 performed very well in our low-light testing. The camera captured clear, bright, usable images at light levels as low as 1/16 foot-candle (or 0.67 lux) at all three ISO settings. Color looked great and well saturated, even at the darkest light levels, and the Auto white balance option interpreted the low lighting surprisingly well. Noise levels were fairly high (even at ISO 100) in our shots without the Noise Reduction activated. However, we found the Noise Reduction system to be very effective, greatly reducing the noise levels, even under very dark shooting conditions. Noise was still present in all three images, but the grain pattern and size became less obtrusive. Bottom line, the 885 looks like a good choice for shooting night scenes.
The Coolpix 885's electronic optical viewfinder was very tight, showing only 76 percent of the final frame at wide angle, and only 75 percent accuracy at telephoto. This is quite a bit less accurate than average. Images framed with the optical viewfinder were also slanted toward the lower left corner just slightly. The LCD monitor produced much more accurate results, showing 97 percent accuracy at wide angle, and 99 percent at telephoto. Given that we generally prefer LCD monitors to be as close to 100 percent accuracy as possible, the Coolpix 885 did an excellent job in this respect.
Flash distribution was more uniform than average at the wide angle lens setting (a common problem area for compact cameras), but we found the flash to be rather underpowered overall, with a range of only 7.5 feet when the lens was at its telephoto setting.
The Coolpix 885 did very well in the macro category, as it captured a minimum area of just 1.61 x 1.21 inches (40.82 x 30.62 millimeters). Color, resolution, and detail all looked great. The brooch and coin details were soft, most likely due to the limited depth of field that close, but the printing details of the dollar bill were crisp. The Coolpix 885's flash had some trouble throttling down for the macro area at such close range, and overexposed the entire top portion of the image.
Overall, the Coolpix 885 performed well during our testing. Flexible white balance controls provide a lot of freedom with light sources and color balance, and the manual exposure controls allow you to capture bright images in extremely low lighting. While we'd like to see overall noise levels reduced somewhat (we felt we saw more noise than average under bright shooting conditions), and we had a few minor quibbles over the color, we felt that the 885 produced appealing photos under a wider variety of conditions than most consumer digicams can manage.
Conclusion
Nikon's Coolpix 885 is the latest in Nikon's line of cameras aimed at "assisted creative picture taking." That is, it's intended to help average point & shoot photographers obtain good results under tricky shooting conditions, without having to become photography gurus in the process. We think it succeeds very well in that goal. While it obviously caters to novices, it simultaneously offers enough options in its "custom" mode to interest the serious amateur. It lacks a little flexibility in the aperture category, having only two aperture settings, but most of the other advanced features found in Nikon's high-end 995 model are here as well. (The most notable exception being the lack of any connection for an external flash.) Overall, this looks like a great camera for "dual-use" families: You could confidently set it to full auto mode and hand it to a family member or friend with no photo experience, and they'd get good shots. One step up from there, the "scene" modes let you quickly and easily get good shots under difficult conditions. Finally, the manual options available in "custom" mode offer (almost) all the flexibility an experienced photographer would need. Good pictures from a compact, affordable package. - Another strong showing from Nikon. (Just make sure you budget for the "optional" battery/charger kit though!)
<<CoolPix 885 Sample Images | Additional Resources and Other Links>>
Reader Comments!
Questions, comments or controversy on this product? Click
this link to see what other Imaging Resource readers have had to say about
the Nikon CoolPix 885, or add comments of your own!