 Back
to Full Nikon Coolpix 8400 Review
Back
to Full Nikon Coolpix 8400 ReviewGo to Nikon Coolpix 8400 Data Sheet
Go to Nikon Coolpix 8400 Pictures Page
Up to Imaging Resource Cameras Page
Use your browser's "Back" button to return to the previous page, or the links at the top and bottom of this page to navigate to related information. If you have difficulty fitting the text on this page onto your printer output, simply resize your browser window to a narrower width and print again.
Remember us when it's time to buy!
Dave here: Have our reviews been helpful to you? (Is this article you're reading right now useful?) Preparing this level of information on as many products as we do is incredibly hard work, not to mention expensive. Things on the Internet may look like they're free, but they're not. (As a lot of big dot.com companies are finding out these days.) Somewhere, somebody has to pay to produce worthwhile content. YOU can help us though, by remembering us when it comes time to make your purchase. Would you consider coming back to our site and clicking-through to one of our advertisers to make your purchase? Every dollar you spend with one of our advertisers helps us directly (in affiliate fees) or indirectly (the advertiser will keep renewing their ad contract with us). To make it easy for you to support us, here's a URL you can visit, to see all our current advertisers, with links to click on that will register your visit to them as having come from our site. It's up to you where you buy, but Mike, Mike, Kim, Yazmin, Marti and I would be really grateful if you'd help us out by choosing one of our advertisers to purchase from.
Thank you for your support!
Dave Etchells, Founder & Publisher
Visit our "Buy Now" Page:
https://www.imaging-resource.com/buynow.htm
Back
to Full Nikon Coolpix 8400 Review
Go to Nikon Coolpix 8400
Data Sheet
Go to Nikon Coolpix 8400
Pictures Page
Up to Imaging Resource Cameras
Page
Nikon Coolpix 8400(none) Review First Posted: 09/16/2004, Updated: 12/13/2004 |
|
 |
|
8.0 (effective) megapixel CCD delivers images up to 3,264 x 2,448 pixels. |
|
Nikkor lens provides 3.5x, 24-85mm equivalent zoom range. | |
|
"Articulated" LCD tilts/swivels 270 degrees. | |
|
White balance bracketing and noise reduction modes extend capability. | |
|
Electronic viewfinder for optimum framing accuracy |
Manufacturer Overview
Announced September 16, 2004, the Nikon Coolpix 8400 fills-in the high end of Nikon's "prosumer" lineup. It incorporates most of the features of the top-end 8800 model, minus the 8800's anti-shake system and long zoom lens. With one of the widest-angle zoom lenses on the market (extending down to 24mm equivalent focal length), the Nikon 8400 marks out territory of its own though, as an ideal high-end digital camera for anyone forced to shoot in confined spaces. (Realtors come immediately to mind.) With an 8-megapixel sensor, a 3.5x zoom lens with ED glass, and the panoply of advanced features we've come to expect from the upper end of Nikon's digicam line, the Nikon 8400 is designed to compete at the middle of the "prosumer" digital camera market. At the same time though, optional fully automatic operation and a rich collection of 12 "scene" modes make it easy for even rank amateurs to use. All in all though, the new Nikon Coolpix 8400 is probably going to be most appealing for the new possibilities offered by its ground-breaking 24mm equivalent wide angle lens. - Read on for all the details!
Nikon Coolpix 8400 High Points
User Report
Introduced at the same time as its larger brother, the Coolpix 8800, the Nikon Coolpix 8400 is both similar at heart and vastly different in purpose, as different as two brothers can be. While the former is far-sighted and stable with its long zoom and vibration reduction, the latter is more circumspect with its extremely wide angle zoom lens, yet it reacts more quickly when you want it to. Deep down, however, they've the same basic set of guiding principles, down to the level of menu options.
The body designs and very purpose of both these cameras are so different that it's important to have your use for each camera clearly defined before you commit to either. The good news is that both are feature rich offerings from a company that has had some time to figure out what works and what doesn't.
I have to admit that after spending time with the Coolpix 8800 before it, the 8400 seemed a little unexciting. After all, everyone loves a big zoom, and you can't get more gee-whiz than vibration reduction, both major features of the 8800. But when you realize the implications of a digital camera with a lens that reaches out to 24mm at its wide-angle end, something changes. When you realize that this is the only such digital camera on the market (as of December, 2004 anyway), the value of the 8400 comes to the fore. Most of us are so used to digital cameras and even film cameras that start at about 35mm equivalent and zoom in from there that we never knew anything was missing.
The widest lens available on the Coolpix 8400's nearest competitor is a 28mm equivalent, only reaching 24mm with an external adapter and accessory lens. Those of us who scrimped and saved for our first 24mm lens remember the bliss of seeing the world through that wide eye. Your perspective changes completely. Mere dirt on the ground becomes an interesting part of a greater canvas, and the mundane takes on new significance if you put it in the foreground of a scene that reaches beyond the trees to the sky. 24mm really is the entry level to this world, but you can do amazing things with your photography when you have this powerful--some would say essential--tool. In some situations (real estate photography comes immediately to mind), truly wide-angle capability is an outright necessity.
Every pro has at least one wide angle lens in their bag. If they don't, they're saving for one. Up until now, that lens had to be for an SLR, or else an accessory lens for a prosumer digital camera. Now, for the first time, a digital camera with a built-in zoom has one as its main lens. When you add the .75x wide angle accessory lens, we're looking at a Coolpix capable of 18mm. Suddenly this short-zoom digicam doesn't look so boring.
The Coolpix 8400 has an excellent swivel LCD, and an electronic viewfinder (EVF). We've made no secret that we view EVFs as a necessary evil in camera design, but it is peculiar to see one on a wide angle digicam. However, just as it is difficult to build a rangefinder optic that will match a 350mm equivalent zoom, it's tough to make one that will handle 24mm equivalent wide angle without having the camera's own lens get in the way. Add an accessory lens, and you can forget about the rangefinder altogether. So Nikon took the smart way out and eliminated a lot of customer complaints. They gave us an excellent and versatile swivel screen, and added a higher resolution EVF for when it's too bright out to use the LCD panel. The eyepoint relief of the EVF is excellent, by the way. I can see the entire frame without my glasses even touching the rubber guard around the EVF's opening. Excellent. The big diopter correction wheel to the left of the EVF is powerful, able to correct for all of the various eyeballs here in the office. We were also pleasantly surprised at the EVF's low light performance, still showing at least some detail in a nearly dark room.
Like its brother, the Nikon Coolpix 8400 has comprehensive capabilities, including Nikon's standard set of continuous modes. I'm not a big continuous mode user, but those who are will have even more fun than I did with both of these cameras. My favorite continuous mode, Ultra High Speed, captures up to one hundred 640 x 480 images in just over three seconds. That's 30 frames per second. Your Coolpix could help analyze and improve your golf swing, and with that wide angle lens you could even catch the ball as it heads for the trees.
The one drawback to Ultra High Speed mode is that no matter how many pictures you capture in other modes after doing an Ultra HS shot, that set of UHS images will always come first when you switch to playback mode--and with the ability to capture 100 images in just over three seconds, you're going to be wasting a lot of time looking at nearly identical 640 x 480 images just trying to get back to the 8 megapixel image you just shot. This turns out to be a problem with folders, because each sequence captured in UHS mode gets saved into its own folder. Each folder name ends up with a name that puts all the photos in front of any subsequent photos captured into the default NIKON folder. This is potentially very handy, because it groups all your UHS shots together, and can keep them tucked out of the way if you just do a little preliminary housekeeping with folder names on the memory card you're using. The problem is that the separate folders created to hold the UHS images are ahead of the main "Nikon" folder alphabetically, so any (and all) UHS images will always appear in playback mode before the most recently shot normal images stored in the Nikon folder. There's unfortunately no complete solution to this problem. The simple workaround is to go into the Folder sub-menu in Playback mode and select only the NIKON folder (or other folder you may have created yourself) for playback. This will effectively hide any UHS files from view during normal browsing of images on the memory card. The downside is that you'll have to go back to the Folder sub-menu to re-enable viewing of the other folders any time you decide you want to look at your UHS shots. What would really help would be a feature in the Playback mode where you could zoom back out past "Index" view into a Folder view where you could more easily switch between folders, without having to venture into the LCD menu system.
Best Shot Selector mode is another of my favorite modes, because it allows you to get a great shot in low light without a tripod, and without filling up your card with multiple attempts. The camera fires off up to 10 shots, analyses each, and picks the sharpest one. It then saves only that one shot to the card. In the Nikon 8400 and 8800, the Best Shot feature has been extended to handle exposure bracketing as well, with a clever implementation that lets you shoot for best detail in either the highlights or the shadows, or split the difference between the two.
Another bonus to consider with the Nikon Coolpix 8400 is its comparative superiority to most digital video cameras for certain applications. After all, most video cameras--digital or otherwise--have fallen victim to the same market forces that digital still cameras have: that of the battle of the X's. Long zoom reigns supreme in the video marketplace, and if you know zoom design, you know that to increase your X number (as in "40X zoom!") you have to compromise on the wide angle portion. Not with the Coolpix 8400. You can take wide angle videos that your camcorder couldn't do even with a lens attachment. The limiting factor is that you only get DV-quality movies for 60 seconds. Believe it or not, that's long enough to videotape all the way through the Happy Birthday song and see your kid blow out her candles (with a little left over to capture the glow on her cheeks and part of the fight about who gets the biggest piece). Switch to the lower-quality 320 x 240 mode, and you can record until you fill the card.
Focus with the Coolpix 8400 is also pretty fast. This is partly due to the camera's Hybrid autofocus system. A passive "AF Ranging" sensor located on the upper left of the camera (as viewed when holding the camera from the back) does the rough focus work so that the camera's usual contrast-detection method can more quickly refine the focus to sharp. As a result, the Coolpix 8400 has a noticeably shorter AF shutter lag than the 8800 when using its Hybrid AF system. Unfortunately, the sophisticated AF Area Mode options that let the camera determine focus from specific parts of the frame, under either automatic or manual control require the Hybrid AF system to be disabled, stretching shutter response to match the more leisurely pace of the 8800.
You should be more like your brother...
While I like a lot about the 8400 from a technical standpoint (features, lens, and performance), I'd have been happier if more of the rest of the Coolpix 8800's ergonomic niceties had made it to the 8400. Buttons and crucial controls that are perfect on the 8800 are just a tad out of reach on the Coolpix 8400, requiring the user to stretch too much, especially to oft-used controls like the zoom rocker and AE/AF lock button. The right-side camera strap lashing point is right where the web of my index and middle finger wants to rest, and the triangle-shaped ring often pinches my fingers when I'm trying to hold the camera. Were a strap attached, I'd have to thread it through my two fingers and up out of the way as I shot. Since I don't shoot with a strap, I would most certainly "accidentally" snip this ring off with my Leatherman(tm) in a freak accident.
Finally, the grip could be a little better contoured. As it is, the balls of your fingertips can't get a really solid purchase on the inside. I can't imagine what happened here, because the Nikon D70 and Coolpix 8800 both have excellent grips, with just the right angle to support the weight of the camera. The Nikon 8400, despite the large size of the grip, always felt like it wanted to slip out of my hand. This is true despite that all four fingers find a comfortable home on the grip; the index on the shutter, and the remaining three below that. The 8400 and 8800 both use the same battery, so the bulk of the battery can't account for this difference between the two models.
The good news is that all of the above can be adapted to. If any of the items I mention are truly important to you, then you were warned, but I honestly wouldn't let any of them get in the way of my own purchase of this camera. Own any camera and you'll get used to its quirks.
The first market I'll be recommending the Nikon Coolpix 8400 to is obvious: Realtors. A wide angle lens is critical to their work of photographing home interiors (or exteriors, at short shooting distances). Interior designers and contractors will also need such ability. No other non-SLR digital camera is up to the task as well as the Coolpix 8400, at least at the time of this writing. As I mentioned, others require an external lens adapter and lens. That's not a bad thing, but it is an additional purchase, and usually makes the camera quite a bit bigger, most often blocking the real-image optical viewfinder. That won't be a problem with the 8400, because of its EVF viewfinder. I also often tell Realtors that having a swivel screen can be important as well, because they can back themselves into a corner, hold the camera over their head, and use the swivel LCD to frame an unusual and often beautiful shot from the furthest possible corner of a room. With the Nikon 8400, the wide angle lens will make the most of every extra inch.
Naturally, those who've been frustrated by the lack of a truly wide angle digital camera in the marketplace should also give the Coolpix 8400 a closer look. Because the 8400 fulfills the one mission that the 8800 does not, a few true enthusiasts (fanatics?) might invest in both and hang them around their necks to cover all possibilities. Admittedly, that's a big investment, but add up the cost of a Nikon D70 with a very wide angle zoom and a very long zoom with VR to surpass the capabilities of these two cameras, and the combination exceeds $4,300. The combo of the Coolpix 8400 and Coolpix 8800, costing less than half that amount and covering the 24mm to 350mm range might start to make sense. After all, you can't take video with a D70, and you can't shoot 30 fps, either. These high-end prosumer cameras do still have their purpose.
Nikon has given you a choice. Go for a long zoom with vibration reduction with the 8800--an excellent choice for sports fans, bird watchers, or zoom lovers--or expand your vision with a wide angle lens to help you capture everything you need in a tight space while retaining some moderate zoom capability out to 85mm (great for portraits). Remember that the 8400 isn't exactly incapable of good telephoto either, thanks to its accessory lens mount. The two main accessory lenses can extend your vision out to 18mm with the WC-E75 Wide-angle Converter or in to 255mm (3x) with their new TC-E3PF "Phase Fresnel" Telephoto lens (we can't wait to see this, by the way).
Our impression of the 8400 is that it's a solid performer that breaks new ground for digicams. Now that we've had the opportunity to test a production model, we can say that its image quality holds up to that of the 8800 as well, making it a solid choice for anyone needing the ultimate in a wide-angle digital camera.
Design
 Similar
in concept and programmed features to the new Coolpix 8800, but much smaller
with its 3.5 x 6.1-21.6mm (35mm camera equivalent 24-85mm) zoom lens, the Coolpix
8400 is a function-rich, but very compact camera, well suited to travel and
general photography. Its most salient characteristic is perhaps the wide-angle
capability of its zoom lens. Most modern point-and-shoot digicams start at around
35mm, but the Coolpix 8400 starts at a groundbreaking 24mm, great for realtors,
builders, and anyone looking to explore wide angle photography. The tradeoff
of course, is that the 8400's 3.5x zoom stops a little short of true telephoto
territory, with its maximum 85mm equivalent focal length. This camera packs
a lot of pixels (8 million) and features into a midsize package that is not
quite shirt- or pants-pocketable, but still very portable. The Coolpix 8400
controls are nicely laid out, with all buttons and dials except the Manual/Autofocus
button within reach of the right index finger or thumb, although the Command
dial is recessed more and a little harder to turn than those on some other Coolpix
cameras, the larger 8800 model prominent among them. The Coolpix 8400 has a
"Vari-angle" LCD design that swivels, very useful for getting the
shot from various angles, including from directly in front of the camera. (Good
for self-portraits, or working with a model.) The camera has a well balanced,
all-black plastic body that weighs in at only 16.8 ounces
(478.8 grams) with battery and memory card included. The 8400 is definitely
stowable in a jacket pocket or purse, with dimensions of 4.4 x 3.2 x 3.0 inches
(113 x 82 x 75mm).
Similar
in concept and programmed features to the new Coolpix 8800, but much smaller
with its 3.5 x 6.1-21.6mm (35mm camera equivalent 24-85mm) zoom lens, the Coolpix
8400 is a function-rich, but very compact camera, well suited to travel and
general photography. Its most salient characteristic is perhaps the wide-angle
capability of its zoom lens. Most modern point-and-shoot digicams start at around
35mm, but the Coolpix 8400 starts at a groundbreaking 24mm, great for realtors,
builders, and anyone looking to explore wide angle photography. The tradeoff
of course, is that the 8400's 3.5x zoom stops a little short of true telephoto
territory, with its maximum 85mm equivalent focal length. This camera packs
a lot of pixels (8 million) and features into a midsize package that is not
quite shirt- or pants-pocketable, but still very portable. The Coolpix 8400
controls are nicely laid out, with all buttons and dials except the Manual/Autofocus
button within reach of the right index finger or thumb, although the Command
dial is recessed more and a little harder to turn than those on some other Coolpix
cameras, the larger 8800 model prominent among them. The Coolpix 8400 has a
"Vari-angle" LCD design that swivels, very useful for getting the
shot from various angles, including from directly in front of the camera. (Good
for self-portraits, or working with a model.) The camera has a well balanced,
all-black plastic body that weighs in at only 16.8 ounces
(478.8 grams) with battery and memory card included. The 8400 is definitely
stowable in a jacket pocket or purse, with dimensions of 4.4 x 3.2 x 3.0 inches
(113 x 82 x 75mm).

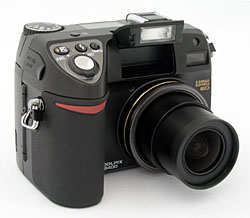
Visible on the front panel are the lens and metal lens ring, built-in speedlight, Autofocus-assist illuminator and Self-timer lamp, Autofocus ranging sensor and Infrared receiver. The lens extends about 1 1/4" when set to either the wide or telephoto extreme, but shortens to just under 1" at the middle settings, an unusual pattern apparently caused by the way lens element groups are moved inside the lens barrel to change the angle of view. A cap clips over the end of the lens and stays in place even when it telescopes out when the camera is turned on, a useful feature because the front element is only very slightly recessed. At the base of the lens, a removable metal ring covers threads for attaching an adapter for accessory lenses. Accessory wide, fisheye, and telephoto lenses are available, the telephoto being especially of interest given the built-in lens's maximum 85mm equivalent focal length. Adjustment to an auxiliary lens is not automatic; users must tell the camera which add-on lens is mounted via a Record mode menu option. The flash pops up in the center of the body, a little off line with the lens. To the right of the flash head, at the extreme upper right of the front panel (as viewed from the front of the camera), is the Autofocus-assist illuminator, which does triple duty as a self-timer lamp and as a shot-confirmation lamp as well. Just under it is the Autofocus ranging sensor that helps the camera quickly focus to near the range necessary so that the camera's contrast detection method can more quickly take over and refine focus (this would have been helpful on the Coolpix 8800, which is sometimes a little slower getting to focus in low light). At the bottom right of the front panel, the Infrared receiver accepts signals from the camera remote. A large hand grip, coupled with the deep recess between the grip and the lens barrel, provides a reasonable hold on the camera, but you'll have to be a bit more careful not to drop this camera due to the lack of a straight inside angle for the pads of the fingers to really grip, as we saw on the Nikon Coolpix 8800.

The camera's right side (as viewed from the back) houses the memory card compartment (a Type I and II Compact Flash slot) and an eyelet for the neck strap. The positioning of the neck strap eyelet relative to the controls on the camera's top is one aspect of the 8400's design that I really didn't care for. With the camera hanging from a neckstrap, the strap comes up right where your index finger wants to come around to reach the shutter button and other top-panel controls. You have to reach around it either fore or aft, a somewhat awkward arrangement. I like the positive snap-action operation of the memory compartment cover: The spring action is apparently contained in the hinge mechanism, and it feels much better than the usual friction snap-latch I commonly find on the outside edges of these flaps on most cameras I test. The ejection button can be a little confusing if you get out of sync with it though. It works like a pen plunger: In order to extend the release so that it can push the card out, you first have to press in to make it pop out. Once it's extended, you can press in again and it releases the card and then stays pressed in, as long as you pressed it back in far enough. When it doesn't stay in, you'll find that the door will not close after inserting a new card.

The left side of the camera holds the second neck strap eyelet, a connector compartment, and the speaker. A rubbery flap covers the connector compartment, which houses the USB and A/V Out jacks. The flexible but substantial flap remains fastened to the camera body and folds out of the way easily. Also visible from this angle is the diopter adjustment dial on the viewfinder eyepiece.

The top of the camera has a handful of controls and a small status display panel. You can set the flash pop up feature to "manual" to pop it up using the Flash button, or the camera will pop it up automatically when needed. The hot shoe has the standard five-contact design used by the Nikon Speedlights, but should also host some third-party flash units. The small status display panel reports a number of camera settings, including battery power, and is very useful for making quick camera adjustments. Top panel controls include the On/Off switch and Shutter release, and the Function, Flash control, and Exposure compensation/Voice record buttons, along with a button to illuminate the small control panel. A Command dial just below the Mode Dial top panel of the 8400 is used in conjunction with various buttons on the body of the camera to change settings.

The remaining controls and user interface elements for the Coolpix 8800 are on the back of the camera. At top left is an impressively high-eyepoint electronic viewfinder (EVF) eyepiece, with a diopter adjustment dial on the left side and a nice rubber guard, important for wearers of glasses. To the right of it is the Autoexposure/Autofocus Lock button. A rocker button in the top right corner controls optical and digital zoom, as well as playback viewing options. Right of the LCD are the Menu and Quick review buttons, Five-way controller, and the Erase and Display buttons. Just below the LCD are the Manual Focus-Auto Focus button--easily reached only by the left hand--and the monitor select button (this switches between the EVF and swivel LCD). When the Manual Focus button is held in, the right thumb can be used to make manual focus adjustments with the Command Dial.
The Command Dial on the Coolpix 8400 was another design element that I found myself less than happy with. On the Coolpix 8800, the Mode Dial is set back slightly on the top panel, so its edge sits in a different plane than the Command Dial. On the 8400 though, the two controls are more or less directly in line with each other, and I found it more awkward to adjust one without jiggling the other. Not a huge point, but this was one of the factors that left me liking the 8800 quite a bit more than the 8400.

The 8400 has a "vari-angle" LCD monitor, which lifts off of the back panel and swings outward. Once out, the monitor swivels 270 degrees. In addition to facing a variety of angles, the LCD can flip around and face the back of the camera when closed, protecting it from scratches.

Viewfinder
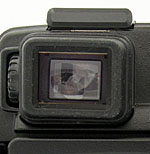 A
feature in the 8400 that entered the Nikon line with the Coolpix 5700 is the
electronic viewfinder (EVF), essentially a miniaturized version of the LCD monitor,
complete with information and menu screens, but sheltered from the sun in a
more traditional viewfinder with an "optical viewfinder" feel. The
Monitor Select button below right of the viewfinder switches the view back and
forth between the EVF and LCD monitor displays. Though you can call up the LCD
menus in the EVF display, I found it rather tedious to actually make menu selections
that way. It's much easier to use the larger display of the LCD monitor for
menu navigation. Still, the EVF's informative display reports exposure settings,
camera mode settings, and battery information, all of which are useful during
normal operation. The EVF comes in handy when shooting outside in extremely
bright sunlight that washes out the LCD, or when nearby reflections just make
viewing an otherwise good outdoor LCD uncomfortable. A diopter adjustment dial,
tucked on the left side of the eyepiece, adjusts the view to accommodate eyeglass
wearers, and the micro-LCD used in the 8400's EVF has higher than average resolution,
with 235,000 pixels (101,000 more than the rear-panel LCD display). The high
eyepoint of this viewfinder allows eyeglass wearers to see the entire image
while wearing their glasses. Through the Setup menu, you can specify whether
the EVF or LCD monitor automatically activates by default at camera startup.
A
feature in the 8400 that entered the Nikon line with the Coolpix 5700 is the
electronic viewfinder (EVF), essentially a miniaturized version of the LCD monitor,
complete with information and menu screens, but sheltered from the sun in a
more traditional viewfinder with an "optical viewfinder" feel. The
Monitor Select button below right of the viewfinder switches the view back and
forth between the EVF and LCD monitor displays. Though you can call up the LCD
menus in the EVF display, I found it rather tedious to actually make menu selections
that way. It's much easier to use the larger display of the LCD monitor for
menu navigation. Still, the EVF's informative display reports exposure settings,
camera mode settings, and battery information, all of which are useful during
normal operation. The EVF comes in handy when shooting outside in extremely
bright sunlight that washes out the LCD, or when nearby reflections just make
viewing an otherwise good outdoor LCD uncomfortable. A diopter adjustment dial,
tucked on the left side of the eyepiece, adjusts the view to accommodate eyeglass
wearers, and the micro-LCD used in the 8400's EVF has higher than average resolution,
with 235,000 pixels (101,000 more than the rear-panel LCD display). The high
eyepoint of this viewfinder allows eyeglass wearers to see the entire image
while wearing their glasses. Through the Setup menu, you can specify whether
the EVF or LCD monitor automatically activates by default at camera startup.
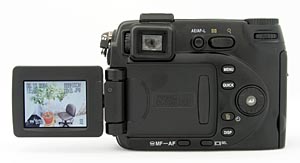
The 1.8-inch, 134,000-dot, low-temperature polysilicon TFT color LCD monitor features a swivel design, plus brightness and hue adjustment. The LCD monitor actually lifts up off of the back panel, flipping out toward the left side of the camera. Once opened, the LCD monitor can swivel around to face up or down over about a 270 degree range of rotation. You can also turn the LCD monitor around to face the camera and then close it to protect the monitor from any accidental scratches. I really like swiveling LCD designs, as they greatly increase the camera's shooting flexibility, allowing you to hold the camera at a variety of angles and still clearly see the LCD display. (They're particularly handy for over-the-head shots in crowds, or for ground-level macro shooting.)
A nice touch in the Coolpix 8400's LCD viewfinder implementation is that you can adjust not only the viewfinder brightness, but its color (hue) as well. A menu option lets you adjust the viewfinder color toward either the blue or the red ends of the spectrum, to help match the viewfinder display to the actual color balance of your captured images. I applaud this, but note that having control only over blue/red tints is only a partial solution. (Technically, you need separate controls for red, green, and blue, in order to be able to completely control the display color. You could getaway with only varying two of these relative to the third, but I suspect that full control would result in a bewildering user interface. Still, I'd like to see some attempt to offer more complete color adjustment. Big kudos to Nikon for providing any sort of LCD hue adjustment though.)
 The
Coolpix 8400 features a new 9-point autofocus system (shared with its sibling,
the 8800). The camera automatically chooses between nine different autofocus
zones, or you can lock it in on any one of them manually. In auto mode, only
the areas the camera chooses will be illuminated in red; otherwise they do not
appear. In manual mode, all nine points appear onscreen at all times, shown
in white, while the selected point appears in red.
The
Coolpix 8400 features a new 9-point autofocus system (shared with its sibling,
the 8800). The camera automatically chooses between nine different autofocus
zones, or you can lock it in on any one of them manually. In auto mode, only
the areas the camera chooses will be illuminated in red; otherwise they do not
appear. In manual mode, all nine points appear onscreen at all times, shown
in white, while the selected point appears in red.
 Beyond
the zone-based AF indication though, the Coolpix 8800's viewfinder offers a
number of display options in capture mode. Pressing the DISP button cycles through
the various options, which include a basic display showing no information at
all (in Manual AF mode, the nine AF points appear), a display that includes
information on a fair number of camera settings, a display with a live histogram
graph overlaid on the image, and a new mode that adds a rectangular alignment
grid.
Beyond
the zone-based AF indication though, the Coolpix 8800's viewfinder offers a
number of display options in capture mode. Pressing the DISP button cycles through
the various options, which include a basic display showing no information at
all (in Manual AF mode, the nine AF points appear), a display that includes
information on a fair number of camera settings, a display with a live histogram
graph overlaid on the image, and a new mode that adds a rectangular alignment
grid.
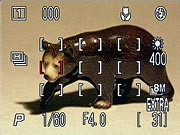
 A Quick Review function lets you quickly check the last exposure while still
in record mode, simply by pressing the Quick Review button above the LCD screen.
This isn't an uncommon feature on digicams, but what's absolutely unique on
the Coolpix cameras is the "picture in picture" review mode (shown
here), which opens a playback window in the upper left-hand corner of the display
screen, while keeping the viewfinder image live on the remaining LCD area. Note
too, that this image isn't restricted to the most recently captured photo. You
can scroll through all the images on the memory card by pressing the rocker
button arrows. The first press of the Quick Review button activates the picture
in picture review mode, a second press enables full-screen playback, and a third
press returns you to full capture mode. At any point, pressing the Shutter button
returns you to capture mode and snaps a picture.
A Quick Review function lets you quickly check the last exposure while still
in record mode, simply by pressing the Quick Review button above the LCD screen.
This isn't an uncommon feature on digicams, but what's absolutely unique on
the Coolpix cameras is the "picture in picture" review mode (shown
here), which opens a playback window in the upper left-hand corner of the display
screen, while keeping the viewfinder image live on the remaining LCD area. Note
too, that this image isn't restricted to the most recently captured photo. You
can scroll through all the images on the memory card by pressing the rocker
button arrows. The first press of the Quick Review button activates the picture
in picture review mode, a second press enables full-screen playback, and a third
press returns you to full capture mode. At any point, pressing the Shutter button
returns you to capture mode and snaps a picture.
 In
Playback mode, the LCD offers a wealth of information via several display pages.
In total, no fewer than six information screens are available, accessed by first
pressing the DISP button then turning the Command dial in playback mode. The
first display is the standard Playback information readout, which reports the
date and time of the shot, file name, quality setting, and the image number
on the card. The next three screens report a long listing of camera and exposure
settings, including the firmware version, focal length, shutter speed, ISO,
etc. A fourth information page shows a histogram view of the image, illustrating
the distribution of brightness values in the image, with the left edge corresponding
to pure black, and the right edge to pure white. Once you learn how to read
it, a histogram is very useful in determining whether you've managed to capture
a good exposure or not. Ideally, a well-exposed image would produce a histogram
curve that just filled the graph from left to right, indicating that it contained
a full range of tonal values. The final information screen shows lens, shutter,
and focus settings, and indicates (by the red brackets) what the autofocus system
had locked onto when the picture was taken. Histogram displays won't always
show you if only a small portion of your image is blown-out: To address this
need, the 8400 blinks those parts of the image that are overexposed, letting
you see exactly where you're losing highlight detail. Very nice. (Although,
as with most Nikon digicams, I've generally found the 8400's blinking highlights
a little too aggressive in what they choose to warn you about.)
In
Playback mode, the LCD offers a wealth of information via several display pages.
In total, no fewer than six information screens are available, accessed by first
pressing the DISP button then turning the Command dial in playback mode. The
first display is the standard Playback information readout, which reports the
date and time of the shot, file name, quality setting, and the image number
on the card. The next three screens report a long listing of camera and exposure
settings, including the firmware version, focal length, shutter speed, ISO,
etc. A fourth information page shows a histogram view of the image, illustrating
the distribution of brightness values in the image, with the left edge corresponding
to pure black, and the right edge to pure white. Once you learn how to read
it, a histogram is very useful in determining whether you've managed to capture
a good exposure or not. Ideally, a well-exposed image would produce a histogram
curve that just filled the graph from left to right, indicating that it contained
a full range of tonal values. The final information screen shows lens, shutter,
and focus settings, and indicates (by the red brackets) what the autofocus system
had locked onto when the picture was taken. Histogram displays won't always
show you if only a small portion of your image is blown-out: To address this
need, the 8400 blinks those parts of the image that are overexposed, letting
you see exactly where you're losing highlight detail. Very nice. (Although,
as with most Nikon digicams, I've generally found the 8400's blinking highlights
a little too aggressive in what they choose to warn you about.)
 Also in Playback mode, the LCD offers a thumbnail index display, showing either
four or nine images to a page depending on the setting. The Zoom Rocker button
controls the index display, as the wide-angle side of the zoom lever increases
the number of thumbnails displayed (from one to four to nine). The telephoto
side returns to the single image display, and also activates the playback zoom,
which enlarges the displayed image up to 10x. When you're zoomed in on an image,
you can pan around the image with the rocker control. Pressing the shutter also
captures a cropped image of the current LCD display and saves it as a new file.
You can then zoom in on the cropped image even further. An unexpected plus.
Also in Playback mode, the LCD offers a thumbnail index display, showing either
four or nine images to a page depending on the setting. The Zoom Rocker button
controls the index display, as the wide-angle side of the zoom lever increases
the number of thumbnails displayed (from one to four to nine). The telephoto
side returns to the single image display, and also activates the playback zoom,
which enlarges the displayed image up to 10x. When you're zoomed in on an image,
you can pan around the image with the rocker control. Pressing the shutter also
captures a cropped image of the current LCD display and saves it as a new file.
You can then zoom in on the cropped image even further. An unexpected plus.
EVF Under Low Light
As you might expect, the Coolpix 8400 seems to use the same EVF as I initially
encountered in its big brother, the 8800. In playing with this EVF, I was pleased
to discover that Nikon has improved its functioning over that of the 8700, in
a way that I'd asked for. On the 8700, the EVF responded to the camera's ISO
setting pretty directly: Higher ISO's produced brighter EVF displays under darker
conditions. I discovered though, that changes in EVF sensitivity lagged changes
in the ISO setting by a few seconds. The viewfinder display was at least somewhat
usable down to surprisingly low light levels with the ISO set to 400, but it
took a good 6-10 seconds for the display to brighten after changing from a lower
ISO setting. If I wanted to shoot at lower ISO settings to minimize image noise,
I had to set the ISO up to 400 to frame the shot, then dial it back down to
whatever value I wanted to shoot at. This was feasible, but far from convenient.
In the 8400 (and 8800), the Nikon engineers have implemented what amounts to a "viewfinder only" ISO boost, that dramatically increases the sensitivity of the EVF and rear-panel LCD viewfinder under low light conditions, regardless of the ISO selected to shoot at. This viewfinder sensitivity boost is still applied fairly slowly, in that it can take a number of seconds for the viewfinder display to become usable in dark conditions after the camera has been exposed to bright lighting, but this seems like an entirely acceptable solution. - There's no longer any need to jack up the ISO just to frame the subject, then set it back down to actually take the shot. The net result is that the 8400's EVF is one of the best at low light levels that I've yet seen, usable down to 1/16 foot-candle. (That's about 4 f-stops down from typical city street lighting at night.) Kudos to the Nikon engineers, and thanks for listening to my suggestions!
Optics
| Free Photo Lessons | |
|
 The
Coolpix 8400 features a 3.5x Nikkor 6.1-21.6mm ED lens, the equivalent of a
24-85mm lens on a 35mm camera. The maximum aperture varies from f/2.6 to f/4.9,
depending on the lens zoom setting, with the largest aperture available when
the lens is at its maximum wide angle focal length. Minimum aperture is f/7.2
at wide angle, 7.7 at telephoto, and a maximum of 7.9 somewhere in between.
(The minimum aperture fluctuates both up and down slightly as you zoom from
wide to telephoto focal lengths.) Apertures are adjustable in 10 steps with
one-third EV increments, and are created by a seven-blade
iris diaphragm. (The seven-blade diaphragm is a nice but subtle touch- it will produce less distortion in sharp, specular highlights than apertures made by diaphragms with fewer blades in them, and hence more irregular shapes. The seven-blade iris also provides finer-grained aperture
control than simpler designs.)
The
Coolpix 8400 features a 3.5x Nikkor 6.1-21.6mm ED lens, the equivalent of a
24-85mm lens on a 35mm camera. The maximum aperture varies from f/2.6 to f/4.9,
depending on the lens zoom setting, with the largest aperture available when
the lens is at its maximum wide angle focal length. Minimum aperture is f/7.2
at wide angle, 7.7 at telephoto, and a maximum of 7.9 somewhere in between.
(The minimum aperture fluctuates both up and down slightly as you zoom from
wide to telephoto focal lengths.) Apertures are adjustable in 10 steps with
one-third EV increments, and are created by a seven-blade
iris diaphragm. (The seven-blade diaphragm is a nice but subtle touch- it will produce less distortion in sharp, specular highlights than apertures made by diaphragms with fewer blades in them, and hence more irregular shapes. The seven-blade iris also provides finer-grained aperture
control than simpler designs.)
Focus on the Coolpix 8400 operates under automatic or manual control, and features Macro and Infinity focus modes as well. The Coolpix 8400's autofocus mechanism employs a combination of infrared and contrast-detection methods. The front-mounted infrared focus sensor establishes rough focus, after which the CCD-based multi-point AF system sets final focus. One interesting consequence of the dual nature of the 8400's AF system though, is that the camera focuses much more quickly when the Auto Area Focus Mode is turned off, allowing the hybrid AF system to be used. (A few important notes here: The camera's factory-default setup is to have the AF Area Mode disabled and Hybrid AF enabled, which is the fastest focusing mode. It's possible that a camera may have been set up differently in the store by a salesperson though, so you should check explicitly to see that the camera is set up properly for fastest shutter response. If you disable AF Area Mode, but leave the camera in Normal vs Hybrid AF mode, you'll see little or no speed improvement. You need to disable AF Area Mode and set the focusing to Hybrid to get the best shutter response. Note too, that Manual AF Area selection is only slightly faster than Auto Area selection, as both modes disable the Hybrid AF system.)
The Focus option under the Record mode settings menu allows AF area selection under automatic control, or lets you manually set the location of the autofocus area. (This last is a nice feature that works well when combined with the spot metering mode, which can likewise be directed to link exposure to the same zone.) In the "Auto" option for focus area selection, the camera chooses the area corresponding to the subject closest to the camera. When the area focus option is set to Off, the camera bases focus on the central area. Two AF modes are also available: Continuous AF and Single AF. Continuous AF mode means that the camera constantly adjusts the focus, good for moving subjects. It should be noted that because the camera is always focusing, it will make a noise as long as the camera is on, because it is constantly trying to focus and refocus on the selected AF point. Many users have written us in the past about cameras operating in this mode, finding the constant burbling of the focus actuator disturbing. Continuous AF mode also tends to use power more quickly, so it should only be used when necessary. In Single AF mode, focus is only determined when the Shutter button is halfway pressed.
The fully manual focus option is accessed by pressing the AF button on the camera's side and turning the Command dial. A distance scale in the LCD monitor reports current focusing distance in a very general sense, showing a bar that extends from a macro symbol on one side to an infinity symbol on the other. The minimum focusing range depends strongly on the lens zoom setting, so the focus-distance display turns red if you try to manually focus closer than the lens can support at its current focal length. I have to say that I dislike the 8400's distance readout because it makes it difficult or impossible to know the actual focusing distance you've selected. I've often had occasion to set an approximate manual focus distance in advance of a shot, based on my estimate of the subject's distance. (After-dark candid and wildlife photography are two situations where I've frequently needed to do this.) I would think Nikon could use the combination of lens focal length and focus-motor position to derive the actual focusing distance. - Certainly, I've seen numeric distance readouts on cameras from a variety of other manufacturers, so it's technically possible.
For those situations when you can actually point at your subject long enough to set the focus visually, a "Focus Confirmation" option (available as a menu selection in Record mode) applies a strong "sharpening" operator to the LCD display. The result is that the LCD image very clearly "snaps" into focus when proper focus is achieved, making the LCD display much more useful than it ordinarily would be for manual focusing. Focus Confirmation can be set to be on all the time, off all the time, or only on when the camera is being manually focused. This is another Nikon trick that I'd like to see more camera manufacturers adopt.
The Coolpix 8400's digital telephoto feature is enabled through the Zoom option under the Setup menu, and enlarges images as much as 4x. An indicator on the LCD monitor displays a bar graph showing the approximate level of digital zoom. Keep in mind though that digital telephoto only enlarges the center of the image, reducing resolution in direct proportion to the amount of digital zoom used. Also under the Zoom menu option, you can turn the digital zoom off and activate the Fixed Aperture function, which keeps the aperture fixed as the lens zooms. (This last being a very handy option when working with studio strobes or other strobes with fixed output levels and no exposure feedback from the camera.)
There's a set of body threads around the base of the lens barrel, protected by a metal ring, for attaching an adapter barrel for accessory lenses. The 8400 can accept wide, telephoto, and fisheye lenses with the use of an optional adapter.
Autofocus performance under low light on the 8400 seems similar to that on prior Coolpix models, aided by an AF-assist light nestled next to the hand grip for better results. In my informal testing, the AF system could focus on sharply-defined, high-contrast objects in total darkness out to about 6 feet or so, but it did considerably better with at least some ambient light, and the focus performance was also very dependent on the contrast level of the subject involved. Though there are many similarities between the Coolpix 8400 and it's brother the 8800, they do differ a fair bit in their ability to focus well in low light. This is due not only to the shorter zoom, but also to the phase-detect IR AF assist or prefocus system mentioned earlier. The bottom line is that the Coolpix 8400 focuses much more quickly in dim lighting than does the 8800.
Exposure
| Free Photo Lessons | |
|
You can choose between a Bulb setting (allowing shutter to be held up to ten minutes) or a Timed Release option with settings of 30 seconds and 1, 3, 5, or 10 minutes. When ULTRA HS is selected for Continuous shooting, the shutter speeds range from 1/30-1/8000s (again, to reach above 1/1500, the aperture needs to be f/4.5 or smaller). Like other Coolpix models, the 8400 uses a noise reduction technology that's based on a form of "dark frame subtraction," whereby a second exposure is snapped immediately after the first, but with the shutter closed. The pattern of noise in this "dark frame" is then subtracted from the image itself, resulting in a drastic reduction in apparent noise levels. (I suspect that the actual algorithm is more complex than simple subtraction though, involving data substitution to prevent black pixels where the noise current saturated the CCD pixel sensor.) This Noise Reduction can be enabled via a menu option, and is applied to any exposure longer than 1/4 second. The 8400's manual notes that the time to save the resulting image to the card more than doubles with Noise Reduction enabled.
Adding to the usefulness of the fully-automatic Program AE mode, the Flexible Program AE (P) option lets you select from a range of exposure settings by turning the Command dial. (Simply turn the Command dial on its own while in Program mode, and an asterisk appears next to the "P" in the LCD display. Further rotation of the Command dial cycles through the available combinations of shutter speed and aperture that correspond to the exposure level the camera has selected.) Flexible Program AE lets you choose from several equivalent exposures, allowing you to decide between a faster shutter speed or a smaller lens aperture. Personally, I find this more useful than the more common aperture- or shutter-priority metering options, as it gives the camera more latitude to get the shot you want, while letting you express a "preference" for larger or smaller aperture settings.
The Coolpix 8400 uses the 256-Segment Matrix system by default, but also offers Center-Weighted, Spot, and AF Spot metering options. The 256-Segment Matrix setting determines the exposure based on 256 separate areas in the frame, taking into consideration both overall brightness as well as contrast levels to determine the best overall exposure. Center-Weighted metering measures light from the entire frame but places the greatest emphasis on a circular area in the center. Spot metering is pretty self-explanatory, taking a reading from the dead center of the image (best when using the AE Lock function). With AF Spot, the spot metering actually centers on the specific focus area selected, giving you the option for off-center spot metering. (See the previous Optics section of this review for a discussion of the 8400's AF Area focusing mode.)
An ISO adjustment option offers a range of values, including Auto, 50,100, 200, and 400 ISO equivalents. White balance choices include Auto, Daylight, Incandescent, Fluorescent, Cloudy, Speedlight, or Preset (which lets you manually adjust the white value by using a white card or object as a reference point). All white balance settings except Preset and Fluorescent (adjustable by type of fluorescent bulb) can be adjusted from -3 to +3 units on an arbitrary scale. There's also a White Balance Bracketing mode, which captures three images at slightly different white balance adjustments, so you can pick the best image when you get them all back on your computer. I think both of these options are very useful, as I often find myself wanting to tweak one of a camera's preprogrammed white balance values to my liking. White balance "tweak" adjustments like this are becoming more common, but I wish even more manufacturers would adopt them.
Exposure compensation on the Coolpix 8400 is adjustable from -2 to +2 exposure equivalents (EV) in one-third step increments, in all exposure modes. Simply hold down the exposure compensation button and turn the Command dial. The Auto Bracketing feature takes three or five shots of the same subject with varying exposure values determined either by the photographer in Manual mode or by the camera in all other modes. Exposure settings for bracketing can vary from -1 to +1 EV (values are added to the already chosen exposure compensation value), with step sizes of 0.3, 0.7, or one EV unit.
Another signature Nikon feature is the Image Adjustment menu. This menu offers options to increase or decrease contrast. Like other recent Coolpix digicams, the 8400 also provides a range of color saturation options, covering a five-step scale plus and Auto and Black & White. Unlike some cameras, the Coolpix 8400 actually increases detail when recording in B & W, rather than simply discarding color information. Additionally, a Sharpness adjustment controls the amount of in-camera sharpening applied to the image, with a three-step range of adjustment, plus Off and Auto.
One of the really unique Nikon digicam features, the Best Shot Selector (BSS), captures several images in rapid succession, and lets the camera choose only the sharpest (least blurred) or the best exposed image to be saved. Best Shot Selector set to sharpness makes it feasible to handhold the camera for surprisingly long exposures - I've routinely handheld 1/2 second exposures and gotten good results with Coolpix cameras. You can check your own work immediately by using the Quick review button. I've really enjoyed the available-light and low-light photos BSS has let me bring home those times when I've taken a Nikon digicam with me on a trip or outing. Since it chooses the sharpest image from among several that it shoots though, it's at its best when you have a fairly static subject. When shooting people-pictures, it tends to miss fleeting expressions. Still, it's a remarkably useful photographic tool, one I'd be happy to see on cameras from other manufacturers. (I seem to end up saying that a lot when talking about unique Nikon features.)
New on the 8400 (and 8800 as well) is an "Exposure BSS" feature. Like standard BSS, this option shoots several frames in sequence, while you hold down the shutter button, but this time varies exposure between shots. While many cameras offer automatic exposure bracketing, the Nikon Exposure BSS approach is unique, in that the camera analyzes the results, and only saves the image with the best exposure. Exposure BSS has three options, called Highlight, Shadow, or Histogram. Highlight Exposure BSS looks for the brightest image that still shows significant detail in the highlights. Shadow Exposure BSS does the opposite, looking for the darkest exposure that still shows good exposure in the shadows. Histogram BSS represents a combination of the two, as it tries to balance any loss of detail between highlight and shadow areas. - Big kudos to Nikon for this feature, which should be useful to a great many photographers.
The Coolpix 8400 lets you save two sets of User settings for focus, exposure, and other camera options for rapid recall via the setup menu. This is a real time saver in rapidly switching between widely different sets of shooting conditions. User changes to the camera's settings default to setting 1, unless setting 2 is specified.
Finally, a Self-Timer mode provides a short countdown between a full press of the Shutter button and the actual exposure. The Coolpix 8400 lets you select either a three- or 10-second delay. The shorter delay is great for those times when you're talking a long exposure on a tripod, and want to use the self-timer to trip the shutter so you won't jiggle the camera.
Flash
 The
Coolpix 8400 features a built-in, pop-up flash with five modes available, including
Auto, Flash Cancel, Anytime Flash, Auto Red-Eye Reduction, Slow-Sync and Rear
Curtain Sync. The Slow-Sync option is useful when shooting subjects with darker
or dimly-lit backgrounds (such as night scenes) because the camera leaves the
shutter open longer, firing the flash before the shutter closes. This allows
more ambient light into the image, avoiding the starkly-lit appearance of standard
nighttime flash shots. It can also provide a nice motion blur effect. Red-Eye
Reduction mode fires a pre-flash before the main exposure, to reduce the reflection
from the subject's pupils. Rear Curtain Sync creates a trail of light behind
moving subjects.
The
Coolpix 8400 features a built-in, pop-up flash with five modes available, including
Auto, Flash Cancel, Anytime Flash, Auto Red-Eye Reduction, Slow-Sync and Rear
Curtain Sync. The Slow-Sync option is useful when shooting subjects with darker
or dimly-lit backgrounds (such as night scenes) because the camera leaves the
shutter open longer, firing the flash before the shutter closes. This allows
more ambient light into the image, avoiding the starkly-lit appearance of standard
nighttime flash shots. It can also provide a nice motion blur effect. Red-Eye
Reduction mode fires a pre-flash before the main exposure, to reduce the reflection
from the subject's pupils. Rear Curtain Sync creates a trail of light behind
moving subjects.
The top-mounted hot shoe accommodates a more powerful external flash, either a Nikon dedicated unit, or a generic third-party one. According to Nikon's documentation, the Coolpix 8400's hot show is set up to work with Nikon Speedlight models SB-600 and SB-800, and the SC-28 and SC-29 sync cables for off-camera flash. Unlike earlier high-end Coolpix models, Nikon does not seem to support connection of the 8800 to older models of Nikon Speedlights, although I suspect that many of them would provide at least some level of compatibility.
One of the nicest surprises with the Coolpix 8400 though, is that it finally supports the zoom heads on the SB-600/800 external speedlights. (Thank you, Nikon!) As you zoom the 8400's lens with an SB-600 or -800 attached, after each zoom movement (at least, at wide-to-normal focal lengths), you'll hear the zoom motor in the flash head actuate. This can really help with flash shots at telephoto focal lengths, ad the light from the flash will be concentrated on a much smaller area, significantly increasing the usable range of the flash.
Finally, a major feature of the SB-600/800/Coolpix 8400 combo is that either flash offers true Through The Lens (TTL) flash metering when used with the camera. This is a really significant benefit, particularly with a long-ratio zoom lens, as it makes it possible to get accurate flash exposures, even when zoomed way in on a subject that's a significantly different color/reflectance than the background. Very few prosumer-level digicams offer true TTL flash metering, and even fewer do so when used with external flash units.
One remaining feature that may still seem to be "missing" relative to Nikon speedlights is external-flash-based autofocus assist illumination. Both the SB-600 and SB-800 speedlights incorporate infrared autofocus assist illuminators, which aren't utilized by the Coolpix 8400. While some readers will doubtless wonder why this is the case, use of an IR AF assist light may have fundamental issues, given that the contrast-detection portion of the 8400's AF system is based on the signal coming from the CCD, and the CCD in the 8400 (like those in most digicams) has an IR filter over it to improve color rendition.
Continuous Shooting Modes
The Coolpix 8400 offers a number "motor drive" rapid-exposure
modes for capturing quick sequences of images. Six modes (Continuous L, Continuous
H, Ultra High Speed Continuous, Multi-Shot 16, 5-shot Buffer, and Interval Timer
Shooting) are selectable under the Continuous option of the settings menu. Continuous
L mode captures as many as 11 frames at 1.2 frames per second (the first frame
seems to take a little longer, so the buffer will hold 12 frames, but they aren't
all captured at 1.2 frames per second). Continuous H mode captures as many as
five frames at 2.3 frames per second (LCD and EVF turn off while capturing in
this mode). In Ultra High Speed Continuous mode, the Coolpix 8400 captures as
many as 100 frames at 30 frames per second, VGA resolution (640 x 480). Multi-Shot
16 mode subdivides the image area into 16 sections and captures a "mini-movie"
of small images (816 x 612 resolution), which fills-in a 4x4 array within a
single 3,264 x 2,448 pixel image as the shooting progresses. Frame rates in
Multi-Shot 16 are as fast as 1.7 frames per second. 5-shot buffer mode captures
full res images at .7 frames per second, allowing the user to just hold the
shutter button down while following or waiting for the action; and once the
button is released, the last five frames are saved from the buffer to the card.
This allows photographers to capture the apex of an event whose apex they cannot
predict. It would be nice if the frame rate could be increased if shot at 5
megapixel resolution, but it's a great feature nonetheless. Finally, the Interval
Timer Shooting mode lets you continuously shoot time-lapse images, with intervals
of 30 seconds, or 1, 5, 10, 30, or 60 minutes between shots.
Movie Mode
The Coolpix 8400 also records moving images with sound. In TV Movie mode,
new to the series, the camera captures an impressive 30 frames per second at
640 x 480 for a maximum of 60 seconds. Small Movies are recorded at QVGA (320
x 240 pixels) resolution for as long as the card can record (over 14 minutes
or 895 seconds, according to Nikon with a 256MB card). Time lapse movies are
limited to 640 x 480 resolution, and a max of 1050 images, for a maximum playback
time of 35 seconds at 30fps. Frame capture intervals in time lapse movie mode
can be set to 30 seconds, or 1, 5, 10, 30, or 60 minutes. Another odd mode is
Sepia movie mode, which is only five frames per second at 320 x 240, with a
max whatever the card can store. Many competing cameras currently on the market
can record movie segments of arbitrary length, limited only by available memory
card capacity. Frankly though, I think that the ability to take lengthy movies
is overrated. Most television shows and movies change shots every 10 seconds
to one minute, and for good reason: Taking short video snapshots usually results
in better videos, capturing just enough of the flavor of an event to get the
message across, without leaving your audience bleary-eyed and bored. (Of course,
there's also the argument that you'll often want to film a longer clip, and
then chop out just the most interesting part of it. In that scenario, longer
maximum recording times are indeed helpful, provided you have the technical
savvy and desire to do video editing.)
Shutter Lag/Cycle Times
When you press the shutter release on a camera, there's usually a lag time or delay before the shutter actually fires. This corresponds to the time required for the autofocus and autoexposure mechanisms time to do their work, and can amount to a fairly long delay in some situations. Since this number is rarely reported on (and even more rarely reported accurately), and can significantly affect the picture taking experience, I routinely measure both shutter delay and shot to shot cycle times for all cameras I test, using a test system I designed and built for the purpose. (Crystal-controlled, with a resolution of 0.001 second.) Here are the numbers I collected for the Nikon Coolpix 8400:
| |
||
| |
(secs) |
|
| Power On -> First shot | |
LCD turns
on and lens extends forward. Fairly fast. |
| Shutdown | |
First time is time to retract
lens, second time is worst-case buffer-clearing time. First time is
fairly fast, second time is long, but corresponds to the time required
for the camera to clear a buffer of more than 100 small/basic after
a long continuous-mode burst. |
| Play to Record, first shot | |
Time until
first shot is captured. A little slow. |
| Record to play | |
First time is that required
to display a large/fine file immediately after capture, second time
is that needed to display a large/fine file that has already been processed
and stored on the memory card. First time is rather slow, second time
is reasonable. |
| Shutter lag, full autofocus AF Area Mode off, Hybrid AF on, Normal Response monitor mode off. |
0.41 / 0.39 | First time is at full wide-angle, second is full telephoto. Very fast when using Hybrid Autofocus! |
| Shutter lag, full autofocus AF Area Mode off, Hybrid AF On, Quick Response monitor mode on. |
0.320 | Wide Angle number only. Switching to Quick Response mode in the Monitor Options submenu produces a slight additional boost in shutter response speed, but not anything dramatic. |
| Shutter lag, full autofocus, AF Area Mode enabled (Camera not writing to memory card.) | |
First time is at full wide-angle, second is full telephoto. A good bit faster than average, impressive given that this mode doesn't use the camera's Hybrid IR/contrast-detect AF system. |
| Shutter lag, full autofocus, AF Area Mode enabled. (Camera writing to the memory card) |
1.15 - 2.3 (!) | If the camera is still writing previous images to the memory card, the shutter lag time is much longer. The times at left are for the camera in wide angle mode, with the green "writing to the card" icon still displayed on the LCD screen. The shorter time corresponds to "modern" cards (a Lexar 4x and 80x card, essentially no difference between them), the longer time is for an ancient (~4 years old) non-speed rated Kingston 64MB card. |
| Shutter lag, Manual Focus | 0.369 | Average speed, not especially fast. |
| Shutter lag, prefocus | |
Time to capture, after half-pressing
shutter button. Very fast. |
| Cycle Time, max/min JPEG resolution | 2.7-3.3 / |
First two numbers are for large JPEG images, third number is for TV-size (640x480) images. When shooting large images, the interval between the first two shots is 2.6-2.7 second, but subsequent shots slow to 3.1-3.3 second. The camera can capture 5 large/extra fine or 19 large/fine shots before slowing further. Buffer clears in about 16 seconds for large/extra fine, 19 seconds for large/fine shots. In TV mode, maintains this rate for 30+ frames and clears the buffer almost immediately. Not terribly fast, but not horrible either. |
| Cycle Time, RAW mode | 9.56 | Shoots 5 RAW images this fast, then slows to about 13.55 seconds apart. Buffer clears in 71 seconds with a Lexar 80x CF card, 97 seconds with a Lexar 4x CF card. Times are averages. |
| Cycle Time, HI (TIFF) mode | 15.63 | No buffering of TIFF images, all shots take this long. (Tested with a Lexar 80x CF.) |
| Cycle Time, Continuous High mode | 0.44 (2.27 fps) |
Shoots a burst of 5 shots at the same rate for large/fine, TV or RAW mode. Takes 15, 11, or 69 seconds to clear the buffer, respectively, then shoots 5 more. Buffer-clearing times were with a Lexar 80x card. A Lexar 4x card cleared slightly faster (12 seconds) when shooting in Large/Fine mode. (We didn't repeat the other tests with the 4x card.) |
| Cycle Time, Continuous Low mode, Large Fine/Large Normal | 0.89 (1.13 fps) |
In Continuous Low mode, the camera snaps a frame every 0.89 seconds, regardless of resolution/quality setting. In large/fine mode, it can capture ~11 shots this fast, before slowing to a rate of one shot every 7.7 seconds. In large/normal mode, it can capture as many as 19 shots before slowing to a rate of one shot every 7.12 seconds. The interval between the first two shots of a series is always longer, about 1.1 seconds. NOTE: As was the case with the Coolpix 8800, we did encounter a glitch with this mode: When shooting Extra Fine JPEGs at ISO 200 or 400, the first shot of a series of 5 was almost always trashed. (If we shot longer sequences, more of the files were corrupted.) The problem never appeared at ISO 50 or 100, and never with lower-quality JPEGs. (Times are with a Lexar 80x CF card.) |
| Cycle Time, continuous Multi 16 mode | 0.60 (1.67 fps) |
Camera captures 816 x 612 pixel images, stores them in 4x4 arrays inside normal 3264x2448 files. Buffer clears in 6 seconds. (Times are with a Lexar 80x CF card.) |
| Cycle Time, UHS mode | 0.03 (30.4 fps) |
Shoots a burst of 100 TV size images at 30 fps. Clears buffer in 35 seconds. Very fast. |
| Cycle Time, continuous 5-shot buffer mode | 1.40 (0.71 fps) |
Time is for large/extra fine images. Camera shoots continuously while shutter button is pressed, but only stores the last five shots. Buffer clears in 18 seconds with a Lexar 80x CF card. (22 seconds with a 12x card, 23 seconds with a 4x one.) |
While its cycle times are merely average, the Coolpix 8400's best-case shutter lag numbers of 0.39 - 0.41 second are quite impressive, no doubt thanks in part to its hybrid IR/Contrast Detection AF system. It's important to note though, that the best shutter response comes when the camera's Hybrid AF system is engaged, an option that's only available when the camera's multi-area AF system is disabled. Shutter response is quite good even in multi-area AF mode though, at 0.54 - 0.56 second. Oddly though, shutter response suffered significantly whenever we shot while the camera was still writing previous images to the memory card. Under that condition, shutter lag was 1.15 second with reasonably fast memory cards (4x or better), but stretched to 2.3 seconds with a very slow card we had on hand. As noted, the Coolpix 8400's shot to shot cycle time of 2.7 - 3.3 seconds is a little slow by current standards, but its performance in its various Continuous modes is quite good. In Continuous High mode, the camera captures up to 5 shots at a rate of 2.3 frames/second. In Continuous Low mode, the camera captures a variable number of images depending on the image size/quality selected, at a rate of 1.1 frames/second. NOTE though, that Continuous Low mode can yield corrupted images if you're shooting at high ISOs in Large/Extra Fine mode. For the real speed fanatics, Ultra High Speed continuous mode can capture up to 100 TV-sized (640x480) images at a rate of 30 frames/second. Overall, the biggest speed issue with the Nikon 8400 is that it's rather slow writing to its memory card, and doesn't benefit much from very fast memory cards. Buffer clearing times for JPEG files captured in single-shot mode are long but reasonable, in the range of 15-20 seconds. RAW-mode files clear much more slowly (42 seconds), and long series of shots captured in continuous mode can take 100 seconds or more to fully clear the buffer.We did find a very significant variation in shutter lag times, depending on whether the camera's AF Area Mode option was enabled. One explanation might be that it takes longer for the camera to determine which of several focus areas on the subject are closer to the camera, but we suspect that it's more a matter of the 8400's IR autofocus system being disabled for AF Area Mode focusing.
Operation and User Interface
The Coolpix 8400's substantial LCD menu system is useful for novices and for less commonly used controls, and it's good that it's there; but over time, experienced users will find they can make many of the necessary adjustments for routine shooting without resorting to the LCD screen. Once you learn where the functions are, you can do most of what you need using the external controls on the camera.
The programmable Function key adds some limited flexibility, letting you customize the camera to your specific shooting needs by assigning a single frequently used setting to the top-panel FUNC button. With the use of various dials and buttons, you can adjust exposure compensation, exposure mode, focus controls (manual focus setting, macro, and infinity focus) and flash mode without the LCD. ISO value, Image quality, Image size, White balance, Continuous mode, and User setting bank 1 or 2 can also be adjusted without the LCD, if they are assigned to the FUNC key. However, only one of these functions can be assigned to the FUNC key at any one time. This inconvenience is mitigated by the fact that the Mode dial on the Coolpix 8400 has separate settings that allow quick access for White Balance, ISO, and Image mode (quality and size), although you are taken out of the Recording mode in the process of using them. The top-panel monochrome status display provides clear feedback for all of the settings accessed via the buttons and Command wheel. When you do have to delve into the LCD menu system, navigation via the Five-way controller is intuitive and quick. In normal operation, many of the camera's functions are controlled by a combination of hitting a button and turning the Command dial, which usually makes it fast and efficient to change settings. Control layout is also logical, allowing one-handed operation for commonly changed functions, and requiring a two-handed approach only for manual focus setting.
The two available User settings allow you to pre-set an wide range of features. Any changes to settings on the Coolpix 8400 go to User setting 1 by default, unless setting 2 is specified. As mentioned above, White balance, ISO, and Image size and quality can be accessed directly by the Mode dial, without toggling through the menu system.
Reading the manual is essential to understanding many of the functions of the Coolpix 8400. Its feature set is rich and deep, and the reward for the extra research is a thorough understanding of a very capable camera.
Controls

Shutter Button: Located on top of the camera (slightly sloping down in front)
and encircled by the Power switch, this button sets focus and exposure when
halfway pressed and fires the shutter when fully pressed.
Power Switch: Surrounding the Shutter button on the camera's top panel, this dial turns the camera on or off.

Function Button: Just behind the shutter release, this button can be assigned
via the Setup menu to one of the following functions: White balance, Image quality,
Image size, Sensitivity (ISO), Continuous shooting, and User setting. The selected
function can then be controlled without using the LCD menu. You simply hold
down the FUNC button and move the Command dial to adjust the setting. The small
Control panel displays the changing settings, as will the LCD panel or viewfinder.

Flash Button: Just behind the function button, this button adjusts the flash setting in all still recording modes except for the those where flash has been cancelled by the user, the Scene modes for which flash has been disabled by Nikon, and when settings such as Continuous do not allow the flash to fire. By repeatedly pressing the button, you can set the flash for Auto, Flash Cancel, Auto Red Eye, Anytime Flash (fill), Slow sync, and Rear curtain sync. Icons for each setting are shown in the Control panel, and can be displayed in the LCD and viewfinder.

Exposure Compensation/Voice Memo Button: Directly to the right of the Flash button, this button adjusts the amount of exposure compensation (from-2 to +2 exposure equivalents (EV) in one-third step increments) when held down while turning the Command dial. When in full-frame Playback mode, voice memos can be added to photos up to 20 seconds long. Hold the button down while recording. A music note icon appears onscreen when a voice memo is attached to a photo, and pressing the Voice Memo button plays the note. The zoom controls change the volume up and down.
![]()
Illuminate Button: Behind the Flash button, this button activates a green
back light behind the status display panel, so you can read the displaying dark
conditions.
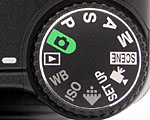
Mode Dial: Located in the right rear corner of the top panel, the Mode Dial
is the heart of the 8400's control system. It selects between eight major operating
modes, including Playback mode, Auto, Program, Shutter Priority, Aperture Priority,
full Manual, and Scene still capture modes, and Movie mode. A Setup option calls
up the three-screen setup menu on the LCD or EVF display, while three setting
options let you adjust White Balance, ISO, and Image Size/Quality without having
to delve into the menu system.
![]()
Command Dial: Located just below the right hand corner of the top of the camera, this rotary control is used in conjunction with a number of the other buttons on the camera to change camera settings. Pressing the appropriate button and rotating the dial one way or the other steps through the options available for the setting in question. In programmed exposure mode, rotating the dial at any time (e.g., with no button pressed) varies the exposure program, biasing it toward larger or smaller aperture settings. (A very handy way to control depth of field in your photos, without having to bother with the aperture priority exposure mode.)

Diopter Adjustment Dial: Hidden on the left side of the viewfinder eyepiece, this small, black dial adjusts the viewfinder to accommodate eyeglass wearers.

AE / AF Lock Button: Just to the right of the viewfinder eyepiece, this
button locks exposure and/or focus when pressed. A setting in the Record menu
assigns either AE only, AF only, or both to the button.
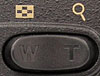
Zoom Control: Located near the top of the back panel, between the AE/AF-L
button and Command Dial, this rocker control operates the optical zoom in all
capture modes. Likewise, when digital telephoto is enabled, this button controls
the amount of digital zoom (from 1.1x to 4.0x).
In single-image playback mode, pressing the "T" side of the rocker repeatedly zooms in on the image, while pressing the "W" side of the control reverses the zoom. Pressing the "W" side again after reaching a full-frame view switches to a four-image thumbnail view, and another press switches to a nine-image thumbnail view. Pressing the "T" side of the control steps back through the sequence in the other direction. These buttons also control volume in Voice Memo playback mode.
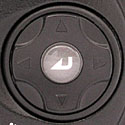
Five-way controller: Situated on the right side of the rear panel, this
control features four arrows that allow the user to navigate through the LCD
menu system and make selections in Record and Playback modes. Different menu
items are selected via the up/down arrows. Pressing the right arrow selects
the item, generally taking you into a sub-menu. Pressing the left arrow takes
you back out again. Once in a sub-menu, the up/down arrows again step between
items, while a right-arrow selects. This process continues until you arrive
at the final point of selection, upon which a press on the center, or "fifth"
button sets the selection.
In Playback mode, the left and right arrows scroll through captured images. If an image has been enlarged, with the Zoom control, all four arrows pan around within the view.

Menu Button: Adjacent to the top right corner of the LCD monitor, this button
brings up the settings menu in all capture modes and in the Playback mode. Pressing
it a second time cancels the menu display.

Quick Review Button: Beneath the Menu button, this button calls up a thumbnail
sized display of the most recently captured image while in either record mode,
appearing in the upper left-hand corner of the viewfinder display, overlaid
above the live viewfinder image. The left and right arrow keys scroll through
the remaining captured images on the memory card. Pressed a second time, it
expands the thumbnail view to a full-screen display of the captured images on
the card, complete with an image information overlay. The Quick Review mode
is canceled by pressing the button a third time, or by half-pressing the Shutter
button.

Erase Button: Just below the Quick Review button, this button calls up the Erase menu in Playback mode, which lets you delete the displayed image. There is an option to cancel. In Record mode, it sets the self timer: one press for 10 seconds, two presses for 3 seconds, a third press to cancel.
![]()
Display Button: Directly below the Erase button, this button controls the
information overlay in Playback and any Record mode. Pressing it once turns
off the information display, while a second press recalls it. When information
display is on, you can use the Command dial to change among several screens
worth of information, in both Playback and Record modes.
![]()
Monitor Select Button: Just below the lower right corner of the rear-panel
LCD, this button toggles the viewfinder display back and forth between the EVF
and LCD monitor. Since there's no optical viewfinder, there's no "off"
setting to disable the electronic viewfinders entirely.
![]()
MF--AF Focus Mode Button: Pressing this button cycles between normal
autofocus mode, Landscape mode (infinity focus), and Macro mode (close focus).
Rotating the Command Dial while pressing and holding this button down puts the
camera in to Manual Focus mode and adjusts the focusing distance.
Camera Modes and Menus
The Coolpix 8400's operation revolves (no pun intended ;) around the Mode Dial, located in the rear, right hand corner of its top panel. The Mode Dial selects one of eight operating modes for the camera, plus a setup mode and three parameter-adjustment settings. The operating modes are Auto, Program, Shutter Priority, Aperture Priority, Manual, and Scene still-capture modes, Movie mode, and Playback mode. The three parameter-adjustment positions let you set White Balance, ISO, and Image size/quality.
With the exception of Auto mode, all of the operating modes have menu systems associated with them, accessed by pressing the Menu button on the camera's rear panel. You navigate through the menu system by using the 5-way controller's arrow keys and central Select button to move a cursor and confirm selections, but some submenus also let you select options by rotating the Command Dial, without actually entering the submenu itself. Submenus having this option are marked on the LCD screen with a rotating dial icon when they are selected.
Recording Mode (still images)
Nikon's higher-end "prosumer" digicams have a somewhat different
setup in their menu system from that found in most competing models. The limited
function offering on the initial "My Menu" can be confusing to first-time
users, but does offer some efficiency for more experienced owners of the cameras.
Our advice to new owners is to scan through the options available in the full
menu system (see the "Show all menus" option at the bottom of the
My Menu), and then select a subset of your most frequently used options to appear
in the My Menu. Customizing the My Menu like this can make the camera much easier
and more intuitive to operate. (Likewise, assigning a commonly-used function
to the FUNC button makes for smoother operation as well.)
With the above as a preface, let's take a look at the 8400's still-capture
menu screens:
My Menu
 As just
noted above, this first menu lets you select any six submenus to appear on the
screen, based on the settings you're likely to want to adjust most often. The
default choices are: Metering, Continuous, BSS, Image adjustment, Saturation
control, User setting, and Show all menus. The "Show all menus" settings
lets you scroll down through all three menus. In many cases the Command dial
can be used to scroll through submenu choices without actually selecting the
submenu with the Five-way controller. The features allowing use of the Command
dial are indicated on the menu by the Command dial icon (represented by a small
disk with arrows beneath). Having a My Menu is good, but having to bypass it
when you want more is sometimes annoying. The trick is to hit the up-arrow and
press the Enter key (the Five-way controller's center button),
which takes you to the *real* menu. Unfortunately there appears to be no way
to disable My Menu
As just
noted above, this first menu lets you select any six submenus to appear on the
screen, based on the settings you're likely to want to adjust most often. The
default choices are: Metering, Continuous, BSS, Image adjustment, Saturation
control, User setting, and Show all menus. The "Show all menus" settings
lets you scroll down through all three menus. In many cases the Command dial
can be used to scroll through submenu choices without actually selecting the
submenu with the Five-way controller. The features allowing use of the Command
dial are indicated on the menu by the Command dial icon (represented by a small
disk with arrows beneath). Having a My Menu is good, but having to bypass it
when you want more is sometimes annoying. The trick is to hit the up-arrow and
press the Enter key (the Five-way controller's center button),
which takes you to the *real* menu. Unfortunately there appears to be no way
to disable My Menu
Menu One (1/3)
Once you leave the Coolpix 8800's My Menu, the menus do get complex enough
to warrant a table to describe them.

| Menu Selection | Options | Notes |
| White balance |
|
Options marked with "*" can be tweaked +/- 3 units to shift to warmer or cooler white balances using the Command dial. Fluorescent option offers choice of 3 lamp types. |
| Metering |
|
Defines area and pattern of metering. |
| Continuous |
|
Allows multiple shots to be taken and recorded while shutter release is pressed. Also enables interval timed shooting. |
| BSS |
|
Best Shot Selector takes series of pictures and selects either sharpest (BSS On) or best exposed (AE Exposure BSS). Exposure can be set to favor highlights, shadows, or overall (histogram) exposure. |
| Image adjustment |
|
Increases or reduces contrast between light and dark areas. |
| Saturation control |
|
Increases or reduces vividness of colors. |
| User setting |
|
User camera settings are automatically stored in bank 1. A second bank of settings can be set up. |
Menu Two (2/3)

| Menu Selection | Options | Notes |
| Image Mode |
|
RAW and HI (TIFF) settings are uncompressed. (Or
possibly compressed losslessly in the case of RAW files.) Compression
(JPEG) increases as user moves from EXTRA down to BASIC. |
| Sensitivity |
|
|
| Image Sharpening |
|
Controls the amount of image sharpening applied by the camera. |
| Lens |
|
Configures the autofocus system to compensate for auxiliary
lenses. Optional adapters are:
|
| Exposure options |
|
AE lock locks in exposure and white
balance for a series of pictures. |
| Focus options |
|
AF area mode options control the choice of active autofocus area from among the 9 available. |
| Zoom options |
|
Digital tele increases zoom range 4x but at the
cost of resolution. |
Menu Three (3/3)

| Menu Selection | Options | Notes |
| Speedlight opt. |
|
Flash exposure can be compensated +/- 2 EV in 1/3 EV intervals. Internal flash can be disabled when using external strobe unit. |
| Auto bracketing |
|
Exposure bracketing can capture either 3 or 5 shots
in the bracket. WB bracketing Takes three exposures--one 'normal,' one with a more bluish cast, another with a more reddish cast. |
| Noise reduction |
|
When enabled, noise reduction operates only at shutter speeds below 1/4 sec. |
| Reset |
|
Resets current user setting bank to default values. |
| My menu | Allows selection of options for "My Menu" from all submenus on Record menus 1-3. | |
| CF card format |
|
Reformats CF card, erasing all images. Displays message: 'Warning! All images will be deleted!' (Note that formatting the CF card erases even images that have been "protected" via the playback-mode menu option. |
Playback Mode
No surprises here, the Coolpix 8400's Playback mode lets you view and manage
images stored on its memory card. The Playback mode menu system is very straightforward,
with two screens of primary options. (No My Menu in this mode.)
Menu One (1/2):

| Menu Selection | Options | Notes |
| Delete |
|
"Selected images" shows 3 images
at a time with the center one highlighted for deletion. 'Erase all images' option excludes protected images. |
| Folders |
|
Options allow creation, naming, and deletion of new folders on the memory card, in addition to the default Nikon folder (which cannot be deleted). |
| Slide Show |
|
Sets up options for and starts automated picture playback. |
| Protect |
|
Shows three images. Highlighted image can be marked as "protected.". Protected image will not be deleted unless card is formatted. |
| Hide image |
|
Allows highlighted image to be hidden for slide show or other showing. Image remains accessible through Hide image menu. (Hide the club photos when delivering your trip report at the office? ;-) |
| Print set |
|
Displays image to be printed directly from camera (PictBridge) or marked for subsequent printing (DPOF). |
| Auto transfer |
|
Sends selected pictures can be automatically transferred to a computer running Nikon's PictureProject software. |
Menu Two (2/2):

| Menu Selection | Options | Notes |
| Move image |
|
Allows user to move pictures from one folder to another. |
| CF card format |
|
Reformats CF card, erasing all images. Displays message: 'Warning! All images will be deleted!' (Note that formatting the CF card erases even images that have been "protected" via the playback-mode option described above. |
| Small pic. |
|
Controls size of copies made with Small picture option. |
Scene Mode
Offers a choice of fifteen different "scenes" that correspond to common situations. A variety of camera settings are automatically adjusted to give optimum results for each scene type.

| Menu Selection | Options | Notes |
Portrait |
|
Favors larger apertures for softer backgrounds. Focus area selectable via multi-selector. |
Party/Indoor |
Use to capture lighting effects in background. | |
Night portrait |
|
Longer shutter time combined with flash balances exposure between subject and background. |
Beach/Snow |
Reduces tendency to underexpose bright scenes. | |
Landscape |
Enhances colors and contrasts. | |
Sunset |
Uses fixed white balance setting and a little negative exposure compensation to preserve deep hues. | |
Night landscape |
Slow shutter speed with noise reduction. | |
Museum |
Engages BSS to capture sharpest image when hand-holding. | |
Fireworks show |
Slow shutter speed to capture bursts, small lens aperture to preserve color in streamers. | |
Close up |
|
Engages macro focusing, allows manual selection of focus area. |
Copy |
For black copy on white background. | |
Back light |
Activates fill flash for subject. | |
Panorama assist |
White balance and exposure are fixed on first shot in series to avoid exposure or color variations between shots. | |
Sports |
Favors fast shutter speeds. | |
Dusk/Dawn |
Uses fixed white balance setting to preserve colors. Turns on noise reduction. |
Movie Mode:
The Coolpix 8400 can record movies with sound (except for time-lapse movies,
which are silent) ranging in length from 60 seconds at 640x480 resolution to
the limit of the available card in 320x240, sepia, and black & white (895
seconds for 256 MB card).

| Menu Selection | Options | Notes |
| Movie options |
|
In time-lapse mode, the interval between shots can be set to 30 seconds, 1 minute, 5m, 10m, 30m, or 60m. |
| Auto-focus mode |
|
Single AF sets focus at the beginning of the movie clip, continuous AF focuses during the entire recording. |
Setup Mode Menu One (1/3):

| Menu Selection | Options | Notes |
| Language |
|
|
| Date |
|
Time Zone displays the currently set time zone and allows user to toggle across all time zones on a world map to select a main time zone and an optional second time zone. |
| Folders |
|
Options allow creation, naming, and deletion of new folders on the memory card, in addition to the default Nikon folder (which cannot be deleted). |
| Monitor options |
|
Release speed can be set to reduce shutter lag at
the cost of a slightly inferior preview image. |
| Seq. numbers |
|
Sequential file numbering continues from one card to another when this setting is on. |
| Shutter sound |
|
Controls camera 'beep' for a number of functions and warnings. |
| Auto off |
|
Puts camera in standby mode. |
Setup Mode Menu Two (2/3):

| Menu Selection | Options | Notes |
| Language |
|
|
| Date |
|
Time Zone displays the currently set time zone and allows user to toggle across all time zones on a world map to select a main time zone and an optional second time zone. |
| Folders |
|
Options allow creation, naming, and deletion of new folders on the memory card, in addition to the default Nikon folder (which cannot be deleted). |
| Monitor options |
|
Release speed can be set to reduce shutter lag at
the cost of a slightly inferior preview image. |
| Seq. numbers |
|
Sequential file numbering continues from one card to another when this setting is on. |
| Shutter sound |
|
Controls camera 'beep' for a number of functions and warnings. |
| Auto off |
|
Puts camera in standby mode. |
Setup Mode Menu Three (3/3):

| Menu Selection | Options | Notes |
| Date imprint |
|
Date or Date and Time are imprinted into images themselves. |
| Firmware version | Displays current firmware version on the LCD screen. |
Image Mode
This mode-dial option lets you adjust image quality and size settings without
having to delve into the normal record mode menu system. Its entries are just
duplicates of those for the Image Mode submenu, found on the second screen of
the full record menu. As such I won't include a new screenshot here, but do
repeat the menu options for the sake of clarity.
| Menu Selection | Options | Notes |
| Image quality |
|
RAW and HI (TIFF) settings are uncompressed. (Or possibly compressed losslessly in the case of RAW files.) Compression (JPEG) increases as user moves from EXTRA down to BASIC. |
| Image size |
|
The 3:2 setting crops the top and bottom of 8 megapixel images to match the proportions of a 35mm film frame. |
Sensitivity Mode
This is another Mode dial option that simply repeats a menu option, this
time one that's available both on the main Record menu, as well as the default
My Menu. This option lets you adjust the camera's light sensitivity to ISO equivalents
of 50, 100, 200, 400, or let the camera control it automatically.
White Balance Mode
The third and final Mode dial option that repeats a menu option, letting
you adjust the camera's response to differently colored lighting.
Menu
Selection |
Options |
Notes |
| White balance |
|
Options marked with "*" can be tweaked +/- 3 units to shift to warmer or cooler white balances using the Command dial. Fluorescent option offers choice of 3 lamp types. |
Image Storage and Interface
The Nikon Coolpix 8400 uses standard CompactFlash Type I or II memory cards, but no "starter" card is included with the camera. Given the size of the camera's images, purchasers should seriously consider getting at least a 256MB card. Captured images can be individually write-protected through the Playback menu, but write protected files are only immune to accidental deletion, not card reformatting. File formats include several levels of compressed JPEG files as well as an uncompressed TIFF mode (HI quality setting) and RAW (NEF) mode. (Both TIFF and RAW settings are only available at maximum resolution.) Available image sizes are 3,264 x 2448 (8MP), 3,264 x 2176 ( 3:2 ratio), 2,592 x 1,944 (5MP), 2,048 x 1,536 (3MP), 1,600 x 1,200 (2MP), 1,280 x 960 (SXGA or 1MP), 1,024 x 768 (XGA or PC), and 640 x 480 (VGA or TV). The table below details the Coolpix 8400's approximate file sizes and compression ratios in all its various image size/quality combinations, with file capacities shown for the 256 MB card size that I recommend as a minimum for this camera.
| Resolution/Quality 256 MB Memory Card |
RAW | HI | Extra-Fine | Fine | |
|
|
|
2448 x 3264 |
Images (Avg size) |
20 |
10 24.4 MB |
32 7.9 MB |
64 4.0 MB |
126 2.0 MB |
245 1.0 MB |
| Approx. Compression |
2:1 | - | 3:1 | 6:1 | 12:1 | 23:1 | |
|
2592 x 1944 |
Images (Avg size) |
51 5.0 MB |
100 2.5 MB |
196 1.3 MB |
374 684 KB |
||
| Approx. Compression |
3:1 | 6:1 | 12:1 | 22:1 | |||
|
2048 x 1536 |
Images (Avg size) |
81 3.1 MB |
160 1.6 MB |
314 814 KB |
605 423 KB |
||
| Approx. Compression |
3:1 | 6:1 | 12:1 |
22:1 |
|||
| 1600
x 1200 |
Images (Avg size) |
133 278 KB |
253 180 KB |
115 KB |
115 KB |
||
| Approx. Compression |
3:1 | 5:1 | |
|
|||
| 1280
x 960 |
Images (Avg size) |
201 1.3 MB |
393 651 KB |
358 KB |
195 KB |
||
| Approx. Compression |
3:1 | 5:1 | |
|
|||
| 1024 x 768 | Images (Avg size) |
314 814 KB |
605 423 KB |
260 KB |
163 KB |
||
| Approx. Compression |
3:1 | 6:1 | |
|
|||
| 640
x 480
|
Images (Avg size) |
711 360 KB |
1304 196 KB |
131 KB |
98 KB |
||
| Approx. Compression |
3:1 | 5:1 | |
|
|||
Like most modern high-end digicams, the Nikon 8400 supports the FAT 32 directory standard, and so can make full use of memory cards larger than 2 GB. (I did verify that it properly formatted and recognized a 4GB Lexar CF card.)
The Nikon 8400 uses a USB interface to connect to a host computer for image downloading. Like many higher-end cameras these days, it's a "storage class" device, which means that Mac users on OS 8.6 or greater, or Windows Me, 2000, or XP users can just plug the camera into their computers and have it appear as a removable hard drive. Data transfer is quite fast, as I clocked it at 1,678 KBytes/second on my Windows XP machine. This is quite a bit faster than any cameras using a USB v1.1 interface, and well within the middle range of USB 2.0-equipped models.
Recommended Software: Rescue your Photos!
Just as important as an extra memory card is a tool to rescue your images when
one of your cards fails at some point in the future. I get a lot of email from
readers who've lost photos due to a corrupted memory card. Memory card corruption
can happen with any card type and any camera manufacturer, nobody's immune.
A surprising number of "lost" images can be recovered with an inexpensive,
easy to use piece of software though. Given the amount of email I've gotten
on the topic, I now include this paragraph in all my digicam reviews. The program
you need is called PhotoRescue, by DataRescue SA. Read our review
of it if you'd like, but download the program now, so you'll have it.
It doesn't cost a penny until you need it, and even then it's only $29, with
a money back guarantee. So download PhotoRescue
for Windows or PhotoRescue
for Mac while you're thinking of it. (While you're at it, download the
PDF manual
and quickstart
guide as well.) Stash the file in a safe place and it'll be there when you need
it. Trust me, needing this is not a matter of if, but when... PhotoRescue
is about the best and easiest tool for recovering digital photos I've seen.
(Disclosure: IR gets a small commission from sales of the product, but I'd highly
recommend the program even if we didn't.) OK, now back to our regularly
scheduled review...
Video Out
 US
and Japanese versions of the Coolpix 8400 include an NTSC video cable for connecting
to a television set. European models will doubtless support PAL timing and connections,
given the Video Mode option in the settings menu. All images that would normally
appear on the LCD are routed to the external video display so that the television
screen becomes an enlarged version of the LCD monitor and can be used both for
image playback and composition.
US
and Japanese versions of the Coolpix 8400 include an NTSC video cable for connecting
to a television set. European models will doubtless support PAL timing and connections,
given the Video Mode option in the settings menu. All images that would normally
appear on the LCD are routed to the external video display so that the television
screen becomes an enlarged version of the LCD monitor and can be used both for
image playback and composition.
Power
 The Nikon Coolpix 8400 runs on a rechargeable EN-EL7 lithium-ion battery pack, housed inside the hand grip, or an external AC adapter which plugs into the side of the camera (available as a separate accessory). The camera can also utilize six AA batteries via the optional MB-CP10 battery pack. With a capacity of 1100 mAh, the EN-EL7 battery in the Coolpix 8400 (also used in the new 8800) represents a significant increase in capacity over the EN-EL1 battery used in Nikon's earlier high-end Coolpix models, which only had a capacity of 680 mAh.
The Coolpix 8400 unfortunately uses a custom power connector, so I wasn't able to perform my usual direct power measurements on it. In use, its battery did seem to last quite a long while though, and I measured its worst case run time (capture mode, with the rear-panel LCD illuminated) at 2 hours and 56 minutes (176 minutes total), a very good performance indeed, and a dramatic improvement over the battery life of the earlier 8700 model.
Included Software
The Nikon Coolpix 8400 ships with Nikon's own Picture Project 1.0 for Mac and Windows. This is a rather basic organize/view/print application, although it does provide the (limited) ability to convert RAW files to JPEG format: You'll almost certainly still want some sort of commercial image-editing application (like Adobe Photoshop or Photoshop Elements) as well, and serious users will want a better workflow tool for working with RAW-format images.
Picture Project is clearly intended for novice digital camera users. It installs drivers that watch for the connection of digital cameras via the computer's USB port, or memory cards inserted into card readers. When either is detected, it offers automatic transfer of images to your hard disk, generating a catalog of them in the process. (It can also build a catalog of images already on your disk, if you so desire.) Very basic image editing tools are provided to adjust brightness, color, and sharpness, and convert color images to either black and white or sepia monochromes.
For advanced users, Picture Project's biggest limitation will most likely be its awkward handling of RAW-format files. You can make adjustments like brightness (although not exactly digital exposure compensation, calibrated in EV units) and color, but then have to save the NEF RAW file to disk and return to the application's Organize mode before you can export it as a JPEG.
Given Picture Project's RAW-file limitations, advanced users will undoubtedly
want to examine the more advanced Nikon Capture software, or one of the several
third-party programs for managing RAW files. Options there include Mike Chaney's
Qimage Pro, (an excellent program for very high-quality
printing, although I'm not certain of Mike's current level of NEF-format support),
Eric Hyman's Bibble and MacBibble
(as I write this in early September 2004, Eric is almost (but not quite) ready
to release Bibble 4.0). Adobe's Photoshop CS now also supports a variety of
RAW formats directly as well.
PictureProject is clearly aimed at the first time digital camera user, it installs
tray applications which monitor for connection of digital cameras via USB or
cards inserted into card readers and then provides automatic transfer of images
to the hard disk, cataloging them as it does so. You can also have the application
catalog images already on your hard disk. It provides basic image editing including
Brightness, Color, Sharpness and Photo Effects (B&W/Sepia).
In use I found PictureProject to feel a little awkward and incomplete, for example
you double-click on an RAW to go into Edit mode where you can apply adjustments
such as brightness (although not specifically digital exposure compensation)
you then have to save the NEF go back to Organize mode select the image then
do File -> Export as JPEG to convert the RAW file to JPEG. It doesn't support
output to TIFF and doesn't provide adjustment of white balance or digital exposure
compensation. PictureProject simply felt like a half finished solution and several
steps back from Nikon View.
In the Box
The following items will be packaged with production models of the Nikon Coolpix 8400:
Test Results
In keeping with my standard test policy, the comments given here summarize only my key findings. For a full commentary on each of the test images, see the Nikon Coolpix 8400's "pictures" page.
Not sure which camera to buy? Let your eyes be the ultimate judge! Visit our Comparometer(tm) to compare images from the Nikon Coolpix 8400 with those from other cameras you may be considering. The proof is in the pictures, so let your own eyes decide which you like best!
As with all Imaging Resource product tests, I encourage you to let your own eyes be the judge of how well the camera performed. Explore the images on the Coolpix 8400 pictures page for the, to see how the Nikon 8400's images compare to other cameras you may be considering.
Conclusion
| Free Photo Lessons | |
|
<<8400 Sample Images | Additional Resources and Other Links>>
Reader Comments!
Questions, comments or controversy on this product? Click
this link to see what other Imaging Resource readers have had to say about
the Nikon Coolpix 8400, or add comments of your own!

