Nikon Coolpix 8700Nikon moves into 8 megapixel territory with a long zoom, and a new body, but the same legendary Nikon feature set!<<Executive Overview :(Previous) | (Next): Viewfinder>> Page 3:DesignReview First Posted: 03/22/2004 |
Essentially identical externally to the Coolpix 5700, the Coolpix 8700 is both small and function-rich. Compared to the many newly-emerging EVF designs, the Coolpix 8700 is still relatively compact. Because the camera is so small, and to accommodate its big flip out screen, some of the control buttons were placed on the left of the lens housing. Those used to having most of the controls on the back will have to adjust to having basic functions like resolution and flash control out of sight on the left, but it does give something for the left hand to do while you're working the command dial. There is a risk of pressing these side-mounted buttons accidentally, adjusting the various controls without the photographer's knowledge, so user beware, but I did find that their locations become more intuitive with extended use. The Coolpix 8700 has a "Vari-angle" LCD design that swivels, useful for getting the shot from various angles, including from directly in front of the camera. (Good for self-portraits, or working with a model.) The Coolpix 8700 has an all-black body composed of a mixture of metal and plastic. It's fairly compact at 4.3 x 3.0 x 4.0 inches (108 x 76 x 102 mm). It has a pleasant heft, and the lens is close enough to the grip that there is very little "twist away" as we've seen with heavier EVF cameras. It weights 18.8 ounces (533 grams) with battery and memory card loaded.
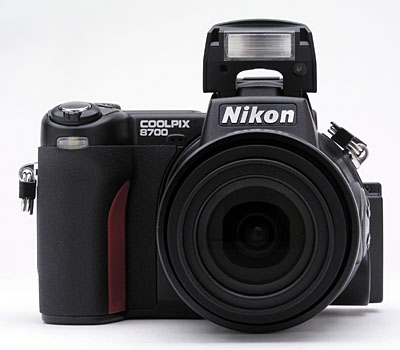
Visible on the front panel are the lens and self-timer lamp, the latter at the top of the handgrip, just below the power switch. The telescoping lens extends as much as two inches when the camera is powered on. (The lens extends two inches when set to its telephoto position, but only a bit over an inch at its wide angle setting.) There are body threads at the base of the lens barrel for mounting an accessory adapter, and wide, telephoto, and fisheye lenses are available for the camera. Adjustment to an auxiliary lens is not automatic; users must tell the camera which add-on lens is mounted. A removable plastic lens cap protects the lens from scratches, and comes with a tiny strap to tether it to the camera body and prevent it from being lost. Instead of popping off if you've left the cap on when starting up the camera, this cap just comes out with the lens, since it actually fits inside the innermost lens assembly. It looks funny, but it's a great solution that keeps the lens well protected. Tucked beneath the Coolpix logo are two small holes for the microphone, used to record audio when in movie mode or Voice Memo mode. A large hand grip, coupled with the deep recess between the grip and the lens barrel, provides a firm hold on the camera, and a rubbery coating provides a good gripping surface for your fingers.
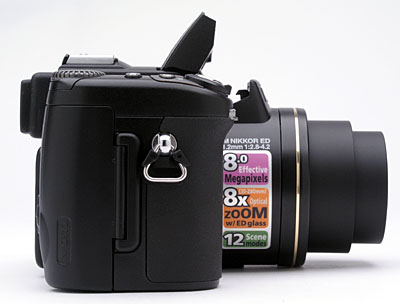
The camera's right side (as viewed from the back) houses the memory card compartment (a Type II Compact Flash slot) and an eyelet for the neck strap. I liked the positive snap-action operation of the memory compartment cover: The spring action is apparently contained in the hinge mechanism, and it feels much better than the usual friction snap-latch I commonly find on the outside edges of these flaps on most cameras I test. The ejection button can be a little confusing if you get out of sync with it though. It's one of those that works like a pen plunger: In order to extend the release so that it can push the card out, you first have to press in to make it pop out. Once it's extended, you can press in again and it releases the card and then stays pressed in, as long as you pressed it back in far enough. When it doesn't stay in, however, you'll find that inserting a new card and closing the door will just cause the card to eject again into the door, crashing the camera. Nikon warns about this in the manual. Those experienced with this method will likely be okay, but novices could get a little frustrated.
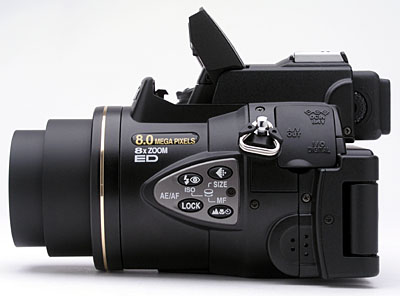
The left side of the camera is rounded to conform to the shape of the lens barrel, and holds several control buttons, the second neck strap eyelet, a connector compartment, and the speaker. The four control buttons (Flash / ISO, Image Quality and Size, AE/AF Lock, and Focus Mode buttons) on the side of the lens serve dual purposes, changing one setting when pressed, and another when pressed and held while turning the Command dial. A rubbery flap covers the connector compartment, which houses the DC In, A/V Out, and Digital I/O jacks. The flap remains fastened to the camera body and folds out of the way easily, using the new, more substantial connector/hinge tab design I saw and approved of on Nikon's D100 SLR. Also visible from this angle is the diopter adjustment dial on the viewfinder eyepiece.
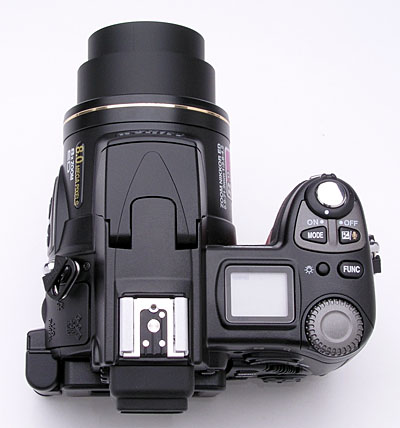
The top of the camera has a handful of controls, a small status display panel, the pop-up flash, and the external flash hot shoe. You can either pull the flash up manually, or the camera will pop it up automatically when needed. It also pops up even if you've used a custom mode to turn flash off. Don't be alarmed or frustrated, as I was initially, it's just that the AF assist light is also located in the flash housing, so the flash head has to be popped up in order for the assist light to function. The hot shoe has the standard five-contact design used by the Nikon Speedlights, but should also host some third-party flash units. (Particularly since the camera doesn't use many of the special Nikon-proprietary contacts on the flash shoe.) The small status display panel reports most camera settings, including battery power, and is very useful for making quick camera adjustments. Top panel controls include the Power dial and Shutter, Mode, Exposure Compensation, Illuminate, and Function buttons. A Command dial on the top panel of the 8700 is used in conjunction with various buttons on the body of the camera to change settings.
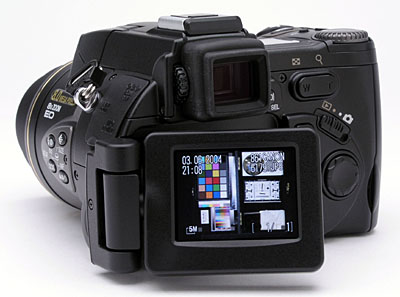
A number of the controls and user interface elements for the Coolpix 8700 are on the back of the camera. At top left is the electronic viewfinder (EVF) eyepiece, with a diopter adjustment dial on the left side and a nice rubber guard, important for wearers of glasses. On the right side of the eyepiece is a Monitor Select button, which toggles the viewfinder display back and forth between the EVF and LCD monitor. A rocker button in the top right corner controls optical and digital zoom, as well as playback viewing options. The remaining controls include the Menu and Quick Review buttons, Mode switch, Four-Way Arrow pad, and the Erase and Display buttons. The right edge of the back panel is sculpted, providing a nice indentation and associated ridge that provides just enough of a lip to give your thumb something to hold onto.
The 8700 has a "vari-angle" LCD monitor, which lifts off of the back panel and swings outward. Once out, the monitor swivels 270 degrees. One benefit is that in addition to facing a variety of angles, the LCD can flip around and face the back of the camera when closed, protecting it from any scratches.
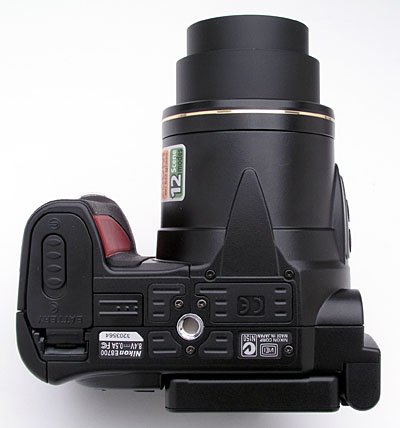
The bottom of the Coolpix 8700 is nice and flat, with several slightly raised inserts of resilient plastic that increase the camera's grip on tripod mounting plates. The tripod socket itself is a rugged metal unit. The tripod socket is also roughly centered on the camera body, which is good for mounting stability, but which does put the lens quite a bit off-center from the mount. This isn't an issue for normal shooting, but does mean that a special tripod head will be needed to shoot panoramic images, to compensate for the parallax error introduced by the offset between the lens' optical center and the center of rotation for the tripod mount. Having the tripod socket centered also means that some tripod mounting plates will prevent you from removing the battery while mounted to the plate. (Again, not an issue for most users, but something I'm attuned to given how much I shoot in the studio with cameras I test.) A small plastic plate next to the battery compartment pops out revealing a connector for the power/vertical hand grip accessory. Unfortunately, there is no retaining latch to keep the battery in place when you open the battery door, so be careful when opening. Batteries can become unusable after only one drop depending on where and what and how hard they hit.
Reader Comments! --> Visit our discussion forum for the Nikon Coolpix 8700!

Follow Imaging Resource: