Nikon D1xNikon ups the ante with 5.33 million pixels (5.9 megapixel file size), improved color, and exceptional noise performance!<<Shutter Lag & Cycle Time Tests :(Previous) | (Next): Camera Modes & Menus>> Page 8:Operation & User InterfaceReview First Posted: 6/16/2001 |
Operation and User Interface
We found the user interface on the D1x surprisingly straightforward and simple to use, particularly so in light of the extensive array of functions and features. By moving many of the "Custom Settings Menu" (CSM) functions to the LCD menu system, the D1x’s functions and features are much to find and set than those of the D1. The tradeoff is that you have to cycle through multiple pages of LCD menus to find the setting you want, which could be an issue in rapid-fire shooting situations. Nikon thoughtfully did still provide "expert mode" access to the CSM options though, allowing you to program the Function button to activate the CSM menu in the cryptic (but fast) numbers-only mode familiar from the D1.
While many of the camera's options can be accessed via the excellent "plain English" menu system, all the most common shooting controls are available via the camera's external buttons and knobs. You can also program the operation of some of the buttons, to configure the camera for your particular shooting requirements.
Nikon makes a big deal of their digital SLR's "cameraness", defined as how well/easily they function as cameras. We're happy to say that they've done an excellent job in this respect with the D1x's control system. It's even easier to use than the D1, and the control layout is exceptionally logical and easy to follow. Big kudos to Nikon for the D1x's user interface!
Control Enumeration

Depth of Field Preview Button: Located on the front of the camera, on the top left side (viewed from the front) next to the lens, this button allows you to check the depth of field for the current aperture setting by looking through the viewfinder, which provides an approximate idea of the depth of field.

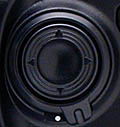
Focus Mode Selector Dial: Located on the front of the camera, on the right side next to the lens, this dial selects between Manual, Single Servo, and Continuous Servo focus modes.

Lens Release Button: Also on the front of the camera, on the right side next to the lens, this button releases the lens from its mount when pressed.

Subcommand Dial: Positioned at the top front of the hand grip, just beneath the Power switch, this dial is used for selecting secondary values in many operating modes and menus. Among other functions, it fine-tunes the white balance across the -3 to +3 range (arbitrary units) when holding down the White Balance button. While pressing the Function button, this dial allows you to change CSM (Custom Settings Menu) options. When turned while pressing the Bracket button, the dial changes the bracketing step size (in EV units) and range. The dial also adjusts the aperture in Aperture Priority and Manual exposure modes.

Power Switch: Encircling the Shutter button on the top right of the camera, this switch turns the camera on and off. It also turns on the backlights for both status display panels (on top and on the back panel) when shooting in dark situations (light bulb icon position, momentary contact).

Shutter Button: In the center of the Power switch, on the top of the camera, this button sets exposure and focus when halfway pressed and fires the shutter when fully pressed.

Exposure Compensation Button: Directly behind the Shutter button on the top of the camera, this button sets the Exposure Compensation from –5 to +5 exposure equivalents (EV) in one-third step increments when pressed while turning the main Command dial. When pressed in conjunction with the Bracket button, displays the date and/or time, and allows you to change the setting.

Exposure Mode / Format Button: Just to the left of the Exposure Compensation button, pressing this button while turning the main Command dial sets the exposure mode (Program AE, Manual, Aperture Priority, or Shutter Speed Priority). In any mode, pressing this button simultaneously with the Delete button (also labeled Format) formats the memory card.

Metering Selector: To the left of the Exposure Mode / Format button on top of the camera, this selector ring surrounds a small black button. Pressing the button and turning the ring allows you to select between Spot, Center-Weighted, and 3D Color Matrix metering options.

Diopter Adjustment Knob: Directly behind the metering selector, this knob adjusts the optical viewfinder to accommodate eyeglass wearers. (Range is -3 to +1 DP)
Mode Dial Lock Release: (See photo of mode dial below.) On the top left side of the camera (when looking at the back), next to the Mode dial, this button releases the Mode dial to select the camera mode.

Mode Dial: Underneath a set of control buttons on the left side of the top panel, this notched dial selects between PC (computer connection), Playback, Single Shot, Continuous Shooting, and Self-Timer modes.
Auto Bracketing Button: (See photo of mode dial above. The Auto Bracket button is the one labeled "BKT".) Positioned on the top of the Mode dial and next to the Flash and ISO buttons, this button turns on the Auto Bracketing function (when pressed while turning the main Command dial). When pressed in conjunction with the Exposure Compensation button, this button displays the date and/or time setting, and allows it to be changed.
Flash Sync Mode Button: (See photo of mode dial above. Flash sync button is the one with a lightning bolt icon on it.) Directly beside the Auto Bracketing button, this button cycles between the five flash sync modes (Front-Curtain Sync, Slow-Sync, Rear-Curtain Sync, Red-Eye Reduction, and Red-Eye Reduction with Slow-Sync) when held down while turning the main Command dial.
ISO Button: (See photo of mode dial above.) Directly to the right of the Flash Sync Mode button, this button changes the camera’s sensitivity setting (ISO equivalent) when pressed while turning the Command dial.
Monitor Button: Situated at the top left side of the back panel, this button turns the LCD monitor on and off. Pressing the button once displays the Quick Review of the most recently captured image. A second press displays the menu system.

Delete / Format Button: To the right of the Monitor button, this button deletes individual images. When pressed in conjunction with the Mode button, this button formats the CompactFlash card.

Eyepiece Shutter Lever: Nestled above the left side of the optical viewfinder, this lever opens and closes the shutter that covers the viewfinder eyepiece for accurate exposures when using a tripod. (E.g., when your eye isn't blocking light from entering the rear element of the viewfinder.)

AE/AF Lock Button: Located on the top right side of the back panel, this button locks the exposure and/or focus when pressed (can be set through the Custom Settings menu to lock one or the other or both).

AF-On Button: To the right of the AE/AF Lock button, this button sets the autofocus when pressed (performs the same function as halfway pressing the Shutter button).

Main Command Dial: The final control on the top right of the back panel, this dial is used to select various camera settings when turned in conjunction with the Auto Bracketing, Flash Sync Mode, Exposure Compensation, Mode, Function, ISO, and White Balance buttons. In Aperture Priority and Shutter Speed Priority modes, this dial sets either the aperture or shutter speed settings. In Manual exposure mode, the dial sets the shutter speed.
Focus Area Selector and Lock / Four-Way Arrow Rocker Pad: Beneath the Command dial, on the right side of the back panel, this rocker button with its associated locking switch controls the autofocus area in Record mode. The switch unlocks the autofocus area and the four arrow buttons let you decide where to set the main autofocus area (by choosing one of the five brackets displayed in the viewfinder). In Playback mode, the rocker toggle button's up and down arrows scroll through captured images while the right and left arrow buttons cycle through various information displays for each image. The arrow buttons also navigate through the LCD menu system.

Rear control panel buttons:
The next series of five controls we describe are all located in a small control panel area on the rear panel of the camera, at bottom left. They are protected by a small metal cover that flips down to reveal the pushbuttons.
Menu Button: The first button on the top row of controls, this button calls up the LCD menu system.
White Balance Button: Directly to the right of the Menu button, this button selects the White Balance setting when pressed while turning the main Command dial. Options are Auto, Incandescent, Fluorescent, Direct Sunlight, Flash, Overcast, Shade, and Preset (which allows you to manually adjust the white value by using a white card or object as a reference point). All white balance settings (except Preset) can be adjusted from -3 to +3 EV by turning the Subcommand dial (on the front of the hand grip) while holding down the White Balance button.
Function Button: Beneath the Menu button, this button activates any function assigned to it through the Custom Settings menu while turning the main Command dial in Record mode. Available functions are Quality, CSM (allows the button to access all of the Custom Settings menu options), AF Area, and Command Lock (locks shutter speed or aperture). This button also confirms menu selections if pressed while in any LCD menu screen.
Protect Button: To the right of the Function button, this button write-protects individual images from accidental deletion (except through card formatting). Pressing this button also removes protection.
Thumbnail Button: To the right of the Protect button, this button works together with the main command dial to select 1, 4, or nine-image display in Playback mode.

Card Slot Release Button: Hidden beneath a plastic flap on the back panel, just below the four-way Arrow Rocker pad, this button releases the CompactFlash card slot cover so that the card can be removed.

Vertical AF-ON Button: Hidden on the bottom right of the back panel, this button serves the same purpose as the main AF-ON button, but is used when shooting vertically.

Vertical Command Dial: Directly beside the vertical AF-ON button on the lower right corner of the back panel, this dial serves the same purpose as the main Command dial but is used when shooting vertically.

Vertical Shutter Release Button and Lock: Located on the bottom of the right side of the camera (when looking at the back panel), this locking Shutter button can be used when shooting vertically. The rotating lock ring keeps it from accidentally firing when shooting normally.
Reader Comments! --> Visit our discussion forum for the Nikon D1x!

Follow Imaging Resource: