 Back
to Full Nikon D1x Review
Back
to Full Nikon D1x ReviewGo to Nikon D1x Data Sheet
Go to Nikon D1x Pictures Page
Up to Imaging Resource Cameras Page
Use your browser's "Back" button to return to the previous page, or the links at the top and bottom of this page to navigate to related information. If you have difficulty fitting the text on this page onto your printer output, simply resize your browser window to a narrower width and print again.
Remember us when it's time to buy!
Dave here: Have our reviews been helpful to you? (Is this article you're reading right now useful?) Preparing this level of information on as many products as we do is incredibly hard work, not to mention expensive. Things on the Internet may look like they're free, but they're not. (As a lot of big dot.com companies are finding out these days.) Somewhere, somebody has to pay to produce worthwhile content. YOU can help us though, by remembering us when it comes time to make your purchase. Would you consider coming back to our site and clicking-through to one of our advertisers to make your purchase? Every dollar you spend with one of our advertisers helps us directly (in affiliate fees) or indirectly (the advertiser will keep renewing their ad contract with us). To make it easy for you to support us, here's a URL you can visit, to see all our current advertisers, with links to click on that will register your visit to them as having come from our site. It's up to you where you buy, but Mike, Mike, Kim, Yazmin, Marti and I would be really grateful if you'd help us out by choosing one of our advertisers to purchase from.
Thank you for your support!
Dave Etchells, Founder & Publisher
Visit our "Buy Now" Page:
https://www.imaging-resource.com/buynow.htm
Back
to Full Nikon D1x Review
Go to Nikon D1x
Data Sheet
Go to Nikon D1x
Pictures Page
Up to Imaging Resource Cameras
Page
Nikon D1xNikon ups the ante with 5.33 million pixels (5.9 megapixel file size), improved color, and exceptional noise performance! Review First Posted: 6/16/2001 |
|
 |
|
True Nikon pro SLR that just happens to be digital |
|
|
5.47- megapixel CCD, 3,008 x 1,960-pixel images |
|
|
|
ISO from 125 to 800 ("ISO Boost" to 3200) |
|
|
|
Three frames per second, super-fast shutter delay! |
|
|
|
Part of Nikon "Total Imaging System" - Compatible with >90% of all Nikon F-mount lenses ever made! |
Executive Overview
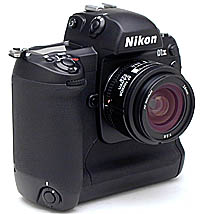
Just like the previous D1 model, we couldn't wait to get our hands on the updated D1x. (We're highly partial to cameras offering full manual control and loads of features, and use Nikon prosumer SLRs for our own film-based photography.) With the same familiar, F5-inspired body design, the D1x offers the look and feel that film-based pros are accustomed to, and is quick to get to know. The standard Nikon F lens mount means that you can attach most of Nikon's 35mm lenses with no problem (great for current Nikon 35mm shooters who already have a full kit of lenses). Although the D1x is quite a bit heavier (2.5 pounds or 1.1 kilograms) than the prosumer-level digicams we've reviewed in the past, we feel pretty confident that pocket-sized portability isn't much of an issue with this camera's potential buyers, all of whom will value the extraordinary control and exceptional image quality provided by the D1x far above a few ounces of extra weight. Also, the weight is due in part to the incredibly rugged magnesium metal body, which creates a rigid optical platform designed to absorb unreasonable abuse with aplomb. (Handy for pounding tent pegs while on safari. ;-) We were pleased to see the inclusion of an external flash hot shoe on top of the camera as well as an external flash (PC style) sync socket in the design, giving you as much flash flexibility as any high-end film-based Nikon SLR.
The very accurate TTL optical viewfinder means that you have no need for the LCD panel as a viewfinder, a good thing, since the SLR optics mean that the LCD can't be used as a "live" viewfinder anyway. (By its nature, barring a "pellicle" mirror, the very design of an SLR precludes a "live" LCD viewfinder.) In addition to a dioptric adjustment dial and an internal shutter to prevent stray light from affecting exposures when the camera is used on a tripod, the viewfinder features a very detailed information display that reports most of the camera's exposure settings and also shows a set of five focus targets. A very flexible autofocus system means that you can determine the type of autofocus (single, continuous, or manual), designate how it's used (single area, dynamic area, etc.) and even designate the location of the autofocus target within the frame. Exposure-wise, there are so many features on this camera that you'll have to read the entire review to get them all. We'll just mention a few here that we find particularly noteworthy.
To begin, you have the option of working in Program AE, Aperture Priority, Shutter Priority, or Manual exposure modes. Exposure settings are easily changed by using a combination of control buttons and command dials, or through the LCD menu system. The extensive (!) Custom Settings menu provides access to a huge range of camera settings, including how various elements of the user interface itself work. For example, you can decide which command dial controls the shutter speed or aperture, adjust the image sharpness and contrast, determine whether or not the aperture changes as the lens zooms, or set exposure variables for the automatic bracketing, among many others (there are 36 Custom Settings menu options in all). With the D1x, you have a broad exposure compensation range, with a variable adjustment from -5 to +5 exposure equivalents (EV) in one-third step increments (the increments can also be altered to one-half or one EV unit). White balance also has a lot of flexibility, with options for Auto, Incandescent, Fluorescent, Direct Sunlight, Flash, Overcast, and Shade, all of which are adjustable from -3 to +3 (arbitrary units) in their intensity. A Preset white balance setting serves as the manual adjustment, and the D1x can store up to three presets.
Three metering modes are available: Spot, Center-Weighted, and a very accurate Color 3D Matrix metering option. ISO can be set anywhere from 125 to 800, giving you tremendous exposure flexibility. (Special "ISO Boost" modes are available that extend the effective ISO to 1,600 or 3,200, albeit at the cost of image noise.) The auto bracketing feature takes three exposures of the same subject at different exposure settings (the variation of which either you or the camera can control). There's even a black and white monochrome exposure mode. Continuous Shooting lets you capture up to nine consecutive images as quickly as three frames per second, and here again, you can select both the maximum number of shots as well as the frame rate. The camera's flash sync mode menu lets you select when the flash fires. Choose from Front-Curtain Sync, Slow-Sync, Rear-Curtain Sync, Red-Eye Reduction, and Red-Eye Reduction with Slow Sync. Because the D1 accommodates a variety of Nikon's Speedlights, specific flash power and operation will vary depending on the particular model you're using.
The 5.47-megapixel CCD delivers image resolutions of 3,008 x 1,960 and 2,000 x 1,312 pixels. Image quality options include the usual Basic, Normal, and Fine but also RGB TIFF, YCbCr TIFF, and two RAW data formats (all listed under the High quality option in the menu system). Image storage is on CompactFlash Type I or II, and the D1x supports the 340 MB IBM MicroDrive for huge on-the-go storage capacity. The D1x utilizes a custom EN-4 NiMH battery pack for power and an AC adapter/charger is included in the box. (We also highly recommend a spare battery pack). A design plus we really enjoyed here is that the battery pack and card slot are both accessible from the sides of the camera, meaning that you don't have to dismount the camera from the tripod to access either compartment (this is something we always pay attention to, given the amount of studio work we do).
To our mind, the real story about the D1x is its image quality. Color rendition is significantly improved from that of the original D1, and the D1x now supports both sRGB and Adobe RGB color spaces. The sRGB space is its default, while Adobe RGB can be set via a Custom Settings Menu option. We're pleased to see a major manufacturer provide color space options like this. The Microsoft/HP-dictated sRGB color space is fine for generic computer displays and web work, but its color gamut (the range of colors that can be accurately represented) is too small for professional work. By making Adobe RGB available as an option, Nikon is helping promote a move away from the overly restrictive "standard" that's dominated the industry for years. The thing that really surprised us about the D1x's photos though, was the almost complete absence of image noise at normal ISO settings. These are some of the "cleanest" images we've seen from any digicam to date. (June, 2001)
The full manual control, lack of LCD reliance, and bevy of features will make the D1x a coveted addition to any photographer's equipment bag, and the larger, CCD will doubtless tempt many current D1 owners to upgrade. This camera is perfect for the professional photographer as well as the advanced amateur ready for a digicam that's a no-compromise creative tool. We're thrilled to see the carryover of Nikon's extensive exposure controls and features to the digital world and glad to see the return of the familiar styling that made the D1 so easy to get acquainted with. Kudos to Nikon for creating a digital camera that's practical in the studio and out in the field, with all the exposure and creative control we could ask for: A true Nikon SLR in every respect!
Design
A bit less than two years after they revolutionized the digital SLR market with the D1, Nikon dramatically upped the ante with the D1x. Keeping the same SLR design introduced with the D1, the D1x bears a strong resemblance to the 35mm F5, reducing the learning curve for professional photographers transitioning into the digital format. The physical dimensions of the CCD in the D1x are the same as those in the original D1, but Nikon has packed in twice as many pixels by going to a rectangular pixel format. By doubling the number of pixels horizontally, Nikon went from a 2.7 megapixel camera in the D1 to 5.74 megapixels (5.33 effective) in the D1x. Weighing in at a hefty 2.5 pounds (1.1 kilograms) excluding the lens, batteries, and flash (the exact weight of the D1), this camera is definitely solid (although we don't think that the purchaser of this camera is going to be too concerned with pocket-sized portability). The camera maintains the same dimensions as the D1, measuring 6.2 x 6.1 x 3.4 inches (157 x 153 x 86 millimeters), again without the lens, batteries, or flash. Control layout is roughly the same as the D1 model, though some buttons now have new functions.

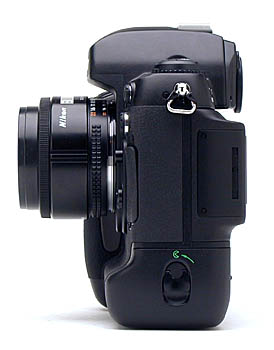
The front of the camera features a standard Nikon F lens mount, complete with AF coupling and AF contacts. (The D1x body contains the necessary contacts to support Nikon's latest AF-S "silent wave" autofocus lenses.) There's also a Depth of Field Preview button, Subcommand dial, sync terminal for an external flash, 10-pin remote terminal, Lens Release button, Focus Mode Selector dial, self-timer lamp, and DC In and Video Out sockets (protected by a flexible rubber flap). A substantial hand grip on the right side of the camera sports a rubbery covering that provides a very secure finger grip. A rib running along the bottom of the body serves as a hand grip when the camera is rotated for vertical-format shots.
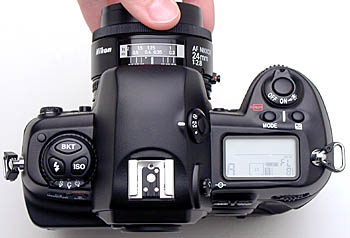
The top of the camera features the Power switch, Shutter button, Mode and Exposure Compensation buttons, and a small status display panel that reports most of the camera's settings. Also on top is a diopter adjustment dial for the optical viewfinder, Metering dial, Mode dial, and several control buttons (Flash, Bracketing, and ISO buttons). The top of the camera also contains a hot shoe for mounting an external flash unit. The hot shoe has the usual trigger terminal in the bottom, as well as three other contacts for interfacing to Nikon dedicated speedlights. Neck strap eyelets are located on both sides of the top of the camera as well.

On the hand grip side of the camera, a second Shutter Release button makes vertical shooting much easier. A locking dial surrounds the button to prevent accidental triggering.
The opposite side of the camera features the battery compartment, which locks into place with a sliding latch.
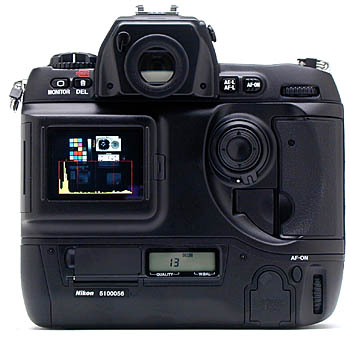
The back panel of the D1x holds the remaining controls. The large, bright LCD screen features a removable protective cover which just pops on and off. The protective cover is a nice idea, as the LCD projects out from the back of the camera further than any other feature, and so would be subject to abrasion, sliding back and forth across your jacket or shirt front, if the camera were hanging from a neck strap. A light-tight shutter can be flipped closed across the viewfinder eyepiece, preventing stray light from affecting exposures when the camera is used on a tripod. This shutter is opened and closed by a small lever at the top left of the eyepiece. Across the top are several command buttons, including the Monitor, Delete, AE/AF Lock, and AF-On buttons, in addition to the main Command dial. The LCD panel rests in the left center of the back panel, along with a four-way Arrow Rocker pad, card slot cover release button (beneath a small, plastic flap), and the CompactFlash slot which supports Types I and II CompactFlash cards, as well as the IBM MicroDrive. Across the bottom of the back panel is another set of control buttons beneath a protective metal flap (Menu, White Balance, Function, Protect, and Index View buttons), another status display panel which reports the quality and white balance settings, an IEEE 1394 ("FireWire") connector and RS-232C mini-jack, and a secondary AF-On button and Command dial for vertical shooting.
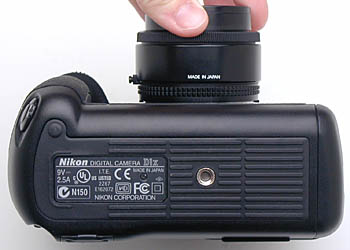
The very flat bottom of the camera reveals only the metal tripod mount. We appreciate the fact that neither the batteries nor the CompactFlash slot are accessed from the bottom of the camera, which enables you to change the batteries and CompactFlash card without dismounting from the tripod. The large surface area of the camera's bottom combines with the high-friction rubberized surface to produce a very stable mounting surface for use with a tripod.
 Viewfinder
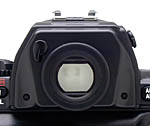
The D1x is equipped with an optical viewfinder that works through the lens (the LCD monitor is for image playback and accessing the menu system). The circular optical viewfinder features a diopter adjustment dial and a sliding protective shutter that is manually moved in and out of place by a small lever. Nikon states that the optical viewfinder provides about 96 percent frame coverage, which agrees fairly well with our own measurements. (We measured viewfinder coverage at about 95%.) An illuminated display inside the viewfinder provides an information readout that includes focus indicators, shutter speed, aperture, exposure mode, metering, shutter-speed lock, aperture lock, AE lock, electronic analog display, frame counter, ready light, and five sets of focus brackets. The internal metal shutter can be deployed (via the small lever just above and to the left of the viewfinder eyepiece) to avoid exposure errors due to light entering the rear element of the viewfinder during long exposures on a tripod.
 While the LCD panel on the D1x isn't usable as a viewfinder, it does provide a great deal of information about your pictures after you've shot them. No less than five screens of information are available, but the most interesting is the optional histogram display, shown at right. (Click on the display to view an animated image showing all five playback display screens.) The histogram display is common among other professional digicams, and we greatly appreciated it on the D1 model. The histogram display is simply a graph of how many pixels there are in the image at each brightness level. The brightness is the horizontal axis, running from black at the left to white at the right. The height of the graph shows the relative number of pixels having each brightness level. This sort of display is very handy for determining under- or overexposure. Ideally, the histogram would stretch across the entire width of the display, using the full range of brightness values available. An underexposed image will have a histogram with all the data lumped on the left-hand side, with nothing reaching all the way to the right. Likewise, an overexposed image will have all the data lumped on the righthand side.
The histogram display is very helpful in telling whether you've got the exposure right, but sometimes you'd like even more assurance: With digicams, it's very important not to blow-out the highlights in a picture (rather like slide film in that respect), since once you hit the maximum brightness, the image just "saturates," and any highlight detail will be lost. A histogram display does a pretty good job of telling you how the image as a whole is doing, but what if there are just a few critical areas that you're worried about for the highlights? If they're just a few areas, they won't account for many pixels. That means any peak at the "white" end of the histogram graph will be pretty small, and easy to miss (or just plain invisible). What to do?
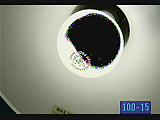
The folks at Nikon recognized this problem, and provided another special display mode that they simply call "highlights," accessible via the Playback settings menu, under "Display Mode." What this mode does is "blinks" any highlights that are saturated all the way to pure white. It does this by taking the pure white areas on the LCD and toggling them between white and black. The screenshot at right shows this happening with the globe of a light bulb that we've deliberately overexposed.
One quibble we had with the D1 that has thankfully been addressed on the D1x is the availability of playback zoom. It's becoming almost commonplace for prosumer digicams to have a playback mode that lets you magnify the image in the LCD by 2-3x, letting you see critical details that you couldn't begin to discern in the basic LCD image. We view this as an enormously handy feature, and use it all the time to check the product shots we do for the website. To enlarge a captured image, you simply press the Function button while the image is displayed on the screen. You can then use the four-way Arrow Rocker pad to pan around within the image. Pressing the Function button a second time returns to the normal display. The D1x gives you about a 3x playback zoom. - We'd like to see an option for even more magnification, for checking critical focus via the LCD display, but we applaud the fact that Nikon's added zoomed playback in response to requests from D1 owners.
 Optics
In this section, we usually discuss the lens characteristics of the camera we're describing. In the case of the D1x, you can attach pretty much any lens you want, as long as it uses the Nikon F mount. The D1x features the standard F mount, with both mechanical AF coupling for older lenses, and AF electrical contacts for the latest AF-IF or AF-S Nikkor lenses with internal focus motors. With very few exceptions, you can use the D1x with any F Mount Nikkor lens ever made. (Actually, we're not personally aware of any F-mount lenses that *wouldn't* work, but do know that some of the really unusual Nikkor lenses from the past (full-frame fisheye lenses?) that had problems on some camera bodies, requiring mirror lockup to function properly. This is a vanishingly small percentage of the possible lenses that could be used with the camera though, so you can safely assume that most any F mount lens in your camera bag will work just fine with the D1x.)
Functions and exposure modes available with a given lens will vary with the type: More recent Nikkors (the D-type models) include a microchip that communicates focal-distance information to the camera. Lenses without the "D" microchip won't support the "3D matrix metering" mode. Here's a table giving a brief idea of the functionality available with different Nikkor lens types (abstracted from the D1x's manual).
|
|
|
| Type G or D AF Nikkor Lenses (except IX models) |
|
| Other Type D Nikkor Lenses |
|
| Other AF Nikkor Lenses (Excluding F3AF) |
|
| AI-P Lenses |
|
| Other Lenses |
|
Obviously, optical specifications vary greatly depending on the lens you attach. One thing that struck us about the Nikkor lenses we used with the D1x though, was how vastly superior they were to the lenses on any of the "prosumer" digicams we've tested to date: Chromatic aberration was essentially nonexistent, barrel and pincushion distortion were very low, sharpness was excellent, etc. It should be no surprise that a lens costing more than an entire lower-end digicam would perform better than that camera's own lens, but the magnitude of the difference in quality was amazing.
One important note about Nikkor optics on the D1x: With linear dimensions of 15.6 x 23.7 millimeters, the CCD in the D1x is a fair bit smaller than a 35mm film frame. Thus, the D1x is essentially cropping into the central area of the normal 35mm field of view that any given lens would have. The result is that the field of view of any lens attached to the D1x will be narrower than the same lens on a Nikon film camera. The net effect is that the D1x has a "focal length multiplier" of 1.5. Thus, a 50mm lens on the D1x will behave much as a 75mm lens on a film-based Nikon SLR. This is good news for sports photographers (all your telephoto lenses just got 50% longer), but not so good for landscape photographers or others who shoot lots of wide angle photos. The D1x was apparently part of the reason that Nikon came out with the 17-35mm zoom lens that we used in much of our testing of the camera: On the D1x, this lens effectively translates into a 25.5 to 52.5mm, providing moderate (rather than extreme) wide angle coverage.

As shown in the illustration above (showing dimensions of the D1 CCD, but the D1x's is the same size), the CCD of the D1x is also much larger than that used in the Coolpix 950. One consequence of this is that depth of field in lenses used with the D1x will be much shallower at any given aperture value (f-stop) than with the 950. (Depth of field as a function of f-stop will match that of the same lenses on 35mm cameras, even though the "effective focal length" is increased.) Many of our test shots show the reduced depth of field of the D1x with typical Nikkor lenses from Nikon's 35mm line, as compared to the same images shot with the 950 or 990.
Given that the optical characteristics will depend entirely on the lens attached, we'll instead concentrate here on the focusing options and modes. There's a lot to talk about here, given the extraordinary control and flexibility afforded by the D1x's autofocus systems. The D1x allows you to take advantage of auto or manual focus via a small dial on the front of the camera, right next to the lens. Setting the switch to "M" puts the camera into manual focus mode, "S" places it in Single Servo AF (focus priority), and "C" puts it into Continuous Servo AF ![]() (release priority). Single Servo simply means that the camera sets focus only once, when the Shutter button is first pressed halfway, and is best for still objects. Continuous Servo means that the camera continuously adjusts the focus, as long as the shutter button is halfway pressed, and is best for moving objects. The AF-On buttons (one for vertical shooting and one for horizontal) perform the same function as halfway pressing the Shutter button by setting the focus.
(release priority). Single Servo simply means that the camera sets focus only once, when the Shutter button is first pressed halfway, and is best for still objects. Continuous Servo means that the camera continuously adjusts the focus, as long as the shutter button is halfway pressed, and is best for moving objects. The AF-On buttons (one for vertical shooting and one for horizontal) perform the same function as halfway pressing the Shutter button by setting the focus.
You also have the freedom of setting the autofocus area on the D1x. The AF Area Mode option in the Shooting menu lets you select between Single Area and Dynamic Area, both of which offer a Closest Subject Priority option. Single Area AF simply means that the camera judges focus based on one part of the subject. Dynamic AF employs all five of the autofocus brackets, or areas. The camera first focuses on the subject in the central focus area. Whenever the subject moves to a different AF area, the camera also shifts the focus to "follow" the subject. This is great for irregularly moving subjects. The Closest Subject Priority option (enabled through the Custom Settings menu) means that the camera first focuses on the closest object that falls into one of the five focus areas and then tracks it as it moves. (Note that no focus area brackets are illuminated in the viewfinder with this mode and that this mode doesn't work well with telephoto lenses or poorly lit subjects, according to Nikon). In Single Area AF mode, you can change the main focus area by unlocking the focus area selector (the four-way Arrow Rocker pad on the back panel) and then shifting the focus area using the up, down, right, or left arrow keys. Then, simply lock the focus area selection by sliding the switch back into place. By default, the D1x does not "wrap" the focus area selector as you scroll between focus areas. Through the Custom Settings menu, you can opt for a "Wrap" function, which hunts for the next area from top to bottom or left to right. What this means is that if you continue to press the right arrow key when the right focus area is selected, the selection will immediately jump to the left focus area.
There are two methods for using the AF Lock function. The first is to place the central subject in the selected focus area, halfway press the Shutter button, then realign the composition and fire the shutter. Alternatively, when using Single Servo AF, you can press the AF-L/AE-L button to lock focus (and exposure, unless set for focus only in the Custom Settings menu). Keeping this button pressed will lock focus and/or exposure, even if the Shutter button is released. This allows you to recompose the photograph without keeping your finger on the Shutter button, but on the AE-L/AF-L button instead. (Thereby resulting in less chance that you'll accidentally fire the shutter when you don't intend to.)
Exposure
Just like the original D1, the D1x gives you a tremendous amount of exposure control and multiple options that can get quite involved. First of all, the D1x gives you a choice between Program AE, Manual, Aperture Priority, and Shutter Priority exposure modes with shutter speeds from 1/16,000 to 30 seconds available, as well as a Bulb setting for longer exposures. A very nice touch is that, while in Program AE mode, you can rotate the Command dial to select different combinations of aperture and shutter speed settings than those normally chosen by the autoexposure system. (That is, if the automatic program would have chosen 1/125 second and f/5.6, you could instead direct the camera to use 1/60 at f/8 or 1/30 at f/11, to get greater depth of field.) This is a very handy option for those times when you need some measure of increased control, but still want the camera to do most of the work for you.
An interesting feature when using Manual exposure mode is the electronic analog exposure display visible in both the optical viewfinder and the top-panel data readout. This shows the amount an image will be over- or underexposed, based on the settings you have selected, and helps you find the best exposure for the subject. We also liked the Command Lock feature (activated through the Command Lock option of the Shooting menu) which locks the shutter speed and/or aperture setting so that it is not accidentally changed when using the Command dial for another purpose. (If you set either the shutter speed or aperture before activating the Command Lock function, a "lock" icon will appear next to the corresponding setting in both the viewfinder and data readout displays, and that setting can't be changed until you change the Command Lock option.) You can also assign the Command Lock function to the Function button.
ISO can be set to a range of values from 125 to 800 via the ISO button on the back panel, and to values of 1,600 or 3,200 by using the "ISO Boost" option on the Custom Settings menu (option 20). White balance can be set to Auto (useful from 4,200K to 7,000K), Incandescent (set to about 3,000K), Fluorescent (4,200K), Direct Sunlight (5,200K), Flash (5,400K), Overcast (6,000K), Shade(8,000K), and Preset (which allows you to manually adjust the white value by using a white card or object as a reference point). All white balance settings can be adjusted from -3 to +3 units on an arbitrary scale by turning the Subcommand dial (on the front of the hand grip) while holding down the White Balance button (with the exception of the Preset option, which is not adjustable). Higher values correspond to a decrease in the camera's white point, in degrees Kelvin (meaning the images become "cooler" in appearance). This is a very nice feature, as we often wish we could use one of a camera's standard white-balance settings, though just a bit warmer or cooler. To be sure, some experimentation would be required to familiarize yourself with the impact of these "tweaked" white balance settings, but having them available is a definite plus. The table below shows approximate white point temperatures in degrees Kelvin for the various adjustments in each of the major white balance settings.
| Camera Display--> | -3 | -2 | -1 | 0 | 1 | 2 | 3 |
| Direct Sunlight | 5600 | 5400 | 5300 | 5200 | 5000 | 4900 | 4800 |
| Shade | 9200 | 8800 | 8400 | 8000 | 7500 | 7100 | 6700 |
| Overcast | 6600 | 6400 | 6200 | 6000 | 5800 | 5600 | 5400 |
| Incandescent | 3250 | 3150 | 3100 | 3000 | 2900 | 2800 | 2700 |
| Fluorescent | 7200 | 6500 | 5000 | 4200 | 3700 | 3000 | 2700 |
| Flash | 6000 | 5800 | 5600 | 5400 | 5200 | 5000 | 4800 |
A note to the Nikon engineers: We'd like to see a fine-tuning adjustment capability
added to the Custom white balance option as well. We've often found that we'd
like to adjust a camera's custom white balance setting a little, and a fine-tuning
option like the D1x provides for its other settings would be an excellent way
to accomplish this. (We've sometimes resorted to carrying slightly different
"colors" of white paper to adjust manual white balances to our liking.
An on-camera control would be infinitely easier.)
Three metering options are available on the D1x: 3D Color Matrix, Center-Weighted,
and Spot. The 3D Color Matrix setting uses a 1,005-pixel CCD sensor (separate
from the main image sensor) to meter exposure based on several areas in the
frame (useful when brightly colored or very dark subjects occupy a significant
portion of the frame). This is the same 3D Color Matrix metering system used
on the Nikon F5 and the previous D1 model. Center-Weighted metering measures
light from the entire frame but places the greatest emphasis on a circular area
in the center (which you can determine the size of via the Custom Settings menu
option 14). Spot metering is pretty self-explanatory, taking a reading from
the dead center of the image (best when using the AE Lock function). The D1x
has a nifty trick with spot focus though. With D-type lenses, and in the proper
focus-area mode, the spot metering actually centers on the focus area selected,
giving you the option for off-center spot metering!
![]() Exposure compensation on the D1x is adjustable from -5 to +5 exposure equivalents
(EV) in one-third step increments, and is controllable in all exposure modes.
The Auto Bracketing feature takes three shots of the same subject with varying
exposure values determined by either the photographer in Manual mode or by the
camera in all other modes. Exposure settings for bracketing can vary from -2
to +2 EV (values are added to the already chosen exposure compensation value),
with step sizes of one-third, one-half, or one EV unit, and the bracketing biased
toward either underexposure, overexposure, or centered around the main exposure
value.
Exposure compensation on the D1x is adjustable from -5 to +5 exposure equivalents
(EV) in one-third step increments, and is controllable in all exposure modes.
The Auto Bracketing feature takes three shots of the same subject with varying
exposure values determined by either the photographer in Manual mode or by the
camera in all other modes. Exposure settings for bracketing can vary from -2
to +2 EV (values are added to the already chosen exposure compensation value),
with step sizes of one-third, one-half, or one EV unit, and the bracketing biased
toward either underexposure, overexposure, or centered around the main exposure
value.
On a more mundane level, the D1x has a self-timer feature that allows you to
set the time interval anywhere from two to 20 seconds, activated by fully pressing
the Shutter button.
Another interesting feature is the Anti-Mirror-Shock Mode, which delays the
exposure until after the mirror shock has subsided and is available through
the Custom Settings Menu (option 5). (Obviously meant for times when the camera
is on a tripod.) The default setting allows for the image to be exposed as soon
as the shutter is released. By activating this function, the image isn't captured
until a fraction of a second after the shutter is released, giving time for
vibrations from the mirror actuation to damp out before the shutter is opened.
Also through the Custom Settings menu, you can adjust the image Sharpness, Tone
Compensation (Contrast), and Hue. We were impressed with the Tone Compensation
option’s Custom setting, which allows you to download a custom tone curve
from your computer. (If no curve is downloaded, the Custom setting defaults
to the Normal setting.) The Hue adjustment offers arbitrary adjustments from
zero to six, with "three" being the default setting. Raising the Hue
setting above three results in a stronger yellow cast in the image, causing
reds to become orange. Alternatively, lowering the Hue setting below three introduces
a blue cast, which consequently changes red to purple. The D1x also features
a Color Mode option in the Custom Settings menu, which allows you to capture
images in sRGB or Adobe RGB color. A Color option under the Image Quality setting
of the Shooting menu offers a black and white monochrome setting.
When reviewing images on the LCD monitor, you can pull up a histogram and a
highlight function to give you a complete readout on the exposure. This is a
useful tool to examine your exposure in the camera instead of waiting to download
images and then deciding to reshoot.
Continuous Shooting Mode
The D1x offers a Continuous Shooting mode that shoots up to approximately three
frames per second (as many as nine consecutive shots), depending on the amount
of image information and available CompactFlash space. Once the nine frame limit
is reached, the camera is unable to record any more photographs until at least
one of the images is transferred from the buffer memory to the memory card.
As the photos are being transferred, the number of available consecutive photographs
is displayed in the viewfinder and on the status display panel when the Shutter
button is halfway pressed. Through the Custom Settings menu, you can select
frame rates of 1, 2, or 3 frames per second. You can also change the maximum
number of exposures, from one to nine (no more than six RAW files can be stored
in the buffer memory though).
| What's up with RAW? | |
|
Amazing Flash Unit!
Like most professional SLRs, the D1x doesn't carry a built-in flash of its own,
but rather is designed to work with external strobe systems, or "Speedlights,"
as Nikon is fond of calling them. As with our testing of the D1, we were fortunate
to have a SB-28DX speedlight to play with while we had the D1x, and felt the
results & flexibility we found were impressive enough to justify a completely
separate section of the review to discuss them. Herewith the story of the D1x
& SB-28DX:
 Flash
Flash
The D1x carries a standard Nikon hot shoe, compatible with a wide range of Nikon
speedlights, as well as many third-party flash units, albeit with a lower level
of integration with the camera. The manual includes a full list of compatible
Nikon flash units, and details the capabilities provided by each. (Note though,
that the special SB-28DX speedlight model is required for TTL metering with
the D1x.) There's also a sync terminal for attaching another flash via a sync
cable, giving you even greater options. With Nikon speedlight models SB-25,
26, or 28, the flash will sync at shutter speeds as high as 1/500 of a second(!).
 Five flash sync modes are available by pressing the flash button on top of the
camera. Front-Curtain Sync fires the flash in sync with the opening of the front
curtain of the focal plane shutter, at the beginning of the exposure. Slow-Sync
uses a slower shutter speed in Program AE and Aperture Priority modes to bring
out background details by letting in more ambient light. Rear-Curtain Sync creates
a motion effect firing the flash just before the shutter closes. On longer exposures,
this results in a sharp image of the object, trailed by a blur caused by its
motion before the flash fired. (When used with Program AE or Aperture Priority,
this slows the shutter speed to achieve the same effect as Slow-Sync). Red-Eye
Reduction emits a small pre-flash before firing the full flash to reduce the
red-eye effect. Finally, Red-Eye Reduction with Slow-Sync combines the two sync
modes and is available only with Program AE and Aperture Priority exposure modes.
Five flash sync modes are available by pressing the flash button on top of the
camera. Front-Curtain Sync fires the flash in sync with the opening of the front
curtain of the focal plane shutter, at the beginning of the exposure. Slow-Sync
uses a slower shutter speed in Program AE and Aperture Priority modes to bring
out background details by letting in more ambient light. Rear-Curtain Sync creates
a motion effect firing the flash just before the shutter closes. On longer exposures,
this results in a sharp image of the object, trailed by a blur caused by its
motion before the flash fired. (When used with Program AE or Aperture Priority,
this slows the shutter speed to achieve the same effect as Slow-Sync). Red-Eye
Reduction emits a small pre-flash before firing the full flash to reduce the
red-eye effect. Finally, Red-Eye Reduction with Slow-Sync combines the two sync
modes and is available only with Program AE and Aperture Priority exposure modes.
When using the external Speedlight, Nikon recommends setting the camera to any
metering method except Spot. After setting exposure and the flash sync mode,
set the Speedlight to TTL so that it meters through the lens. ("DX"
version of the SB-28 only.) You can also select the flash's appropriate range
for the subject and the ISO setting to match the camera's. Because each Speedlight
varies, you'll want to check the accompanying manual to verify settings and
proper usage.
Important Note: The SB-28DX is a special model of Nikon's flagship SB-28, specifically designed to interface to the D1 and D1x. It will work like a conventional SB-28 (as far as we know) on cameras other than the D1x, but its special characteristics are critical to accurate TTL metering with the D1x. (A standard SB-28 won't work accurately.) The reason is that current Nikon film SLRs offering TTL metering do so by using a flash sensor that reads the light reflected from the film itself, during the actual exposure. In the case of the D1x, the optical characteristics of the CCD prevented such an approach. Instead, the D1x's flash-metering circuitry measures the flash output that is reflected from the shutter curtain immediately before the exposure itself, and uses that information to determine the exposure. (We're told that the SB-28DX emits a special metering pulse immediately before the main flash, but we confess to being unable to detect it - it must be *awfully* quick! The possibility of a pre-flash from the SB-28DX though, suggests that it might require special "smart" slave triggers to fire non-SB28 flash slave units properly.) The D1x's flash exposure system is apparently improved over that of the original D1. Some readers wrote us to report having rather uneven exposure results with the original D1 in TTL flash mode, although we didn't have any problems while we were testing the camera ourselves. Thus, since we again had no flash exposure problems with the D1x, we can't say whether the flash exposure is improved or not - both cameras worked fine in our use.
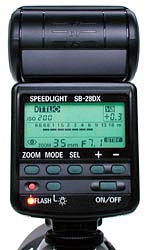 The SB-28DX really deserves an Imaging-Resource level review all its own: It has more modes and functions than you can shake the proverbial stick at (as hinted at by its control panel display, shown at right), and integrates beautifully with the D1x. One indication of its complexity is its 96-page instruction book! Used in its simplest mode, an SB-28DX mounted atop the D1x's hot shoe takes advantage of subject distance information obtained from the chips inside D-series Nikkor lenses to implement what Nikon calls "3D Matrix Metering." The result is that the basic flash, operating in its simplest full-auto mode seems nearly incapable of making a bad exposure. Straight-on, bounced from any direction, off-camera via an extension cable, it doesn't matter. You can certainly use it to take unattractive pictures, but just about all of them will be well-exposed!
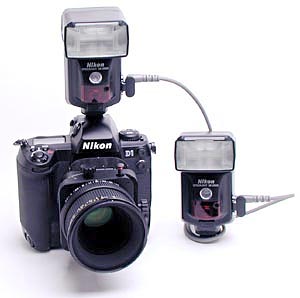
Used in conjunction with one or more additional SB-28DX units, you can adjust the output of each unit to achieve a balanced exposure, with separate output levels for main, fill, and sweep (background) lights. While we had only a single SB-28DX for use while we were testing the D1x, we'd previously experimented with using multiple SB-28DX's together. Given that many D1x readers will be interested in such usage, we've included the following section in this review, largely copied from our previous D1 review.
Our evaluation of the SB-28DX in multi-flash mode was admittedly limited to some rather crude tests of setting relative flash intensities on the main and remote unit to achieve different light balances between the two units: We really didn't have time (either with the unit, or in our overloaded schedule) to conduct extensive "live" studio tests. We did see enough though, to convince ourselves that multiple-flash studio photography with multiple SB-28DX strobe units would be quite practical. There are a few pieces of hardware that are key to getting the whole assemblage to work. We'll share a couple of these here, to help anyone interested in pursuing such application further.
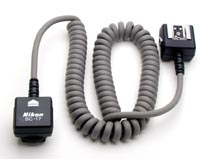 SC-17 Remote TTL cord
In an SB-28DX system, one flash must serve as the "master," with the others essentially daisy-chained off of it via SC-18 or SC-19 extension cables. The only catch is that all the signals from the D1x's hot shoe must be connected to the master SB-28DX. This is trivial if you want the main light to come from the vicinity of the camera, but what if that's not what you're looking for? The answer is the SC-17 remote TTL cord, which gives you a few feet of extension from the hot shoe contact to the flash itself. (Nikon doesn't officially support it, but you can wire together multiple SC-17 units, or cut & extend the wires yourself. This obviously voids all warrantees, etc., but we know photographers who routinely use 10-foot extension cables cobbled together from butchered SC-17s.)
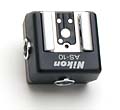 AS-10 Multi-Flash Adapter
The SB-28DX itself has a three-prong sync connector on its side, allowing you to directly strap together two of them into a multi-flash setup, with one mounted on the camera, and the other held off to the side. Once you've made that connection though, all the available connector sockets are full. To combine more than two SB-28DXs together, you need one or more AS-10 multi-flash adapter units. These are little gadgets that fit on the hot shoe of the flash, and offer three sync sockets to chain additional speedlights off of. What we found most useful about the AS-10 though (not needing the additional sync sockets in our 2-flash setup) was the 1/4-inch threaded tripod socket on its bottom. This let us mount the remote flash securely on a spare tripod, leaving our hands free without requiring an assistant.
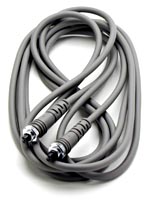 SC-18 and SC-19 extension cables
These are rather pedestrian, simply consisting of 3-prong extension sync cables. Useful to know what they are though: The SC-18 is a 1.5 meter unit, while the SC-19 is a 3.0 meter unit. Use these to carry sync signals between flash units in a multi-strobe setup. (Maximum official cable length is 10 meters or 33 feet. Again, we know photographers who use longer homebrew cables, but such lengths aren't supported by Nikon and may not work reliably.)
In our test shooting, we had a bit of a finicky time balancing light output between strobe units properly: The SB-28DXs are complex beasts, more so than most cameras we're accustomed to testing. We were able to get the multi-flash strapup working though, and achieved a variety of very "different" (my wife's term for something ugly but interesting) lighting effects with the combination. We had the clear sense that a day's experimentation in the studio with the flash units tucked inside our softbox and mounted on a tripod or two would result in a very flexible and powerful lighting system. Clearly *way* beyond the capabilities of any shoe-mount flash system we've ever seen before!
Other SB-28DX tricks
While we've focused on the SB-28's multi-unit sync capabilities, it has a host of other features, some vital, others whimsical. In the former category is its ability to automatically zoom to match its coverage area to lenses ranging from 24 to 85mm. Flip down a built-in diffuser, and the range extends to 18mm at the wide angle end. The obvious advantage of this zooming capability is that its flash power is concentrated into a tighter beam for telephoto use, extending its range: It has an ISO 200 guide number of 33.6m or 107 feet. At f/2.8, this translating to a maximum range of 38 feet at ISO 200, and the 85mm zoom setting. Another nifty addition is a fairly powerful autofocus illuminator lamp on the front of the unit, permitting accurate autofocus operation in total darkness. Finally, in the whimsical category, the SB-28 has a stroboscope setting, in which it emits a stream of flashes, at repetition rates of anywhere from 1 to 50 flashes per second. The number of flashes that can be emitted in this mode depends on both the intensity of each flash, as well as the repetition rate. Values range from 4 flashes at 20-50 fps (flashes per second) and 1/8 power to 90 flashes at 1/64 power and 1-2 fps. (Fun for humans, but our cat hates it.)
Shutter Lag / Cycle Times
When you press the shutter release on a camera, there's usually a lag time before the shutter actually fires. This time allows the autofocus and autoexposure mechanisms time to do their work and can amount to a fairly long delay in some situations. Since this number is almost never reported on, and can significantly affect the picture taking experience, we now routinely measure it.
Almost a year ago when the D1 was first announced, we asked Richard LoPinto (VP of Nikon's Professional Division, and the "father" of the D1 in the US) what the D1's shutter lag was. He replied "58 milliseconds" (0.058 seconds). We have to confess we assumed there was some marketing hype involved in that spec, and that the actual camera couldn't possibly be *that* fast. Well, we were wrong: The D1 was phenomenally responsive to the shutter button, and very fast from shot to shot as well. We're happy to report that this same performance has carried over to the D1x. Maximum frame rate in continuous mode is a bit slower due to the larger file sizes, but cycle time in single-shot mode is actually considerably improved. The table below summarizes our test results:
|
|
|||
|
|
Normal Card |
Lexar 12x |
|
| Power On -> First shot |
|
|
Very fast.
|
| Shutdown |
|
|
"Shutdown" can be zero if card isn't writing, as no lens retraction to wait for. Longest time shown is when camera is clearing buffer with TIFF files, until card can be removed.
|
| Play to Record, first shot |
|
|
Shortest time is from quick review to first capture. Longer time is from normal playback mode to first capture. Both are very fast.
|
| Record to play (max/min res) |
|
|
Very fast to quick review, even when shooting TIFF or NEF files.
|
| Shutter lag, full autofocus |
|
|
Will depend on lens being used, how far the focus has to traverse from prior shot. Time shown is minimum time with the 24-85 zoom we tested with. (Very fast AF system!) |
| Shutter lag, manual focus |
|
|
Blazingly fast! |
| Shutter lag, prefocus |
|
|
Blazingly fast! |
| Cycle time, large/fine files |
|
|
Shorter time is for first 5-7 shots, then need to wait for the buffer to clear before taking next shots. Note 30+% faster buffer clearing with 12x card. |
| Cycle time, small/basic files |
|
|
Quite fast. Buffer didn't fill after 20+ shots, so no advantage to 12x card in this mode. |
| Cycle time, TIFF files |
Buff clear 116 sec |
Buff clear 74 sec |
TIFF mode files are huge, take a long time to write. 12x card cuts time by 30+%. (Couldn't measure post-buffer cycle time on "conventional card, because our card was too small to exhaust the buffer.) |
| Cycle time, NEF files |
Buff clear 17.8 sec |
Buff clear 34.74 sec |
First time is for first 4 shots, then speed slows to second number shown. After exposure series, time to clear buffer is shown as third figure. - In NEF mode, 12x card is almost twice as fast. |
| Continuous mode, large files |
|
|
2.86 frames/second for first 4-6 frames at max res, until buffer fills. Then speed drops to times shown by second numbers. (Lexar 12x card is 1.8x as fast on buffer overruns.) |
| Continuous mode, small files |
|
|
Max series is still only ~6 frames even at medium/basic size/quality setting. After 6 frames, rate is highly variable as buffer fills/empties. 12x card does empty buffer quite a bit faster, but hard to quantify.
|
The D1x is indeed a very fast camera. Shutter lag is amazingly fast, measured at 72 milliseconds with our test apparatus. This is slightly slower than the 58 milliseconds we measured for the original D1, but still incredibly fast. This ultrafast shutter response only occurs when the camera is manually focused or prefocused by half-pressing the shutter button before the exposure itself. Autofocus performance will be dependent on the lens you're using with the camera: We clocked the 24-85mm zoom we tested at only 0.26 seconds in situations where the subject was nearly the same distance away as for the previous shot. Needless to say, these shutter delay times are enormously faster than anything we've encountered in the consumer digicam world. It's safe to say that the D1's reflexes are quite a bit quicker than yours!
Unlike the D1, the D1x seems to make good use of its buffer memory even in single-shot mode. Shot to shot cycle time is about a half second in single shot mode, or 0.35 seconds in continuous mode, not a great difference. This is nice, as it avoids the complication of special continuous-mode setup required to get the maximum cycle time performance out of the D1. The buffer on the D1x only holds 4-6 images at the highest resolution/quality setting though, a significant step down from the 21 frames of buffer in the original D1. Maximum continuous-mode shooting speed is 2.8 frames/second, a pretty good clip, and pretty amazing given the amount of data the D1x is dealing with..
Finally, the D1s starts up and shuts down quite quickly, taking only 0.73 seconds from power-on to the first image captured, and shutting down in effectively no time at all. (Not surprising, since there's no lens to retract, as in many consumer cameras.) It switches from record to play mode very quickly (0.76 seconds), and from play to record mode almost instantly (0.2 seconds).
Operation and User Interface
We found the user interface on the D1x surprisingly straightforward and simple to use, particularly so in light of the extensive array of functions and features. By moving many of the "Custom Settings Menu" (CSM) functions to the LCD menu system, the D1x’s functions and features are much to find and set than those of the D1. The tradeoff is that you have to cycle through multiple pages of LCD menus to find the setting you want, which could be an issue in rapid-fire shooting situations. Nikon thoughtfully did still provide "expert mode" access to the CSM options though, allowing you to program the Function button to activate the CSM menu in the cryptic (but fast) numbers-only mode familiar from the D1.
While many of the camera's options can be accessed via the excellent "plain English" menu system, all the most common shooting controls are available via the camera's external buttons and knobs. You can also program the operation of some of the buttons, to configure the camera for your particular shooting requirements.
Nikon makes a big deal of their digital SLR's "cameraness", defined as how well/easily they function as cameras. We're happy to say that they've done an excellent job in this respect with the D1x's control system. It's even easier to use than the D1, and the control layout is exceptionally logical and easy to follow. Big kudos to Nikon for the D1x's user interface!
Control Enumeration

Depth of Field Preview Button: Located on the front of the camera, on the top left side (viewed from the front) next to the lens, this button allows you to check the depth of field for the current aperture setting by looking through the viewfinder, which provides an approximate idea of the depth of field.

Focus Mode Selector Dial: Located on the front of the camera, on the right side next to the lens, this dial selects between Manual, Single Servo, and Continuous Servo focus modes.

Lens Release Button: Also on the front of the camera, on the right side next to the lens, this button releases the lens from its mount when pressed.

Subcommand Dial: Positioned at the top front of the hand grip, just beneath the Power switch, this dial is used for selecting secondary values in many operating modes and menus. Among other functions, it fine-tunes the white balance across the -3 to +3 range (arbitrary units) when holding down the White Balance button. While pressing the Function button, this dial allows you to change CSM (Custom Settings Menu) options. When turned while pressing the Bracket button, the dial changes the bracketing step size (in EV units) and range. The dial also adjusts the aperture in Aperture Priority and Manual exposure modes.

Power Switch: Encircling the Shutter button on the top right of the camera, this switch turns the camera on and off. It also turns on the backlights for both status display panels (on top and on the back panel) when shooting in dark situations (light bulb icon position, momentary contact).

Shutter Button: In the center of the Power switch, on the top of the camera, this button sets exposure and focus when halfway pressed and fires the shutter when fully pressed.

Exposure Compensation Button: Directly behind the Shutter button on the top of the camera, this button sets the Exposure Compensation from –5 to +5 exposure equivalents (EV) in one-third step increments when pressed while turning the main Command dial. When pressed in conjunction with the Bracket button, displays the date and/or time, and allows you to change the setting.

Exposure Mode / Format Button: Just to the left of the Exposure Compensation button, pressing this button while turning the main Command dial sets the exposure mode (Program AE, Manual, Aperture Priority, or Shutter Speed Priority). In any mode, pressing this button simultaneously with the Delete button (also labeled Format) formats the memory card.

Metering Selector: To the left of the Exposure Mode / Format button on top of the camera, this selector ring surrounds a small black button. Pressing the button and turning the ring allows you to select between Spot, Center-Weighted, and 3D Color Matrix metering options.

Diopter Adjustment Knob: Directly behind the metering selector, this knob adjusts the optical viewfinder to accommodate eyeglass wearers. (Range is -3 to +1 DP)
Mode Dial Lock Release: (See photo of mode dial below.) On the top left side of the camera (when looking at the back), next to the Mode dial, this button releases the Mode dial to select the camera mode.

Mode Dial: Underneath a set of control buttons on the left side of the top panel, this notched dial selects between PC (computer connection), Playback, Single Shot, Continuous Shooting, and Self-Timer modes.
Auto Bracketing Button: (See photo of mode dial above. The Auto Bracket button is the one labeled "BKT".) Positioned on the top of the Mode dial and next to the Flash and ISO buttons, this button turns on the Auto Bracketing function (when pressed while turning the main Command dial). When pressed in conjunction with the Exposure Compensation button, this button displays the date and/or time setting, and allows it to be changed.
Flash Sync Mode Button: (See photo of mode dial above. Flash sync button is the one with a lightning bolt icon on it.) Directly beside the Auto Bracketing button, this button cycles between the five flash sync modes (Front-Curtain Sync, Slow-Sync, Rear-Curtain Sync, Red-Eye Reduction, and Red-Eye Reduction with Slow-Sync) when held down while turning the main Command dial.
ISO Button: (See photo of mode dial above.) Directly to the right of the Flash Sync Mode button, this button changes the camera’s sensitivity setting (ISO equivalent) when pressed while turning the Command dial.
![]()
Monitor Button: Situated at the top left side of the back panel, this button turns the LCD monitor on and off. Pressing the button once displays the Quick Review of the most recently captured image. A second press displays the menu system.

Delete / Format Button: To the right of the Monitor button, this button deletes individual images. When pressed in conjunction with the Mode button, this button formats the CompactFlash card.

Eyepiece Shutter Lever: Nestled above the left side of the optical viewfinder, this lever opens and closes the shutter that covers the viewfinder eyepiece for accurate exposures when using a tripod. (E.g., when your eye isn't blocking light from entering the rear element of the viewfinder.)

AE/AF Lock Button: Located on the top right side of the back panel, this button locks the exposure and/or focus when pressed (can be set through the Custom Settings menu to lock one or the other or both).

AF-On Button: To the right of the AE/AF Lock button, this button sets the autofocus when pressed (performs the same function as halfway pressing the Shutter button).

Main Command Dial: The final control on the top right of the back panel, this dial is used to select various camera settings when turned in conjunction with the Auto Bracketing, Flash Sync Mode, Exposure Compensation, Mode, Function, ISO, and White Balance buttons. In Aperture Priority and Shutter Speed Priority modes, this dial sets either the aperture or shutter speed settings. In Manual exposure mode, the dial sets the shutter speed.
Focus Area Selector and Lock / Four-Way Arrow Rocker Pad: Beneath the Command dial, on the right side of the back panel, this rocker button with its associated locking switch controls the autofocus area in Record mode. The switch unlocks the autofocus area and the four arrow buttons let you decide where to set the main autofocus area (by choosing one of the five brackets displayed in the viewfinder). In Playback mode, the rocker toggle button's up and down arrows scroll through captured images while the right and left arrow buttons cycle through various information displays for each image. The arrow buttons also navigate through the LCD menu system.

Rear control panel buttons:
The next series of five controls we describe are all located in a small control panel area on the rear panel of the camera, at bottom left. They are protected by a small metal cover that flips down to reveal the pushbuttons.
Menu Button: The first button on the top row of controls, this button calls up the LCD menu system.
White Balance Button: Directly to the right of the Menu button, this button selects the White Balance setting when pressed while turning the main Command dial. Options are Auto, Incandescent, Fluorescent, Direct Sunlight, Flash, Overcast, Shade, and Preset (which allows you to manually adjust the white value by using a white card or object as a reference point). All white balance settings (except Preset) can be adjusted from -3 to +3 EV by turning the Subcommand dial (on the front of the hand grip) while holding down the White Balance button.
Function Button: Beneath the Menu button, this button activates any function assigned to it through the Custom Settings menu while turning the main Command dial in Record mode. Available functions are Quality, CSM (allows the button to access all of the Custom Settings menu options), AF Area, and Command Lock (locks shutter speed or aperture). This button also confirms menu selections if pressed while in any LCD menu screen.
Protect Button: To the right of the Function button, this button write-protects individual images from accidental deletion (except through card formatting). Pressing this button also removes protection.
Thumbnail Button: To the right of the Protect button, this button works together with the main command dial to select 1, 4, or nine-image display in Playback mode.

Card Slot Release Button: Hidden beneath a plastic flap on the back panel, just below the four-way Arrow Rocker pad, this button releases the CompactFlash card slot cover so that the card can be removed.

Vertical AF-ON Button: Hidden on the bottom right of the back panel, this button serves the same purpose as the main AF-ON button, but is used when shooting vertically.

Vertical Command Dial: Directly beside the vertical AF-ON button on the lower right corner of the back panel, this dial serves the same purpose as the main Command dial but is used when shooting vertically.

Vertical Shutter Release Button and Lock: Located on the bottom of the right side of the camera (when looking at the back panel), this locking Shutter button can be used when shooting vertically. The rotating lock ring keeps it from accidentally firing when shooting normally.
Camera Modes and Menus
PC Mode: Accessed by turning the Mode dial to the PC position, this mode allows the camera to download images while connected to a computer.
Playback Mode: Noted on the Mode dial as "Play," this mode allows you to review captured images, as well as delete or protect them and set them up for printing.
Single-Frame Shooting Mode: Turning the mode dial to the "S" position allows you to capture single images by pressing the Shutter button. The following exposure modes are available here (accessed by pressing the Mode button and turning the main Command dial):
Continuous Shooting Mode: Accessed by turning the mode dial to the "C" position, this mode allows you to take up to nine consecutive shots as fast as three frames per second. (Maximum number of shots and frame rate can be adjusted through the Custom Settings menu, and also varies somewhat depending on image content and how well they compress. For whatever reason, our test unit never took more than six shots in continuous mode.) Exposure is set with the first shot.
Self-Timer Mode: activates the Self-Timer mode, which is triggered by the Shutter button. The time interval is variable through the Custom Settings menu from two to 20 seconds.
LCD Menu System: The following menus are available in any camera mode, and are called up by pressing the Menu button.
Playback Menu:
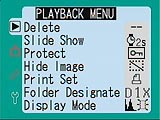 Delete: Displays the Delete submenu:
Shooting Menu:
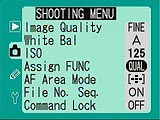 Image Quality: Displays a sub-menu of image quality and resolution choices:
Custom Settings Menu: These functions can also be accessed via the Function button, once programmed to do so. The option numbers are reported with each setting (thus, you would select option 0-1, or 32-3).
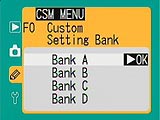 0 - Bank Select: The D1x can store custom settings in up to four "banks" of settings, allowing you to save a series of adjustments to be recalled at any time. Options are A, B, C, and D. (Displayed as 0-A, 0-B, etc.)
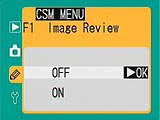 1 - Image Review: Activates or deactivates the Image Review option, which automatically displays the captured image on the LCD screen as it’s being recorded.
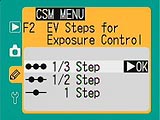 2 - EV Steps for Exposure Control: Specifies the amount of variation between exposure settings (shutter speed, aperture, Exposure Compensation, and Auto Bracketing).
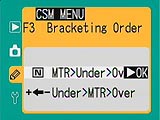 3 - Bracketing Order: Sets the order of the Auto Bracketing exposure series.
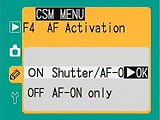 4 - AF Activation: Designates how focus is set.
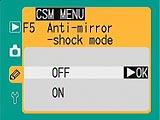 5 - Anti-Mirror-Shock Mode: Enables or disables the Anti-Mirror-Shock mode, which prevents any vibration from shutter movement in long exposures.
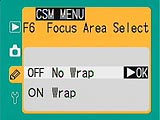 6 - Focus Area Select: Determines whether or not the autofocus area selector tool "wraps" from top to bottom or left to right when selecting the autofocus area.
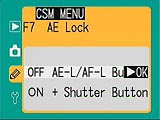 7 - AE Lock: Sets whether the AE / AF Lock button locks exposure or the Shutter button.
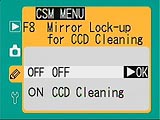 8 - Mirror Lock-Up for CCD Cleaning: Locks the mirror in the up position, so that the CCD can be cleaned. (Only available when using the EH-4 AC adapter, to ensure there is enough power to lower the mirror after cleaning.
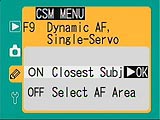 9 - Dynamic AF, Single-Servo: Determines whether the autofocus bases focus on the closest subject or if the user selects the focus area.
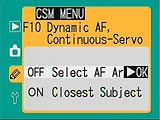 10 - Dynamic AF, Continuous Servo: Just like the previous menu option, this determines whether focus is based on the closest subject or an area chosen by the user, for the Continuous Servo focus mode.
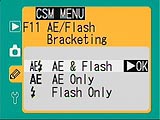 11 - AE / Flash Bracketing: Specifies whether the autoexposure and flash exposure change with each shot taken in Auto Bracketing mode.
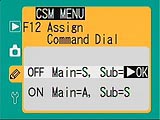 12 - Assign Command Dial: Assigns the Command dial function.
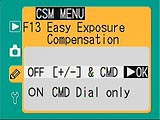 13 - Easy Exposure Compensation: Specifies how Exposure Compensation is adjusted. Options are to use the Exposure Compensation button with the Command dial, or the Command dial only.
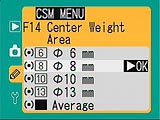 14 - Center Weight Area: Sets the size of the area metered in Center-Weighted Metering mode.
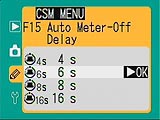 15 - Auto Meter-Off Delay: Sets the amount of time that the exposure information is displayed in the control panel on top of the camera.
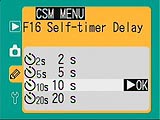 16 - Self-Timer Delay: Sets the countdown time for the self-timer.
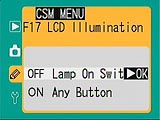 17 - LCD Illumination: Determines whether the LCD illumination activates with the Lamp On switch (the light bulb setting of the Power switch) or when any button is pressed.
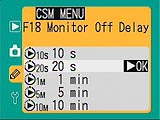 18 - Monitor Off Delay: Controls the length of time that the LCD monitor remains activated during a period of inactivity.
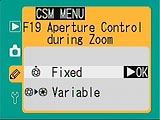 19 - Aperture Control During Zoom: Establishes whether the aperture remains fixed as the lens zooms, or varies with the focal length.
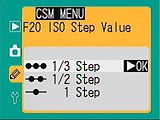 20 - ISO Step Value: Determines the amount of variation between ISO settings.
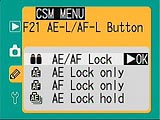 21 - AE / AF Lock Button: Specifies the function of the AE / AF Lock button.
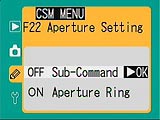 22 - Aperture Setting: Designates whether aperture is adjusted with the Subcommand dial or the aperture ring on the lens.
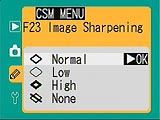 23 - Image Sharpening: Adjusts the in-camera sharpening.
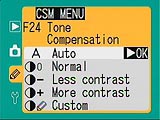 24 - Tone Compensation: Adjusts the overall image contrast, based on a tone curve.
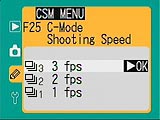 25 - C-Mode Shooting Speed: Specifies the frame rate used in Continuous Shooting mode.
 26 - C-Mode Max Shots: Specifies the maximum number of shots taken in a Continuous Shooting Mode series, from one to nine. (Displayed as 26-1, etc.)
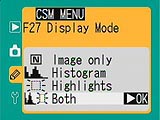 27 - Display Mode: Determines whether the histogram and highlights pages are displayed on the LCD monitor (also adjustable through the Playback menu).
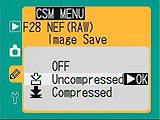 28 - NEF (RAW) Image Save: Saves NEF (RAW) format images as Compressed or Uncompressed.
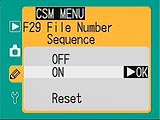 29 - File Number Sequence: Turns file numbering sequencing on or off. Sequenced file numbering continues from one memory card to the next, instead of resetting with each new card.
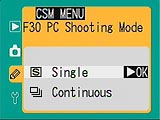 30 - PC Shooting Mode: Sets the camera in Continuous Advance or Single Advance shooting mode, for capturing images while connected to a computer.
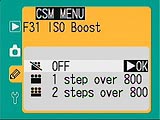 31 - ISO Boost: Turns on the ISO Boost feature, which raises the camera’s sensitivity to one or two steps over 800.
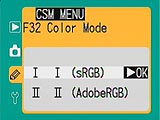 32 - Color Mode: Records color in sRGB or Adobe RGB.
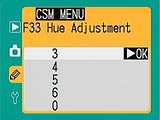 33 - Hue Adjustment: Adjusts the color saturation of the image, in arbitrary units from zero to six. Three is the default setting. Adjustments above three increase a yellow cast, while adjustments below three increase a blue cast.
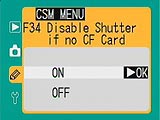 34 - Disable Shutter if no CF Card: Locks the Shutter button when no memory card is in the camera.
 35 - Rear Control Panel Display: Designates whether the rear control panel displays the current ISO setting or number of available exposures.
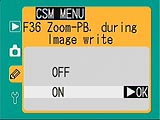 36 - Zoom-PB During Image Write:
Setup Menu:
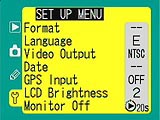 Format: Formats the memory card, erasing all images on the card, even write-protected ones.
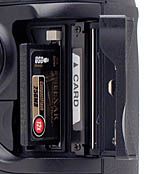 Image Storage and Interface
The D1x uses CompactFlash memory cards for image storage, accommodating Type I and II sizes, as well as the IBM Microdrive. The D1x does not come with a memory card, so you’ll need to purchase one separately. As with the original D1, we were pleased to find the CompactFlash slot very accessible, allowing us to quickly change the card while the camera was mounted on a tripod. The D1x utilizes a folder arrangement that allows users to organize images in the camera and a sequential frame counter option to avoid problems with overwriting files when copying them to the computer.
Captured images can be individually write-protected through the Playback settings menu. Write-protected files are only immune to accidental deletion, not card reformatting. Two image resolution sizes are available: Large (3,008 x 1,960 pixels) and Medium (2,000 x 1,312 pixels). File formats include several levels of compressed JPEG files as well as RGB TIFF, YCbCr TIFF, and RAW data modes. RGB TIFF is the familiar uncompressed TIFF format that can be read by most any imaging program. The YCbCr TIFF is also an uncompressed mode, dealing with data more closely to the format in which it comes from the CCD. While still uncompressed, it is a more compact data format. The "raw" file format stores the data exactly as it comes from the CCD array, either compressed or uncompressed. Since the "raw" format is completely proprietary though, it can only be processed by Nikon's "Nikon Capture" software, Mike Chaney's Qimage Pro program, or "Bibble." The compressed RAW format is a "lossless" compression, making it difficult to determine the actual amount of compression being used. Nikon estimates that compression is 50 or 60 percent over the standard, uncompressed RAW format.
Below are the approximate number of images and their compression ratios for a 96 MB CompactFlash card. (The largest size sold directly by Nikon. Third-party cards are available as large as 512 MB for solid-state memory, and up to 1 gigabyte in the case of the IBM MicroDrive.)
| Resolution/Quality vs Image Capacity |
|
|
||
|
|
|
|
|
|
| HI RAW data (Uncompressed) |
|
|
|
|
| HI RAW data (Compressed) |
|
|
|
|
| HI YCbCr TIFF |
|
|
|
|
| HI RGB TIFF |
|
|
|
|
| Fine Quality |
|
|
|
|
| Normal Quality |
|
|
|
|
| Basic Quality |
|
|
|
|
Video Out
 US and Japanese
models of the D1x come with an NTSC video cable for connection to a television
set or VCR (European models come with the appropriate PAL cable). This allows
images to be played back on the TV screen and recorded to video tape, with all
the menu options available.
US and Japanese
models of the D1x come with an NTSC video cable for connection to a television
set or VCR (European models come with the appropriate PAL cable). This allows
images to be played back on the TV screen and recorded to video tape, with all
the menu options available.
Power
The D1x uses an EN-4 NiMH battery pack (7.2 V DC, 2000 mAh) which can be recharged
with an optional MH-16 or MH-15 Quick Charger. You can also purchase an EH-4
AC adapter separately (100-240 V AC) which is useful for saving battery power
when working in the studio, or performing mundane tasks such as reviewing or
downloading large numbers of images. An indicator on the status display panel
lets you know approximately how much battery power is left and if no segments
appear in the indicator at all, the battery is completely exhausted. As always,
we heartily recommend purchasing a spare battery pack and keeping it charged
for long shooting days or for shooting in cold weather (which can zap battery
power quickly). We do note though, that the D1x's battery life is very good.
The special connections used between the D1x and EN-4 battery pack prevented
us from performing our usual power-consumption measurements on the D1x. Our
sense though, was that battery life was quite good, as we managed literally
several hundred exposures on a single battery charge, including a goodly amount
of LCD usage. Still, our standard recommendation of buying a second battery
pack stands: Murphy's law applies very directly to digicam power sources, meaning
you'll always run out of battery capacity at the worst possible moment....
Included Software
| |
|
|
The D1x ships with the "Nikon View" software, which provides basic
manipulation and cataloging capabilities for images captured by the camera,
and which can interpret the raw CCD format "NEF" files. A much more
advanced package called Nikon Capture is available separately, but we didn't
receive a copy of it for testing. Users will also want to check out the third-party
applications Bibble and Qimage,
both of which offer improved interpolation of the NEF files, for even higher
image resolution.
In the Box
Included in the box with the D1x are the following items:
Test Results
The biggest news with the D1X is its resolution. Compared to what has gone before it, it's a remarkably affordable 6 megapixel professional SLR, but its rectangular pixels have led many to wonder how it would perform on a practical basis.
We've put together two illustrations below showing the D1X's performance on our ISO-standard resolution test target, and have also assembled clips from our high-resolution "House" poster test to show how the camera stacks up on a more "natural" subject. Finally, we compared the camera's own interpolation to that of two third-party programs (Bibble and Qimage), working from the NEF files. How's it do? Read on!
ISO Res Target Vertical Resolution Tests

ISO Res Target Horizontal Resolution Tests

"Natural Object" Resolution Tests
Well, that's very interesting, but how does the D1X handle more ordinary images of natural objects? Quite well, actually: Here's some samples, making the same model comparisons as the res target crops above.
| Here's a crop from our high-resolution "House" poster. The D1X reveals an exceptional amount of detail, although the image is characterized by the slight softness we observed in all the D1X's images. As we'll see though, this is simply the result of very conservative unsharp masking applied in the camera, a good approach for a professional camera. |
 |
| This is the same image as above, only with strong, low-radius unsharp masking (0.4 pixel radius, 125 percent) applied in Photoshop(tm). The result is almost startling, the tiniest details pop out incredibly. |
 |
| This is a crop of the same area from the 5.1 megapixel Minolta Dimage 7, a prosumer-level digicam we recently reviewed with much applause. The detail is very good, but obviously doesn't rise to nearly the level seen in the D1X. |
 |
| This is a shot of the same area, cropped from our test image shot with the original D1 SLR. It looks like there's a lot of fine detail there, but it's hard to tell just how it compares with the images above. |
 |
| Here's that same D1 image, only now resampled in Photoshop to the same size as the D1X and Dimage 7 shots. We confess we were quite surprised by the amount of detail present here: To our eye, it looks like there's at least as much information in this image as in that from the Dimage 7, possibly more. Still though, the D1X easily surpasses the performance of it's older sibling. |
 |
Bibble & Qimage Interpolation Examples
The D1x is interesting in that it can save the "Raw" image data directly as it comes from the CCD array. Particularly in light of the unusual rectangular pixel format, this opens the possibility for third-party software to offer alternate interpolation schemes, possibly extracting more data. As it happens, two programs that became popular with D1 users have now been adapted to work with the D1x's raw "NEF" formatted files, and do indeed offer alternative interpolation schemes. Both applications process the D1x's NEF format into larger images, but seem to extract noticeably more image information than the D1x does on its own. (We're waiting to receive the Nikon Capture application to work with the D1x's files, in addition to the Nikon View. If we find significant differences relative to the D1x's internal interpolation, we'll update this report.)
Bibble turns the NEF file into a 4018 x 2624 pixel image, while Qimage makes a 4020 x 2638 file. As you can see from the samples below, there's a slight resolution improvement in the vertical direction, but quite a dramatic one in the horizontal. (The originals wouldn't fit our layout, so we've scaled the images below to 40-50% of actual size: Click on an image to see the full-sized version.)
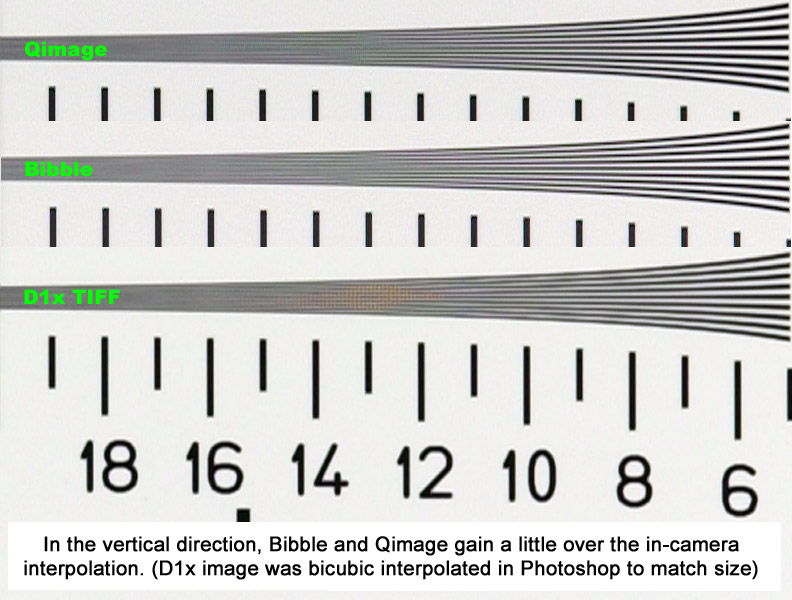
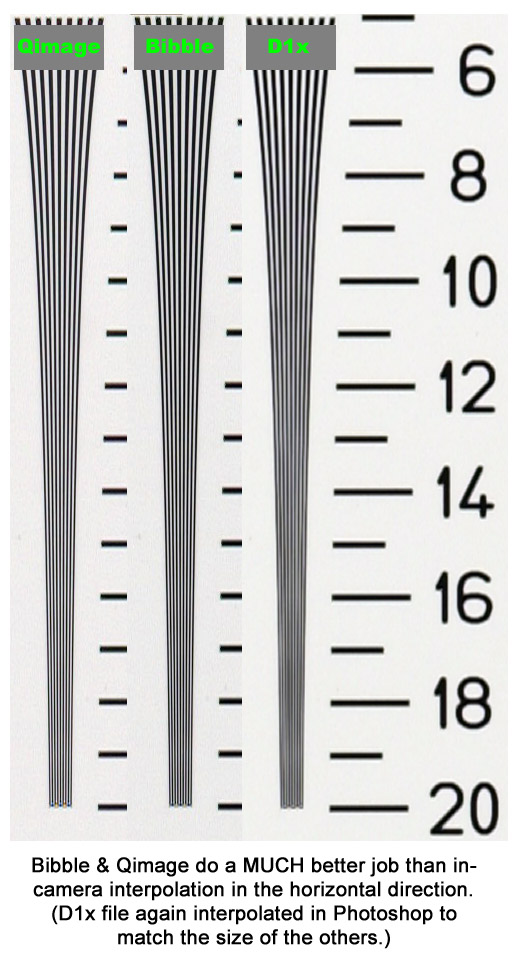
"Real World" Interpolation examples
As noted earlier, resolution targets are one thing, but real-world images are another. The illustration below again compares the camera's own processing (bicubic interpolated to match the size of the third-party-processed files) with samples processed in Bibble and Qimage. In this case, Qimage produced the sharpest-looking image, but our (very subjective) opinion was that it seemed to have artifacts not present in the original subject. Bibble was less sharp, but closer to the original subject. The D1x's own interpolation was a softer, but improved when we applied unsharp masking in Photoshop. (The full-sized image reached by clicking the photo below has had no Photoshop processing applied to any of the images.) (Once again, the image below is reduced in size to fit the page layout. Click on it to see the full-sized version. - The differences between the three approaches are really only visible in the full-sized image.) This is very much a subjective judgement call though: We'd advise that interested parties download both applications, along with a NEF file from our sample pictures page, and play with them yourselves: Sharpness and artifacts are very much in the eye of the beholder!
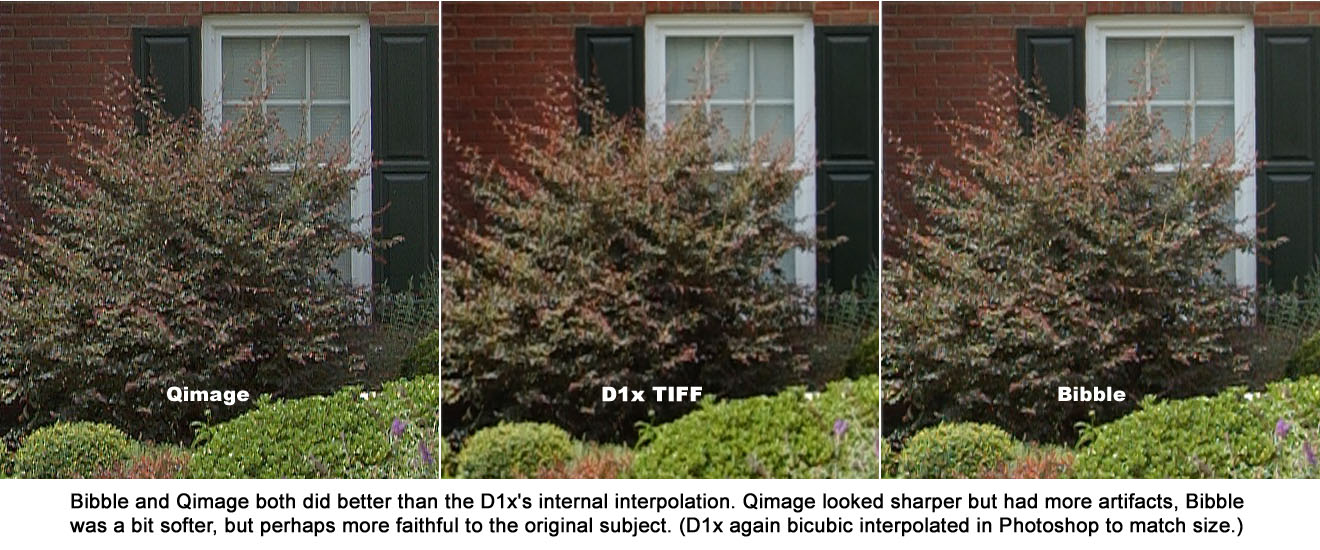
 Flash! MORE Comparison Images!
Several of you asked about further comparisons between the D1x and other Pro SLRs. Always happy to oblige, we've produced the "Great Digital SLR Shootout" Page, shown in thumbnail form at right. We've cropped out sections of the Davebox target, House poster, and ISO Res target, from shots taken with the D1x, the original D1, the Canon D30, the Minolta Dimage 7, the Olympus E10, and the Fuji S1. Check it out by clicking here!
Other Test Results
Apart from the increased resolution, we found big improvements in image noise and color handling relative to the earlier D1. Rather than repeat all our comments in this section, we refer interested readers to the detailed analysis on our Sample Pictures Page for the D1x.
But I will let you know that I've just recently become aware of some amazing and very affordable Photoshop "actions" developed by pro photographer Fred Miranda that do an incredible job of reducing image noise without significantly impacting detail. I first saw this software work its magic on the Nikon Coolpix 5000, and literally hundreds of IR readers have taken advantage of it. Now Fred's developed a custom set of actions specifically tuned to the D1x's image characteristics. They do an absolutely fantastic job of cleaning up the D1x's chroma noise, especially at high ISOs. (The ISOR filter cuts the image noise by almost two stops, making ISO 1600 look nearly as good as 400, etc.) The D1x's increased noise at very high ISOs is a limitation a number of pros have lamented over: The dramatic improvement Fred's Actions provide could really make the camera usable for a lot of pros who need lower noise levels in low light shooting conditions.
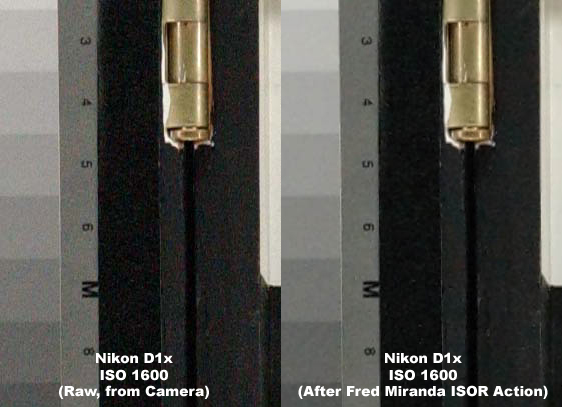
It's really hard to overstate the impact of Fred's "ISOR" actions. The photo above shows an isolated example of what the D1x ISOR can do for a D1x image shot at ISO 1600. Click the image to see a larger version, or follow the link below to read more about the ISOR action itself and see more examples. If you have Photoshop (NOTE that you need version 6.0 or higher), I think the $15 for Fred's "ISOR" actions should be a complete no-brainer for any D1x owner.- Click here for more information, or to buy them! (Congrats to Fred on an amazing job with this!)
Colors from the D1x appeared very natural and well-balanced. The sRGB default color space produces much more accurate colors on typical computer monitors than did the NTSC color space of the original D1. The optional "Adobe RGB" color space (accessed via the Custom Settings Menu) provides significantly greater color gamut for critical work, and is most suited for use in a color-managed environment and workflow.
We commented at several points throughout this review and the sample pictures page on the remarkably low levels of image noise we saw in the D1x's photos. At low ISO settings, image noise is for all intents and purposes completely absent. Even at ISO 800, the noise level is still quite acceptable for most uses. We're not sure what Nikon did to cut the noise so significantly, but the D1x certainly seems to set a new standard in that area, particularly given its high resolution. (Higher resolution and smaller pixel sizes tend to increase noise, so we're doubly surprised to see the D1x's noise turn out to be so low.) Compared to film-based photos at any given ISO level, the "grain" of the D1x is almost certainly less apparent.
Exposure metering with the D1x is very accurate, thanks to Nikon's sophisticated 3D Color Matrix metering. We did have some exposure problems with our "indoor portrait" test shot, but determined that this was almost certainly due to using the camera on a tripod with strong ambient light, and not using the protective eyepiece shutter to prevent stray light from affecting the exposure calculations.
In our low light test, the D1x went all the way down to our test's limit of 1/16 of a foot-candle (0.17 lux), with excellent color and tonal balance, and an amazingly low noise level.
The D1x's optical viewfinder was pretty accurate, but not the near-100% we personally prefer to see on high-end cameras. (It tested out at about 95% frame coverage, matching Nikon's published specs.)
As expected (due to the rectangular pixel geometry), the D1x showed significantly higher resolution horizontally than vertically, as measured on our ISO-12233 resolution target. Vertically, the D1x showed "clean" resolution (totally devoid of artifacts) to 620 lines per picture height, "strong detail" (target lines resolved clearly, albeit with some aliasing) to 1030 lines, and "extinction" (the camera stopped responding to the target lines altogether) at 1240 lines. Horizontally, the corresponding numbers were 750 lines of "clean" resolution, 1270 lines for "strong detail", and 1600+ lines for "extinction." The third-party programs Qimage and Bibble improve vertical resolution slightly and horizontal resolution dramatically when working from the raw NEF file format.
In this section of our reviews, we normally also summarize test results involving lens performance. In the case of the D1x, optical characteristics will obviously vary depending on the particular lens being used, so the optical distortion measurements we'd normally report here really aren't applicable. (Likewise flash range and coverage.)
Conclusions
It's rare for a single product to change the ground rules for an entire marketplace, but Nikon's original D1 did just that for professional digital SLR cameras when it first shipped about a year and a half ago. With the release of the D1x, Nikon's done it again. They've managed to simultaneously improve nearly every operating parameter, from color quality, to resolution, to image noise, while at the same time incorporating numerous user-interface improvements and ergonomic niceties. It'll be interesting to see how some of the other 6 megapixel cameras due to market soon from other manufacturers will compare. We can say confidently though, that they'll have a very hard time beating the D1x: This is a digital SLR truly deserving of the august Nikon name, and one that we predict will be the deciding factor for many photographers to finally throw over film for an all-digital workflow. Outstanding in every respect!
<<D1x SAMPLE IMAGES! | Additional Resources and Other Links>>
Reader Comments!
Questions, comments or controversy on this product? Click
this link to see what other Imaging Resource readers have had to say about
the Nikon D1x, or add comments of your own!
