Back
to Full Kodak DC4800 Zoom Review
Back
to Full Kodak DC4800 Zoom ReviewGo to Kodak DC4800 Zoom Data Sheet
Go to Kodak DC4800 Zoom Pictures Page
Up to Imaging Resource Cameras Page
Use your browser's "Back" button to return to the previous page, or the links at the top and bottom of this page to navigate to related information. If you have difficulty fitting the text on this page onto your printer output, simply resize your browser window to a narrower width and print again.
Remember us when it's time to buy!
Dave here: Have our reviews been helpful to you? (Is this article you're reading right now useful?) Preparing this level of information on as many products as we do is incredibly hard work, not to mention expensive. Things on the Internet may look like they're free, but they're not. (As a lot of big dot.com companies are finding out these days.) Somewhere, somebody has to pay to produce worthwhile content. YOU can help us though, by remembering us when it comes time to make your purchase. Would you consider coming back to our site and clicking-through to one of our advertisers to make your purchase? Every dollar you spend with one of our advertisers helps us directly (in affiliate fees) or indirectly (the advertiser will keep renewing their ad contract with us). To make it easy for you to support us, here's a URL you can visit, to see all our current advertisers, with links to click on that will register your visit to them as having come from our site. It's up to you where you buy, but Mike, Mike, Kim, Yazmin, Marti and I would be really grateful if you'd help us out by choosing one of our advertisers to purchase from.
Thank you for your support!
Dave Etchells, Founder & Publisher
Visit our "Buy Now" Page:
https://www.imaging-resource.com/buynow.htm
Back
to Full Kodak DC4800 Zoom Review
Go to Kodak DC4800 Zoom
Data Sheet
Go to Kodak DC4800 Zoom
Pictures Page
Up to Imaging Resource Cameras
Page
Kodak DC4800 ZoomKodak's first true 3 megapixel consumer camera has excellent color and *amazing* low-light capability! Review First Posted: 7/31/2000 |
|
 |
|
True 3 megapixel resolution for 2160 x 1440 images
|
|
|
Good exposure control with AE, aperture priority and manual metering
|
|
|
|
Near-unbelievable low-light capability(!)
|
|
|
|
Exceptional white-balance control
|
|
| * | Option of "neutral" or "saturated" color modes | |
Executive Overview
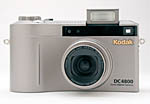
If you're at all familiar with Kodak's long line of digital cameras, the design of the DC4800 may come as a surprise. Designed more like a compact, point and shoot 35mm film camera, the DC4800 features virtually none of the design elements used in previous Kodak digicams. This smaller camera has much more angular features on the whole, although there's still quite a graceful curve along the front of the camera, as the hand grip slowly tapers off across the body. With the exception of the lens barrel, the DC4800 has few abrupt protrusions, and its compact size makes it quite portable when you're on the go. The camera weighs 11.45 ounces (325 g) and measures 4.72 x 2.56 x 2.72 inches (120 x 65 x 69 mm), which, with the accompanying neck strap, should make traveling a snap.
Probably our favorite design feature on the DC4800 is the exposure compensation adjustment dial, which allows you to set the exposure compensation from -2 to +2 EV in 1/2 EV increments without accessing any menu systems. The mode dial is similar, in that it allows you to change aperture settings without using the LCD menu. This saves time, since you can access two very basic functions quickly. Our least favorite design element has to be the CompactFlash card ejection switch, which is actually on the bottom of the camera (the actual slot is on the side). The problem with this is its proximity to the tripod mount, meaning that you cannot easily change the card with the camera mounted on a tripod. Along the same lines, the battery compartment is also too close for comfort, but these should be trivial gripes for most consumers, who probably do less studio work than we do.
The DC4800 features a telescoping, 3x, 6 to 18 mm lens (equivalent to a 28 to 84 mm lens on a 35 mm camera), which is activated simply by turning the camera on with the mode dial set to any capture mode. Focusing is automatic, but a fixed focus button sets the camera to Macro mode (close focusing) or Landscape (focus is fixed at infinity). The 2x digital telephoto function is enabled through the Setup menu, but remember that digital zoom results in a lesser image quality than optical zoom. A real image optical viewfinder features central autofocus target marks, and a tiny dioptric adjustment dial on the side for those with eyeglasses. Additionally, a 1.8 inch color LCD monitor on the back panel assists with composing images and displays a small amount of camera information at the top of the screen. The majority of the camera settings are reported on the smaller status display panel on top of the camera, such as the quality setting and the number of available images.
When it comes to exposure, the DC4800 gives you about as much or as little control as you need. The Program AE mode puts the camera in charge of shutter speed and aperture, while you control things like white balance, exposure control, metering, flash, etc. You enter into Aperture Priority mode by simply turning the mode dial to one of the aperture settings (f/2.8, f/5.6, f/8.0) and leaving the shutter speed control set to automatic. You get full manual control by turning the mode dial to one of the f-stop settings and setting the shutter speed option to Manual or Long Time Exposure. The Manual setting gives you a choice of shutter speeds from 1/2 to 1/1,000 seconds, while the Long Time Exposure option provides a range of slow exposures from 0.7 to 16 seconds. The only option missing is a shutter priority mode, doubtless left off because the three discrete aperture settings available wouldn't provide fine enough exposure control when the shutter speed is set to a fixed value. Also in the exposure-control category, the DC4800 provides options for the ISO setting, with choices of Auto, 100, 200 or 400, and the exposure metering (Mult-Pattern, Center Weighted or Center Spot).
Beyond these basic exposure settings, the DC4800 provides a generous bounty of other controls. White balance offers the standard Auto, Daylight, Flash, Tungsten and Fluorescent settings, in addition to a complete Manual setting and adjustable Color Temperature option. The Manual setting is unusually flexible, in that it not only lets you adjust the camera based on a white reference object, but even lets you alter the color balance by adding more red, blue, green or yellow to the image. The Color Temperature option also provides unusually fine-grained color control, by giving you a selection of Kelvin temperatures (from 2,500 to 10,000) to match an extensive amount of artificial light sources. This wide range of color temperature settings lets you adjust the color balance of your pictures to match a wide range of lighting conditions, and also to shift the color slightly toward the yellow/red or blue ends of the spectrum for creative effect. As if this exceptional white-balance control wasn't enough, the DC4800 also offers the option of either "neutral" or "saturated" color. For routine shooting, we prefer the "neutral" option, although it looks like "saturated" is the camera's default when you turn it on the first time. We're happy to see this neutral/saturated option, and encourage Kodak to take it even further, letting people choose the degree of color saturation they want from a wider range of options: Color saturation is one of the differentiators between digital cameras when it comes to people deciding which camera to buy. With a film camera, you can pick the color you like by choosing different film types. Until now though, the only way to get different color rendering in a digital camera was to buy a different camera. This is definitely a step in the right direction, and we expect this feature to be very popular with users. In addition to the color-related adjustments, the DC4800 also provides a variety of monochrome shooting modes, including standard black and white, black and white with either a red or yellow filter, or sepia tones. Overall, very impressive color controls! Not a color-related setting, but we didn't know where else to put this tidbit: There's also an adjustable sharpness setting that lets you control the amount of in-camera sharpening applied to your photos.
The built-in, pop-up flash features four operating modes and can be combined with an external flash (via a sync terminal on the side of the camera) to capture dimly-lit subjects. The DC4800 also features a 10 second self-timer and a Burst photography mode, which captures up to 16 images at a maximum of five frames per second (depending, of course, on the available CompactFlash space and the size and quality settings selected).
As we've mentioned, images are saved to a CompactFlash card (a 16 megabyte card comes with the camera) and a full range of sizes and quality settings are available. The large image size (2160 x 1440) features an uncompressed TIFF format in addition to the normal and basic JPEG compression levels. The remaining image sizes (1800 x 1200, 1536 x 1024 and 1080 x 720) are saved with normal JPEG compression. A USB cable ships with the camera, along with a CD containing Kodak's Digital Camera Software and Pictures Now. US and Japanese models come with an NTSC video cable (PAL for European models), so that you can compose and review images on a television screen. Power-wise, the DC4800 utilizes a Kodak lithium-ion rechargeable batter pack or an AC adapter. The AC adapter also doubles as an in-camera battery charger (a faster accessory charger is also available).
Overall, the DC4800 offers enough exposure control to satisfy more advanced shooters, while the full automatic settings will please (comfort?) even novice consumers.
Design
Kodak's new DC4800 Zoom looks nothing like the other digital cameras in the Kodak line. With the DC4800, Kodak has moved beyond the smooth contours and elliptical appearance of some of their other DC models, and opted for a sleeker, more angular design. It's also smaller and more compact. Although the telescoping lens does protrude a little from the front of the camera even when retracted, the DC4800 should fit into most coat pockets and purses. Without batteries, the camera weighs 11.45 ounces (325 g) and it measures 4.72 x 2.56 x 2.72 inches (120 x 65 x 69 mm). Though the camera is rather light weight, it does come with a neck strap for easier toting.
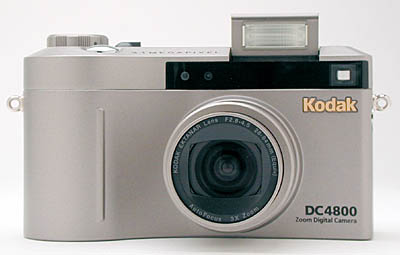
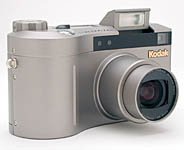
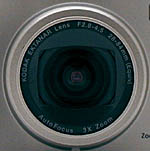
The front of the camera features a very clean, stylish design with the telescoping lens in the center. You can also see the front of the optical viewfinder as well as a small LED and sensor. The lens already protrudes about an inch or so from the camera front and extends about another half an inch when the camera is turned on. A lens cap protects the lens and (surprisingly) remains securely fastened to the lens as it extends out from the camera body. This is a great feature, as many lens caps will pop off when the lens is extended. We should also mention that the lens cap features a small eyelet for attaching a strap, keeping your mind off of accidentally misplacing it.
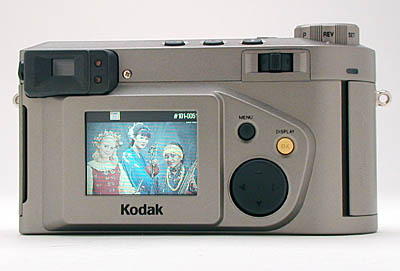
The back panel of the DC4800 holds the majority of the camera controls, the optical viewfinder and the LCD monitor. Because many of the camera functions are changed through the LCD menu system, there aren't very many buttons to figure out here. Across the top section are the Flash, Macro and Self-Timer / Burst buttons. There's also the optical zoom control lever, Menu and Display buttons, and the rocker toggle control that navigates through the menu options. On the left side of the optical viewfinder is a small dioptric adjustment dial, which adjusts the optical viewfinder to accommodate eyeglass wearers.
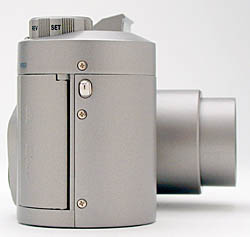
On the right side of the camera (when looking from the back panel), is the CompactFlash slot, protected by a hinged plastic door that snaps shut. One minor gripe we had here is that while you can open the plastic door to access the card, you also have to push the Eject lever on the bottom of the camera to actually pop the card out. This is a nuisance if you're working on a tripod, because it forces you to dismount the camera to access the card.
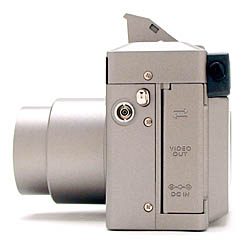
The opposite side of the camera houses the USB, DC power and Video Out jacks, also beneath a hinged plastic door. We found this door a little difficult to open. There's also a sync terminal here for connecting an external flash.
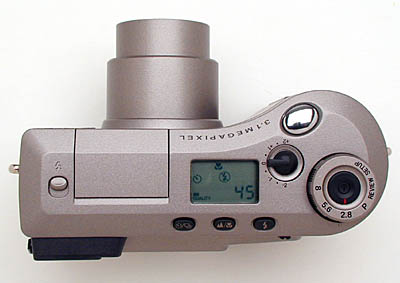
On the top panel of the camera are the popup flash, small status display panel, an exposure compensation adjustment lever, shutter button, power button and mode dial. A helpful feature on the mode dial is that in addition to being shown on the top portion of the dial, each of the settings are also displayed on the side of the dial so that they are visible when operating the camera from a lower angle. The popup flash is released by sliding a small switch just beside it. The power switch inside the mode dial turns the camera on, which then triggers the lens to extend outwards from the camera body (if the mode dial is set to a capture mode). We liked the idea of a small dial to control the exposure compensation, as this makes it easier (and faster) to make the adjustment without stopping to sift through the record menu.

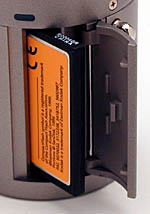
Finally, the DC4800 has a nice flat bottom, which holds a plastic tripod socket, the CompactFlash card Eject switch and the battery compartment. Our only complaint here is the close proximity of all three, which makes it impossible to change batteries or CompactFlash cards while shooting on a tripod. We would much rather have the Eject switch on the side of the camera, next to the actual card slot. Likewise, just a little more space between the tripod mount and the battery compartment would have made life a little easier, given the extent to which we use a tripod in our testing. On a more positive note, the battery compartment operates very smoothly, with an uncomplicated door that simply slides in and out of place.
 Viewfinder
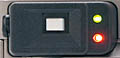
The DC4800 is equipped with a real-image optical viewfinder and an LCD monitor for image composition. The optical viewfinder resides on the top left of the back panel, and features center focusing targets and close-up cropping marks for telephoto framing. A small dioptric adjustment dial on the left side of the viewfinder adjusts the view for eyeglass wearers. Also, on the right side of the viewfinder, two small LEDs let you know the current status of the camera, whether the focus is locked or if the flash isn't ready.
In the center of the back panel, the 1.8 inch color LCD monitor can be turned on or off by pressing the Display button. An omnipresent black strip across the top of the monitor displays camera information such as the current amount of zoom, and when the shutter button is halfway pressed, the exposure settings. In Playback mode, the LCD monitor allows you to zoom into captured images up to 4x and scroll around to check various details. Also, instead of the ordinary index display mode, the DC4800 actually displays a small row of thumbnails of captured images at the bottom of the Playback menu. You can use the right and left arrow keys to scroll through these to quickly find the picture you want. We noticed that the LCD monitor was a little dark at times, and it took us a while to figure out how to adjust the brightness. We actually found the adjustment by reading the manual, as it falls under the Power Save function of the Setup menu, where you can select between Off, Standard and On. The Off setting brightens the LCD display quite a bit. Standard sets the LCD to normal brightness, and On significantly lowers the brightness. The Power Save settings also adjust features like the automatic quick view and whether or not the LCD monitor and television outputs can function at the same time.
We found the DC4800's optical viewfinder to be pretty accurate, just a little bit "tight", showing fully 98 percent of the final image area at wide-angle and about 93 percent at telephoto. (Note the change in our nomenclature, dating from spring 2000: Previously, we referred to this viewfinder behavior as "loose" rather than "tight".) The LCD monitor was even more accurate, showing 100 percent of the final image area at wide-angle and 98 percent at telephoto. (We suspect this variation was actually more reflected the difficulty of determining *exactly* where the boundaries of our test target rectangle are on the LCD, rather than any actual variation in LCD accuracy as a function of focal length.) We like to see LCD monitors as close to 100 percent accuracy as possible, and DC4800 (like essentially all Kodak digicams) does very well in this category. We did notice that the images framed with the optical viewfinder are rotated clockwise slightly, about 0.5 degrees. This is an annoying but not uncommon digicam manufacturing defect, caused by the CCD being placed in the camera slightly rotated relative to the camera body itself. The 0.5 degree error of the DC4800's optical viewfinder is fairly slight , and you'll probably want to rely on the LCD finder if you're doing really critical framing anyway.
 Optics
A 3x optical zoom, 6.8 to 18 mm lens (equivalent to a 28 to 84 mm lens on a 35 mm camera) is built into the DC4800, featuring adjustable apertures from f/2.8 to f/8. The lens does not have threads for mounting filters on, but we suspect Kodak and/or third parties will offer adapter that press-fit onto the large body flange surrounding the lens, as they did for the DC260 and DC290-series cameras. Focusing distance ranges from 1.6 feet (0.5 m) to infinity in normal mode and from 7.8 inches to 1.6 feet (0.2 to 0.5 m) in macro mode. Macro mode is accessed through the Macro / Landscape button on the back panel. Pressing the button once sets focus for the macro range. A second press sets focus at infinity, for capturing far away subjects. A 2x digital telephoto can be enabled through the camera's Setup menu, and you have the option of setting it to Pause or Continuous. Pause means that the camera will hesitate before passing into digital telephoto once the end of the optical zoom range is reached. Alternatively, the Continuous setting allows you to pass straight into digital telephoto at the end of the optical zoom range. We appreciated the way the amount of digital zoom is reported in the information display on the LCD monitor. This lets you easily control the amount of digital zoom, which otherwise would be a bit of a guessing game. Keep in mind that since digital telephoto is simply enlarging the center of the CCD image, quality is compromised in the form of a softer resolution and higher noise level.
Optical distortion on the DC4800 is moderate to high on the wide-angle end, as we measured a 1.01 percent barrel distortion at that focal length. Distortion is lower at the telephoto end, with a very slight 0.2 percent pincushion effect present. Chromatic aberration is also very low, showing about one and a half pixels of coloration on each side of the black target lines. (This distortion is visible as a very slight colored fringe around the objects at the edges of the field of view on the resolution target.)
Exposure
Exposure control on the DC4800 works a little differently than most other digicams, determined by the way the mode dial is set up. Instead of offering a variety of operating modes, the DC4800's mode dial lets you shoot in straight Program AE mode or select from three aperture settings (f/2.8, f/5.6 and f/8.0). Although we're used to seeing a shutter priority and aperture priority selection on the dial, this setup may actually be a little simpler. You still have to go into the LCD menu to change the shutter speed, but the ability to set the aperture and exposure compensation (through another topside dial) without resorting to the LCD does save time. While shooting in Program AE (the 'P' setting on the mode dial), the camera controls both the aperture and shutter speed, but you can make adjustments to the white balance, metering mode, special image effects, ISO setting, exposure compensation, sharpness and flash mode. Turning the mode dial to one of the aperture settings gives you the same controls, with the addition of a manually-selectable shutter speed from 16 to 1/1,000 seconds.
As we mentioned above, aperture is selected by simply turning the mode dial to the desired setting. Shutter speed is changed through the Record menu and you can select Auto, Manual or Long Time Exposure. Remember that you must have the mode dial set to one of the aperture values to be able to actually change the shutter speed. Choosing the Manual setting lets you scroll through a variety of speed settings, from 1/2 to 1/1,000 seconds. While it is rather time consuming to scroll through so many settings, the advantage is that you get to see all of the available settings, a helpful feature. Selecting the Long Time Exposure option gives you another scrolling list, with speeds from 0.7 to 16 seconds available.
Thanks to the wide range of slow shutter speeds, the camera's low light capabilities are truly exceptional, as we obtained bright, clear images as low as 1/16 foot-candles (0.7 lux) in our testing. This low light performance deserves special comment: We were absolutely amazed by how well the DC4800 did shooting time-exposure shots in very dim light. For comparison, a typical city night scene lit by modern street lights corresponds to a light level of about 1 foot-candle (11 lux). The lowest light levels we test at are so dim we literally have a hard time finding our way around the studio. At these levels, virtually all digicams we've tested tend to (a) introduce significant color shifts in the pictures, and (b) show tremendous amounts of image noise, "stuck" pixels (bright spots in the image), and poor color saturation. The DC4800's low light images were almost entirely devoid of such undesirable artifacts, and the pictures it took under these conditions stood out head and shoulders above those from virtually every other camera we've tested to date. (July 2000) It appears that part of what the DC4800 is doing in its time exposures is taking a "black calibration" shot right after the actual image, of the same duration as the main exposure. That is, if you take a 16 second exposure, the camera will actually take 32 seconds to respond, because it immediately takes another shot of the backside of the shutter so it can compensate for "stuck" pixels and image noise. If you need to take long time-exposure pictures under very low light conditions, the DC4800 is definitely a camera you should consider carefully! One practical limitation though: The DC4800's autofocus only appears to be usable down to 1 foot-candle (11 lux) or so, so you'll need to shoot with focus locked at infinity and forego subjects close at hand. (If it's possible given your shooting situation though, you could work around this by selecting a fixed white balance setting, turning on brighter room lights, half-press the shutter button to focus, and then turn the lights off again before you actually snap the picture. Not optimal, but a possible workaround for some situations.)
Exposure compensation is conveniently controlled by a small lever on top of the camera, with adjustments available from -2 to +2 in 0.5 EV increments. We liked this method of adjustment because it's quick and easy, and less draining on the battery since you don't have to utilize the LCD monitor to make the selection. With the exception of the self-timer, zoom, burst mode, macro / infinity and flash mode, the remaining exposure controls are accessed through the LCD menu system. Although we like to see less reliance on the LCD menu, we feel compelled to note that the DC4800's menu system is very concise and straightforward. You simply press the Menu button to access the menu screen, scroll through options with the rocker toggle button and confirm selections with the Display (OK) button. User friendly icons provide a quick reference to each menu option.
The DC4800 gives you several white balance options: Automatic, Daylight, Flash, Tungsten, Fluorescent, Manual and Color Temperature. All of these modes are relatively self-explanatory in that they match the white value to the selected light source, but we would like to explain the Manual and Color Temperature settings a little further.
Selecting the Manual white balance option brings up a screen with four arrows (one in each cardinal direction and color coded as blue, green, red and yellow). In this mode, you initially set the white balance by pointing the camera at a white card or other white object and pressing the shutter button. The camera analyzes what it sees, and adjusts its color balance so that whatever it was looking at when you pressed the shutter button will be forced to pure white. This is a very nice feature that we're seeing on more consumer-level cameras these days. Where the DC4800 goes one step further though, is in the four colored arrows on-screen, corresponding to the four cardinal directions of the rocker control. These let you fine-tune the manual white balance setting that the camera calculated, allowing you to either further correct the color cast, or add a little color cast back into the image. This is a really great feature we've often found ourselves wishing for on cameras with conventional manual white balance options. Kudos to Kodak on this one!
The Color Temperature white balance option lets you select from a range of explicit color temperature values, from a very reddish 2,500 to a very bluish 10,000 Kelvin. A total of 15 different color temperature options are provided, allowing very fine control over the white balance. This is great for studio work, in that you can exactly match the color temperature of the lights you're using. At other times, it allows very fine control over the color cast of your images when you're trying for a particular effect.
By default, the DC4800 utilizes a multi-pattern exposure metering system that averages values from a number of points throughout the frame to determine the proper exposure. Through the Record menu, you can change this to Center Weighted, which takes a reading from a large area in the center, or to Center Spot, which reads just the very center of the image. You can also adjust the sharpness, with options for Sharp, Standard or Soft. The camera's light sensitivity can be set to Automatic, or the ISO equivalents of 100, 200 and 400, giving the camera a little more flexibility in low light situations (we found that the higher ISO settings do increase the camera's sensitivity, but also significantly increase the noise level). A 10 second self-timer is accessed by pressing the Self-Timer / Burst button. Once the shutter button is pressed in this mode, the LCD monitor goes blank and the small red LED on the front of the camera lights solid for the first eight seconds and then flashes during the remaining two. The camera exits the self-timer mode after firing the shutter.
![]() Flash
Flash
The DC4800 is equipped with a built-in popup flash, featuring four shooting modes controlled by the Flash button: Automatic, Fill, Red-Eye Reduction and Off. The Automatic setting puts the camera in charge of whether or not to fire the flash, based on the existing light levels. Setting the flash to Fill tells the camera to fire the flash with every exposure. The Redeye Reduction setting operates similarly to Automatic, but in addition fires a small pre-flash before firing the full flash, to reduce the occurrence of the Redeye Effect. As you'd expect, the Off setting simply means that the flash never fires, regardless of the lighting conditions. The flash is released from its housing by sliding the small switch directly to its left. Closing the flash automatically turns it off. When you re-open the flash though, the camera remembers the previous mode setting and resets the flash to that mode. Kodak estimates the DC4800's flash power as effective all the way to 10 feet (3.2 m) at the wide angle setting and to 6.5 feet (2 m) at the furthest telephoto setting. In our own tests, we found the internal flash to be reasonably effective all the way out to 14 feet, with just a slight bluish tint in the highlights starting around eight feet and a slight magenta cast starting at 12 feet. An external flash sync connection is present on the data port side of the camera, which helps out when you need extra power or the flexibility of an off-camera flash. Kodak recommends setting the white balance to the Flash setting when working with an external flash.
Burst Mode
The DC4800 features a Burst photography mode, accessed by pressing the Self-Timer / Burst button. This mode allows you to capture up to 16 images at a maximum speed of five frames per second (depending on image quality and size, as well as the amount of CompactFlash space). While the camera's built-in flash is unavailable in this mode, you can still use an external flash. (Provided of course, that you have a flash system that will cycle quickly enough.)
Color Mode
Through the Record menu, you can significantly alter the camera's color settings, with choices of Saturated Color, Neutral Color, Black and White, Black and White (Y filter), Black and White (R filter) and Sepia. Selecting Saturated Color heightens the brightness of the colors in the image without altering the white value (especially noticeable in reds, greens and blues), making images more vibrant. We found this to be a useful tool in some of our test shots, particularly the Indoor Portrait Without Flash, which many cameras leave a little washed out, and in the Davebox. The Neutral Color setting simply sets the color brightness to normal, without muting the tones too much. The black and white settings let you shoot in straight black and white tones, or apply a red or yellow filter. Shooting with a yellow filter lightens the yellow tones and darkens the blues, good for capturing dramatic skies or water scenes. Shooting with a red filter lightens the red tones and darkens blues and greens. The red filter works well with portrait shots by hiding blemishes, and also produces interesting sky images. Finally, the Sepia setting simply captures the image in sepia monotones, creating an "antique" look.
As we mentioned in our overview of the DC4800, we particularly like seeing the "neutral" and "saturated" color options: In the past, color rendering in digicams was pretty well fixed, and you bought one camera or an other in part based on which one's color handling you liked the best. We've seen some attempts at providing a "saturated" option for color, but the results were generally more in the "special effects" category, rather than a useful extension of camera abilities. With the DC4800 though, the "saturated" color mode is a nice enhancement to the camera's color capabilities, usable in a wide range of circumstances, and in fact it's the default setting for the camera. (That is, the one that the camera returns to if you use the setup menu option to restore the cameras settings to their factory defaults.)
Macro / Landscape Mode
The Macro / Landscape button on the top of the DC4800's back panel controls the camera's focusing modes. One press of the button puts you in Macro mode, which sets the focal range from 7.8 inches to 1.6 feet (0.2 to 0.5 m) for close-up subjects. A second press puts you in Landscape mode, which sets the focus at infinity. This setting is most useful for landscapes and far away subjects like sporting events. Landscape mode is also a time-saver, in that you don't have to wait around for the camera to set the focus. The DC4800 does a good job in the macro category, capturing a minimum area of 3.65 x 2.43 inches (92.77 x 61.84 mm). This places it about in the middle range of current consumer digicams for macro shooting. Very nice color and detail, although resolution still appears a little soft. We picked up only the slightest hint of distortion, as the edge of the dollar bill seems to curve a little. The DC4800's onboard flash does a very nice job of throttling down (some digicams are tricked by the shiny coin). The large silver coin does reflect a lot of light, but overall, the illumination looks very good.
Shutter Lag / Cycle Times
When you press the shutter release on a camera, there's usually a lag time before the shutter actually fires. This time allows the autofocus and autoexposure mechanisms time to do their work and can amount to a fairly long delay in some situations. Since this number is almost never reported on, and can significantly affect the picture taking experience, we now routinely measure it using an electronic test setup.
The DC4800 is a fairly fast camera overall, at less than 4 seconds from power on to the first shot (fast for a camera with a telescoping lens design), and only about a second between shots until the internal buffer memory fills. The buffer memory apparently is used to store full-resolution files, regardless of the resolution setting the camera's shooting at. Thus, the faster cycle times the buffer memory provides are only available for the first four shots, regardless of resolution setting. Likewise, since the camera seems to be subsampling the low-resolution images from higher-resolution ones, long sequences of low resolution images actually take longer than full-res shots. (The benefit of this approach though, is that the image quality at small image sizes is much better than cameras that simply leave out every other pixel when reading data from the sensor.) Generally very respectable timings though, for a high-resolution camera.
|
|
||
|
|
|
|
| Power On -> First shot |
|
|
| Shutdown |
|
(For lens retraction, could be up 80 seconds for full-res TIFF file to finish writing.) |
| Play to Record, first shot |
|
|
| Record to play |
|
|
| Shutter lag, full autofocus |
|
|
| Shutter lag, prefocus |
|
|
| Cycle Time, shot-shot, high res |
|
Times are for full-res JPEGs before buffer fills (first 4 shots), after buffer fills, and for full-res TIFF |
| Cycle Time, shot-shot, low res |
|
Times are for minimum-res JPEGs before buffer fills (first 4 shots), and then after buffer fills. |
Operation and User Interface
The DC4800's user interface is alternately both time saving and time consuming. We greatly appreciate the ability to set the aperture and the exposure compensation by simply turning a dial. It's also nice to have these settings physically marked on the camera. Kodak thoughtfully placed the setting values of the mode dial on the side of the dial in addition to the top, making it more convenient to read from different shooting angles. That said, we still find the camera's LCD menu system a little tedious for setting some options. For example, to manually set the shutter speed, you have to navigate through the menu and then scroll through a selection of speeds. The benefit of this is being able to see all the available shutter speeds at once, though. Other than the time it takes to scroll through the menu, we did find the menu system very user friendly. Memorable icons quickly clue you in to the various exposure options, and the rocker toggle button simplifies the navigation process. We also noticed that all of the controls are placed so that you could operate the camera one-handed, presuming you have small to medium sized hands (larger hands may find it a little hard to grip all the controls).
One minor complaint we had with the DC4800's user interface design might have more to do with our familiarity with other digicam designs than any inherent defect in the DC4800: From working with a large number of other digicams that use the "rocker toggle" type of control used on the 4800 for navigating menu choices, we're accustomed to using the up/down directions to navigate to a given choice, and then selecting it using either the right arrow, or by pressing down on the center of the toggle control. On the DC4800, the up/down arrows do in fact navigate between menu choices, but you actually make the choices by pressing the yellow display/OK button. We found it unnatural to take our finger off the rocker toggle just to tell the camera "OK." This may just be a personal bias, but we much prefer keeping all the menu navigation functions on the rocker control itself.
Let's take a look at each of the DC4800's controls.

Shutter Button: Located on the top right of the camera, just over the hand grip, this button sets focus and exposure with a half press, and fires the shutter with a full press.

Exposure Compensation Adjustment Lever: Located just behind the shutter button, this notched dial sets the camera's exposure compensation from -2 to +2 in 1/2 EV increments.
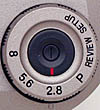
Mode Dial: Also on the top right of the camera, this dial controls the camera's operating mode:

Power Button: Situated directly in the center of the mode dial, this button turns the camera on and off, and signals the activation or deactivation of the telescoping lens.
![]()
Flash Button: Directly beneath the status display panel, this button controls the flash mode:
![]()
Macro / Landscape Button: Located to the left of the Flash button, this button cycles through the Macro mode for close-up photography, and the Landscape mode, which fixes the focus at infinity for far away subjects.
![]()
Self-Timer / Burst Button: To the left of the Macro / Landscape button, this button cycles through normal exposure, 10 second Self-Timer, and the Burst photography modes.
![]()
Pop-Up Flash Switch: Located on the left side of the pop-up flash, this sliding switch releases the pop-up flash from its compartment.

Dioptric Adjustment Dial: Positioned on the left side of the optical viewfinder, this small dial adjusts the optical viewfinder to accommodate eyeglass wearers.
![]()
Zoom Lever: Situated on the top right side of the back panel, this lever controls the 3x optical zoom. When the digital telephoto mode is activated through the setup menu, it also controls the 2x digital telephoto.

Menu Button: Also on the back panel of the camera, just to the right of the LCD monitor, this button activates the LCD menu system in all capture modes and in Playback mode. Pressing it a second time dismisses the menu.

Display (OK) Button: Located to the right of the Menu button, this button activates and deactivates the LCD display. It also serves as the "OK" button for confirming menu selections.
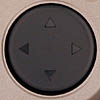
Rocker Toggle Control: This large button is positioned to the right of the LCD monitor and features arrows in all four cardinal directions. When in any record mode, pressing the right or left arrow displays the last image captured on the LCD monitor. You can then press the left arrow to delete the image, or the right arrow to magnify the image to 4x. Once magnified, the four arrows allow you to scroll around in the enlarged image. (This is one of the nicest "quick review" implementations we've seen to date.) In any of the menu screens, these arrow buttons navigate through menu options. In Playback mode, the right and left arrow buttons allow you to review captured images, one by one. Once an image is magnified (through the Playback menu) the four arrow buttons let you move around within the image.

CompactFlash Eject Switch: Situated on the bottom of the camera, adjacent to the battery compartment, this sliding button releases the CompactFlash card from its slot (once the plastic protective door has been opened).
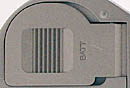
Sliding Battery Compartment Door: Also located on the bottom of the camera, this sliding door serves as both the battery compartment door and lock.
Camera Modes and Menus
Setup Mode: Accessed by turning the mode dial to the Setup position, this mode instantly pulls up the following settings menu:
Review Mode: Turning the mode dial to the Review position puts the camera in Playback mode, where you can review and manage captured images. Here you have the power to delete, write protect or review images in a slide show. Pressing the Menu button calls up the Playback menu with the following options:

Program AE: This mode is marked on the mode dial simply with the letter 'P'. In this capture mode, the camera controls the shutter speed and aperture settings. You have control over the remaining exposure options through the Record menu, in addition to the flash, exposure compensation, macro mode, landscape mode, self-timer and burst photography mode. The Record menu accesses the following settings:
Aperture Priority Mode: Setting the mode dial to f/2.8, f/5.6 or f/8.0 accesses the Aperture Priority mode. Here, you have all the same exposure control options as with Program AE, with the added ability to change the lens aperture setting through the mode dial.
Manual Mode: To enter into full manual exposure mode, the mode dial must be set to either of the three aperture positions (f/2.8, f/5.6 or f/8.0) and the Shutter Speed option in the Record Menu set to Manual or Long Time Exposure. All of the same exposure options as in Aperture Priority are available, with the same Record menu. The only change is with the Shutter Speed option, which offers the following choices:
 Image
Storage and Interface
Image
Storage and Interface
The DC4800 stores images on CompactFlash cards, and a 16 megabyte card is provided
with the camera. Additional memory cards are available in 32 and 64 megabytes
sizes, and up 128 megabytes or larger from third parties. Through the Playback
menu, you can access an information display for each image, which tells you
the file name and directory, date and time, and the majority of the exposure
settings. Also through the Playback menu, you can write-protect individual images
to prevent them from accidentally being erased. Note though, that write-protection
does not protect images if the card is formatted, which is performed through
the Setup menu.
Images can be deleted through the Playback menu, by selecting the Erase option.
This allows you to delete only the current image or all images, with an option
to cancel. You also have a chance to delete images in any of the record modes,
provided that the image preview function is turned on (check the Power Save
setting). After firing the shutter, the image preview displays the captured
image and gives you the option of deleting it (by pressing the left arrow key).
If you've just captured an image and allowed it to be saved, you can still delete
it while in any record mode by pressing the right arrow key. This pulls up a
small menu that allows you to either delete the image (with the left arrow key)
or magnify it to 4x (with the right arrow key). This "quick review"
feature is only available for the most recently captured image on the memory
card.
You have several file size and compression levels available with the DC4800,
adjustable through the Quality setting under the Record menu. The 2160 x 1440
image size, listed as 3.1 megapixels, offers uncompressed TIFF, normal compression
and high compression settings. The remaining image sizes are only available
in normal compression: 2.2 megapixels (1800 x 1200), 1.6 megapixels (1536 x
1024) and 0.8 megapixels (1080 x 720).
The table below shows the number of images and their approximate compression
levels for each image size and quality setting for a 16 megabyte card.
|
Image Capacity vs
Resolution/Quality |
Uncompressed Quality
|
Normal Quality
|
Low Quality
|
|
|
High Resolution
(2160x1440) |
Images
|
1
|
15
|
32
|
|
Approx. Compression
|
1:1
|
9:1
|
19:1
|
|
|
Standard Resolution
(1800x1200) |
Images
|
N/A
|
20
|
N/A
|
|
Approx. Compression
|
N/A
|
8:1
|
N/A
|
|
|
Low Resolution
(1536x1024) |
Images
|
N/A
|
28
|
N/A
|
|
Approx. Compression
|
N/A
|
8:1
|
N/A
|
|
|
Economy Resolution
(1080x720) |
Images
|
N/A
|
47
|
N/A
|
|
Approx. Compression
|
N/A
|
7:1
|
N/A
|
|
 Video Out
US and Japanese models of the DC4800 ship with an NTSC video cable for connecting the camera to a television set, while European models ship with the appropriate PAL cable (the video out setting is adjustable to NTSC or PAL through the Setup menu). By connecting to a television set, you can use the larger screen for composing and playing back images. You also have the option of recording images to video tape by connecting a VCR. The Power Save setting in the Setup menu lets you decide whether or not the LCD monitor will be active along with the television set. For lower battery consumption, we recommend keeping the LCD monitor off when using the video output.
 Power
Power
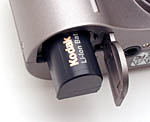
The DC4800 utilizes a lithium-ion rechargeable battery pack for power, and is shipped with one battery. An AC adapter also comes with the camera and allows you to charge the battery in-camera by simply attaching the adapter and plugging it in (the camera must be shut off for the battery to charge). A completely spent battery should take about four hours to charge in the camera. Faster, one hour charging can be done with the accessory battery charger, sold separately by Kodak. A very useful feature we found on the DC4800 is the Power Save option in the Setup menu. By setting the Power Save to On, Standard or Off, you can optimize the camera's power consumption. For example, the On setting slows down the preview frame rate, lowers the LCD brightness, turns off the slide show loop, does not allow the LCD monitor to be active while connected to a television set, and turns off the automatic quick view function. At the opposite extreme, the Off setting increases the preview frame rate, sets the LCD brightness to high, allows the slide show to loop five times, allows the LCD monitor to be active in conjunction with the television set, and activates the automatic quick view function.
You can also save power by turning the LCD monitor off while composing images. Since the top panel status display window shows the majority of the camera settings, there's really no need to keep the LCD running if you're not using it for any other purpose (especially since relatively little operating information is shown on the LCD screen).
The table below shows the amount of power consumption for a variety of operating modes and functions.
|
|
|
| Capture Mode, w/LCD |
|
| Capture Mode, no LCD |
|
| Half-pressed shutter w/LCD |
|
| Half-pressed w/o LCD |
|
| Memory Write (transient) |
|
| Flash Recharge (transient) |
|
| Image Playback |
|
In our tests, the DC4800 showed fairly high power consumption, particularly relative to the capacity of its 3.7 volt, 1100 mAh Li-Ion rechargeable battery. These small Li-Ion batteries are becoming quite popular with digicam manufacturers, but they simply don't pack the punch of a set of four high-capacity NiMH AA cells. Comparing the Li-Ion cell in the DC4800 with 1500 mAh AA cells, we find a total energy capacity of 4.07 watt-hours (3.7 volts x 1.1 amp-hours), as compared to 7.2 watt-hours for the NiMH cells. This is a very significant difference, and the DC4800 is far from a low-power camera to boot. You also need to take into consideration that the power numbers shown in the table above are measured with 5 volts applied to the external power jack: When the applied voltage is brought down to closer to the operating voltage of the battery, current drain easily soars over 1000 ma As a result, the DC4800 doesn't have a terribly long battery life. We always advise buying an extra battery pack with any digicam, but especially recommend doing so with the DC4800. Also, minimizing your use of the LCD display can pay especially large dividends here.
Included Software
A USB cable is packaged with the DC4800, for quick connection to a PC or Mac. Also included with the camera is a software CD containing Kodak's Digital Camera Software and Pictures Now, compatible with Windows 98 and 2000, as well as Macintosh OS 8.6 or higher. The Kodak software simply allows you to download and organize images, as well as access the camera to change settings. You can also pull up the image information screen for each image, to see the exposure settings, date, time, filename and directory. Pictures Now allows you to set up images for printing on all of the available Kodak photo papers for Inkjet printers.
At the time of our testing, the DC4800's final software disk wasn't ready yet, so we weren't able to measure download timing from the camera to a host computer. Given that it uses the USB interface though, we're confident that downloads will be pretty fast. (On the order of several hundred kilobytes per second.)
Test Results
In keeping with our standard policy, our comments here are rather condensed, summarizing our key findings. For a full commentary on each of the test images, see the DC4800's "pictures" page.
As with all Imaging Resource camera tests, we encourage you to let your own eyes be the judge of how well the devices performed. Explore the images on the pictures page, to see how well the DC4800 performed, and how its images compare to other cameras you may be considering buying.
On the whole, the Kodak DC4800 produced very nice images. Color accuracy was excellent, with an outstanding selection of white balance choices including a range of Kelvin color temperatures (which we used with many of our test targets). Color saturation on our Davebox test target appeared very good overall, although the cyan, magenta and yellow did appear slightly weak in the "neutral" saturation shots. The default "Saturated Color" mode eliminated this weakness entirely, but some of the other colors then seemed a bit over-saturated. Still, the DC4800 does a nice job with subtle tonal variations and provided great color results for most of our tests.
The DC4800 performed well in our resolution tests, coming in about in the middle of the current (July, 2000) pack of 3 megapixel digicams. We called the resolution at about lines per picture height in the horizontal direction, although we found some aliasing as low as 650 lines, albeit pretty mild. Vertical resolution was lower, about 650-700 lines per picture height, but aliasing appeared as early as 600 lines. As noted, this is about the middle of the field for 3 megapixel cameras we've tested to date. We felt the results from the DC4800 were actually a bit better in the "real world" images we shot than in this laboratory test. Color aliasing was quite pronounced at vertical frequencies over about 900 lines per picture height, and present to a much lesser extent along the horizontal axis beginning in the same frequency range. Overall, a good performance, if not at the top of the field. Optical distortion on the DC4800 is moderate to high on the wide-angle end, as we measured a 1.01 percent barrel distortion at that focal length. Distortion is lower at the telephoto end, with a 0.2 percent pincushion effect present. Chromatic aberration is also very low, showing about one and a half pixels of coloration on each side of the black target lines. (This distortion is visible as a very slight colored fringe around the objects at the edges of the field of view on the resolution target.) Flash distribution looks pretty good, although there's a moderate amount of falloff on the left and right sides at the wide-angle setting.
The DC4800 offers a good range of exposure control, with aperture priority and full manual modes available, as well as the ability to set the ISO from 100 to 400 and select from spot, center weighted or multi-pattern metering. The camera does a truly exceptional job in low light shooting situations, as we were able to obtain useable images as low as 1/16 foot candles, or about 0.67 lux, with great detail (even at the 100 ISO setting!). Since we were using shutter speeds as slow as 16 seconds at these low light levels, there is some noise in the images, particularly at the 200 and 400 ISO settings. (We direct readers to Mike Chaney's excellent Qimage Pro program, for a tool with an amazing ability to remove image noise without significantly affecting detail.) Overall though, the DC4800's low-light shots showed some of the lowest noise and best color of any consumer-level digicam we've tested to date (July, 2000). To fully understand the DC4800's low light capabilities, note that an average city night scene under modern street lighting corresponds to a light level of about 1 foot candle. Thus, the DC4800's ability to produce clear images at 1/16 foot candles is an exceptional performance.
We found the DC4800's optical viewfinder to be pretty accurate, just a little bit "tight", showing fully 98 percent of the final image area at wide-angle and about 93 percent at telephoto. (Note the change in our nomenclature, dating from spring 2000: Previously, we referred to this viewfinder behavior as "loose" rather than "tight".) The LCD monitor was even more accurate, showing 100 percent of the final image area at wide-angle and 98 percent at telephoto. (We suspect this variation was actually more reflected the difficulty of determining *exactly* where the boundaries of our test target rectangle are on the LCD, rather than any actual variation in LCD accuracy as a function of focal length. We like to see LCD monitors as close to 100 percent accuracy as possible, and DC4800 (like essentially all Kodak digicams) does very well in this category. We did notice that the images framed with the optical viewfinder are rotated clockwise slightly, about 0.5 degrees. This is an annoying but not uncommon digicam manufacturing defect, caused by the CCD being placed in the camera slightly rotated relative to the camera body itself. The 0.5 degree error of the DC4800's optical viewfinder is fairly slight , and you'll probably want to rely on the LCD finder if you're doing really critical framing anyway.
The DC4800 performs pretty well in the macro category, capturing a minimum area of 3.65 x 2.43 inches (92.77 x 61.84 mm), which seems to be about average among digital cameras we've tested. Additionally, the flash does a pretty good job of throttling down for this small area, not being entirely fooled by the shiny coin on the target.
Overall, the DC4800 about average resolution and above-average color and color control for its 3 megapixel class. Image quality and color accuracy are both good, although resolution is a little softer than the best we've seen. Fantastic performance in low light conditions, a nice range of exposure control and an excellent selection of white balance choices make the DC4800 a serious contender among the top echelon of 3 megapixel consumer digicams.
Conclusion
With its compact size, relatively smooth contours and available neck strap, the DC4800 should be able to travel just about anywhere. The availability of a full manual mode and a generous range of features will make this digicam attractive to advanced and novice consumers alike. Good exposure control, external flash support, an unusual degree of white balance adjustment, the option of either "neutral" or "saturated" color settings, and fantastic low-light capability make the DC4800 a serious player at the upper end of the current consumer digicam market.
<<DC4800 Sample Images | Additional Resources and Other Links>>
Reader Comments!
Questions, comments or controversy on this product? Click
this link to see what other Imaging Resource readers have had to say about
the Kodak DC4800 Zoom, or add comments of your own!