Panasonic DMC-GH1 Modes and Menus
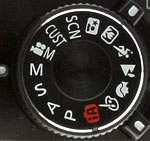 Capture Modes: When powered on, the Panasonic GH1 defaults to Record mode. The Exposure Mode dial on top of the camera sets the main shooting mode, with the following options:
 Intelligent Auto: This mode places the camera entirely in control of the exposure, though the user can adjust the exposure compensation and determine the flash mode.
 Program AE (with Shift): This mode places the camera in control of both aperture and shutter speed, while the user has access to all other menu functions. Once the camera's exposure system has been activated by half-pressing the shutter button, the user can shift the aperture value and shutter time by rotating the front dial. (The overall exposure remains the same, but you can ask the camera to use a larger or smaller aperture or faster/slower shutter speed.)
 Aperture Priority: Lets the user control the aperture setting while the camera selects the best shutter speed. (The aperture range varies with the lens in use.)
 Shutter Priority: The opposite of Aperture Priority, allows the user to set the shutter speed, from 1/4,000 to 60 seconds, while the camera selects the most appropriate aperture setting.
 Manual: Provides complete user control over the exposure, including both aperture and shutter speed settings. A Bulb shutter setting also becomes available in this mode, allowing variable length exposures for as long as you hold down the shutter button, to a maximum exposure time of four minutes.
 Creative Motion Picture: You can set the exposure mode to Program AE, Aperture Priority, Shutter Priority or Manual from the Motion Picture Menu and shoot video using those modes, including the use of exposure compensation. The shutter speed range is 1/30s to 1/4000s, and the available aperture depends on the lens (f4(W)/ f5.8 (T)to f22 with the 14-140mm kit lens). You can also set autofocus mode to AF-S or AF-C.
 Custom: Up to three sets of shooting modes and settings can be stored, and are accessed quickly in this mode. Settings for each of the three custom modes can be made via the Cust. Set Mem. option on the first screen of the GH1's Custom Menus.
 Scene Mode: Adjusts camera settings (color rendering, flash mode, etc.) to optimize for different subject types: Sunset, Party, Babies (including keeping track of birthdays for two different children, so the Panasonic software can display the child's age along with the photo), and Pets.
 Night Portrait: Allows slower shutter speeds to be used with flash. Balances the foreground subject illuminated by flash with the ambient light of the background. Sub-options include Night Portrait, Night Scenery, Illuminations (outdoor lighting at night), and Creative Night Scenery, which allows changes in the aperture value for special effects.
 Macro: This mode is for close-up pictures of small objects, enhancing color in flowers, etc. Sub-options include Flower, Food, Object and Creative. Creative lets you adjust the aperture, so you can select a larger aperture, to help blur background objects. (Note that, unlike digicams, the Panasonic GH1's macro mode doesn't affect the minimum focusing distance, which is solely a function of the lens being used with it.)
 Sports: Adjusts ISO and controls shutter speed to freeze fast-moving subjects. Sub-options include Normal Sports (intelligent ISO control & high shutter speeds), Outdoor Sports (the same, but lower ISOs for shooting in good lighting), Indoor Sports (favors higher ISO speeds for indoor lighting), and Creative Sports (allows direct control of shutter speed).
 Scenery: Optimizes settings to produce sharp, colorful landscapes. Sub-options include Normal, Nature, Architecture and Creative, the latter allowing control of the shutter speed. (Perhaps for deliberately blurring motion of waterfalls, fountains, etc.)
 Portrait: Optimizes camera settings to reproduce warm, soft skin tones against a slightly blurred background. Sub-options include Normal Portrait (large aperture and soft skin tones), Soft Skin (introducing additional color-based blurring of skin areas by the camera's processor), Outdoor Portrait (compensates for backlighting), Indoor Portrait (intelligent ISO control to prevent blurring) and Creative Portrait (allows direct control of aperture setting).
 My Color Mode: Lets you adjust color, brightness, or saturation of the image on-screen. (That is, the preview image shown on the LCD will reflect the color adjustments you've selected.) Here, the "Color" adjustment shifts the overall hue of the image from yellow at one extreme to blue at the other.
 Movie Record Button: Pressing this dedicated movie record button will start and stop movie recording. Movies will be recorded using whatever mode is currently selected. This button can be enabled or disabled in some modes via a Custom Settings Menu setting. (Confusingly, some modes (such as iA) provide only a limited options on the Custom Settings menu, and the Movie button will retain whatever setting it had when it was last set - But you can't change that setting in the current mode. So users might find themselves in iA mode unable to trigger a movie when they want to, and also unable to find the option on the Custom Settings menu that would let them do so.)
![]() Playback Mode: The Playback button on the rear panel accesses Playback mode, where you can review captured images. The left and right arrow keys, as well as the up and down keys, scroll through the images on the card. You can enlarge captured images or display them in an index format for quick viewing.
Playback Mode: The Playback button on the rear panel accesses Playback mode, where you can review captured images. The left and right arrow keys, as well as the up and down keys, scroll through the images on the card. You can enlarge captured images or display them in an index format for quick viewing.
Panasonic GH1 Menus
Pressing the Menu button provides access to the camera's full menu system. The following options are available in most camera modes as menu tabs down the left side of the display. (Full auto mode greatly reduces the available options, to simplify camera operation.)
Options in blue are new or changed for the Panasonic GH1, versus the previous G1 model.
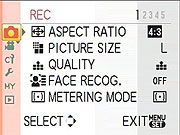
Panasonic GH1 Record Menu:
| Record Menu 1 Options | ||
|
Top-Level
Selection |
Second-Level
|
Notes
|
|
Aspect Ratio
|
- 4:3
- 3:2 - 16:9 - 1:1 |
Select normal, 35mm film or HDTV wide screen aspect ratios for images. (Maximum image width is always 4,000 pixels, wide/short aspect ratios just crop top and bottom.)
|
|
Picture Size
|
- L
- M - S |
Specifies the pixel dimensions of the pictures you will take. (Options are roughly 12, 6, and 3 megapixels in 4:3 aspect ratio mode.)
|
|
Quality
|
- Fine
- Standard - RAW & Fine JPEG - RAW & Std JPEG - RAW (no JPEG) |
Specifies the compression level and file type of images.
|
|
Face Recognition
|
- Off
- On - Memory - Set |
Up to 6 faces can be registered, with name, priority and age.
|
|
Metering Mode
|
- Multi-pattern
- Center-Weighted - Spot |
|
| Record Menu 2 Options | ||
|
Top-Level
Selection |
Second-Level
|
Notes
|
|
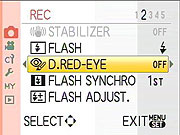
Stabilizer
|
- Off
- Mode 1 - Mode 2 - Mode 3 |
Optical Image Stabilizer modes. Mode 1 is continuous, Mode 2 is on when the shutter is pressed, Mode 3 is used when panning. (Mode 3 only compensates for up/down motion of the camera.)
|
|
Flash
|
- Auto Flash
- Auto Flash w/red-eye reduction - Forced Flash on - Forced Flash on w/red-eye reduction - Slow Sync. - Slow Sync. w/red-eye reduction |
Selects the flash mode.
|
|
D. Red-Eye
|
- Off
- On |
Dynamic Red-Eye reduction. If this option is enabled and the flash is in any of the red-eye reduction modes, the camera will examine the captured images and remove any red-eye that it finds.
|
|
Flash Synchro
|
- 1st
- 2nd |
Select either first or second shutter curtain sync. (Use second-curtain sync for motion trails that follow your subjects, rather than lead them.)
|
|
Flash Adjust
|
- +/-2 EV scale
|
Adjusts flash power higher or lower, in 1/3 EV steps. (Note: This adjustment is independent of the ambient exposure compensation, accessed via the front dial - So you can adjust flash and ambient exposure independently.)
|
| Record Menu 3 Options | ||
|
Top-Level
Selection |
Second-Level
|
Notes
|
|
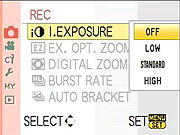
I. Exposure
|
- Off
- Low - Standard - High |
Intelligent Exposure mode adjusts contrast and exposure to handle high-contrast subjects. This menu option varies the amount of the effect applied to your photos.
|
|
Ex. Opt. Zoom
|
- On
- Off |
When shooting at less than maximum image size, integrates an intelligent digital zoom with the lens' zoom ring, providing a greater zoom range without pixel interpolation.
|
|
Digital Zoom
|
- Off
- 2X - 4X |
Adds a fixed digital magnification (w/lower image quality) of 2x or 4x.
|
|
Burst Rate
|
- H
- L |
High or Low speed burst rate. High speed is 3 frames/second (max of 2.85 in our testing), low speed is 2 frames/second.
|
|
Auto Bracket
|
- Step
- Sequence |
Shoot groups of 3, 5 or 7 pictures with user selectable EV steps (1/3 or 2/3 EV between shots). The sequence of the bracketed shots (under/nominal/over) can also be set by the user.
|
| Record Menu 4 Options | ||
|
Top-Level
Selection |
Second-Level
|
Notes
|
|
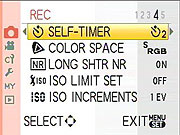
Self Timer
|
- 10 Seconds
- 10 Seconds/3 shots - 2 Seconds |
Configures the Self Timer mode. The 10 second/3 pic mode shoots a sequence of 3 shots after an initial 10-second delay, with a couple of seconds between shots in the sequence. (Handy for making sure nobody blinked/everyone was smiling.)
|
|
Color Space
|
- sRGB
- Adobe RGB |
Select the color space for images to be recorded in.
|
|
Long Shutter NR
|
- On
- Off |
If enabled, the camera will shoot a "dark frame" for noise subtraction on long exposures. This doubles the time for each shot for long exposures, but reduces image noise.
|
|
ISO Limit Set
|
- Off
- 200 - 400 - 800 - 1600 |
Sets maximum Auto ISO limit or can be set to Off. When set to Off, Auto ISO is limited to 400 by default.
|
|
ISO Increment
|
- 1/3 EV
- 1 EV |
Default is 1 EV steps in ISO adjustment, but 1/3 EV steps can be handy for maintaining a specific shutter/aperture speed combination.
|
| Record Menu 5 Options | ||
|
Top-Level
Selection |
Second-Level
|
Notes
|
|
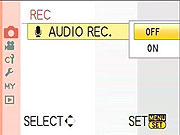
Audio Record
|
- Off
- On |
Audio is recorded for 5 seconds after each image is captured. The recorded audio is stored on the memory card as a MOV file with the audio playing under a screen-resolution (640x480) copy of the still image.
|
Panasonic GH1 Motion Picture Menu:
| Motion Picture Menu 1 Options | ||
|
Top-Level
Selection |
Second-Level
|
Notes
|
|
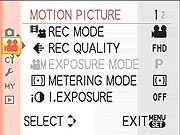
Record Mode
|
- AVCHD
- Motion JPEG |
Selects the video file format. AVCHDis meant for playback on an HDTVvia HDMI. Motion JPEG makes much larger files, but doesn't produce as many compression artifacts with moving subjects.
|
|
Record Quality
|
AVCHD:
- FHD (1920x1080, 17 Mbps) (60i recording, sensor output is 24 fps) - SH (1280x720, 17 Mbps) - H (1280x720, 13 Mbps) - L (1280x720, 9 Mbps) |
Specifies the video file quality (compression level).
(Our tests showed that lower compression artifacts lead to much better image quality in 1280x780 HD mode than in 1920x1080.) |
|
Motion JPEG:
- HD (1280x720, 30 fps) - WVGA (848x480, 30 fps) - VGA (640x480, 30 fps) - QVGA (320x240, 30 fps) |
||
|
ExposureMode (Movie)
|
- P
- A - S - M |
Selects the exposure mode in Creative Motion Picture Mode. Shutter speeds can range from 1/30 - 1/4,000, aperture range is set by the lens.
|
|
Metering Mode
|
- Multi-pattern
- Center-Weighted - Spot |
Selects the metering mode in Creative Motion Picture Mode.
|
|
I. Exposure
|
- Off
- Low - Standard - High |
Selects the intelligent exposure level in Creative Motion Picture Mode.
|
| Motion Picture Menu 2 Options | ||
|
Top-Level
Selection |
Second-Level
|
Notes
|
|
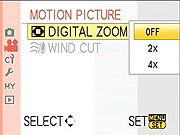
Digital Zoom
|
- Off
- 2x - 4x |
Sets the amount of digital zoom when recording movies.
|
|
Wind Cut
|
- Off
- Low - Standard - High |
Selects the microphone wind filter setting.
|
Panasonic GH1 Custom Menu:
| Custom Menu 1 Options | ||
|
Top-Level
Selection |
Second-Level
|
Notes
|
|
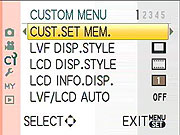
Cust. Set Mem.
|
- C1 Set1
- C2 Set2 - C3 Set3 |
You can maintain up to 3 separate custom shooting profiles, saving most of the settings on the camera. They can then be quickly accessed via the CUST option on the mode dial.
|
|
LVF Disp. Style
|
- Viewfinder style
- LCD monitor style |
Viewfinder style shrinks the EVF viewfinder display (Panasonic calls this the LVF), puts the shooting information at the bottom, LCD monitor style lets the viewfinder display cover the full area of the screen, overlays the shooting information over the live image. (Viewfinder mode shows more live information in the EVF than Monitor mode does.)
|
|
LCD Disp. Style
|
- Viewfinder style
- LCD monitor style |
Same as the above, only for the rear-panel LCD screen. (No difference in the amount of information displayed on the rear-panel LCD in the two modes, though.)
|
|
LCD Info. Disp.
|
- Off
- 1 (Brown) - 2 (Red) - 3 (Black) |
Selects the color scheme for the rear-panel LCD info display.
|
|
LVF/LCD Auto
|
- Off
- On |
Controls the eye sensor for the electronic viewfinder. When enabled, the viewfinder display will switch to the EVF automatically when you hold the camera to your eye.
|
| Custom Menu 2 Options | ||
|
Top-Level
Selection |
Second-Level
|
Notes
|
|
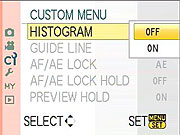
Histogram
|
- Off
- On |
Display live histogram in Record Mode. You can position the histogram display anywhere within a horizontal band covering about 70% of the display area. (Histogram can't overlap with shooting information overlay areas.)
|
|
Guide Line
|
- Off
- Grid - Grid + Star - Positionable horiz/vertical lines |
Select grid overlay pattern. The fourth option lets you position single horizontal and vertical lines anywhere in the frame you want.
|
|
AF/AE Lock
|
- AE
- AF - AF/AE |
Controls the AF/AE lock button's function. When pressed, lock the Auto exposure, Auto Focus or both.
|
|
AF/AE Lock Hold
|
- Off
- On |
Normally, the AF/AE Lock button locks exposure/focus only while you're holding it down. With this option selected, pressing the AF/AE Lock button toggles the lock. (That is, once it's been pressed, the lock remains in effect until you press it again to release it.)
|
|
Preview Hold
|
- Off
- On |
Controls the Preview display option in Record mode. (For previewing effects of exposure, depth of field, and shutter speed.) When Preview Hold is enabled, the Preview button toggles the mode on and off. Otherwise, the Preview function is only active while you're pressing the Preview button.
|
| Custom Menu 3 Options | ||
|
Top-Level
Selection |
Second-Level
|
Notes
|
|
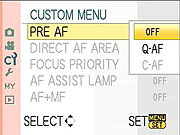
Pre AF
|
- Off
- Q-AF (Quick-AF) - C-AF (Continuous-AF) |
Quick AF focuses automatically whenever the camera stops moving, Continuous AF adjusts the AF all the time. Either mode will reduce AF times when you're switching between close and distant subjects, but both will use more battery power. (Continuous more so than Quick.)
|
|
Direct AF Area
|
- Off
- On |
When enabled, lets you modify the position and size of the AF area while shooting. Arrow keys move the AF area around, control dial adjusts the size.
|
|
Focus Priority
|
- Off
- On |
When enabled, the camera will only open the shutter when the subject is in focus. Does not apply to movie recording.
|
|
AF Assist Lamp
|
- Off
- On |
When enabled, AF assist light will illuminate when shooting in dim lighting.
|
|
AF + MF
|
- Off
- On |
Allows manual focusing after autofocus is done.
|
| Custom Menu 4 Options | ||
|
Top-Level
Selection |
Second-Level
|
Notes
|
|
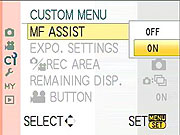
MF Assist
|
- Off
- On |
Enables automatic zoom of the viewfinder image whenever the manual focus ring is moved. (While the shutter button is still being held down.) (Zoom is selectable between 5x and 10x, by rotating front dial.)
|
|
Expo. Settings
|
- Switch by pressing front dial
- Switch by pressing LVF/LCD button |
Normally, you switch between aperture and shutter speed (in manual mode) or EV adjust and program shift by pressing in on the front control dial. This option lets you also make that switch with the LVF/LCD button on the camera's back.
|
|
Record Area
|
- Picture
- Motion Picture |
Crops the viewfinder display to either 4:3 (Picture) or 16:9 (Motion Picture) aspect ratio, apparently as a guide for images that will be displayed on different-format output devices.
|
|
Remaining Display
|
- Still (shots left)
- Movie (time left) |
Selects between displaying number of shots and minutes left.
|
|
Motion Picture Button
|
- Off
- On |
Enables/disables the Motion Picture Button.
|
| Custom Menu 5 Options | ||
|
Top-Level
Selection |
Second-Level
|
Notes
|
|
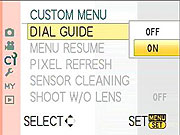
Dial Guide
|
- Off
- On |
When enabled, the camera momentarily displays an icon telling you to push the front dial to switch between exposure settings.
|
|
Menu Resume
|
- Off
- On |
If set on, the camera will remember the last menu screen you were using, even if the camera is turned off.
|
|
Pixel Refresh
|
- Yes
- No |
Maps-out bad sensor pixels. Panasonic recommends doing this once a year.
|
|
Sensor Cleaning
|
- Yes
- No |
Performs dust reduction function (also done at each startup). Was combined with Pixel Refresh on G1.
|
|
Shoot W/O Lens
|
- Off
- On |
If set on, you can activate the shutter button without a lens mounted. (Useful for cleaning the sensor manually?)
|
Panasonic GH1 Setup Menu:
| Setup Menu 1 Options | ||
|
Top-Level
Selection |
Second-Level
|
Notes
|
|
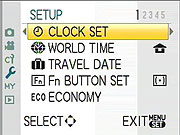
Clock Set
|
- Hr/min/M/D/Y
|
Sets cameras time and date.
|
|
World Time
|
- Destination
- Home |
Lets you quickly switch time/date between two locations, "Home" and "Destination".
|
|
Travel Date
|
- Travel Setup
- Location |
You can set Arrival and Departure dates, as well as Location. Travel info is added to your photos. |
|
Fn Button Set
|
- Aspect Ratio
- Quality - Metering mode - I. Exposure - Guide Line - Record Area - Remaining Display |
Selects what the Fn Button does. (Fn button doubles as down-arrow key.) (Record Area and Remaining Display are as on Custom Menu 4 above.)
|
|
Economy
|
Power Save:
- Off - 1 Min - 2 Min - 5 Min - 10 Min |
Turns camera and/or LCD monitor off after a specified period of inactivity.
|
|
Auto LCD Off:
- Off - 15 Sec - 30 Sec |
||
| Setup Menu 2 Options | ||
|
Top-Level
Selection |
Second-Level
|
Notes
|
|
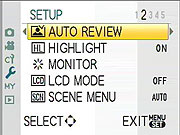
Auto Review
|
Review:
- Off - 1 Sec - 3 Sec - 5 Sec - Hold |
Selects the time that an image is displayed on the LCD monitor after the picture is taken. Camera can also automatically display a 4x zoomed review. Same options for Review and Zoom, both can be enabled at the same time (will display first normal, then zoomed review image).
|
|
Zoom:
- Off - 1 Sec - 3 Sec - 5 Sec |
||
|
Highlight
|
- Off
- On |
If on, any blown highlight areas will blink when the image is played back on the LCD screen.
|
|
Monitor / Viewfinder
|
Adjust brightness and/or contrast & saturation in 7 steps
|
Adjusts LCD when LCD in use, EVF when EVF is in use.
|
|
LCD Mode
|
- Off
- A* - * |
Enables auto brightness adjustment of LCD screen in response to bright surroundings. Alternatively the "*" option increases brightness all the time.
|
|
Scene Menu
|
- Off
- Auto |
Chooses whether or not the sub-option menu automatically appears when the camera is switched into one of its scene modes.
|
| Setup Menu 3 Options | ||
|
Top-Level
Selection |
Second-Level
|
Notes
|
|
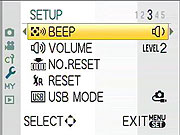
Beep
|
- Muted
- Low - High |
Sets the beep volume for the focus confirmation, self-timer and the alarm.
|
|
Volume
|
- 0 to 7
|
Adjusts the volume of the speakers.
|
|
No. Reset
|
- Yes
- No |
Resets the file numbering.
|
|
Reset
|
- Yes
- No |
Resets most menu options back to their default settings. You have the option to reset either or both the Record settings and Custom settings.
|
|
USB Mode
|
- Select on connection
- PC - PictBridge |
Selects how the camera connects with your computer or printer. Set to always appear as a storage-class device (PC) or as a PictBridge controller, or to select each time the camera is connected.
|
| Setup Menu 4 Options | ||
|
Top-Level
Selection |
Second-Level
|
Notes
|
|
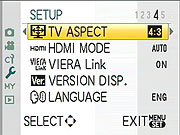
TV Aspect
|
- 16:9
- 4:3 |
Matches the video output's aspect ratio to that of your TV.
|
|
HDMI Mode
|
- Auto
- 1080i - 720p - 480p |
Selects the HD video output format.
|
|
Viera Link
|
- Off
- On |
When enabled, the GH1 can be controlled by other Panasonic Viera home electronics (TVs, projectors, home theater systems) its connected to via its HDMI link. (Some other brands of HDTV may also be able to control the camera, but control may not be as extensive as with Panasonic Viera models.)
|
|
Version Disp.
|
- Body Firmware
- Lens Firmware |
Displays the version of firmware in the body and lens.
|
|
Language
|
- English
- Francais - Espanol - Portugues |
Select the menu language. (US models only: Units sold in other parts of the world will have different language menu options.)
|
|
Format
|
- Yes
- No |
Formats the memory card.
|
| Setup Menu 4 Options | ||
|
Top-Level
Selection |
Second-Level
|
Notes
|
|
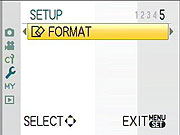
Format
|
- Yes
- No |
Formats the memory card.
|
Panasonic GH1 My Menu:
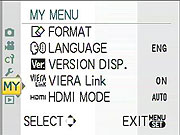
The Panasonic DMC-GH1's My Menu shows the five most recently-used menu options, handy for accessing frequently-used controls quickly. Unlike some My Menu features, you can't explicitly assign controls to this menu, rather, the most-recently used ones appear here automatically.
Panasonic GH1 Playback Menu:
| Playback Menu 1 Options | ||
|
Top-Level
Selection |
Second-Level
|
Notes
|
|
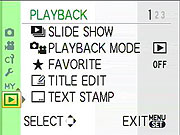
Slide Show
|
- All
- Picture Only - Motion Pic. Only - Favorite - Face Recog. |
Controls the slide show. Four fade effects are available: Natural, Swing, Urban and Off. You can specify duration, music, repeat and audio play. (Duration control is only available when the Fade Effects are off.)
|
|
Playback Mode
|
- Normal Play
- Picture Play - AVCHD Play - Motion JPEG Play - Face Recog. Play |
Selects the playback mode. Only the selected types of images/movies will be visible when playing images back. Normal play displays all image types.
|
|
Favorite
|
- On
- Off - Cancel |
In Favorite mode, you can mark images as your "Favorites", and then choose to show only those images in slide shows. When enabled, the down-arrow button marks/unmarks favorites in playback mode.
|
|
Title Edit
|
- Single
- Multi |
Add text comments to pictures. The text comments appear in playback mode, overlaid over the image. The text does not appear in the original image, though.
|
|
Text Stamp
|
- Single
- Multi |
You can stamp the recording date, date+time, age, travel date or title onto photos. A new small-size image is saved with the stamped information embedded in it.
|
| Playback Menu 2 Options | ||
|
Top-Level
Selection |
Second-Level
|
Notes
|
|
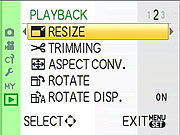
Resize
|
- Single
- Multi |
Allows you to resize your pictures. (Only resizes down to smaller sizes.)
|
|
Trimming
|
- Displays picture
|
Lets you crop pictures by zooming in until you have the framing you want, then pressing the shutter button. Only provides for about a 2x zoom, regardless of image resolution, but you can zoom & trim multiple times. (No limit on number of times you can zoom and trim.)
|
|
Aspect Conv.
|
- 3:2
- 4:3 - 1:1 |
Lets you change the aspect ratio of images.
|
|
Rotate
|
- Clockwise
- Counter-clockwise |
Allows you to manually rotate the selected picture.
|
|
Rotate Disp.
|
- On
- Off |
When enabled, if a picture was shot with the camera held vertically, it will be displayed on the LCD vertically. (NOTE that the GH1 always tags portrait-format files in the EXIF header, this menu option just controls how they're displayed by the camera.)
|
| Playback Menu 3 Options | ||
|
Top-Level
Selection |
Second-Level
|
Notes
|
|
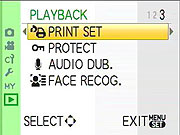
Print Set
|
- Single
- Multi - Cancel |
DPOF (Digital Print Order Format). You can select which photos to print, how many, and whether a date stamp is added.
|
|
Protect
|
- Single
- Multi - Cancel |
Protect pictures that you do not want deleted. (Note though, that they aren't protected against memory card reformatting.)
|
|
Audio Dub.
|
|
You can add or replace audio memos to the currently selected image. As with post-capture audio, the audio is stored as a separate MOV file with the same file number.)
|
|
Face Recog.
|
All face recognition info for the selected image will be cleared.
|
|
 Fujifilm GFX 50S Review
 Fujifilm X-T3 Review
 Olympus E-M5 III Review

Follow Imaging Resource