Panasonic DMC-L1 Design
With many of the basic internals of the Olympus E-300 and E-330, the Panasonic Lumix L1 is the Japanese electronics giant's first move into digital SLRs. The L1 has many unique features, not the least of which are its analog controls for Aperture and Shutter speed. Featuring an interchangeable lens mount, a host of exposure controls, this well-built SLR is priced to go up against the semi-pro cameras of Canon and Nikon in the $1,000 to $1,500 range. The Panasonic L1 has a Live View LCD monitor, though with fewer "modes" than its Olympus predecessor. The optical viewfinder is in fact a true optical viewfinder. However, you also have the option of enabling the LCD monitor's Live View mode, which offers a view direct from the sensor, much like most digicam users are used to. The Panasonic L1's magnesium cast body weighs in at a hefty 2.4 pounds (1,090 grams) for the camera, lens, CF card, and battery. Measuring 5.7 x 3.4 x 3.1 inches (146 x 87 x 80 millimeters), the Panasonic L1 is quite a handful, a little bigger and bulkier than most in this category.
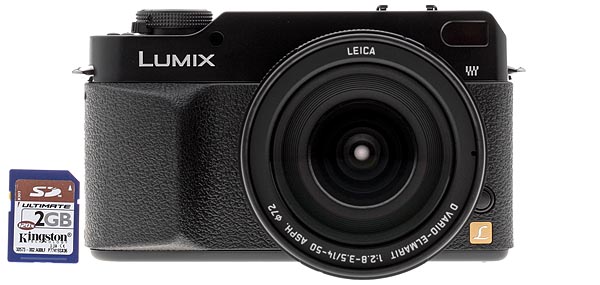
The front of the Panasonic L1 shows the large lens, self-timer LED/AF assist lamp, the IR sensor window, and the lens release button. The small handgrip is covered with a textured, rubbery material that clings to your fingers as they wrap around the camera.
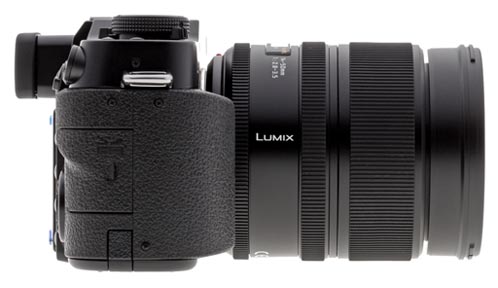
Visible on the right side of the camera is the SD/SDHC Card compartment, as well as one of the eyelets for attaching the neck strap. The media compartment opens from the rear panel, with a hinged, hard-plastic door that snaps shut securely. At the bottom you can see a cutout for the rubber door that allows the included AC dummy battery's cord to come out of the body.
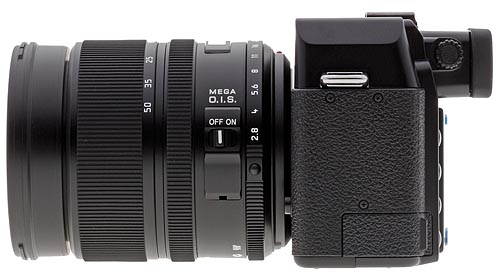
On the opposite side of the camera is the second neck strap eyelet, as well as the shared USB/Video Out/Remote control connector compartment. The compartment is protected by a flexible, rubbery flap tethered to the camera. Also visible on this side is the diopter adjustment on the left side of the optical viewfinder eyepiece.
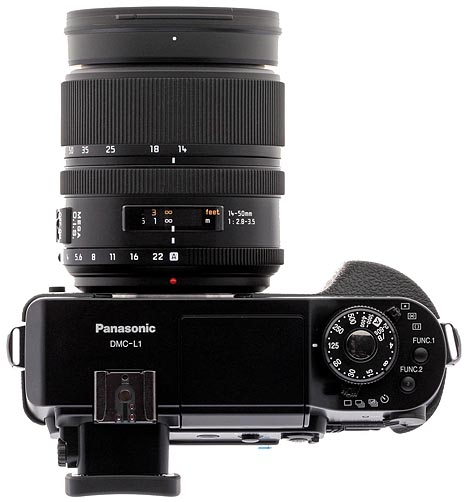
The Panasonic L1's top panel has the hot shoe, the pop-up flash, the Shutter speed dial with the Shutter button perched right in the middle. Jutting out from underneath this dial are the Metering mode and Drive mode switches, and just to the right are the two programmable Function buttons.
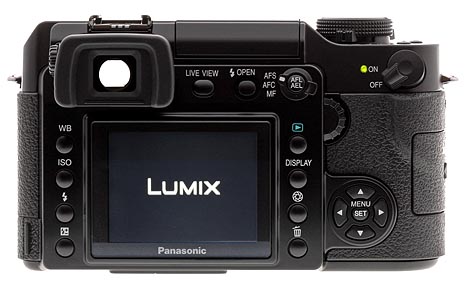
The majority of the Panasonic L1's controls are on the rear panel. A series of buttons lines the left side of the 2.5-inch LCD monitor, including buttons for White Balance, ISO, Flash mode, and Flash Exposure compensation. Along the right another set of buttons are for Playback, Display, "Aperture Stopping Down" (depth of field preview), and Delete. Just above the LCD are the Live View, and Flash release button, and the Autofocus mode selector switch. Nestled in the middle of this rotating switch is the AF/AE Lock button. Just below and right of this control is the Command dial, which works in conjunction with many other buttons to change settings, and zoom in and out on images in Playback mode. Below this is the Four-way arrow pad, with a small Set button in the middle. The optical viewfinder eyepiece is surrounded by a rubbery cup that helps prevent eyeglass scratches, and features a dioptric adjustment dial on its left side to adjust for vision problems. The power switch is in the upper right corner, and a green LED lights up when set to on. There is no "card-write" LED, but a red icon appears on the LCD when a write operation is in progress (removing a card during a write could result in data loss, so be careful with the L1).

The bottom of the camera holds the battery compartment cover and a metal screw-mount tripod socket. The tripod socket is just far enough from the battery compartment to make battery changes easy when mounted on a tripod. The battery compartment door features a swiveling lock to keep it (and the battery) in place, and a second gray sliding lock holds the battery in place inside the compartment.
Panasonic DMC-L1 External Controls
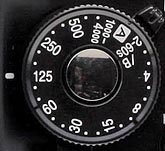
Shutter Button: Located atop the right handgrip surrounded by the shutter speed dial, the Shutter button sets focus and exposure settings when pressed halfway and triggers the shutter when fully pressed.
Shutter Speed Dial (see above image): This dial is on the top of the camera's right side and surrounds the shutter button. It allows you to change your shutter speeds or to select Aperture Priority mode.

Metering Mode Lever: Tucked under the shutter speed dial, this three position switch lets you change between exposure modes.
![]()
Func. 1 Button: Located to the right of the shutter speed dial, this allows you to change and save many settings to this Func 1 setting, this maybe easier than changing settings by going through menus prior to shooting a picture.
![]()
Func. 2 Button: Located to the right of the shutter speed dial, this allows you to change and save many settings to this Func 2 setting, this maybe easier than changing settings by going through menus prior to shooting a picture.
![]()
Drive Mode Lever: tucked under the shutter speed dial, this lets you chose drive modes to single or burst, auto bracketing or self-timer.

Pop Up Flash: Directly on top of the camera is the hidden flash. Pushing the Flash Open button on the back once will bring the flash into bounce mode, a second press will bring it into direct flash mode. You must manually close the flash compartment when done shooting.
![]()
Eyepiece Diopter Adjustment knob: Tucked on the left side of the viewfinder eyepiece, this knob allows you to adjust the viewfinder to your particular eyesight.
![]()
IR Sensor: Located on the camera front, top left position. If you select Auto mode, the sensor decides if the surrounding light is indoor light or sunlight and automatically sets an even more accurate white balance.

AF Assist Lamp/Self Timer Indicator: Located on the camera front, top right position. The AF Assist light can be turned on or off in the menu. If the Self-Timer is used this indicator blinks and the shutter is activated after 10 or 2 seconds.

Lens Release Button: Right next to the lens mount, at about the 4 o'clock position (viewed from the front), this button releases the lens from its mount when pressed, so you can rotate and remove it.
![]()
WB Button: Located just to the left of the LCD monitor, this button allows you to choose which white balance mode to use.
![]()
ISO Button: Located just to the left of the LCD monitor, this button lets you change the camera's ISO.
![]()
Flash Mode Button: Located just to the left of the LCD monitor, this button lets you change the flash mode.
![]()
Flash Exposure Compensation Button: Located just to the left of the LCD monitor, this button adjusts the flash exposure compensation from -2 to +2 EV in 1/3-step increments. The Command dial on the camera back adjusts the increment.

Live View Button: Above the middle of the LCD monitor, this button switches to the Lumix L1's Live View mode.

Flash Release Button: Located on the rear panel beneath the pop-up flash compartment, this button releases the pop-up flash, an entirely mechanical operation. (That is, the camera can't automatically invoke the flash in response to the camera's exposure calculations or settings; it must be popped up by the user.) Pushing the Flash Open button on the back once will bring the flash into bounce mode, a second press will bring it into direct flash mode. You must manually close the flash compartment when done shooting.

AFS/AFC/MF Switch: Activated by a ring switch around the AFL/AEL Lock button, this button controls the autofocus and manual focus settings.
AF Lock /AE Lock (see above image): Above and to the right side of the LCD monitor, this button locks the Autofocus or Autoexposure.

Power Switch: On the top right of the camera back is the power switch, this switch turns the camera on and off. When turned on the green light next to the ON text will light up.
![]()
Playback Button: Next to the LCD monitor's right side this button switches the camera to Playback mode. The L1 is a "shooting priority" camera, so you can return to capture mode either by pressing the Playback button again, or simply by pressing the Shutter button.

Display Button: To the right of the LCD Monitor is the Display button, this button controls the LCD display. One push turns off the LCD display, a second push brings up the LCD with the Control Panel displayed. If using Live View mode, pressing the button cycles through a Live View image with no data, some data, some data with a histogram, grid lines or a grid pattern.
![]()
Aperture Stopping Down button: On the right side of the LCD monitor is this button. This button closes the lens down for depth of field previewing.
![]()
Delete Button: Located near the bottom right of the LCD monitor, this button is to deleted unwanted pictures from the camera.

Command Dial: To the top right of the LCD screen is the Command dial, which adjusts a wide variety of settings when turned while pressing control buttons. In Playback mode, this dial controls digital enlargement of captured images up to 16x when turned toward the right. The dial also accesses the nine, and 25 image thumbnail index display modes, as well as a calendar display, when turned to the left.
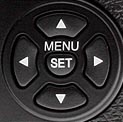
Four-Way Arrow Pad and Menu Set Button : Made up of four buttons arranged in a circle around a central Menu SET button, the Arrow Pad controls many of the camera's operations. The four way pads control scrolling through menu options and the Menu Set button confirms your selection. In record mode you can use the left and right buttons to control which focus points the camera will use. This works the same way in Live view mode.
In Playback mode, the left and right Arrows move forward or backward through the pictures stored on the card. All four are used to scroll around portions of the zoomed image in Zoom Playback mode.
 Fujifilm GFX 50S Review
 Fujifilm X-T3 Review
 Olympus E-M5 III Review

Follow Imaging Resource