Olympus E1 SLRThe first "Four Thirds" system (almost) sees the light of day!<<Shutter Lag & Cycle Time Tests :(Previous) | (Next): Camera Modes & Menus>> Page 8:Operation & User InterfaceReview First Posted: 06/24/2003, Updated: 03/16/2004 |
Camera Operation and User Interface
Camera operation is pretty straightforward on the E-1, as the camera offers only four exposure modes and a large number of external controls, making for an uncomplicated user interface. The Mode dial quickly sets the main exposure mode, and the combination of external control buttons lets you quickly adjust most key camera settings without having to resort to the LCD menu system. Plus, the status display panel on top of the camera reports pretty much all of the main exposure settings (and then some), for quick reference while shooting. The LCD menu system itself consists of four menu tabs, one each for Record, Playback, Setup1, and Setup 2 menus. Each menu is multi-paged, but clearly laid out and easy to scroll through.
Control Enumeration
![]()
Shutter Button: Angled down toward the front
of the camera on the slope of the hand grip, this button sets focus and exposure
when halfway pressed, and triggers the shutter when fully pressed.
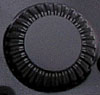
Sub Command Dial: Directly behind the Shutter button
on top of the camera, this ridged dial adjusts a variety of camera settings.
Turning the dial while holding down a control button adjusts settings.
In Program exposure mode, turning this dial on its own cycles through
a range of equivalent exposure settings, so you can bias the exposure toward
larger or smaller lens apertures, or faster or slower shutter speeds.
![]()
White Balance Button: To the right and slightly in
front of the Sub Command dial, pressing and holding this button while rotating
either the Main or Sub Command dial cycles through a variety of white balance
options, including a range of Kelvin temperature settings and four separate
custom white balance settings.
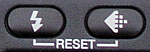
Image Quality Button: On the left side of the Command dial, just above
the status display panel, this button cycles through the available image size
and quality settings when pressed while turning the Command dial. Choices are
TIFF, RAW, SHQ, HQ, and SQ.
Flash Mode Button: Directly to the left of the Image Quality button, this button controls the external flash mode setting. Options are Auto, Forced, Red-Eye Reduction, Slow Sync with Red-Eye Reduction, Slow Sync, and 2nd Curtain Sync.
Reset Function: Holding down the Image Quality and Flash buttons simultaneously accesses the E-1's Reset function. When you press down both buttons, a somewhat cryptic combination of segments appear in the top-panel LCD data readout. (Apparently meant to look like "r-C", for "reset Cancel".) Rotating either the Main or Sub command dial while the buttons are held down selects between canceling the reset, resetting the camera to factory default settings, or selecting one of four different sets of reset settings that you'd previously "registered," via a setup menu option. The Factory Default option affects the greatest number of camera parameters, but the custom reset options nonetheless record an unusually broad range of camera settings for immediate recall. The table below shows the camera functions that can be controlled by both the Factory Default and Custom Reset options:
| Function | Factory Default | Custom Reset |
| Flash Exposure Comp. | 0.0 | x |
| Saturation | (default) | x |
| Contrast | (default) | x |
| Sharpness | (default) | x |
| Color Space | sRGB | x |
| WB Bracket | Off | x |
| Raw + JPEG | Off | x |
| Noise Filter | Off | x |
| Noise Reduction | Off | x |
| Shading Comp. | Off | x |
| AF Illuminator | Off | x |
| Anti-Shock | Off | x |
| Position Sensor | Off | - |
| EV Step | 1/3 EV | x |
| ISO Boost | Off | x |
| White Balance Comp. | +/- 0 | x |
| SQ Image Size | 1280x960 1/8 compression |
- |
| AEL/AFL (Factory default changes with focus mode) | mode1/mode6 | - |
| Dial Functions (Factory default changes with exposure mode.) | Ps/F.No./Shutter | - |
| Focus Ring | counterclockwise | - |
| S-AF & MF | Off |
- |
| Release Priority S | Off | - |
| Release Priority C | On | - |
| Reset Lens | On | - |
| PC Mode | Storage | - |
| Erase Setting | No | - |
| File Name | Auto | - |
| Rec View | Off | - |
| Sound | On | - |
| Display Brightness | 0 | - |
| Sleep | 1 min | - |
| Language (Default depends on where purchased) | English | - |
| Video Out (Default depends on where purchased) | NTSC | - |
| ISO |
Auto | x |
| Exposure Comp. | 0.0 | x |
| White Balance | Auto | x |
| Record Mode | HQ | x |
| Flash Mode | Auto/Fill-in | x |
| Auto Bracketing | Off | x |
| Metering Mode | ESP | x |
| Drive Mode | Single-frame | x |
| AF Frame Selection | 3 points | x |
| Shutter Speed (depending on mode) | 1/50 | x |
| Aperture (depending on mode) | f/2.8 | x |
| Playback Mode | Single-frame (w/no info) | - |
| Information Display | Highlight | - |

Mode Dial and Lock Button: Behind the Command dial on top of the camera,
this dial sets the camera's exposure mode to Manual, Shutter Priority, Aperture
Priority, or Program. A small button in the center of the dial unlocks the dial,
so that it can be turned.
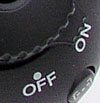
Power Switch: Resting beneath the Mode dial is the Power switch, which
turns the camera on or off.
![]()
Focus Area Selector: On the far right corner of the
camera's back panel, and directly below the Power switch, this button selects
the camera's AF area. Pressing the button while turning the Command dial lets
you select one of three areas around the center of the frame to base focus on,
or lets you select all three areas, in which case the camera will determine
focus based on the part of the subject lying under one of the three areas that's
closest to the camera.
![]()
AE Lock Button: Directly to the left of the Focus
Area Selector button, this button locks exposure when pressed. Exposure remains
locked until the button is either pressed a second time or the shutter is fired.
The button may be configured to lock exposure, focus, or both, via myriad menu
options. (See my discussion of this control in the Exposure section of this
review.)
![]()
Exposure Compensation (+/-) Button: On the left side of the Mode dial,
this button adjusts the exposure compensation from -5 to +5 exposure equivalents
(EV) in one-third-step increments when pressed while turning the Command dial.
(Adjustments may also be made in one-half and full-step increments, if so configured
via a setup menu option.)
![]()
ISO Button: Below the status display panel, this button controls the
camera's sensitivity setting when pressed while turning the Command dial. Options
are Auto, or 100, 200, 400, or 800 ISO equivalents.
![]()
Light Button: To the left of the ISO button, this button activates
an illuminator on the status display panel, making it easier to read data displayed
there in dim shooting conditions.

Metering Button: Located on the left side of the top panel, angling
down from the external flash hot shoe, this button adjusts the camera's metering
mode when pressed while turning the Command dial. Metering modes include Digital
ESP, Center-Weighted, and Spot.

Remote Control / Drive Mode Button: Below the Metering button, this
button accesses the camera's available drive settings. Turning the Command dial
while pressing this button cycles through Single, Continuous Shooting, 12-Second
Self-Timer, Two-Second Self-Timer, Two-Second Remote Control, and Remote Control
modes.

BKT Button: Next to the neck strap eyelet on the left side of the top
panel, this button turns the Auto Exposure Bracketing function on or off. Turning
the Command dial while pressing the button selects the number of images that
will be captured in the series, and the amount of exposure variance between
shots.

Diopter Adjustment Dial: This tiny dial is located above the top right
corner of the viewfinder eyepiece, and adjusts the viewfinder display to accommodate
eyeglass wearers. (The diopter adjustment range is specified as -3 to +1.)
![]()
Viewfinder Shutter Switch: On the opposite side of the viewfinder eyepiece,
this switch opens and closes a shutter inside the viewfinder display, which
blocks light during longer exposures.
![]()
Playback Zoom Dial / Main Command Dial: Located
at the top of the camera's rear panel, this sideways dial controls the digital
enlargement of captured images. Turning the dial toward the magnifying glass
symbol enlarges images, while turning in the other direction zooms back out.
At the normal image display, turning the dial toward the index position calls
up a nine-image index display of all images on the memory card.
Through the Setup menu, you can program this dial to control a handful of camera functions, including exposure compensation, aperture, etc. In Manual mode, this dial controls either the shutter speed or the aperture, depending on the setting.
![]()
Playback Button: Immediately below the Playback Zoom
dial, this button puts the camera into Playback mode, displaying captured images
on the LCD screen.
![]()
Menu Button: Adjacent to the top right corner of the
LCD monitor, this button displays the settings menu in any camera mode. It also
dismisses the menu display.
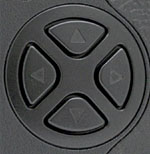
Four-Way Arrow Pad: Close to the center of the camera's
rear panel, this four-button pad features an arrow key in each direction. The
arrow keys navigate through the LCD menu system, as well as scroll through captured
images on the memory card.

Memory Card Compartment Latch: To the right of the
Four-Way Arrow pad, this latch unlocks the memory compartment door.
![]()
OK Button: Diagonally to the lower right of the Four-Way
Arrow pad, this button confirms menu selections.
![]()
Erase Button: Below the lower right corner of the LCD
monitor, this button displays the camera's Delete menu, which lets you erase
single images from the memory card.
![]()
Protect Button: To the left of the Erase button, this
button marks images for write protection, preventing them from being accidentally
erased (except via card formatting). You can also remove write protection.

Info Button: To the left of the Protect button, this
button calls up a limited information overlay for the currently viewed image.
In this mode, the camera also flashes any overexposed areas of the frame.

Focus Mode Switch: Located near the lower right corner
of the lens barrel (when looking at the camera from the front), this switch
sets the camera's focus mode to Continuous Servo, Single Servo, or Manual modes.
Lens Release Button: Above the Focus Mode switch on the camera's front panel, this button unlocks the lens from its mount, allowing it to be rotated and removed.
![]()
Depth of Field Preview Button: On the opposite side
of the lens, this button stops down the lens to the selected aperture setting,
so that you have an idea of the estimated depth of field.

Follow Imaging Resource: