Canon EOS-1Ds Mark IICanon upgrades their "ultimate" d-SLR with 16.7 megapixels of resolution and significant performance improvements.<<Video & Power :(Previous) | (Next): Test Results & Conclusion>> Page 16:Included SoftwareReview First Posted: 9/26/2005 |
Included Software
Three software CDs come with the 1Ds Mark II, the first containing Canon's Solution Disk software for both PC and Macintosh platforms, the second containing Canon's new Digital Photo Professional software package, and the third Adobe Photoshop Elements. The camera connects to the computer via an IEEE-1394 "FireWire" interface cable. A USB cable is also included, for direct printing to Canon or other PictBridge/DPOF printers. The Solution Disk software package includes Canon Utilities, EOS Capture (for operating the camera from the computer), and the necessary drivers. I mentioned the Canon software earlier, calling particular attention to the ability it provides the user to customize the camera's tone curves. Here's a simple list of what's included on the cross-platform disk:
- TWAIN Driver
- Macintosh Plug-In Module (for Photoshop and compliant applications)
- IEEE1394 Driver (Windows)
- FireWire Driver (Mac)
- EOS Viewer Utility
- EOS Capture
- Canon Digital Photo Professional
- TWAIN Driver for Card Reader
- Adobe Photoshop Elements
The two Canon applications shipped with the EOS-1Ds Mark II to some extent overlap in function, to the extent that I expect Canon in the future will merge both into a single application, almost certainly Digital Photo Professional. Here's a look at the two Canon applications:
Canon EOS Viewer Utility (version 1.1.10)
(Note: Screenshots in this section were collected with the EOS-1D Mark II, rather than the 1Ds. This has no effect on the software features though.)
This is Canon's workhorse image viewing utility, shipped in one form or another with Canon digital cameras for the last several years. This latest version has a somewhat updated user interface, as well as significantly improved performance when adjusting RAW-format image files. I unfortunately did still find it to be glacially slow when navigating into folders with large numbers of items in them, a trait shared by both Mac and PC versions of the program.
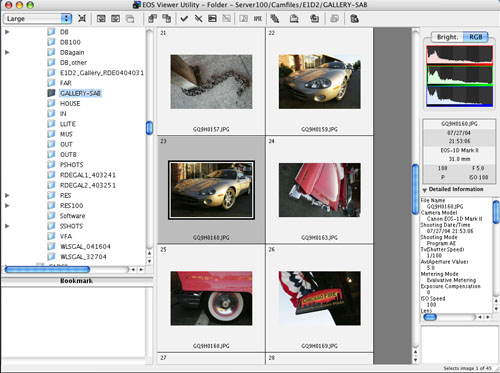
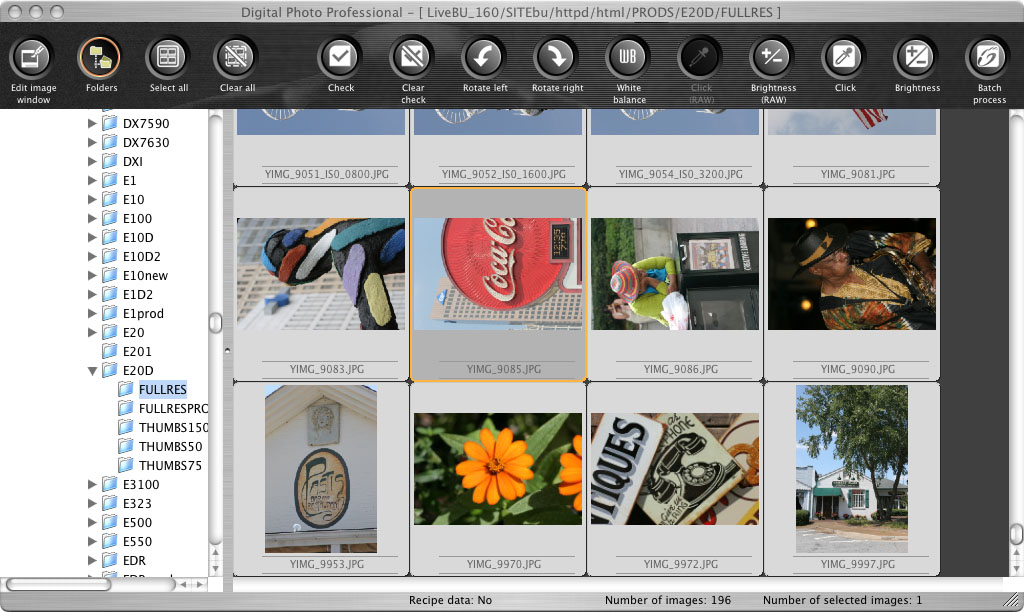
EOS Viewer's main window (shown above) is split into four panes: File/Folder list (upper right), thumbnail display (center), image information (right), and bookmark (bottom right). EOS viewer will display thumbnails directly from the camera (without having downloaded the images to the computer first), from a local hard drive, or from a network-attached drive. Clicking on an image causes its exposure information to be displayed in the righthand pane, where you now have a choice between a single brightness histogram, or a display showing separate histograms for the red, green, and blue color channels. (A nice touch.) You can select multiple images at once by shift-clicking on their thumbnails. Double-clicking on an image opens it for viewing, either fit to the window or 100% (1:1 camera/screen pixels). Icons across the top toolbar let you show or hide the thumbnails or the directory tree, move between open windows, rotate images, mark or unmark them, protect or unprotect them, play any attached sound clips, view and edit IPTC caption information, select all/marked/unmarked/protected/unprotected images, save files, transfer images to another application, start up the Capture application, or delete selected images. When you have an image open for individual viewing, a nifty feature lets you see what autofocus points were active when the image was captured. (This works with both JPEG and RAW formats.)
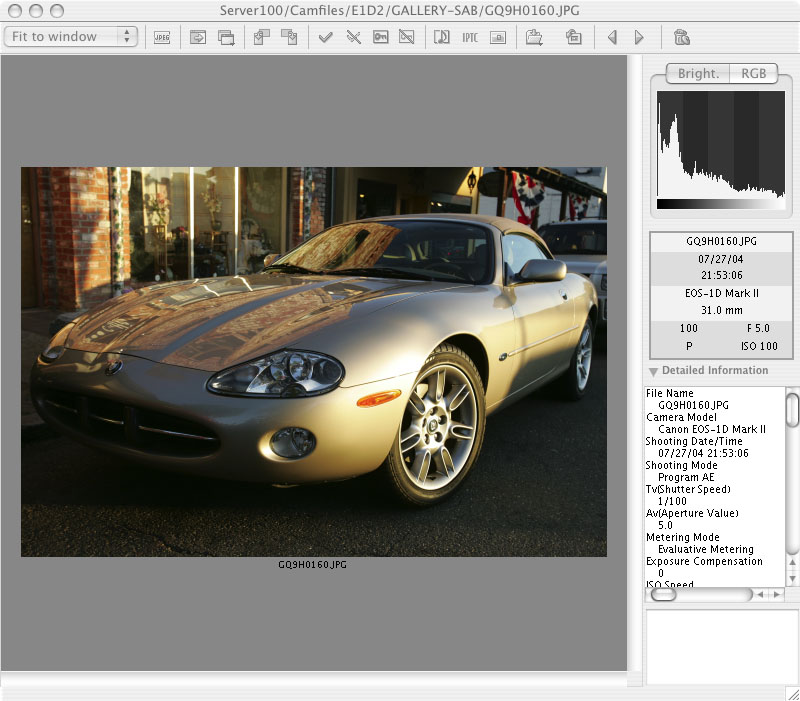
When you have an image open for individual viewing, there's not much else to do with JPEG files than inspect them more closely. - EOS Viewer doesn't provide any tools for editing JPEG files, apart from rotating them.
 The Tool Palette (access from the View menu, or hit CTRL-T on the keyboard) lets you adjust RAW-mode image files. (If you hit CTRL-T while viewing a JPEG image, you'll just get an empty window.) The Tool Palette works in both Thumbnail or full-frame views, and you can manipulate multiple images simultaneously in Thumbnail view, simply by shift-click selecting them. A wide range of adjustments are possible, including (from the top down):
- Digital exposure compensation (-2 to +2 in 0.1 EV steps)
- White balance adjustment via preset (auto, daylight, etc)
- White balance adjustment via degree Kelvin setting (2,800 to 10,000K)
- White balance adjustment via "click" adjustment (manual setting based on scene content)
- Two-axis fine tuning of color balance
- Custom tone curve creation
- Contrast adjustment, (-2 to +2, arbitrary units)
- Color Matrix remapping
- "Advanced" color adjustments
- Color saturation (5 settings from low to high)
- Color Tone (-2 to +2, steps of 5 mired)
- Color Space (repeated in Advanced Mode)
- Sharpness (0-5 in arbitrary units)
RAW-file image manipulation is the area where Canon has made the biggest improvements relative to earlier versions of this program, changes that you make now being reflected in the images after only a slight pause. Tone curves developed in EOS Viewer can be saved to disk, and then applied to the camera, stored on the camera in any of the three custom tone-curve memories. You can thus shoot a test image, manipulate the tone curve until you get it looking the way you want on the computer, and then download that custom tone curve into the 1Ds Mark II. Very slick! (This feature was available as far back as the original 1D, but prior to late 2004 the software application was so mind-numbingly slow that it just wasn't practical to create your own tone curves.) Another nice touch is that EOS Viewer saves its RAW-file adjustments in the file header, so they're remembered from one use of the program to another, while leaving the image data itself untouched.
With the camera connected via its FireWire port, you can modify a variety of its internal settings, including Owner's name and date and time (which can be set directly from the PC, nice if your computer uses a time server to keep its clock accurate). The second screen gives you access to all the Personal Functions of the 1D Mark II. Important note: In order to access the Personal Functions from the camera's menu, you have to first enable them (one by one) via the EOS Viewer software. The third screen gives you control over the camera's various shot settings, including Parameters, Tone Curve (this is where you'd go to download a custom tone curve), Personal white balance, Color matrix, and JPEG quality.
Canon Digital Photo Professional (version 1.5.0.8)
This is the latest addition to Canon's imaging software, apparently intended primarily to provide better color management when working from RAW files. Digital Photo Professional's (DPP for short) main screen looks similar to that of EOS Viewer Utility (EVU for short), the most obvious difference being the different graphical treatment of the icons across the top, and the lack of an information pane on the right.
Some functions that were buried on the Tool Palette on EVU are brought out onto the icon bar in DPP, but other things are lacking, mainly anything involving connection to the camera. - You can't download files from the camera in DPP, control the camera, or upload custom settings. DPP does offer the ability to manipulate JPEG files as well as RAW ones though, and as noted elsewhere in this review, it does a significantly better job rendering difficult colors from RAW images, notably some reds and blues.
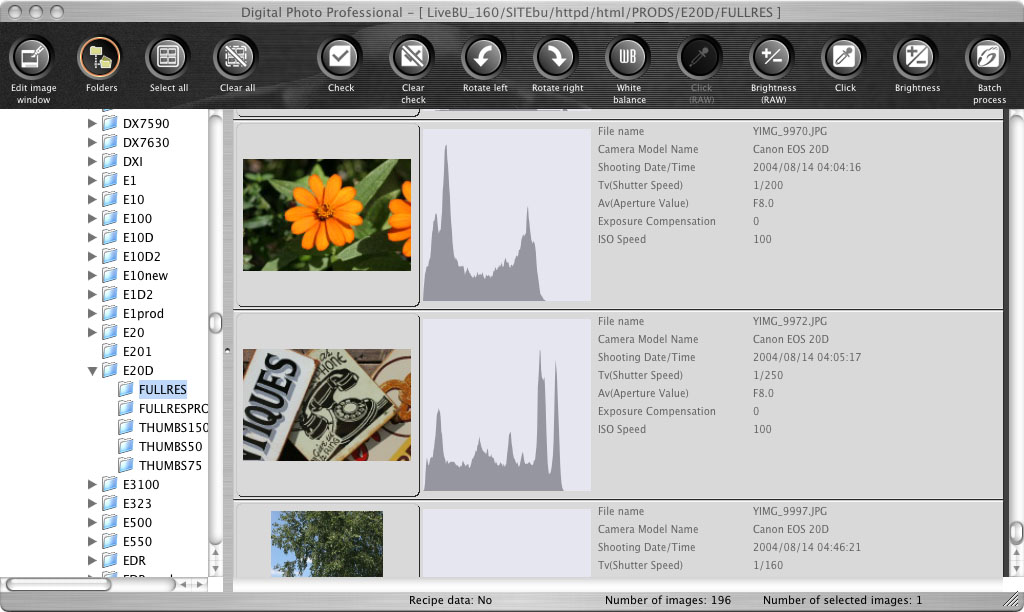
While it lacks EVU's info pane, DPP does offer a useful "Info view" of the files, combining a thumbnail with a brightness histogram and basic exposure information about each file. The information here isn't nearly as extensive as that in EVU's information pane, but it's much easier to access.
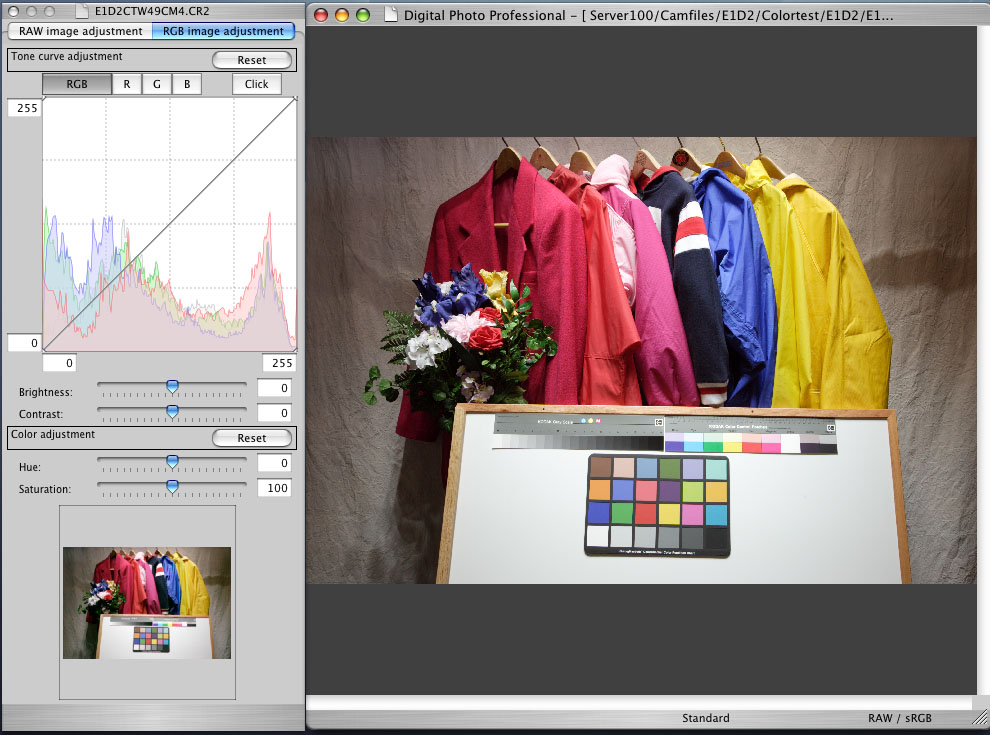
Just as with EVU, double-clicking on an image in DPP opens it into a larger window of its own. Likewise, hitting CTRL-T brings up a tools palette. The biggest difference here though, is that DPP lets you manipulate the tone curve, brightness, contrast, hue and saturation on JPEG files as well as RAW ones.
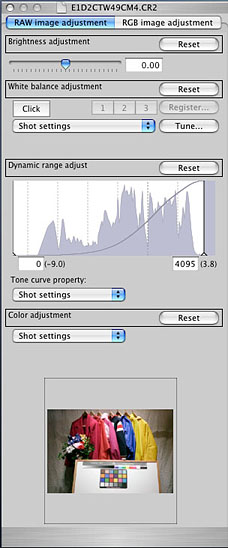 When manipulating RAW images, the tool palette looks slightly different, incorporating some (but not all) of the capabilities of EVU, as well as some new ones particular to DPP. The standard brightness (EV) adjustment leads the list, followed by a range of white balance options. The "Tune" button now leads to a more intuitive color-wheel display for making fine adjustments to color balance, rather than the blue-yellow/red-cyan sliders of EVU. There's a nice combined dynamic range/tone curve adjustment that lets you easily adjust how the 12-bit data of the RAW file maps onto the 8-bit display space, but you have much less control over the tone curve itself than in EVU, with just a single slider to shift it darker or lighter. (EVU lets you place multiple control points along the curve, and push/pull them however you like.) Finally, there's an option to adjust the camera's color handling to the Shot Settings, to a "Faithful" (basically, a setting that tries to match in-gamut colors more precisely, and lets out of gamut colors clip), and a Custom setting that lets you adjust hue and saturation via a pair of sliders.
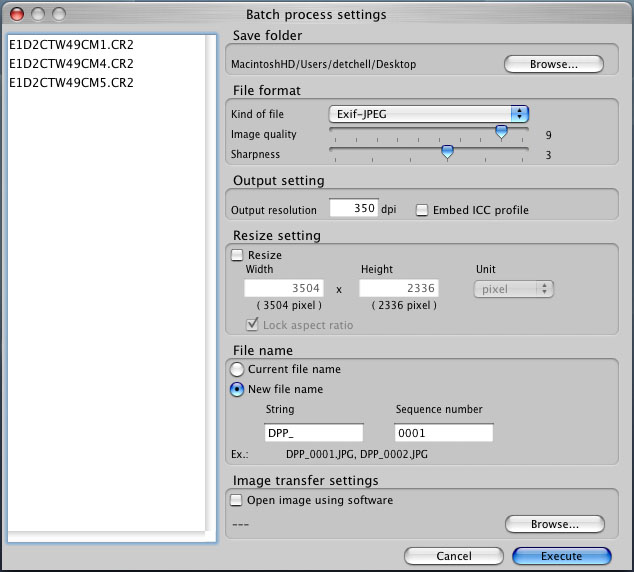
DPP's batch-processing screen is a new addition, but in actuality, essentially all its capabilities were available in EVU's Save As dialog, just arranged slightly differently. Still, nice to have them arranged cleanly in a separate option screen, as shown here.
Overall, as I noted at the outset of the software discussion here, there's a fair bit of duplication and redundancy between EVU and DPP. The obvious direction for Canon to go would be to integrate the camera-control functions of EVU into DPP (including most particularly custom tone curve creation), and then dispense with EVU entirely. For anyone doing color-critical work, DPP's color rendering (from RAW files) is significantly more sure-footed than either EVU's or that of the 1Ds Mark II itself.
In the Box
Included with the EOS-1Ds Mark II digital camera are the following items:
- Eyecup for optical viewfinder
- NiMH NP-E3 battery pack with protective cover
- NiMH battery charger
- DC Coupler Kit
- Neck Strap
- USB Cable
- IEEE-1394 "FireWire" Interface Cable
- Video Cable
- EOS Digital Solution Disk software CD (Includes Adobe Photoshop LE)
- Digital Photo Professional Disk
- Instruction Manual, Registration Information, and Quick Guide
NOTE: No memory card is included with the Mark II, so plan on buying a large SD or CF memory card.
Reader Comments! --> Visit our discussion forum for the Canon EOS-1Ds Mark II!

Follow Imaging Resource: