Back
to Full Sony Cyber-shot DSC-F707 Review
Back
to Full Sony Cyber-shot DSC-F707 ReviewGo to Sony Cyber-shot DSC-F707 Data Sheet
Go to Sony Cyber-shot DSC-F707 Pictures Page
Up to Imaging Resource Cameras Page
Use your browser's "Back" button to return to the previous page, or the links at the top and bottom of this page to navigate to related information. If you have difficulty fitting the text on this page onto your printer output, simply resize your browser window to a narrower width and print again.
Remember us when it's time to buy!
Dave here: Have our reviews been helpful to you? (Is this article you're reading right now useful?) Preparing this level of information on as many products as we do is incredibly hard work, not to mention expensive. Things on the Internet may look like they're free, but they're not. (As a lot of big dot.com companies are finding out these days.) Somewhere, somebody has to pay to produce worthwhile content. YOU can help us though, by remembering us when it comes time to make your purchase. Would you consider coming back to our site and clicking-through to one of our advertisers to make your purchase? Every dollar you spend with one of our advertisers helps us directly (in affiliate fees) or indirectly (the advertiser will keep renewing their ad contract with us). To make it easy for you to support us, here's a URL you can visit, to see all our current advertisers, with links to click on that will register your visit to them as having come from our site. It's up to you where you buy, but Mike, Mike, Kim, Yazmin, Marti and I would be really grateful if you'd help us out by choosing one of our advertisers to purchase from.
Thank you for your support!
Dave Etchells, Founder & Publisher
Visit our "Buy Now" Page:
https://www.imaging-resource.com/buynow.htm
Back
to Full Sony Cyber-shot DSC-F707 Review
Go to Sony Cyber-shot DSC-F707
Data Sheet
Go to Sony Cyber-shot DSC-F707
Pictures Page
Up to Imaging Resource Cameras
Page
Sony Cyber-shot DSC-F707Wow! 5 megapixels, a super-sharp lens, Hologram AF, NightShot, NightFraming and more! Killer technology, great photos from Sony! Review First Posted: 08/20/2001 (Full production model update 11/20/2001) |
|
 |
|
5 megapixel CCD for resolution to 2,560 x 1,930 pixels |
|
|
Amazing NightShot and NightFraming see-in-the-dark technology |
|
|
|
Hologram Autofocus for sharp focus in any light |
|
|
|
Ultra-sharp 5x zoom lens (f/2.0-2.4 too!) |
|
|
|
Excellent color, automatic noise reduction |
Manufacturer Overview
Sony Electronics Inc. has long held a dominant position in the digicam marketplace, with a wide range of models enjoying enormous popularity with consumers. Last February (2001), the company announced six new units. Four of these models included members of the FD Mavica family, enormously popular because of their floppy disk (and now CD) storage media, while the other two came from Sony's DSC Cyber-shot line, which relies solely on Sony's proprietary Memory Stick storage media for capturing images. Since then, Sony has stayed ahead of the competition with increasingly sophisticated technical innovations, more competitive prices, and ever larger CCDs. The Cyber-shot DSC-S85, introduced in June, featured a 4.1-megapixel CCD with 14-bit digitizing and a 3x Carl Zeiss Zoom lens. Now (August, 2001), Sony has dropped another bombshell, with the 5-megapixel DSC-F707. This model will go down in history as the first "Night Vision" digicam, incorporating NightShot technology (borrowed from Sony's consumer camcorder line) and NightFraming IR mode for low-light and "no light" framing and shooting. Add to that a Hologram Autofocus feature that zeros in on difficult low-contrast subjects, and you've got one heck of cool camera! We expect that it will raise a lot of eyebrows among Sony customers (and competitors!). Read on for all the details, this is a hot one!
High Points
Many of our readers will be familiar with Sony's earlier DSC-F505V camera. For those wondering exactly what's different in the new model, here's a table listing the changes:
| Feature |
|
|
| Lens |
f/2.0-2.4 to f/8 38-190mm equiv. 58mm threads 6-blade iris |
f/2.8-3.3 to f/8 38-190mm equiv. 52mm threads 2-blade iris |
| Exposure |
46 shutter speeds 30 - 1/1,000 Settable ISO 100-400 Full Manual mode added Exp. Comp. on button Three-frame auto-bracketing AutoExposure Lock added |
9 shutter speeds 8 - 1/1,000 Auto ISO only (100-300) Exp. Comp. on menu |
| CCD |
(5.24 MP CCD) 2/3" |
(3.24 MP CCD) 1/1.8" |
| Viewfinder |
Rear-Panel LCD |
Only |
| Flash |
Cold shoe mount for proprietary external flash |
Connection for proprietary flash, no shoe mount though |
| Power |
(2.1x capacity) In-camera charging, direct camera power connection |
External charger, "dummy battery" AC adapter connection |
| New Features | "NightShot" and "NightFraming" IR-based see-in-the-dark photo modes. Hologram AF projects a laser autofocus pattern for no-light focusing. ClearColor Noise Reduction produces amazingly low noise in all shooting conditions. Slow Shutter Noise Reduction provides additional NR for long exposures. Burst 3 continuous-shooting mode MPEG EX for continuous movie recording, to limit of card capacity. Multi-pattern metering 14-bit A/D vs 12-bit for 505V Updated Y2001 user interface (Big improvement, IOHO!) |
Executive Overview
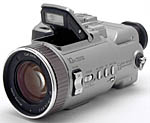
"Wow! What a camera!" was our initial reaction to Sony's new DSC-F707. In addition to its super-size, 5-megapixel CCD (5.2 million effective pixels), the F707 offers a host of innovative technologies and improvements over previous Sony digicams. Among the most exciting new features are the NightShot, NightFraming, and Hologram AF technologies. The NightShot technology, borrowed from Sony's consumer camcorder line, allows you to see and capture images in almost total darkness. Capitalizing on the CCD's super sensitivity to infrared light, the F707's NightShot mode removes the IR filter from the front of the CCD and projects IR beams from two small LEDs on the front of the camera. The resulting image is monochromatic, similar to the view through night vision goggles. The NightFraming mode uses the same technique, allowing you to frame dark subjects using the IR beams, but once focus is determined, the camera replaces the IR filter and makes the exposure with normal flash. We can see almost limitless applications for NightShot and NightFraming, such as taking pictures at dimly lit parties or sneaking up on night critters. (We suspect NightShot may result in a lot of these being sold to law enforcement agencies.)
The Hologram AF feature is another Sony innovation that works very well in the F707. It uses a laser diode and tiny holographic diffraction grating to produce a crosshatched pattern of bright red lines on the subject. This projected pattern stays more or less "in focus" almost irrespective of subject distance, so there's always a sharp pattern for the camera to focus on. Hologram AF isn't just for low light, you'll sometimes see the camera using it in fairly normal lighting if there's not enough contrast in the subject to focus effectively with the contrast-detection AF system. We had great focus results in our low-light testing and are duly impressed with this new focusing mechanism. Another first for Sony is through-the-lens flash metering, which provides more accurate light readings than the conventional on-camera sensor (especially in low-light and no-light settings). Many digicams provide flash metering, but the F707 is the only prosumer model we're aware of that offers true through-the-lens metering. (This should contribute to markedly more accurate flash metering with many subjects, particularly when the lens is zoomed to telephoto focal lengths.)
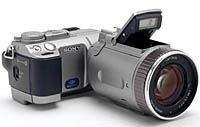
The F707 features the same rotating lens action we so loved on the F505 and F505V models, providing approximately 135 degrees of rotation, for some very versatile shooting options. The camera's overall dimensions are 6.31 x 4.88 x 2.63 inches (162 x 124 x 68mm), but these measurements are somewhat misleading since the camera body itself is only about 2.75 inches deep, and the lens extends nearly 4 inches beyond the body's front panel. Because the lens is so long, the F707 is much too bulky to fit into even a large coat pocket; however, it's reasonably lightweight for its size (22.39 ounces / 635 grams) and therefore easily transportable using the supplied neck strap. Sony also offers a very nice soft case to protect the camera when you're carrying it.
The camera offers two options for precision framing: a large 1.8-inch color LCD monitor on the back panel, and a smaller LCD in the form of an electronic viewfinder (EVF) at the eye-level position. The EVF is designed much like a conventional viewfinder, with a diopter adjustment dial on top to accommodate eyeglass wearers. The same information display is shown on both monitors, reporting battery power, Memory Stick capacity, flash status, and the number of images taken, plus various exposure settings, such as aperture, shutter speed, exposure compensation, image size, and quality. A small switch directly above the monitor allows you to switch between the large LCD and small EVF monitors. We're no fans of EVFs, but that on the F707 seems to provide much more resolution than is normally the case. With the optional viewfinder magnification during manual focusing, the EVF is even marginally useful for setting focus.
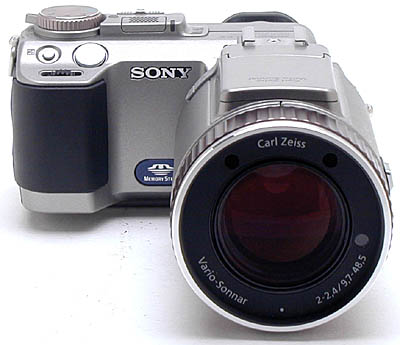
Carl Zeiss lenses are famous for their high quality and image sharpness. The F707 is equipped with a 5x, 9.7-48.5mm Carl Zeiss Vario-Sonnar lens (equivalent to a 38-190mm lens on a 35mm camera), and in our assessment, performs better than most any other lens we've tested. The aperture can be manually or automatically adjusted from f/2 to f/8, and shutter speeds range from 1/1,000 to 30 seconds. (Note that this is a noticeably faster lens that the f/2.8 design used on the earlier F505V.) Focus also can be automatically or manually controlled, with a single readout display that shows the distance in metric measurements, and an Enhanced Focus function that temporarily doubles the size of the image in the viewfinder as you're turning the focusing ring (selectable through the Setup menu), for more accurate focusing. Sony's 2x Precision Digital Zoom function is also activated through the Setup menu, increasing the F707's zoom capabilities to 10x (although as always there is a direct decrease in resolution and image quality resulting from digital magnification). Macro performance is very good, with macro focus distances ranging from 0.8 to 19.7 inches (2 to 50cm).
In addition to a full Manual exposure mode, the F707 also provides Aperture Priority, Shutter Priority, Program AE, and Scene exposure modes. Aperture Priority allows you to select the working aperture, from f/2 to f/8, while the camera chooses the best corresponding shutter speed. Shutter Priority allows you to select the shutter speed, from 1/1,000 to 30 seconds, while the camera selects the appropriate aperture. Program AE places the camera in control of both aperture and shutter speed, while you control the remaining exposure parameters. The Scene exposure mode provides three preset shooting modes -- Twilight, Landscape, and Portrait -- which are designed to obtain the best exposure for specific shooting situations.
Multi-Pattern, Center-Weighted, and Spot Metering options are available in all shooting modes, selectable via the Spot Metering button on the camera's lens barrel. (A crosshair target appears in the center of the LCD monitor in Spot metering mode). White Balance options include: One Push (manual setting), Outdoor, Indoor, and Auto. Exposure Compensation is adjustable from -2 to +2 exposure values (EV) in one-third-step increments, and the camera's ISO value can be set to Auto or 100, 200, or 400 equivalents, increasing performance in low-light shooting situations. The F707's built-in flash features Auto, Red-Eye Reduction, Forced, and Suppressed operating modes, with a variable flash intensity adjustment. As an added bonus, the F707 offers an external flash connection and cold shoe mount, which allow you to use a more powerful flash with the camera.
The F707 also provides a Movie mode with sound recording, which stores files in the MPEG EX format. (MPEG EX enables continuous MPEG movie recording directly to the memory card in the camera's non-"HQ" modes, for as long as the memory card has space.) A Clip Motion option, available through the Setup menu, works like an animation sequence, allowing you to capture a series of up to 10 still images, which are recorded as GIF file for sequential frame playback. A Picture Effects menu captures images in Solarized, Sepia, and Negative Art tones and a Sharpness setting allows you to control image sharpness.
The Record menu offers a list of Record mode options, including a TIFF mode for saving uncompressed images; a Voice mode for adding sound clips up to 40-seconds long to accompany captured images (great for "labeling" or annotating shots you've taken); and an E-Mail mode that saves a seperate 320 x 240-pixel file, in addition to your normal size image, that's small enough for e-mail transmission. An Exposure Bracketing mode captures three images at three different exposures, so you can choose the best overall exposure, and the Burst 3 mode captures three images in rapid succession with one press of the Shutter button (shot-to-shot frame rates vary with the pixel resolution size and the amount of image information being recorded). Finally, there is a Normal setting for standard JPEG compressed images.
Images are stored as uncompressed TIFFs, JPEGs, MPEGs, or GIFs (depending on the Record mode) on a 16MB Memory Stick included with the camera (higher capacity cards are available up to 128MB). A video cable is also provided with the camera for connecting to a television set. (You can choose between NTSC or PAL video standards via the Setup menu), and a USB cable provides high-speed connection to PC or Macintosh computers. Software supplied with the F707 includes MGI's PhotoSuite SE (Mac and Windows) and VideoWave SE (Windows only) for image downloading, image-correction capabilities, and a variety of creative templates for making greeting cards and calendars, as well as basic video editing utilities.
The F707 uses an NP-FM50 InfoLITHIUM battery pack (M series) and comes with an AC adapter that doubles as a battery charger. We like the InfoLITHIUM batteries because they communicate with the camera, showing exactly how much battery power has been consumed, and reporting the remaining battery time via a small readout on the LCD screen. This is really valuable to avoid lost shots when your batteries die unexpectedly.
We are continually impressed by Sony's innovations and the quality level of each new product that comes along. The 5.02-megapixel F707 is no exception -- capturing high-resolution images with great precision and color. The NightShot technology and Hologram AF focusing systems not only give the F707 a definite edge in the digicam arena, but they take digital photography into territory that's simply unattainable in the conventional film-based world. If the point of having a camera is to bring back great pictures, the F707 will let you do so under a wider variety of conditions than almost any other camera on the market, regardless of price.
Design
Sony's newest digicam, the DSC-F707, features the same rotating lens barrel
and compact body size as its predecessors, the DSC-F505 and DSC-F505V. Indeed,
at first glance, the F707 appears to be "all lens," but a quick review
of its features proves otherwise. While the F707 looks essentially the same
as the F505 and F505V models (apart from the faster lens), the F707 sports a
bevy of new features never before seen in a digicam. First of all, this "under
$1,000" camera sports a whopping 5.02-megapixel CCD chip, which produces
very large image resolutions (as high as 2,560 x 1,920 pixels) with great color
and quality. For low-light and "no-light" shooting, NightShot and
NightFraming (borrowed from the Sony camcorder line) allow you to frame and
capture images in the darkest shooting situations. For accurate low-light focusing,
Sony introduces the Hologram AF assist light, which bounces a pattern of laser
lights off of the subject to determine focus. Also new to the F707 are through-the-lens
(TTL) flash metering and Multi-Pattern metering systems.
The camera's rotating lens barrel continues to be one of our favorite design
features in terms of flexibility. You can rotate the lens approximately 135
degrees -- from straight up to almost straight down. (Since the tripod mount
is on the bottom of the lens barrel, you can easily tilt the camera body upwards
to view the LCD monitor more clearly.) As we've noted on previous digicams of
this design, the rather large lens requires a different grip method than most
people are accustomed to, but it's fairly intuitive once you get a feel for
it. The large lens is heavy, contributing to the camera's hefty 22.39 ounces
(635 grams), and therefore requires that you use your left hand to support the
lens. The body itself is relatively compact (smaller than the lens, in fact),
but with overall dimensions of 6.31 x 4.88 x 2.63 inches (162 x 124 x 68mm),
the F707 certainly doesn't qualify as a pocket camera. It's best used with the
accompanying neck strap, and we suggest investing in a small camera bag or soft
cover to protect the LCD monitor and optics. A tethered, spring-loaded lens
cover accompanies the camera.
Aside from the long lens barrel, which dominates the front of the camera, you'll
see the Shutter button and Exposure Compensation controls on a sloping ledge
off the camera's top panel. Encircling the tip of the lens barrel is a ridged
focus ring, which controls the manual focus, much like the focus ring on a conventional
35mm camera lens. On the face of the lens are two LED lights -- a Hologram AF
assist and NightShot IR -- which extend the camera's low-light capabilities
(more on these features later). A rather substantial hand grip is built into
the camera's right side, which is necessary to help counterbalance the weight
of the lens when holding the camera. (This is a welcome design enhancement relative
to the earlier F505V.)
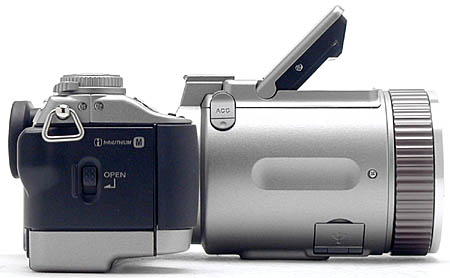
On the right side panel is a neck strap attachment eyelet, positioned just above
the battery and Memory Stick compartment. The compartment door features a locking
catch that must be released before sliding the door open. Also visible from
this view is the "ACC" Sony accessory connection jack on the top of
the lens barrel, which connects Sony accessories, such as the HVL-F1000 flash
unit.
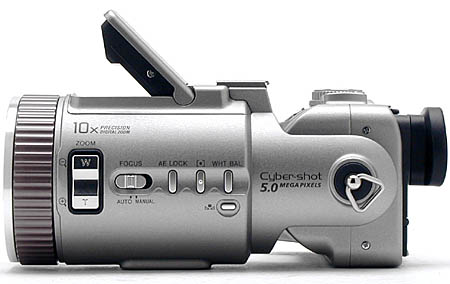
The left side of the camera holds a myriad of controls, all located along the
side of the lens barrel. From left to right, they include the Zoom lever, Auto
/ Manual Focus switch, AE Lock button, Spot Metering control, and White Balance
(WB) adjustment. Directly under the WB button is the One-Push button, which
is used to take manual White Balance readings. All of these controls are within
easy reach of your left hand when holding the camera two-handed. Also on the
left side of the camera is another neck strap attachment eyelet.
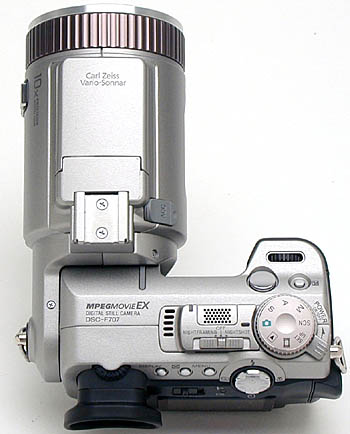
The camera's top panel has some key camera controls, including the Shutter and
Exposure Compensation buttons (mentioned above), a Command dial (located in
front of the these two buttons), as well as a Mode dial, NightFraming / NightShot
switch, and Power switch all clustered on the top right side. Nested within
these controls are the camera's microphone and speaker holes. On top of the
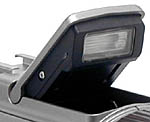
lens barrel, you'll find the pop-up flash compartment, with a cold shoe flash
mount just behind it.
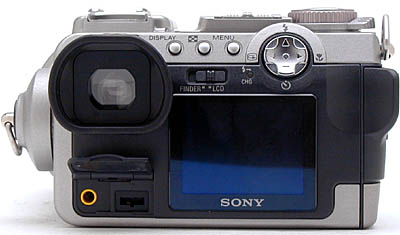
The remaining camera controls are located on the F707's rear panel, along with
the LCD monitor and electronic viewfinder (EVF) eyepiece. Just above the viewfinder
eyepiece, a diopter adjustment dial corrects the viewfinder for eyeglass wearers.
Across the top of the rear panel are the Display, Index, and Menu buttons, to
the left of the Four Way Arrow pad. A sliding switch above the LCD monitor determines
which viewfinder display you use, alternating between the LCD monitor and EVF.
The eyepiece itself is surrounded by a soft rubber eye cup. In the bottom left
corner of the rear panel are the DC In and A/V Out connection jacks, protected
by a spring-loaded hinged plastic door. A large thumb rest near the top right
side of the rear panel protrudes slightly from the battery compartment door,
providing a firmer grip for your right hand. The rear panel also features a
very tiny LED lamp, located above the center of the LCD monitor, which reports
when the flash is charging.
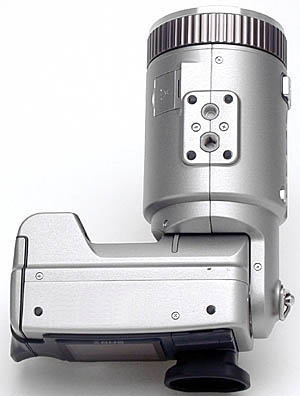
The bottom panel of the F707 is flat and featureless, with the exception of the tripod mount on the bottom of the lens barrel. The USB compartment is also located on the underside of the lens barrel, covered by a lightweight plastic door. Kudos to Sony for keeping the memory card and battery compartments away from the screw mount, making it easy to change batteries while the camera is mounted on a tripod. (We always take note of this, given the amount of studio work we do, and we find it particularly important with feature-laden cameras like this one.) We don't know if the tripod socket is exactly under the optical center of the lens, but it's certainly on the lens centerline at least, making alignment for panorama shots much easier.
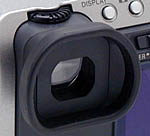 Viewfinder
The F707 offers both a 1.8-inch, 123,000-pixel, rear panel LCD monitor and a smaller electronic viewfinder (EVF) in place of a true "optical" viewfinder. The EVF actually uses a tiny (and lower-power) LCD screen to show the same view you'll see in the camera's monitor display.What makes the EVF so useful is the information display, which is identical to the LCD monitor's display (complete with navigable menus). As we discovered on the FD91 and FD95 models, the idea of being able to see the exposure settings in the viewfinder is a good one, but navigating the menus through this small viewfinder is pretty tricky. We found it much easier to simply switch on the LCD monitor when we needed to change menu options. The EVF does feature a diopter adjustment dial on top of the eyepiece, which should make things easier for eyeglass wearers. A sliding switch on the rear panel controls where the view is displayed, either on the larger LCD monitor or in the smaller eyepiece.
As we noted in the overview portion of this review, we're in general no fans of EVFs, finding them a poor substitute for true optical viewfinders. On the F707 though, the EVF seems to have higher resolution than we're accustomed to seeing, which helps a great deal. Plus, the NightShot and NightFraming modes eliminate one of our stronger objections to EVFs; that they're generally useless in low light conditions. Overall, even the F707's EVF doesn't take us entirely out of the anti-EVF camp, but it goes a long ways in the right direction.
 The Display button on the back panel controls the information display, with a choice of full or partial readings in Record mode. The basic information display reports Flash mode, exposure settings (aperture and shutter speed), and Focus mode. The detailed display also shows the remaining battery power and image quality and resolution. Both the EVF eyepiece and rear panel LCD monitor have adjustable brightness functions. The LCD Brightness adjustment is the first option in the camera's Setup menu, with Dark, Normal, and Bright settings. When the camera is running on battery power, the second and third menu item are for LCD and EVF Backlight adjustment respectively. The backlight settings have Normal and Bright options. This is particularly helpful when shooting in bright, sunlit conditions. For some reason, when the camera is plugged into the AC adapter, the LCD Backlight option disappears. (Perhaps because Sony felt that the camera would generally be indoors when connected to an AC source, and hence not need the high brightness backlight option for the LCD screen.)
 In Playback mode, the Display button also controls the information display, but in this case, turns it completely on or off. An Index Display mode shows as many as nine thumbnail images at a time on the LCD monitor with the first press of the Index button. Pressing the Index button a second time displays exposure information about the selected thumbnail, including aperture, shutter speed, exposure compensation, ISO, metering mode, flash, and white balance (in two screens). The Zoom control on the side of the lens barrel controls the playback zoom, enlarging captured images as much as 5x.
The advantage of an eye-level viewfinder, as provided by the EVF, is that it promotes a more secure camera grip (arms clamped to your sides, camera body braced against your face), which helps with long telephoto and low-light shots. It also provides a more natural "look-and-shoot" operation than when you're forced to rely on a rear-panel LCD display. On previous Sony digicams, we found the smaller EVF eyepieces difficult to work with in low-light situations, as the electronic viewfinder system typically requires more light to operate. Sony has answered this challenge with the NightFraming and NightShot modes. The NightShot technology was first pioneered by Sony in its consumer camcorder lines, and is now making its way into digital still photography. In the F707, it allows you to do things with a digital camera that you simply *can't* do with a film-based unit, such as take pictures in total darkness.
NightShot and NightFraming take advantage of the CCD's sensitivity to infrared light, which is normally filtered out, because it tends to skew the camera's color rendering in bright sunlit scenes. Sony's NightShot technology uses a movable IR filter that lets the camera take advantage of this IR sensitivity in low-light situations and block it at other times.
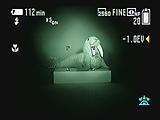 In NightShot mode, the camera flips the IR filter out of the way for both the framing and exposure. Any natural IR light in the scene is supplemented by two infrared LEDs on the front of the lens, which project IR beams onto the subject. These lamps don't completely cover the field of view at wide angle, but they do a pretty good job from about halfway up the zoom range toward telephoto. The built-in illuminator lamps enable you to shoot in total darkness, but the pictures you capture will be monochromatic, with the majority of light areas showing a green cast (as is typical with Night Vision goggles). Some colors will render as different shades of gray than they would in a normal black-and-white photo. This is because the reflectance of objects is often different in IR than in visible light, so a "dark" color in daylight may actually appear quite bright in IR. (Note that when shooting reflective surfaces close-up, you'll be able to see the glow of the camera's IR lamps in the center of the image.)
In NightFraming mode, the camera also flips the IR filter out of the way and turns on the illuminator lamps, but only while you're framing your shots. As soon as you half-press the Shutter button, the IR filter flips back down, and the camera takes a normal visible-light photo, using its built-in flash. This is particularly handy for nighttime flash shooting, when you wouldn't be able to see (or focus on) the subject otherwise.
We'd really like to see the NightFraming made available for other exposure modes besides Auto, and to be able to choose whether or not to fire the flash. We enjoy taking night shots from a tripod, and the NightFraming would be a nice way to take advantage of the F707's 30-second maximum exposure time and excellent noise reduction. Of course, if you're shooting from a tripod, you can still use the NightFraming like this, it just takes two steps: Turn on the NightFraming and switch the camera to Auto mode, compose your picture, then turn it off again, switch back to the mode you want to shoot in, and take your shot. This isn't a huge inconvenience, but we'd still like to see NightFraming work independently of the shooting mode, and also not mandate use of the flash.
Overall, NightShot and NightFraming are a tremendous extension to digital photography, clearly taking it into realms that film-based cameras just don't touch on. Sure, you can shoot with IR film, but the no-light viewfinder capability of NightFraming just isn't available in the film world. Combined with the Hologram AF feature, they make in-the-dark digital photography more practical than it's ever been. Big kudos to Sony for bringing these innovations to digital photography!
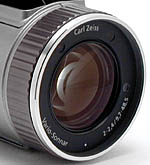 Optics
The F707 is equipped with a super-sharp 9.7-48.5mm Carl Zeiss lens (equivalent to a 38-190mm lens), and an impressive 5x optical zoom. The aperture can be adjusted automatically or manually, and ranges from f/2-2.4 to f/8 depending on the zoom setting. (This is a significant increase in maximum aperture from the lens on the earlier F505V, which had a maximum aperture that ranged from f/2.8-3.5.) An additional 2x digital zoom function (10x total zoom) can be turned on and off via the Record menu, but remember that quality is always an issue with digital enlargement. That said, the F707 employs Sony's Precision Digital Zoom, which we have found to produce less quality degradation than the normal digital zoom used by other digicams. (One difference seems to be that the required interpolation is done with raw CCD data, before the JPEG compression is applied.) The F707's zoom control is nice and smooth, with a two-step rocker switch that lets you zoom slowly or quickly. This made it easy to make small adjustments to the zoom without going too far in either direction, a very nice feature for critical framing. A zoom bar appears on the LCD screen, reporting the zoom position, along with an indicator to show when the digital zoom kicks in (if Digital Zoom is activated through the Setup menu).
The rotating lens barrel continues to be one of our favorite designs, although the bulky lens takes some getting used to. (Actually, we're a little conflicted over the design: We love the flexibility it gives, but find it a little awkward to hold in most situations.) The lens pivots up and down approximately 135 degrees, greatly multiplying your shooting options. It's especially handy for grabbing ground-level macro shots or when holding the camera above your head to shoot over a crowd. The tripod mount on the bottom of the lens barrel provides even greater flexibility when working with a tripod or monopod, allowing you to tilt the camera's back panel for easier viewing. Sony offers both wide-angle and telephoto converters as accessories for the F707, which are mounted over the lens via the 58mm filter threads that line the inside lip of the lens barrel. Having the tripod mount on the lens centerline also makes it easier to align multiple shots to be used later to assemble a panorama.
Focus on the F707 ranges from 19.7 inches (50cm) to infinity in normal mode, and from 0.8 to 19.7 inches (2 to 50cm) in Macro mode. The Macro function is controlled via the Right arrow button on the Four Way Arrow pad, and is only available when the focus is in Auto mode (Manual focus mode includes the macro range). A Focus switch on the side of the lens selects either Auto or Manual Focus control. The F707's Autofocus mode employs a contrast-detection system to automatically determine focus. Manual focus is set by turning a focus ring at the end of the lens barrel, just as you would a standard 35mm camera lens. When using the Manual focus, a small indicator appears on the LCD screen that shows the focal distance in meters as you turn the ring. Also, an Expanded Focus option (activated in the Setup menu) automatically magnifies the image by 2x when you turn the focus ring, allowing for more fine-tuned focus adjustments. We really liked the feel of a digicam with a manual focus that works similar to that on a standard 35mm camera lens. If you're making the transition from a film camera though, the F707's focus ring may take a little getting used to. It isn't directly coupled to the lens elements, but rather just instructs the camera's CPU which way to move the focusing elements. This leads to a sense of disconnection between movements of the focus ring and corresponding focus changes that takes some getting used to. Also, the proportionality between focus-ring movement and focus adjustment seems to be a pretty strong function of the speed with which the ring is turned. If you move the ring slowly, it can take many turns of it to traverse the full focal range, while a quick twist will switch you from infinity focus to a couple of meters with only a partial rotation. This variable proportionality is doubtless an attempt to deal with the slow slew rate of most "fly by wire" digicam focusing systems. It definitely improves the focus response relative to other cameras we've worked with, but we still find manual focusing on the 707 to be a somewhat disconcerting experience.
 We were also impressed by Sony's Hologram AF system for low-light focusing, which uses a laser diode and tiny holographic diffraction grating to project a crosshatched pattern of bright red lines on the subject. The nifty thing about the hologram is that the projected pattern stays more or less "in focus" almost irrespective of subject distance, so there's always a sharp pattern for the camera to focus on. Hologram AF isn't only for low light, you'll see the camera use it in fairly normal lighting as well, if there's not enough contrast in the subject to use the normal contrast-detect AF system. Try pointing the camera at a blank wall in normal home / office lighting, and you'll see the pattern. The screen shot at right shows a camera's eye view of the Hologram AF pattern, as the lens zooms from wide to telephoto.
In actual use, we found the Hologram AF system made low-light and low-contrast focusing practically foolproof. In fact, it was hard to get an out-of-focus photo with the F707, in almost any situation.
Exposure
The F707 offers a full range of exposure controls, with options for Program AE,
Aperture Priority, Shutter Priority, and Manual exposure modes, as well as a
Scene mode position with Twilight, Landscape, and Portrait preset shooting modes.
All exposure modes are accessed via the Mode dial on top of the camera, and
the Scene presets are accessed through the Record menu in Scene mode. In Program
AE mode, you control everything except the aperture and shutter speed. Aperture
and Shutter Priority modes give the user control over either aperture or shutter
speed (depending on the mode), while the camera selects the best corresponding
exposure value. Manual mode provides complete control over the exposure, with
the user selecting both shutter speed (1/1,000 to 30 seconds) and aperture (f/2
to f/8).
In the Scene exposure mode, you have the option of shooting in Twilight, Landscape,
or Portrait preset modes. Twilight mode sets up the camera for shooting night
scenes, using a slower shutter speed to capture more ambient light. This mode
is good for subjects like sunsets and fireworks, as the longer exposure preserves
the original color in the scene. Landscape mode simply uses a smaller lens aperture
setting to increase the depth of field, keeping the foreground and background
in focus. Landscape mode typically uses slower shutter speeds, so a tripod is
recommended. Portrait mode works in the opposite manner, using a larger aperture
to decrease the depth of field. This produces a sharply focused subject in front
of a slightly blurred background.
The F707 employs a Multi-Pattern metering system as the default mode, dividing
the scene into several small sections and taking exposure readings for each
section. The readings are then averaged to determine the best overall exposure.
Center-Weighted and Spot metering options are also available, accessed by pressing
the Metering button on the lens barrel. You can lighten or darken the exposure
with the F707's Exposure Compensation adjustment, which ranges from -2 to +2
exposure values (EV) in one-third-step increments and is available through the
Record menu.
In addition to the F707's NightShot and NightFraming low-light utilities (discussed
in detail in the Viewfinder section), the camera also offers an impressive Noise
Reduction system. Activated automatically with shutter speeds of 2.5 seconds
and longer, Noise Reduction does an outstanding job of reducing the image noise
associated with long exposure times. Judging by the camera's operation, it looks
like the F707 is shooting a "dark" frame after each exposure when
the noise reduction mode is active, and then subtracting the dark noise from
the captured image. This is very effective in reducing noise, but "hot"
pixels end up as black spots, since they were saturated at white on both the
live and dark frames. (And when the two values are subtracted, they sum to zero.)
Still, the resulting images are exceptionally clean, even at ISO 400. Color
in extreme low light is also quite good, although the auto white balance system
left a little of the warm cast of the shuttered photoflood bulb in our low light
testing.
An AE Lock button on the side of the lens allows you to lock the exposure reading
without locking focus. AE Lock works well with Spot and Center-Weighted metering,
as you can base the exposure on a particular area of the subject without locking
the focus on that area. Simply aim the center of the viewfinder at the portion
of the subject you want properly exposed and press the AE Lock button. The exposure
is locked until the Shutter button is fully depressed or until the AE Lock button
is pressed again. ISO can be adjusted to 100, 200, or 400 sensitivity equivalents,
or set on Auto. The F707's White Balance adjustment offers four settings: One-Push
(manual), Indoor, Outdoor, and Auto. The One-Push reading is set by placing
a white card in front of the lens and pushing the One-Push button on the side
of the lens barrel. The Indoor setting is matched to incandescent lighting,
so you'll need to use the Auto or One-Push functions when shooting under fluorescent
lights.
The 10-second Self-Timer mode is activated by pressing the Down arrow button
on the Four Way Arrow pad. Once in Self-Timer mode, a full press of the Shutter
button kicks off the timer, which counts down 10 seconds before firing the shutter.
The F707 also offers the versatile Picture Effects menu, which has become a
standard feature on Sony digicams. The menu offers three creative options: Negative
Art, Sepia, and Solarize. Negative Art reverses the color and brightness of
the image. Sepia changes the image into brown, monochromatic tones. Solarize
clarifies the light intensity of the image, making it look more like an illustration
than a photograph. These effects are "live" in Record mode, so you
get a preview of the effect on the LCD monitor before you record the image.
The F707 also offers a Sharpness function, which adjusts the overall image sharpness
from -2 to +2 in arbitrary units.
After recording an image, the Quick Review function provides instant playback
of the picture. Pressing the Left arrow button also activates the Quick Review
mode, giving you the option of deleting the most recently recorded image.
 Flash
Flash
The pop-up flash on the F707 features true TTL (Through The Lens) metering,
for more accurate flash exposures. To the best of our knowledge, the F707 is
the first prosumer-level digicam to offer true TTL flash metering. Most cameras
have "smart" flashes that automatically adjust exposure based on the
light being reflected by the subject. Other than the F707 though, the sensor
for the flash exposure is mounted on the front of the camera case, and simply
responds to the overall amount of light bouncing back toward the camera. If
the camera's lens is zoomed in on a small subject with a significantly different
reflectance than the remainder of the area illuminated by the flash, the exposure
seen by the CCD and the flash sensor will be very different. With the F707 however,
the flash exposure is based on the light actually coming through the lens, avoiding
this problem. The result will be much more accurate flash exposures in a much
wider range of shooting conditions.
The flash operates in Auto (no icon), Forced, and Suppressed modes, with a Red-Eye
Reduction mode that can be enabled through the Setup menu. Auto mode lets the
camera decide when to fire the flash, based on existing lighting conditions.
Forced means that the flash always fires, regardless of light, and Suppressed
simply means that the flash never fires. Red-Eye Reduction mode tells the camera
to fire a small pre-flash before firing the full flash to reduce the effect
of red-eye. Once enabled through the Setup menu, the Red-Eye Reduction flash
fires with both Auto and Forced modes. Flash intensity can be manually controlled
via the Record menu with choices of High, Normal, and Low. There is no flash
release mechanism, as the camera pops open the flash on its own, once the Shutter
button is halfway pressed (in all flash modes except Suppressed).
 Sony estimates
the F707's internal flash to be effective from 1.6 to 16.4 feet (0.5 to 5 meters)
in the normal intensity mode. This agrees well with our own testing, which is
limited by the 14 foot depth of our studio. (We couldn't test to the full 16.4
foot distance, but can safely say that we saw no decrease in flash intensity
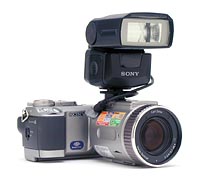
out to 14 feet.) When a more powerful flash is needed, the F707 has an external
flash connection socket and a "cold" mount shoe. (Note though, that
the flash connection on the F707 is a proprietary one, requiring use of the
dedicated Sony HVL-F1000 external flash unit. You could certainly slave additional
external flash units to this one via an optical slave unit, but the main flash
will need to be a HVL-F1000.) The HVL-F1000 is a pretty capable little unit,
particularly in that it provides true TTL (through the lens) flash metering
when used with the F707. (This is quite unusual in prosumer digicams, which
almost universally employ area sensors for flash metering.) (Late-breaking
note: IR Reader Tom Ferguson has observed that the F1000 is *not* TTL. I had
the camera and flash all boxed up, ready to ship back to Sony, but will unpack
it again and double-check this: I admit I'd just slavishly repeated what Sony
told me about the unit, without actually checking it out myself. Stay tuned
for more info once I've verified (or not) this piece of info!)
Sony estimates
the F707's internal flash to be effective from 1.6 to 16.4 feet (0.5 to 5 meters)
in the normal intensity mode. This agrees well with our own testing, which is
limited by the 14 foot depth of our studio. (We couldn't test to the full 16.4
foot distance, but can safely say that we saw no decrease in flash intensity
out to 14 feet.) When a more powerful flash is needed, the F707 has an external
flash connection socket and a "cold" mount shoe. (Note though, that
the flash connection on the F707 is a proprietary one, requiring use of the
dedicated Sony HVL-F1000 external flash unit. You could certainly slave additional
external flash units to this one via an optical slave unit, but the main flash
will need to be a HVL-F1000.) The HVL-F1000 is a pretty capable little unit,
particularly in that it provides true TTL (through the lens) flash metering
when used with the F707. (This is quite unusual in prosumer digicams, which
almost universally employ area sensors for flash metering.) (Late-breaking
note: IR Reader Tom Ferguson has observed that the F1000 is *not* TTL. I had
the camera and flash all boxed up, ready to ship back to Sony, but will unpack
it again and double-check this: I admit I'd just slavishly repeated what Sony
told me about the unit, without actually checking it out myself. Stay tuned
for more info once I've verified (or not) this piece of info!)
Even though you'd give up the advantages of TTL flash metering and variable
flash exposure provided by the dedicated HVL-F1000, we really wish Sony would
provide some means of interfacing to strobe systems using the standard PC sync
connector. Besides the hordes of photographers with old Vivitar 285's kicking
around in their gear bags, the extraordinary image quality and resolution of
the F707 will likely lead to a lot of them being used in pro studio environments,
for tabletop or portrait photography. While you'll doubtless be able to shoot
with a "peanut" slave taped to a HVL-F1000, that's an awfully kludgey
solution for such a sophisticated piece of equipment. (Actually, it may take
more than a simple peanut slave - The F707's internal strobe uses a metering
flash prior to the main exposure, necessitating a "smart" strobe trigger
such as the SA-10 slave unit sold by SR
Electronics.)
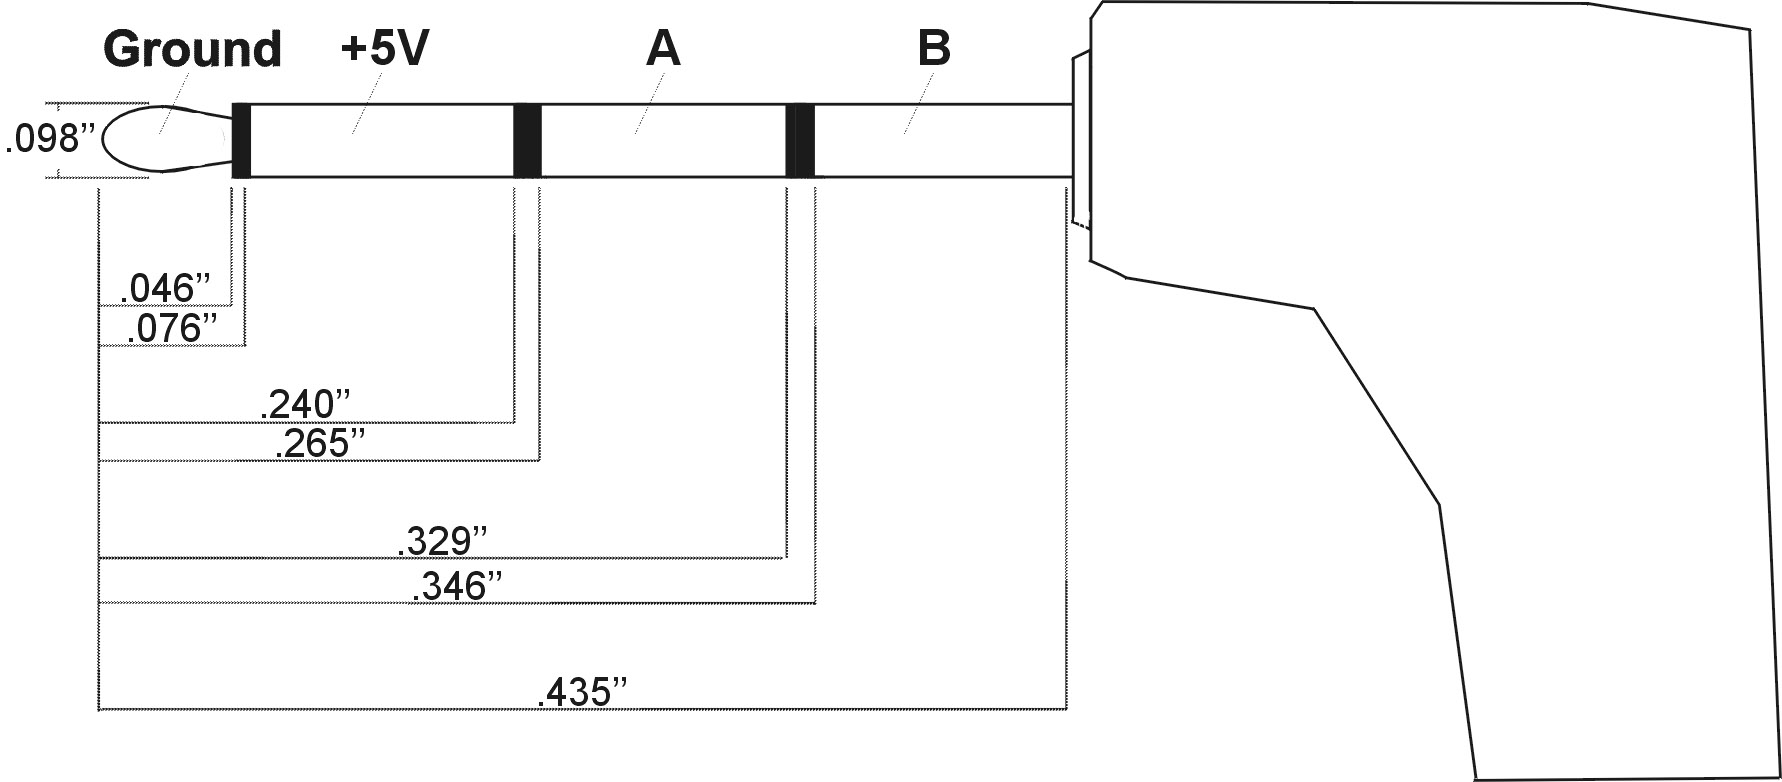 In
the event that any of our readers are electronically inclined (possibly someone
from SR Electronics themselves?), we measured the dimensions of the unsual four-circuit
plug used for the F707's flash connector. The connection between the F707 and
the flash unit is apparently a serial data link, so we'll leave that to the
individual experimenter to figure out. The connector itself strikes us as the
biggest challenge in building an external flash coupler though, as we've never
seen a four-channel mini phone plug anyplace. As a first step toward someone
building a flash coupler for the F707 (or other Sony digicams that connect to
the HVL-F1000), here's a diagram with the physical dimensions we measured from
the plug on the HVL-F1000. (Click on the thumbnail for a large-scale drawing.)
- The "A" and "B" circuits shown on the plug appear to be
the serial data connections.
In
the event that any of our readers are electronically inclined (possibly someone
from SR Electronics themselves?), we measured the dimensions of the unsual four-circuit
plug used for the F707's flash connector. The connection between the F707 and
the flash unit is apparently a serial data link, so we'll leave that to the
individual experimenter to figure out. The connector itself strikes us as the
biggest challenge in building an external flash coupler though, as we've never
seen a four-channel mini phone plug anyplace. As a first step toward someone
building a flash coupler for the F707 (or other Sony digicams that connect to
the HVL-F1000), here's a diagram with the physical dimensions we measured from
the plug on the HVL-F1000. (Click on the thumbnail for a large-scale drawing.)
- The "A" and "B" circuits shown on the plug appear to be
the serial data connections.
Special Recording Modes
Like many Sony digicams, the F707 offers a number of special recording modes,
including TIFF, Voice, E-Mail, Exposure Bracketing, and Burst 3. The TIFF option
saves a 2,560 x 1,920-pixel uncompressed TIFF version of each image, in addition
to the standard JPEG version, at whatever image size you've selected. Voice
mode lets you record a five-second sound clip to accompany a still image, with
the audio recording starting immediately after the image capture. The E-Mail
option records a still image at the 320 x 240-pixel JPEG size for easy e-mail
transmission, in addition to a full-resolution file, at whatever image size
you've selected in the menu system. This enables you to capture full-resolution
images for storage, while at the same time recording smaller versions that you
can just drop into an e-mail to share with others. Exposure Bracketing captures
three images with one press of the Shutter button (one at the normal exposure,
one underexposed, and one overexposed). The amount of variation between exposures
is adjustable through the Setup menu, with options of 0.3, 0.7, and 1.0 EV steps.
"Burst 3" mode captures a rapid series of three images, at approximately
two frames per second. The actual frame rate and the number of images in the
series varies depending on the resolution and quality settings, as well as the
amount of available Memory Stick space.
Movie Mode
The Movie mode is accessed via the Mode dial on top of the camera, by selecting
the film frame icon. You can record moving images with sound at either High
Quality (HQ) 320 pixels, or standard quality 320 x 240 and 160 x 112 pixels.
MPEG EX means that you can record in the non-HQ modes for as long as the Memory
Stick has space. (The amount of available space varies with the quality setting
and resolution.) At the HQ setting, recording time is restricted to a maximum
of 15 seconds because of the larger file size, but the image quality, frame
rate, and audio sampling rate are all significantly increased. Recording starts
with a single press of the Shutter button, and ends with a second press. A timer
appears in the LCD monitor to let you know how long you've been recording and
approximately how much recording time is available. At the 320 x 240- and 160
x 112-pixel settings, the F707 records in the MPEG EX format, capturing eight
frames per second, with audio sampling at 4 KHz. The 320 HQ setting captures
16 frames per second, uses less image compression, and increases the audio sampling
rate to 10 KHz. Additionally, movies captured in the 320 HQ setting play back
full screen in Playback mode, as opposed to the smaller display shown with the
MPEG EX settings.
 The F707 also
provides limited editing capabilities. We don't think digicam users will want
to engage in full A/B roll video editing on their cameras, but we've often found
that we wanted to trim off material from the beginning or end of a video we've
recorded, or to extract an interesting bit of action from the middle of a much
longer clip. The F707 provides for this via an option on the Playback menu called
Divide. As its name suggests, Divide works by dividing movies into two segments.
Do this once to trim away spurious material at the front of the clip you're
interested in, and do it a second time to remove unwanted footage at the end.
Once you've split the movie into parts like this, throw away the segments you
don't need, or keep them around to show your viewers how lucky they are that
you're only showing them the "interesting" parts!
The F707 also
provides limited editing capabilities. We don't think digicam users will want
to engage in full A/B roll video editing on their cameras, but we've often found
that we wanted to trim off material from the beginning or end of a video we've
recorded, or to extract an interesting bit of action from the middle of a much
longer clip. The F707 provides for this via an option on the Playback menu called
Divide. As its name suggests, Divide works by dividing movies into two segments.
Do this once to trim away spurious material at the front of the clip you're
interested in, and do it a second time to remove unwanted footage at the end.
Once you've split the movie into parts like this, throw away the segments you
don't need, or keep them around to show your viewers how lucky they are that
you're only showing them the "interesting" parts!
After enabling the Divide function through the Playback menu, the F707 starts
to play back the movie. You simply press the center of the Four Way Arrow pad
to stop the playback where you'd like to make an edit. From there, you can scroll
backward or forward frame-by-frame until you find the point where you'd like
to divide the movie. You can then either delete the unwanted portion of the
movie or keep it on the Memory Stick. As noted, the Divide function is great
for "editing" out the best part of a movie file, as you can make an
unlimited number of divides. You just can't put the pieces back together again
in the camera. For that, you'll have to use the included MGI VideoWave III SE
software, which is Windows only.
 Clip Motion
Through the Setup menu, you can set the movie recording format to "Clip
Motion," which turns the F707 into an animation camera, recording up to
10 frames of still images to be played back in succession as an animated GIF.
Frames can be captured at any interval, with successive presses of the Shutter
button. When you've captured as many photos as you need, you just press the
center of the Four Way Arrow pad to tell the camera to finish the sequence.
Available image sizes are Normal (160 x 120) and Mobile (80 x 72), and the number
of actual captured frames may vary with image size and available Memory Stick
space. (You have a maximum of 10, but could be constrained to fewer if your
memory is very full.) Files are saved in the GIF format, and are played back
with approximately 0.5 second intervals between frames. Unlike Movie mode, the
flash is available with Clip Motion. (The shot at right was captured using the
Clip Motion feature on Sony's earlier DSC-P1 camera.)
Shutter Lag/Cycle Times
When you press the shutter release on a digital camera, there's usually a lag
time before the shutter actually fires. This time allows the autofocus and autoexposure
mechanisms to do their work and can amount to a significant delay in some situations.
Since this number is rarely reported by manufacturers or reviewers, and can
significantly affect the picture-taking experience, Imaging Resource
now measures shutter lag and cycle times using a proprietary electronic test
setup.
|
|
||
|
|
|
|
| Power On -> First shot |
|
Time from power-up to first shot. Quite fast.
|
| Shutdown |
|
Time to finish writing average large/fine file to the
Memory Stick. (No lens to retract, so quite fast.)
|
| Play to Record, first shot |
|
Time until first shot is captured. Very fast.
|
| Record to play |
|
First time is for immediate switch after pressing shutter,
second is time to display image from quiescent state in capture mode.
NOTE though, that the camera shows a preview of the image right after
the exposure anyway, so the first time (4.59 secs) could be considered
to be nearly zero.
|
| Shutter lag, full autofocus |
|
Longer time is for telephoto, shorter for wide angle. Both figures are slightly slower than average. |
| Shutter lag, manual focus |
|
A bit slower than average. |
| Shutter lag, prefocus |
|
Somewhat faster than average.
|
| Cycle Time, max/min resolution |
2.25 39.3 |
First number is for large/fine
files, second for small/economy. Last time is for full res TIFF files.
Overall, quite fast, but no buffer memory. |
| Cycle time, continuous mode ("Burst 3" mode) |
|
Quite fast. Captures three images, then needs to wait 8.2 (low res) or 12.8 (high res) seconds for buffer to clear before capturing the next burst of 3 shots. |
Overall, the DSC-F707 is a pretty fast camera, with a great startup time thanks to not having to telescope its lens before it can shoot. Autofocus speed is a little slow, although the spread between wide and telephoto performance isn't as large as is often the case. (Many competing cameras autofocus in 0.7 - 0.8 seconds, vs the 1.0-1.1 of the '707.) On the other hand, its prefocus lag is noticeably faster than average, at 0.18 seconds (vs the roughly 0.3 seconds that we usually find). Cycle time is pretty fast, particularly given that the camera doesn't seem to use buffer memory, but writes the files to the card as it goes.
One note we feel compelled to make is that the F707 is one of the cameras that "penalizes" you for pressing the shutter button too quickly after the previous exposure. Quite a few cameras do this (although at least one internet reviewer seems to be selectively criticizing products that do so), but we really don't understand why this should be: Why not just have the camera immediately fire off another exposure if it sees the shutter button still pressed when it's finished saving the previous image? On the F707 (and as noted, many other consumer-level digicams), if you press and hold the shutter immediately after an exposure, the camera won't shoot again until you release and re-press the shutter after it's done processing. - Just a suggestion for Sony's engineers for the next model! (Or, maybe for a firmware upgrade for the current one?)
Operation and User Interface
The F707 packs a lot of camera controls into a relatively small space, given the camera's small body size. The bounty of external controls may seem a bit much at first, but we always appreciate having as much external control as possible, rather than having to scroll through menu items. Given our experience with the F505 and F505V models, we quickly adapted to the F707's control layout. The Mode dial on top of the camera controls the main exposure mode, while things like Flash mode, Macro mode, White Balance, Exposure Compensation, etc. are all controlled via small buttons, either on the rear panel or along the side of the lens barrel. The Command dial, located in front of the Shutter button, allows you to quickly adjust aperture and / or shutter speed without accessing a menu system. We also liked the controlled actuation of the optical zoom control, with its slow or fast zoom operation. Overall, camera operation is smooth and efficient, with an easy-to-navigate LCD menu system and a user interface that doesn't require too much downtime to learn. You may spend a few minutes reading through the manual, but once you get the hang of things, the user interface is quite intuitive.
Our only complaint is with the Set button in the center of the Four-Way Arrow pad. This has always been a somewhat tricky control to implement on Sony cameras, because it must be pushed "exactly" the right way to set a menu selection. We've found that it could take several attempts before we achieve our goal, and many of these attempts lead to accidentally pressing one of the arrow buttons instead. We'd like to see this fine-tuned so that it's more responsive to the user. (Some variance in our experiences here at IR with the camera: Two of us had no problem with the Arrow Pad, one of us was ready to throw the camera through a window. We guess "your mileage may vary" in this respect.)
Control Enumeration
Shutter Button: Located on the right side of the top panel, on a sloped ridge that angles down toward the front of the camera, this button sets focus and exposure when pressed halfway. Fully depressing the button fires the shutter. When the Self-timer is enabled, fully depressing the Shutter button kicks off the 10-second countdown.

Exposure Compensation Button: Adjacent to the Shutter button, this button instantly highlights the exposure compensation adjustment on the LCD screen. Once highlighted, the exposure compensation is adjusted by turning the Command dial (below). A second press of the button removes the highlight.
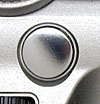
![]()
Command Dial: Directly in front of the Shutter and Exposure Compensation buttons, this black, notched dial controls various exposure settings in any Record mode. In Aperture Priority, Shutter Priority, and Manual exposure modes, it controls exposure compensation, aperture, and / or shutter speed settings. Turning the dial scrolls through the available settings, while a quick press of the dial selects the setting for adjustment (highlighting it in yellow on the LCD screen). Once the setting is selected, it can be adjusted by turning the dial forward or backward.

Manual Focus Adjustment Ring: Encircling the end of the lens barrel, this notched ring adjusts the focus when the camera is in Manual focus mode.

Open Battery Compartment Switch: Located on the right side of the camera (as viewed from behind), this sliding switch unlocks the compartment door, revealing the battery and Memory Stick compartments.

Power Switch: Located underneath the Mode dial on top of the camera, pushing this switch forward turns the camera on and off.
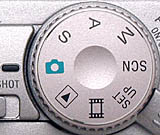
Mode Dial: Sitting on top of the Power switch, this notched dial controls the camera's operating mode. Choices are Program AE (green camera icon), Shutter Priority, Aperture Priority, Manual, Scene, Setup, Movie, and Playback modes.
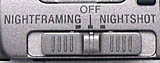
NightShot / NightFraming Switch: To the left of the Mode dial, this switch activates either the NightShot or NightFraming modes, for low-light and no-light shooting and framing.

Four Way Arrow Pad: Situated in the top right corner of the camera's rear panel, this rocker pad has four arrows, one pointing in each direction (up, down, left, right). In any record mode (except Movie), the Up arrow controls the Flash mode, cycling between Auto, Forced, and Suppressed. The Left arrow controls the Quick Review function, which provides a quick playback of the most recently captured image. The Right arrow activates the Macro shooting mode, and the Down arrow activates the Self-Timer mode.
In Playback mode, the Right and Left arrows scroll through captured images. The Up and Down arrows control the playback volume. When an image has been digitally enlarged, pressing the center of this button returns to the normal view.
In all camera modes, the arrow keys navigate through settings menus, highlighting menu options. Pressing the center of the pad confirms menu selections.

Menu Button: To the left of the Four Way Arrow pad is the Menu button, which activates and deactivates the settings menus in all camera modes (except for Setup mode, which automatically displays the menu upon entering the mode).

Index Button: Adjacent to the Menu button on the left, this button pulls up a nine-image index display in Playback mode. Pressing the button a second time activates an information display for the thumbnail image selected, reporting the main exposure information. A third press returns to the normal, single-image display.

Display Button: Located to the right of the viewfinder eyepiece, this button controls the on-screen information display in all camera modes (except Setup mode).
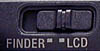
Finder / LCD Switch: Just above the top left corner of the LCD monitor, this switch controls the location of the viewfinder display, placing it in either the viewfinder eyepiece or on the LCD monitor.
Diopter Adjustment Dial: Positioned directly above the viewfinder eyepiece, this dial adjusts the viewfinder to accommodate eyeglass wearers.

White Balance Button: Located on the left side of the lens barrel (as viewed from behind), this button cycles through the available White Balance settings: Auto, Outdoor, Indoor, and One-Push.

One-Push Button: Just below the White Balance button, this button sets the One-Push white balance setting, based on a reading from a white card held in front of the lens.
![]()
Metering Button: Directly to the left of the White Balance button, this button cycles through the Multi-Pattern, Center-Weighted, and Spot metering options.

AE Lock: The next button to the left of the Spot Metering button, this button locks the exposure reading until it's pressed again, or until the Shutter button is pressed.

Focus Switch: Next in line beside the AE Lock button, this sliding switch alternates between Auto and Manual focus modes.
Zoom Control: The final control in the series on the left side of the lens barrel, this rocker button controls the optical and digital zoom in any Record mode. In Playback mode, this button controls the digital enlargement of captured images, as much as 5x.
Camera Modes and Menus
Program AE: Marked on the Mode dial with the green camera symbol, this mode places the camera in control of aperture and shutter speed, while the user controls all remaining exposure decisions.
Shutter Priority (S): Shutter Priority mode allows the user to control the shutter speed, from 1/1,000 to 30 seconds, while the camera selects the best corresponding aperture setting. The user retains control over all other exposure variables.
Aperture Priority (A): As the opposite of Shutter Priority mode, Aperture Priority mode gives the user control over the aperture setting, from f/2 to f/8, while the camera chooses the best shutter speed. All other exposure controls are available to the user.
Manual Exposure Mode (M): This mode provides total control over the exposure, with the user able to select both aperture and shutter speed independently of each other, as well as control all other exposure variables.
Scene (SCN): Scene mode offers three preset shooting modes to choose from -- Twilight, Landscape, and Portrait -- which set the camera's exposure controls for photographing each specific subject. The available exposure settings depend on the scene selected.
Movie Mode: Noted on the Mode dial with the film strip icon, this mode allows the user to capture moving images with sound.
Record Menu: In each of the above recording modes, pressing the Menu button pulls up the following menu selections (some options are not available in all modes):
 ISO:
Sets the camera's light sensitivity to Auto or 100, 200, or 400 ISO equivalents.
ISO:
Sets the camera's light sensitivity to Auto or 100, 200, or 400 ISO equivalents.
Playback Mode: Indicated on the Mode dial with the traditional Playback symbol, this mode allows the user to scroll through captured images on the Memory Stick. Images can be deleted, protected, copied, resized, rotated, or set up for printing on DPOF devices. Movie files and Clip Motion animations can also be played back. Pressing the Menu button displays the following options:
 Delete:
Deletes the currently displayed image from the Memory Stick.
Delete:
Deletes the currently displayed image from the Memory Stick.
Setup Mode: This mode allows the user to change a variety of camera settings. The Setup menu is automatically displayed upon entering the mode.
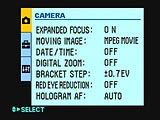 Expanded
Focus: Turns the Expanded Focus option on or off. Expanded Focus automatically
doubles the on-screen image while focusing in Manual Focus mode.
Expanded
Focus: Turns the Expanded Focus option on or off. Expanded Focus automatically
doubles the on-screen image while focusing in Manual Focus mode.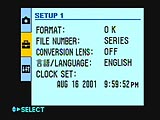 Format:
Formats the Memory Stick, erasing all files (even write-protected ones).
Format:
Formats the Memory Stick, erasing all files (even write-protected ones). LCD
Brightness: Controls the brightness of the LCD display. Options are
Bright, Normal, and Dark.
LCD
Brightness: Controls the brightness of the LCD display. Options are
Bright, Normal, and Dark.
 Image
Storage and Interface
Image
Storage and Interface
The F707 uses the proprietary Sony Memory Stick technology for image storage.
A 16MB Memory Stick is supplied with the camera and additional media are available
up to 128MB. Individual images can be write-protected from accidental erasure
(except through card formatting) via the Protect option under the Playback settings
menu. Individual write-protection also prevents the image from being changed
in any way, such as rotating or resizing. The entire Memory Stick can be write-protected
by sliding the lock switch on the stick into the locked position, which also
guards against the entire stick being formatted.
The F707's LCD monitor reports storage information in the detailed information
display, including the current number of images captured, how many additional
images can be stored (based on current image resolution and quality settings),
and a small card graphic lets you know approximately how much space is left
on the Memory Stick. (In Movie mode, the camera reports the available recording
time.) Through the Playback settings menu, you can designate whether the camera
numbers each image sequentially (from one Memory Stick to the next), or restarts
file numbering with each new Memory Stick. The Playback menu also offers a Resize
option, as well as Copy and Rotate tools. The camera's Digital Print Option
Format (DPOF) compatibility allows you to mark specific images for printing
on a DPOF-compatible printer. Through the Setup menu, you can decide whether
or not to print the date and / or time on the image as well.
Image Size options include 2,560 x 1,920-, 2,560 (3:2), 2,048 x 1,536-, 1,280
x 960-, 640 x 480-, and 320 x 240-pixels (E-Mail recording option). Movie file
sizes are 320 (HQ), 320 x 240-, and 160 x 112-pixels for MPEG Movies, or 160
x 120- and 80 x 72-pixels for Clip Motion files. In addition to the uncompressed
TIFF file format, the F707 offers both Fine and Standard JPEG compression levels,
and a GIF option for the Clip Motion recording mode.
The table below shows the approximate still image capacities and compression
ratios for a 16MB Memory Stick (main resolution sizes):
|
Resolution/Quality |
|
|
|
|
| Highest Resolution 2560 x 1920 |
Images | 6 |
|
|
| Approx. Compression |
5.5:1 |
|
|
|
| High Resolution 2048 x 1536 |
Images |
|
|
|
| Approx. Compression |
|
|
|
|
|
1280 x 960 |
Images |
|
|
|
| Approx. Compression |
|
|
|
|
|
Resolution 640 x 480 |
Images |
|
|
|
| Approx. Compression |
|
|
|
|
The F707 is also accompanied by a USB cable for quick connection to a PC or
Macintosh computer, as well as a software CD containing interface software and
USB drivers. Data transfer is very fast: We clocked a download of a 5,372KB
file at 8.72 seconds, a transfer rate of 616 KB/second. This is about as fast
as we've measured for a USB-connected camera.
Lost Images? - Download this image-recovery program so you'll have it when
you need it...
Since we're talking about memory and image storage, this would be a good time
to mention the following: I get a ton of email from readers who've lost photos
due to a corrupted memory card. It's tragic when it happens, there are few things
more precious than photo memories. Corrupted memory cards can happen with any
card type and any camera manufacturer, nobody's immune. "Stuff happens,"
as they say. A surprising number of "lost" images can be recovered
with an inexpensive, easy to use piece of software though. Given the amount
of email I've gotten on the topic, I now include this paragraph in all my digicam
reviews. The program you need is called PhotoRescue, by DataRescue SA. Read
our review of it if you'd like, but download the program now,
so you'll have it. It doesn't cost a penny until you need it, and even then
it's only $29, with a money back guarantee. So download PhotoRescue for
Windows or PhotoRescue for
Mac while you're thinking of it. (While you're at it, download the PDF
manual and quickstart
guide as well.) Stash the file in a safe place and it'll be there when you need
it. Trust me, needing this is not a matter of if, but when... PhotoRescue
is about the best and easiest tool for recovering digital photos I've seen.
(Disclosure: IR gets a small commission from sales of the product, but I'd highly
recommend the program even if we didn't.) OK, now back to our regularly
scheduled review...
Video Out
 The F707 comes
equipped with an Audio / Video cable for connection to a television set. (Through
the Setup menu, users can select NTSC signal format for U.S. and Japanese systems
and PAL for European systems.) Once connected to the TV, you can review images
and movies or record them to videotape.
The F707 comes
equipped with an Audio / Video cable for connection to a television set. (Through
the Setup menu, users can select NTSC signal format for U.S. and Japanese systems
and PAL for European systems.) Once connected to the TV, you can review images
and movies or record them to videotape.
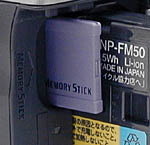
Power
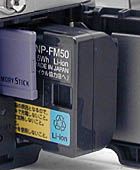 The F707 is powered
by an NP-FM50 InfoLITHIUM battery pack (M series) and comes with an AC adapter
which doubles as an in-camera battery charger. InfoLITHIUM battery packs actually
exchange information with the camera, reporting approximately how many minutes
of battery life are left. This information is displayed on the LCD monitor and
the electronic viewfinder with a small battery graphic. The AC adapter plugs
into a small socket on the camera's back panel (lower left corner). It can run
the camera without a battery inserted, or charge the battery when the camera
isn't in use.
The F707 is powered
by an NP-FM50 InfoLITHIUM battery pack (M series) and comes with an AC adapter
which doubles as an in-camera battery charger. InfoLITHIUM battery packs actually
exchange information with the camera, reporting approximately how many minutes
of battery life are left. This information is displayed on the LCD monitor and
the electronic viewfinder with a small battery graphic. The AC adapter plugs
into a small socket on the camera's back panel (lower left corner). It can run
the camera without a battery inserted, or charge the battery when the camera
isn't in use.
The Li-Ion battery packs used in Sony cameras prevent us from making our usual
direct power measurements, but the good news is that the InfoLITHIUM system
reports projected camera runtime while the battery is being used in the camera.
We still recommend users purchase and pack along a second battery. (Another
advantage of the Li-Ion technology used in the InfoLITHIUM batteries is that
they don't "self-discharge" like conventional NiMH rechargeable cells
do, and so can hold their charge for months on the shelf or in your camera bag.)
|
|
|
| Capture Mode, w/LCD |
|
| Capture Mode, w/EVF |
|
| Image Playback, w/LCD |
|
| Image Playback, w/EVF |
|
Run times from the "M" series InfoLITHIUM battery are very good. Three
hours in capture mode with the LCD on is really excellent. We still strongly
recommend purchasing a spare battery (Murphy's Law, you know), but it 's much
less a necessity with the F707 than most digicams.
Unfortunately, the proprietary power connection on the back of the F707 precludes
its use with third-party external battery packs, like the Powerex PowerBank
units we use with our own cameras.
Included Software
| |
||
|
The F707 comes with a software CD loaded with MGI PhotoSuite SE and MGI VideoWave
III SE. Two versions of MGI PhotoSuite are included on the CD. Version 8.1 is
compatible with Windows 95/98/98SE/ME/2000/NT4.0; Version 1.1 is compatible
with Macintosh OS 7.6.1 to 9.0. Unfortunately for Mac users, VideoWave III SE
is compatible with Windows systems only (the same versions as PhotoSuite). MGI
PhotoSuite SE retrieves images from the camera in a very organized manner, allowing
you to view them with a slide show or in album format, and then set them up
for printing. In addition to traditional photo editing and manipulation tools,
PhotoSuite offers a variety of templates to help you turn your images into mock
magazine covers, sports cards, greeting cards, and calendars. Combined with
the camera's Picture Effects menu options, MGI PhotoSuite SE allows you to be
very creative with your images. MGI's VideoWave III SE provides minor video
editing and enhancement tools, allowing you to cut out frames, add music, and
apply creative effects.
In the Box
Included with the DSC-F707 are the following items:
Test Results
In keeping with our standard policy, my comments here are rather condensed, summarizing
my key findings. For a full commentary on each of the test images, see the DSC-F707's
"pictures" page.
As with all Imaging Resource camera tests, I encourage you to let your own eyes be the judge of how well the devices performed. Explore the images on the pictures page, to see how well the F707 performed, and how its images compare to other cameras you may be considering buying.
Wow! The DSC-F707 figuratively knocked my socks off with its resolution and image quality: While it's important to note that there's a lot more to the F707 story than "just" image quality (what with NightFraming, Hologram AF, etc), the camera surely delivers in that department. In virtually every parameter, the F707 delivered outstanding images: Hue, saturation, tone, noise, and resolution were all excellent. On my "Davebox" test target, the F707 reproduced the subtle pastels accurately, handled the often-difficult red/magenta separation with ease, and showed excellent hue accuracy and saturation on the large primary color blocks. It also handled the difficult blue colors of the flowers and model's pants on the Outdoor Portrait test well, with only a slight tendency to shift those colors to purple, as so many digicams seem to do. Overall, it's hard to find any fault with the F707's color handling in any circumstance.
The camera's white balance system also deserves special mention, as I found it very accurate under a wide variety of circumstances. The prototype F707 I tested showed some tendency to introduce a greenish tinge when using the Automatic white balance setting, but that defect appears to be entirely corrected in the production firmware. In particular, I was impressed by how well the automatic white balance option did on the tough "Indoor Portrait" test. Many cameras have a hard time with incandescent room lighting, although those with manual white balance options generally manage to get a decent exposure. Cameras' automatic white balance systems almost never manage to neutralize the heavy yellow cast of the room lighting though. I was thus very surprised that the F707 in fact produced a nearly perfect shot with the auto white balance option selected.
As just noted, the slightly cyan/green cast to the images shot under outdoor lighting with the prototype seems to be comletely cured in the production firmware. Readers have written to ask me if I'd seen an over-saturation in reds reported by some reviewers. I didn't notice this the first time around, but looked back over the test results to see what I could find. Interestingly, it does seem that the F707 over-saturates very strong reds, but curiously, this doesn't seem to affect more pastel shades. Of the shots I normally take, only the red roses in the outdoor portrait shot looked too strong, any other shades of red looked quite OK. (For instance, both the skin tones and the pink flower in the outdoor shot look very natural.) In revisiting this topic with the production F707, it looked to me like the oversaturation wasn't quite as pronounced, but was still there. As noted though, it seems to only affect red hues that are highly saturated, the effect not extending into more pastel or less saturated shades. (Thanks to reader Wade Hathaway for the forum query asking me about this issue.)
WIth its 5 megapixel CCD and razor-sharp Carl Zeiss lens, resolution is a big part of the F707's story. As you might expect, it performed superbly on my "laboratory" resolution test chart. While minor artifacts crept in at spatial frequencies as low as 1,000 lines per picture height, I found "strong detail" out to 1,200 lines (!) both horizontally and vertically, and "extinction" of the target patterns didn't occur until about 1,650 lines (I dropped both those numbers slightly after scrutinizing the shots from the production camera. They're still very good resolution numbers though.) Throughout all of my testing, I found exceptional detail, even in the difficult shrubbery of the House poster and the outdoor far-field shot.
Actually, the F707's resolution comes close to the very best I've seen from any digicam I've tested, at any price point. How close? Check out the comparison below. (Click to see a full-sized version.) This is a direct comparison between a F707 and Nikon D1X pro SLR, my current "reference standard" for image resolution (and most any other image-quality parameter) among the cameras I've tested. (Note: To head off the inevitable emails, no, I haven't tested the Kodak DSC760 6 megapixel pro SLR yet, so can't comment on its resolution.)
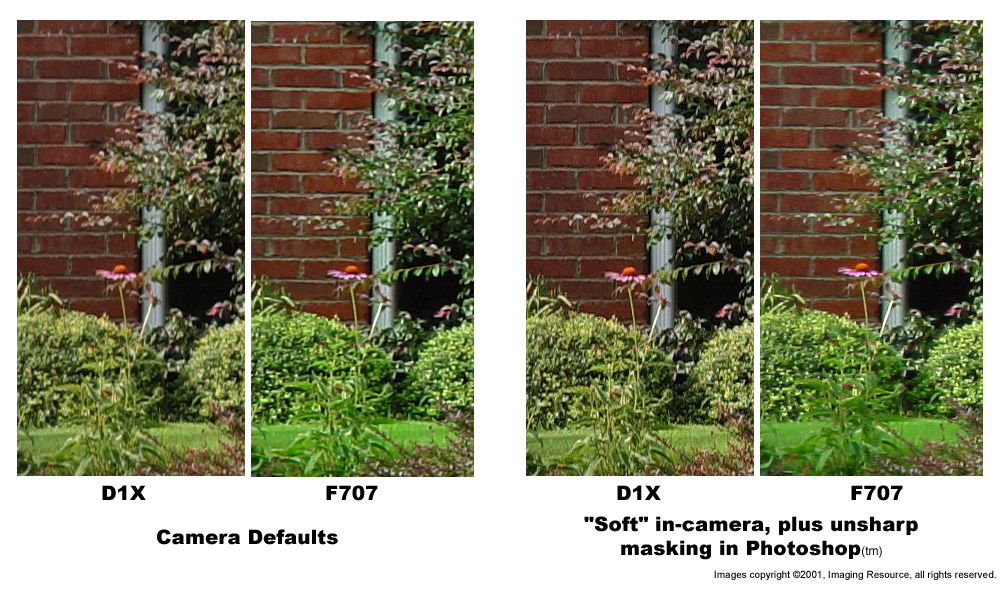
Because the two cameras' in-camera sharpening is so different, I've shown comparisons with the default sharpening, and then with the images shot with in-camera sharpening off and unsharp masking applied in Photoshop. The results are interesting, to say the least. To my eyes, the D1X wins for sharpness and clarity (an ill-defined term meant here to indicate that it simply looks like I can see more detail more clearly in the D1X image). It's impressive just how closely the F707 matches the D1X's resolution though: If your budget is less than a thousand dollars, and you need maximum resolution and detail, the F707 is the camera to get.
Optical distortion on the F707 was a bit higher than I expected. At wide angle, barrel distortion is about average, at 0.74 percent. The telephoto end was slightly better, but showed 0.55 percent pincushion distortion, a bit more than average among the cameras I've tested. (To be fair though, the other cameras mostly have 3x zoom lenses, not the 5x of the F707.) Chromatic aberration was also a bit higher than I'd like to see, although better than average among long-zoom digicams. I saw 2-3 pixels of color on either side of the target lines on the resolution target. I saw this some in shots of trees against bright sky, as the long-familiar "purple plague" syndrome, with purple highlights around dark areas, shooting against bright backgrounds. The purple plague wasn't as bad as I've seen on some cameras but definitely still there. (Frankly, there's only one or two cameras on the market that seem to manage to avoid this, so no big demerits for Sony on this score. I'd sure like to see digicam manufacturers address this problem though...)

With full manual exposure control and a maximum shutter speed of 30 seconds, the F707 handles low-light shooting with ease. Not only that, but noise levels are amazingly low! The crop above is taken from a shot at 1/16 foot-candle (*0.687 lux), a full three stops down from typical city streetlighting. While the prototype camera required some color-correction, the shot above from the production model has had no tonal or color correction applied to it. (! - This level of color rendition at this low a light level is quite rare in my experience.)This was a 20 second exposure at ISO 100! Frankly, there are some cameras with this much noise in broad daylight. Needless to say, the F707 produced clear, bright, usable images down to about 1/16 foot-candle (or 0.67 lux) with good color at all three ISO settings. The camera's Auto white balance had some difficulty adjusting the color balance at the lower light levels, but began accurately processing the scene at 1/4 foot-candle (2.7 lux). The F707 automatically employs a Noise Reduction system at shutter speeds slower than two seconds, which did an excellent job of keeping noise in check. Even at ISO 400, noise was very minimal. The hologram AF is another big plus for low light shooting - the camera focused perfectly at all light levels, including pitch blackness. Really an amazing low-light machine!
Actually, noise (or the lack of it) is an important part of the F707 story. Buried in the Sony specs was mention of "ClearColor Noise Reduction." I'd noticed that the F707's images seemed to be very low noise, whether shooting at low light (as above), or in daylight. I asked Sony what ClearColor NR was all about, and were intrigued by the answer. Apparently, the F707 processes chrominance and luminance separately in the camera electronics, before combining them to produce the RGB data recorded in the file. (This is a video processing trick, so no surprise to find it in a Sony camera, given Sony's looong experience in broadcast video.) What the ClearColor trick is about is that the camera leaves the luminance signal alone (preserving detail that our eyes are sensitive to), but closely examines the chrominance data. Wherever the difference in chrominance from one pixel to the next is less than a certain threshold, the camera "flattens" the chrominance, eliminating noise that exists solely in the color channel. The chrominance and luminance signals are then combined and separated into RGB components. (Actually, I suspect what happens is a lot more sophisticated than what I just described. For instance (for those readers into image processing), I expect that what's used is some sort of a median-filter kernel, as opposed to a simple thresholding.) Regardless of the specifics, the results are pretty amazing: The F707 has lower image noise than any camera I've tested, with the sole exception of the Nikon D1X. (One wonders if Nikon might not be using this sort of approach in the D1X as well...) - And yes, that includes cameras like the Canon G2, which offer an ISO50 option: The F707 at ISO 100 is actually "cleaner."
I thought some of our readers would be interested in seeing actual noise
measurement results from three four cameras noted for their
low noise: The new Canon G2 (an excellent performer in this respect), the
F707, the Nikon D1X, and the Canon D30. The screen shot above shows the histogram
display from Photoshop. Four options are available, showing histograms for
luminosity and the R, G, and B color channels. To perform the test, I selected
90x90 pixel blocks from a flat tint from the MacBeth chart on the Davebox
target, and looked at the stats. Here's what I found:
|
|
||||
| Camera |
|
|
|
|
| Canon G2, ISO 100 |
|
|
|
|
| Canon G2, ISO 50 |
|
|
|
|
| Sony DSC-F707 ISO 100 |
|
|
|
|
| Nikon D1X, ISO 125 |
|
|
|
|
| Canon D30, ISO 100 |
|
|
|
|
UPDATE: Reader Cinstance Chen called us rather severely to task for leaving out the Canon D30 from the comparison, as that camera is widely recognized as being at the top of the market in terms of noise performance. Cinstance was absolutely right in doing so, I'd totally overlooked the D30, it having been a year since I reviewed it. In fact, the D30 does do quite a bit better than even the D1X, making the F707 the *third* best camera noise-wise that I've tested. (At least, so I think, the noise measurement is a new one I'm experimenting with, so I don't have a lot of historical data for it.) The general conclusion still stands though, buyers of the F707 aren't giving up anything in noise performance simply because the camera lacks an ISO 50 setting. (In the rumor frenzy leading up to the F707's announcement, the lack of an ISO 50 option was voiced by some as a strike against the F707. I didn't find this to be the case.)
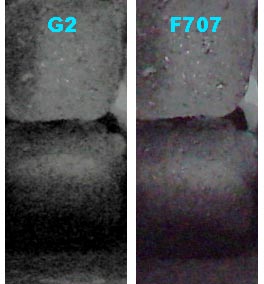 UPDATE #2: (Dave here.) Reader
Bryan Siverly wrote to say that he had both a Canon G2 and a Sony F707 in
his posession, and was considering returning the 707 because its shadow noise
was noticeably higher. This was very interesting because the noise measurements
I took (see above) showed the 707 having lower noise than the G2, not higher.
When I looked in the deep shadows of the Davebox, and at the darker swatches
of the MacBeth and grayscale targets, I did indeed see more noise there than
in the midtone regions. It appears that the 707 delivers excellent noise levels
at roughly midtone and brighter levels, but does less well in deep shadows.
It seems that a complete characterization of image noise will really require
measurements at shadow, midtone, and highlight brightness values. For now,
the 707 does seem to fare a bit worse than the G2 in deep shadows, but I didn't
think it was overall too bad in that respect.
UPDATE #2: (Dave here.) Reader
Bryan Siverly wrote to say that he had both a Canon G2 and a Sony F707 in
his posession, and was considering returning the 707 because its shadow noise
was noticeably higher. This was very interesting because the noise measurements
I took (see above) showed the 707 having lower noise than the G2, not higher.
When I looked in the deep shadows of the Davebox, and at the darker swatches
of the MacBeth and grayscale targets, I did indeed see more noise there than
in the midtone regions. It appears that the 707 delivers excellent noise levels
at roughly midtone and brighter levels, but does less well in deep shadows.
It seems that a complete characterization of image noise will really require
measurements at shadow, midtone, and highlight brightness values. For now,
the 707 does seem to fare a bit worse than the G2 in deep shadows, but I didn't
think it was overall too bad in that respect.
UPDATE based on production model 707: Measuring the noise levels on the darkest swatch of the MacBeth chart in the Davebox target, the F707's noise at ISO 100 does in fact appear to be slightly higher than that of the G2 at ISO 100, and a fair bit higher than the G2 shooting at ISO 50. Interestingly, at ISO 100, the F707's luminance noise is actually lower than that of the G2 (standard deviation of 1.59 vs 1.7), but the noise in each of the individual color channels is higher. This can be seen in the illustration at right: These crops are from the ISO 100 Davebox tests, with a pretty extreme gamma boost (2.8) applied in Photoshop. The shadows on the G2 shot are a bit grainier and more mottled looking (higher luminance noise), but the F707's show more coloration (higher color noise). This is all probably a bit overwrought, as both cameras do very well in the noise department, but I thought it important to qualify my earlier effusive enthusiasm over the F707's noise performance, to incorporate Bryan Siverly's observations about shadow noise levels, and place the whole issue fully in context.
The F707's electronic "optical" viewfinder is very accurate, showing approximately 98 frame accuracy at both wide angle and telephoto lens settings. Therear-panel LCD monitor is also very accurate, showing approximately 97 percent of the image area at the wide angle setting, and approximately 98 percent at telephoto. Given that I generally prefer LCD monitors to be as close to 100 percent accuracy as possible, the F707's LCD monitor performs well here (and the electronic viewfinder isn't too shabby either, since it's essentially a miniature version of the LCD monitor).
The F707 captures a very tiny macro area, among the smallest I've seen at just 1.68 x 1.26 inches (42.79 x 32.19 millimeters). (Although not the smallest, that honor still goes to the Nikon 995.) Resolution was again very high, though the sharpest details were in the center of the frame, on the dollar bill. The brooch and coin details were very soft due to a limited depth of field up that close, and there seemed to be quite a bit of curvature of field. (Corners were rather soft.) Because of its position and the huge lens cross-section, the F707's flash really doesn't work up close: Figure on getting an external flash or using floods for macro shooting.
While its NightShot, NightFraming, and Hologram AF capabilities put it in a class of one, the F707's image quality really raises the bar on the rest of the prosumer camera field. Without question, its resolution and color rival those of vastly more expensive professional products. When I looked at the first test shots, I could hardly believe the level of detail I could see in them, and its low noise levels were a big surprise as well. Although I had a few minor quibbles here and there, the DSC-F707 really sets a new standard for prosumer digicam performance. VERY highly recommended!
<<Cyber-shot DSC-F707 Sample Images | Additional Resources and Other Links>>
Reader Comments!
Questions, comments or controversy on this product? Click
this link to see what other Imaging Resource readers have had to say about
the Sony Cyber-shot DSC-F707, or add comments of your own!