Back
to Full Sony Cyber-shot DSC-F828 Review
Back
to Full Sony Cyber-shot DSC-F828 ReviewGo to Sony Cyber-shot DSC-F828 Data Sheet
Go to Sony Cyber-shot DSC-F828 Pictures Page
Up to Imaging Resource Cameras Page
Use your browser's "Back" button to return to the previous page, or the links at the top and bottom of this page to navigate to related information. If you have difficulty fitting the text on this page onto your printer output, simply resize your browser window to a narrower width and print again.
Remember us when it's time to buy!
Dave here: Have our reviews been helpful to you? (Is this article you're reading right now useful?) Preparing this level of information on as many products as we do is incredibly hard work, not to mention expensive. Things on the Internet may look like they're free, but they're not. (As a lot of big dot.com companies are finding out these days.) Somewhere, somebody has to pay to produce worthwhile content. YOU can help us though, by remembering us when it comes time to make your purchase. Would you consider coming back to our site and clicking-through to one of our advertisers to make your purchase? Every dollar you spend with one of our advertisers helps us directly (in affiliate fees) or indirectly (the advertiser will keep renewing their ad contract with us). To make it easy for you to support us, here's a URL you can visit, to see all our current advertisers, with links to click on that will register your visit to them as having come from our site. It's up to you where you buy, but Mike, Mike, Kim, Yazmin, Marti and I would be really grateful if you'd help us out by choosing one of our advertisers to purchase from.
Thank you for your support!
Dave Etchells, Founder & Publisher
Visit our "Buy Now" Page:
https://www.imaging-resource.com/buynow.htm
Back
to Full Sony Cyber-shot DSC-F828 Review
Go to Sony Cyber-shot DSC-F828
Data Sheet
Go to Sony Cyber-shot DSC-F828
Pictures Page
Up to Imaging Resource Cameras
Page
Sony Cyber-shot DSC-F828Sony extends their high end to encompass 8(!) megapixels and a sharp 7x Zeiss zoom lens. - And Sony's new RGB+E sensor technology for more accurate color! Review First Posted: 08/15/2003, Updated: 02/05/04 |
|
 |
|
8.0-megapixel CCD for image sizes to 3,264 x 2,440
pixels |
| |
Ultra-sharp 7x zoom lens (f/2.0-2.8 too!), now with
manual zoom control via lens ring. |
|
| |
Sony's new "RGB+E" sensor
technology for dramatically improved color accuracy. |
|
| |
The fastest prosumer digicam on the planet? - Maybe so... | |
| |
Many enhancements and feature upgrades
over the previous F717. |
Manufacturer Overview
Sony Electronics Inc. has long been a dominant player in the digicam marketplace,
with a wide range of models enjoying enormous popularity with consumers.
Currently, they're maintaining what's arguably the broadest line of digicams
in the industry, with multiple models in a number of distinct product lines.
At the high end, they rocked the digicam world in 2001 by introducing the
DSC-F707, a five megapixel model with a tack-sharp Carl Zeiss lens and a
host of unprecedented features, all for under $1,000. The F707's infrared-based
Night Shot and Night Framing modes and the completely unique Hologram Autofocus
created a camera that could quite literally shoot (and focus) in total darkness.
Last year, they updated the F707 to the F717, adding a number of enhancements that together constituted a significant upgrade to an already highly capable camera. This year (this is being written in August, 2003), they migrated many of the F717's features into a compact body style, the result being the new DSC-V1 model.
This time around, at a time when five-megapixel cameras are beginning to become commonplace, Sony has leapfrogged the competition once again, extending the F717 "big lens" concept by boosting the sensor resolution to 8 megapixels (!) and the lens to a 7x zoom, equivalent to a 28-215mm lens on a 35mm camera. - And it's not just any 7x zoom lens either, but one with a fast f/2.0-2.8 maximum aperture. The result is the new DSC-F828, a burly uber-camera to redefine the high end of Sony's lineup.
Some of the biggest news with the 828 is that it's the first vehicle for Sony's new "RGB+E" image sensors, which use four different color filters, rather than the usual three. (Most digicams distinguish color thanks to red, green, and blue color filters over their individual pixels. The 828 adds "Emerald" (more or less a cyan color) filters, replacing half of what would otherwise have been green pixels on a normal CCD chip.) This new sensor color space dramatically improves color rendition in some parts of the spectrum. In particular, it reveals more shading and detail in highly-saturated yellows, reds, and oranges, and more renders some shades of blue and blue-green more accurately. In early samples I saw, the RGB+E technology looked like it held great promise for significantly improving color accuracy and the ability of cameras to faithfully render subtle hues in brightly-colored subjects. Now, after some time spent with a production model, I have to say that it looks like the promise was fulfilled. - The F828 does a much better job with highly saturated colors of certain hues than any other digicam I've seen to date. (Interested readers can peruse our original news stories covering the announcement of RGB+E technology here and here.)
Overall, the 828 will look familiar to people acquainted with the previous F717, although it also shares some heritage with Sony's much-earlier "cult" model, the D770. There's one significant departure internally though, that frankly surprised me given Sony's recent history: A Type II CompactFlash memory slot! While there's still a Memory Stick slot hidden inside the battery compartment, the inclusion of a CF slot struck me as an indication of how seriously Sony wants to pursue the high end "prosumer" digicam market. - A lot of prospective buyers in that market segment already have a significant investment in CF cards, so the presence of a CF slot in the 828 removes a potential barrier for many prospective buyers.
It's clear that the F828 constitutes a technological breakthrough in several areas, including the aforementioned RGB+E sensor technology, and also in its autofocus speed and shutter response. It does suffer from higher image noise than we've seen in the best 5-megapixel digicams though, and its lens also seems somewhat prone to the "purple fringing" problem that's plagued the digicam world for years now. Overall though, the F828 is an incredible picture-taking machine that raises the bar for the entire field. Read on for all the details!
High Points
Executive Overview
Sorry, no "Overview" for this camera, you'll have to read the full
review for all the details. (I'll try to get back here to write an overview,
but no promises. ;-)
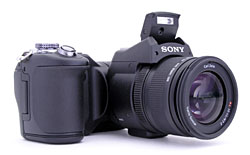
Design
Updating Sony's highly popular Cyber-Shot line, the DSC-F828 expands the
previous DSC-F717's capabilities with a true 8.0-megapixel Super HAD "RGB+E"
CCD, 7x optical zoom lens, dual Memory Stick/CompactFlash compatibility,
and a host of other updated features. The DSC-F828 shares a similar design
with the previous F717 model, with the same rotating lens barrel, but with
a larger body, larger lens, and an all-black metal case. The F828 continues
with the features that made the previous F707 and F717 models such dramatic
entries on the digicam scene, with Hologram AF and Night Shot technologies,
but adds a longer-sequence Burst mode with Speed Priority and Framing Priority
settings, as well as a RAW data format and a handful of Noise Reduction modes
for low-light shooting.

The rotating lens barrel that accounts for a large portion of the F828's
bulk continues to be one of my favorite design features. You can rotate the
lens approximately 100 degrees -- from about 70 degrees upward, to a 30 degree
downward angle. Since the tripod mount is on the bottom of the lens barrel,
you can easily tilt the camera body upwards to view the LCD monitor more
clearly when the camera is mounted on a tripod, something I really appreciate
when working in the studio, and very handy for ground-level macro shots as
well. As I've noted on previous digicams of this design, the rather large
lens requires a different grip than most people are accustomed to, but it's
fairly intuitive once you get a feel for it, and contributes to the stability
of the camera when hand-holding it. On the F828, the lens barrel features
two separate control rings, one for focus and the other for zoom, operating
much like a standard 35mm lens. (The previous F717 had a single ring which
controlled both focus and zoom, so the F828's dual-ring design is even more
comfortable to operate.) On the 828, the zoom ring is directly coupled to
the lens mechanism itself, making for very precise, sure-footed control.
(I greatly prefer this sort of arrangement to the "fly by wire"
zoom of the F717 and most other digicams on the market.) The large lens is
heavy though, contributing to the camera's hefty(!) 34.5 ounce (2 pounds,
2.5 ounces, 978 gram) weight, and therefore requires that you use your left
hand to support the lens, while your right grips the body. The body itself
is relatively compact, though a fair bit larger than the body on the previous
F717, with a much more substantial handgrip. In fact, the handgrip is large
enough that I wonder whether people with small hands will find it awkward
to hold. Given the 828's bulk and weight, it's best used with the accompanying
neck strap, and I suggest investing in a small camera bag or soft cover to
protect the LCD monitor and optics. A spring-loaded lens cover accompanies
the camera, but it doesn't have any provision to tether it to the camera
body.
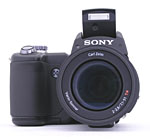
In addition to the large lens barrel that dominates the front of the camera,
the Shutter button is also visible on a sloping ledge off the camera's top
panel, as well as the front of the pop-up flash compartment above the lens.
Tucked between the lens barrel and handgrip is the camera's microphone. Surrounding
the middle portions of the lens barrel are two ridged control collars, the
front controlling zoom and the rear controlling focus. The collars work much
like the focus rings on a conventional 35mm camera lens, with the zoom ring
coupling directly to the lens mechanism, while the focus adjustment is still
a "fly by wire" adjustment. (That is, the focus ring simply instructs
the camera which way to adjust the focus, rather than connecting mechanically
to the lens elements themselves.) On either side of the Sony logo, just beneath
the pop-up flash compartment, are two high-output infrared LEDs which extend
the camera's low-light capabilities through the Hologram AF and Night Shot/Night
Framing features (more on these later). A rather substantial hand grip is
built into the camera's right side, which helps counterbalance the weight
of the lens when holding the camera. As noted though, while the handgrip
is large enough to be comfortable for even the largest, American-sized hands,
it seems a little outsized for people with more average hand dimensions.
- My wife Marti and writer-assistant-gal Stephanie both felt that the grip
was over-large and awkward to hold.
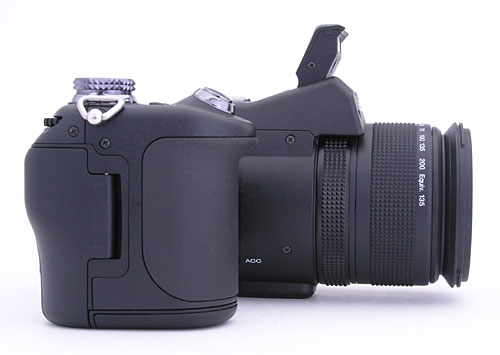
On the right side panel is a neck strap attachment eyelet, positioned just
above the CompactFlash memory card compartment. A latch on the rear panel
must be released before sliding the compartment door out to open it. Inside
the compartment is a slot CompactFlash Type I or II memory cards. Also visible
in this view is the "ACC" Sony accessory connection jack on the
side of the lens barrel, near the bottom, which connects Sony accessories,
such as the HVL-F1000 or new HVL-F32X flash units or the RM-DR1 remote shutter
release.
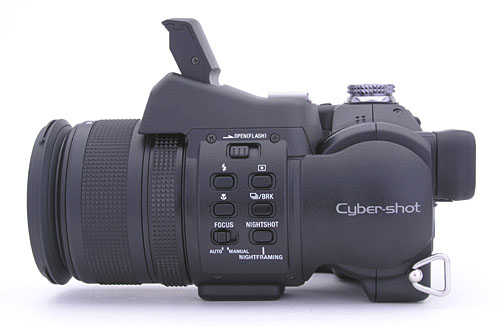
The left side of the camera holds no fewer than seven different control buttons,
arranged on the side of the lens barrel. Starting at the top, they include
the Open Flash switch, Flash button, Spot Metering button, Macro button,
Drive button, Focus switch, and Night Shot/Night Framing control. All of
these controls are within easy reach of your left hand when holding the camera
two-handed. Most of them are used in conjunction with the Command Dial on
the camera's back panel. To make selections, you press and hold one of these
buttons and rotate the Command dial. A clever animated "virtual dial"
appears in the viewfinder, showing you the available selections and your
current choice. Also on the left side of the camera is the second neck strap
attachment eyelet.
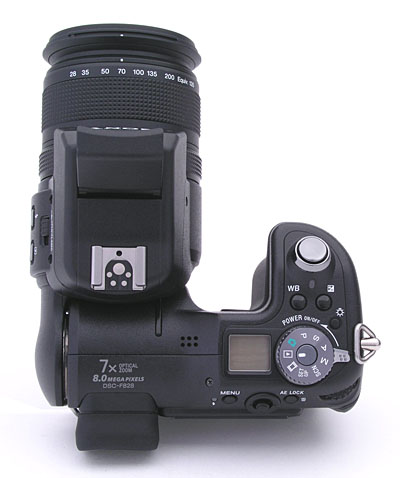
The camera's top panel holds several key camera controls, including the Shutter,
White Balance, and Exposure Compensation buttons, and the Power and Mode
dials, all clustered on the right-hand side. A small status display panel
to the left of the Mode dial reports basic camera settings, and features
an illuminator button (on the right of the Mode dial). The camera's speaker
grill is just to the left of the display panel.
Atop the lens barrel is the pop-up flash compartment, with a standard hot shoe
flash mount just behind it. The 828's hot shoe is like that on the new DSC-V1
model, supporting Sony's new HVL-F32X strobe, providing the benefits of true
TTL (through the lens) flash metering in a high-power external flash unit.
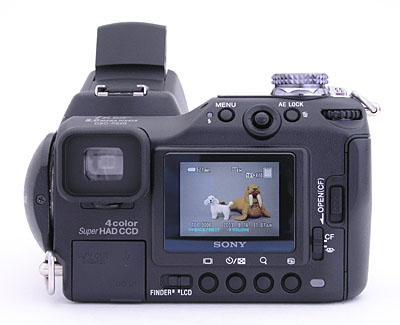
The remaining camera controls are located on the F828's rear panel, along
with the LCD monitor and electronic viewfinder (EVF) eyepiece. On the underside
of the viewfinder eyepiece, a lever-actuated dioptric adjustment corrects
the viewfinder for near- or farsighted users. Across the top of the rear
panel are the Menu, Multi-Controller, and AE Lock buttons, along with a Command
dial. Below the LCD monitor are the Display, Self-Timer/Index, Magnify, and
Quick Review buttons. A slide switch beneath the lower left corner of the
LCD monitor determines which viewfinder display you use, selecting either
the LCD monitor and EVF. The eyepiece itself is surrounded by a soft rubber
eye cup that does a good job of blocking extraneous light. In the bottom
left corner of the rear panel are the DC In, USB, and A/V Out connection
jacks, protected by a rubbery flap that's tethered to the camera body. On
the right side of the LCD are the memory card Open switch, and a sliding
MS/CF switch, used to select between Memory Stick or CompactFlash memory
cards. The rear panel also features two very small LED lamps. One, located
next to the Menu button, shows when the flash is charging. The other is in
the lower right corner, and flashes when the camera is accessing the memory
compartment.
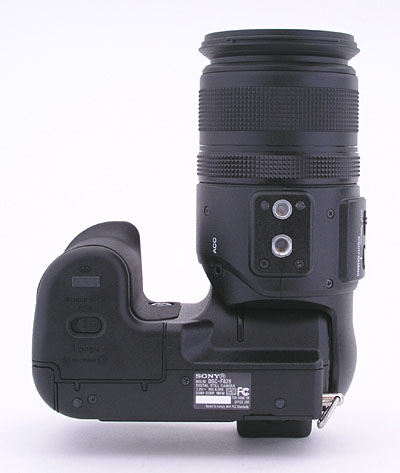
The bottom panel of the F828 is flat and features the all-metal tripod mount
on the bottom of the lens barrel and battery compartment. Kudos to Sony for
keeping the memory card and battery compartments away from the screw mount,
making it easy to change batteries while the camera is mounted on a tripod.
(I always take note of this, given the amount of studio work I do, and I
find it particularly important with feature-laden cameras like this one.)
I don't know if the tripod socket is exactly under the optical center of
the lens, but it's at least on the lens centerline, making alignment for
panorama shots much easier. One thing I like about the tripod mount here
is that it includes a socket for the second "lock" pin found on
some professional tripods. This provides a much more secure mount between
camera and tripod, without having to crank down so tightly on the tripod
mounting screw.
Viewfinder
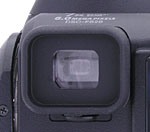 The F828
offers both a 1.8-inch, 134,000-pixel, rear panel LCD monitor and a smaller
electronic viewfinder (EVF) in place of a true "optical" viewfinder.
The EVF actually uses a tiny (and slightly lower-power) LCD screen
to show the same view you'll see in the camera's monitor display. What makes
the EVF so useful is the information display, identical to that shown on
the LCD monitor (complete with navigable menus). As I noted on earlier Sony
digicams using EVFs, the idea of being able to see the exposure settings
in the eye level viewfinder is a good one, but navigating the menus through
this small viewfinder is pretty tricky. I found it much easier to simply
switch on the LCD monitor when I needed to change menu options. The EVF does
feature a diopter adjustment dial hidden on the bottom of the eyepiece, but
doesn't have quite as high an eyepoint as did the EVF on the F717. It's still
fairly "eyeglass-friendly," but you'll have to press your glasses
more firmly against the rubber eyecup than was required with the 717, and
the eyecup tends to leave smudges on the lenses of your glasses. A slide
switch on the rear panel controls where the view is displayed, either on
the larger LCD monitor or in the smaller eyepiece.
The F828
offers both a 1.8-inch, 134,000-pixel, rear panel LCD monitor and a smaller
electronic viewfinder (EVF) in place of a true "optical" viewfinder.
The EVF actually uses a tiny (and slightly lower-power) LCD screen
to show the same view you'll see in the camera's monitor display. What makes
the EVF so useful is the information display, identical to that shown on
the LCD monitor (complete with navigable menus). As I noted on earlier Sony
digicams using EVFs, the idea of being able to see the exposure settings
in the eye level viewfinder is a good one, but navigating the menus through
this small viewfinder is pretty tricky. I found it much easier to simply
switch on the LCD monitor when I needed to change menu options. The EVF does
feature a diopter adjustment dial hidden on the bottom of the eyepiece, but
doesn't have quite as high an eyepoint as did the EVF on the F717. It's still
fairly "eyeglass-friendly," but you'll have to press your glasses
more firmly against the rubber eyecup than was required with the 717, and
the eyecup tends to leave smudges on the lenses of your glasses. A slide
switch on the rear panel controls where the view is displayed, either on
the larger LCD monitor or in the smaller eyepiece.
The viewfinder LCDs represent an area where Sony has upgraded the F828 relative
to the earlier F717. The F717's rear-panel LCD had 123,000 pixels vs the
134,000 of the one on the 828, a nice, but not very noticeable improvement.
Much more impressive is the upgrade of the EVF though, with the EVF on the
828 sporting 235,000 pixels, to the 717's 180,000. The difference in the
two viewfinders is immediately apparent if you hold each camera up to your
eye. The F828's EVF doesn't so much appear sharper, as larger. When
you look through the 828's EVF, the LCD screen covers a much larger field
of view. (Which probably also explains why it has a lower eyepoint than the
EVF on the F717.)
As I've noted in the past, I'm generally no fan
of EVFs, finding them a poor substitute for true optical viewfinders. On
the F828 though, the EVF seems to have more resolution than I'm accustomed
to seeing (more even than the F707 and F717 models), which helps a great
deal. Plus, the Night Shot and Night Framing modes eliminate one of my biggest
objections to EVFs, which is that they're generally useless in low light
conditions. Overall, even the F828's EVF doesn't take me entirely out of
the anti-EVF camp, but it's definitely a further step in the right direction.
 The Display button on the back panel controls the information display,
with a choice of full or partial exposure information display in Record mode.
The basic information display reports Flash mode, exposure settings (aperture
and shutter speed), and Focus area. The detailed display also shows the remaining
battery power, image quality and resolution, and a handful of other exposure
settings. A histogram display appears in response to a third press of the
Display button. The histogram graphs the tonal distribution of the image,
and is helpful in determining over- or underexposure before snapping the
shot. (Very nice, but I'd really like to see a "blink highlights"
feature as found on some Nikon digicams.) Both the EVF eyepiece and rear
panel LCD monitor have adjustable brightness settings. The LCD Brightness
adjustment is the first option in the camera's "Setup 1" menu,
with Dark, Normal, and Bright settings. When the camera is running on battery
power, the second and third menu items are for LCD and EVF Backlight adjustment
respectively. The backlight settings have Normal and Bright options, the
latter of which is particularly helpful when shooting in bright, sunlit conditions.
When the camera is plugged into the AC adapter, the LCD Backlight option
disappears, because the backlight automatically switches to the "high"
illumination setting by default.
The Display button on the back panel controls the information display,
with a choice of full or partial exposure information display in Record mode.
The basic information display reports Flash mode, exposure settings (aperture
and shutter speed), and Focus area. The detailed display also shows the remaining
battery power, image quality and resolution, and a handful of other exposure
settings. A histogram display appears in response to a third press of the
Display button. The histogram graphs the tonal distribution of the image,
and is helpful in determining over- or underexposure before snapping the
shot. (Very nice, but I'd really like to see a "blink highlights"
feature as found on some Nikon digicams.) Both the EVF eyepiece and rear
panel LCD monitor have adjustable brightness settings. The LCD Brightness
adjustment is the first option in the camera's "Setup 1" menu,
with Dark, Normal, and Bright settings. When the camera is running on battery
power, the second and third menu items are for LCD and EVF Backlight adjustment
respectively. The backlight settings have Normal and Bright options, the
latter of which is particularly helpful when shooting in bright, sunlit conditions.
When the camera is plugged into the AC adapter, the LCD Backlight option
disappears, because the backlight automatically switches to the "high"
illumination setting by default.
 In Playback mode, the Display button also controls
the information display, but in this case, turns it completely on or off.
The histogram is also available in Playback mode. An Index Display mode shows
as many as nine thumbnail images at a time on the LCD monitor with a press
of the Index button. While in Index display mode, pressing the Display button
simply toggles the limited information display on and off. The Magnify button
on the camera's rear panel controls the playback zoom, enlarging captured
images as much as 2x. Turning the Command dial increases the amount of digital
enlargement to 5x.
In Playback mode, the Display button also controls
the information display, but in this case, turns it completely on or off.
The histogram is also available in Playback mode. An Index Display mode shows
as many as nine thumbnail images at a time on the LCD monitor with a press
of the Index button. While in Index display mode, pressing the Display button
simply toggles the limited information display on and off. The Magnify button
on the camera's rear panel controls the playback zoom, enlarging captured
images as much as 2x. Turning the Command dial increases the amount of digital
enlargement to 5x.
One advantage of an eye-level viewfinder, is that
it promotes a more secure camera grip (arms clamped to your sides, camera
body braced against your face), which particularly helps with long telephoto
and low-light shots. It also provides a more natural "look-and-shoot"
operation than when you're forced to rely on a rear-panel LCD display. On
previous Sony digicams, I found the smaller EVF eyepieces difficult to work
with in low-light situations, as the electronic viewfinder system typically
requires more light to operate. As noted though, Sony's Night Framing and
Night Shot modes are very effective in making the EVF usable at low
light levels. (The Night Shot technology was first pioneered by Sony in its
consumer camcorder lines, and made its debut in digital camera form on the
original F707, in 2001.)
Night Shot and Night Framing take advantage of the CCD's sensitivity
to infrared light, which is normally filtered out, because it tends to skew
the camera's color rendering in bright sunlit scenes. Sony's Night Shot technology
uses a movable IR filter that lets the camera take advantage of this IR sensitivity
in low-light situations and block it at other times. The prototype model
of the F828 I tested removed the limitation of Night Shot to Program and
Auto modes that was present in the F707 and F717, allowing its use in any
exposure mode. Unfortunately, it appears that production models of the F828
will once again restrict Night Shot to Programmed and Auto exposure modes
only. The reasons for this are unclear, but are most likely related to issues
of "propriety" - The Night Shot mode was similarly restricted in
Sony's camcorders, because some users found that the IR technology could
"see through" certain fabrics when used under daylight conditions.
I personally never saw this, and think that the validity of the effect was
dubious to begin with, but the furor in the popular press over the issue
was enough to cause Sony to redesign the feature, restricting its use to
dark shooting conditions. This is a real shame, as there are a LOT of IR
photography enthusiasts who have been waiting for a digicam that would permit
full exposure and depth of field control combined with IR-capable operation.
(To date, the original Minolta DiMAGE 7 (not the 7i or 7Hi) remains the best
option for digital IR photographers, as it was made with no IR filter over
it's CCD.) I'd be happy to field any articulate arguments for "uncrippling"
the 828's Night Shot mode that might help persuade Sony to re-enable it in
a future camera or firmware release. - They don't seem to feel that this
is a "make or break" issue for enough photographers to be worth
supporting.
In Night Shot mode, the camera flips the IR filter out of the way for both the framing and exposure. Any natural IR light in the scene is augmented by two infrared LEDs on the front of the camera (just beneath the pop-up flash compartment), which project IR beams onto the subject. These lamps don't completely cover the field of view at wide angle, but they do a pretty good job from about halfway up the zoom range toward telephoto. The built-in illuminator lamps let you shoot in total darkness, but the pictures you capture will be monochromatic, with the majority of light areas of the subject showing a green cast (as is typical with Night Vision goggles). Some colors will render as different shades of gray than they would in a normal black-and-white photo. This is because the reflectance of objects is often different in IR than in visible light, so a "dark" color in daylight may actually appear quite bright in IR. (Note that when shooting reflective surfaces close-up, you'll be able to see the glow of the camera's IR lamps in the center of the image.)
In Night Framing mode, the camera also flips the IR filter out of the way
and turns on the illuminator lamps, but only while you're framing your shots.
As soon as you half-press the Shutter button, the IR filter flips back down,
and the camera takes a normal visible-light photo, using the built-in flash.
This is particularly handy for nighttime flash shooting, when you wouldn't
be able to see (or focus on) the subject otherwise.
Overall, Night Shot and Night Framing are tremendous extensions to digital
photography, clearly taking it into realms that film-based cameras just can't
touch. Sure, you can shoot with IR film in a conventional camera, but the
no-light viewfinder capability of Night Framing simply isn't available in
the film world. Combined with the Hologram AF feature, it makes in-the-dark
digital photography more practical than it's ever been. Big kudos to Sony
for bringing these innovations to digital photography!
Trimming
 This
isn't strictly a "Viewfinder" function, but I didn't know
where else to mention it. Since it at least uses the LCD display,
I figured I'd go ahead and talk about it here.
This
isn't strictly a "Viewfinder" function, but I didn't know
where else to mention it. Since it at least uses the LCD display,
I figured I'd go ahead and talk about it here.
One of the best things most amateur photographers could do to improve
their photos would be to simply crop them a little, cutting out distracting
objects, and filling more of the frame with their primary subject. Virtually
all Sony digicams let you do this right on the camera. Zoom in on an
image in playback mode, and use the Multi-Controller to adjust the framing
to your preference. Then hit the Menu button, and you'll see options
labeled Return and Trimming. Select Trimming, and you'll see further
options to select an image size. (Keep in mind that enlarging the image
back up to full size after cropping it down only softens the detail,
since no new information is added to the image file. The reduced number
of pixels in the cropped image are simply enlarged to fill the full-size
pixel array.) Select a size option, and the camera will save the image
the way you've zoomed and cropped it on the LCD display into a separate
file on the memory card. Very slick! (The animated screenshot at right
was "borrowed" from my review of the F717. The function works
the same way on the F828.)
Optics Learn how to use lens aperture to control depth of field - Visit our free Photo Lessons area!
Free Photo Lessons
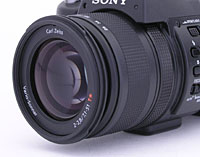 The F828 is equipped with a super-sharp 7.1-51mm Carl Zeiss lens (equivalent
to a 28-200mm lens on a 35mm camera), an impressive 7x optical zoom ratio. Equally
important to the zoom ratio itself is that the wide-angle end of its range goes
all the way out to 28mm, wider than most digicam lenses offer. (Very handy for
Realtors and others who need maximum angular coverage for cramped shooting conditions.)
The aperture can be adjusted automatically or manually, and ranges from f/2-2.8
to f/8 depending on the zoom setting. An additional 2x Precision digital zoom
function (14x total zoom) can be turned on and off via the Record menu, but
remember that quality is always an issue with digital enlargement. That said,
the F828 employs Sony's Precision Digital Zoom, which seems to cause less quality
degradation than the normal digital zoom used by some other digicams. (One difference
seems to be that the required interpolation is done with raw CCD data, before
the JPEG compression is applied.)
The F828 is equipped with a super-sharp 7.1-51mm Carl Zeiss lens (equivalent
to a 28-200mm lens on a 35mm camera), an impressive 7x optical zoom ratio. Equally
important to the zoom ratio itself is that the wide-angle end of its range goes
all the way out to 28mm, wider than most digicam lenses offer. (Very handy for
Realtors and others who need maximum angular coverage for cramped shooting conditions.)
The aperture can be adjusted automatically or manually, and ranges from f/2-2.8
to f/8 depending on the zoom setting. An additional 2x Precision digital zoom
function (14x total zoom) can be turned on and off via the Record menu, but
remember that quality is always an issue with digital enlargement. That said,
the F828 employs Sony's Precision Digital Zoom, which seems to cause less quality
degradation than the normal digital zoom used by some other digicams. (One difference
seems to be that the required interpolation is done with raw CCD data, before
the JPEG compression is applied.)
The F828 also offers as much as 5x of "Smart Zoom" when shooting at the VGA resolution setting, effectively increasing the total zoom to 35x. (Smart Zoom is Sony's term for a digital zoom feature that limits its magnification to that which results in a 1:1 mapping of sensor pixels to final image pixels. Thus, at the full 8MP resolution, there's no Smart Zoom available, as the image is using all the sensor pixels already. A 640x480 chunk of pixels cropped out of the center of the 8MP sensor corresponds to a 5.1x linear "magnification," so that's the amount of Smart Zoom you have available when that image size is selected. Smart Zoom avoids the distortion produced by interpolating the image data back up to larger pixel dimensions. It's new to Sony's line, but Fuji's consumer cameras have worked this way for a few years now. - Overall, this is how I think digital zoom should work, so kudos to Sony for getting onboard with it.) When activated through the Setup menu, Smart Zoom and Precision Digital Zoom are controlled via the Magnify button on the rear panel.
The F828's zoom control is nice and smooth, with an adjustment ring around
the end of the lens barrel that is coupled directly to the lens elements
themselves. This provides complete control over optical zoom, with none of
the "fly by wire" uncertainty that characterizes most digicams.
The direct control makes it easy to make small adjustments to the zoom without
going too far in either direction, a nice feature for critical framing, and
is also much faster to use than the purely electronic controls on most digicams.
A zoom bar appears on the LCD screen, reporting the zoom position.
The rotating lens barrel of the F828 continues to be one of my favorite designs,
although the bulky lens takes some getting used to. (Actually, I'm a little
conflicted over the design. I love the flexibility it gives, but find it
a little awkward to hold in some situations. This is balanced by its making
certain shots very easy that would be either awkward or impossible otherwise.)
The lens pivots up and down approximately 100 degrees (roughly 70 degrees
up, 30 degrees down), greatly multiplying your shooting options. It's especially
handy for grabbing ground-level macro shots or when holding the camera above
your head to shoot over a crowd. The tripod mount on the bottom of the lens
barrel provides even greater flexibility when working with a tripod or monopod,
allowing you to tilt the camera's back panel for easier viewing. Sony offers
both wide-angle and telephoto converters as accessories for the F828, which
mount in front of the lens via the 58mm filter threads that line the inside
lip of the lens barrel. (The same thread diameter as the F717.) Having the
tripod mount on the lens centerline also makes it easier to align sequences
of shots intended for later assembly into panoramas.
Focus on the F828 ranges from between 9 and 27 inches (23-69 centimeters, depending on the zoom setting) to infinity in normal mode, and from 0.8 inches (2 cm) to infinity in Macro mode. (Note that the closest macro focusing occurs only when the lens is set to its maximum wide-angle position.) A Focus switch on the side of the lens selects either Auto or Manual Focus control. Manual focus is set by turning the focus ring at the end of the lens barrel, just as you would a standard 35mm camera lens. When using the Manual focus, a small indicator appears on the LCD screen that shows the current focusing distance in meters as you turn the ring. Also, an Expanded Focus option (activated in the Setup menu) automatically magnifies the image by 2x whenever you rotate the focus ring, providing just enough resolution to accurately set the focus based on what you see onscreen.
I really like the feel of a digicam with a manual focus that works more or less like that on a standard 35mm camera lens. If you're making the transition from a film camera though, the F828's focus ring may take a little getting used to. It isn't directly coupled to the lens elements (like the zoom control), but rather just instructs the camera's CPU which way to move the focusing elements. This leads to a sense of disconnection between movements of the focus ring and corresponding focus changes that takes some getting used to. Also, the proportionality between focus-ring movement and focus adjustment seems to be a pretty strong function of the speed with which the ring is turned. If you move the ring slowly, it can take many turns of it to traverse the full focal range, while a quick twist will switch you from infinity focus down to a couple of meters with only a partial rotation. This variable proportionality is doubtless an attempt to deal with the slow slew rate of most "fly by wire" digicam focusing systems. It definitely improves the focus response relative to other cameras I've worked with, but I still find manual focusing on the F828 to be a slightly disconcerting experience. (I also noticed that the front of the pop-up flash housing obstructs the top of the focus ring, making it slightly awkward to turn.)
 Similar
to the CD500 high-end Mavica model, the F828 features an adjustable AF area,
with a number of selection points available (one at dead center and the others
surrounding the center point). In straight autofocus mode, the camera uses
a multi-point selection, often highlighting two or three points on the screen
that it's basing focus on. You can also opt for a broader center AF selection,
as well as a smaller Spot AF area, or manually select the desired AF point,
to force the camera to focus on a particular subject and not be led astray
by other objects in the field of view. In any capture mode, the AF point
can be controlled by pressing the Multi-Controller until the Spot AF marks
appear, and then moving the AF point with the Multi-Controller in any direction.
A set of four corner bracket marks in the main viewing area indicate the
AF area.
Similar
to the CD500 high-end Mavica model, the F828 features an adjustable AF area,
with a number of selection points available (one at dead center and the others
surrounding the center point). In straight autofocus mode, the camera uses
a multi-point selection, often highlighting two or three points on the screen
that it's basing focus on. You can also opt for a broader center AF selection,
as well as a smaller Spot AF area, or manually select the desired AF point,
to force the camera to focus on a particular subject and not be led astray
by other objects in the field of view. In any capture mode, the AF point
can be controlled by pressing the Multi-Controller until the Spot AF marks
appear, and then moving the AF point with the Multi-Controller in any direction.
A set of four corner bracket marks in the main viewing area indicate the
AF area.
Three AF modes in the camera's Setup menu control how often the camera adjusts
focus, including Single, Monitor, and Continuous. Single AF mode adjusts
focus only when the Shutter button is half-pressed, while Continuous AF mode
adjusts focus continuously as the subject moves, both before and after the
shutter button is half-pressed. Monitor mode is probably most similar to
the Continuous AF modes of most other manufacturers. It continuously adjusts
focus until the user half-presses the Shutter button, at which time the focus
is locked. Monitor mode slightly improves shutter lag for stationary subjects.
 I've been a fan
of Sony's Hologram AF system for low-light focusing ever since I first saw
it. Hologram AF uses a laser diode and a tiny holographic diffraction grating
to project a crosshatched pattern of bright red lines on the subject. The
nifty thing about the hologram is that the projected pattern stays more or
less "in focus" almost irrespective of subject distance, so there's
always a sharp pattern for the camera to focus on. Hologram AF isn't only
for low light, as you'll see the camera resort to it in fairly normal lighting
as well, if there's not enough contrast in the subject to use the normal
contrast-detect AF system. Try pointing the camera at a blank wall in normal
home / office lighting, and you'll see the pattern. The screen shot at right
shows a camera's-eye view of the Hologram AF pattern, as the lens zooms from
wide to telephoto. (This shot was copied from my F707 review - Astute readers
will note the differences in the onscreen information display, but the Hologram
AF function works identically in the F828.)
I've been a fan
of Sony's Hologram AF system for low-light focusing ever since I first saw
it. Hologram AF uses a laser diode and a tiny holographic diffraction grating
to project a crosshatched pattern of bright red lines on the subject. The
nifty thing about the hologram is that the projected pattern stays more or
less "in focus" almost irrespective of subject distance, so there's
always a sharp pattern for the camera to focus on. Hologram AF isn't only
for low light, as you'll see the camera resort to it in fairly normal lighting
as well, if there's not enough contrast in the subject to use the normal
contrast-detect AF system. Try pointing the camera at a blank wall in normal
home / office lighting, and you'll see the pattern. The screen shot at right
shows a camera's-eye view of the Hologram AF pattern, as the lens zooms from
wide to telephoto. (This shot was copied from my F707 review - Astute readers
will note the differences in the onscreen information display, but the Hologram
AF function works identically in the F828.)
In actual use, I've found that the Hologram AF system makes low-light and
low-contrast focusing practically foolproof. In fact, it literally was hard
to get an out-of-focus photo with the F828, in almost any situation. Hologram
AF is a significant innovation in AF-assist lighting!
Sony's "RGB+E" Sensor Technology
As I mentioned at the beginning of this article, arguably the biggest
news with the 828 is that it's the first vehicle for Sony's new "RGB+E"
image sensors, which use four different color filters, rather than the usual
three. (Most digicams distinguish color thanks to red, green, and blue color
filters over their individual pixels. The 828 adds "Emerald" (more
or less a cyan color) filters, replacing half of what would otherwise have
been green pixels on a normal CCD chip.) This new sensor color space dramatically
improves color rendition in some parts of the spectrum. In particular, it
reveals more shading and detail in highly-saturated yellows, reds, and oranges,
and more renders some shades of blue and blue-green more accurately. In early
samples I saw, the RGB+E technology looked like it held great promise for
significantly improving color accuracy and the ability of cameras to faithfully
render subtle hues in brightly-colored subjects. Now, after some time spent
with a production model, I have to say that it looks like the promise was
fulfilled. - The F828 does a much better job with highly saturated colors
of certain hues than any other digicam I've seen to date. (Interested readers
can peruse our original news stories covering the announcement of RGB+E technology
here and
here.)
I highly applaud Sony's innovation in exploring new camera color spaces to
improve image quality. Based on preliminary results, it looks like they've
achieved a real breakthrough in digicam color fidelity.
In their marketing literature for the F828, Sony touts the camera's use of
a true "Linear Matrix computing process" to convert the four-color
RGB+E data to conventional RGB. This is just a fancy way of saying that the
four colors are converted to the normal red, green, and blue values by multiplying
each of the four color values for each pixel by a coefficient, and summing
the results together for each of the target primary colors. What puzzles
me is that I thought this was how you always do color transformations.
Given Sony's hype over their use of this approach, it seems likely that other
digicams more often use a different technique that's less accurate, perhaps
trading off computational speed for accuracy. Regardless of the specifics,
it does appear that the F828 offers a new level of color rendition.
Exposure Learn about white balance and simple lighting techniques for dramatic shots in out free Photo Lessons area!
The F828 offers a full range of exposure controls, with options for Full
Auto, Program AE, Aperture Priority, Shutter Priority, and Manual exposure modes,
as well as a Scene mode position with Twilight, Twilight Portrait, Landscape,
and Portrait scene options. All exposure modes are accessed via the Mode dial
on top of the camera, and the Scene presets are accessed through the Record
menu in Scene mode. In Full Auto mode, the camera controls everything, with
the exception of resolution, flash, zoom, and capture mode. Program AE mode
lets you control everything except the aperture and shutter speed, though you
can select from a range of equivalent exposure settings by turning the Command
dial. Aperture and Shutter Priority modes provide user control over either aperture
or shutter speed (depending on the mode), while the camera selects the best
value of the other exposure parameter. Manual mode provides complete control
over the exposure, with the user selecting both shutter speed (1/2,000 to 30
seconds) and aperture (f/2 to f/8).
Free Photo Lessons
In the Scene exposure mode, you have the option of shooting in Twilight, Twilight
Portrait, Landscape, or Portrait preset modes. Twilight mode sets up the camera
for shooting night scenes, using a slower shutter speed to capture more ambient
light. Use Twilight mode in any situation where the lighting is too dim to give
a good exposure in normal exposure mode, but be aware that the camera will be
using slower shutter speeds. Mount it on a tripod or otherwise provide stable
support. Twilight Portrait operates under the same guidelines, but automatically
uses the Slow Sync flash setting, so foreground subjects (people, for instance)
will be properly illuminated by the flash, while any natural illumination in
the background will show up in the shot as well. Landscape mode simply uses
a smaller lens aperture to increase the depth of field, keeping the foreground
and background in focus. Landscape mode typically uses slower shutter speeds,
so a tripod is recommended in all but bright lighting. Portrait mode works in
the opposite manner, using a larger aperture to decrease the depth of field.
This produces a sharply focused subject in front of a slightly blurred background.
The F828 employs a Multi-Pattern metering system as its default, dividing the
scene into several small sections and taking exposure readings for each section.
The readings are then evaluated (not necessarily averaged) to determine the
best overall exposure. Center-Weighted and Spot metering options are also available,
accessed by pressing the Metering button on the side panel and turning the Command
dial. You can increase or decrease the exposure with the F828's Exposure Compensation
adjustment, which ranges from -2 to +2 exposure values (EV) in one-third-step
increments and which is adjusted by pressing the Exposure Compensation button
on the top panel and turning the Command dial.
In addition to the F828's Night Shot and Night Framing low-light features (discussed
in detail in the Viewfinder section earlier), the camera also offers an impressive
Noise Reduction system, adding "Clear Color Noise Reduction" and "Clear
Luminance Noise Reduction" to the "NR Slow Shutter" found in
the F717. NR Slow Shutter is fairly conventional dark-frame subtraction noise
reduction, but appears to go a bit further than most. Judging by the camera's
operation, it looks like the F828 is shooting a "dark" frame after
each exposure when the noise reduction mode is active, and then subtracting
the noise in that dark frame from the captured image. It's obvious that the
camera is doing something like this, because it takes roughly twice as long
for it to complete a long exposure than the exposure time of the shot itself.
With dark frame subtraction, any hot pixel that saturated and went all the way
to white ends up black in the final image, since it was pure white in both the
actual photo and the dark frame itself. (By way of explanation, "white"
means a value of 255. If the hot pixel was white in both the image and dark-noise
reference frame, when the subtraction is done, 255-255=0, or black.)
Clear Color NR and Clear Luminance NR are a bit more mysterious. If I get further
details on their operation from Sony, I'll pass them along here. From their
names though, it sounds to me like Clear Color NR looks at color noise at higher
light levels, while Clear Luminance NR works on luminance (brightness) in darker
areas. AFAIK though, both are purely image processing techniques, not subtracting
noise patterns from the image data directly.
An AE Lock button on the rear panel lets you lock the exposure reading without
also locking the focus. (As happens when you half-press the Shutter button.)
AE Lock works well with Spot and Center-Weighted metering, as you can base the
exposure on a particular area of the subject without also having to lock the
focus on that area as well. Simply aim the center of the viewfinder at the portion
of the subject you want properly exposed and press the AE Lock button. The exposure
will be locked until the Shutter button is fully depressed or until the AE Lock
button is pressed again.
ISO can be adjusted to 100, 200, 400, or 800 sensitivity equivalents, or set
on Auto. The F828's White Balance adjustment offers seven settings: One-Push
(manual), Auto, Daylight, Cloudy, Fluorescent, Incandescent, and a new Flash
setting. The One-Push Set option lets you manually set the white balance, based
on a white card held in front of the lens. The 10-second Self-Timer mode is
activated via the Self-Timer/Index button on the rear panel. Once in Self-Timer
mode, a full press of the Shutter button kicks off the timer, which counts down
10 seconds before firing the shutter.
The F828 also offers a versatile Picture Effects menu, a standard feature on
Sony digicams. The menu offers three creative options: Negative Art, Sepia,
and Solarize. Negative Art reverses the color and brightness of the image. Sepia
changes the image into brown, monochromatic tones. The Solarize option is really
more of a level-slicing function, dividing the image into areas of fairly "flat"
color. (Not really a "solarization" effect as old-line film types
would understand the term.) These effects are "live" in Record mode,
so you get a preview of the effect on the LCD monitor before you record the
image. The F828 also offers a Sharpness function, as well as Saturation and
Contrast adjustments that weren't previously on the F717 model. A Color adjustment
offers Real and Standard settings, with "Standard" apparently producing
slightly more saturated images.
| What's up with RAW? | |
|
 Flash
Flash
The pop-up flash on the F828 features true TTL (Through The Lens)
metering, for more accurate flash exposures. (This is surprisingly rare in
the current digicam market. Many cameras from "camera" companies
that you would think surely would have TTL metering do not.) The flash operates
in Auto (no icon), Forced, Suppressed, and Slow-Sync modes, with a Red-Eye
Reduction mode that can be enabled through the Setup menu. Auto mode lets
the camera decide when to fire the flash, based on existing lighting conditions.
Forced means that the flash always fires, regardless of light, and Suppressed
simply means that the flash never fires. Slow-Sync mode times the flash with
a slower shutter speed, allowing more ambient light in to balance the flash
exposure. Red-Eye Reduction mode tells the camera to fire a small pre-flash
before firing the full flash to reduce the effect of red-eye. Once enabled
through the Setup menu, the Red-Eye Reduction flash fires with both Auto
and Forced modes. Flash intensity can be manually controlled via the Record
menu with choices of High, Normal, and Low. A sliding switch on the side
of the flash compartment releases the flash. However, through the Setup menu,
you can set the flash to automatically pop up whenever an active flash mode
is enabled.
The F828 features a true hot-shoe external flash connection on top of the
camera. This greatly increases the options for connecting an external flash.
The F828 also has the ACC Sony accessory flash/remote trigger input socket
on the side of the lens. (Note though, that the ACC connection is proprietary
to the Sony external flash units.) Thanks to an array of extra contacts in
its hot shoe (and associated camera smarts to go along with them), the F828
supports Sony's neat new HVL-F32X external flash unit, which offers the higher
power capability of an external unit, while still retaining the advantages
of true TTL flash metering. (This combo of TTL flash metering with an external
flash unit is even more rare than TTL flash metering itself.)
Special Recording Modes
Like many Sony digicams, the F828 offers a number of special recording modes,
including RAW, TIFF, Voice, E-Mail, Exposure Bracketing, and Burst. The TIFF
option saves a high-resolution uncompressed TIFF version of each image, in
addition to the standard JPEG version, at whatever image size you've
selected. Voice mode lets you record a five-second sound clip to accompany
a still image, with the audio recording starting immediately after the image
capture. The E-Mail option records a still image at the 320 x 240-pixel JPEG
size for easy E-mail transmission, again in addition to a full-resolution
file, at whatever image size you've selected in the menu system. This lets
you capture full-resolution images for storage and printing, while at the
same time recording smaller versions that you can just drop into an E-mail
to share with others.
While many other digicam makers offer their own versions of it, RAW mode is new to the Sony line with the F828. RAW mode simply records all the picture data, exactly as it comes from the image sensor. RAW files are generally losslessly compressed, so they take up less space than TIFF images, but don't exhibit the artifacts and data loss that characterizes JPEG-compressed files. RAW-mode file formats are prized for the ability they give photographers to make color balance and even minor exposure adjustments after the fact, working with the exact data that the camera captured originally. As of this writing, Sony hadn't yet released their software for manipulating the F828's RAW-mode images but we're told it will be available by the time the cameras ship to retail stores this fall. (2003)
Exposure Bracketing captures three images with one press of the Shutter button
(one at the normal exposure, one underexposed, and one overexposed). The
amount of variation between exposures is adjustable through the Record menu,
with options of 0.3, 0.7, and 1.0 EV steps. "Burst" mode captures
a rapid series of seven images. (The actual frame rate and the number of
images in the series may be limited by available memory card space, depending
on the resolution and quality settings, though.) Through the Drive setting,
you can opt for Speed Priority Burst mode or Framing Priority Burst mode.
Speed Priority blanks the viewfinder display to improve cycle time slightly,
while Framing Priority keeps the display live so you can see what the image
is pointed at. As it turns out, there isn't a huge difference between the
two modes, but Speed Priority is indeed a little faster.
Movie Mode
The Movie mode is accessed via the Mode dial on top of the camera, by selecting
the film frame icon. You can record moving images with sound at either 640
x 480 or 160 x 112 pixels, with Fine and Standard quality options for the
640-pixel size. (Full 640x480 movies are very rare in the digicam world,
and even more rare is the F828's ability to record them nonstop at 30 frames/second.
(Note though, that this recording rate can only be sustained when using a
Memory Stick PRO or IBM/Hitachi Microdrive CFII card. Even very fast chip-based
CF cards won't work, the camera apparently checks specifically for a Microdrive
before it will let you use this mode when the CF slot is selected.) The F828
employs Sony's MPEG VX technology, which lets you record for as long as the
memory card has space. (The amount of available space varies with the quality
setting and resolution.) A timer appears in the LCD monitor to let you know
how long you've been recording and approximately how much recording time
is available.
 The F828 also provides limited movie editing capabilities. While most digicam
users won't be looking for full A/B roll video editing from their cameras,
I've often found that I wanted to trim off material from the beginning or
end of a video I've recorded, or to extract an interesting bit of action
from the middle of a much longer clip. The F828 provides for this via an
option on the Playback menu called Divide. As its name suggests, Divide works
by dividing movies into two segments. Do this once to trim away spurious
material at the front of the clip you're interested in, and do it a second
time to remove unwanted footage at the end. Once you've split the movie into
parts like this, throw away the segments you don't need, or keep them around
to show your viewers how lucky they are that you're only showing them the
"interesting" parts. ;-) The screenshot at right shows the Divide
function in action.
The F828 also provides limited movie editing capabilities. While most digicam
users won't be looking for full A/B roll video editing from their cameras,
I've often found that I wanted to trim off material from the beginning or
end of a video I've recorded, or to extract an interesting bit of action
from the middle of a much longer clip. The F828 provides for this via an
option on the Playback menu called Divide. As its name suggests, Divide works
by dividing movies into two segments. Do this once to trim away spurious
material at the front of the clip you're interested in, and do it a second
time to remove unwanted footage at the end. Once you've split the movie into
parts like this, throw away the segments you don't need, or keep them around
to show your viewers how lucky they are that you're only showing them the
"interesting" parts. ;-) The screenshot at right shows the Divide
function in action.
After enabling the Divide function through the Playback menu, the F828 starts
to play back the movie. You simply press the center of the Multi-Controller
to stop the playback where you'd like to make an edit. From there, you can
scroll backward or forward frame-by-frame until you find the point where
you'd like to divide the movie. You can then either delete the unwanted portion
of the movie or keep it on the memory card. As noted, the Divide function
is great for "editing" out the best part of a movie file, given
that you can make an unlimited number of divides. You just can't put the
pieces back together again in the camera. For that, you'll have to use the
included software.
Multi Burst
Also accessed through the Movie option under the Setup menu, the F828
features a Multi Burst mode, which captures a rapid burst of 16 images. Once
captured, the images are played back as a movie file. Because image capture
is so fast, the effect is of a slow-motion sequence. Three frame interval
rates are available through the Record menu, 1/7.5, 1/15, and 1/30. You can
also set image quality (Fine or Standard), Picture Effects, and Sharpness.
Shutter Lag/Cycle Times
When you press the shutter release on a digital camera, there's usually a
delay or "lag time" before the shutter actually fires. This time
allows the autofocus and autoexposure mechanisms to do their work and can
amount to a significant delay in some situations. Since this number is rarely
reported by manufacturers or reviewers, and can significantly affect the
picture-taking experience, I routinely shutter lag and cycle times using
a proprietary electronic test setup with a resolution of 0.001 second.
| Sony
DSC-F828 Timings |
||
|
Operation |
|
|
| Power
On -> First shot |
|
Time from power on to first shot captured. Very fast. (There's no lens to telescope out, but even so the startup time is faster than I'd have expected.) Time measured with Memory Stick Pro. |
| Shutdown |
|
No lens to retract, so "shutdown" time is effectively nil. Depending on the memory card in use though, it could take 20 seconds or more to finish writing a large RAW-format file. (Worst case with a Memory Stick Pro is only 10 seconds though.) |
| Play
to Record, first shot |
|
Time to capture image from quick review mode, lens set to manual focus. Very fast. (Time would be somewhat longer in autofocus mode, particularly with the lens set to full telephoto, due to autofocus time.) |
| Record
to play, quick view mode, camera finished processing previous
shot. |
|
Initial image display is very fast in quick review mode, and there doesn't seem to be any additional time required for the display to sharpen-up. (Playback zoom also operates very quickly.) |
| Record
to play, normal playback mode |
2.3/0.4 | Time from switch to playback mode to image displayed, large/fine mode images. First time is for immediate switch after an image is acquired, second is for switch with camera done processing the last image. Pretty fast when camera is quiescent, but time for immediate switch is average. |
| Shutter
lag, full autofocus |
0.44 0.69 |
First time is with lens set at wide angle, second time is with lens set to 100mm equivalent focal length, third time is with lens set to full telephoto. All times are very fast, wide angle and 100mm times are blazing. (By far the fastest prosumer camera I've tested.) |
| Shutter
lag, continuous autofocus |
0.42 | As is generally the case with cameras I've tested, continuous autofocus doesn't improve the shutter lag at all, although it may be helpful for moving subjects. (This time measured with the zoom set to 100mm.) |
| Shutter
lag, manual focus |
|
Blazingly fast. |
| Shutter
lag, prefocus |
|
Yes that's 9 milliseconds! I repeated my measurements 3 times (total of ~40 shots) to be sure. For this particular parameter, this is the fastest camera of any sort that I've tested. (I'm fortunate to have a test system that's fast enough to record this - Most methods of measuring shutter lag have a resolution of only 0.1 second.) |
| Cycle
Time, Memory Stick Pro, max/min res |
|
These times are for a
Memory Stick Pro card. Almost identical times for large/fine and
small/normal files, the small files taking slightly longer, apparently
as a result the resampling of the image. No detectable buffer,
the camera ran this fast for 27 consecutive shots, until I got
tired of pressing the shutter button. VERY fast! NOTE in all these cycle time numbers, that the F828 "penalizes" you for trying to fire the shutter too quickly. If you do so, the camera will just sit there until you release and re-press the shutter button. |
| Cycle
Time, CF card, max/min res
(All CF timings here gathered with Lexar 512MB 24x card) |
1.26/1.37 | Times with a CF card. CF cards are slower in other tests, but seemingly no impact in single-shot mode cycle times. Once again, VERY fast. |
| Cycle
Time, RAW file format, Memory Stick Pro/CF card |
13.49/15.33 | First time is for Memory Stick Pro, second is for CF card. No buffering of files in RAW mode, you have to wait for each to write to the card before you can grab the next shot. Here, the Memory Stick Pro showed its higher transfer rate, although the difference wasn't dramatic. |
| Cycle
Time, TIFF file format, Memory Stick Pro/CF card |
8.82/12.52 | First time is for Memory Stick Pro, second is for CF card. No buffering, you have to wait for the camera to finish writing to the card before you can snap the next shot. Oddly, TIFF write times are faster than those for RAW format. (Usually, the opposite is the case.) Once again, Memory Stick Pro is the faster media. |
| Cycle
Time, "S" continuous mode
(In Speed burst mode, the camera viewfinder blanks until the sequence of shots is completed.) |
0.38 (2.65 fps) |
Same speed regardless of card used, and regardless of size image captured. Seven shots in the buffer, also regardless of image size or card type. After 7 shots, there's a long pause before the next shot (for large/fine images, it's 11 sec for MS Pro, 13.4 sec for CF, for small/normal, the numbers are 5.29 and 4.07 respectively). After that though, the camera will continue snapping additional images every ~2.7 sec for large/fine, or every ~1.6-1.7 sec for small/normal. NOTE though, that you have to press the shutter button repeatedly after the initial burst of 7 shots, to get the shutter to fire. If you get past the long pause and into the slower shot to shot time regime, the "buffer" clears very quickly, in a time equivalent to the cycle time at that point. |
| Cycle
Time, "F" continuous mode
(In Framing burst mode, the camera viewfinder displays a "preview" of each image briefly between shots, slowing the frame rate slightly.) |
(2.43 fps) |
Essentially identical behavior to the "F" continuous mode (7 shots in sequence regardless of file size or card type, long pause after the 7th shot, followed by longer shot to shot cycle times), the only difference being that the shot to shot time stretches a few hundreths of a second. |
| Cycle
Time, "M" continuous mode
(In this mode, the camera records 16 tiny 320x240 images in a single 1280x960 frame.) |
0.0334 (29.94 fps) |
No surprises here - Only 16 images (played back as a slow-motion sequence on the camera, but arranged in a 4x4 array in a single image file), but 30 frames/second capture speed. (Can be set via a menu option to 15 or 7.5 frames/second.) Camera is ready for the next sequence almost immediately. (About as fast as you can release and re-press the shutter button.) |
Sony makes a great deal of the F828's speed in their marketing
pitch for the camera, and the numbers above show that there's a
good reason for this: The F828 is by far the fastest prosumer-grade
camera I've tested to date, and is the fastest camera at any
price point when it comes to shutter lag in the pre-focused
mode. (That is, the shutter lag after you've half-pressed and held
down the shutter button, prior to the exposure itself.) Other reviewers
have reported this lag time as 0.1 second, but that's probably
just the resolution of their test setup. I was so astonished at
the 0.009 second prefocus lag that I repeated my tests three times,
for a total of about 40 shots, and got the 9 millisecond number
very consistently. Of course, normal full-autofocus lag is what
really matters to most shooters, and the F828 excels there as well.
- At maximum wide angle, it routinely focuses and shoots in only
0.25 seconds. This time stretches to a still-fast 0.69 seconds
at full telephoto, but is a very fast 0.42 seconds with
the lens set to the 100mm equivalent focal length, still a reasonable
telephoto. Shutter lag in manual focus mode is also exceptionally
short, at only 0.20 seconds.
Cycle times are also quite impressive, with a minimum cycle time
of only 1.26-1.27 seconds in manual focus mode with the auto review
display turned off. Add ~0.05 seconds for autofocus at wide angle,
or ~ 0.75 seconds for autofocus at maximum telephoto. Most impressive
is the fact that the F828 appears able to write its image files
to the memory card at this rate, without having to slow down to
wait for the card to catch up. - There's no sign of a buffer, or
if there is one, it holds more than the 27 shots I snapped at maximum
resolution before I got tired of pressing the shutter button. Continuous-mode
operation is also impressive, capturing up to 7 frames (regardless
of image size or JPEG quality setting) at a rate of 2.65 frames/second.
Finally, a "Movie" continuous mode shoots 16 tiny 320x240
images at a selectable frame rate of 7.5, 15, or 30 frames/second,
storing them in a single 1280x960 image file.
The camera slows a fair bit when recording full-resolution RAW
or TIFF files, although its performance there is still very much
in the top echelon, particularly considering that it's saving 8
megapixel images. It really would be nice to see some level of
buffering applied to RAW and TIFF files though, as a lot of prospective
users of the F828 are likely to want to shoot in RAW mode.
Overall, the F828 is easily the fastest "prosumer" non-SLR
camera on the market, by a wide margin. With its long 7x zoom lens,
it'll make an excellent camera for sports shooters. (Although it'd
be nice to see something like Fuji's "Final 5" shooting
mode, for capturing critical moments despite lagging reflexes on
the part of the photographer.
The only complaint I have about the F828's timing performance is
that it's one of the (unfortunately many) cameras that "penalize"
you for pressing the shutter button too quickly after the previous
shot is taken. If you click and hold down the shutter button immediately
after a shot is taken, the camera will save that shot to the memory
card and then just sit there. You have to release the shutter button
and press it again to take the next photo. In practice, you can
develop a pretty good sense of how long to wait before pressing
the shutter button, and so avoid the "penalty," but it's
easy to get a little over-eager in the face of fast-breaking action.
And the camera should really handle this anyway. Why can't the
camera simply notice that the shutter button is still down and
fire off another frame as soon as it's able? As noted, this is
an unfortunately common behavior among even the higher-end digital
cameras I've tested, but one that I'd really like to see
done away with.
Operation and User Interface
Like the F717, the F828 packs a lot of camera controls into a relatively
small space, making good use of the left side of the lens barrel to spread
the various buttons out a bit. The panoply of external controls may seem
a bit much at first, but I always appreciate having as much external control
as possible, as it saves having to scroll through LCD menu items for common
settings. Given my prior experience with the F707 and F717 models, I quickly
adapted to the F828's control layout, since most of the differences between
the two are fairly subtle. Even novice users should be able to quickly adapt
to the F828's control setup though, as it's very logically laid out. The
Mode dial on top of the camera controls the main exposure mode, while things
like Flash mode, Macro mode, White Balance, Exposure Compensation, etc. are
all controlled via small buttons, either on the rear panel or along the left
side of the lens barrel.
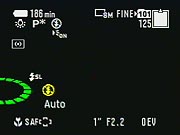 New
to the F828's interface are a series of animated "virtual dials,"
that appear on the LCD screen whenever a setting is adjusted, such as flash
mode, exposure compensation, etc. (The static shot at right shows the flash-mode
virtual dial.) A virtual dial also appears in the center of the LCD whenever
the Mode dial is turned. The Command dial, located in the top, righthand
corner of the rear panel, lets you quickly adjust aperture and / or shutter
speed without accessing a menu system, a nice touch. I also liked dual rings
on the lens barrel for focus and zoom control. Overall camera operation is
smooth and efficient, with an easy-to-navigate LCD menu system and a user
interface that doesn't require a long learning curve. You may spend a few
minutes reading through the manual, but once you get the hang of things,
the user interface is quite intuitive.
New
to the F828's interface are a series of animated "virtual dials,"
that appear on the LCD screen whenever a setting is adjusted, such as flash
mode, exposure compensation, etc. (The static shot at right shows the flash-mode
virtual dial.) A virtual dial also appears in the center of the LCD whenever
the Mode dial is turned. The Command dial, located in the top, righthand
corner of the rear panel, lets you quickly adjust aperture and / or shutter
speed without accessing a menu system, a nice touch. I also liked dual rings
on the lens barrel for focus and zoom control. Overall camera operation is
smooth and efficient, with an easy-to-navigate LCD menu system and a user
interface that doesn't require a long learning curve. You may spend a few
minutes reading through the manual, but once you get the hang of things,
the user interface is quite intuitive.
Control Enumeration

Shutter Button: Located on the right side of the top panel, on an
angled ridge that slopes down toward the front of the camera, this button
sets focus and exposure when pressed halfway. Fully depressing the button
fires the shutter. When the Self-timer is enabled, fully depressing the Shutter
button begins a 10-second countdown before the shutter fires.

Exposure Compensation Button: Behind the Shutter button to the right,
this button displays the exposure compensation virtual dial on the LCD screen.
Turning the Command dial while holding down the button adjusts the setting.
In Manual exposure mode, this button accesses the aperture adjustment.

White Balance Button: To the left of the Exposure Compensation
button, this button accesses the available White Balance
settings: Auto, Daylight, Cloudy, Fluorescent, Incandescent, Flash, One-Push,
and One Push Set (manual setting). Pressing the button displays the
setting dial on the LCD monitor, and the setting is adjusted via the Command
dial.

Status Display Illuminator Button: Located on the far right of
the top panel, behind the Exposure Compensation button, this button activates
an illuminator for the status display panel.
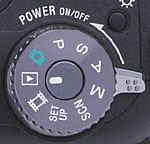
Mode Dial: Sitting atop the Power switch, this knurled dial controls
the camera's operating mode. Choices are Full Auto (green camera icon), Program
AE, Shutter Priority, Aperture Priority, Manual, Scene, Setup, Movie, and
Playback modes.
Power Switch: Located underneath the Mode dial on top of the
camera, pushing this lever forward turns the camera on or off.
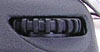
Command Dial: Located in the top right corner of the rear panel, this
black, ribbed dial controls various exposure settings in any Record mode,
when turned while pressing a control button. In Aperture Priority and Shutter
Priority exposure modes, it adjusts the available exposure variable when
turned. In Manual mode, turning the dial adjusts the shutter speed. (It adjusts
aperture when turned while pressing the Exposure Compensation button.)
In Playback mode, when image enlargement has been enabled via the Magnify button,
turning this dial enlarges the image as much as 5x, or zooms back out, all
the way to 1x.

AE Lock/Erase Button: To the left of the Command dial, this button
locks the exposure reading until it's pressed again, or until the Shutter
button is pressed. In Playback mode, this button displays the Erase menu
for a single image, or for all images when in Index display mode.
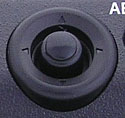
Four Way Multi-Controller: Located between the Menu and AE Lock buttons
on the camera's rear panel, this multi-directional rocker button navigates
through the LCD settings menus. Pressing the button at the center acts as
an OK button, confirming menu selections. In Record mode, pressing the button
in any autofocus mode cycles through the available AF area settings: Multi-Point,
Spot, and Center areas. When in Spot AF area mode, the controller moves the
AF area selection to any of the available AF areas on the screen.
In Playback mode, the Right and Left arrows scroll through captured images. The Up and Down arrows control the playback volume. When an image has been digitally enlarged, pressing the center of this button returns to the normal view.

Menu Button: To the left of the Multi-Controller
is the Menu button, which activates and deactivates the settings menus in
all camera modes (except for Setup mode, which automatically displays the
menu upon entering the mode).

Open CF Latch: Located on the right side of the camera's rear panel,
this sliding latch unlocks the CF compartment door, revealing the CompactFlash
slot.

CF/MS Switch: Just below the Open CF switch, this slide
switch designates which type of memory card is in use, either a Sony Memory
Stick or a CompactFlash card. The camera can have both types of cards loaded,
but will only write to the one that's explicitly selected via this switch.

Quick Review Button: The first button in a series located beneath
the LCD monitor (reading from right to left), this button displays a quick
review of the most recently captured image. (All Playback mode options are
available.)

Magnify Button: To the left of the Quick Review button, this button
is indicated by a magnifying glass icon. In Record mode, if the digital zoom
is enabled, pressing this button activates the digital zoom. In both zoom
modes, the digital zoom kicks in at a fixed ratio, determined by the zoom
mode in use. With Precision Digital Zoom, pressing this button magnifies
the image by 2x, regardless of the current image size. When Smart Zoom is
selected, the camera restricts the digital zoom to the amount that corresponds
to dropping down to a 1:1 crop of the sensor pixels, at whatever image size
is currently selected. Thus, there's no SmartZoom available when the camera
is recording full-sized 8-megapixel images, while at VGA resolution, 5.1x
of digital zoom is available.
In Playback mode, pressing this button enlarges the captured image to 2.0x (after which, turning the Command dial enlarges the image as much as 5.0x).

Self-Timer/Index Button: Adjacent to the Magnify button on the left,
this button turns the Self-Timer mode on or off. In Playback mode, pressing
this button calls up a nine-image index display.

Display Button: Located to the left of the Self-Timer/Index button,
this button controls the on-screen information display in all camera modes
(except Setup mode). It also enables the histogram display.

Finder / LCD Switch: Just below the lower left corner of the LCD monitor,
this switch directs the viewfinder display to either the viewfinder eyepiece
(EVF) or the LCD monitor.
![]()
Diopter Adjustment Dial: Hidden on the underside of the viewfinder
eyepiece, this dial adjusts the viewfinder display for eyeglass wearers.

Open Flash Switch: Located at the top of the camera's left panel
(as viewed from the rear), directly beneath the pop-up flash compartment,
this sliding switch releases the flash from its compartment.

Flash Button: Below the Open Flash switch, this button cycles
through the available main flash modes: Auto, Forced, Slow-Sync, and Suppressed.

Metering Button: To the right of the Flash button, this button cycles
through the Multi-Pattern, Center-Weighted, and Spot metering options.

Macro Button: Below the Flash button on the camera's left panel,
this button turns the macro shooting mode on or off.

Drive Button: Adjacent to the Macro button on the right, this
button accesses the F828's continuous shooting and bracketing modes when
pressed while turning the Command dial. Available modes are Normal, Speed
Priority Burst, Framing Priority Burst, Auto Exposure Bracketing, and Multi-Burst
modes.

Focus Switch: Directly beneath the Macro button, this sliding switch
alternates between Auto and Manual focus modes.

Night Shot / Night Framing Button: To the left of the Focus switch,
this button cycles between Normal, Night Shot, and Night Framing modes when
pressed while turning the Command dial.

Zoom Adjustment Ring: Surrounding the end
of the lens barrel, this collar controls the optical zoom.

Focus Adjustment Ring: Also surrounding the lens barrel, though
further back, this second adjustment ring controls the manual focus.
Camera Modes and Menus
Full Auto
Indicated on the Mode dial by a green camera icon, this
mode places the camera in charge of everything apart from flash, zoom, resolution,
and record mode. (Think of this as a quick way to get back to the camera's
default settings, without disturbing all the settings you've made in various
menus.)
Program AE (P): This mode puts the camera in control of aperture and
shutter speed, while you control all remaining exposure decisions. You can
cycle through equivalent exposure settings by turning the Command dial, thereby
biasing the exposure either toward shutter speed or depth of field.
Shutter Priority (S): Shutter Priority mode lets you control the shutter
speed, from 1/2,000 to 30 seconds, while the camera selects the best corresponding
aperture setting. You retain control over all other exposure variables.
Aperture Priority (A): As the opposite of Shutter Priority mode, Aperture
Priority mode lets you the aperture setting, from f/2.0-2.8 (depending on
lens zoom setting) to f/9, while the camera chooses the best shutter speed.
All other exposure parameters are under your control.
Manual Exposure Mode (M): This mode provides
total control over the exposure, as you're able to select both aperture and
shutter speed independently of each other, as well as control all other exposure
variables.
Scene (SCN): Scene mode offers four preset
shooting modes to choose from (Twilight, Twilight Portrait, Landscape, and
Portrait) which set the camera's exposure controls for photographing each
specific subject. The available exposure settings depend on the scene selected.
Twilight and twilight portrait both enable camera-determined exposure times
longer than 1/30 second. Twilight mode disables the flash, while Twilight
Portrait enables it. Landscape mode sets the exposure system to prefer smaller
apertures, for greater depth of field. Portrait mode is the opposite, setting
a bias toward larger apertures, for less depth of field.
Movie Mode: Marked on the Mode dial with
a film strip icon, this mode allows the user to capture moving images with
sound.
 Record
Menu: In each of the above recording modes, pressing the Menu
button calls up the following menu selections. Some options are not available
in all modes.
Record
Menu: In each of the above recording modes, pressing the Menu
button calls up the following menu selections. Some options are not available
in all modes.
Movie Mode Menu - MPEG Movie Option: MPEG Movie
mode has only two options on its record menu:
 Image
Size: Sets the resolution for movies. Choices are 160 x 112, 640
x 480 Standard, and 640 x 480 Fine.
Image
Size: Sets the resolution for movies. Choices are 160 x 112, 640
x 480 Standard, and 640 x 480 Fine.
Playback Mode: Indicated on the Mode dial
with the traditional green arrow Playback symbol, this mode lets the user
scroll through captured images on the Memory Stick. Images can be deleted,
protected, copied, resized, rotated, or set up for printing on DPOF devices.
Movie files and Clip Motion animations can also be played back. Pressing
the Menu button displays the following options:
 Folder:
Selects which folder will be played back, and displays the number of
files, creation date, and folder name for each.
Folder:
Selects which folder will be played back, and displays the number of
files, creation date, and folder name for each.
Setup Mode: This mode lets you change a
variety of camera settings. The Setup menu is displays immediately upon entering
the mode. Five separate screens of options are available, selected via a
tabbed interface running down the left-hand side of the screen.
 Camera
1:
Camera
1:
 Camera
2:
Camera
2:
 Card Tool:
 Setup 1:
 Setup 2:
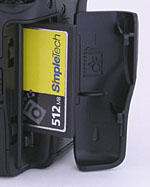 Image
Storage and Interface
Image
Storage and Interface
The F828 uses either the proprietary Sony Memory Stick (compatible with Memory
Stick PRO) or CompactFlash Type I or II cards for image storage. The camera
is also compatible with the IBM MicroDrive. CompactFlash cards insert into
a compartment on the right side of the camera, while the Memory Stick slot
is tucked away inside the battery compartment.
Sony's provision of a CF card slot is a real departure for them, but a very welcome feature. Most prospective purchasers of this camera will already own a digicam, and there's a good chance that that card will be in the CF format. Sony's addition of a CF slot thus removes one purchase barrier for many users.
The camera does not ship with a memory card, as the large image size really calls for a large capacity memory card, and Sony evidently didn't want to run up the cost to the extent that would have resulted from including a large card. (Most users of this class of camera purchase their own large memory cards in any case.)
Individual images can be write-protected from accidental erasure (except through
card formatting) via the Protect option under the Playback settings menu.
Individual write-protection also prevents the image from being rotated, but
does permit resizing and trimming, since those operations don't disturb the
original image, but rather make a new copy. Entire Memory Sticks can be write-protected
by sliding the lock switch on the stick into the locked position, which also
guards against the stick being reformatted.
Like the F717 before it, the F828 offers the ability to set up individual
folders on the memory card. You can thus manage images by folder and choose
where images will be recorded. This could be handy if you wanted to organize
your photos by events, date, etc. (This is a larger issue now that really
large memory sticks are available, not to mention gigabyte-plus CF cards.)
The F828's LCD monitor reports storage information in its detailed information
display mode, including the current number of images captured and how many
additional images can be stored at the current image resolution and quality
settings, while a small graphic shows you approximately how much space is
left on the card. (In Movie mode, the camera reports the available recording
time remaining.) Through the Playback settings menu, you can designate whether
the camera numbers each image sequentially (from one card to the next), or
restarts file numbering with each new card inserted. The Playback menu also
offers a Resize option, as well as a Rotate tool. The camera's Digital Print
Option Format (DPOF) compatibility allows you to mark specific images for
printing on a DPOF-compatible printer. Through the Setup menu, you can decide
whether or not to print the date and / or time on the image as well. A new
feature on the F828 is the USB Direct Print capability (labeled under the
Setup menu as Pict Bridge USB option), which provides direct printing capabilities
to any printer supporting the recently-defined Pict Bridge standard.
Image Size options include 3,264 x 2,448; 3,264 (3:2); 2,592 x 1,944; 2,048
x 1,536; 1,280 x 960; 640 x 480; and 320 x 240 pixels (E-Mail recording option).
Movie file sizes are 640 x 480, and 160 x 112 pixels. In addition to the
uncompressed TIFF and Fine and Standard JPEG compression levels, the F828
also offers a RAW data mode.
The table below shows the approximate still image capacities and compression
ratios for a 256MB memory card (That card size being a good compromise between
size and cost, and providing reasonable capacity at the 828's highest resolution/quality
setting.) Note that in the following, 1 MB = 1,000,000 bytes, as is used
by memory card manufacturers in specifying the capacities of their cards.
(Normally, in computer parlance, 1 MB = 1,048,576 bytes, 20 bits' worth of
memory space.)
| Resolution/Quality |
|
|
|
|
|
| Highest
Resolution 3,264 x 2,448 |
Images (Size) |
64 3.9 MB |
2.2 MB |
17.4MB (Note, also saves JPEG) |
24.0MB (Note, also saves JPEG) |
| Approx. Compression |
6:1 | |
|
|
|
| Higher
Resolution 2,592 x 1,944 |
Images (Size) |
2.5 MB |
1.3 KB |
|
|
| Approx. Compression |
|
|
|
|
|
| High
Resolution 2,048 x 1,536 |
Images (Size) |
1.6 MB |
886 KB |
|
|
| Approx. Compression |
|
|
|
|
|
| 1,280 x 960 S |
Images (Size) |
591KB |
328KB |
|
|
| Approx. Compression |
|
|
|
|
|
| Resolution 640 x 480 |
Images (Size) |
164KB |
66KB |
|
|
| Approx. Compression |
|
|
|
|
|
The F828 is also accompanied by a USB cable for quick connection to a PC or
Macintosh computer, as well as a software CD containing interface software
and USB drivers. The USB connection supports both USB 1.0 and 2.0.
I tested the F828's download speed on my Windows XP machine (Sony VAIO, 2.4
GHz Pentium IV, 512 MB RAM, supports USB 2.0), and was astonished by the
results. I clocked it at 20.5 seconds to download 54.8 megabytes of files
from a Memory Stick PRO card, a transfer rate of 2.67 MBytes/second.(!) It
was somewhat slower when copying from CF cards, with speeds ranging from
1.98 to 2.00 MB/sec with fast CF cards, and 1.2 MB/sec for an old, very slow
card. Here (at last) is a camera that *really* supports the USB 2.0 standard!
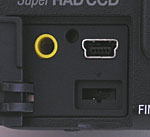 Video
Out
Video
Out
The F828 comes equipped with an Audio / Video cable for connection to a television
set. (Through the Setup menu, users can select NTSC signal format for U.S.
and Japanese systems and PAL for European systems.) Once connected to the
TV, you can review images and movies or record them to videotape.
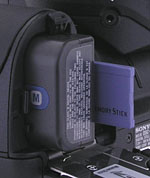 Power
Power
The F828 is powered by an NP-FM50 InfoLITHIUM battery pack (M series) and
comes with an AC adapter which doubles as an in-camera battery charger. InfoLITHIUM
battery packs contain a chip that exchanges information with the camera,
allowing the camera to report approximately how many minutes of battery life
are left at the current drain level. This information is displayed on the
LCD monitor and the electronic viewfinder with a small battery graphic. The
AC adapter plugs into a small socket on the camera's back panel (lower left
corner). It can run the camera without a battery inserted, or charge the
battery when the camera isn't in use.
The Li-Ion battery packs used in Sony cameras prevent me from making my usual
direct power measurements, but the good news is that the InfoLITHIUM system
reports projected camera runtime while the battery is being used in the camera.
Despite the F828's excellent battery life (even better than that of the F717)
and the excellent feedback provided by the InfoLITHIUM system, I still recommend
users purchase and pack along a second battery, though. (Another advantage
of the Li-Ion technology used in the InfoLITHIUM batteries is that they don't
"self-discharge" like conventional NiMH rechargeable cells do,
and so can hold their charge for months on the shelf or in your camera bag.)
| |
|
| Capture Mode, w/LCD | 193 minutes |
| Capture Mode, w/EVF | |
| Image Playback, w/LCD | |
| Image Playback, w/EVF | |
Included Software
The F828 ships with a pair of CDs in the box. The first is the standard Sony
disc that accompanies all their cameras, containing USB drivers for both
Mac and Windows (not needed for Mac OS 8.6 and later, or Windows XP), Image
Transfer, a PC-only automated image download utility, and Pixela ImageMixer
1.5, a basic tool for browsing, creating albums, and making Video CDs containing
slide shows. These applications are very basic, so I won't spend the time
here to describe them. (Frankly, I don't think either is terribly useful.)
Of greater interest is Sony's new Image Data Converter (IDC for short), a Windows-only utility to manipulate the F828's .SRF RAW format files and convert them to either JPEG or TIFF formats after adjustment. IDC seems to be a reasonably capable application in terms of its ability to adjust images, but is so slow that I question how many people will actually use it. The screen shots below give you an idea of what the IDC user interface and controls look like.
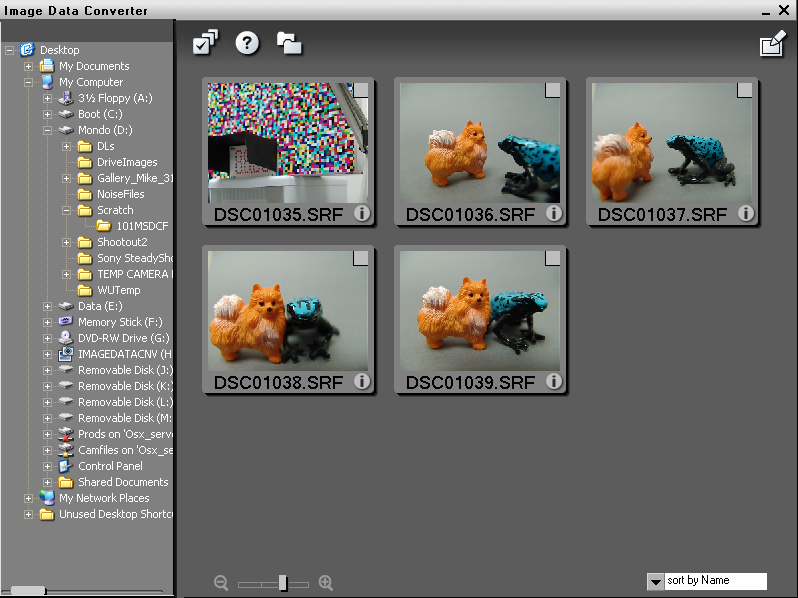
When you launch IDC, you land in a browser screen that shows only .SRF files. You can navigate the usual Windows directory tree in the lefthand pane, and view thumbnails of SRF files in the righthand one. If you want, you can dismiss the lefthand pane to see the thumbnails panel full-screen. I mentioned above that IDC is no speed demon: Even though I think it's just extracting thumbnails embedded in the SRF files, it took over a second apiece to put them up on my 2.4 GHz PIV-equipped Sony VAIO desktop.
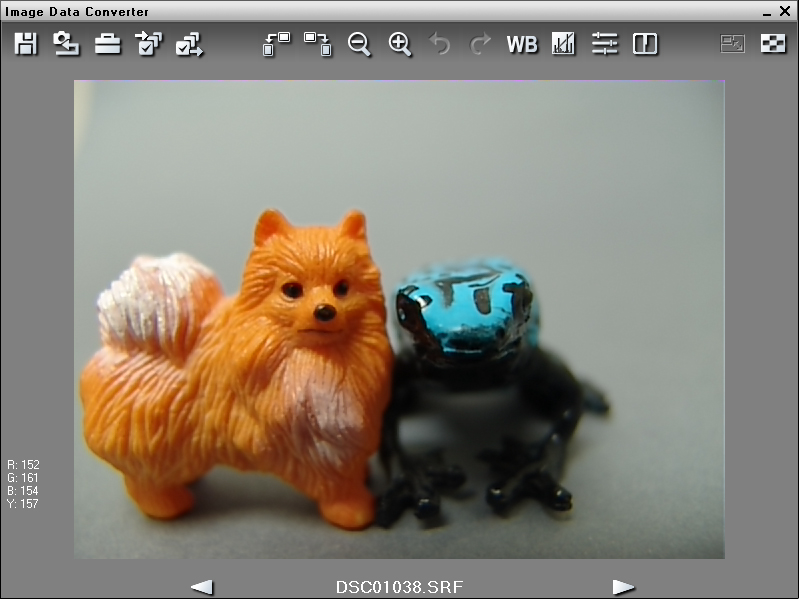
Double-clicking on a thumbnail brings the image up full-screen. Depending on the preview mode you've selected in the setup menu on the previous screen, you'll either see a somewhat fuzzy view, shrunk to fit the viewing window, or a portion of the full-sized image, shown 1:1. Well, eventually you'll see the full-size image. - IDC's preview update can best be described as "glacial". On my 2.4 GHz machine (still pretty fast by current standards), any refreshing of the "normal" (full-sized) image preview took 35.5 seconds. (!) This would be bad enough, but any change of a tool or a setting forced a redraw, taking the full 35.5 seconds each time. - And the image redrew some times when it clearly didn't need to, such as when an adjustment control was being dismissed without any changes having been made, etc.
The one upside to the full-sized image preview is that the computer apparently doesn't have to re-render the image before saving it, so "save as" operations happen almost instantly when you're proceeding from a normal preview. If you had instead been working from the "fast" preview mode, you'll incur the 35-second (depending on your machine's clock speed) delay when you go to save an image.
While I haven't shown the dialog boxes here, IDC does have one minor saving grace, in that it lets you batch-process images from the thumbnail display window, applying a set of saved image-adjustment settings to all images being converted. This could save a lot of human time, but is limited in that you're forced to apply the same adjustments to all images in the batch.
RAW file adjustment controls
Image Data Converter does offer a fairly complete set of adjustment controls, and would be quite useful if only Sony could manage about a 10x speed improvement in the full-sized preview refresh. (Even that could be a little painful, waiting several seconds to see the result of each adjustment.) If you can live with the rather low quality of the preview image in the "fast" mode, it's actually fairly usable.
Here are some screen shots of the control panels for each adjustment available within Image Data Converter:
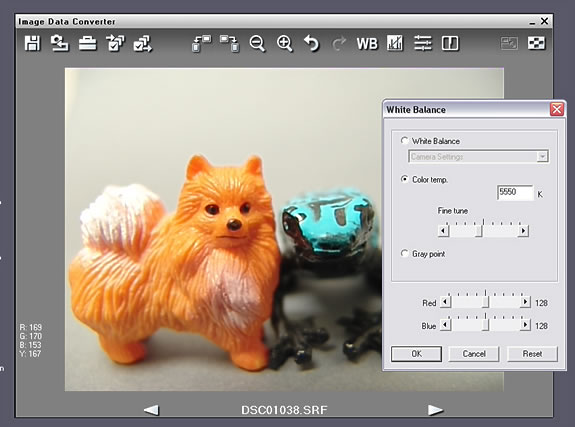
The white balance adjustment control panel lets you select either the original camera white balance setting, one of the various presets available (daylight, incandescent, etc), a color temperature between 3000 and 10000K, or choose a reference gray point on the subject with an eyedropper tool. Alternatively, you can adjust the red or blue channels of the image interactively. All of this worked as expected, with the exception of the color temperature adjustment, which broke sharply to the blue at a setting of 5000K (A setting of 5550K produced a normal-looking picture, while a setting of 5000K resulted in a very blue-looking image.) Apart from this one (fairly serious) bobble though, the white balance controls worked very well.
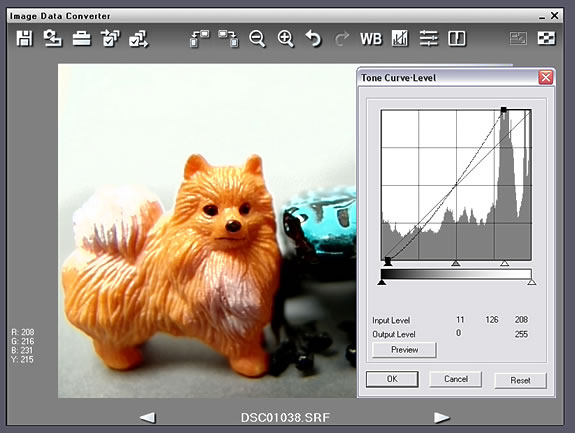
Image Data Converter's tone control offers an interesting and highly usable combination of a basic "levels" (histogram) control and a tone curve on which you can set multiple control points, which serve as handles to drag the curve around. This tool worked very smoothly, but I had a bit of a cognitive disconnect because the highlight nd shadow points can only be controlled by the sliders under the histogram display, even though they look like the handles that result from clicking on the tone curve manually, and which can be adjusted simply by clicking and dragging them.
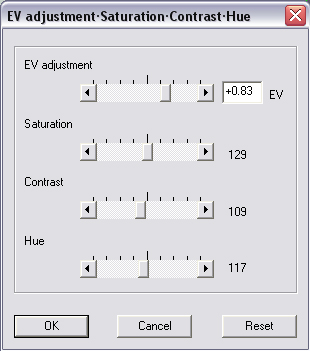
Exposure compensation, color saturation, contrast and overall hue are all controlled from a single panel, shown above. Here again, the controls work pretty much as you'd expect them to. My only comment is that the saturation adjustment is very tweaky -- even very small adjustments have a large impact on the appearance of the image.
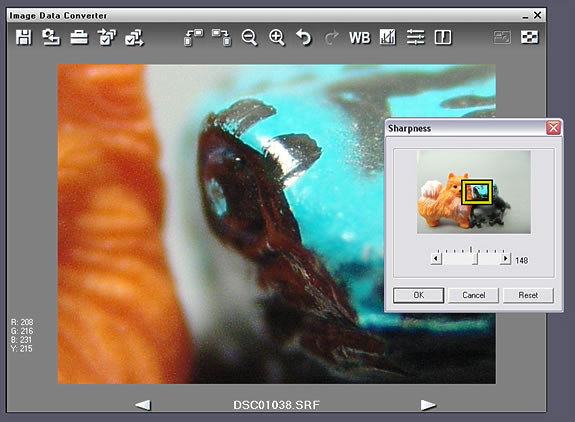
Not much to talk about here: This control panel has only a single slider, which adjusts the amount of algorithmic sharpening applied to the image, in arbitrary units. As an aid to understanding the effects of any setting change you make here, a portion of the image is shown full-screen, even if you don't have the "normal" image preview function enabled. The portion of the image being shown 1:1 can be selected by dragging a small yellow rectangle around a thumbnail of the image.
Overall, Sony's Image Data Converter program is a very good first attempt, with the glaring exception of its glacially-slow image rendering. Its utility is unfortunately severely limited until such time as Sony can dramatically improve its image rendering speed.
In the Box
Included with the DSC-F828 are the following items:
Test Results
In keeping with my standard test policy, the comments given here summarize only my key findings. For a full commentary on each of the test images, see the Sony DSC-F828's "pictures" page.
As with all Imaging Resource product tests, I encourage you to let your own eyes be the judge of how well the camera performed. Explore the images on the pictures page, to see how the F828's images compare to other cameras you may be considering.
Optical distortion on the F828 was lower than average at the wide-angle end, where I measured approximately 0.7 percent barrel distortion, very good for a 28mm zoom, but still more than I like to see. (Barrel and pincushion distortion are pet peeves of mine. Most digicam lenses show 0.8-1.0 percent barrel distortion at the wide angle end, so it's not fair to single out any one manufacturer's cameras, but I'd really like to see all lenses improve in this area.) Interestingly though, the F828 gets better quickly as you zoom away from the full wide-angle setting. At an equivalent focal length of only 33.5mm, the barrel distortion drops to only 0.25 percent, an excellent figure by any measure. As usual, the extreme telephoto end did a little better, as I measured a 0.32 percent pincushion distortion there.
Chromatic aberration looks to be higher than average, showing about nine or ten pixels of fairly strong coloration on either side of the target lines. (This distortion is visible as a very slight colored fringe around the objects at the edges of the field of view on the resolution target.)
In my test shooting, I found some evidence of the infamous "purple fringe" problem, but seemingly less than some other reviewers did. (This is an optical phenomena that produces bright purple fringes around the edges of very bright objects in the image. It's apparently caused by a combination of conventional chromatic aberration and diffraction by the microlenses on the surface of the CCD itself.) I was able to trigger the purple fringe problem in the studio, particularly with very strong light sources, at relatively close range, and with the lens set to its wide angle position and maximum aperture. For whatever reason though, I saw little or no evidence of it in most of my test images. Not to say that the problem isn't there, just that the range of shooting conditions I worked under didn't seem to trigger it to the extent seen by some reviewers. For what it's worth, it does seem to require a pretty severe light overload to trigger the phenomena.
Conclusion
| Free Photo Lessons | |
|
<<F828 Sample Images | Additional Resources and Other Links>>
Reader Comments!
Questions, comments or controversy on this product? Click
this link to see what other Imaging Resource readers have had to say about
the Sony Cyber-shot DSC-F828, or add comments of your own!