 Back
to Full Toshiba PDR-M700 Review
Back
to Full Toshiba PDR-M700 ReviewGo to Toshiba PDR-M700 Data Sheet
Go to Toshiba PDR-M700 Pictures Page
Up to Imaging Resource Cameras Page
Use your browser's "Back" button to return to the previous page, or the links at the top and bottom of this page to navigate to related information. If you have difficulty fitting the text on this page onto your printer output, simply resize your browser window to a narrower width and print again.
Remember us when it's time to buy!
Dave here: Have our reviews been helpful to you? (Is this article you're reading right now useful?) Preparing this level of information on as many products as we do is incredibly hard work, not to mention expensive. Things on the Internet may look like they're free, but they're not. (As a lot of big dot.com companies are finding out these days.) Somewhere, somebody has to pay to produce worthwhile content. YOU can help us though, by remembering us when it comes time to make your purchase. Would you consider coming back to our site and clicking-through to one of our advertisers to make your purchase? Every dollar you spend with one of our advertisers helps us directly (in affiliate fees) or indirectly (the advertiser will keep renewing their ad contract with us). To make it easy for you to support us, here's a URL you can visit, to see all our current advertisers, with links to click on that will register your visit to them as having come from our site. It's up to you where you buy, but Mike, Mike, Kim, Yazmin, Marti and I would be really grateful if you'd help us out by choosing one of our advertisers to purchase from.
Thank you for your support!
Dave Etchells, Founder & Publisher
Visit our "Buy Now" Page:
https://www.imaging-resource.com/buynow.htm
Back
to Full Toshiba PDR-M700 Review
Go to Toshiba PDR-M700
Data Sheet
Go to Toshiba PDR-M700
Pictures Page
Up to Imaging Resource Cameras
Page
Toshiba PDR-M700Toshiba introduces 10x optical zoom and an updated user interface. Review First Posted: 08/26/2003 |
|
 |
|
3.37 megapixel CCD delivers
2,048 x 1,536 images |
| |
10x optical zoom, 37-370mm
equivalent focal length range |
|
| |
Full
manual exposure option for sophisticated users |
|
| |
Updated user interface |
|
| * | Large, 2.5-inch color LCD monitor | |
Manufacturer Overview
Toshiba is clearly one of the true "mega" players in the world of
computers and electronics. When they moved into digital cameras, they brought
tremendous engineering resources to bear. Their effort has borne fruit in the
form of fast, functional, and very inexpensive camera models. Now, the PDR-M700
arrives with excellent exposure control and flexibility, plus the benefit of
a true 10x optical zoom lens. (Using quality Canon optics.) A generous, 2.5-inch
LCD monitor, a handful of preset scene modes, and (optional) complete manual
exposure control recommend the PDR-M700 to novice amateurs and experienced enthusiasts
alike.
Highlights
Executive Overview
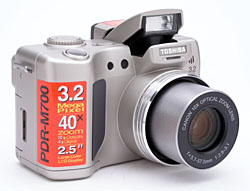
One of the newest arrivals on the digicam scene, the Toshiba PDR-M700 features
many of the same exposure control options I've enjoyed on the most recent Toshiba
models. What's exciting about this new model is the true 10x optical zoom lens
(using quality Canon optics), larger LCD panel (a full 2.5 inches), and a slightly
redesigned user interface that's a little more playful than previous Toshiba
designs. The PDR-M700 is just slightly bulky (it definitely won't fit into your
shirt pocket), but it's still compact enough for easy traveling. The all-silver
plastic body sports a similar shape to previous Toshiba models, and has a substantial
hand grip for a secure, comfortable hold. A neck/shoulder strap comes with the
camera, as well as a soft camera case, to make toting it a little easier.
The PDR-M700 is equipped with a 10x optical zoom, 5.7-57.0mm lens, equivalent
of a 37-370mm lens on a standard 35mm camera. Aperture can be automatically
or manually adjusted from f/2.8 to f/8.0. (The maximum aperture ranges from
f/2.8 to f/3.1, depending on the zoom setting.) Focus ranges from 3.9 inches
(10 centimeters) to infinity, which includes the macro range. The camera also
offers an Infinity focus setting, as well as two fixed focal distances (1.0
and 3.0 meters) through the Record menu. In addition to the 10x optical zoom,
the PDR-M700 also offers as much as 4x digital zoom (but keep in mind that image
quality suffers with digital enlargement). The PDR-M700 does away with an optical
viewfinder, instead offering a 2.5-inch color LCD monitor and a smaller "electronic"
eye level viewfinder (EVF) for composing images. Both displays are complete
with image information and menu screens, and the Display button on the rear
panel switches the view from one to the other. The LCD monitor displays a good
bit of information about the camera and the exposure settings, including a small
histogram of the image's tonal range, which helps you gauge how much an image
may be under- or overexposed. As is the case with many cameras having only electronic
viewfinders though, the M700 is difficult to use in low light situations. You
can only see what the camera is pointing at in light levels roughly corresponding
to that of a well-lit city street at night, so the camera's low light ability
is rather limited. - It can actually capture images in very dark surroundings,
it's just that you just can't see what it's pointing at until after the shot
is captured.
Complete exposure control is available on the PDR-M700, including full manual exposure control. The Mode dial on top of the camera selects between Automatic and Manual Record modes. Within each major recording mode you have a range of exposure modes to choose from. In Automatic Record mode, you can opt for Auto exposure mode, or Portrait, Landscape, Sports, Portrait + Landscape, Night Scene, or Multi scene settings. (Multi mode captures 16 small images continuously at 0.13-second intervals, which are saved as one 2,048 x 1,536 image.) Under Manual Record mode, you can choose from Program AE, Aperture Priority, Shutter Priority, and Manual exposure modes. Shutter speeds range from 1/2,000 to 16 seconds, depending on the exposure mode selected. Exposure Compensation is adjustable from -2 to +2 exposure equivalents (EV) in one-third-step increments, and an Autoexposure Bracketing option captures either three or five images at different exposure settings. By default, the PDR-M700 uses a Center-Priority metering mode, but a Spot option is also available.
White Balance options include Auto, Sunlight, Cloudy, Daylight (Bluish) Fluorescent, Reddish Fluorescent, Incandescent, and two Preset options (manual settings). Sensitivity can be manually set to ISO equivalents of 70, 100, 200, or 400, with two Auto settings available. Sharpness and contrast adjustments are available as well, in addition to black-and-white and sepia monochrome settings, and a Vivid color adjustment for more saturated colors. The PDR-M700 offers two- and 10-second self-timer options, and a Remote Control mode for use with the included IR remote. The camera's built-in, pop-up flash operates in Auto, Red-Eye Reduction, Forced, Suppressed, and Slow Synchro modes. The PDR-M700 also features Standard and High Speed Continuous Shooting modes, as well as a Movie mode for recording moving images with sound.
Images are recorded to SD memory cards, and a 16MB card comes with the camera (although strongly I advise picking up a larger card so that you aren't limited by a small image capacity). Four AA batteries power the camera (either NiMH or lithium is recommended), and a set of single-use alkaline batteries is included. I advise picking up two sets of rechargeable NiMH batteries and a good charger, so that you have a freshly-charged set on-hand at all times. Click here to read my "battery shootout" page to see which batteries currently on the market are best, or here for my review of the Maha C-204F charger, my longtime favorite. Also included with the camera is an A/V cable for connecting to a television set, and a USB cable for downloading images to either a Mac or PC. The accompanying Digital Still Camera software CD includes ACDSee for minor image editing and organization capabilities.
Design
Slightly bulky but still quite manageable, the Toshiba PDR-M700 is just slightly
bigger than preceding models in Toshiba's "M" series. The larger lens
barrel accommodates the impressive Canon 10x zoom lens, and the pop-up flash
compartment adds some height to the top panel. Other design enhancements over
previous models include a larger, 2.5-inch LCD monitor, full manual exposure
mode, and an updated LCD menu system. The PDR-M700's 3.37-megapixel CCD captures
high-quality images, which can be printed as large as 8x10 inches with good
detail. (Smaller resolutions are available for easier email transmission or
use on the Web.) The PDR-M700's silver, all-plastic body is quite portable,
especially with the accompanying neck strap attached. Although the camera's
dimensions of 4.31 x 3.02 x 2.60 inches (110 x 77 x 66 millimeters) keep it
out of shirt pockets, the camera should fit into larger coat pockets, purses,
and backpacks. Weighing in at 14.6 ounces (413 grams), with batteries and SD
card, the PDR-M700 has a comfortable heft but is still portable enough to make
a reasonable travel companion.
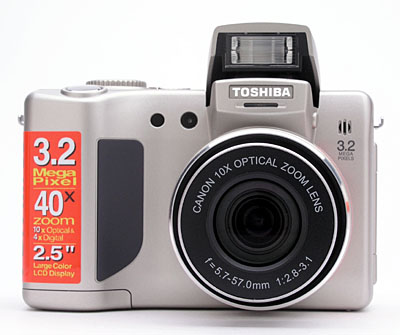
The front of the camera is dominated by the large lens barrel (necessary to accommodate the 10x optical zoom lens). Filter threads inside the lip of the lens barrel accommodate the included lens adapter ring, which attaches to accessory lenses and also serves as a lens shade. (Kudos to Toshiba for including a lens adapter ring in the box, rather than requiring users to purchase it as an optional accessory.) A plastic, removable lens cap protects the lens surface, and tethers to one of the neck strap eyelets via a small strap. Whenever the camera is turned on with the Mode dial set to one of the capture modes, the lens extends from the body into its operating position, projecting about another 7/8 of an inch. Likewise, it retracts when the camera is switched off. Just above the lens is a small LED behind a wide lens that flashes through the colors of the rainbow when power is turned on. (It serves no discernible purpose, as far as I can tell, it's just there for decorative effect.) Also visible from the front is a small microphone (just above the top left corner of the lens when looking from the front), and the remote control and flash sensors (on the right side of the lens). A bulky hand grip is substantial enough for a firm hold, and features a rubbery strip that won't let fingertips slip.
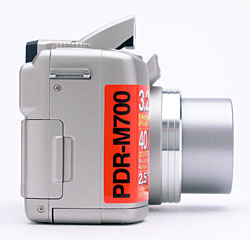
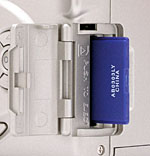
On the right side of the camera, when viewed from the rear, is the SD memory card slot, protected by a smooth plastic door that snaps shut with light finger pressure. One of the neck strap attachments appears atop the right panel.
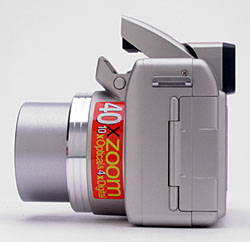
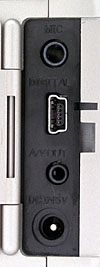
On the opposite side of the camera is the second neck strap eyelet, and the connector compartment. A hinged plastic door covers the compartment, which houses the Mic (for connecting a more sensitive microphone), Digital (USB), AV Out, and DC In jacks. Also from this view, you can see the pop-up flash release button on the side of the flash compartment.
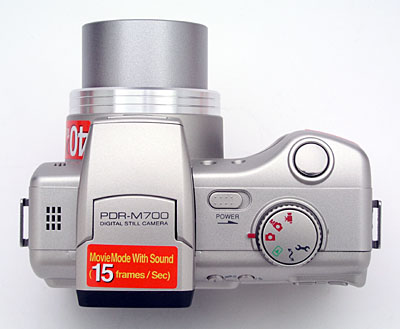
The camera's top panel features the Shutter button, sliding Power switch, Mode dial, and pop-up flash compartment. On the far side is a small speaker.

The PDR-M700's rear panel holds the remaining camera controls, including the Information, Flash, Zoom, Menu, Erase, and Display buttons. There's also a Four-Way Arrow pad with an OK button in the center. The 2.5-inch color LCD monitor dominates most of the space, and an electronic optical viewfinder eyepiece is just above it, with a diopter adjustment and camera status LED lamp.
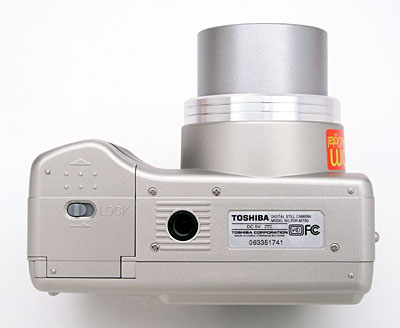
The camera's bottom panel is nice and flat, holding the plastic threaded tripod mount and battery compartment. The battery compartment is too close to the tripod mount to allow for quick battery changes when working with a tripod, but the side DC In port allows convenient connection to the AC adapter when working indoors. The battery compartment door slides forward before opening, and features a latch to prevent it from accidentally opening while shooting.
Viewfinder
The PDR-M700 offers both an electronic optical viewfinder (EVF) and a generous,
2.5-inch color LCD monitor for composing images. The EVF shows the same view
as the LCD monitor, when enabled via the Display button. All of the same menu
and information display overlays are visible in the smaller viewfinder as well.
A diopter adjustment dial adjusts the view for eyeglass wearers, and the viewfinder
itself has a fairly high eyepoint. On the outside edge of the viewfinder, a
small, red and green LED clues you in to the camera's status (i.e., if the focus
is set, flash is ready, etc.). I've said many times in the past that I'm no
fan of EVFs, and the M700 gives me little reason to change my mind about them.
The biggest problem with them is that they're generally useless in dimly-lit
conditions, as there just isn't enough light available to provide a bright (or
even visible) display at the sort of refresh rate the LCD demands. While some
recent digicams have managed to deliver viewable images under surprisingly dark
conditions, the M700 unfortunately isn't one of them. - It can capture images
at light levels a lot darker than those at which you can see what you're aiming
at.
 The
2.5-inch color LCD monitor is a welcome feature, as the larger screen is helpful
when framing tight shots. The overlaid information display reports a variety
of camera settings, including exposure compensation, aperture, and shutter speed.
A small histogram is displayed on the right side of the display, graphing the
tonal distribution of the image and giving you a chance to adjust exposure before
snapping the picture. The information display is omnipresent, however, meaning
you cannot disable it via the Display button without turning off the LCD. (I
find this a little awkward, as the info overlay can obscure critical subject
details at times.) The updated LCD menu system includes an on-screen tab menu
that appears at the bottom of the LCD whenever the camera is powered on. The
menu disappears after a few seconds, but can be recalled by pressing the OK
button. This shortcut style menu provides quick access to common exposure options
such as Exposure Mode, White Balance, Photometry (metering modes), etc., without
requiring a full screen LCD menu. Toshiba also made the PDR-M700's user interface
a bit more playful than on previous models, with animated menu and startup screens.
When you press the Shutter button in Auto mode to capture an image, a digital
representation of a lens diaphragm closing and then opening visually indicates
that you've captured the image (it looks a lot like the opening animation to
a James Bond movie).
The
2.5-inch color LCD monitor is a welcome feature, as the larger screen is helpful
when framing tight shots. The overlaid information display reports a variety
of camera settings, including exposure compensation, aperture, and shutter speed.
A small histogram is displayed on the right side of the display, graphing the
tonal distribution of the image and giving you a chance to adjust exposure before
snapping the picture. The information display is omnipresent, however, meaning
you cannot disable it via the Display button without turning off the LCD. (I
find this a little awkward, as the info overlay can obscure critical subject
details at times.) The updated LCD menu system includes an on-screen tab menu
that appears at the bottom of the LCD whenever the camera is powered on. The
menu disappears after a few seconds, but can be recalled by pressing the OK
button. This shortcut style menu provides quick access to common exposure options
such as Exposure Mode, White Balance, Photometry (metering modes), etc., without
requiring a full screen LCD menu. Toshiba also made the PDR-M700's user interface
a bit more playful than on previous models, with animated menu and startup screens.
When you press the Shutter button in Auto mode to capture an image, a digital
representation of a lens diaphragm closing and then opening visually indicates
that you've captured the image (it looks a lot like the opening animation to
a James Bond movie).
 In
Playback mode, the LCD by default reports basic information such as image number,
quality and resolution, folder number, and the date and time when the image
was captured. Pressing the Info button once dismisses the information screen
entirely. A second press brings up a more detailed display of exposure information,
and a third press displays a large histogram of the image. The PDR-M700 also
features a nine-image index display mode, and a playback zoom function for enlarging
captured images to check framing and focus.
In
Playback mode, the LCD by default reports basic information such as image number,
quality and resolution, folder number, and the date and time when the image
was captured. Pressing the Info button once dismisses the information screen
entirely. A second press brings up a more detailed display of exposure information,
and a third press displays a large histogram of the image. The PDR-M700 also
features a nine-image index display mode, and a playback zoom function for enlarging
captured images to check framing and focus.
Optics Learn how to use lens aperture to control depth of field - Visit our free Photo Lessons area!
Free Photo Lessons
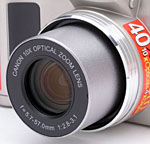 One of the most impressive features on the PDR-M700 is its Canon-built 10x, 5.7-57mm optical zoom lens (the equivalent of a 37-370mm lens on a 35mm camera). I count it as a very positive point that Toshiba teamed with established optical giant Canon for the camera's lens system. The lens is protected by a plastic lens cap, which attaches to the camera body via a small strap, preventing it from being accidentally lost. When the camera is turned on and the Mode dial is set to any capture mode, the lens extends outward from the camera body into its operating position, a distance of about 7/8 of an inch. When the camera is shut off or left in Playback mode for any length of time, the lens retracts automatically. The camera uses a contrast detection autofocus system with a focal range from 3.9 inches (10 centimeters) to infinity, which includes the macro range. A Focus option on the on-screen menu offers Macro and Infinity focus settings, as well as one and three meter fixed focus settings. (The latter useful for shooting after dark, when the autofocus system may not have enough light to operate reliably.) Aperture can be automatically or manually controlled on the PDR-M700, and ranges from f/2.8-3.1 to f/8.0, the maximum value depending on the current zoom position.
In addition to the camera's 10x optical zoom, as much as 4x digital telephoto is available, extending the camera's zoom capabilities to a total of 40x. However, keep in mind that the quality of the image will suffer in the form of reduced resolution when the digital telephoto function is engaged. - And it is very difficult to hold the camera steady at 40x zoom. A set of filter threads inside the lip of the lens barrel accommodates a variety of auxiliary lenses via the included adapter tube accessory and doubles as a lens shade. (Kudos to Toshiba: I really wish more manufacturers would just include lens adapters like this with their cameras, rather than as added-cost, hard-to-find accessories.) When the lens cap is in place, it firmly grips the inside of these threads, protecting them from damage.
Exposure
| Free Photo Lessons | |
|
In Auto mode, the camera controls everything except flash, zoom, and a handful of capture settings, although you do have a choice of six preset "Scene" modes to choose from (detailed below). In Manual mode, you can choose between Program, Aperture Priority, Shutter Priority, and Full Manual exposure modes, through the Exposure Mode setting of the shortcut menu. Program mode puts you in control of everything except shutter speed and aperture, while the Aperture and Shutter Priority modes let you control one exposure variable while the camera sets the other. In Full Manual mode, you have complete control over the exposure. Shutter speeds on the PDR-M700 range from 1/2,000 to 16 seconds in Full Manual and Shutter Priority modes, with the maximum exposure decreasing to 1/2-second in the remaining exposure modes. In addition to the histogram which lets you quickly check the exposure, the PDR-M700 also reports the amount of over- or underexposure it thinks will occur with the Manual exposure mode settings, from -2 to +2 exposure equivalents (EV). Because the histogram can be slightly difficult to read at times, this is slightly more helpful in determining how to adjust the exposure.
Six preset "scenes" are available while shooting in Automatic exposure mode, set through the Scene option of the shortcut menu. Choices include Portrait, Landscape, Sports, Portrait + Landscape, Night Scene, and Multi. The Portrait setting adjusts the aperture so that the background is blurred and the subject is the main focus, while Landscape mode adjusts the camera for distant scenes and landscapes. In Sports mode, the camera increases the shutter speed so that you can capture fast paced action such as sporting events. Portrait + Landscape mode adjusts the aperture and focus so that you can capture a sharply focused subject in front of an expanse of scenery, and have both the foreground and background in focus. As you might expect, the Night Scene setting allows you to photograph people against dark backgrounds, such as cityscapes, without losing any of the background's details. The flash is fixed at the Slow-Sync setting in Night Scene mode. Finally, Multi mode actually takes 16 small images continuously at 0.13-second intervals (7.5 frames per second), which are saved as a single 2,048 x 1,536 image, best used with moving subjects for a sort of timeline.
By default, the PDR-M700 uses a Center-Priority metering mode, which bases the exposure on a large area in the center of the frame. Through the Photometry option of the shortcut menu, however, you can opt for Spot metering, which reads from a small point in the very center of the frame, and is best for off-center or high-contrast subjects. The PDR-M700's Exposure Compensation adjustment ranges from -2.0 to +2.0 exposure equivalents (EV), in one-third-step increments. If you're unsure of the exposure adjustment, the camera's Auto Exposure Bracketing option takes either three or five images at different exposure settings with one press of the Shutter button.
White Balance options include Automatic, Sunlight, Cloudy, Daylight (Bluish) Fluorescent, Reddish Fluorescent, Incandescent, and two Preset options (manual settings). Sensitivity can be manually set to 70, 100, 200, or 400 ISO equivalents, with two Auto settings available. The first, Auto 200, automatically adjusts the ISO from 70 to 200 depending on conditions, while the second, Auto 400, adjusts it from 70 to 400. This is particularly useful if you want the camera to automatically set the ISO it needs, but want to limit how high it can go to prevent excess image noise.
Through the Record menu, you can adjust the image sharpness as well as the contrast. A fun feature on the PDR-M700 is the Color option on the Record menu, which allows you to choose between Standard color, Vivid color, Monochrome, and Sepia tones.A self-timer function allows you to set up a shot and then fire a delayed shutter, with either a 10 or two second countdown. The camera comes with an IR remote control, which lets you fire the shutter and control zoom from a maximum distance of 13.1 feet (4 meters). A Remote Control mode sets up the camera to receive signals from the remote unit. An optional quick image preview appears after firing the shutter, allowing you to delete an image if you aren't satisfied with it. This saves a little time, as you don't have to switch over to Playback mode to check your image.
Flash
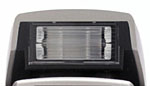 The PDR-M700 features a pop-up flash unit on top of the camera, released by a small button on its side. A Flash button on the rear panel cycles between Automatic, Red-Eye Reduction, Forced, Suppressed, and Slow Synchro modes. Most of the flash modes are pretty self explanatory. Automatic fires the flash depending on the light level. Red-Eye Reduction fires a small pre-flash before firing the full flash to reduce the Red-Eye Effect. Forced mode fires the flash with the shutter, no matter what the light levels are. Likewise, Suppressed prevents the flash from firing at all. Finally, Slow Synchro fires the flash in conjunction with a slower shutter speed for night scenes. Toshiba reports the PDR-M700's flash range as effective from 1.6 to 14.4 feet (0.5 to 4.4 meters) in the telephoto setting. In my own testing, I found the flash to be rather dim at 14 feet, and so would rate its actual range at 10-12 feet or so.
Continuous Shooting
The PDR-M700 offers two continuous shooting modes, accessed through the on-screen menu. Normal Continuous Shooting mode captures as many as 14 frames at approximately one-second intervals while the Shutter button is held down. High Speed Continuous Shooting mode captures as many as six frames at 0.3-second intervals. In both modes, the actual number of frames in the series, and the approximate frame rate, depend on the resolution setting and amount of available memory card space.
Movie Mode
Movie mode on the PDR-M700 is accessed simply by turning the Mode dial to the movie camera symbol. The amount of available recording time will display on the LCD monitor, and depends on the battery power and available SD card space. To record, you simply press the Shutter button once and then press it again to stop recording. Movies are recorded with sound and saved as AVI files. Resolution is fixed at 320 x 240 pixels, with three compression levels available. You can use the zoom (both optical and digital) but the sound of the lens moving is quite apparent on the soundtrack.
Shutter Lag/Cycle Times
When you press the shutter release on a camera, there's usually a lag time before
the shutter actually fires. This time allows the autofocus and autoexposure
mechanisms time to do their work and can amount to a fairly long delay in some
situations. Since this number is almost never reported on, and can significantly
affect the picture taking experience, we now routinely measure it using a special
electronic test setup.
NOTE: My qualitative characterizations of camera performance below (that is, "reasonably
fast," "about average," etc.) are meant to be relative to
other cameras of similar price and general capabilities. Thus, the same
shutter lag that's "very fast" for a low-end consumer camera might
be characterized as "quite slow" if I encountered it on a professional
model. The comments are also intended as only a quick reference: If performance
specs are critical for you, rely on the absolute numbers to compare cameras,
rather than my purely qualitative comments.
| | ||
| | Normal Card | |
| Power On -> First shot | | Fairly slow. |
| Shutdown | | About average. |
| Play to Record, first shot | | Pretty fast. |
| Record to play | | Pretty fast (numbers are for large/small files). |
| Shutter lag, full autofocus | | About average, good for a long telephoto. |
| Shutter lag, manual focus | | Faster than average. |
| Shutter lag, prefocus | | Very fast. |
| Cycle time, large/fine files | | Fast. Seemingly no buffer memory, as there's no point at which the cycle time increases dramatically. (Rather variable times all the time though.) |
| Cycle time, small/basic files | | Oddly, only slightly slower than with large/fine files. |
| Continuous mode (High Speed), large files | (3.6 fps) | Very fast. Shoots this fast for 6 frames (buffer size), then must wait 5-8 seconds to dump data to the memory card. Small/basic images show almost identical performance. |
| Continuous mode (Normal), large files | (1.28 fps) | Fairly fast. With large/fine files, you can shoot up to about 12 shots before having to wait for the memory card to catch up, 100+ shots in small/basic mode.Once again, small/basic files show same shooting speed, but the buffer capacity stretches to 100+ shots. |
Overall, the PDR-M700 ranges from average to fairly fast in its operation. Startup and shutdown are rather leisurely, and shutter lag is only average at 0.89-1.07 seconds (which actually isn't too bad for an ultra-zoom camera), but shot to shot cycle times are very good at about 1.4 seconds, and its continuous modes are quite fast indeed.
Operation and User Interface
Once you get used to the menu setup and on-screen menu options, operation of
the PDR-M700 becomes fairly straightforward. The most commonly accessed exposure
options are included in the on-screen menu, with the more obscure functions
in the main Record menu. The redesigned menu system is animated for a more playful
appearance, and is quite easy to navigate. External controls are fairly sparse,
causing more reliance on the LCD menu system. The Mode dial on top of the camera
quickly changes the main operating mode, while zoom, flash, the self-timer and
erase functions also feature external controls. With the instruction manual
in-hand, it'll probably take the better part of an hour or so to get familiar
with the camera.

Shutter Button: Located on the top of the camera, this shiny, silver button
sets the focus and exposure when halfway pressed and fires the shutter when
fully pressed.

Power Switch: Also located on top of the camera, next to the pop-up flash
compartment, this switch powers the camera on and off.
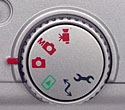
Mode Dial: Behind the Shutter button on top of the camera, this notched
dial controls the camera's operating mode with the following choices:

Pop-up Flash Release Button: Tucked on the opposite side of the
pop-up flash compartment from the Shutter button, this button releases the flash.
![]()
Diopter Adjustment Dial: Nestled to the left of the viewfinder
eyepiece, this dial adjusts the view for eyeglass wearers.
![]()
Self-Timer/Remote Control/Info Button: Directly to the right of the viewfinder
eyepiece, this button cycles through the two- and 10-second self-timer modes,
and also accesses the Remote Control mode for use with the optional remote control.
In Playback mode, this button enables a more detailed information display with
exposure information about the captured image.
![]()
Flash Button: Adjacent to the Self-Timer / Remote Control / Info button,
this button controls the following flash modes:

Wide/Tele Zoom Buttons: Positioned side-by-side in the top right corner
of the back panel, these buttons control the 10x optical zoom, and when enabled,
the 4x digital telephoto.
In Playback mode, when playing back movie files, the "T" button increases
the playback volume and the "W" button decreases volume. When playing
back still images, the zoom lever controls the playback zoom.
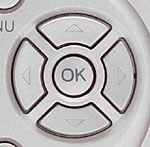
Four Way Arrow Pad and OK Button: To the right of the LCD monitor, this
five-key pad features arrows in all four directions and a center OK button.
In both Playback and Record menus, the arrow buttons navigate through menu items.
The center button, when pressed, confirms changes. Depending on the capture
mode selected, the arrow keys control aperture, shutter speed, and Exposure
Compensation (as indicated on the LCD display).
In Playback mode, the right and left arrow buttons scroll through captured still images and activate the playback of movie files. Once zoomed into a captured image, the four arrow buttons allow you to scroll around within the image to investigate small details.
In Record mode, pressing the OK button outside of a menu displays the on-screen LCD menu items, and a second press activates the menu for adjusting the following options:

Menu Button: Adjacent to the top right corner of the LCD monitor, this button
accesses the control menu in all of the Record modes as well as in Playback
mode.

Erase Button: Beneath the Menu button, and adjacent to the lower right corner
of the LCD monitor, this button erases images in any of the Record modes as
well as in Playback mode.
![]()
Display Button: Below the Erase button, this button switches the LCD display
between the larger LCD monitor and the viewfinder eyepiece.

Battery Compartment Lock: Positioned on the bottom of the camera, in the
center of the battery compartment door, this button locks and unlocks the battery
compartment door.
Camera Modes and Menus
Movie Record Mode: Marked on the Mode dial by a red movie camera symbol,
this mode allows you to capture short movies with sound. The camera determines
the shutter speed and aperture, while you can select the ISO, focus mode, and
zoom settings.
Manual Record Mode: Featuring a red camera icon with an "M" on the Mode dial, this mode accesses Program, Aperture Priority, Shutter Priority, and Manual exposure modes, for varying control over exposure.
Automatic Record Mode: A single red camera symbol represents this mode on the Mode dial. Here, the camera controls exposure completely, but you can select from a range of preset scene modes as well. Available scenes are Portrait, Landscape, Sports, Portrait + Landscape, Night Scene, and Multi.
Playback Mode: Turning the Mode dial to the green playback symbol accesses the Playback mode, for reviewing captured still and movie images, and deleting, protecting or resizing them.
Transfer (PC) Mode: Turning the Mode dial to the black, double-ended arrow symbol puts the camera in digital transfer mode, allowing you to download images from the camera to a computer.
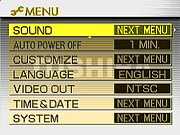 Setup
Mode: Noted on the Mode dial with a wrench symbol, this mode calls up the
following Setup menu for changing the camera's internal settings.
Setup
Mode: Noted on the Mode dial with a wrench symbol, this mode calls up the
following Setup menu for changing the camera's internal settings.
 Record
Menu: Entered by pressing the Menu button while in any of the Record
modes, this menu offers the following options: Record
Menu: Entered by pressing the Menu button while in any of the Record
modes, this menu offers the following options: |
|
|
|
|
|
|
|
|
|
|
|
|
|
|
|
Image Storage and Interface
 The
PDR-M700 stores images on SD memory cards, and comes with a 16-megabyte card.
I highly recommend picking up a larger capacity card right away, at least a
64-megabyte card, so you don't miss any shots. While data on SD memory cards
can be protected using the built-in write protection tab to lock the card, the
PDR-M700 also lets you protect individual images from accidental erasure (except
from card formatting) through an option in the Playback menu in Playback mode.
Protected images are denoted by a key symbol beneath the image. Protection can
be removed through the same process.
The
PDR-M700 stores images on SD memory cards, and comes with a 16-megabyte card.
I highly recommend picking up a larger capacity card right away, at least a
64-megabyte card, so you don't miss any shots. While data on SD memory cards
can be protected using the built-in write protection tab to lock the card, the
PDR-M700 also lets you protect individual images from accidental erasure (except
from card formatting) through an option in the Playback menu in Playback mode.
Protected images are denoted by a key symbol beneath the image. Protection can
be removed through the same process.
The PDR-M700's available resolutions are 2,048 x 1,536; 1,600 x 1,200; 1,280 x 960; 1,024 x 768; and 640 x 480. Three JPEG compression levels are available Fine (three stars), Normal (two stars), and Economy (one star). A Playback menu option lets you save images at lower resolutions, either at 320 x 240 or 160 x 120 pixels.
The table below shows the number of still images that can be stored on the included 16-megabyte card in various size/quality modes, and their approximate compression ratios:
| Resolution/Quality 32MB Memory Card | | | | |
| Full Resolution 2,048 x 1,536 | Images (Avg size) | 12 1.3 MB | 19 842 K | 421 K |
| Approx. Compression | 7:1 | 11:1 | | |
| 1,600 x 1,200 | Images (Avg size) | 15 1.0 MB | 23 674 K | 337 K |
| Approx. Compression | 6:1 | 9:1 | | |
| 1,280 x 960 | Images (Avg size) | 610 K | 405 K | 203 K |
| Approx. Compression | | | | |
| | Images (Avg size) | 405 K | 270 K | 135 K |
| Approx. Compression | | | | |
| | Images (Avg size) | 203 K | 135 K | 67 K |
| Approx. Compression | | | | |
The PDR-M700 connects to a host computer via a built-in USB port. In my tests,
the PDR-M700 transferred 6.43 megabytes of files in only 8.64 seconds, a transfer
rate of nearly 744 Kbytes/second. (This to a Sony VAIO running Windows XP on
a 2.4 GHz Pentium IV with 512 MB of RAM.) This is quite fast, suggesting that
the M700 actually has a USB 2.0 interface.
Video Out
 The
PDR-M700 comes equipped for both NTSC and PAL video formats, configurable via
the Setup menu. An A/V cable comes with the camera for connection to a television
set. You can record and review images using the television screen as an enlarged
version of the LCD viewfinder. The camera also features a Mic terminal in the
connector compartment, for connecting a more powerful microphone when recording
sound with movies.
The
PDR-M700 comes equipped for both NTSC and PAL video formats, configurable via
the Setup menu. An A/V cable comes with the camera for connection to a television
set. You can record and review images using the television screen as an enlarged
version of the LCD viewfinder. The camera also features a Mic terminal in the
connector compartment, for connecting a more powerful microphone when recording
sound with movies.
Power
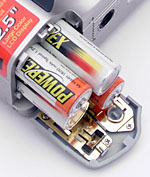 For
power, the PDR-M700 utilizes four AA NiMH, lithium, or alkaline batteries, and
a set of single-use AA alkaline cells comes with the camera. An AC adapter is
available as an optional accessory. I highly recommend picking up two sets of
rechargeable batteries and a good charger, and keeping a freshly-charged set
on-hand at all times. Click here
to read my "battery shootout" page to see which batteries currently
on the market are best, or here
for my review of the Maha C-204F charger, my longtime favorite. An automatic
shutoff powers the camera down if inactive for a preset period of time. Through
the Setup menu, you can adjust this time period from one to three minutes. Power
consumption in various operating modes is detailed in the chart below, measured
at the external power connector, at the specified 5v supply voltage.
For
power, the PDR-M700 utilizes four AA NiMH, lithium, or alkaline batteries, and
a set of single-use AA alkaline cells comes with the camera. An AC adapter is
available as an optional accessory. I highly recommend picking up two sets of
rechargeable batteries and a good charger, and keeping a freshly-charged set
on-hand at all times. Click here
to read my "battery shootout" page to see which batteries currently
on the market are best, or here
for my review of the Maha C-204F charger, my longtime favorite. An automatic
shutoff powers the camera down if inactive for a preset period of time. Through
the Setup menu, you can adjust this time period from one to three minutes. Power
consumption in various operating modes is detailed in the chart below, measured
at the external power connector, at the specified 5v supply voltage.
| | (@ 5v) | |
| Capture Mode, w/LCD | | 144 |
| Capture Mode, w/EVF | | 178 |
| Half-pressed shutter w/LCD | | 137 |
| Half-pressed w/o LCD | | 171 |
| Memory Write (transient) | | |
| Flash Recharge (transient) | | |
| Image Playback | | 183 |
Run time is better than average for a digicam with an EVF, roughly 2.4 hours
in record mode with the LCD enabled, and almost 3 hours when using the EVF.
(These numbers are based on a standard of NiMH cells with 1600 mAh of true
(vs advertised) capacity. With the most recent, highest-capacity NiMH AA cells,
you could expect up to 25% greater run times.) I still strongly recommend
carrying a set of freshly-charged spare batteries with you on any extended
outings, but the M700 does have better than average battery life.
Included Software
A software CD ships with the PDR-M700 and includes the Toshiba Digital Still
Camera package, the main application of which is ACDSee for Windows and Macintosh
platforms. ACDSee provides minor image editing and organization tools so that
you can correct color, crop, etc.
In The Box
Included in the box with the PDR-M700 are the following items:
Recommended Accessories
Lost Images? - Download this image-recovery program so you'll have it
when you need it...
Since we're talking about memory and image storage, this would be a good time
to mention the following: I get a ton of email from readers who've lost photos
due to a corrupted memory card. It's tragic when it happens, there are few
things more precious than photo memories. Corrupted memory cards can happen
with any card type and any camera manufacturer, nobody's immune. "Stuff
happens," as they say. A surprising number of "lost" images
can be recovered with an inexpensive, easy to use piece of software though.
Given the amount of email I've gotten on the topic, I now include this paragraph
in all my digicam reviews. The program you need is called PhotoRescue, by
DataRescue SA. Read our review of it if you'd like, but download the program now,
so you'll have it. It doesn't cost a penny until you need it, and even then
it's only $29, with a money back guarantee. So download PhotoRescue for
Windows or PhotoRescue for
Mac while you're thinking of it. (While you're at it, download the
PDF manual and quickstart
guide as well.) Stash the file in a safe place and it'll be there when you
need it. Trust me, needing this is not a matter of if, but when...
PhotoRescue is about the best and easiest tool for recovering digital
photos I've seen. (Disclosure: IR gets a small commission from sales of
the product, but I'd highly recommend the program even if we didn't.)
OK, now back to our regularly scheduled review...
Test Results
In keeping with my standard test policy, the comments given here summarize only my key findings. For a full commentary on each of the test images, see the M700's "pictures" page.
As with all Imaging Resource product tests, I encourage you to let your own eyes be the judge of how well the camera performed. Explore the images on the pictures page, to see how the M700's images compare to other cameras you may be considering.
Conclusion
The PDR-M700 combines flexible exposure control with a high-quality Canon-built 10x optical zoom lens and an updated user interface. The availability of fully automatic exposure control and preset Scene selections is great for novices, while the range of manual exposure options should appease enthusiasts. Beginners will also be able to step up to increased control as they become more experienced with the camera. The 3.2-megapixel CCD delivers enough resolution for sharp 8x10 prints, and exposure, tonal balance, and color are all quite good. While I didn't initially like the M700 as much as the somewhat higher-end ultra-zoom models from Olympus, its solid performance eventually won me over. For the money, it's a very good long-zoom digicam. Good enough, in fact, for me to make it a "Dave's Pick." If you're looking for a really long-ratio zoom lens on a budget, you should give the M700 careful consideration.
Free Photo Lessons

Learn how to take stunning photos with simple pro lighting tips, in our free Photo School area!
<<M700 Sample Images | Additional Resources and Other Links>>
Reader Comments!
Questions, comments or controversy on this product? Click
this link to see what other Imaging Resource readers have had to say about
the Toshiba PDR-M700, or add comments of your own!

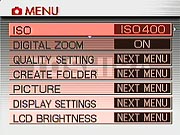
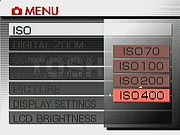 ISO:
Sets the ISO to 70, 100, 200, or 400 equivalents. In Auto record mode,
options also include Auto 200 and Auto 400.
ISO:
Sets the ISO to 70, 100, 200, or 400 equivalents. In Auto record mode,
options also include Auto 200 and Auto 400. 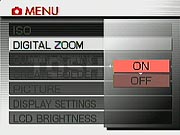 Digital
Zoom: Turns the 4x digital telephoto function on and off.
Digital
Zoom: Turns the 4x digital telephoto function on and off. 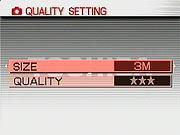 Quality
Setting: Controls the resolution and compression settings.
Resolutions are 3M (2,048 x 1,536 pixels), 2M (1,600 x 1,200 pixels),
1.2M (1,280 x 960 pixels), 0.8M (1,024 x 768 pixels), and 0.3M (640
x 480 pixels). Compression levels indicated by stars, including Fine
(three), Normal (two), and Economy (one).
Quality
Setting: Controls the resolution and compression settings.
Resolutions are 3M (2,048 x 1,536 pixels), 2M (1,600 x 1,200 pixels),
1.2M (1,280 x 960 pixels), 0.8M (1,024 x 768 pixels), and 0.3M (640
x 480 pixels). Compression levels indicated by stars, including Fine
(three), Normal (two), and Economy (one). 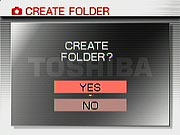 Create
Folder: Creates a new folder for storing images on the SD card.
Create
Folder: Creates a new folder for storing images on the SD card.
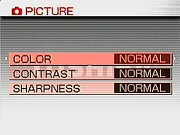 Picture:
Accesses the following picture adjustments:
Picture:
Accesses the following picture adjustments:
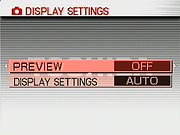 Display
Settings: Accesses the following submenu:
Display
Settings: Accesses the following submenu:
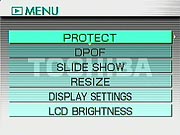 Playback
Menu: Accessed
by pressing the Menu button when in Playback mode.
Playback
Menu: Accessed
by pressing the Menu button when in Playback mode. 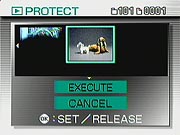 Protect:
Write protects individual images from accidental erasure (except from
formatting).
Protect:
Write protects individual images from accidental erasure (except from
formatting). 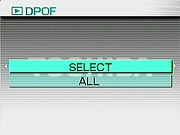 DPOF:
Sets up images for printing.
DPOF:
Sets up images for printing. 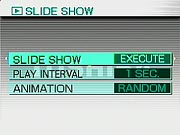 Slide
Show: Activates a slide show playback of captured images, with options
for interval length and the type of animation between images.
Slide
Show: Activates a slide show playback of captured images, with options
for interval length and the type of animation between images. 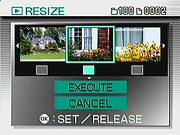 Resize:
Resizes images to either 320 x 240 or 160 x 120 resolutions.
Resize:
Resizes images to either 320 x 240 or 160 x 120 resolutions.  Display
Settings: Selects the amount of information displayed on the LCD
monitor over captured images. You can select individual information
such as File Number, Icon, Date, Time, Size, and Quality.
Display
Settings: Selects the amount of information displayed on the LCD
monitor over captured images. You can select individual information
such as File Number, Icon, Date, Time, Size, and Quality.