Back
to Full Canon PowerShot Pro90 IS Review
Back
to Full Canon PowerShot Pro90 IS ReviewGo to Canon PowerShot Pro90 IS Data Sheet
Go to Canon PowerShot Pro90 IS Pictures Page
Up to Imaging Resource Cameras Page
Use your browser's "Back" button to return to the previous page, or the links at the top and bottom of this page to navigate to related information. If you have difficulty fitting the text on this page onto your printer output, simply resize your browser window to a narrower width and print again.
Remember us when it's time to buy!
Dave here: Have our reviews been helpful to you? (Is this article you're reading right now useful?) Preparing this level of information on as many products as we do is incredibly hard work, not to mention expensive. Things on the Internet may look like they're free, but they're not. (As a lot of big dot.com companies are finding out these days.) Somewhere, somebody has to pay to produce worthwhile content. YOU can help us though, by remembering us when it comes time to make your purchase. Would you consider coming back to our site and clicking-through to one of our advertisers to make your purchase? Every dollar you spend with one of our advertisers helps us directly (in affiliate fees) or indirectly (the advertiser will keep renewing their ad contract with us). To make it easy for you to support us, here's a URL you can visit, to see all our current advertisers, with links to click on that will register your visit to them as having come from our site. It's up to you where you buy, but Mike, Mike, Kim, Yazmin, Marti and I would be really grateful if you'd help us out by choosing one of our advertisers to purchase from.
Thank you for your support!
Dave Etchells, Founder & Publisher
Visit our "Buy Now" Page:
https://www.imaging-resource.com/buynow.htm
Back
to Full Canon PowerShot Pro90 IS Review
Go to Canon PowerShot Pro90 IS
Data Sheet
Go to Canon PowerShot Pro90 IS
Pictures Page
Up to Imaging Resource Cameras
Page
Canon PowerShot Pro90 ISAn impressive update to the PowerShot "Pro" line, with a 10x optically stabilized zoom lens and 2.6 megapixel CCD! Review First Posted: 2/6/2001 |
|
 |
|
2.6-megapixel CCD for 1,856 x 1,392-pixel images |
|
|
10x optically stabilized (IS) zoom lens | |
|
|
SLR-like design with Electronic Viewfinder (EVF) | |
|
|
Type II MicroDrive-compatible CompactFlash storage | |
|
|
Extensive exposure controls, powerful internal flash |
Executive Overview
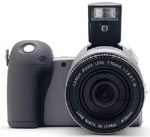
The 2.6-megapixel Canon PowerShot Pro90 IS combines the benefits of a 10x Image Stabilizer zoom, a rotating LCD monitor, and extensive automatic and manual exposure controls to make a complete, flexible features package that will appeal to serious amateur and pro digital shooters alike. Weighing in at 24 ounces (680g) and measuring 5.0 x 3.3 x 5.5 inches (126.5 x 83.9 x 139.1mm), the Pro90 is built for performance rather than convenience. It has a sturdy molded plastic body (to keep the weight down) and a large, somewhat bulky design to accommodate the 10x zoom lens and internally rechargeable battery pack.
The Pro90 features an electronic SLR viewfinder design, meaning that the "optical" viewfinder is actually a smaller version of the LCD monitor. Only one display can be active at a time. The swiveling LCD monitor, which folds against the back panel when closed, lifts up and off of the back panel, and rotates approximately 270 degrees to face just about any direction. Both LCD screens feature an in-depth information display and are controlled by the Display button on the back panel.
Optically, the Pro90 is equipped with a 10x, 7-70mm lens, equivalent to a 37-370mm lens on a 35mm camera. Focus is controlled automatically or manually, and a Pan Focus mode fixes the focal setting for faster shooting. The lens aperture can also be manually or automatically controlled, with a range of openings from f/2.8 to f/8.0. An Image Stabilizer system reduces the effect of camera shake on slower exposures, as well as those taken at the full 10x telephoto setting (when the slightest movement can blur an image). You can increase the camera's zoom capabilities by enabling the 2x or 4x digital zoom, which, unlike the 10x optical zoom, digitally enlarges the center of the CCD image rather than magnifying the image optically (resulting in higher noise levels and decreased resolution). A set of 58mm filter threads on the inside lip of the lens accommodates Canon's stable of accessory lens kits and filters.
The PowerShot Pro90 provides a wide range of exposure controls. The Mode Dial includes standard Program AE, Shutter Speed Priority, Aperture Priority, and Manual exposure modes, in addition to a handful of preset modes and a fully Automatic mode. The presets include Pan Focus, Portrait, Landscape, Night Scene, Black and White, Stitch Assist (panoramic), and Movie. The Movie mode records both moving images and sound, for up to 30 seconds at a time, at 15 frames per second. A Continuous Shooting mode captures a series of images as fast as 0.7 frames per second, depending on compression, resolution, and the amount of image information. An Auto Exposure Bracketing function takes a series of three images, each at different exposure values. There's also a 10 second self-timer mode, so you can set the timer and the camera will fire the shutter when the countdown is finished.
The Pro90 offers seven White Balance settings: Auto, Daylight, Cloudy, Tungsten, Fluorescent, Flash, and Custom. ISO is also adjustable, with options of 50, 100, 200, and 400 ISO equivalency ratings, plus an Automatic ISO function. Both spot- and center-weighted metering options are available, as well as an AE Lock function, which locks the exposure for normal and flash shots. A handful of image adjustments control exposure compensation, image contrast, sharpness, and saturation. The Pro90 is accompanied by an infrared remote control, which works with most Record and Playback mode functions.
The built-in, pop-up flash is activated when you choose one of the four active modes (Auto, Red-Eye Reduction Auto, Red-Eye Reduction On, or On) with the Flash button on the lens barrel. The flash unit pops up automatically when you press the shutter button halfway, rather than opening when the flash is engaged. An external hot shoe enables you to connect to a more powerful flash unit, such as the Canon SpeedLite series. Flash exposure compensation is adjustable from -2 to +2 exposure values (EV) in one-third-step equivalents. The Pro90 also features a Flash white balance mode and an FE Lock (flash exposure lock).
Images are saved to a Type I or II CompactFlash card (a 16MB card is supplied with the camera), with still images saved at one of three JPEG compression levels, or in RAW data format. Movie files are saved as AVI format movies that can be viewed in Apple QuickTime. Images can be composed, captured, and played back on the television set, which, when used with the remote control, makes a useful presentation tool. (US and Japanese models of the Pro90 come with an NTSC A/V cable for connecting to a television set, while European models come with a PAL cable.)
A USB cable accompanies the Pro90, for connecting directly to the computer, and a serial cable is available as a separate accessory. Two software CDs include Canon's Utilities, ZoomBrowser EX and PhotoRecord (for Windows), ImageBrowser (for Macintosh), and PhotoStitch, RemoteCapture, QuickTime, Adobe Photoshop LE 5.0, and USB drivers, for both PC and Macintosh computers. Probably the most exciting software application in the bundle is the RemoteCapture, which allows you to control the camera through the computer and save images directly to your hard drive. (See our review of Canon's D30 SLR camera for a brief discussion of RemoteCapture, including a screen shot.) The inclusion of Photoshop LE is also a nice, bonus, providing a variety of creative and corrective digital imaging functions.
The Pro90 is powered by a single BP-511 lithium rechargeable battery pack, which recharges in the camera via the AC adapter -- both of which are provided with the camera. The power consumption level is reported on the LED display, and an auto shutoff feature saves battery power after extended periods of inactivity.
Overall, we were very pleased with the Pro90's performance, as the extensive exposure control and 10x zoom lens produced very nice images with excellent quality and color. The swiveling LCD monitor is also great when shooting at odd angles, and the Image Stabilizer function is a huge plus for handheld telephoto shots, as well as low-light shooting conditions. With its large variety of exposure options and control levels, the Pro90 should appeal to a wide range of users.
Design
The 2.6-megapixel Canon PowerShot Pro90 IS is about the size of a mid- to large-size 35mm SLR. Though it is somewhat larger than other SLR-style digicams we've reviewed, the 10x zoom lens and extensive features make the added bulk a necessity. Measuring 5.0 x 3.3 x 5.5 inches (126.5 x 83.9 x 139.1mm) with the lens, the Pro90 won't slip into your shirt pocket, but you can carry it with the accompanying neck strap or a small camera case if you prefer. The Pro90's plastic body keeps the weight down to about 24 ounces (680g) without the battery pack or memory card inserted.

The smooth gray surface of the Pro90 gives it a very clean, sleek appearance all around. From the front, only the lens barrel, shutter button, and large hand grip are visible, with a very small remote control sensor and self-timer lamp blended inconspicuously into the landscape. A ridged zoom ring around the end of the lens barrel controls the optical zoom. The lens itself is protected by a plastic lens cap which can be tethered to the camera body with the included cord. The large palm-size hand grip, which wraps around the battery and memory card slot compartments, has a soft, rubbery texture that grabs the fingers. There's also a small indentation on the front of the hand grip that gives you an added finger-hold.
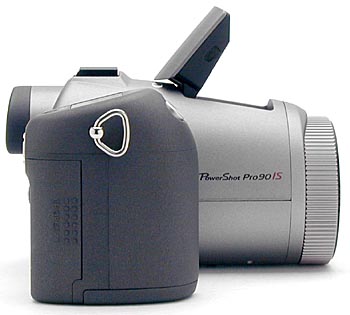
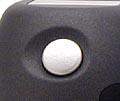
On the right side of the camera, the CompactFlash slot is protected by a sliding, hinged door. The door slides out toward the back of the camera and then flips open to reveal the slot. Accommodating both Type I and II CompactFlash cards, a small button next to the slot releases the memory card once inserted. Also inside the memory card compartment is a tiny battery slot, which holds the CR2025 battery that powers the camera's internal clock. The only other feature on this side of the camera is the neck strap attachment eyelet.
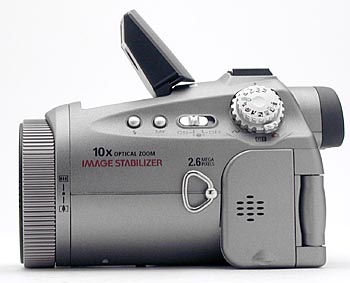
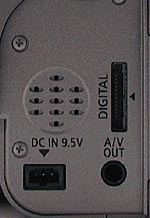
The left side of the camera is comprised mainly of the lens barrel, a number of camera controls, and the terminal connector compartment. The Flash button, Manual Focus button, Image Stabilizer On/Off switch, Mode dial, and Main dial (with On/Off, Record, Playback, and Computer Connect settings) are on the top of the lens barrel. Beneath the Mode and Main dials is the connector compartment, which is covered by a plastic door that flips open. This door is attached by a small piece of flexible rubber. (Personally, we're not big fans of this sort of attachment, as we feel they're prone to breakage under repeated stress.) Inside the compartment is the speaker, DC-In, Digital (USB or serial) jack, and A/V Out terminal. Speaker holes in the compartment door allow you to hear the playback sound, even when the compartment door is closed. Also on this side of the camera is the other neck strap attachment eyelet.

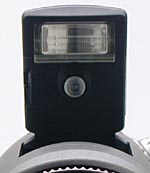
The top of the camera has the pop-up flash compartment, external flash hot shoe, Jump, Index, and Metering buttons, as well as the Continuous Shooting / Self-Timer / Wireless Remote button and a small, black-and-white status display panel. At the end of the lens (on top) is the microphone for recording sound in Movie mode. An interesting variation in the way the Pro90 Flash operates compared to other digicams is that the Flash button does not pop up the flash. Instead, when an active flash mode is selected, the flash pops up when the shutter button is halfway depressed.
The status display panel reports most of the camera's settings, the current level of battery consumption, and any adjustment bars (such as Flash Exposure Compensation, Exposure Compensation, and the Auto Exposure Bracketing adjustment).

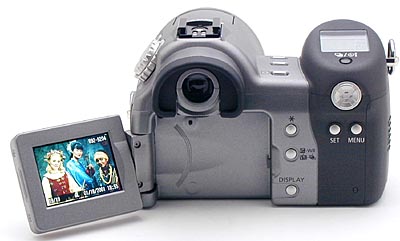
The remaining camera controls are on the back panel, along with the Electronic Viewfinder eyepiece and LCD monitor. Camera controls include the four-way arrow rocker button, Set, Menu, AE Lock, White Balance, and Display buttons. One observation that we made about the Set, Menu, and arrow buttons is that they are easily pressed by accident, particularly when you pick up or put down the camera. Their placement falls right where the thumb naturally gravitates when you grasp the hand grip. This wasn't a big concern when the camera was turned off, but did cause some annoyance when the camera was on. (The shutter button on the front side of the hand grip also falls precariously close to where you grab the camera with your forefinger.)
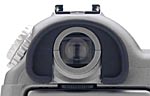
The viewfinder eyepiece features a soft rubber rim that helps to cushion your eye and protect it from glare, and a tiny diopter adjustment dial is hidden underneath the viewfinder. The swiveling LCD monitor lifts up and off of the back panel to face the photographer. It can also be rotated about 270 degrees to face front, down, and back, plus any angle in between.
A tiny indicator light in the lower right corner of the back panel reports the battery charging status as well as when the memory card is in use. When the indicator is lit solid green, the battery charge is complete. A flashing green light indicates that the camera is accessing the CompactFlash card. A solid orange light means that the battery charge is about 90 percent complete, and adequate for shooting. Finally, the flashing orange light means that the battery is still charging, with the frequency of flashing varying with the charge state.
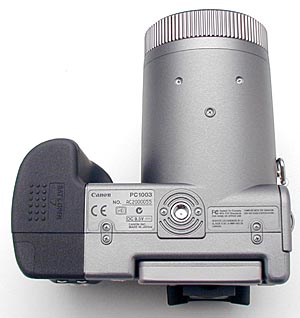
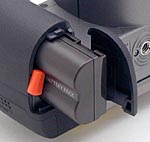
On the camera's bottom panel are the battery compartment door and metal, threaded tripod mount. The battery compartment door slides out and then open, and a small, orange button holds the battery in place. Since the battery compartment takes up a large part of the hand grip, the soft rubbery "grip" texture extends to the compartment door, making it easy to grasp and open. We also noticed that the tripod mount and battery compartment are too close to allow quick battery changes when mounted to a tripod. A minor note with most smaller digicams, but more important with this model, because it is heavy enough to benefit from tripod use.
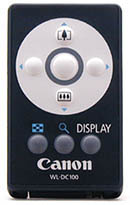
A small infrared remote control is provided with the camera, complete with zoom controls, shutter button, Display button, and several Playback controls such as the Index, Zoom, and arrow buttons. A CR2025 lithium battery powers the remote and fits into a small slot just beneath the Canon logo.
 Viewfinder
The Pro90 features a color LCD electronic viewfinder that operates just like a smaller version of the larger LCD monitor display. The mini-LCD viewfinder is only activated when the main LCD monitor is off. A tiny diopter adjustment dial under the eyepiece adjusts the view for eyeglass wearers. A soft rubber lip partially surrounds the eyepiece, helping to block out excess light and cushion your forehead from the hard camera surface.
The viewfinder provides the same information display as the larger LCD monitor, which is controlled by pressing the Display button. On both LCD screens, the information display reports camera settings such as metering, exposure, and flash modes, as well as the aperture or shutter speed when the camera is set in one of the manual exposure modes. (We noticed that in Aperture or Shutter Speed Priority, only the selectable value is reported, not both.) Pressing the Display button cycles back and forth between the information display and no information.
Whenever the camera is first powered on, or a shooting mode is changed, a partial information screen automatically appears for six seconds, even if the Display is turned off. This partial display includes the shooting, flash, and drive modes, plus it displays the metering mode, white balance, exposure compensation, auto bracketing, and flash exposure compensation, if enabled. A small green dot appears in the lower left corner of the LCD display when focus is set, and a yellow dot appears when metering is set in Manual focus mode.
The 1.8-inch, low-temperature, polycrystalline silicon, TFT, color LCD monitor on the back panel is activated as soon as it is opened (disabling the viewfinder eyepiece). The LCD monitor lifts up off of the back panel and when extended, swivels around 270 degrees to face just about any direction. You can also turn the LCD monitor to face the camera, and then close it to protect the screen. Just like the viewfinder eyepiece, the Display button cycles between the two on-screen information display modes. (Canon notes in the User's Manual that the information display is not available when the LCD monitor is turned 180 degrees toward the lens, or when facing the front of the camera). An automatic image preview displays the previously captured image on the LCD screen for about two seconds while recording it to the memory card. You can instantly delete the image by pressing the AE Lock button (marked with an "*"), which asks you to confirm the deletion.
In Playback mode, the LCD monitor also offers a range of information display options, including Simple Display, Detailed Display, and No Display, all controlled by pressing the Display button. The Simple display reports the file number, image number, date/time, compression setting, resolution size, file format, movie (if a movie file), and protection status. The Detailed Display includes all the same information, in addition to the shooting mode, exposure compensation, white balance, metering, ISO, shutter speed, aperture, and flash exposure compensation settings. An Index View mode displays nine thumbnail images at a time on the screen and is activated by pressing the Index button on top of the camera. Captured images can also be enlarged for closer inspection at 2.5x and 5x, by pressing the Playback Zoom (Metering) button on top of the camera. Once an image is enlarged, the arrow keys of the Arrow rocker button navigate through the image.
 Optics
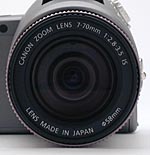
The Pro90 is equipped with a 7-70mm, 10x zoom lens, the equivalent of a 37-370mm lens on a 35mm camera. Optical zoom is controlled by a notched zoom ring at the end of the lens barrel. This zoom-control ring is a "fly by wire" control, in that it doesn't actuate the lens mechanically, but rather acts as a toggle control to activate a motor that does the zooming for you. We found this slightly disconcerting at first, our unconscious expectation being that the ring would operate the lens directly. Ultimately though, it's no different than the use of rocker controls to actuate the lens mechanism on other cameras, and was easy enough to adapt to after only a little use.
The lens aperture ranges from f/2.8 to f/8.0, and can be manually or automatically set. Focus ranges from 3.9 inches (10cm) to infinity at maximum wide angle, or 3.3 feet (1 meter) to infinity at maximum telephoto. Thus, with the closest range at 3.9 inches (10cm), there is no macro mode available. Closeup photography is achieved by placing the lens at the full wide-angle setting and moving closer to the subject.
Focus options include both automatic and manual control. The camera's autofocus mechanism uses a contrast-detection system to determine focus, which may prove difficult when focusing on low-contrast or moving subjects. For very difficult subjects, the Pro90 offers two methods to manually lock focus. The first is to place the part of the subject you wish to emphasize in the center of the frame, and then press the shutter button halfway to lock focus (this also locks exposure in any automatic shooting mode). While holding the shutter button down halfway, recompose the image and fire the shutter. The second method follows the same procedure, only this time you press the Manual Focus (MF) button on the side of the camera while depressing the shutter button halfway. Once the MF icon appears in the LCD display, you can let go of the shutter button, recompose the shot, then make the exposure.
Holding down the MF button pulls up the manual focus distance scale on the LCD screen, and the up and down arrow buttons control the amount of focus. A second press of the MF button returns the camera to autofocus mode. The only drawback here is that the LCD distance scale doesn't report the actual distances. A chart in the instruction manual shows the approximate distances, which would be much more helpful on the LCD screen, especially in low-light situations when distance is a better gauge of focus. In addition to standard automatic and manual focus modes, the Pro90 also offers a Pan Focus mode via the Mode dial. Pan Focus fixes the focus to capture subjects anywhere from 23.6 inches (60cm) away to infinity, eliminating the time required to determine focus for each shot.
The Digital Zoom function, which is activated through the Record menu, increases the camera's telephoto range to 20x or 40x. Digital zoom differs from optical zoom in that it enlarges the center portion of the CCD image digitally, rather than magnifying the overall image with a lens. The results is lower resolution and higher noise levels. A shortcut to activating the Digital Zoom is to hold down the Set button while turning the lens zoom ring to the maximum telephoto position. This engages the 2x digital zoom, and a second turn activates the 4x digital zoom. To cancel the digital zoom, you simply hold down the Set button and turn the zoom ring twice in the wide-angle direction. (Digital Zoom is not available in Stitch Assist and Movie modes, and when the file format is set to RAW.)
Because of its 10x optical zoom range, and the length of the lens barrel, the Pro90 features an Image Stabilizer system, activated by a switch on the side of the lens. When shooting images with the lens at the full 10x telephoto setting, the potential for motion blur, due to camera shake, increases. The built-in image stabilizer also helps with low-light shooting situations and occasionally with slow shutter speeds (for night scenes with very slow shutter speeds, a tripod is recommended for the most steady shot). In practice, Canon's IS technology is enormously useful, making the 10x telephoto much more useful for routine handheld shooting. (We'd go so far as to say that a 10x lens without optical stabilization would be of very limited usefulness.)
The Pro90 lens also features 58mm filter threads to accommodate Canon's series of wide-angle and telephoto lens kit accessories. Our evaluation model was accompanied by the accessory lens hood, which blocks out stray light that might otherwise cause lens flare.
Exposure
The Pro90 features a wide range of exposure controls, with a variety of exposure modes available through the Mode dial. Canon has divided the exposure modes into zones: Auto, Image, and Creative. On the camera's Mode dial, Auto is positioned in the middle of the dial, with the Creative and Image Zones on either side. Auto simply refers to the fully Automatic exposure mode, which limits your control to resolution, compression, flash, zoom, and self-timer. The Image Zone includes Pan Focus, Portrait, Landscape, Night Scene, Black and White, Stitch Assist, and Movie modes, all preset to handle specific shooting situations. Pan Focus mode fixes the focal range, thus eliminating the shooting delay that results while the camera sets the focus. Portrait mode uses a larger aperture to decrease the depth of field, keeping the subject in sharp focus and the background slightly blurred. Alternately, Landscape mode uses a smaller aperture setting to increase the depth of field and place the foreground and background in focus.
Night Scene uses a slower shutter speed to capture night and twilight scenes. Flash is also available in this mode for capturing night portraits. Black and White mode simply captures images in black-and-white monotone. (Although the images from Black and White mode are stored as full RGB files, meaning they are no smaller than full-color ones.) Stitch Assist is a panoramic mode that allows you to capture multiple images that can be "stitched" together later on a computer. A framing guideline keeps a portion of the previously captured image on the LCD screen, to help you line up the next shot. All exposure settings are locked with the first shot, and up to 26 consecutive images can be recorded for a vertical, horizontal, or larger square image.
The last of the Image Zone modes is Movie mode, which captures moving images with sound at a resolution of 320 x 240 pixels. The maximum movie length is 30 seconds, with a frame rate of 15 frames per second. Recording begins when you fully depress the shutter button once, and ends with a second press (or when the CompactFlash card runs out of free space, or the 30 second maximum recording time is reached). In just about all of the Image Zone modes, the AE Lock, FE Lock, metering mode, RAW file format, and image adjustment tools (ISO, contrast, sharpness, and saturation) are not available. We don't formally test movie recording functions on the digicams we test, but did notice a rather loud buzz on the audio track of any movies we tried recording with the Pro90. We can't imagine this being a normal behavior, but can't chalk it up to a prototype foible, as the unit we received was a full production model in retail packaging.
The Creative shooting zone includes Program AE, Shutter Speed Priority AE, Aperture Priority AE, and Manual exposure modes. (The AE stands for auto exposure, indicating that in these modes, the camera is making specific exposure decisions.) The Creative Zone provides full access to the camera's variety of exposure settings, including exposure compensation, metering, white balance, and image adjustments such as sharpness, contrast, and saturation. The first mode in the Creative Zone, Program AE, places the camera in control of the shutter speed and aperture settings only, while the user controls all other exposure variables. Shutter Speed Priority AE allows the user to control the shutter speed, from 1/1,000 to eight seconds, while the camera selects the best corresponding aperture. Working along similar lines, the Aperture Priority AE mode gives the user control over the lens aperture setting, from f/2.8 to f/8.0, while the camera chooses the correct shutter speed. Finally, Manual mode gives the user complete control over all exposure settings, including both shutter speed and aperture.
In Shutter Speed Priority, Aperture Priority, and Manual exposure modes, if the user-selected settings will result in an under- or overexposure, the offending variable glows red in the LCD monitor and blinks in the top status display panel. In Shutter Speed Priority or Aperture Priority mode, only the user-adjustable variable shows in the LCD display until you half-press the shutter button, at which point both parameters appear. In both Shutter Speed Priority and Aperture Priority modes, the variable is adjusted by pressing the right and left arrow buttons; while in Manual exposure mode, the right and left arrows control shutter speed, and the up and down arrows control aperture.
In all exposure modes, the Pro90 features a two- or ten-second image review screen, which pops up while the captured image is being recorded to the memory card. (You can cancel the review function through the Record menu.) By pressing the "*" button during the two-second image review, you can instantly erase the image from the card (with an option to cancel). The "instant review" image display can be prolonged by two means. First, you can simply hold down the shutter button after snapping the shot. This will hold the review image on the LCD until you release the shutter button. (This appears to be a "family trait" of Canon digicams, a feature we personally find very useful.) The second method of retaining the review display is to momentarily press the "Set" button on the camera's back during the normal review period. This will hold the review image until the shutter button is half-pressed.
Exposure compensation is controlled by pressing the White Balance/Exposure button once, which displays an adjustment bar at the bottom of the LCD screen and on the status display panel. The right and left arrow buttons control the adjustment, which ranges from -2 to +2 exposure equivalents (EV) in one-third-step increments. Exposure compensation is available in all exposure modes except Auto and Manual. The Pro90 features seven White Balance options, set by pressing the White Balance button on the camera's back panel twice and selecting the desired setting from the menu (also using the right and left arrow buttons). Auto, Daylight, Cloudy, Tungsten, Fluorescent, Flash, and Custom White Balance modes match a variety of light sources. The Custom White Balance option matches the white balance to the current lighting, and is manually set by placing a white card or piece of paper in front of the lens. Once the white paper fills the field of view on the LCD screen, pressing the "*" button sets the white value. (The Pro90 will also let you snap images directly from the White Balance menu, returning you to the menu once the image is recorded.) White balance is adjustable in all modes except Auto and Black and White.
The Metering button on top of the camera cycles back and forth between Spot and Center-Weighted Averaging metering systems. Spot metering bases the exposure on a reading from the very center of the image, and is good for high-contrast or backlit subjects. The Center-Weighted Averaging system combines the average value from the entire image with the value of the center of the image. Metering mode is only adjustable in Program, Shutter Speed Priority, and Aperture Priority exposure modes.
In the "Creative" exposure modes, the "*" button on the back panel controls the AE Lock. To lock an exposure reading, simply frame that portion of the subject in the center of the LCD screen, hold down the shutter button halfway (to lock focus), then press the "*" button and recompose the subject before firing the shutter.
Several image adjustments are available on the Pro90, which are only available when shooting in the Creative Zone. ISO, contrast, sharpness, and saturation are all adjustable through the camera's Record menu. ISO options include: Auto, 50, 100, 200, and 400 equivalents, with ISO 50 as the default setting. The Contrast, Sharpness, and Saturation options all feature three settings: Weak (-), Neutral (0), and Strong (+).
 Flash
Flash
The Pro90 features a built-in, pop-up flash, which operates in five modes: Auto, Red-Eye Reduction Auto, Red-Eye Reduction On, On, and Off. Unlike many pop-up flash designs, the Pro90's internal flash does not have a release button. Instead, the flash pops up automatically when the shutter button is halfway depressed, as long as the flash mode is set to anything other than Off. We found this to be somewhat annoying when shooting in a hurry, as it causes a short delay before the shutter can be fired while you wait for the flash to open and charge.
The five flash modes operate much as their names suggest. Automatic mode gives the camera control over when to fire the flash, based on the existing exposure conditions. Both the Red-Eye Reduction modes fire a small pre-flash before firing the full flash, to reduce the occurrence of red-eye effect (caused by a reflection from a non-contracted pupil). The difference between the two modes is that the Red-Eye Reduction Auto fires at the camera's discretion and Red-Eye Reduction On fires with every exposure, regardless of light levels. The last two flash modes, On and Off, set the flash to fire with every exposure or not at all (respectively). Canon estimates the Pro90's flash range to be effective from 2.3 to 13.8 feet (70cm to 4.2m) at the 100 ISO setting.
The Pro90 also allows you to adjust the flash intensity level, using the same White Balance button on the back panel that controls Auto Exposure Bracketing, Exposure Compensation, and White Balance. Pressing the button four times displays the Flash Exposure compensation adjustment bar at the bottom of the LCD screen and status display panel. Flash exposure is adjustable from -2 to +2 exposure equivalents (EV) in one-third-step increments by pressing the right and left arrow buttons.
The "*" button on the back panel allows you to lock the flash exposure setting, in much the same way normal AE Lock functions. (The "*" button automatically controls the flash exposure, or FE Lock, when the flash is enabled.) To lock the flash exposure, center the desired portion of the subject in the frame (with the flash enabled), press the shutter button halfway to set focus, then press the "*" button. The flash will then fire a pre-flash and lock the exposure to the best intensity for the subject. You can press the "*" button more than once, as it simply readjusts the flash exposure lock each time. Once the flash exposure is locked, simply re-frame the subject and fire the shutter. FE Lock is beneficial for backlit subjects, for which the camera's flash may not automatically fire, and is only available in the Program, Shutter Speed Priority, and Aperture Priority exposure modes.

The Pro90 features a hot shoe on its top panel for connecting to a more powerful external flash. The camera's automatic exposure controls will function with Canon Speedlite units (220EX, 380EX, 420EX, or 550EX), as will the FE Lock, shutter synchronization, flash exposure compensation, and auto zoom functions. Other manufacturers' flash units can also be used, though Canon does not guarantee that all of the camera's functions will work with the external unit. Check the flash manual and verify the contacts before attaching it to the camera.
Self-Timer / Wireless Remote Mode
The Pro90 features a 10-second self-timer, activated by pressing the shutter button fully in Self-Timer / Wireless Remote mode. The mode is accessed by the Continuous Shooting / Self-Timer / Wireless Remote button on top of the camera (just below the status display panel). Once the timer has been activated, the self-timer lamp on the front of the camera blinks until the shutter opens (the lamp blinks faster during the last two seconds). The infrared remote control is effective up to 16.4 feet (5.0 meters) from the camera, within 15 degrees to the right or left of the remote sensor on the front of the camera. Pressing the remote shutter button triggers a shorter, two-second countdown before the shutter opens.
Continuous Shooting Mode
Also accessed through the Continuous / Self-Timer / Wireless Remote button, Continuous Shooting mode captures a series of sequential images at approximately 0.7 frames per second (image quality set to Large/Fine), when the shutter button is held down. The actual frame rate varies with the subject and shooting conditions. The total number of sequential images depends on the amount of available space on the CompactFlash card. In this mode, the camera is saving the images to an internal buffer memory prior to writing them to the memory card. Thus, once the buffer memory is filled, the capture speed slows dramatically. The number of images that can be captured at full speed depends on the image size and quality setting. At the high resolution setting, 6, 10, or 20 images can be captured in rapid sequence at the Super, Fine, or Normal image-quality settings. The internal flash is available in this mode, however, the frame rate will slow to accommodate the necessary charging time for the flash. Images are saved to an internal memory buffer before being saved to the memory card, which causes a slight delay in capture time when the internal memory fills up. Continuous Shooting is accessible in all exposure modes except Auto, Stitch Assist, and Movie.
Auto Exposure Bracketing Mode
For situations when the best exposure isn't immediately obvious, the Pro90 offers an Auto Exposure Bracketing mode, controlled through the White Balance button on the back panel (three presses access the mode). Auto Exposure Bracketing takes three shots in sequence, each at different exposure settings, after just one press of the shutter button. The amount of exposure variation is adjustable from -2 to +2 exposure values (EV) in one-third-step increments. An adjustment menu appears on the bottom of the LCD screen, with the marker set at zero. The right arrow button expands the exposure range, while the left arrow button reduces it. For example, pressing the right arrow button to include -1 and +1 EV settings will take an image at the currently set exposure, one at -1 EV, and one at +1 EV. We like the way Canon has implemented the display showing the bracketing setup, in that it shows not only the range of the exposure bracketing, but also the amount of offset in the initial exposure value, as set by the Exposure Compensation adjustment. Auto Exposure Bracketing is only available in Program, Shutter Speed Priority, and Aperture Priority exposure modes. Canon notes that if the Auto Exposure Bracketing range is left at zero, the camera will take an image at the currently set exposure, plus or minus what the metering system dictates.
Shutter Lag/Cycle Times
When you press the shutter release on a camera, there's usually a lag time before
the shutter actually fires. This time is to allow the autofocus and autoexposure
mechanisms time to do their work, and can amount to a fairly long delay in some
situations. Since this number is almost never reported on, and can significantly
affect the picture taking experience, we now routinely measure it using proprietary
Imaging Resource test equipment.
|
|
||
|
|
|
|
| Power On -> First shot |
|
About average
|
| Shutdown |
|
Fast, because no lens retraction.
|
| Play to Record, first shot |
|
Fairly fast
|
| Record to play (max/min res) |
|
Average to moderately fast
|
| Shutter lag, full autofocus |
|
A bit slower than average. |
| Shutter lag, manual focus |
|
About average. |
| Shutter lag, prefocus |
|
Quite fast. |
| Cycle Time, max/min res |
|
A bit slow, compared to other top models. |
| Cycle Time, continuous mode |
1.35 frames/sec |
Fairly fast. A minimum of 6 shots in succession before the buffer fills, more for lower resolution/quality.
|
Overall, the Pro90 was about average in its speed performance, faster than some cameras in it's range, but noticeably slower than others. Shutter lag consistently came out around 0.95 seconds in full autofocus, while competing models tend to be closer to 0.8 seconds on average. (It's possible that the long zoom lens affected focusing time, as the manual focus shutter lag of 0.55 seconds was about average, and the 0.1 second prefocus lag time was very fast.)
We found the shot-to-shot speed most puzzling, as it didn't seem that the Pro90 was using any buffer memory, but rather waiting to write the file to the memory card after every shot. As noted, a four-second cycle time isn't bad, but it's a notch below the performance we'd have expected for a camera with such excellent capabilities otherwise.
Operation and User Interface
We found the Pro90 user interface is reasonably uncomplicated, though a few of the controls confused us at first. For example, we kept expecting the Flash button to release the pop-up flash, but in this model, the button controls the Flash mode and the camera releases the flash when needed. Another control that mystified us in the beginning was the "*" button, which changes functions depending on the exposure mode you're in, and whether or not the flash is in use. Still, a quick read of the manual set us straight and made operation relatively smooth. We did notice that the placement of the Arrow rocker, Set, and Menu buttons was somewhat awkward, in that we kept pressing them by mistake whenever we picked up or set down the camera. This was pretty harmless most of the time, as the camera was turned off, and even when the camera was on, none of the buttons cause any unalterable changes. The control layout and camera weight pretty much rule out one-handed operation, since you'll need the other hand to support the heavy lens (unless it's mounted on a tripod). One-handed shooting is possible, but not really recommended. The User Guide was fairly easy to follow, and offered several shortcuts to change camera settings and avoid scrolling through the menu. The settings menu is set up like many other Canon digicams, and is reasonably short to navigate.
Control Enumeration
Shutter Button: Located on the front of the hand grip, this small silver button sets focus when halfway depressed, and fires the shutter when fully depressed. When the Self-Timer mode is enabled, the shutter button triggers a 10-second countdown.

Zoom Ring: Encircling the end of the lens barrel, this notched ring controls the 10x optical zoom. The zoom directions are marked on the side of the lens: One tree for telephoto and three trees for wide-angle. You can activate the Digital Zoom through the Record menu by choosing either 2x or 4x, or by turning past the telephoto range while pressing the Set button. Turn the ring one time for 2x or two times for 4x Digital Zoom. Holding down the Set button and turning the ring back toward the wide-angle setting turns the Digital Zoom off.
![]()
Jump Button: Located on the camera's top panel, this button activates the Jump feature in Playback mode, which displays the Jump bar on the LCD screen (pressing the right and left arrow buttons "jumps" ahead or behind nine images).

Index View Button: Just below the Jump button, this button enables and disables the nine-image thumbnail index display in Playback mode. In Record mode, when the LCD monitor is folded back against the camera body, this button switches the viewfinder display back and forth between the small viewfinder LCD and the larger LCD monitor.

Metering / Enlarge Button: The button below Index View is the Metering / Enlarge button. It cycles between Spot and Center-Weighted Averaging metering systems in Record mode, and in Playback mode, enlarges the currently displayed image to 2.5x or 5x when pressed sequentially. (Once the image is enlarged, you can scroll around inside it with the arrow buttons.) A third press of the button displays the captured image full screen.

Continuous / Self-Timer / Wireless Remote: Located below the small status display panel on top of the camera, this button cycles between Continuous Shooting, Self-Timer / Wireless Remote, and normal shooting modes.

Flash Button: Positioned on the side of the lens barrel, just beneath the pop-up flash compartment, this button controls the flash operating mode. Pressing the button sequentially cycles through the Auto, Red-Eye Reduction Auto, Red-Eye Reduction On, On, and Off modes. If the pop-up flash is closed, the camera will automatically open it once the shutter button is depressed halfway in any flash mode except Off. (Note: Auto and Red-Eye Reduction Auto options are not available in Program, Aperture Priority, Shutter Speed Priority, or Manual modes.)

Manual Focus (MF) Button: To the right of the Flash button on the lens barrel, the MF button places the camera in Auto or Manual Focus modes. Holding the button down and pressing the up and down arrow buttons manually adjusts the manual focus. A second press of the button returns the camera to standard autofocus mode. If the MF button is pressed quickly while the shutter button is halfway pressed, it locks focus, allowing the user to recompose the shot without holding down the shutter button.
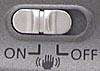
Image Stabilizer Switch: Directly to the right of the MF button on the lens barrel, this sliding switch turns the Image Stabilizer function on or off.

Main Dial: Also on the lens barrel side of the camera, this notched dial is under the Mode dial, and controls the camera's operating mode, with the following options:
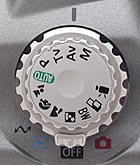
Mode Dial: Stacked on top of the Main Dial, the Mode Dial is also notched for easy turning. The Mode Dial controls the following camera exposure modes:
Diopter Adjustment Dial: Hidden beneath the viewfinder eyepiece, this tiny dial adjusts the focus of the viewfinder to accommodate eyeglass wearers.

"*"/AE Lock / FE Lock Button: Located to upper right of the LCD monitor and marked with an astrix "*" symbol, this button controls Exposure and Flash Exposure Lock. In Program AE, Shutter Speed Priority, or Aperture Priority modes, pressing this button locks the exposure reading for the image, and it will stay locked until the button is pressed again, or the shutter button is fully depressed. If the flash is set to Auto or Red-Eye Reduction Auto, it locks the exposure for the flash. Once pressed, the flash fires a small pre-flash to judge the correct exposure reading, and retains the information for the exposure. In both cases, the exposure is based on the center of the image. In any Record mode, pressing this button while the post-capture image preview is still displayed allows you to delete the displayed image. When the Custom White Balance option is selected, pressing this button sets the current white value. In Playback mode, pressing this button pulls up the Erase sub-menu for the currently displayed image.
![]()
Exposure Compensation / WB (White Balance) / AEB (Auto Exposure Bracketing / Flash Exposure Compensation Button: Directly below the "*" button, this button is marked with four symbols, one for each of its functions. In all exposure modes except for Auto and Manual, one press of this button pulls up the Exposure Compensation adjustment bar, which adjusts the exposure from -2 to +2 exposure equivalents (EV) in one-third-step increments. In all exposure modes except Black and White and Auto, a second press of this button pulls up the White Balance menu, with options for Auto, Daylight, Cloudy, Tungsten, Fluorescent, Flash, and Custom. In Program AE, Shutter Speed Priority, and Aperture Priority exposure modes, pressing this button three times enables the Auto Exposure Bracketing mode, which takes a series of three images at different exposure levels (one at the current setting, one overexposed, and one underexposed). An exposure adjustment bar allows you to control the exposure variation from -2 to +2 EV in one-third-step increments. Finally, in all exposure modes except for Auto, Movie, and Manual, pressing this button four times pulls up the Flash Exposure Compensation bar, which varies from -2 to +2 EV in one-third-step increments.

Display Button: Adjacent to the lower right corner of the LCD monitor, this button controls the information display on the LCD monitor and smaller viewfinder in both Record and Playback modes. In Record mode, the button switches between no information and a detailed information display, which reports camera and exposure settings. In Playback mode, when a single image is displayed, this button cycles between the simple display (limited information such as file name, date, and image quality), detailed information (exposure settings), and no information display. Pressing this button in Index Display mode cycles between limited information and no information.

Four-Way Arrow Rocker Button: Located on the very top right side of the back panel, this button features four arrows, one in each direction (up, down, left, and right). In any camera menu, these arrows navigate through menu options and settings. In Aperture and Shutter Speed Priority modes, the left and right arrows control the exposure variable. In Manual exposure mode, the left and right arrows control shutter speed, while the up and down arrows adjust the lens aperture. In Playback mode, the left and right arrows scroll through captured images, either in single or index display mode.

Set Button: Just below the arrow rocker button, the Set button confirms menu choices in any settings menu. In Playback mode, pressing the Set button begins movie playback. In Record mode, pressing the Set button while turning the zoom ring beyond the optical telephoto limit enables the digital telephoto mode and enlarges the image by 2x or 4x. Holding down the Set button and turning the ring back toward the wide angle setting turns Digital Zoom off.

Menu Button: To the right of the Set button, the Menu button displays the settings menu in any Record mode as well as in Playback mode. Pressing the button a second time dismisses the menu display.
Camera Modes and Menus
PC Mode: Accessed by turning the Main Dial to the crooked arrow position, this mode enables the camera to connect to a computer via a USB or serial connection.
Replaying (Playback) Mode: This mode is marked on the Main Dial with the traditional arrow playback symbol. In this mode, the user can scroll through captured images on the memory card or play back movie files. Images can also be set up for printing on DPOF devices, protected, erased, automatically played back in a slide show, enlarged for viewing, or rotated. Pressing the Menu button displays the following menu options:
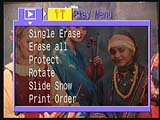 Single Erase: Erases the currently displayed image.
Off: Shuts down the camera completely.
Shooting (Record) Mode: Noted on the Main Dial with a red camera symbol, this mode allows the camera to capture images and record them to the memory card. Within Record mode are 12 exposure modes, controlled by the Mode Dial:
Pressing the Menu button in any Record exposure mode pulls up the following menu (some items may not appear in certain shooting modes):
 Resolution: Sets the pixel resolution to Large (1,856 x 1,392 pixels), Medium (1,024 x 768 pixels), or Small (640 x 480 pixels).
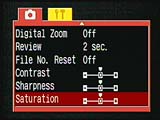 File Number Reset: Resets the file numbering with each new memory card when set to On. The Off setting continues file numbering regardless of the card.
Set Up Menu: The Set Up Menu is available in both Record and Playback modes, and is displayed as the second page of the settings menu. Menu options are:
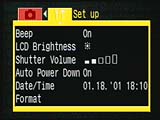 Beep: Turns the camera's beep sound on or off.
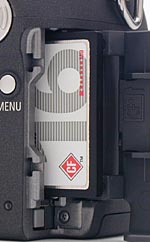 Image Storage and Interface
The Pro90 uses CompactFlash (Type I or II) cards for image storage, and a 16MB card is supplied with the camera. Upgrades up to 128MB are available separately from Canon, and up to 300+ MB from third party vendors. The Pro90IS is also compatible with IBM's MicroDrives, with up to 1 Gigabyte capacity. The memory card slot is housed in the hand grip. Insert the card with the label facing up and the directional arrow pointing toward the camera. Memory cards should never be removed while the camera is on, nor should the camera be turned off while performing operations, to avoid damaging the media. A flashing green light on the back panel notifies you when the card is in use. A small button beside the CompactFlash slot releases the card.
The table below shows the approximate number of storable images and compression ratios for a 16MB memory card:
|
Resolution/Quality (16 MB Memory Card) |
|
|
|
|
|
| High Resolution | Images | 9 | 25 | 54 |
|
| Approx. Compression |
4:1 | 12:1 | 26:1 |
|
|
| Standard Resolution | Images | 17 | 45 | 94 |
|
| Approx. Compression |
2:1 | 7:1 | 14:1 |
|
|
| Low Resolution | Images |
|
|
|
|
| Approx. Compression |
|
|
|
|
|
Canon estimates that a 16MB CompactFlash card should hold about 62 seconds of
movie files.
Images on CompactFlash cards cannot be write-protected as a group, but the Pro90
allows you to protect individual images through the Playback menu. Protection
prevents images from being accidentally erased, or manipulated in any other
way, except when the card is formatted. The "*" button on the camera's
back panel deletes the currently displayed image (with an option to cancel)
during the image preview display in any Record mode, or in Playback mode. A
Rotate menu option rotates the image display 90 or 270 degrees clockwise.
The Record menu allows you to reset the frame numbering sequence for new cards,
or to maintain the numbering sequence regardless of a card change. Images are
saved in DCF compliant (Exif Ver. 2.1 JPEG compliant) or RAW format. Movie files
are saved as AVI files. Three still image sizes are available: Large (1,856
x 1,392 pixels), Medium (1,024 x 768 pixels), or Small (640 x 480 pixels). JPEG
quality levels are Superfine, Fine, and Normal. Movie files are automatically
recorded at 320 x 240 pixels. The RAW format automatically saves files at the
1,856 x 1,392 resolution size.
Interface software and a USB cable are provided with the camera, for high-speed
connection to a computer. (A serial cable is available as a separate accessory,
as the Digital jack supports both USB and serial interfaces.) The Pro90's USB
interface is fairly fast, as we measured the data-transfer rate at 442 KBytes/second,
falling on the upper end of data-transfer range for USB-equipped cameras we've
tested to date. (January, 2001)
![]() One
of the first things any new digicam owner will need is a larger memory card
for their camera: The cards shipped with the units by the manufacturers should
really be considered only "starter" cards, you'll definitely want a higher capacity
card immediately. - Probably at least a 32 megabyte card for a 1.3 or 2 megapixel
camera, 64 megabytes or more for a 3, 4, or 5 megapixel one. (The nice thing
about memory cards is you'll be able to use whatever you buy now with your next
camera too, whenever you upgrade.) To help you shop for a good deal on memory
cards that fit the P90, we've put together a little memory locater, with links
to our price-comparison engine: Just click on the "Memory Wizard" button above
to go to the Canon memory finder, select your camera model , and click the shopping
cart icon next to the card size you're interested in. You'll see a list of matching
entries from the price-comparison database. Pick a vendor & order away! (Pretty
cool, huh?)
One
of the first things any new digicam owner will need is a larger memory card
for their camera: The cards shipped with the units by the manufacturers should
really be considered only "starter" cards, you'll definitely want a higher capacity
card immediately. - Probably at least a 32 megabyte card for a 1.3 or 2 megapixel
camera, 64 megabytes or more for a 3, 4, or 5 megapixel one. (The nice thing
about memory cards is you'll be able to use whatever you buy now with your next
camera too, whenever you upgrade.) To help you shop for a good deal on memory
cards that fit the P90, we've put together a little memory locater, with links
to our price-comparison engine: Just click on the "Memory Wizard" button above
to go to the Canon memory finder, select your camera model , and click the shopping
cart icon next to the card size you're interested in. You'll see a list of matching
entries from the price-comparison database. Pick a vendor & order away! (Pretty
cool, huh?)
 Video Out
An NTSC audio/video cable accompanies the Pro90, for connection to a television set. We assume that European models come with the necessary PAL cable, since the Set Up menu offers an NTSC and PAL setting. Once connected to a television set, the camera's LCD monitor automatically switches off. All Playback and Record functions are available (except the Stitch Assist exposure mode). The remote control can also be used to control image playback and recording.
 Power
Power
The Pro90 uses a BP-511 rechargeable lithium battery pack for power, which can be recharged inside the camera via the accompanying cable. (It also doubles as an AC adapter). The battery compartment is accessed via the bottom of the camera, and takes up a large portion of the hand grip. The Pro90 reports the current battery consumption on the status display panel as well as the LCD monitor, via a small battery icon. Canon estimates that a fully charged battery pack should accommodate about 200 images in Record mode, or provide about 120 minutes of playback time in Playback mode. This seems more or less consistent with our own test results, although the "200 shot" capacity would depend a great deal on how quickly you could squeeze off those shots, and how long the camera was left running between captures.
An automatic shutdown option is available through the Set Up Menu. When activated, the auto shutdown will turn off the camera after about three minutes of inactivity in Record mode, and about five minutes in Playback mode.
The table below documents our power consumption measurements on the Pro90 IS. It's important to note that these measurements were performed at the camera's external power terminal, with an operating voltage of 9.5 volts. Since the battery itself provides 7.4 volts, the figures shown must be increased by a factor of 25 to 30 percent to reflect the actual current drain on the battery itself.
|
|
|
| Capture Mode, w/LCD |
|
| Capture Mode, no LCD (EVF active) |
|
| Half-pressed shutter w/LCD |
|
| Half-pressed w/o LCD (EVF active) |
|
| Memory Write (transient) |
|
| Flash Recharge (transient) |
|
| Image Playback |
|
Given the 1100mAh capacity of its 7.4 volt Li-Ion NP-511 battery pack, and the 870 mA current drain when operating at the battery's voltage level in Capture mode with the LCD active (680 measured at 9.5 volts x 1.28 factor to adjust for the 7.4 volt actual battery voltage), we'd expect about 75 minutes of continuous operation in Record mode. We didn't test the total discharge time for the camera, but this number seemed to square well with our experience in the studio. Canon's NP-511 batteries are real powerhouses, but the Pro90 IS is also a fairly power-hungry device. The combination of powerful camera and powerful battery pack nets out to slightly better than average battery life.
One feature that we very much liked about the Pro90 was how quickly the battery recharged. In-camera battery charging is often a rather leisurely process, but the Pro90 brings its NP-511 battery packs up to 90% charge within 100 minutes. (Typically about an hour and a half in our experience with the camera.) Our standard advice to purchase an extra battery pack still holds, but the speed of in-camera charging was a pleasant surprise. (A car power adapter is available as a separate accessory.)
Included Software
Both a USB cable and two software CDs accompany the PowerShot Pro90 (a serial cable is available as a separate accessory). The first software CD contains Canon Utilities, ZoomBrowser EX (Windows) or ImageBrowser (Macintosh) for image handling, PhotoRecord (Windows only) for print output, and PhotoStitch, RemoteCapture, Apple QuickTime, and USB drivers, for both Macintosh (OS 8.1 or higher) and Windows (95/98/NT 4.0/2000) operating systems. The Canon Utilities software enables the camera to download images from the memory card. ZoomBrowser and Image Browser provide a variety of camera connection functions, such as the ability to convert and save RAW data files, as well as image organization and printing tools. PhotoRecord is the printing utility, which allows you to lay out prints, add frames or backgrounds, supply captions or titles, and create photo albums. PhotoStitch "stitches" together the panoramic images shot in Stitch Assist mode. RemoteCapture is a very interesting utility, which allows you to control the camera through your computer. The camera's shutter button can be released through the software, and images are saved directly to your computer. RemoteCapture also provides interval (or time-lapse) shooting at user-set intervals. (See our review of Canon's D30 SLR camera for a brief discussion of RemoteCapture, including a screen shot.) Finally, QuickTime enables you to view recorded movies and Stitch Assist files.
The second software CD contains Adobe Photoshop 5.0 LE (Limited Edition), which provides a full range of image editing, correction, and enhancement tools. Special effects filters such as Watercolor and Charcoal enable creative enhancements, and correction tools adjust image characteristics such as contrast, saturation, and lightness. Photoshop LE is also launchable directly from the browser softwares.
Included Hardware
The following hardware and accessories are included in the Pro90 box:
Test Results
In keeping with our standard test policy, the comments given here summarize only
our key findings. For a full commentary on each of the test images, see the Canon
PowerShot Pro90 IS' "pictures" page.
As with all Imaging Resource product tests, we encourage you to let your own eyes
be the judge of how well the camera performed. Explore the images on the pictures
page, to see how the Pro90 images compare to other cameras you may be considering.
Overall, the Pro90 did a great job with color balance, overcoming the challenges
of our most difficult lighting situations. We used the automatic and manual white
balance options during most of our testing, although the white balance presets
produced accurate results in most cases, differing only minutely from the automatic
settings. The Pro90 reproduced the large color blocks in the Davebox test target
quite well, with good saturation. Tonal handling was also good, as the subtle
tonal variations of the Q60 target were visible up to the "B" range,
and the small blocks in the vertical grayscales were distinguishable all the way
into the deepest shadows. We did notice slightly oversaturated red tones in a
few of our test images (mainly the red flowers in the outdoor portrait), but overall
color balance was remarkable throughout our testing.
The Pro90 also performed very well in our "laboratory" resolution test,
with excellent detail visible to 900 lines per picture height and beyond, in both
horizontal and vertical directions. The onset of aliasing (slightly jagged appearance
in the fine details, barely perceptible as thickening and thinning in the lines)
at 750 lines per picture height prompted us to "call" the resolution
at 750 lines in both directions. (It's almost a toss-up though, to rate it at
800 lines...)
We appreciated the Pro90's very flexible exposure system, which offers as little
or as much control as you need. In addition to the standard Automatic, Program
AE, Aperture Priority, Shutter Speed Priority, and Manual modes, the camera also
provides a handful of programmed Scene modes that you can use when you're at a
loss as to how to handle specific lighting or focusing situations. In addition,
the user is given control over flash mode and power, metering, exposure compensation,
ISO, AE / FE Lock, white balance, sharpness, contrast, and color saturation.
The Pro90 performed very well in the low-light category, as we were able to obtain
very bright, usable images at light levels as low as 1/16 foot-candle (0.67 lux)
at the 100, 200, and 400 ISO settings. (An excellent performance in a really dark
scene!) At the 50 ISO setting, we could see the target at the 1/16 foot-candles
light level, but the image was just a little too dim. As we expected, noise levels
were the highest at the 400 ISO setting, with a much larger grain pattern than
the slower ratings. At 50 and 100 ISO, noise was minimal, even at the darkest
light levels. To put the Pro90's low-light performance into perspective, one foot-candle
of light equals the overall lighting conditions of an average city night scene
under modern street lamps. Based on our results, the PowerShot should easily handle
even darker situations.
Since the Pro90 features an electronic SLR design, we measured the viewfinder
accuracy using the larger LCD monitor on the back panel. We found the LCD monitor
to be very accurate, measuring about 98 percent at both wide angle and telephoto
settings (for all three resolutions). Since we generally like to see LCD monitors
as close to 100 percent accurate as possible, the Pro90 does an excellent job.
The Pro90 also did well in the macro category, capturing a minimum area of 4.40
x 3.30 inches (111.74 x 83.80mm). Color, detail, and resolution all looked great,
though we picked up a low level of noise in the gray background. Printing details
on the dollar bill were slightly soft, but the coins appeared reasonably sharp.
The Pro90's built-in flash had a little trouble throttling down for the macro
area, producing a bright reflection on the brooch, and a large shadow area extended
across the bottom of the flash image, indicating that the flash was partially
blocked by the rather long lens.
The Pro90 performed very well throughout our testing, handling our toughest light
sources well, and coping with low light levels with ease. Resolution was great,
as was overall image quality, and the variety of exposure controls makes the camera
very flexible in a wide variety of shooting situations. Though its macro capability
is slightly less than average, the Pro90's 10x zoom lens and Image Stabilizer
technology more than make up for it! Overall, we were very pleased with the Pro90's
performance.
Conclusion
Canon's earlier PowerShot Pro70 received wide acclaim for its excellent picture-taking
capabilities, with excellent optics and beautiful, accurately-rendered images.
The Pro90IS is a very worthy upgrade to the earlier product, carrying on the tradition
of image quality, but now adding the power of a 10x Image Stabilizer lens and
a 2.6 megapixel CCD. The intervening time has also brought advances in the CCD
and camera circuitry, with the result that the Pro90IS is also capable of low-noise
image captures in very low light conditions as well. By offering a wide range
of preset exposure modes along with flexible manual exposure options, the Pro90IS
will appeal to serious amateurs and less-committed family members alike. All in
all, a very nice picture-taking package, entirely worthy to carry on the PowerShot
"Pro" heritage!
<<PowerShot Pro 90 Sample Images | Additional Resources and Other Links>>
Reader Comments!
Questions, comments or controversy on this product? Click
this link to see what other Imaging Resource readers have had to say about
the Canon PowerShot Pro90 IS, or add comments of your own!