Back
to Full Ricoh RDC-6000 Review
Back
to Full Ricoh RDC-6000 ReviewGo to Ricoh RDC-6000 Data Sheet
Go to Ricoh RDC-6000 Pictures Page
Up to Imaging Resource Cameras Page
Use your browser's "Back" button to return to the previous page, or the links at the top and bottom of this page to navigate to related information. If you have difficulty fitting the text on this page onto your printer output, simply resize your browser window to a narrower width and print again.
Remember us when it's time to buy!
Dave here: Have our reviews been helpful to you? (Is this article you're reading right now useful?) Preparing this level of information on as many products as we do is incredibly hard work, not to mention expensive. Things on the Internet may look like they're free, but they're not. (As a lot of big dot.com companies are finding out these days.) Somewhere, somebody has to pay to produce worthwhile content. YOU can help us though, by remembering us when it comes time to make your purchase. Would you consider coming back to our site and clicking-through to one of our advertisers to make your purchase? Every dollar you spend with one of our advertisers helps us directly (in affiliate fees) or indirectly (the advertiser will keep renewing their ad contract with us). To make it easy for you to support us, here's a URL you can visit, to see all our current advertisers, with links to click on that will register your visit to them as having come from our site. It's up to you where you buy, but Mike, Mike, Kim, Yazmin, Marti and I would be really grateful if you'd help us out by choosing one of our advertisers to purchase from.
Thank you for your support!
Dave Etchells, Founder & Publisher
Visit our "Buy Now" Page:
https://www.imaging-resource.com/buynow.htm
Back
to Full Ricoh RDC-6000 Review
Go to Ricoh RDC-6000
Data Sheet
Go to Ricoh RDC-6000
Pictures Page
Up to Imaging Resource Cameras
Page
Ricoh RDC-6000Ricoh's inexpensive 2 megapixel digicam doubles as a USB webcam. (With optional software.) Review First Posted: 1/9/2001 |
|
 |
|
1.3 megapixel sensor for 1280x960 pixel images |
|
|
Simple user interface | |
|
|
Enough exposure control for most shooting situations | |
|
|
Compact design |
Executive Overview
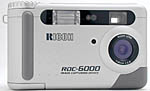
Compact, lightweight, and very portable, Ricoh's RDC-6000 offers pocket-friendly design with a nice complement of features, perfect for busy consumers. Measuring just 4.33 x 2.64 x 1.56 inches (110 x 67 x 39.5mm), and weighing 7 ounces (220 grams), the RDC-6000 is easy to keep up with, especially when you use the included wrist strap and soft case. The camera features a 2.1 megapixel CCD that can be interpolated to nearly 3 megapixels (and an image resolution size of 2,000 x 1,480 pixels) with the Image Enlargement feature under the settings menu.
The RDC-6000 offers both a Galileo type (also known as "real image") optical viewfinder and a 1.8-inch, color LCD display for composing images. The informative LCD display reports a fair amount of camera information, including battery power and the number of remaining images, which can be canceled for a clear view of the image area. The LCD monitor also features a grid template that divides the image into thirds both horizontally and vertically to aid in image composition.
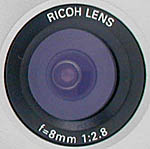
Optically, the RDC-6000 features a 8.24mm, aspherical glass lens, equivalent to a 40mm lens on a 35mm camera. Instead of a lens cap, the lens is protected by a clear plastic cover that remains in place at all times. Focus can be automatically or manually controlled, and an Area option allows you to establish the area of the frame on which the camera will base its focusing (25 framing areas available). Two fixed focusing distance settings are also available, 2.5m and Infinity, for faster shooting. Normal focus ranges from 11.8 inches (0.3 meters) to infinity and from 5.11 to 11.8 inches (0.13 to 0.3 meters) in Macro mode. No optical zoom function is available, although a digital telephoto option enlarges images to 2x, 3x, or 4x. (Remember that digital zoom isn't the same as a true optical zoom lens, compromising image quality by increasing noise and decreasing resolution).
Exposure is automatic, with Aperture Priority, Exposure Compensation, and ISO adjustments available. In Aperture Priority mode, the user can set the lens aperture from f/2.8 to f/13 and the camera selects the best shutter speed (from 1/500 to 1/4 second). Exposure compensation can be adjusted from -2 to +2 EV (exposure values) in 0.25 EV increments, and ISO can be set to 100, 200, or 400 sensitivity equivalents. The camera's white balance system offers Auto, Daylight, Overcast, Tungsten, Fluorescent, User Define, and W/B Calibration modes. User Define allows you to manually adjust the red, green, and blue levels in a picture, while W/B Calibration bases the white value on a white card placed in front of the camera. The camera's built-in flash operates in Flash Off, Auto Flash, Forced Flash, or Slow Synchro modes, which are controlled by a button on top of the camera. A Redeye Reduction option is available through the Record settings menu. An Auto Bracketing function provides a little flexibility with exposure, capturing three images at different exposure compensation levels with one press of the shutter button. There's also a 10-second self-timer, which can be used with an accessory remote control (available separately).
A variety of capture modes are available on the RDC-6000. Text mode increases the image contrast to capture clear images of text. Quick Shooting mode captures a series of consecutive images at approximately one frame per second with one press of the shutter button (the total number of images depends on the amount of available SmartMedia space). A Movie recording mode captures moving images without sound (the total recording time is also dependent upon available memory card space). In Movie mode, the shutter speed ranges from 1/2,000 to 1/30 second, and remains under automatic control. Interval (time-lapse) mode records a series of images at preset intervals (from 30 seconds to 180 minutes) until the mode is canceled or the memory card runs out of room. Finally, the RDC-6000 offers a Monochrome shooting mode, allowing users to record images in black-and-white or sepia monotones.
The RDC-6000 records images to 3.3v SmartMedia cards (an 8MB card is included with the camera). Standard file sizes include 1,600 x 1,200, 800 x 600, and 640 x 480 pixels (320 x 240 and 160 x 120 for movie files), with Fine, Normal, and Economy JPEG compression levels available. As we mentioned earlier, the RDC-6000 features an interpolation algorithm, called Image Enlargement in the Record menu, which bumps up the maximum file size to 2,000 x 1,480 pixels (Fine compression only). (Note: Interpolated images are enlarged by using a software program to mathematically increase resolution, it should not be equated with true, optical image resolution.)
Power is supplied by a rechargeable DB-20 lithium-ion battery pack, supplied with the camera. Also included are an AC adapter and battery charger. A video cable connects the camera to a television set (NTSC for US and Japanese models, and PAL for European models). Once connected, the television can display captured images or be used to compose new ones. An optional accessory remote control increases the camera's video capabilities, by turning it into a presentation tool. A USB connector and RS232 serial cable are provided for connection to a computer. Two software CDs include Ricoh's utility software for downloading images, as well as a complete suite of ArcSoft image editing software, and the necessary TWAIN and USB drivers. All software is compatible with both Windows and Macintosh operating systems.
Overall, we found the RDC-6000 to have a nice selection of features and a lightweight, compact size for easy portability. While image quality was not the best we've seen, the RDC-6000 offers 2-megapixel capability at a very affordable price. The combination of automatic exposure, manually adjustable focus, and white balance settings makes the RDC-6000 a great match for the consumer who doesn't want to worry too much about exposure decisions, but who also prefers to have manual adjustment tools available when needed.
Design
Compact and low-profile, the Ricoh RDC-6000 packs a lot of features into its trim body size. It measures a mere 4.33 x 2.64 x 1.56 inches (110 x 67 x 39.5mm) and weighs just seven ounces (220g), so should have no trouble slipping into most shirt and coat pockets. A wrist strap is included with the camera, for a little added security. The camera's simple, clean design includes only a handful of control buttons and a very large mode dial. On the inside, a 2.1-megapixel CCD sensor produces images as large as 1,600 x 1,200 pixels in standard mode. The Image Enlargement function (available through the Record menu) interpolates the CCD image to nearly 3 megapixels, producing a larger 2,000 x 1,480 pixel image size.

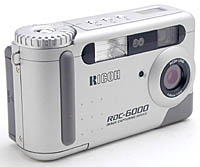
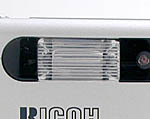
The front of the camera houses the lens, built-in flash, flash sensor, self-timer LED, viewfinder window, and remote control sensor. Ricoh solved the lost lens cap problem by placing a stationary, clear plastic protective cover over the lens. Though we appreciate not having to keep track of a removable lens cover, we're concerned that the plastic itself could be scratched or smudged, causing anomalies to show up in captured images. (You can avoid this problem by keeping the camera in the accompanying soft case whenever it's not in use.) A set of tiny raised finger grips and a large, rubber ridge on the front of the camera provide a firm, comfortable hold. A small rubber grip below the lens provides extra support for a two-handed hold.
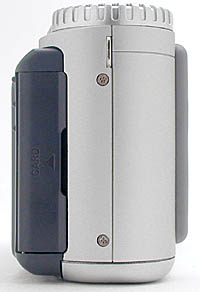
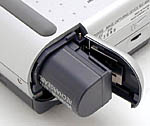
The right side of the camera features the SmartMedia card slot and the wrist strap attachment eyelet. The SmartMedia slot is protected by a hinged, plastic door that snaps firmly into place. We were somewhat mystified with the design of the card release lever, which requires a fairly strong (and long) fingernail to pop it into position. In fact, we also found the card slot door a little difficult to open, with the placement of the access notch slightly difficult to maneuver.
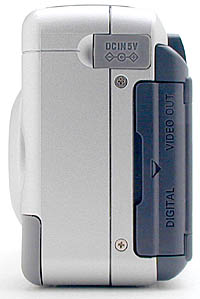
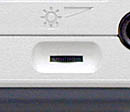
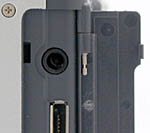
The opposite side of the camera houses the DC-in (power) terminal, as well as the Video Out and serial port connection jacks. The DC-In port is protected by a soft rubber flap which is connected to the camera body by a small rubber strap. Both the Video-Out and serial port jacks are covered by another hinged plastic door, similar in design to the one covering the SmartMedia compartment (though a little less difficult to open).
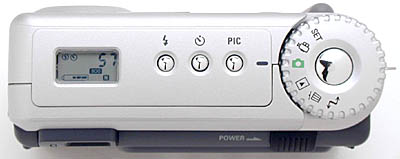
On the top panel of the RDC-6000 are three control buttons (flash, self-timer, and image-quality controls), the mode dial, shutter button, and a small, black-and-white status display panel that reports most camera settings. (We're always glad to see a status display panel, as it enables you to work without the LCD monitor activated.) The mode dial is nice and large, with easy-to-grip notches around the outside of its bezel.
The remaining control buttons are on the camera's back panel, along with the eye-level viewfinder, flash/autoficus status LED, LCD monitor, and power switch. A small thumbgrip in the lower left corner, and a series of raised notches in the top right corner, are provided for one- or two-handed hold. (The control layout is relatively simple and able to accommodate one-handed operation in a pinch, but much easier to handle with two hands.)
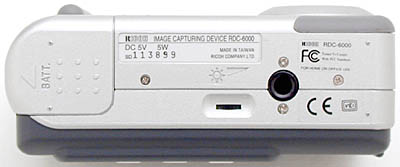
The bottom of the camera has a tripod mount, battery compartment door, and LCD monitor brightness adjustment dial. The plastic tripod mount and battery compartment are far enough from each other to allow battery changes while working with a tripod, which is always beneficial. However, the LCD brightness adjustment dial is completely hidden by the tripod mount plate. (This isn't much of an issue for most users, given the RDC-6000's more practical, portable applications.) The battery compartment is accessed via a plastic door, which slides outward and then opens to reveal the battery pack.
 Viewfinder & LCD
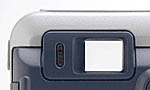
The RDC-6000 features a Galilean type (also referred to as "real image"), eye-level optical viewfinder and an LCD monitor for composing images. The optical viewfinder represents approximately 0.5x magnification, but doesn't provide any autofocus or cropping target marks. We usually prefer some type of target in the center of the viewfinder to help line up shots and guide exposure and focus locking functions. An LED light on the left side of the viewfinder indicates the camera's operational status. When the LED is lit a steady green, the camera has set focus and exposure and is ready to fire the shutter. A flashing red LED indicates that the flash is charging, while a flashing green LED means that the image is out of focus. (In Movie record mode, a flashing red LED simply indicates that the camera is recording moving images.)
The 1.8-inch, D-TFD active matrix, color LCD monitor is comprised of approximately 71,760 pixels. It is automatically activated when the camera is turned on, but a Display button on the left side of the LCD monitor turns the image display on or off as you need it. A small dial on the bottom panel of the camera controls the LCD brightness, adjusting it for light or dark shooting situations. An information display reports the date, flash mode, image size and quality setting, recording mode, battery status, and the number of available images. Pressing the Enter button beneath the LCD monitor cycles through the full information display as described above, a reduced information display with only exposure and camera settings, and no information at all. (We admit to being somewhat puzzled that the Display button didn't also control the information overlay.) The RDC-6000 also features a Grid Template function to help you compose images, which is controlled through the settings menu. When activated, the grid divides the image area into thirds horizontally and vertically with a series of dotted lines displayed on the LCD monitor.
In Playback mode, a multi-image playback function displays up to six thumbnail images on the screen at one time, for a quick review of the images saved to the SmartMedia card. Pressing the Display button cycles between single image and six image displays. Through the Playback menu, a recorded image can be enlarged up to 2x on the LCD monitor, to check fine detail. Once an image is enlarged, the up and down arrow buttons, as well as the Enter and Menu buttons, allow you to scroll around within the image (the Enter and Menu buttons act as right and left arrow keys). An on-screen grid shows you what part of the image is on screen in relation to the complete image. Just like in Record mode, Playback mode features an information display controlled by the Enter button. Again, three levels of information are displayed: The first display reports the image date, file name, file number, battery status, quality setting, and protection status. The second display reports the same, with the exception of the date, time, and battery status. The third display features no information at all.
 Optics
The RDC-6000's built-in 8.24mm, aspherical glass lens is equivalent to a 40mm lens on a 35mm camera. (A moderate wide-angle lens.) Lens aperture can be manually controlled through the camera's Aperture Priority exposure mode if the user so chooses, with available settings from f/2.8 to f/13. Focus ranges from 11.8 inches (0.3m) to infinity in normal mode, and from 5.11 to 11.8 inches (0.13 to 0.3m) in Macro mode. The RDC-6000 offers six focus settings (Auto, Macro, Area, 2.5m, Infinity, and Manual), each is accessed through the Record menu. The Auto and Macro settings are relatively self-explanatory, setting the focus to auto-focus at normal or close-up range. Area focus allows you to establish a specific area of the image as the focal point of the picture. The focus area is represented by a green outline square, which is moved around within the image frame via the right and left arrow buttons at the bottom of the LCD monitor (the Cancel and Enter buttons). The 2.5m and Infinity focus modes simply fix the focus at specific distances, which can save time when you need to shoot quickly, by cutting out the delay of the autofocus function. Finally, the Manual focus mode allows you to adjust the focus (within the same range: 11.8 inches or 0.3 meters to infinity), by pressing the left and right arrow buttons. While the RDC-6000 doesn't feature an autofocus lock function, you can manually lock the focus by simply framing the desired area of the subject in the center of the frame, halfway pressing the shutter button, and then reframing the subject while keeping the shutter button halfway depressed. The focus remains locked until the shutter button is released or fully pressed.
Though the RDC-6000 doesn't offer an optical zoom, it does offer digital telephoto up to 4x. The up and down arrow buttons on the right side of the LCD monitor control the amount of digital zoom, with enlargement options of 2x, 3x, and 4x. Keep in mind that digital zoom is not a true replacement for optical zoom, as digital telephoto simply enlarges the center of the CCD image, thereby decreasing image resolution, increasing the noise level, and reducing the quality of the image.
Exposure
Exposure control is relatively straightforward on the RDC-6000, as the LCD menu system drives the majority of the exposure functions. The flash mode, self-timer, digital telephoto, ISO, and image quality settings are all accessed through external controls. Most exposure functions are automatically controlled, although the camera does offer an Aperture Priority mode which allows you to select the desired lens aperture setting, from f/2.8 to f/13, while the camera selects the best corresponding shutter speed (which ranges from 1/500 to 1/4 second in still Record mode). Program mode chooses both shutter speed and aperture, but you can change the camera's settings by adjusting Exposure Compensation, ISO, and Flash mode. You also have full control over Recording mode, White Balance, and PIC (image quality and compression) settings.
Exposure compensation is adjusted through the Record settings menu, allowing you to choose from -2 to +2 EV (exposure value) in 0.25 EV steps. Also controlled through the Record menu, the RDC-6000's white balance system offers seven modes: Auto, Daylight, Overcast, Tungsten, Fluorescent, User Define, and W/B Calibration. The first five settings basically match the white balance to an existing light source, however, the User Define and W/B Calibration modes work a little differently. The User Define mode allows you to manually correct the white balance by adjusting the amount of red, blue, and green in the image, using the Cancel and Enter buttons as right and left arrow keys to adjust the levels. Once you've adjusted the white balance, a Save option enables you to keep the adjustment as a preset to call up again later. This is a very interesting option, unlike any we've seen before on other cameras we've tested. The only drawback to it is that the LCD screen gives only a very approximate indication of the color of the final image. Still, with some trial and error, the User Define white balance option could be useful in special lighting conditions. More conventionally, the W/B Calibration mode chooses the white balance based on a white card or paper held in front of the camera lens. The flash is disabled when shooting in the Daylight, Tungsten, Overcast, Fluorescent, User Define, and W/B Calibration modes, and according to the user manual, Auto White Balance may be inaccurate when shooting images with low white values. (That is, images with no pure white areas in them.)
The RDC-6000 also gives you control over the CCD light sensitivity, with ISO 100, 200, or 400 equivalents available through the settings menu. The Self-Timer button on top of the camera activates the camera's Self-Timer mode, which provides a 10-second countdown between a full press of the shutter button and the actual firing of the shutter. During the countdown, the self-timer LED on the front of the camera flashes for the first eight seconds, then lights steadily for the remaining two. Self-timer mode is automatically deactivated after the shutter fires. Ricoh offers an accessory remote control unit, which we did not receive for testing. It works with the camera's Self-Timer mode, as well as with the standard Record and Playback functions. An image confirmation screen appears on the LCD monitor immediately after an image is captured, merely displayimg the image as it is being recorded. There is no option to cancel display of the recorded image, but the display time can be set anywhere from zero to three seconds through the Set menu, which is accessed through the camera's Mode dial.
 Flash
Flash
The RDC-6000 features a built-in flash with five operating modes, four of which are controlled by the Flash button on top of the camera: Off, Auto, Forced, and Slow Synchro. Off is the default setting, which the camera reverts to each time it is powered off (unless the default is changed through the Set menu). The Auto setting places the camera in control of when to fire the flash, based on the current ambient light conditions. In Forced mode, the camera fires the flash with each exposure, regardless of the existing light level. In Slow Synchro mode, the camera combines the flash with a slow shutter speed to allow more ambient light into the image (thereby avoiding a harsh flash exposure with a dark background). Ricoh notes that when using the flash to illuminate a backlit subject, the subject must be framed in the center of the image or the camera will not recognize the backlighting. The RDC-6000 also features a Red-Eye Reduction mode, which is turned on through the Record menu. (A puzzling set-up, since you would expect this function to be accessed through the Flash button as well.) Red-Eye Reduction applies to all flash modes except for Off. Once Red-Eye Reduction is activated, the camera fires a small pre-flash before the full flash, to avoid red-eye effect. Ricoh estimates that the RDC-6000's flash is effective from 1.0 to 9.9 feet (0.3 to 3.0m).
Text Mode
Activated through the Recording Mode selection of the Record menu (indicated by a small green box with the letter "A" inside, above the Menu button), Text mode sets the camera to record clear images of text. By altering the contrast, black-and-white values are intensified. The built-in flash is unavailable in Text mode.
Quick Shooting Mode
Also controlled through the Recording Mode selection of the Record menu (and indicated by a series of overlapping green boxes), Quick Shooting mode captures a series of consecutive images at approximately one frame per second for as long as the shutter button is held down. Actual cycle times and the total number of consecutive frames vary, depending on the amount of image information to be recorded and SmartMedia space available. The camera saves each image to its own internal buffer memory before saving the entire series to the memory card. As with Text mode, the flash is unavailable. Focus, exposure compensation, and white balance are all locked with the first shot in the series. If the file numbering has reached 9999, the Quick Shooting mode will not work. You can either format the SmartMedia card or insert a new card.
Movie Mode
The RDC-6000 also offers a Movie mode for capturing moving images. The movie camera symbol on the mode dial designates Movie mode, and the amount of available recording time is automatically displayed on the LCD monitor when the Movie mode is activated. Shutter speed remains under automatic control, with shutter speed range od 1/2,000 to 1/30 second. Exposure compensation, focus, and white balance are all automatically controlled as well, and the flash is unavailable. Movies can be recorded at 320 x 240- or 160 x 120-pixel image sizes, with Fine and Normal quality settings available.
Monochrome Mode
The Monochrome menu option records images in black-and-white or sepia monotones. Black-and-white mode works exactly as it indicates, converting the color image to black and white. Sepia mode is also monotone, but records the blacks in warm shades of brown, reminiscent of old photographs.
Interval (Time Lapse) Shooting
Also through the Record menu, you can set the camera to an Interval Mode option to record images at set time periods (time-lapse photography). Time intervals can be set in 30 second increments from 30 seconds to 180 minutes, and the camera will continue to record one image at each set interval until the mode is canceled, the memory card runs out of room, or the battery discharges. The word "Interval" is displayed on the LCD monitor throughout the recording time, and an initial press of the shutter button kicks off the Interval series.
Auto Bracketing
The RDC-6000 features an Auto Bracket mode, which captures three images at different exposure compensation levels. Once activated, the Auto Bracket feature exposes the image at the camera's set exposure, then takes another exposure at -0.5 EV and one at +0.5 EV. A tripod is recommended when using the Auto Bracket feature to prevent camera shake, and the flash is automatically disabled.
Video Capture
Ricoh bills the RDC-6000 as a "dual mode" camera, as it can be used as a USB-connected digital video camera as well as a conventional digital still camera. Unfortunately, doing so requires that you find and download additional software beyond what comes packaged with the camera. Mac users will need a copy of CU-SEE-ME, while Windows users will need a copy of Microsoft NetMeeting. (We didn't experiment with this capability in our testing, so have no comment on its effectiveness.)
Shutter Lag/Cycle Times
When you press the shutter release on a camera, there's usually a lag time before the shutter actually fires. This allows the autofocus and autoexposure mechanisms time to do their work, and can amount to a fairly long delay in some situations. Since this number is almost never reported by the manufacturer or other reviewers, and because it can significantly affect the picture taking experience, Imaging Resource routinely measures lag-time using a custom-built test system.
|
|
||
|
|
|
|
| Power On -> First shot |
|
Rather leisurely
|
| Shutdown |
|
Pretty quick
|
| Play to Record, first shot |
|
Fairly fast
|
| Record to play (max/min res) |
|
Typical
|
| Shutter lag, full autofocus |
|
Rather slow |
| Shutter lag, manual focus |
|
About average |
| Shutter lag, prefocus |
|
A little slow |
| Cycle time (max/min res) |
|
Slower than average (No buffer memory, so write to card must finish before next image capture.) |
| Frame Rate, continuous modes, frames per second (fps) |
|
Frame rates are for "Quick Shooting" (continuous) mode and movie recording.
|
Operation and User Interface
We found the user interface on the RDC-6000 relatively straightforward, though very reliant on the LCD monitor. The image size and compression ratio are controlled by the "PIC" button on top of the camera. The Self-Timer and Flash mode adjustment buttons are also on top. The digital telephoto is controlled by the up and down arrow buttons next to the monitor, and the display on/off button is on the other side. The remaining exposure variables, such as Exposure Mode, ISO, Exposure Compensation, and White Balance must be accessed through the LCD-based menu system. We found the LCD menu system simple to navigate and reasonably efficient. (We found it odd though, that the exposure compensation adjustment is the last menu option on the second page. Fortunately, this isn't quite as awkward as it sounds, since you can get to the last menu entry by scrolling upfrom the first menu position, saving scrolling through all the other entries first. Still, we'd like the +/- exposure compensation control to be more readily available.) We were glad to see the inclusion of a small status display panel on top of the camera, which reports a variety of camera settings, including battery power and image quality. This helps save precious battery power by allowing you to work without the LCD monitor. Additionally, the control layout should accommodate one-handed shooting, though a couple of extra finger grips on the left side of the camera ensure a good hold when shooting with two hands.
Control Enumeration

Shutter Button: Located on top of the camera, in the center of the Mode dial, this button sets exposure and focus when depressed halfway. Fully depressing the button triggers the shutter. Pressing the shutter button also triggers some menu items while in the settings menu, such as the Erase All option of the Erase menu. When the Self-Timer is activated, pressing the shutter button begins a 10-second countdown before the shutter is fired.
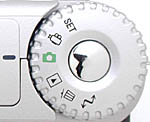
Mode Dial: Encircling the shutter button on the top panel of the camera, this large, notched dial selects the camera's operating mode. Options are:

PIC Button: Positioned directly to the left of the Mode Dial, this button cycles through the available image size and quality settings, depending on the capture mode.

Self-Timer Button: Next to the PIC button, this button activates and deactivates the Self-Timer mode, which provides a 10-second countdown before the shutter is released.

Flash Button: The far left button on the camera's top panel, the Flash button controls the built-in flash operating mode. Options include Off, Auto, Forced, and Slow Synchro.
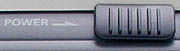
Power Switch: Positioned on the back panel of the camera, just over the top right corner of the LCD monitor, this notched, sliding switch turns the camera on and off.
![]()
Up/Down Arrow Buttons: Resting on the right side of the LCD monitor, these arrow buttons control the amount of digital zoom, with options for 2x, 3x, and 4x enlargement. In any settings menu, these buttons navigate through menu options. In Playback mode, these buttons allow you to scroll around within a captured image that has been enlarged on the LCD screen.
![]()
Enter Button: Located under the lower right corner of the LCD screen, this button cycles through information display formats in both Record and Playback modes. When making menu selections, this button confirms the selected option. On some menu options, such as the User Define White Balance setting and the Manual Focus mode, this button acts as the right arrow button, for making adjustments. In Playback mode, this button acts as the right arrow button when scrolling through captured images (and enlarged ones). This button also controls the amount of playback zoom once the menu option has been selected.
![]()
Menu Button: To the left of the Enter button, this one pulls up the camera settings menu in most modes. When playback zoom has been enabled, it acts as the left arrow key, for scrolling around within the enlarged image.
![]()
Cancel Button: Just beneath the lower left corner of the LCD monitor, this button backs out of menu selections and exits settings menus. In some menu selections, it acts as the left arrow button for making adjustments. In Playback mode, it doubles as the left arrow button for scrolling through captured images.

Display Button: Located on the left side of the LCD monitor, this button controls the LCD monitor display in both Record and Playback modes, turning it on and off. In Playback mode, when playback zoom has been enabled, this button controls the amount of playback zoom, up to 2x.
LCD Brightness Adjustment Dial: A very small black dial on the bottom panel of the camera, this controls the brightness level of the LCD monitor.
Camera Modes and Menus
Set Mode: Accessed by turning the Mode dial to the Set position, this mode pulls up the camera's Set-Up menu with the following options:
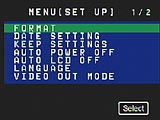 Format: Formats the SmartMedia card, erasing all images from the card (even protected ones).
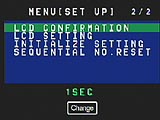 LCD Confirmation: Alters the amount of time that the captured image is displayed on the LCD monitor while being recorded. Times include, zero, one, two, or three seconds.
Movie Mode: Marked on the Mode Dial with a miniature movie camera symbol, the Movie mode allows you to record moving images without sound for as long as the shutter button is held down. Actual recording times vary, depending on the amount of available SmartMedia space, as well as the file size and quality settings. All exposure variables are automatically controlled, and there is no settings menu available in this mode.
Record Mode: This mode is noted on the Mode Dial with a green camera symbol. Here, you can record still images with a variety of recording and exposure mode options available. Pressing the Menu button displays the following settings menu:
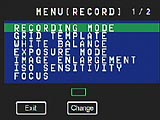 Recording Mode: Selects the camera's still capture mode, with options of Still (single green box), Text (single box with "A" inside), and Quick Shooting (multiple green boxes) modes.
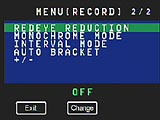 Red-Eye Reduction: Activates the Red-Eye Reduction flash mode, which fires a small pre-flash before the full flash to reduce the effect of red-eye.
Playback Mode: Entered by turning the Mode dial to the traditional playback symbol (a solid, right-pointing triangle inside a rectangular outline), this mode allows you to scroll through captured images on the SmartMedia card. You can also protect individual images, as well as set them up for printing on DPOF-compatible devices. The Playback settings menu is displayed by pressing the Menu button.
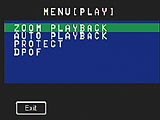 Zoom Playback: Allows you to "zoom" into a captured image, up to two times (2x), for closer inspection of details.
Erase Mode: Turning the Mode dial to the "trash can" symbol immediately displays the Erase menu on the LCD monitor:
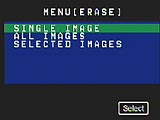 Single Erase: Erases the last image displayed in Playback mode, with an option to cancel.
PC Mode: The final stop on the Mode dial, PC Mode is marked with a crooked arrow symbol. This mode sets the camera for connection to a PC or Macintosh via the included USB or serial cables. Once connected, images can be downloaded from the SmartMedia card.
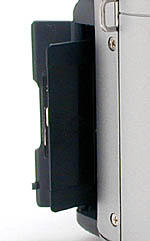
Image Storage and Interface
The RDC-6000 uses SmartMedia for image capture and storage. An 8MB card comes with the camera, but upgrades are available separately up to 64MB. Remember to use only 3.3V SmartMedia cards (sometimes marked simply 3V) and steer clear of the 5V version. The table below shows card capacities, based on the included 8MB memory card, and approximate JPEG compression ratios for the various size/quality combinations the camera provides.
|
Resolution/Quality (Number of images that fit on an 8MB SmartMedia Card) |
|
|
|
|
| Highest Resolution (Interpolated 2000 x 1480) | Images | 5 | N/A | N/A |
| Approx. Compression |
6:1 | N/A | N/A | |
| Highest Resolution (1600 x 1200) | Images | 7 | 15 | 31 |
| Approx. Compression |
5:1 | 11:1 | 22:1 | |
| Standard Resolution (800 x 600) | Images | 31 | 63 | 127 |
| Approx. Compression |
6:1 | 11:1 | 23:1 | |
| Low Resolution (640 x 480) | Images | 49 | 99 | 198 |
| Approx. Compression |
6:1 | 11:1 | 23:1 | |
SmartMedia should never be removed while the camera is on, and neither should the camera be turned off while performing operations, to avoid damaging the media. If the SmartMedia slot cover is opened while the camera is on, the camera will automatically turn off. Always load the SmartMedia with the gold electrodes going into the camera first (the card will not fully slide into the slot if inserted incorrectly). The card is released by a small lever that pops up into its operating position. We found it a little difficult to release the lever, as its placement is somewhat deep within the compartment.
You can write-protect SmartMedia cards by placing a write-protection sticker in the designated area. Write-protection stickers can only be used once and must be clean to be effective. You can protect all images or individual selections in Playback mode, accessible via the Mode Dial. Protection prevents images from being accidentally erased, or manipulated in any way except with card formatting.
Frames are assigned file numbers from 0001 to 9999, with a preceding directory number. Once 9999 is reached, the directory number goes up by one. Setup mode allows you to reset the frame numbering sequence for new cards. Images are saved in DCF compliant (Exif Ver. 2.1 JPEG compliant) format with Digital Print Order Format (DPOF) compatibility.
You can erase images in Erase mode, with the option of erasing the last frame displayed, all frames, or selected frames. Formatting erases all images on the card, including protected images, and reinitializes the SmartMedia card.
A USB cable accompanies the camera for quick connection to a PC or Macintosh, as well as an RS232 serial cable for PCs. A software CD holds a complete Ricoh interface package, including a full suite of ArcSoft image editing software.
Video Out
The RDC-6000 is accompanied by a video cable for connecting to a television set (NTSC for US and Japanese models, PAL for European models). The Set menu offers both NTSC and PAL video settings, in addition to a camera language setting. You can review captured images, as well as compose new ones by using the television set as an extended LCD monitor. Once connected to a television, the RDC-6000's LCD monitor goes blank. Combined with the remote control accessory, the RDC-6000's video-out capabilities make the camera a useful presentation tool.
Power
The RDC-6000 uses a rechargeable, DB-20, lithium-ion battery pack for power. Also included with the camera is an AC adapter and battery charger kit, which charges the battery in-camera. Ricoh estimates that a fully charged DB-20 pack should provide approximately 40 minutes of recording time, or approximately 60 minutes of playback time, figures which agreed very well with our own tests. (We actually got about 55 minutes of operation in record mode with the LCD turned on, didn't test playback mode, but woudl expect a similar gain there.) Though the camera is somewhat dependent on its LCD monitor, it does feature a small status display panel on the top panel, which reports most of the camera's settings. Battery consumption is reported in the LCD monitor via a small battery symbol, with a shaded portion indicating the level of charge remaining. The RDC-6000 also offers an Auto Power Off feature, which shuts down the camera after one, three, or five minutes of inactivity. Similarly, an LCD Off feature disables the LCD monitor after one, three, or five minutes of inactivity, but leaves the camera active.
We normally measure power consumption (in milliamps) directly for this section of our reviews, but the RDC-6000's power system foiled our efforts: The camera refused to run unless the battery was in its compartment, which distorted the power consumption numbers significantly. Thus, all we can say is that the camera seems to somewhat outperform the official runtime estimates from Ricoh, giving us 55 minutes of continuous operation in the maximum power-drain mode. (Record mode with the LCD enabled.)
Included Accessories and Software
The RDC-6000 comes equipped with a USB cable, Serial cables for Windows and Mac, video cable, rechargeable Lithium Ion battery with a combination AC adapter and battery charger, 8MB SmartMedia card, soft carrying case and wrist strap, and two software CDs (one for Windows 98, 2000 or NT 4.0, and one for Macintosh OS 8.6 or higher). Both CDs contain Ricoh's Camera Utility software, in addition to ArcSoft's PhotoImpressions, VideoImpressions, PhotoMontage, PhotoFantasy, and PhotoIsland software packages. The necessary USB and TWAIN drivers are also included.
The Ricoh Camera Utility Software is the basic vehicle for transferring image files from the camera to the computer. PhotoImpressions provides rudimentary image-editing utilities, as well as correction tools and fun effects filters. VideoImpressions allows you to edit your movie files, perform minor corrections, and add music. PhotoMontage creates a single mosaic image from an entire collection of smaller images (either from your own library of images or sample images from the program). PhotoFantasy provides whimsical templates for creating mock magazine covers, fun posters, and greeting cards. Finally, the PhotoIsland software allows you to connect to the www.photoisland.com website, where you can create web-based photo albums to share with family and friends.
Our evaluation model of the RDC-6000 also included a "Cool Stuff" envelope, absolutely stuffed full of special offers, sample photo paper, and a trial version of Scala City multimedia software on CD-ROM. (The included deals actually struck us as having some material value, unlike many toss-in packets we've seen in the past.)
Test Results
In keeping with our standard policy, our comments here are rather condensed, summarizing our key findings. For a full commentary on each of the test images, see the Ricoh RDC-6000's "pictures" page.
As with all Imaging Resource camera tests, we encourage you to let your own eyes be the judge of how well the devices performed. Explore the images on the pictures page, to see how well the Ricoh RDC-6000 performed, and how its images compare to other cameras you may be considering buying.
The RDC-6000 had a little trouble with color balance during our testing. The camera's white balance system had difficulty with the lighting in both our Outdoor and Indoor portrait shots, but managed to reproduce color on our House, Musicians, and Davebox test targets fairly accurately. For the most part, the manual white balance setting produced the most accurate results, although we noticed some magenta tints in a couple of shots. We also noticed odd, green and magenta color casts when shooting with the flash. The RDC-6000 reproduced the large color blocks in our Davebox test target fairly well, though with just a touch of undersaturation. Tonal range was rather problematic, as the subtle variations of the Q60 target were visible only up to the "C" range, and the black and white grayscales showed color shifts toward the lighter ends of the ranges. Overall, we'd really like to see the contrast on the RDC-6000 turned down a couple of notches: Highlights tend to blow out, and shadows plug, in the same image. Less contrast would preserve much more detail at both ends of the tonal range.
The RDC-6000's resolution is at the lower end of the current 2 megapixel camera spectrum. (Perhaps not surprising, as the camera's price is at the lower end of the spectrum as well.) Good detail is visible out to 700 lines per picture height in both horizontal and vertical directions, but aliasing ("jaggies") start back at about 550 lines in the horizontal direction, and 600 lines in the vertical. Overall, we'd "call" the resolution at 650 lines/picture height in both horizontal and vertical directions.
Exposure is automatically controlled on the RDC-6000, with the user only able to adjust white balance, exposure compensation, flash mode, and ISO. We were only able to obtain bright, useable images at light levels as low as four foot-candles (22 lux) at the 200 and 400 ISO settings, and as low as two foot-candles (44 lux) at the 100 ISO setting. Beyond that, the image became very dim, with only the reflection in the silver lid visible at the 1/16 foot candle (0.67 lux) level. Noise is moderately high with the 100 ISO setting, and dramatically higher with the 200 and 400 ISO levels. To put the RDC-6000's low light performance into perspective, an average city night scene under modern street lighting corresponds to a light level of about one foot-candle.
We found the RDC-6000's optical viewfinder to be a little vexing, as it doesn't provide you with very clearly-defined edges of its field of view. If you don't worry too much about precise framing, it's about as accurate as most digicam optical viewfinders, but we'd really prefer a more definitive "edge" to the field of view. The LCD monitor fared much better, showing approximately 95 percent of the final image area at the 2000 x 1480, 1600 x 1200, and 800 x 600 image sizes. However, we noticed that the 640 x 480 resolution size resulted in a similar final image area as that of the optical viewfinder. We usually like to see LCD monitors as close to 100 percent accuracy as possible, so the RDC-6000 performs well in this respect. However, the performance of the optical viewfinder is such that we wouldn't recommend using it at all.
The RDC-6000 performs reasonably well in the macro category, capturing a minimum area of 4.13 x 3.10 inches (104.85 x 78.63mm). Color balance looks pretty accurate, and there's a nice amount of detail visible. The brooch appears a little soft, possibly due to a limited depth of field. We also noticed a fairly bright area in the center of the image, which gives the light background of the dollar bill a slightly magenta cast.
Overall, the RDC-6000 performed a bit below average for its two megapixel category, perhaps not a surprise, given a price point set well toward the lower end of the two megapixel range as well. The camera's white balance system struggled with difficult light sources, and color balance was noticeably off in several cases. Exposure tended to be a little too bright, particularly in sunny situations or when shooting with the flash, but the ability to adjust the exposure compensation corrected this problem somewhat. The RDC-6000's limited exposure capabilities restrict the camera's low light shooting range, but with the flash enabled, the camera should handle most indoor night scenes. Despite its flaws, the RDC-6000 could represent a good "value buy" for consumers looking for a two megapixel digicam on a budget. (Hard to say, as prices will vary over time, but at introduction, Ricoh was clearly aiming this product at the value-conscious digicam market.)
Conclusion
Though we weren't overly impressed by the RDC-6000's image quality, we liked the camera's compact size and affordable 2-megapixel price. The RDC-6000's limited but useful manual exposure controls and variety of shooting modes (including a time-lapse photography option), provide impressive utility for its small size. We also enjoyed the very flexible white balance setting, as well as the grid template function, and bountiful software offering. Compact and reasonably priced, the RDC-6000 may tempt those active consumers who are looking more for a digicam to document day-by-day activities rather than produce high-end photos.
<<RDC-6000 Sample Images | Additional Resources and Other Links>>
Reader Comments!
Questions, comments or controversy on this product? Click
this link to see what other Imaging Resource readers have had to say about
the Ricoh RDC-6000, or add comments of your own!