Fujifilm FinePix S6000fd Operation
Operating the Fuji FinePix S6000fd is straightforward in most cases, as the Power/Mode switch on top of the camera selects the main operating mode and the Exposure Mode dial controls the exposure mode. Only a handful of control buttons sprinkle the back and top panels, and the menu system is simple to navigate. Commonly used features such as exposure compensation and flash mode are quickly adjusted externally, and the Photo Mode button on the rear panel pulls up a shorter menu for options like ISO and resolution. Additionally, the zoom and focus rings surrounding the lens give the camera a more manual feel, and the focus mode switch on the side panel lets you quickly change the AF mode without fishing through menu screens. Most savvy consumers will likely operate the camera pretty quickly right out of the box, but you should probably spend a good hour or so with the manual to discover all of The Fujifilm S6000fd's intricacies.
Record Mode Display In Record mode, the LCD monitor displays the subject with a modest amount of information, indicating AF area, date and time, exposure mode, focus mode (macro or normal), the current size/quality setting, the number of images that can be stored on the remaining memory, and any other manually set options. In Program, Manual, Aperture Priority, and Shutter Priority modes, the exposure information is displayed. Pressing the Display button once eliminates the text overlay and shows only the image area. A second press displays a framing guideline, which divides the image area into thirds both horizontally and vertically, while a third press enables the Post Shot Assist window. In this mode, the camera shows thumbnails of the three most recently captured shots, so you can compare compositions and frame the current shot similarly.
Playback Mode Display In Playback mode, the default image display shows the most recently captured image, with a modest information overlay present. Pressing the Display button once eliminates the overlay, pressing it again pulls up a nine-image thumbnail display. Pressing the Display button a third time shows 12 thumbnails, organized by capture date, with the image date displayed on the left side of the screen. For a more detailed information display with a histogram, you can hold down the Exposure Compensation button in normal image review mode to show a smaller image with an exposure information report, as well as a small histogram. Turning the Zoom ring enlarges the captured image, and you can use the arrow keys to pan around within the view.
Fujifilm FinePix S6000fd Modes and Menus
Record Mode: A red camera icon marks this mode on the Power/Mode dial. In this mode, you can capture movies as well as still images, depending on the position of the Exposure Mode dial. The following exposure modes are available:
 Auto Mode: This mode puts the camera in charge of all exposure
decisions, with the exception of zoom, resolution, and FinePix Color options.
You can also set the flash mode, though the range is slightly limited.
Auto Mode: This mode puts the camera in charge of all exposure
decisions, with the exception of zoom, resolution, and FinePix Color options.
You can also set the flash mode, though the range is slightly limited. Program Mode: In this mode, the camera selects shutter speed and
aperture, while you control all other exposure variables.
Program Mode: In this mode, the camera selects shutter speed and
aperture, while you control all other exposure variables. Shutter Priority Mode: This mode allows the user to control the shutter
speed, from 1/4,000 to four seconds, though the maximum shutter speed depends
on the zoom setting.
Shutter Priority Mode: This mode allows the user to control the shutter
speed, from 1/4,000 to four seconds, though the maximum shutter speed depends
on the zoom setting. Aperture Priority Mode: This mode gives user control of aperture from f/2.8 to f/8 in 1/3 EV increments, while the camera selects the shutter speed.
 Manual Mode: This mode provides complete control over the exposure,
with independent settings for aperture and shutter speed. Apertures range
from f/2.8 to f/11 (depending on the zoom position), and the camera is capable
of shutter speeds from 1/4,000 to 30 seconds.
Manual Mode: This mode provides complete control over the exposure,
with independent settings for aperture and shutter speed. Apertures range
from f/2.8 to f/11 (depending on the zoom position), and the camera is capable
of shutter speeds from 1/4,000 to 30 seconds. Movie Mode: In Movie mode, you can record moving images and sound at either 640 x 480 or 320 x 240 pixels, both fixed at 30 frames per second. While recording, a timer appears in the LCD monitor to let you know how many minutes and/or seconds are remaining on the xD card. You can fill the card with video to its capacity.
 Scene Position: Noted on the Exposure Mode dial as "SP,"
this mode lets you select from a range of preset Scene modes through the Record
menu. Available settings are Sport, Night, Fireworks, Sunset, Snow, Beach,
Museum, Party, Flower, and Text.
Scene Position: Noted on the Exposure Mode dial as "SP,"
this mode lets you select from a range of preset Scene modes through the Record
menu. Available settings are Sport, Night, Fireworks, Sunset, Snow, Beach,
Museum, Party, Flower, and Text. Landscape: A mountain range icon marks this mode on the Exposure Mode dial. Here, the camera optimizes focus and exposure for shooting scenery such as mountain or city scapes.
 Portrait: An icon of a woman's head marks this mode, which uses a larger aperture setting to capture a sharply focused subject in front of a slightly blurred background. The camera also optimizes color and sharpness for better skin tones.
 Natural Light: In Natural Light mode the camera optimizes the exposure for shooting indoors without a flash. Through the Record menu, you can switch to Natural Light + Flash mode. This unique mode captures two images in quick succession, one without flash and one with. It's a unique mode for those wanting to experiment with natural lighting, but wanting to ensure that they get a flash shot as a backup.
 Picture Stabilization: This is not an image stabilization mode, but it does raise the ISO when the camera decides that the scene needs a higher sensitivity setting to enable a faster shutter speed.
Shooting Menu: Available in all Record modes by pressing the Menu button, the Shooting menu offers the following options (some options are not available in all modes):
- Scene Position: (Available in Natural Light mode only.) Sets the scene mode to Natural Light (default) or Natural Light + Flash.
- Scene Position: (Available in SP mode only.) Chooses from
a range of preset Scene modes, including Sport, Night, Fireworks, Sunset,
Snow, Beach, Museum, Party, Flower, and Text.
 Self-Timer: Accesses the two- and 10-second Self-timer modes, or turns the timer off.
- Photometry: Chooses between 256-zone Multi-Metering, Average, and Spot metering modes. Spot metering reads the exposure from the very center of the frame (identified by a cross hair target on the monitor). Spot metering is handy for backlit subjects, or any time the subject and background have very different brightness levels. Average reads the entire frame and then comes up with the best average exposure for the scene. 256-Zone Multi-Metering mode bases the exposure on readings from 256 areas throughout the frame.
- White Balance: Adjusts the overall color balance of the image, to suit the light source. Options are Auto, Custom (manual), Fine, Shade, Daylight Fluorescent, Warm White Fluorescent, Cool White Fluorescent, and Incandescent.
- High Speed Shooting: Turns the High Speed Shooting option on or off. If on, the camera more quickly adjusts the autofocus to cut down on lag time.
- AF Mode: Sets the AF area mode to Center, Multi, or Area. Center bases the AF on an area at the center of the screen, while Multi finds the area of highest contrast in the frame and bases focus on that portion of the subject. The Area option lets you set the AF point by holding down the One Touch AF button on the side of the camera and using the arrow keys to move the AF point.
- Sharpness: Sets the image sharpening to Hard, Standard, or Soft.
 Flash: Controls the output of the built-in flash, from -2/3 EV to
+ 2/3 EV in 1/3 EV increments.
Flash: Controls the output of the built-in flash, from -2/3 EV to
+ 2/3 EV in 1/3 EV increments.
- Bracketing: Enables the camera's auto-exposure bracketing mode, and lets you set the exposure variable to +/- 1/3, 2/3, or 1 EV units.
- Set-up: Displays the camera's Setup menu.
Playback Mode: Marked on the Power/Mode switch with the traditional Playback symbol (a green arrow within a green rectangle outline), this mode lets you review captured images and movie files. You can set up files for printing, view an automated slideshow, and rotate images.
Playback Menu: The following menu items appear after pressing the Menu button in Playback mode:
 Erase: Displays the erase menu option, which lets you delete
images and movies from the memory card or internal memory, with the exception
of write-protected files.
Erase: Displays the erase menu option, which lets you delete
images and movies from the memory card or internal memory, with the exception
of write-protected files.- Image Rotate: Lets you rotate an image clockwise or counterclockwise 90 degrees, using the arrow keys.
- Protect: Marks the current image for write protection, or removes protection. There's also an option to apply protection to all files.
- Copy: Copies a single image or all images from the internal memory to a memory card, or vice versa.
- Voice Memo: Records as much as 30 seconds of audio to accompany a still image.
- Trimming: Enables a cropping tool, employed by moving the arrow keys to pan a portion of an enlarged image, and lets you save the cropped image as a separate file.
- Set-up: Displays the camera's Setup menu.
Setup Menu: This mode allows you to change a variety of basic camera settings, and is accessible from both the Record and Playback menus.
- Camera:
 Image Display: Controls the image display on the LCD monitor
post-capture. Options are Continuous, 3 Sec, 1.5 Sec, and Zoom (Continuous).
Continuous simply means that the image is always displayed post-capture,
and Zoom (Continuous) shows an enlarged version of the captured image.
Image Display: Controls the image display on the LCD monitor
post-capture. Options are Continuous, 3 Sec, 1.5 Sec, and Zoom (Continuous).
Continuous simply means that the image is always displayed post-capture,
and Zoom (Continuous) shows an enlarged version of the captured image.- Frame No.: Specifies whether file naming is continuous from card to card, or resets with each new memory card.
- AF Illuminator: Turns the AF illuminator on or off. If on, the light will always emit in low-lighting.
- CCD-RAW: Enables or disables the RAW file format. If set to On, all files are recorded in RAW format.
- EVF/LCD Mode: Sets the screen display for the EVF and LCD to either 30 or 60 frames per second.
- Focus Check: Turns the Focus Check option on, which enlarges
the central portion of the screen in Manual focus mode to help determine
focus.
- Setup 1:
 Date/Time: Sets the camera's internal clock and calendar.
- Beep Volume: Adjusts the volume of the camera's operation sounds.
- Shutter Volume: Controls the volume of the camera's shutter sound.
- Playback Volume: Controls the volume of the camera's playback sounds for movie files and voice memos.
- LCD Brightness: Adjusts the brightness of the LCD display.
- Format: Formats either the xD-Picture Card or internal
memory, erasing all files (even protected ones).
- Setup 2:
 Language: Sets the menu language to one of 13, English is the
default.
Language: Sets the menu language to one of 13, English is the
default.- Auto Power Off: Sets the amount of the time of inactivity before the camera shuts itself off. Choices are five or two minutes, or you can turn the feature off.
- Time Difference: Lets you set the time in another city besides your own, so you can record the correct time when traveling.
- Background Color: Lets you change the menu and background colors.
- Discharge: Discharges the remaining power on NiMH batteries, so they can be properly recharged.
- Video System: Sets the video signal to NTSC or PAL
formats.
- Setup 3:
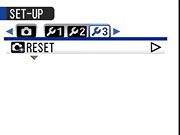 Reset: Resets all camera settings to their defaults.
 Fujifilm GFX 50S Review
 Fujifilm X-T3 Review
 Olympus E-M5 III Review

Follow Imaging Resource