Back
to Full Sony DSC-V3 Review
Back
to Full Sony DSC-V3 ReviewGo to Sony DSC-V3 Data Sheet
Go to Sony DSC-V3 Pictures Page
Up to Imaging Resource Cameras Page
Use your browser's "Back" button to return to the previous page, or the links at the top and bottom of this page to navigate to related information. If you have difficulty fitting the text on this page onto your printer output, simply resize your browser window to a narrower width and print again.
Remember us when it's time to buy!
Dave here: Have our reviews been helpful to you? (Is this article you're reading right now useful?) Preparing this level of information on as many products as we do is incredibly hard work, not to mention expensive. Things on the Internet may look like they're free, but they're not. (As a lot of big dot.com companies are finding out these days.) Somewhere, somebody has to pay to produce worthwhile content. YOU can help us though, by remembering us when it comes time to make your purchase. Would you consider coming back to our site and clicking-through to one of our advertisers to make your purchase? Every dollar you spend with one of our advertisers helps us directly (in affiliate fees) or indirectly (the advertiser will keep renewing their ad contract with us). To make it easy for you to support us, here's a URL you can visit, to see all our current advertisers, with links to click on that will register your visit to them as having come from our site. It's up to you where you buy, but Mike, Mike, Kim, Yazmin, Marti and I would be really grateful if you'd help us out by choosing one of our advertisers to purchase from.
Thank you for your support!
Dave Etchells, Founder & Publisher
Visit our "Buy Now" Page:
https://www.imaging-resource.com/buynow.htm
Back
to Full Sony DSC-V3 Review
Go to Sony DSC-V3
Data Sheet
Go to Sony DSC-V3
Pictures Page
Up to Imaging Resource Cameras
Page
Sony DSC-V3(none) Review First Posted: 09/09/2004, Updated: 11/30/2004 |
|
|
|
Manufacturer Overview
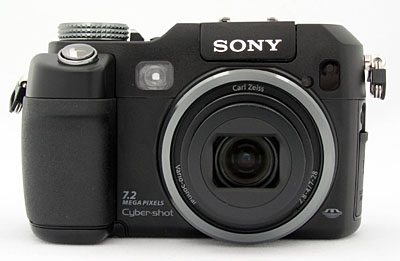
Announced in early September 2004, the Sony Cyber-shot DSC-V3 is the latest embodiment of that company's vision for an "ultimate" digital rangefinder-style camera. Sony Electronics Inc. has long held a dominant position in the digicam marketplace, delivering a wide range of models that enjoy enormous popularity with consumers. Currently, they offer one of the broadest lines of digicams in the industry, with multiple models in several distinct product categories. The only thing lacking is an interchangeable-lens SLR. Last year, Sony brought many of the ground breaking features offered by the biggish and unusual DSC-F717 to a (much) more compact form factor, with the stylish DSC-V1. This year, they skip a number from the V1 to the DSC-V3, in the process along with adding a little bulk with the new grip and flash area.
The new Sony DSC-V3 is still boxy and relatively compact, shaped like a familiar 35mm rangefinder models of years past, but with a decent grip. The DSC-V3's 7-megapixel CCD captures high resolution images, and its full complement of exposure modes provides as little or as much control as you might want. Like the V1, the V3 includes Sony's NightShot, NightFraming, and Hologram AF technologies, which greatly add to the camera's flexibility and usefulness in low-light shooting conditions. Scene exposure mode offers nine preprogrammed exposure modes, and a choice of Sony's "Smart Zoom" or "Precision Zoom" technologies offers better image quality with digital zoom. MPEGMovie VX format allows movie and sound recording at VGA quality, to the capacity of the memory card, without any arbitrary limits imposed by buffer memory capacity. Finally, the V3 features true Through-The-Lens (TTL) flash metering, a rare feature in the digicam marketplace.
Taken as a package, the Sony DSC-V3 offers most of what the V1 pioneered with a few key improvements, not the least of which is a higher resolution imager and a huge LCD. It's a camera clearly aimed at the enthusiast crowd, with many unique features to distinguish it from its competition. Read on for all the details!
Sony DSC-V3 High Points
Sony DSC-V3 Executive Overview
by Shawn Barnett
With an improved build, greater speed, and a wonderfully large screen, the Sony Cyber-shot DSC-V3 gives rangefinder lovers more of what they want a digital camera for, integrating some of the innovations we saw debut in the Sony F828. V1 fans will appreciate the new features, but some might not like the increased size. Since most of the increase is due to the addition of a handgrip, I don't mind so much.
The Sony DSC-V3 is a mid-size rangefinder camera clearly aimed at enthusiasts who want a little more control over their photography, but either don't need a massive zoom lens, or prefer the ability to see actual light transmitted through a "real image" optical viewfinder. The camera captures a 7.07 megapixel image (3,072 x 2,304), as well as several other sizes, including those suitable for email and Web use. Its 34-136mm equivalent lens covers the common zoom range for a rangefinders of this type, a spec that appears unchanged from the V1. The V3 accepts accessory lenses to make it more wide angle or increase the telephoto length. NightShot and NightFraming modes are also carried forward in the V3, useful tools that you'll find only on a few Sony digicams.
Many will be attracted to the V3 more because of its big camera performance combined with a 2.5 inch LCD display, completely ignoring the optical viewfinder. These users would do well to note that the optical viewfinder may at times be necessary, since the 2.5 inch LCD on the V3 differs from the LCD on the Sony T1 in one key area: sunlight viewability. This is because the T1's LCD is transflective--meaning it works well in sunlight--and the Sony DSC-V3's is only transmissive, meaning that it is backlit for indoor use, but can wash out in direct sunlight. Though our area is generally lacking in sunlight, our tests outdoors during the fleeting moments of sunshine a Georgia Summer offers indicate that this will not be a huge problem. That's good, because according to our standard test, the optical viewfinder covers between 79 and 88 percent of the area captured, slightly less to slightly more than the 85 percent that is typical, and parallax appears to be a factor, though this is not uncommon among rangefinders regardless of type. Worse than the low coverage of the V3's viewfinder though, is that it varies with the zoom setting, making it very difficult to mentally compensate for its imperfect coverage. Another hit on the V3's optical viewfinder is lack of diopter correction of any kind, and though it is not impossible to use with glasses, I found I had to smoosh my nose into the lovely LCD to get a full purchase on the image, or turn my head and look through the far side of my spectacles' reach.
The 2.5 inch LCD is arguably the camera's most attractive feature. It makes using the Sony DSC-V3 a pleasure, offering big icons and a better idea of what you've captured when looking at pictures in Playback mode. The 5x Playback zoom is made more meaningful on such a big screen, making it easier to check focus, though I'd like to see a 10x playback zoom on a camera with resolution this high.
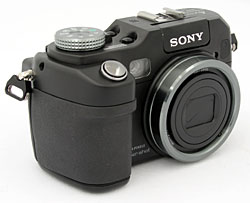
The grip size and shape on the Sony DSC-V3 are just right for anyone with small to mid-size hands, with a protrusion near the top that is designed to keep your middle finger out of the way of the optical viewfinder. This is still a small camera, so your pinkie will just have to find a place to curl up under the camera's bottom plate. The shutter button is comfortably placed, at just the right angle. Your thumb rests on the back in a relatively open location, just left of the zoom rocker and above the Five-way controller. The tip of my thumb rests on the mostly recessed the CF/Memory Stick switch, so there is some danger of accidentally changing cards mid-session, but I haven't found this to be a problem yet. There is little in the way of a thumb grip, though Sony did create a slight lip for the zoom control. While it works just fine, I find the zoom control to be a little small for a camera of this size. Combine that with what feels like a very slow zoom mechanism, and I often found myself wondering whether I'd activated the zoom at all. If a mechanical zoom is necessary, as is the case on most point and shoot cameras, a slower zoom is better because it offers finer control, and since this camera is meant for the hobbyist, this is likely what Sony was thinking. Just a little faster would be better.
To power the unit on, you have to reach over the massive mode dial with your right index finger and hit the prominent power button. Again, here is an aspect that makes the Sony DSC-V3 somewhat cumbersome, but in a way that a higher end camera is expected to be cumbersome. Though not as convenient as it might be, it somehow gives the camera that "pro camera" feel. The power switch is positioned below and to the right of the large flash and hot shoe mount bulge which works together with the previously mentioned massive mode dial to prevent accidental activation of the power or NightFraming/NightShot buttons.
While I've described the mode dial on the Sony DSC-V3 as massive, that doesn't mean I don't like it. Its beautiful metallic sheen makes it lovely to look at, and it is both slick enough, and its detents firm enough that it won't likely be moved accidentally, but a thumb and forefinger will find just enough grip on the outside knurl to turn it easily.
Actually bringing the lens out to its active position takes a little longer than I think it should, requiring about three seconds from start to readiness. Shutdown takes even longer, at almost four seconds. That will matter to some, and not at all to others. Though Sony has made a concerted effort to make some of their other cameras react more quickly, apparently they don't think their target market for the Cyber-shot DSC-V3 will care as much about this as they do about a slow and careful zoom. While the zoom feels a little leisurely, it's important to note that the V3's shutter response is quite the opposite: With full-autofocus shutter lag times of 0.28 - 0.66 seconds, the V3 beats the pants off a lot of the competition in this category, including its chief rival, the Canon G6.
The lens is covered by a two-piece shutter that moves out of the way when the lens opens, so there will be no dangling lens cap to mar the lines of this high-end digicam. The optic itself seems a little small for the camera's size, certainly in this category, again compared with the Canon G6. Its maximum aperture is f/2.8 compared to the latter's f/2.0, a full stop difference--stretching to a two-stop difference at the telephoto end. The Sony DSC-V3's lens is pretty sharp though, and does a much better than average job of maintaining that sharpness into the corners. (The Canon G6 also does a very good job holding sharpness into the corners though, and overall edges the V3 in resolving fine detail.) As was the case on the V1, the lens opening is masked with a rectangular plastic or metal bezel designed to limit unnecessary stray light from entering the top and extreme side angles and thus reducing image contrast. It acts much like a lens hood.
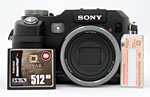
As I already mentioned, the V3 can use both a Memory Stick (regular and Pro) and a Compact Flash card, which opens the camera up to significantly larger storage capacities at a lower cost. Both cards are inserted from the bottom of the camera, beneath the grip area, where you'll also find the slim battery behind a reasonably sturdy plastic door. It should be noted, however, that to take advantage of the highest quality video mode offered by the Sony DSC-V3--DV-quality 640 x 480 at 30 frames per second--you'll need to own at least one Memory Stick Pro card, since this mode will not function with standard Memory Stick nor CF, regardless of speed.
The V3 has a built in flash, and can accept an external flash via the built-in hot shoe, with Sony recommending their HVL-F32X for full TTL flash metering. An unique swivel mechanism conceals the internal flash head beneath the V3's SONY logo. The flash is very close to the lens, and we have already experienced some shots with red-eye as expected.
Speaking of red, one of the most useful features on the Sony DSC-V3 is what Sony calls Holographic AF. It's called holographic because light from a single laser diode passes through a holographic diffraction grating that splits the beam into a matrix of 29 perpendicularly-arranged lines that are aligned at 45 degrees from horizontal. The result is an excellent light pattern that remains surprisingly sharp out to the camera's maximum reasonable focusing range, giving the contrast detection AF just what it needs to pull focus in a hurry. The image size seems to "grow" at a carefully calibrated rate, because it appears to be about the same size on the LCD no matter how far away the object may be.
Incidentally, as I aimed the V3 at my son, repeatedly painting his face with red laser lines, I paused to wonder whether I might damage his new little eyes, but we are assured by Sony that the Class 1 laser used in the V3 is safe for human eyes. Holographic AF goes back to the F717, and is good enough that other manufacturers should either imitate it or license it from Sony. Seriously. You can focus on a blank wall with this system, even in complete darkness, and faces can be made almost frighteningly clear. I should warn you not to point this thing at yourself in macro mode, as I did. It'll take a few points off your self-esteem, believe me, revealing every flaw and pore you have in viciously sharp detail.
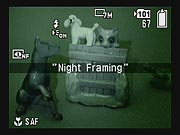
As if this cool laser pattern weren't enough, Sony has once again included the NightFraming/NightShot mode in the Cyber-shot DSC-V3. Rather than permanently filter it out as other camera manufacturers do both of these features take advantage of the tendency of digital cameras to pick up infrared light. For normal photographs you want to filter this light out, because it distorts color rendition, but Sony got clever and mounted their IR filter on a moveable frame. Press the NightFraming/NightShot button and you'll hear a loud click. That's the IR filter moving out of the way. NightFraming is a useful tool, making the V3 more capable than even film cameras, because with this camera you can literally see in the dark, yet still capture a full color image. First the camera shows you a green monochrome image with an eerie glow at the center. This is from the infrared beam the camera is projecting (it appears as a dim red glow from the front of the camera). With this assistance, you can frame your shot fairly well. It really only illuminates the center of the frame with the camera at wide angle, but it's enough to see what's where before you take your shot. Then you press the shutter and the camera goes back to color mode, indicated with a click as the IR filter moves back into place. Now a laser pattern is projected to focus. Once focus is achieved, the IR sensor moves back out of place so you can continue to frame your shot with IR assistance. Finally, you press the shutter and the IR filter moves back into place, the shutter is tripped, and the flash fires, yielding a full-color shot with no IR signal to degrade performance. All this sounds like a lot of trouble, but the camera handles it automatically. It can be surprisingly useful in common low light situations like amusement parks or indoors at night.
Not quite as useful but still a lot of fun on the Sony Cyber-shot DSC-V3 is the Night Shot mode. You won't hear any clicking in this mode except when you turn it on and off. Here, the IR filter moves out of the way during both viewing and capture. The resulting images are green monochrome (in some of my test shots, red does tend to show through a bit). This mode's usefulness is clear, for taking pictures in darkness or near darkness without disturbing the subject with focus assist beams or flashes. As I mentioned, the IR beam does glow a faint red, so anyone conscious of your presence will catch you--or else freak out and think you're giving them a truly evil eye--but it would be perfect for catching a sleeping child. NightShot mode can also be used for video, so you can also prove beyond a reasonable doubt that your spouse snores, for example. We're told this mode does not actually see through clothing, as has sometimes been reported, so no one need worry that you're ogling them electronically.
The Cyber-shot DSC-V3 has seven Scene modes and the five basic capture modes: Auto, Program, Shutter Priority, Aperture Priority, and Manual. Though I tend to stay in one of the semi-auto modes (seldom the green, "Full Auto" mode), I found Manual mode surprisingly easy to use. For the best results, I just turned on the live histogram display (activated by pressing the Display button), set the Mode dial to M, and used the Command dial to adjust aperture and shutter speed as necessary. The screen gives you a rough estimate of what the captured image will look like with its live display, and the camera tells you how close it thinks you are to the ideal exposure with the EV numbers, over a range of plus or minus two. Finally, the histogram shifts left or right as you change the exposure, giving you a graphical display of what light values will be captured. The one dial moves between the two items (shutter speed and aperture) with a roll of the dial, and a press on the dial lets you adjust one or the other, again with a roll of the dial. Pretty simple. All that assistance on a 2.5 inch screen makes Manual mode more accessible than ever.
As for usability, the V3 is easy to understand and use. The main control buttons, arranged around the Five-way controller right of the LCD, are small and difficult to see in low light, but they're aggressively raised and easy enough to find and distinguish with your thumb. Their close placement, rather than being a hindrance, is a boon to usability because you need only move your finger a short distance--less than an inch--to reach the button you need. The resistance is firm, so you're unlikely to press the buttons accidentally, and if you do, you'll know it from the radical change of depth. This sounds strange to mention, but as interfaces go this kind of stuff is important. I would say the Sony Cyber-shot DSC-V3's button design is excellent. One exception is that when the power cord is plugged in it's hard to reach the Menu and Resolution/Delete buttons, but the typically excellent run time provided by the V3's InfoLITHIUM battery system (just shy of 3 hours, worst-case) mean that relatively little time will likely be spent with the camera plugged into its power adapter.
Menus take the common Sony form on the Cyber-shot DSC-V3, with a bar running across the bottom from which pop-up lists emerge as each item is highlighted. I should also mention the Enlarged icon switch that appears in Setup. On by default, this mode momentarily enlarges turns icons yellow for certain functions that have just been activated on the Five-way pad: items like Flash, Macro, and Self-timer modes. The larger screen also makes it easier to recognize one of the more important items to check every time you turn on your digital camera: the ISO setting. On cameras with smaller sensors (that is, on prosumer cameras, as opposed to larger digital SLRs), this is far more important, especially when those sensors reach into ISO 800 as does the V3. These shots can be quite a bit more noisy, and users would do better to stay in Auto or the lower ISO settings.
Overall, the Sony DSC-V3 is a solid performer. Build, design, and feature set are aimed at the enthusiast, and offering many of the key advances that have come along in Sony's photo technology. Meanwhile, we can say that the big screen offers direct advantages right away in framing your images and appreciating them after capture. The interface is also easy. Other cameras in this space often have a tilt/swivel or flip-out screen for easy viewability in awkward places, but Sony bet on the bigger screen perhaps to differentiate themselves from the pack. Since no one else offers a 2.5 inch screen on this category of camera, it just might attract quite a few.
Design
 A
modification of last year's Sony DSC-V1, the Sony Cyber-shot DSC-V3 has become
less retro in appearance, and more utilitarian. While the V1 was sleek and understated,
the V3 could be called gnarly or brawny, with design elements put in place to
both improve grip and allow room for the larger LCD on the back. The V3 can
still be considered portable when compared to its larger cousin, the DSC-F828,
but won't fit well in a shirt or pants pocket by any means. It'll need a camera
bag, though in a pinch it could fit in a large coat pocket (but get a camera
bag for this $700 investment). It is a competent camera for travel and all manner
of travel photography, though more emphasis appears to have been placed on making
the V3 a great photography tool instead of making it particularly compact or
nimble.
A
modification of last year's Sony DSC-V1, the Sony Cyber-shot DSC-V3 has become
less retro in appearance, and more utilitarian. While the V1 was sleek and understated,
the V3 could be called gnarly or brawny, with design elements put in place to
both improve grip and allow room for the larger LCD on the back. The V3 can
still be considered portable when compared to its larger cousin, the DSC-F828,
but won't fit well in a shirt or pants pocket by any means. It'll need a camera
bag, though in a pinch it could fit in a large coat pocket (but get a camera
bag for this $700 investment). It is a competent camera for travel and all manner
of travel photography, though more emphasis appears to have been placed on making
the V3 a great photography tool instead of making it particularly compact or
nimble.
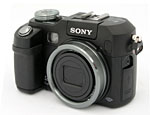
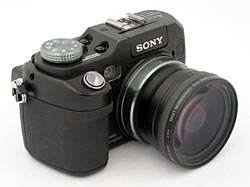
The large, multi-stage lens barrel dominates the front panel of the Sony DSC-V3. Despite this apparent girth, the lens seems almost too small for the camera's overall size, though the large outer ring does offer some protection against impact when the lens is closed. When powered on, the lens extends from the barrel five-eighths of an inch into its operating position. A shutter-like lens cover automatically slides open and closed, eliminating the need for a separate lens cap (be aware, however, that a camera case is still advised, because these shutters are easily opened with slight finger pressure, and pointy objects could damage the lens). Filter threads inside the lip of the outer lens barrel accommodate an adapter that makes available a range of Sony accessory lenses, which extend the camera's zoom capabilities at each end of its focal length range, opening it up as wide as 24mm or as long as 231mm. Aside from the lens, the optical viewfinder window, Holographic AF emitter, and self-timer/IR LEDs are on the front of the camera. A large two-finger grip protrudes from the camera front as well, providing a firm hold for your right hand.
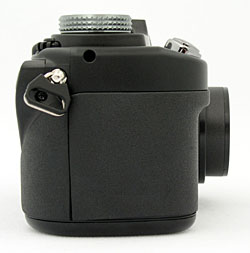
The right panel of the Sony DSC-V3 (as viewed from the rear) is featureless except for one of the eyelets used for attaching a neck or wrist strap. At the bottom of the right panel, the edge of the Memory Stick / battery compartment door is visible.
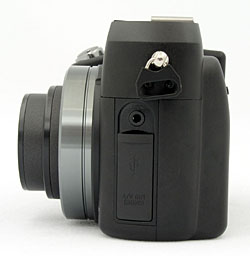
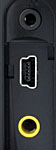
The Sony Cyber-shot DSC-V3's left panel features the other strap attachment eyelet, as well as the "ACC" Sony accessory connection jack, and the connector compartment. A hinged, rigid plastic door covers the connector compartment, where the USB, and A/V Out connector jacks are located.
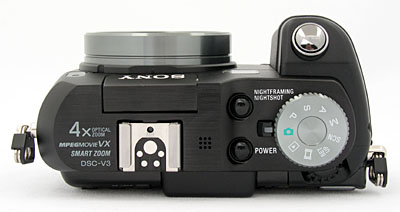
The camera's top panel is unusual, though simple. The hot shoe is surrounded by brushed metal with a black anodized finish. In front of that is the twist-up flash and to the right are nine holes for the microphone. Down the "ramp" on the second level are the Power and NightFraming/NightShot buttons, both of them large, dome-shaped buttons. The large Mode dial is prominent on the camera, and has to be one of the finer design elements of the Sony Cyber-shot DSC-V3. It slides smoothly yet clicks positively, contributing to the very high-quality "feel" of the camera. Just left of the dial is a light pipe that illuminates green from down inside the camera, indicating the camera's on status. Out front on the grip is a very nice looking shutter button, angled just right. Matching the color, but not the texture of the other accents, I'd call it a light gunmetal color. From here you can also see the Command dial, located just below and behind the mode dial. The Command dial turns left and right and also presses in to switch modes in some control applications.
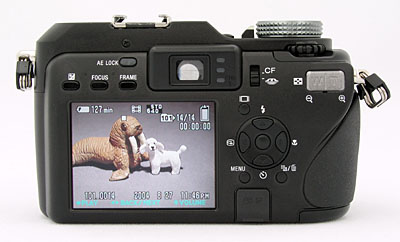
The remaining camera controls are located on the Sony Cyber-shot DSC-V3's rear panel, along with the big 2.5 inch LCD monitor and optical viewfinder eyepiece. Three LEDs are aligned along the right side of the eyepiece, and light or blink to indicate camera status (such as autofocus trouble, charging flash, memory card access, etc.) On the left side of the eyepiece are the AE Lock, Exposure Compensation Focus, and Frame buttons, just above the LCD monitor. A Zoom rocker button is in the top right corner. The Display button is beneath the lower right corner of the eyepiece. Just above that is the recessed CF/Memory Stick switch and above right of that is the Command Dial. The Five-way controller is just right of the LCD. The arrow keys perform multiple functions, becoming increasingly traditional across camera brands: namely Flash mode, Macro mode, Self-timer, and an unusual "Review" button, which brings up the last image captured, but does not allow you to scroll through the others. The Menu and Image Size / Erase buttons are at the bottom of the panel, right above the DC in door.
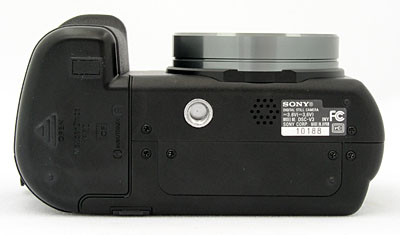
The bottom panel of the Sony Cyber-shot DSC-V3 is nice and flat, with an all-metal tripod mount just off-center, the camera's speaker, and the Memory Stick / CF / battery compartment on the far right. A hinged, plastic door covers the compartment, sliding to the right before opening. One of my few complaints about the V3 is that the Memory Stick / battery compartment is too close to the tripod mount to allow quick changes without dismounting the camera. (I always notice this, given the amount of studio work I do, and find it particularly important with feature-laden cameras like this one.)
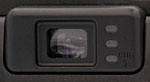
Viewfinder
 The
Sony Cyber-shot DSC-V3 offers both a real-image optical viewfinder and 2.5-inch,
color LCD monitor. Three tiny LEDs line the right side of the optical viewfinder,
and indicate the status of camera functions by blinking or lighting solid. For
example, the middle LED lights green when focus is set, and the bottom blinks
orange when the flash is charging. The top LED lights red to indicate that the
camera is accessing the card, or that there is an error with the camera (an
explanation of which appears on the LCD monitor).
The
Sony Cyber-shot DSC-V3 offers both a real-image optical viewfinder and 2.5-inch,
color LCD monitor. Three tiny LEDs line the right side of the optical viewfinder,
and indicate the status of camera functions by blinking or lighting solid. For
example, the middle LED lights green when focus is set, and the bottom blinks
orange when the flash is charging. The top LED lights red to indicate that the
camera is accessing the card, or that there is an error with the camera (an
explanation of which appears on the LCD monitor).
I was surprised to not find the Sony Cyber-shot DSC-V3 more accommodating for eyeglass wearers. Most other cameras in this category have a dioptric correction control, but not the V3. Also, while the eyepoint of the viewfinder is reasonably high, I generally had to have my eyeglass lens touching the back of the camera in order to see the full frame.
 The Display button on the back panel controls the LCD monitor's detailed information
display, with a choice of full or partial readings in Record mode. The basic
information display reports Flash mode, metering mode, exposure settings (aperture
and shutter speed), and Focus mode. The detailed display also shows the remaining
battery power and image quality and resolution. A third mode includes a live
histogram display, which graphs the tonal distribution of the scene (useful
in determining under- or overexposure before snapping the shot). You can also
shut the display off entirely.
The Display button on the back panel controls the LCD monitor's detailed information
display, with a choice of full or partial readings in Record mode. The basic
information display reports Flash mode, metering mode, exposure settings (aperture
and shutter speed), and Focus mode. The detailed display also shows the remaining
battery power and image quality and resolution. A third mode includes a live
histogram display, which graphs the tonal distribution of the scene (useful
in determining under- or overexposure before snapping the shot). You can also
shut the display off entirely.
 In Playback mode, the histogram is also available, as well as an Index Display mode that shows nine or 16 thumbnail images at a time. The Zoom control on the rear panel controls the playback zoom, enlarging captured images as much as 5x.
 The Sony Cyber-shot DSC-V3's LCD monitor offers NightShot and NightFraming modes,
controlled by a switch on the camera's top panel. Both modes take advantage
of the CCD's sensitivity to infrared (IR) light, which is normally filtered
out because it tends to skew color rendering in bright sunlit scenes. Sony's
NightShot technology uses a movable IR filter that lets the camera take advantage
of IR sensitivity in low-light situations while blocking it out at other times.
The Sony Cyber-shot DSC-V3's LCD monitor offers NightShot and NightFraming modes,
controlled by a switch on the camera's top panel. Both modes take advantage
of the CCD's sensitivity to infrared (IR) light, which is normally filtered
out because it tends to skew color rendering in bright sunlit scenes. Sony's
NightShot technology uses a movable IR filter that lets the camera take advantage
of IR sensitivity in low-light situations while blocking it out at other times.
In NightShot mode, the camera flips the IR filter out of the way for both framing
and exposure. Any natural IR light in the scene is augmented by two powerful
infrared LEDs on the front of the camera, which project IR beams onto the subject.
The built-in illuminator lamp lets you shoot in total darkness, but the pictures
you capture will be monochromatic, with the majority of light areas of the subject
showing a green cast (as is typical with Night Vision goggles). Some colors
will render as different shades of gray than they would in a normal black-and-white
photo. This is because the reflectance of objects is often different in IR than
in visible light, so a "dark" color in daylight may actually appear
quite bright in IR. (Note that when shooting reflective surfaces close-up, you'll
be able to see the glow of the camera's IR lamps in the center of the image.)
In NightFraming mode, the camera also flips the IR filter out of the way and
turns on the illuminator lamps, but only while you're framing your shots. As
soon as you half-press the Shutter button, the IR filter flips back down, and
the camera takes a normal visible-light photo, using the built-in flash. This
is particularly handy for nighttime flash shooting, when you couldn't otherwise
see (or focus on) the subject.
Optics
| Free Photo Lessons | |
|
 One of the truly unique Sony features on the Sony DSC-V3 is the "Hologram
AF" system for low-light focusing. This is basically an AF-assist illuminator
system on steroids, using a laser diode and tiny holographic diffraction grating
to project a crosshatched pattern of bright red lines on the subject. The nifty
thing about the hologram is that the projected pattern stays more or less "in
focus" almost irrespective of subject distance, so there's always a sharp
pattern for the camera to focus on. Hologram AF isn't only for low light, you'll
see the camera use it in fairly normal lighting as well, if there's not enough
contrast in the subject for the normal contrast-detect AF system to work reliably.
Try pointing the camera at a blank wall in normal home / office lighting, and
you'll see the pattern. The screen shot at right shows a camera's eye view of
the Hologram AF pattern, as the lens zooms from wide to telephoto. (This shot
is copied from my original F717 review - Astute readers will note differences
in the onscreen information display, but the Hologram AF function works identically
on the DSC-V3.)
One of the truly unique Sony features on the Sony DSC-V3 is the "Hologram
AF" system for low-light focusing. This is basically an AF-assist illuminator
system on steroids, using a laser diode and tiny holographic diffraction grating
to project a crosshatched pattern of bright red lines on the subject. The nifty
thing about the hologram is that the projected pattern stays more or less "in
focus" almost irrespective of subject distance, so there's always a sharp
pattern for the camera to focus on. Hologram AF isn't only for low light, you'll
see the camera use it in fairly normal lighting as well, if there's not enough
contrast in the subject for the normal contrast-detect AF system to work reliably.
Try pointing the camera at a blank wall in normal home / office lighting, and
you'll see the pattern. The screen shot at right shows a camera's eye view of
the Hologram AF pattern, as the lens zooms from wide to telephoto. (This shot
is copied from my original F717 review - Astute readers will note differences
in the onscreen information display, but the Hologram AF function works identically
on the DSC-V3.)Accessory Lenses
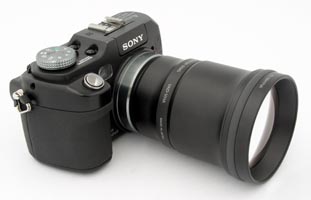
Two accessory lenses are available for the Sony Cyber-shot DSC-V3, both of which require their own adapters (though the necessary adapter appears to be included with each lens). The VCL-DEH17VA, a 1.7x multiplier takes the lens out to 231mm, and uses the VAD-VHA adapter ring. (Currently this version of the lens is unavailable, though the only difference between this and the lens designed for the Sony DSC-V1 is the silver barrel color vs black. Here's a shopping link for that lens: VCL-DEH17VA. - SRP is $149.99) The internal lens can zoom within the adapter ring, but the vignetting is severe until you get more than 2/3 of the way zoomed in, leaving the lens only usable at the extreme telephoto end. To avoid unwanted vignetting, it's probably better to go straight out to the end of the zoom range and shoot as if it's fixed. The wide angle lens, part number VCL-DEH07VA, has a 0.7x multiplier and offers no zoom option. (As with the tele lens, only the silver version seems to be available from most places as of the review date, SRP: $149.99, VCL-DEH07V; though you can get the black version at the SonyStyle website, if you're willing to pay the full SRP price.) A sensor inside the lens screw mount detects the wide angle adapter and prevents zoom action, limiting the angle to 24mm. The adapter is slightly deeper than the adapter for the telephoto lens, tripping a small switch inside the lens bezel. A wide angle lens indicator shows onscreen, and flashes when you try to zoom.
I don't do formal testing of add-on lenses, but casual shooting with the wide and tele adapters on the V3 suggested that they're pretty high-quality optics. Add-on lenses of this sort tend to be very prone to increased distortion and optical problems, but shots taken with these two Sony lenses showed very few problems. The wide-angle lens made the camera/lens combination somewhat more susceptible to "purple fringing" when dark objects were silhouetted against bright backgrounds in the corners of the frame, but the overall effect was less than that of some cameras operating with just their built-in lenses. The telephoto accessory lens showed very little of the increased flare and decreased contrast I've come to expect from such optics. Taken as a kit, the combination of the two accessory lenses and camera together give the Sony DSC-V3 an overall focal length range of just under 10x, yet with much better optical quality than that achieved by most 10x-zoom cameras.
I do have a few minor complaints about the two accessory lenses, although other users may or may not see them as issues, depending on their own particular needs and preferences. First, neither lens has filter threads at the end, so you can't use either with front-element accessory filters such as polarizers, close-up filters, etc. Second, the bulk of both lenses blocks both the optical viewfinder and the camera's flash head, although you'll almost certainly be wanting to use the LCD viewfinder anyway given the significant change in frame coverage, and the internal flash lacks the angular coverage of the wide angle lens, and the power to be very useful with the tele adapter. A bigger issue for night shooters is that both lenses block the V3's Hologram AF Assist system's light pattern, making autofocus in low light conditions problematic. Finally the aforementioned limitation on zooming with the auxiliary lenses attached will reduce their usefulness somewhat. Despite their limitations though, the Sony accessory lenses for the V3 deliver high-quality images, and significantly extend the range of the camera's optical system.
Exposure
| Free Photo Lessons | |
|
In the Scene exposure mode, you have the option of shooting in Twilight, Twilight
Portrait, Landscape, Portrait, Snow, Beach, or Candle modes. Twilight mode sets
up the camera for shooting night scenes, using a slower shutter speed to capture
more ambient light, and adjusting the exposure bias to prevent loss of detail
in bright lights and highlights. Landscape mode simply uses a smaller lens aperture
to increase the depth of field, keeping the foreground and background in focus.
Landscape mode typically uses slower shutter speeds, so a tripod is recommended
in all but bright lighting. Portrait mode works in the opposite manner, using
a larger aperture to decrease the depth of field. This produces a sharply focused
subject in front of a slightly blurred background. Snow mode prevents color
from washing out in heavy-white scenes, while Beach mode emphasizes blues for
accurate water and sky rendition in seaside and lakeside images. Candle mode
maintains the proper yellow cast, rather than letting the white balance correct
for it.
The Sony Cyber-shot DSC-V3 employs a Multi-Pattern metering system as its default,
dividing the scene into multiple areas and taking separate exposure readings
for each section. The readings are then evaluated (not necessarily averaged,
the algorithm evaluates contrast as well as brightness) to determine the best
overall exposure. Center-Weighted and Spot metering options are also available
through the camera's Record menu. The Exposure Compensation adjustment manually
increases or decreases the exposure determined by the metering system from -2
to +2 exposure values (EV) in one-third-step increments, and is adjusted by
pressing the Exposure Compensation button on the rear panel and turning the
Command dial.
In addition to the V3's NightShot and NightFraming low-light features (discussed
in detail in the Viewfinder section above), the camera also offers an impressive
noise reduction system. Activated automatically with shutter speeds of 1/25
second and longer at ISO 800, or 1/6 second or longer at ISO 400 and below,
the Sony Cyber-shot DSC-V3's Noise Reduction does an outstanding job of reducing
the image noise associated with long exposure times. Judging from the camera's
operation, it appears the V3 is shooting a "dark" frame with the shutter
closed after each exposure when the noise reduction mode is active, and then
subtracting the noise in that dark frame from the captured image. (It's hard
to tell whether the camera is using a dark frame after each shot with shorter
exposure times, as there's no visible delay. It definitely does so for exposure
times of one second or longer though.)
An AE Lock button on the Sony Cyber-shot DSC-V3's rear panel locks the exposure
reading without also locking the focus (as happens when you half-press the Shutter
button). AE Lock works well with Spot and Center-Weighted metering, letting
you base the exposure on a particular area of the subject without also having
to lock the focus on that area. Simply aim the center of the viewfinder at the
portion of the subject you want properly exposed and press the AE Lock button.
The exposure will be locked until the Shutter button is fully depressed or until
the AE Lock button is pressed again.
ISO can be adjusted to 100, 200, 400, or 800 sensitivity equivalents, or set
to Auto, letting the camera adjust it to match the shooting conditions. The
V3's White Balance adjustment offers seven settings: Auto, Daylight, Cloudy,
Fluorescent, Incandescent, Flash, and One-Push (manual). The One-Push reading
is set by placing a white card in front of the lens and pressing the up arrow
to set the reading. Through the Record menu, the Sony Cyber-shot DSC-V3 also
lets you adjust sharpness, saturation, and contrast, offering low/normal/high
options for each. (Kudos to Sony for including these features: Now, I'd like
to see them go a step further, and offer both a wider range of adjustment and
more/smaller steps for contrast and saturation. I've found fine-grained contrast
and saturation adjustments on some other cameras highly useful in "customizing"
the camera's basic response to suit my personal preferences.) A Picture Effects
menu offers two creative options: Sepia and Black and White. Sepia translates
the image into brown, monochromatic tones. Black and White mode needs no explaining.
The Self-Timer mode is activated by pressing the Down arrow button on the Four
Way Arrow pad. Once in Self-Timer mode, a full press of the Shutter button starts
the timer, which counts down 10 seconds before firing the shutter. The camera
beeps and flashes a front-panel LED to mark the countdown interval. After recording
an image, the Quick Review function provides instant playback of the picture
if you don't release the Shutter button. Pressing the left arrow button also
activates the Quick Review mode, giving you the option of deleting the most
recently recorded image.
The Small-Aperture Conundrum
While the V3's exposure system tends to deliver accurate exposures, there's
a subtle issue with it that will affect the sharpness of your images. In Auto
or Program mode, all cameras follow a "program curve" that determines
the combination of aperture and shutter speed used for any given light level.
Different cameras employ different curves, some tending to prefer large apertures
(keeping the lens aperture as wide as possible, until the light level forces
the choice of a smaller opening), while others tend to prefer smaller ones.
The Sony DSC-V3 is one of the latter, as it tends to stop down the lens to the
minimum f/8 aperture setting as soon as there's enough light available to do
so without incurring an unreasonably slow shutter speed. This wouldn't normally
be an issue, but it turns out that the V3's lens is much "softer"
at very small apertures than it is at wider ones, causing it to lose a fair
bit of fine detail when stopped down all the way. This isn't an insuperable
obstacle, but it does make the V3 into a somewhat more manual camera than it
could be, at least if you want the best image sharpness: Shoot in aperture-priority
mode at an aperture of f/5.6 or wider, and you'll get images that are tack-sharp
from corner to corner. Let the camera fire away in full-auto or Program mode
while shooting under daylight conditions though, and the images you get will
be softer than they could be.
Flash
The "flip-up" flash on the Sony Cyber-shot DSC-V3 operates in Auto
(no icon displayed on LCD screen), Forced, Suppressed, and Slow Sync modes,
with a Red-Eye Reduction mode enabled through the Setup menu. Auto mode lets
the camera decide when to fire the flash, based on existing lighting conditions.
Forced means that the flash always fires, regardless of light, and Suppressed
simply means that the flash never fires. The Slow Sync setting combines the
flash with a longer exposure, recording more ambient light to balance out light
from the flash. Red-Eye Reduction mode tells the camera to fire a small pre-flash
before firing the full flash to make the pupils of your subjects' eyes contract,
thereby reducing the effect of red-eye. Once enabled through the Setup menu,
the Red-Eye Reduction flash fires in both Auto and Forced modes. Flash intensity
can be manually controlled via the Record menu with choices of High, Normal,
and Low (except in Full Auto mode). If required, the flash pops up on its own
once the Shutter button is halfway pressed in all flash modes except Suppressed.
- But you have to swing it shut manually.
The Sony Cyber-shot DSC-V3 also features a true hot-shoe external flash connection
on top of the camera. This greatly increases the options for connecting an external
flash. Additionally, an ACC Sony accessory flash input socket is on the camera's
left side, but is proprietary to the Sony HVL-F1000 external flash unit. (The
HVL-F32X flash unit is a much better match for the V3's capabilities though.)
All flash exposures -- whether from the built-in flash or a TTL-compatible
external flash -- are metered through the V3's lens, providing true TTL metering.
Sony's recent HVL-F32X external flash unit, for example, is one external unit
that takes advantage of the camera's TTL metering system. (Note that the earlier
HVL-F1000 external flash unit does not provide TTL metering.) The addition
of TTL metering (using the camera's pre-flash to precisely establish exposure)
is particularly useful when the subject is significantly brighter or darker
than its background and the lens is set to the telephoto end of its focal length
range. TTL metering determines exposure from just the part of the subject that
appears in the camera's field of view, ignoring foreground or background objects
outside the frame. The F32X also does an excellent job of throttling down for
macro shots, something many external flash units have difficulty doing.
HVL-F32X External Flash
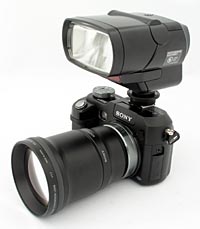 As
just mentioned, the Sony DSC-V3 supports true TTL metering with supporting external
flash units such as Sony's own HVL-F32X flash unit. To our mind, the HVL-F32X
should be on the short list of accessories to add for any photographers seriously
interested in flash photography with the V3.
As
just mentioned, the Sony DSC-V3 supports true TTL metering with supporting external
flash units such as Sony's own HVL-F32X flash unit. To our mind, the HVL-F32X
should be on the short list of accessories to add for any photographers seriously
interested in flash photography with the V3.
The HVL-F32X flash has a host of enhanced features relative to the earlier
HVL-F1000, not the least of which is the support for true TTL (through the lens)
flash metering when used with the DSC-V1 or Sony DSC-V3. This is a huge benefit
whenever you're taking telephoto shots of subjects that are significantly brighter
or darker than the background. With a typical area-metered flash, the background
will dominate the exposure, with the subject coming out either over- or underexposed,
depending on whether the background was darker or lighter than it. With true
TTL metering, only the part of the scene that's visible to the camera's CCD
will affect the ultimate exposure. Also worth mentioning is that the F32X does
an excellent job of throttling down for macro shots, something that many external
flash units have difficulty doing.
Here's a list of features of the HVL-F32X flash unit:
I haven't worked extensively with the HVL-F32X, but first impressions (from a very rough prototype) were very good. The TTL capability worked great, and the powerful AF illuminator was great for photographing more distant subjects in total darkness. (For a little more detail on the unit, as well as a few more product photos, see our Sony HVL-F32X news article on it from the Spring 2004 PMA show.)
Special Recording Modes
Like many Sony digicams, the Cyber-shot DSC-V3 offers a number of special recording
modes, including RAW, TIFF, Exposure Bracketing, MultiBurst, Speed Burst, and
Burst. Sony's software for manipulating RAW images allows users the ability
to do all of the post-capture processing that the camera would do internally
in a special software program that runs on the user's PC. Users are then able
to tweak images individually and output them as whatever supported formats the
software will offer. The TIFF option saves a 2,560 x 1,920-pixel uncompressed
TIFF version of each image, in addition to the standard JPEG version,
at whatever image size you've selected. Multi-Burst mode, which captures a very
rapid burst of sixteen 320 x 240 images arranged in rows and columns in
a single file. Once captured, the images may be played back in sequence on the
camera, but when transferred to a computer they are arranged in a matrix of
16 images in a 1280x 960 pixel image. Because image capture is so fast, the
effect is that of a slow-motion movie sequence. Three frame interval rates are
available through the Record menu, 1/7.5, 1/15, and 1/30. Exposure Bracketing
captures three images with one press of the Shutter button (one at the normal
exposure, one underexposed, and one overexposed). The variation between exposures
is adjustable through the Setup menu, with options of 0.3, 0.7, and 1.0 EV steps.
Speed Burst captures 8 images at 2.5 frames per second before pausing to write
them to the card. Burst fires up to 19 images at about one frame per second
before the buffer fills and writing slows down. Taken together, these continuous-shooting
modes provide an impressive array of tools for capturing fast action.
Movie Mode
The Sony Cyber-shot DSC-V3's Movie mode is accessed by selecting the film frame
icon on the Mode dial on top of the camera. You can record moving images with
sound at 640 x 480 Fine (VGA), 640 x 480 Standard (VGA), or 160 x 112 (Mail)
pixels. Sony's MPEGMovie VX mode lets you record full VGA resolution movies
for as long as the Memory Stick has space. (The amount of available recording
time varies with the quality setting and resolution.) Recording begins with
a single press of the Shutter button, and ends with a second press. A timer
appears in the LCD monitor to let you know how long you've been recording and
approximately how much recording time is available.
The Sony Cyber-shot DSC-V3 also provides limited movie editing capabilities
right in the camera. While most digicam users don't expect to find full A/B
roll video editing in their cameras, I've often wanted to trim off material
from the beginning or end of a video I've recorded, or extract an interesting
bit of action from the middle of a much longer clip. The V3 lets you do just
that via the Divide option on the Playback menu. As its name suggests, Divide
works by splitting movies into two segments. Do this once to trim away spurious
material at the front of the clip you're interested in, and do it a second time
to remove unwanted footage at the end. Once you've split the movie into parts
like this, you can throw away the segments you don't need.
After enabling the Divide function through the Playback menu, the Sony Cyber-shot
DSC-V3 starts to play the movie. You simply press the OK button on the Four
Way Arrow pad to stop the playback where you want to make an edit. From there,
you can scroll backward or forward frame-by-frame until you find the point where
you'd like to divide the movie. You can then either delete the unwanted portion
of the movie or keep it on the Memory Stick. As noted, the Divide function is
great for "editing" the part of a movie file you want to save, given
that you can make an unlimited number of divides. You just can't put the pieces
back together again in the camera. For that, you'll have to use MPEG editing
software on a computer.
Shutter Lag/Cycle Times
When you press the shutter release on a digital camera, there's usually a lag or delay before the shutter actually fires. This represents the time required for the autofocus and autoexposure mechanisms to do their work and can amount to a significant delay in some situations. Since this number is rarely reported by manufacturers or reviewers, and can significantly affect the picture-taking experience, I routinely measure these times with a proprietary electronic test system I designed and built for the purpose. (Timing is crystal-controlled, and accurate to 1/1000 of a second.)
| |
||
| |
(secs) |
|
| Power On -> First shot | |
LCD turns
on and lens extends forward. |
| Shutdown | |
First time is time to retract
lens, second time is worst-case buffer-clearing time. |
| Play to Record, first shot | |
Time until
first shot is captured. |
| Record to play | |
First time is that required
to display a large/fine file immediately after capture, second time
is that needed to display a large/fine file that has already been processed
and stored on the memory card. |
| Shutter lag, full autofocus | |
First time is at full wide-angle, second is full telephoto. |
| Shutter lag, prefocus | |
Time to capture, after half-pressing
shutter button. |
| Cycle Time, max/min resolution | 1.10 / |
First number is for large/fine files, second number is time for "TV" mode (640x480) images. Times are averages. In large/fine mode, shoots 65 shots at this rate, slows only slightly, and keeps on shooting. In TV mode, continues at this speed indefinitely. Buffer clears after each shot. |
| Cycle Time, continuous Burst mode, max/min resolution | 0.96 / 0.83 (1.04 / 1.20 fps) |
First number is for large/fine files, second number is time for "TV" size images. Times are averages. In large/fine mode, shoots 15 shots this fast and clears the buffer in 18 seconds. In TV mode, shoots 100 shots this fast and clears the buffer in 11 seconds. |
| Cycle Time, Speed Burst mode, max/min resolution | 0.40 (2.50 fps) |
Takes a maximum of 8 shots at about the same rate for large/fine or small/basic images. Times are averages. Clears the buffer in 13 seconds in large/fine mode, 4 seconds in TV mode. |
| Cycle Time, Multi Burst mode | 0.03 (30 fps) |
Camera captures 16 320 x 240 pixel images, stores them in 4x4 arrays inside normal 1280 x 960 files. Frame rate can be set to 7.5, 15 or 30 frames/second. Buffer clears in less than a second. |
By almost every measure, the Sony DSC-V3 is a very fast camera. Full-autofocus
shutter lag ranges from 0.28-0.66 seconds, much faster than average, and shutter
lag when prefocused (by half-pressing and holding down the shutter button
before the shot itself) is an amazing 0.011 second. (That's right, just over
1/100 second.) Shot to shot cycle times are excellent as well, at 1.1 second
for large/fine images, more or less to the limits of the capacity of a Memory
Stick Pro or high-speed CompactFlash memory card. In "Speed Burst"
mode, the camera can capture up to eight large/fine images at a rate of 2.4
frames/second. (The 8-frame buffer capacity is a particularly welcome upgrade
from the 3-frame buffer limit of the earlier V1.) Bottom line, this is one
of the faster cameras on the market today.
Operation and User Interface
The Sony DSC-V3's user interface is similar to previous Cyber-shot designs,
most closely resembling the control structure of the DSC-V1, with a range
of multi-functional external controls and an on-screen LCD menu overlay. That
said though, the control interface of the V3 has been significantly enhanced
and modified I always appreciate having as much external control as possible,
as it saves having to scroll through menu items for common settings, and the
Sony DSC-V3 definitely provides that. The Mode dial on top of the camera controls
the main exposure mode, while things like Flash mode, Macro mode, Exposure
Compensation, etc. are all controlled via small buttons on the rear panel.
The Command dial, located on the right side of the rear panel, lets you quickly
adjust aperture and/or shutter speed without accessing a menu system. Overall
camera operation is smooth and efficient, with an easy-to-navigate LCD menu
system and a user interface that doesn't require a long learning curve. You
may spend a few minutes reading through the manual, but once you get the hang
of things, the user interface is very intuitive.
Control Enumeration

Shutter Button: Located out on the grip, this button sets focus and exposure
when pressed halfway. Fully depressing the button fires the shutter. When
the Self-timer is enabled, fully depressing the Shutter button begins a 10-second
countdown before the shutter fires.
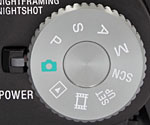
Mode Dial: Behind the shutter on the top panel, this knurled dial controls
the camera's operating mode. Choices are Full Auto (green camera icon), Program
AE, Shutter Priority, Aperture Priority, Manual, Scene, Setup, Movie, and
Playback modes.

Power Button: To the left of the Mode dial on top of the camera, this
button turns the camera on or off.

NightShot / NightFraming Button: Located in front of the Power button
on the top panel, this switch activates either the NightShot or NightFraming
modes, for low-light and no-light shooting and framing.
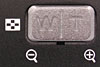
Zoom Rocker Button: Situated in the top right corner of the rear
panel, this two-way rocker button controls the optical and digital zoom in
Record mode. In Playback mode, this button digitally enlarges the captured
image as much as 5x.

Exposure Compensation Button: Left of the Focus button, this button highlights
the exposure compensation adjustment on the LCD screen. Once highlighted,
the exposure compensation is adjusted by turning the Command dial. A second
press of the button removes the highlight.

Focus Button: To the right of the Exposure Compensation / Index button,
this button switches between Manual and Auto focus modes. In Manual focus
mode, turning the Command dial adjusts the focus setting from 0.1 meters to
infinity.
![]()
AE Lock Button: Adjacent to the Focus button, this button locks the exposure
reading until it's pressed again, or until the Shutter button is fully pressed.
![]()
Command Dial: Just below and to the right of the Command dial, this black,
ribbed dial controls various exposure settings in any Record mode. In Aperture
Priority, Shutter Priority, and Manual exposure modes, it controls aperture
and/or shutter speed settings. Turning the dial moves the cursor between available
settings, while a quick press of the dial selects the setting for adjustment
(highlighting it in yellow on the LCD screen). Once the setting is selected,
it can be adjusted by turning the dial forward or backward.

Display Button: Located on the upper right of the LCD, this button controls
the LCD image and information display in all camera modes except Setup mode.
It also enables the histogram display. Repeated presses cycle through detailed
information, detailed information with histogram display, limited information,
and no display.
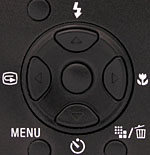
Five-way Arrow Pad: Located to the right of the LCD monitor on the rear
panel, this five-key pad has four arrows, one pointing in each direction (up,
down, left, right), and a center "OK" button. In any record mode
(except Movie), the Up arrow controls the Flash mode, cycling between Auto,
Forced, Suppressed, and Slow Sync (when available). The Left arrow controls
the Quick Review function, which provides a quick playback of the most recently
captured image. The Right arrow activates the Macro shooting mode, and the
Down arrow activates the Self-Timer mode.
In Playback mode, the Right and Left arrows scroll through captured images.
The Up and Down arrows control the playback volume. When an image has been
digitally enlarged, all four arrows pan the view.
In all camera modes, the arrow keys navigate through settings menus, highlighting
menu options. Pressing the center button confirms menu selections.

Menu Button: Beneath the Four Way Arrow pad is the Menu button, which
activates and deactivates the settings menus in all camera modes (except for
Setup mode, which automatically displays the menu upon entering the mode).

Image Size / Erase Button: To the right of the Menu button, this
button pulls up the Image Size menu in any record mode.
In Playback mode, this button lets you erase the currently-displayed image. During index display, pressing this button gives the option of deleting all images in the selected folder, with the exception of any write-protected images.
Camera Modes and Menus
![]()
Full Auto: Indicated on the Mode dial by a green camera icon, this mode
puts the camera in control of everything except flash, zoom, resolution, and
Record mode. (Think of this as a quick way to get back to the camera's default
settings, without disturbing all the settings you've made in various menus.)
![]()
Program AE (P): This mode puts the camera in control of aperture and shutter
speed, while you control all remaining exposure decisions.
![]()
Shutter Priority (S): Shutter Priority mode lets you control the shutter
speed, from 1/1,000 to 30 seconds, while the camera selects the best corresponding
aperture setting. You retain control over all other exposure variables.
![]()
Aperture Priority (A): As the opposite of Shutter Priority mode, Aperture
Priority mode lets you adjust the aperture setting, from f/2.8 to f/8, while
the camera chooses the best shutter speed. All other exposure controls are
under your control.
![]()
Manual Exposure Mode (M): This mode provides total control over the exposure,
as you're able to select both aperture and shutter speed independently of
each other, as well as control all other exposure variables.
![]()
Scene (SCN): Scene mode offers seven preset shooting modes to choose from
(Twilight, Twilight Portrait, Landscape, Portrait, Snow, Beach, and Candle)
which set the camera's exposure controls for photographing each specific subject.
The available exposure settings depend on the scene selected. Twilight and
Twilight Portrait both adjust exposure settings to optimize for after-dark
photography. Twilight mode disables the flash, while Twilight Portrait enables
it. Landscape mode sets the exposure system to prefer smaller apertures, for
greater depth of field. Portrait mode is the opposite, setting a bias toward
larger apertures, for less depth of field. Snow and Beach modes optimize the
camera for better color in extremely bright situations. Candle mode exposes
for the specific light and color expected in candle-lit scenes.
![]()
Movie Mode: Marked on the Mode dial with a film strip icon, this mode
lets you capture moving images with sound.
Record Menu: In each of the above recording modes, pressing the Menu
button calls up the following menu selections. Some options are not available
in all modes.
 Metering
Mode: Sets the exposure metering mode to Multi, Center, or Spot.
Metering
Mode: Sets the exposure metering mode to Multi, Center, or Spot.
Movie Mode Menu: The following limited menu is available:
 Metering
Mode: Sets exposure metering to Multi, Center, or Spot modes.
Metering
Mode: Sets exposure metering to Multi, Center, or Spot modes.
Playback Mode: Indicated on the Mode dial with the traditional arrow-in-a-box Playback symbol, this mode allows you to scroll through captured images on the Memory Stick or CF card. Images can be deleted, protected, copied, resized, rotated, or set up for printing on DPOF devices. Movie files and Clip Motion animations can also be played back. Pressing the Menu button displays the following options:
 Folder:
Selects which folder is to be used for playback, and displays the number of
files, creation date, and folder name for each.
Folder:
Selects which folder is to be used for playback, and displays the number of
files, creation date, and folder name for each.
Setup Mode: This mode lets you change a variety of camera settings. The
Setup menu is displayed immediately upon entering the mode. Five separate screens
of options are available, selected via a tabbed interface running down the left
hand side of the screen.
 AF
Mode: Choices are Single, Monitor, and Continuous.
AF
Mode: Choices are Single, Monitor, and Continuous.
 Enlarged
Icon: Momentarily displays many icons large when they are first selected
for easier viewing. Icons include Flash, Self Timer, and Macro.
Enlarged
Icon: Momentarily displays many icons large when they are first selected
for easier viewing. Icons include Flash, Self Timer, and Macro.
 Format:
Formats the Memory Stick, erasing all files (even "protected"
ones).
Format:
Formats the Memory Stick, erasing all files (even "protected"
ones).
 LCD
Backlight: Controls the backlight for the main LCD, options are Bright,
Normal, and Dark. (This option only appears when the camera is running
from battery power. Connecting the AC adapter automatically sets the brightness
to "Bright," and removes this option from the menu.)
LCD
Backlight: Controls the backlight for the main LCD, options are Bright,
Normal, and Dark. (This option only appears when the camera is running
from battery power. Connecting the AC adapter automatically sets the brightness
to "Bright," and removes this option from the menu.)
 File
Number: Chooses whether file number is continuous or resets with each
new folder.
File
Number: Chooses whether file number is continuous or resets with each
new folder.
Image Storage and Interface
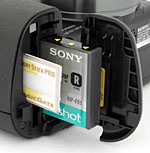 The
Sony Cyber-shot DSC-V3 uses the proprietary Sony Memory Stick as well as Compact
Flash cards for image storage. No card from either memory format ships with
the camera. Memory Sticks are currently available up to 1GB, and CF cards are
available at up to 8GB, but I would advise picking up at least a 256 or 512
megabyte card, given the high resolution of the DSC-V3. Individual images can
be write-protected from accidental erasure (except through card formatting)
via the Protect option under the Playback settings menu. Individual write-protection
also prevents the image from being rotated, but does permit resizing and trimming,
since those operations don't disturb the original image, but rather make a new
copy. The entire Memory Stick can be write-protected by sliding the lock switch
on the stick into the locked position, which also guards against the stick being
reformatted.
The
Sony Cyber-shot DSC-V3 uses the proprietary Sony Memory Stick as well as Compact
Flash cards for image storage. No card from either memory format ships with
the camera. Memory Sticks are currently available up to 1GB, and CF cards are
available at up to 8GB, but I would advise picking up at least a 256 or 512
megabyte card, given the high resolution of the DSC-V3. Individual images can
be write-protected from accidental erasure (except through card formatting)
via the Protect option under the Playback settings menu. Individual write-protection
also prevents the image from being rotated, but does permit resizing and trimming,
since those operations don't disturb the original image, but rather make a new
copy. The entire Memory Stick can be write-protected by sliding the lock switch
on the stick into the locked position, which also guards against the stick being
reformatted.
The DSC-V3 lets you set up individual folders on the Memory Stick, so you can
manage images by folder and choose where images will be recorded. This could
be handy if you wanted to organize your photos by events, date, etc.
The LCD monitor on the Sony Cyber-shot DSC-V3 reports storage information in
the detailed information display, including the current number of images captured,
how many additional images can be stored (based on current image resolution
and quality settings), while a small graphic shows you approximately how much
space is left on the Memory Stick. (In Movie mode, the camera reports the available
recording time remaining.) Through the Setup menu, you can designate whether
the camera numbers each image sequentially (from one Memory Stick to the next),
or restarts file numbering with each new Memory Stick inserted. The Playback
menu offers a Resize option, as well as a Rotate tool. The camera's Digital
Print Option Format (DPOF) compatibility allows you to mark specific images
for printing on a DPOF-compatible printer. Through the Setup menu, you can decide
whether or not to print the date and / or time on the image as well.
PictBridge mode allows individual or batch printing of images to a compatible printer.
Image Size options include RAW at 3072 x 2304; 2,592 x 1,944; 2048 x 1536;
1280 x 960; 640 x 480; and JPEG at 3072 x 2304; 3072 x 2048 (3:2); 2,592 x 1,944;
2,048 x 1,536; 1,280 x 960; 640 x 480; and 320 x 240 pixels (in MultiBurst mode).
Movie file sizes are 640 x 480 and 160 x 112 pixels for MPEG Movies. In addition
to the uncompressed TIFF file format, the V3 offers both Fine and Standard JPEG
compression levels, and a GIF option for the Clip Motion recording mode.
The table below shows the approximate still image capacities and compression
ratios for a 128MB Memory Stick (main resolution options):
| Resolution/Quality 128 MB Memory Card |
Fine | Normal | |
|
|
| 3072 x 2304 | Images (Avg size) |
36 3.5 MB |
72 1.8 MB |
6 19.6 MB |
5 25.6 MB |
| Approx. Compression |
6:1 | 12:1 | - |
- |
|
| 2592 x 1944 | Images (Avg size) |
50 2.5 MB |
95 1.3 MB |
- |
- |
| Approx. Compression |
6:1 | 11:1 | - |
- |
|
| 2048 x 1536 | Images (Avg size) |
81 1.6 MB |
144 884 KB |
- |
- |
| Approx. Compression |
6:1 | 11:1 | - |
- |
|
| 1280 x 960 | Images (Avg size) |
195 655 KB |
355 360 KB |
- |
- |
| Approx. Compression |
6:1 | 10:1 | - |
- |
|
| |
Images (Avg size) |
782 164 KB |
1955 65 KB |
- |
- |
| Approx. Compression |
6:1 | 14:1 | - |
- |
|
A USB cable accompanies the Sony Cyber-shot DSC-V3 for quick connection to a PC or Macintosh computer, as well as a software CD containing interface software and USB drivers. Thanks in part to its USB 2.0 computer interface, the DSC-V3 is capable of very fast downloads. I clocked it at a very fast 2252 KB/second on my Sony VAIO desktop machine, which has a 2.4 GHz Pentium IV CPU running Windows XP. (This high a download speed is dependent on having a computer with a USB 2.0 connection. Computers with older USB version 1.1 connections will probably see download speeds closer to 600 KB/second.)
Recommended Software: Rescue your Photos!
Just as important as an extra memory card is a tool to rescue your images when
one of your cards fails at some point in the future. I get a lot of email from
readers who've lost photos due to a corrupted memory card. Memory card corruption
can happen with any card type and any camera manufacturer, nobody's immune.
A surprising number of "lost" images can be recovered with an inexpensive,
easy to use piece of software though. Given the amount of email I've gotten
on the topic, I now include this paragraph in all my digicam reviews. The program
you need is called PhotoRescue, by DataRescue SA. Read our review
of it if you'd like, but download the program now, so you'll have it.
It doesn't cost a penny until you need it, and even then it's only $29, with
a money back guarantee. So download PhotoRescue
for Windows or PhotoRescue
for Mac while you're thinking of it. (While you're at it, download the
PDF manual
and quickstart
guide as well.) Stash the file in a safe place and it'll be there when you need
it. Trust me, needing this is not a matter of if, but when... PhotoRescue
is about the best and easiest tool for recovering digital photos I've seen.
(Disclosure: IR receives a commission from sales of the product, but I'd highly
recommend the program even if we didn't.) OK, now back to our regularly
scheduled review...
Video Out
 The
Sony Cyber-shot DSC-V3 comes equipped with an Audio / Video cable for connection
to a television set. (Through the Setup menu, you can select NTSC signal format
for U.S. and Japanese systems and PAL for European systems.) Once connected
to the TV, you can review images and movies or record them to videotape. Viewfinder
displays are also visible via the video output, letting you use a video monitor
as an extra-large "remote viewfinder."
The
Sony Cyber-shot DSC-V3 comes equipped with an Audio / Video cable for connection
to a television set. (Through the Setup menu, you can select NTSC signal format
for U.S. and Japanese systems and PAL for European systems.) Once connected
to the TV, you can review images and movies or record them to videotape. Viewfinder
displays are also visible via the video output, letting you use a video monitor
as an extra-large "remote viewfinder."
Power
The
Sony Cyber-shot DSC-V3 is powered by an NP-FR1 InfoLITHIUM battery pack (3.6
volts, 4.4 watt-hours) and comes with an AC adapter which doubles as an in-camera
battery charger. InfoLITHIUM battery packs contain a chip that exchanges information
with the camera, allowing the camera to report approximately how many minutes
of battery life are left at the current drain level. This information is displayed
on the LCD monitor and the electronic viewfinder with a small battery graphic.
The AC adapter plugs into a small socket on the camera's back panel. It can
run the camera without a battery inserted, or charge the battery when the camera
isn't in use.
The Li-Ion battery packs used in Sony cameras prevent me from making my usual
direct power measurements, but the good news is that the InfoLITHIUM system
reports projected camera runtime while the battery is being used in the camera.
Despite the excellent feedback provided by the InfoLITHIUM system, I still recommend
you purchase and pack along a second battery, though. (Another advantage of
the Li-Ion technology used in the InfoLITHIUM batteries is that they don't "self-discharge"
like conventional NiMH rechargeable cells do, and so can hold their charge for
months on the shelf or in your camera bag.)
| |
|
| Capture Mode, w/LCD | |
| Image Playback | |
Relative to its predecessor the DSC-V1, the Sony Cyber-shot DSC-V3 has almost
double the battery life. With a worst-case run time just shy of three hours
(and playback-mode run time of more than five hours), you may actually not
need to purchase a second battery that I recommend above. - Given that typical
usage involves turning the camera off or letting it "sleep" between
shooting sessions, the nearly three-hour worst-case run time should easily
translate into a long day of shooting.
Included Software
The Sony Cyber-shot DSC-V3 comes packaged with the standard Sony CD-ROM containing Pixela ImageMixer software and USB drivers. Pixela ImageMixer is compatible with both Windows and Macintosh platforms, and offers minor image editing tools. In addition to these, the V3 software package will also include Sony's RAW file utility, for manipulating RAW-format image files, a USB Driver, and the Cyber-shot Life tutorial (Windows).
In the Box
Test Results
In keeping with my standard test policy, the comments given here summarize only my key findings. For a full commentary on each of the test images, see the Cyber-shot DSC-V3's "pictures" page.
Not sure which camera to buy? Let your eyes be the ultimate judge! Visit our Comparometer(tm) to compare images from the Sony DSC-V3 with those from other cameras you may be considering. The proof is in the pictures, so let your own eyes decide which you like best!
As with all Imaging Resource product tests, I encourage you to let your own eyes be the judge of how well the camera performed. Explore the images on the pictures page, to see how the DSC-V3's images compare to other cameras you may be considering.
Conclusion
| Free Photo Lessons | |
|
<<DSC-V3 Sample Images | Additional Resources and Other Links>>
Reader Comments!
Questions, comments or controversy on this product? Click
this link to see what other Imaging Resource readers have had to say about
the Sony DSC-V3, or add comments of your own!