Kodak Z650 Design
 Compact and reasonably small in size, considering the 10x optical zoom lens, the Kodak EasyShare Z650 measures 3.8 x 3.1 x 2.9 inches (98 x 77 x 73 millimeters), small enough to fit into coat pockets and purses. The Kodak Z650 is lightweight as well, at just 11.4 ounces (324 grams) with battery and memory card. A neck strap comes with the camera, but I'd recommend a soft carrying case for travel.
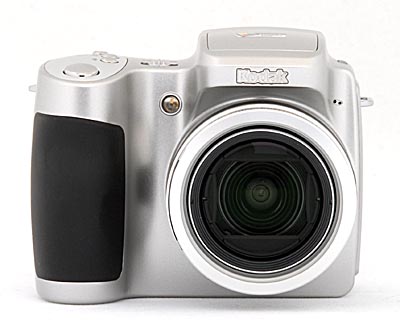
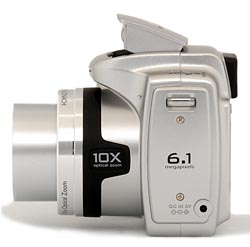
The telescoping lens takes up the right side of the camera's front panel, surrounded by a thick, plastic lip complete with filter threads for accessory lenses or the included lens shade. The lens extends outward when the camera is powered on, and likewise retracts when the camera is turned off. A plastic, removable lens cap protects the lens when not in use, and tethers to the camera body to prevent it from being accidentally lost. Also on the front panel are the light sensor, microphone and AF assist/self-timer lamp. A fairly substantial handgrip provides a good hold.
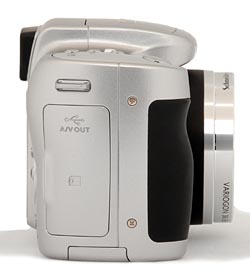
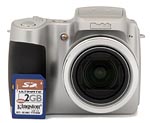
On the right side of the camera (as viewed from the rear) is the SD/MMC memory card compartment, beneath a hinged, plastic door. Opening the door reveals the actual card slot, as well as the USB/AV Out shared connector jack. Directly above the compartment is one of the eyelets for attaching the neck strap.
The opposite side of the camera features the DC In jack (without a protective cover), and the other neck strap attachment eyelet.
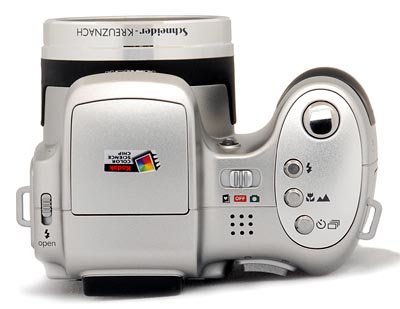
On the camera's top panel are the pop-up flash compartment and release switch, Power/Mode switch, Drive button, Focus button, Flash button, and the Shutter button. The camera's speaker is also on the top panel, just behind the Power/Mode switch.
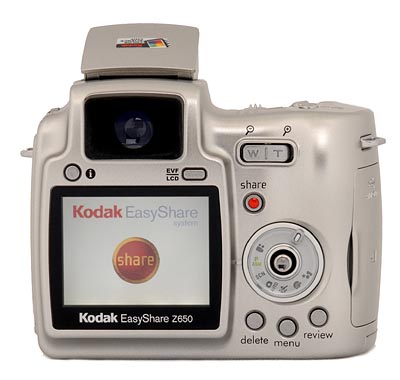
The rest of the camera controls are on the rear panel, along with the electronic viewfinder (EVF) and 2.0-inch LCD monitor. An indented thumb rest on the right side cups your thumb as you hold the camera, reinforcing the front handgrip. The Zoom lever is positioned right where your thumb will rest, making for easy adjustment of the optical and digital zoom. The Information and EVF/LCD buttons are just above the LCD monitor, with the Share button adjacent to the monitor's top right corner. A large Mode dial is below the Share button, with a joystick-like multi-controller button in its center. The joystick navigates through menu settings, and confirms selections when pressed. You use the joystick to change exposure options like aperture and shutter speed in the manual modes. Directly below are the Delete, Menu, and Review control buttons.
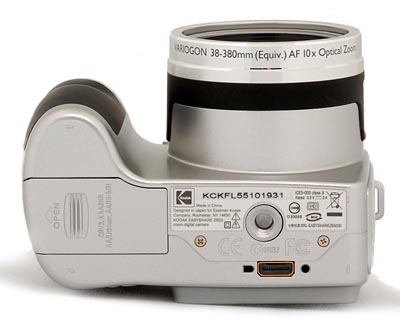
On the bottom panel of the Kodak Z650 are the tripod socket, dock connector, and battery compartment. The metal, threaded tripod socket is just off-center (but centered to the lens) and too close to the battery compartment for quick battery changes while working with most tripods. The battery compartment features a locking, hinged door, which slides to the side to open. The dock connection jack connects the camera directly to the EasyShare dock for quick image downloading.
Kodak Z650 External Controls
![]()
Flash Release Switch: Located next to the flash compartment on the left side of the top panel, this switch releases the pop-up flash from its compartment.
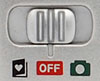
Power/Mode Switch: On the right side of the flash compartment, this sliding switch powers the camera on and pops up the flash. Sliding it to the right puts the camera into Record mode, while sliding the switch to the left puts it in Favorites mode.

Shutter Button: Located on the camera's top panel, this button sets focus and exposure when halfway pressed, and fires the shutter when fully pressed. In Playback mode, pressing this button returns the camera to the selected Record mode.

Flash Button: Just behind the Shutter button on the top panel, this button cycles through the Auto, Fill, Red-Eye Reduction, and Off flash modes.
![]()
Close-Up/Landscape Button: Next in line behind the Flash button, this button controls the camera's focus mode, cycling between Normal AF, Macro, and Landscape focus settings.
![]()
Self-Timer/Burst Button: The final button in the series on the top panel, this button cycles through the First Burst, Last Burst, and Self-Timer drive settings.
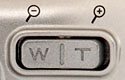
Zoom Lever: Tucked in the upper right corner of the camera's rear panel, this lever controls the optical and digital zoom in any record mode. In Playback mode, the lever controls the amount of digital enlargement applied to captured images, to a maximum of 8x.
![]()
Information Button: Above the top left corner of the LCD monitor, this button controls the information display on the EVF and LCD monitors.
![]()
EVF/LCD Button: Directly above the top right corner of the LCD monitor, this button switches the image and information display between the EVF and LCD monitors.

Share Button: Located to the right of the LCD monitor, this button lets you tag images for printing, emailing, or as a favorite image. A heart icon appears on "favorite" images. Pressing this button automatically displays the Share menu with the following options:
- Print: Sets the number of copies of the current image to be printed.
- E-Mail: E-mails a low-resolution copy of the image to a recipient, based on a saved address book.
- Favorite: Marks the current image as a "favorite."
- Print All: Prints one copy of each image on the memory card or internal memory.
- Cancel Prints: Cancels a print order.
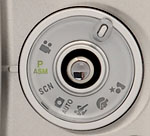
Mode Dial: Dominating the lower right portion of the rear panel, this large disc is dialed until it clicks into the desired exposure mode. A small finger grip protudes from the empty side of the disc. The following camera modes are available:
- Video: Records moving images with sound, for as long as the memory card has available space.
- PASM Mode: Provides access to the Program, Aperture Priority, Shutter Priority, and Manual exposure modes.
- Scene Mode: Offers 15 preset shooting modes, including Children, Party, Beach, Flower, Fireworks, Snow, Backlight, Close-up, Night Portrait, Landscape, Night Landscape, Manner/Museum, Text, Self-Portrait.
- Auto: Best for most average shooting conditions, this mode places the camera under automatic exposure control, with limited user options available through the Record menu.
- Sport: Sets up the camera for recording fast-paced action shots.
- Portrait: This mode captures a sharply-focused subject in front of a slightly-blurred background, so that the emphasis is on the person.
- Night: In this mode, the camera uses a slower shutter speed to capture more ambient light in darker shooting conditions.
Joystick Multi-Controller (see image above): Located in the center of the Mode dial, this joystick-like controller navigates through menu options. When pressed, it confirms menu selections. In PASM mode, moving the controller left and right selects different options for adjustment on the LCD monitor. Once selected, you can then use the up/down motion to adjust the mode, aperture, shutter speed, exposure compensation, and ISO settings.
In Playback mode, moving the controller left or right scrolls through captured images. Pressing the button down plays back movie files. During movie playback, moving the controller up and down adjusts the playback volume.

Delete: Below the Mode dial and adjacent to the lower right corner of the LCD monitor, this button calls up the Delete menu in Review mode. You can delete individual images or all images on the card. There's also an option to cancel.

Menu Button: To the right of the Delete button, this button displays the settings menu in Playback or Record modes.

Review Button: Directly to the right of the Menu button, this button activates the image review mode when pressed in any Record mode. Once in Review mode, pressing the button again, or the Shutter button, returns to the Record display.
 Fujifilm GFX 50S Review
 Fujifilm X-T3 Review
 Olympus E-M5 III Review

Follow Imaging Resource