Fuji GFX Field Test Part III
Investigating Color Chrome, the sensor and additional features
by Jeremy Gray | Posted 06/19/2017
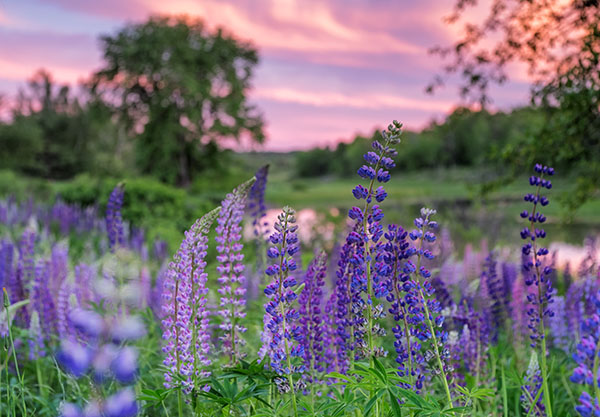 |
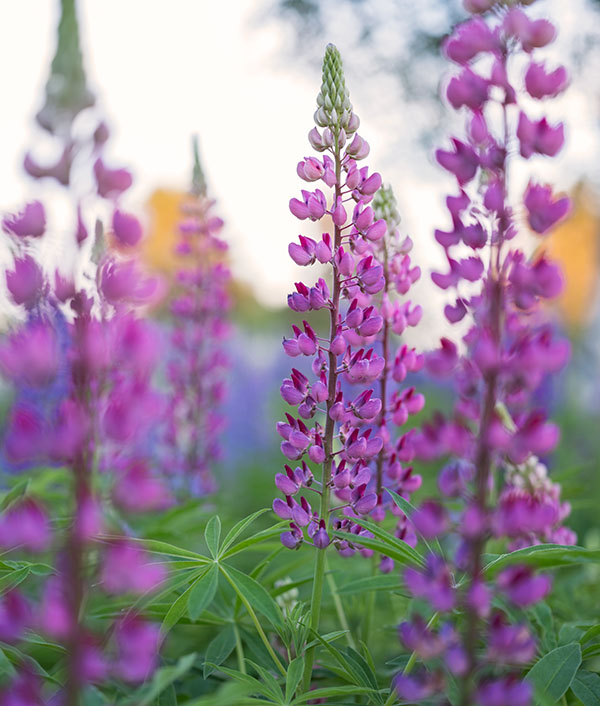
Fujinon GF 32-64mm f/4 R LM WR lens at 61mm (48mm equiv.), f/4.0, 1/7s, ISO 800. This image has been modified. Click for original image. Click here for RAW file. |
In Field Test Part I and Part II, I covered much of the Fujifilm GFX 50S' features and performance. However, the camera has numerous other features that could easily fly under the radar. I wanted to dig deeper into topics such as the new Color Chrome Effect, in-camera RAW processing, wireless and tethered shooting and finish with a collection of observations I've made during my extended time with the camera. Let's get to it and put a bow on my Fujifilm GFX 50S Field Testing.
Fuji Color Chrome Effect: What is it and does it look good?
As part of Fujifilm's ongoing GFX Technologies series, the company has gone behind the scenes with its new Color Chrome Effect. The GFX is the first Fujifilm camera to include the all-new Color Chrome Effect feature.
Its look is derived from Fujifilm's short-lived color reversal film, Fortia. Fortia hit the market in 2004 and was marketed as offering a higher contrast, more saturated look than Velvia. Despite attracting something of a cult following, Fortia had a limited run, being produced only in 2004. There was also a Fortia SP film that was produced from 2005 to 2007. Both Fortia and Fortia SP were exclusive to the Japanese market, however, so not many photographers had a chance to use it.
Fujifilm states that users have been clamoring for a way to recreate Fortia in digital cameras, receiving questions such as "if you set Color +4 in Velvia mode, would it become Fortia?" The short answer is no. The longer answer is no because Fortia renders colors differently than Velvia and has different tonality in high contrast situations. Typically, saturation skyrockets in high contrast images, and the Color Chrome effect aims to reproduce high contrast scenes without that accompanying increase in saturation.
 |
COLOR CHROME OFF Fujinon GF 63mm f/2.8 R WR at 63mm (50mm equiv.), f/2.8, 1/80s, ISO 100. Click image for full-size JPEG file. |
 |
COLOR CHROME WEAK Fujinon GF 63mm f/2.8 R WR at 63mm (50mm equiv.), f/2.8, 1/80s, ISO 100. Click image for full-size JPEG file. |
 |
COLOR CHROME STRONG Fujinon GF 63mm f/2.8 R WR at 63mm (50mm equiv.), f/2.8, 1/80s, ISO 100. Click image for full-size JPEG file. |
Color Chrome is not a Film Simulation, so it works differently. It is turned on via a separate menu option, and Fujifilm recommends leaving it turned off unless you specifically desire to use it because it requires additional processing power. In fact, Fujifilm says the optimal workflow is to apply Color Chrome during in-camera RAW conversion rather than while shooting because even the powerful X-Processor Pro the GFX uses needs around a second to process the Color Chrome effect. Further, you cannot use continuous autofocus with Color Chrome turned on.
The effect is not always obvious either, and you might think that you can achieve similar effects during post-processing, but it is more complicated than that. The Fujifilm image designer responsible for the new Color Chrome Effect had this to say when asked if the effect could be replicated on your computer after shooting, "yes, but it would take me an hour for each image. I also need to know the sensor characteristics of each image." It is not something I would always have turned on, but I do really like the Color Chrome effect overall.
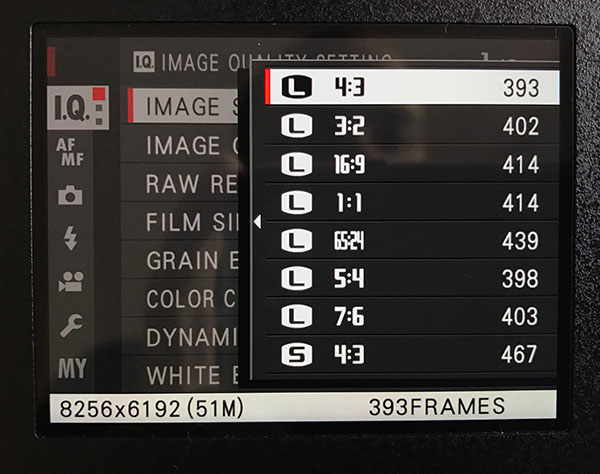
The Fujifilm GFX 50S offers a wide range of in-camera image size and aspect ratios. Given its high-megapixel sensor, I didn't hesitate to utilize different aspect ratios in the camera depending on my subject. The default aspect ratio of the GFX 50S is 4:3 with an image size of 8256 x 6192 pixels (51.1 megapixels). If you'd prefer a 3:2 ratio, that's available too, with a size of 8256 x 5504 (45.4 megapixels). Additional aspect ratios and megapixel counts are as follows: 16:9 (38.3 megapixels), 1:1 (38.3 megapixels), 65:24 (25.2 megapixels), 5:4 (48 megapixels) and 7:6 (44.9 megapixels). There are also "small" options for each of the available aspect ratios, which top out at 4000 x 3000 pixels (12 megapixels). Image ratio settings are embedded in RAW files such that when opening a RAW file in Adobe Lightroom, the software automatically applies the image ratio to the RAW file -- and you can also "uncrop" RAW files back out to full-resolution if you want.
 |
|
Image size settings
|
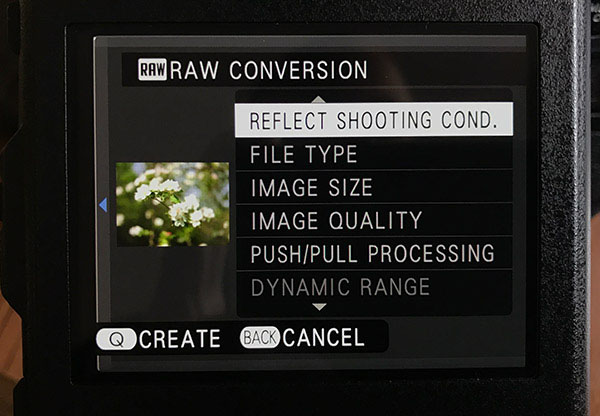
The GFX 50S can convert RAW images to JPEG copies in-camera with a wide array of settings. When you are viewing a RAW image, press the "MENU/OK" button to bring up the playback menu and then select RAW conversion. You can also access this menu by pressing the "Q" button during playback. In either case, you can select a variety of settings when converting RAW files to JPEG including:
- Reflect Shooting Conditions (this creates a JPEG copy using the settings in effect when the photo was captured)
- File Type (file format)
- Image Size
- Image Quality
- Push/Pull Processing (exposure adjustments)
- Dynamic Range
- Film Simulation
- Grain Effect
- Color Chrome Effect (recall that this is Fujifilm's recommended way to apply color chrome effect to images due to processing requirements at the time of capture)
- White Balance
- White Balance Shift (fine-tune white balance)
- Highlight Tone
- Shadow Tone
- Color
- Sharpness
- Noise Reduction
- Lens Modulation Optimizer
- Color Space (sRGB versus Adobe RGB).
You can also create a cropped copy of images using the rear command dial to zoom in and out and the directional buttons to move the crop around the image. There's also an option to simply resize the image.
 |
|
RAW conversions settings
|
If you want to process a RAW image and transfer it to a compatible smart device -- more on this later -- to immediately share it or distribute a file, these options are great. Otherwise, I don't foresee myself making use of in-camera RAW conversion. Nonetheless, it works fine, and it's great to have for photographers who want to use it.
At the computer: Working with Fujifilm GFX 50S files
While not a situation unique to the Fujifilm GFX 50S, but rather any high-resolution camera, I would like to discuss how working with the GFX files can affect photography workflows. Uncompressed RAW files from the GFX are around 120 megabytes and highest-quality JPEG files roughly a quarter of that. Opening up a .RAF file from the GFX in Photoshop and performing some relatively straightforward non-destructive adjustments can quickly make the file balloon up to a massive size. It's worth considering whether you need a faster or larger storage drive to make working with GFX files a better experience.
It is not just hard drive speed and space that I considered when working with files from the GFX 50S, but also how the files worked in my standard editing workflow. GFX files are fully supported by Adobe, both in Lightroom and Photoshop, and its RAW editing works well. Capture One Pro has replaced Lightroom in my personal workflow since I reviewed Capture One Pro 10, but the GFX 50S is currently not supported. The company's official stance is to not comment on any future developments, but there is a history of non-Phase One medium format cameras not being officially supported in Capture One Pro. I'm hopeful the GFX will buck that trend. Other software I've tested, such as Alien Skin's Exposure X2 and ON1 Photo RAW, both support the GFX's .RAF files.
A deeper dive into the GFX 50S's image sensor
We've discussed the sensor in the GFX to some extent in our previous coverage, including in my first Field Test, but there is an aspect of the GFX sensor that I wanted to touch on further: ISO invariance. Just as a quick overview of ISO invariance, it essentially means that the noise levels in an image captured at say ISO 100 at -4 EV exposure compensation with its exposure increased by 4 EV during post-processing is the same as an image captured at ISO 1600 (4 stops higher than ISO 100) with 0 EV exposure compensation. Put another way, an image sensor with ISO invariance will produce, all else equal, identical images with a four-stop underexposed image at ISO 100 compared to a properly exposed image captured at ISO 1600 after equalizing the exposures. Not all cameras are ISO invariant, but it is generally a desirable trait as it means that you aren't punished for brightening an underexposed image during post-processing.
 |
100% crop of a processed RAW image captured at ISO 100 with -4 EV exposure compensation, then a
+4 EV exposure adjustment was added in Adobe Lightroom. Click for original image. Click here for RAW file. |
 |
100% crop of a processed (with Adobe Lightroom defaults) RAW image captured at ISO 1600 with 0 EV exposure compensation. Click for original image. Click here for RAW file. |
There is more to it though, because the native ISO range of the GFX 50S sensor is 100 to 12800, but the sensor's true analog range is 100 to 1600. Beyond ISO 1600, the camera inserts information into the metadata of the image file, which a RAW converter then uses to digitally brighten the image. Suppose you capture an image at ISO 3200, this is really an image with the same analog noise as an image captured at ISO 1600 with a stop's worth of digital noise added due to the metadata telling your RAW converter to brighten the image by one stop. You can see this fleshed out in the data at Photons to Photos -- where we see that the dynamic range bottoms out at ISO 1600 -- and by digging into test files in our Gallery. With no additional analog noise being introduced beyond ISO 1600, you can capture images at these "extended" ISOs without fear of losing dynamic range, as it remains the same through ISO 12800.
Sometimes cameras offer less dynamic range when using an electronic shutter, but that is not the case with the GFX 50S. In the two images below, both shot at ISO 100 with -5 EV exposure compensation, you can see that when the images have their exposures adjusted, they offer essentially identical quality.
 |
100% crop of a processed RAW image captured with the mechanical shutter at ISO 100 with -5 EV exposure compensation. +5 EV exposure adjustment added in Adobe Lightroom. Click for original image. Click here for RAW file. |
 |
100% crop of a processed RAW image captured with the electronic shutter at ISO 100 with -5 EV exposure compensation. +5 EV exposure adjustment added in Adobe Lightroom. Click for original image. Click here for RAW file. |
So we have seen that you aren't punished particularly for underexposing shots with the GFX 50S, but what happens if you overexpose? As is always the case, you don't have the same freedom to fix overexposure as you do underexposure, but the GFX still offers pretty good flexibility. An image captured with no exposure compensation at ISO 100 looks essentially the same as an image captured with +1 EV that has its exposure decreased by a stop during post-processing.
If you are using the GFX, it is likely because you want the ultimate in image quality. With that in mind, it makes sense to use it at the lowest possible ISO to capture the image you want. But it's amazing how much leeway you have when working with the GFX. I would feel comfortable shooting at ISO 1600, for example, and making a very large print from the file. When considering that the Fujifilm GFX 50S is a medium format camera, that's a striking capability. Further, the camera handles ISO increases very well and maintains a strong dynamic range through its entire native ISO range.
 |
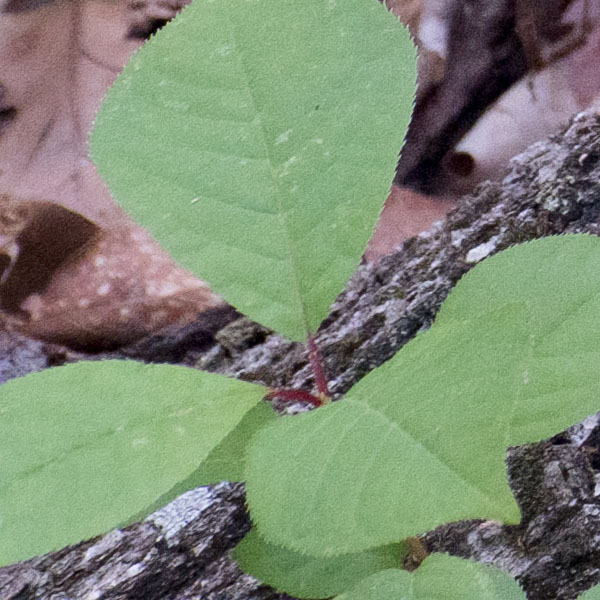
Fujinon GF 32-64mm f/4 R LM WR lens at 56mm (44mm equiv.), f/7.1, 1/250s, ISO 1250. Click here for RAW file. |
 |
100% crop of the RAW file of the image above processed with Adobe Lightroom defaults. Being able to capture such nice tonality and detail at ISO 1250 is very impressive. |
Remote Shooting: Controlling the GFX wirelessly & tethered
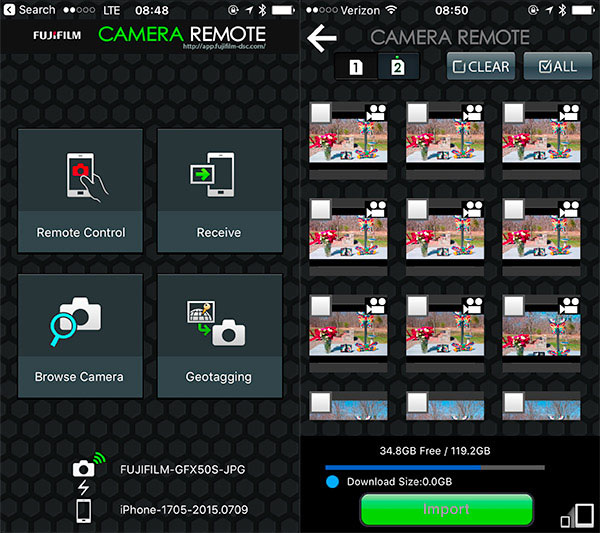
Like other Fujifilm cameras, the GFX has built-in Wi-Fi. This built-in wireless connectivity allows the GFX 50S to be connected to a compatible smart device. I used the GFX with my iPhone and tested its various wireless capabilities. Starting with the connection process, it is straightforward. Go to 'Wireless Communication' in the Shooting Setting 2 menu and press OK. On my phone, I went to the Wi-Fi settings and connected to my GFX's Wi-Fi signal. Once completed, I opened the Fujifilm Cam Remote app on my phone.
 |
|
Fujifilm Camera Remote
|
As you can see above, the app has remote control, image receiving, camera browsing and geotagging capabilities. When transferring images, it can take a fair bit of time in the app to scroll and select images. By default, images are transferred at a size of 3 megapixels, but you can change that. When I tried to transfer full-size images, the application disconnected however.
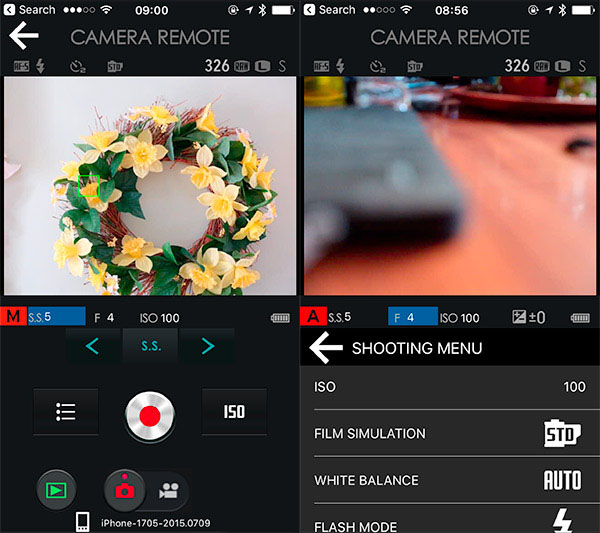
Remote control functionality works well and offers a decent amount of control over the camera. Although you cannot change any settings on the camera itself and have them register in the remote control app without disconnecting and reconnecting, you can change a fair amount of settings within the app, including: ISO, film simulation, white balance, flash mode and self-timer. You can change aperture, shutter speed and exposure compensation, as well, depending on the exposure mode you are using.
 |
|
Fujifilm Camera Remote
|
You can move the autofocus point around the screen and record either stills or video within the app. The live view on my phone was sharp and nearly real-time with a steady, fast refresh rate. The application works well and the performance is solid, although being able to change exposure mode in the app or having physical adjustments made on the camera appear in the app while connected would make it even better.
For this Field Test, I had the opportunity to test Fujifilm's Tether Shooting Plug-in PRO for Adobe Lightroom. The software costs around $80 and offers a lot of great features and functionality for tethered shooting through Lightroom.
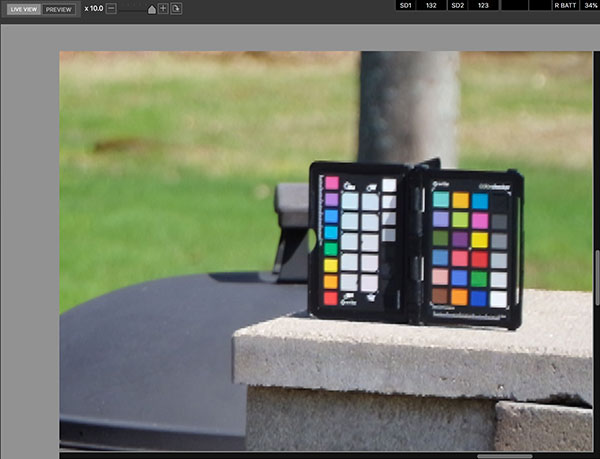
Once you have the plug-in installed and the camera plugged in, you can control the camera through your computer. In my case, I tested it with a MacBook Pro. The Live View quality is okay, although not high enough fidelity to allow for precise manual focusing through the software, in my opinion. Autofocus worked well, but the Focus Area function caused issues with the software. Checking the Focus Area box brings up a focus area overlay, but unchecking the box caused the software to slow down dramatically and crash a few times.
 |
|
10x zoom view within the the tethered shooting plug-in The live view quality is okay, but as you can see, it is not very sharp when zoomed in, meaning that dialing in manual focus via the plug-in is difficult.
|
You can make a lot of changes to camera settings through the plug-in, but you can also make changes on the camera itself and have them reflected in the plug-in by switching between PC and Camera tabs on the computer. It's a quick process to switch control from one to the other and back. You can change settings including image size, film simulation, focus mode, metering mode and much more. You can see the different shooting settings options below.
 |
|
Shooting settings view within the plug-in
|
Another aspect of shooting tethered that I really enjoyed was being able to move the cursor around the frame to get a real-time readout of different RGB values. The histogram in general is very nice when shooting tethered.
 |
|
The real-time RGB histogram readout is useful while shooting.
|
Even when the camera is set to specific values, such as f/11, 1/500s shutter speed, ISO 200, etc., you can still adjust them in the plug-in without needing to change anything on the camera, which is very convenient.
 |
|
You can adjust a lot of camera settings through the plug-in
|
There are some features missing from the tethered shooting plug-in that I'd like to see added at some point. I would like to be able to see what focal length the lens is currently set to within the plug-in When using different image area settings, it would be nice if the plug-in grayed out the area in the navigator that won't be captured with your selected image area settings. Right now it entirely blacks it out, but it would be nice to still have a sense of the full frame. The plug-in can be a bit sluggish, too. When changing basic settings such as exposure compensation, it takes a few seconds for the change to be reflected. In general, the software feels sluggish and it needs a bit more optimization, particularly with regards to the focus area crashing issue.
Overall, the tethered software works quite well and offers extensive control. Considering the cost of the camera, though, it would be nice to have software like this packaged with the camera.
Printing GFX images: At what point does its resolving power matter?
It is one thing to pixel peep test shots, and I think that this is the best way to make very objective, quantitative comparisons between cameras and lenses. It is another thing altogether to print images. There is something inherently subjective about print quality and sometimes subtleties can become apparent in a large print that would not have been obvious if you were looking at a dynamic range chart or reading off a table of numbers taken from rigorous testing. Ultimately cameras are tools used to make photographs, and there is no better way to view a photograph than a print, in my opinion.
To that end, printing is important to me and ultimately what I care about most is a camera's ability to help me make prints that I am proud to share with others. The brilliant sensor of the GFX 50S and the excellent Fujinon lenses combine to deliver phenomenal prints. While the resolving power is not apparent when making small prints, such as 11 x 14 or 16 x 20 inch prints, there is a special quality to images made with the GFX that are apparent at all print sizes. The resolving power of the 50-megapixel sensor is particularly noticeable when making big prints, such as 20 x 30 inches or larger.
Fujifilm GF lenses: A look at the present and future of the GFX system
It's obvious that the Fujifilm GFX sensor is incredible. The sensor is sharp, it performs remarkably well, and it can bring out the best in good glass. However, it's a double-edged sword because it can bring out the worst in bad glass. Having had the chance to test two of the three launch lenses with the GFX 50S, the GF 32-64mm f/4 and GF 63mm f/2.8, I can confidently say that Fujifilm is on the right track so far. The company is in the process of building a new camera system, and they have so far made the most of their opportunity. A 50-megapxiel sensor seems like a lot and is plenty of resolving power for many situations, but of course we know that megapixel count will increase and Fujifilm must future-proof their glass, much like Sony is doing with their G Master lens lineup. To that end, all GF lenses are being designed to work with sensors up to 100 megapixels, as Fuji states.
Needing to cover a large sensor than full-frame lenses do, it is unsurprising that GF lenses are rather large and expensive given their focal lengths. While $1,500 for a high-quality lens such as the GF 63mm f/2.8 doesn't seem out of line, considering it fills a similar role as a 50mm standard prime lens on a full-frame sensor, the price tag feels high. After all, a 50mm f/1.4 or f/1.8 lens costs well under $1,000 for a full-frame camera. Similarly, the GF 32-64mm f/4 lens is essentially a (less versatile and slower) 24-70mm f/2.8 sort of zoom, but it costs $2,300. While comparable to the retail prices for a Sony 24-70mm f/2.8 G Master lens or a Nikon 24-70mm f/2.8E lens, the GF 32-64 has less zoom range and is slower.
 |
|
The upcoming Fujinon 110mm f/2 lens.
|
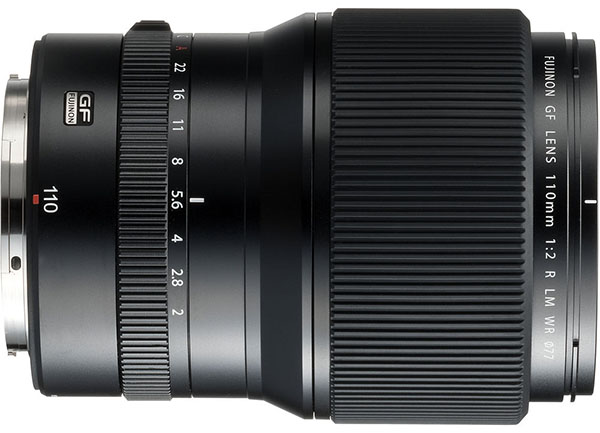
A better comparison would be to look at GF lenses versus Hasselblad lenses. The GF series of lenses look very affordable relative to the leaf shutter Hasselblad lenses. For example, the Hasselblad 120mm f/4 macro lens is around $5,800 versus the GF 120mm f/4 macro lens which costs $2,700. The Hasselblad 100mm f/2.2 lens is $4,470 compared to the upcoming Fujifilm GF 110mm f/2 lens, which fills a similar role, and will cost just under $2,800 despite being longer and faster. Granted, Hasselblad does have a medium format sensor in their system that is larger than the sensor found in the GFX, but nonetheless, they are both medium format camera systems and the price difference in lenses is stark.
What about Hasselblad's X system lenses to go with their new X1D mirrorless camera, a direct competitor to the GFX 50S considering it uses what is essentially the same sensor? The X series currently has no zoom lens to compare to the GF 32-64mm f/4, but it does have a 120mm f/3.5 macro lens coming out. That will retail for $4,495. That's a lot more money for a slightly faster optic (which is arguably not that relevant to macro photography).
Fujifilm's GF system is new, so it would be unfair to expect a dozen lenses to have been ready at launch. However, it is crucial that Fujifilm release lenses quickly for the GF system because the GFX 50S is not only competing against more expensive medium format cameras, such as the X1D and more traditional ones from Hasselblad and Phase One, but it's also competing against high-resolution full-frame cameras, which offer much wider selections of lenses than the GFX 50S.
 |
|
The upcoming Fujinon 23mm f/4 lens.
|
It certainly helps that in late June, Fujifilm will be releasing a new GF 23mm f/4 lens (18mm equivalent focal length) and GF 110mm f/2 lens (87mm equivalent), but the longest lens will still have a 35mm equivalent focal length under 100mm and fast glass options are limited, particularly with wide-angle lenses.
As of right now and including the pair of new lenses coming soon, the GFX 50S's biggest weakness is not its slow performance nor its unremarkable autofocus, but rather its lack of glass. Fujifilm is asking people to pay nearly $10,000 just to get into the GFX system. While that is a great price relative to other medium format cameras, it is not an easy sell when photographers can choose a high-resolution full-frame camera, such as the Canon 5DS R, Nikon D810, Pentax K-1 or Sony A7R II, which offer a lot more bang for the buck, vastly larger selections of high-quality lenses and only marginally weaker imaging performance.
- You can bring up a live color histogram when shooting by pressing the selected function button. I opted for the rear function button located above the 'Q' button.
- You can view a 3D electronic level by pressing its respective function button. This is not a default function, so it must be selected through the camera's settings.
- While opening the menu does not default to the prior-used menu selection, when you customize your "My Menu," the GFX will then default to that screen, providing immediate access to up to 15 selected settings.
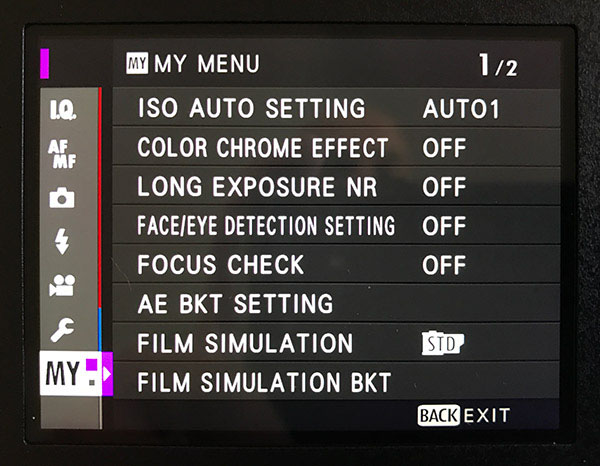 |
|
The My Menu on the Fujifilm GFX 50S.
|
- By default, AF-S is set to release priority rather than focus priority. I understand why this would be the case for AF-C, but for AF-S, focus priority makes more sense to me.
- You can set the self-timer to persist after powering off the camera.
- There is no way to have the focus distance saved after powering off the camera. This is the result of the focus-by-wire lenses rather than a function of the camera itself, but it is nonetheless annoying.
- When utilizing both card slots, you can choose to have stills and video files recorded to separate cards. This is available even when using the second card as a backup card.
- Setting function buttons is very easy on the GFX. You can hold the DISP/BACK button to bring up an interactive diagram showing all custom functions and customize assignments from there.
- If you have the camera set to record to two SD cards, the second as a backup for example, but only have one in the camera, it won't work. I haven't found a workaround yet except either changing the settings or putting the second card back in. Not big deal, really, but notable if you want to change your workflow up on the fly.
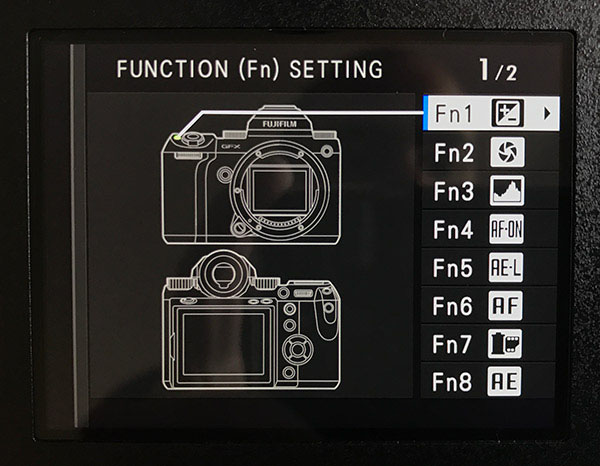 |
|
The menu for assigning custom functions on the Fujifilm GFX 50S.
|
Fujifilm GFX Field Test Part III Summary
The GFX 50S is an impressive camera system with room to grow
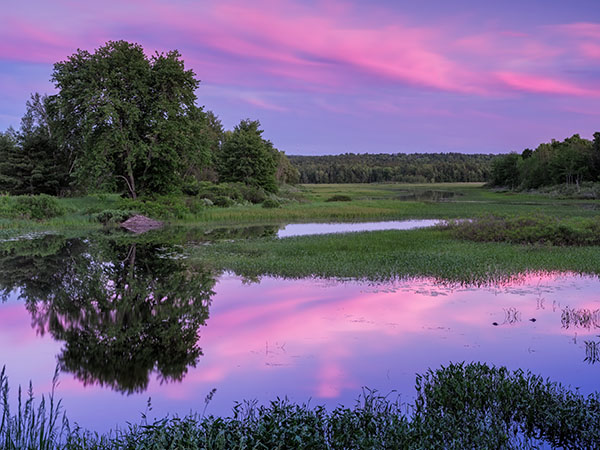 |
Fujinon GF 32-64mm f/4 R LM WR lens at 59mm (46mm equiv.), f/13, 20s, ISO 100. This image has been modified. Click for original image. Click here for RAW file. |
What I like:
- Decent in-camera RAW processing
- Very flexible when processing RAW files
- New Color Chrome Effect is subtle, but excellent
- Tethered shooting is generally a good experience
- Impressive GF lenses
What I dislike:
- Tethered software has some bugs to work out
- While the glass is good, the current selection is sparse
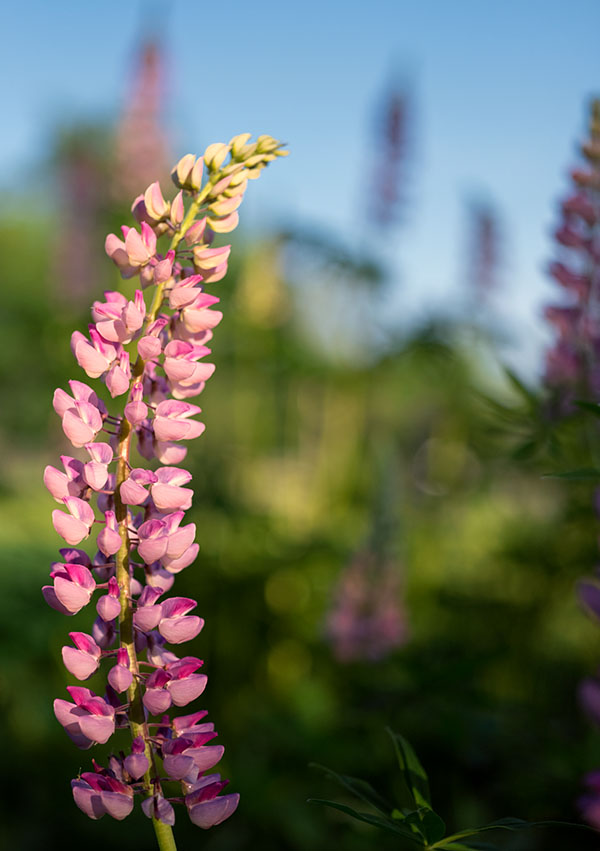 |
Fujinon GF 63mm f/2.8 R WR lens at 63mm (50mm equiv.), f/2.8, 1/4000s, ISO 800. This image has been modified. Click for original image. Click here for RAW file. |
The Fujifilm GFX system is young, and there will likely be firmware updates to work out some of its quirks. The selection of native lenses is not vast and no firmware can fix that, but Fujifilm appears dedicated to the GF system, not just now, but for the future as well. If you buy a GFX 50S, you're not really buying one camera, you're buying into a system which you expect will grow and mature over time.
When using the camera, it already feels like it's the result of years of development and prior product releases, it genuinely feels polished. When your lens of choice isn't perfect for the shot you're capturing and you start to look for alternatives, the reality of the newness of the GFX sets in, however. Fujifilm is hard at work developing more glass for the camera, and I look forward to seeing what Fujifilm does with the GF system because it shows a lot of promise.
Who is the GFX 50S suited for currently? Landscape photographers, for sure, because the GF 32-64mm is fantastic and the upcoming GF 23mm f/4 should be as well. Portrait photographers should also consider the GFX 50S, especially with the GF 110mm f/2 lens on the horizon. Wedding photographers could make use of it as well, although I question the capabilities of the GFX autofocus system to handle candid or fast-paced situations. If action or sports photography is important to you, the GFX 50S would not be a good choice, though I wonder if any medium format camera ever would be.
 |
Fujinon GF 63mm f/2.8 R WR lens at 63mm (50mm equiv.), f/2.8, 1/25s, ISO 100. This image has been modified. Click for original image. Click here for RAW file. |
 Fujifilm GFX 50S Review
 Fujifilm X-T3 Review
 Olympus E-M5 III Review

Follow Imaging Resource