Nikon D7200 Field Test Part II
High ISO, long exposure and a smorgasbord of movie goodness!
By Mike Tomkins | Posted: 08/28/2015
In the first part of my Nikon D7200 Field Test, I found much to love in this rugged, enthusiast-grade DSLR. Its weather-sealed body might come with a bit of a learning curve due to its extremely generous array of controls, but after a while becomes second nature, and helps keep your attention focused on your subject.
And while I found its Wi-Fi wireless networking connectivity a little rough around the edges, and missed the presence of any articulation mechanism for the D7200's monitor, I felt it was otherwise a camera that's a whole lot of fun to shoot with. And the results spoke for themselves: On a spur-of-the-moment trip to Lexington, Kentucky, I got a whole raft of photos that I was very happy with.
Exposure and white balance were accurate, and colors convincing. And there was detail by the boatload, just as you'd expect from its 24-megapixel image sensor. But that was all in the daytime: I still had quite a bit more testing to do before I drew any final conclusions.
Running down my To-Do list
For my second Field Test, I wanted to take the Nikon D7200 out for a late afternoon / evening shoot, and with nearby downtown Knoxville beckoning, that's just what I did earlier this week. Top of my list to check was the D7200's movie-recording chops, as Nikon has beefed up its feature set quite substantially in this area. And I also wanted to see how still image quality fared once the sun set, both for high sensitivity and long-exposure captures.
Perhaps most of all, though, I was excited to try out the D7200's updated time-lapse mode, which now features an exposure smoothing function. I've been on a bit of a time-lapse kick lately, and this new addition seemed pretty much ideal for recording the transition from day to night. I'd been meaning to do just that in Knoxville's World's Fair Park for a while now, as I think it makes for a rather pretty transition as the sun sets and the lights come on. Doubly so with Knoxville's iconic Sunsphere standing in the foreground, crowned by its golden sphere reflecting the warmth of the last few sunrays.
Choosing the right angle
And so it was here I started my shooting, scouting around downtown for a good angle about an hour before sunset. To help out, I had one of my favorite Android apps on hand: Adam Ratana's excellent Sun Surveyor Lite. (I've been meaning to try out the payware version, but this wasn't the day for it as I was running a bit behind schedule. iOS users, too, can get both the free and paid apps on their platform, incidentally.)
Initially, I was planning to try and catch the sunset right behind the Sunsphere, and Sun Surveyor let me figure out right where and when it was going to take place. As it transpired, though, I couldn't find an angle I liked, mostly because of the rather curious decision to build the Sunsphere in a slight depression that's surrounded by higher ground, way back when Knoxville was preparing to host the 1982 World's Fair. And for a change, I actually found myself hoping for a cloud or two with which to give the scene a bit more motion and excitement in time-lapse, but the sky was clear in that direction.
And so, instead, I set up down in World's Fair Park itself, shooting pretty much at right-angles to the sunset. I ended up choosing my position about 20 minutes before the sun was set to make its exit, stage right, and that gave me just enough time to shoot a few trial time-lapses to make sure I was fully prepared.
Click to download the original file |
Exposure smoothing isn't infallible, but definitely helps
And it's a good thing I did, because I very quickly made a discovery: Nikon's new exposure smoothing function is no panacea, by any means. Even when enabled, you can still get some very noticeably flickering in your videos, as you'll see in the clip above.
By the time I'd realized this was going to prove to be an issue, I only had limited time left before I wanted to start my time-lapse, so I went with the first thing that seemed to improve the situation: Switching to a longer two-second interval instead of my original one second.
Click to download the original file |
That did largely resolve the problem, leaving only relatively minimal flicker towards the end of an otherwise very nice result in my final video. I'm not quite sure why that would be, though. The metering mode was set to matrix, and although I was shooting in program mode, two exposures of an essentially identical scene just a second apart shouldn't yield significantly different exposures.
Be that as it may, though, the exposure smoothing function is certainly still very useful for evening out longer changes in scene brightness that you get in day/night transitions, as weather rolls through, and so on.
 |
|
Higher frame-rate 60p video definitely shows less stutter
Another of the new video-mode features of the Nikon D7200 is the ability to record Full HD video at 60 frames per second. There's a proviso, though -- you have to opt for a 1.3x focal length crop, making wide-angle video a bit more challenging.
But if you're shooting far-away subjects, that little extra crop can actually be a good thing. And honestly, a 1.3x crop isn't really as much as it might sound like, as you can see in the side-by-side comparison below, shot from the same location and at the same lens focal length.
Click to download the original DX-format clip or 1.3x crop clip |
And if you want smoother, less stuttery motion in your video, shooting at 60p can help. I'm personally a big fan of higher frame-rate video, as I find that it gives a more natural feel to things, but I know that not everyone agrees. (Some complain that it gives the video a "soap opera" look, and I can certainly understand what they mean. If you've grown accustomed to a more movie-like 24 frames per second, even 60p can seem too smooth initially.)
It's a bit tricky to compare the two videos above for their smoothness, though, since they have different effective focal lengths. For that reason, I shot another comparison showing 30p vs. 60p video, this time using the same 1.3x crop mode for both clips. (And it's handy to know that the crop mode is there, should you not favor the extra frame rate but still want to bring your subject closer than your lenses alone will allow.)
Click to download the 30p clip or 60p clip |
Auto ISO puts the control in your hands
Another new addition to the Nikon D7200's video feature set is auto ISO sensitivity. This is particularly handy because it allows you to set both your frame rate and aperture, and still have the camera keep your exposure at the right level by ramping sensitivity as needed. In the clip below, the D7200 opted for a sensitivity around ISO 500-equivalent at the start, but as I panned towards a brighter subject, this dropped back down to ISO 100 equivalent, all without changing my shutter speed or aperture.
Click to download the original file |
Full-time autofocus is pretty obtrusive, but likely good enough for consumers
Full-time autofocus isn't new to the Nikon D7200's movie mode, but I consider it a pretty important checklist item for consumer use. It's pretty commonplace now, but implementations vary wildly: Some cameras offer very usable AF during movie capture (particularly mirrorless models), while others are much more limited in this area.
I'd have to put the Nikon D7200 into the latter group, after having spent some time playing with full-time AF as I was shooting movies around downtown Knoxville. The function is there, certainly, and it works fairly well. The problem is that it's very obtrusive -- you're not going to get results reminiscent of a pro pulling focus manually, or even close to it.
Click to download the original file |
Since it is using solely contrast-detection to determine the point of focus, the D7200 can take quite a while to notice that your subject distance has changed, noticeably hunt around the point of focus, and even set off in completely the wrong direction initially. And when the focus change happens, it's very swift. That's something of a mixed blessing, because it helps get your subject back in focus sooner, but makes the change in focus all the more obvious as it's happening.
I think enthusiasts and pros will almost certainly favor pulling focus manually -- which you can, of course, still do -- or simply maximizing depth of field and setting up their shots to avoid focus changes during each scene. For consumers, though, the Nikon D7200's full-time autofocus is certainly still better than nothing, as pulling focus manually is a difficult art to master. If you're planning on shooting a lot of video and want responsive yet unobtrusive AF adjustment, though, you'd probably do better to consider a different camera.
 |
|
No focus peaking, but zebra stripes are handy
Unfortunately, if you do opt to pull focus manually, you'll have to rely on the live view feed to judge whether things are in focus without any assistance. You can use a magnification function to set things up before you start recording, but not once capture is underway. Nor is there a focus peaking function, sadly.
There's a nice new addition if you want manual exposure control, though. Admittedly, it's a little bit hidden, accessible only under the i-menu, but the Nikon D7200's new highlight display function makes it easy to spot overexposed areas within your scene. (And this function, unlike the focus magnification, can be turned on or off during movie capture. That means it's not a distraction, but there when you need it.)
More commonly known as "zebra stripes", what this function does is to simply fill any clipped highlights in your scene with a fine pattern of diagonal black and white stripes. Once I figured out how to enable it, I found it pretty handy.
Aperture can't be adjusted in movie mode if live view is active
Something which had me scratching my head, though, was Nikon's decision to prevent aperture adjustment when movie live view mode is active. I can understand not allowing this function if movie capture was underway, as changing the aperture causes a brief but very obvious change in scene brightness, even if you're using program or priority exposure, or have auto ISO enabled.
 |
|
But not allowing it prior to capture makes little sense to me, because it puts extra hurdles in the way of your aperture adjustment. And there's no technical reason not to allow access to the function -- after all, you can change the aperture while the live view is active if you're in still image live view mode. (And indeed, that's the quickest way to change your aperture and preview the effect for movie shooting: Switch to still image live view, dial in your desired aperture, and then switch back to movie live view.)
This behavior, frankly, needs to change. Sure, you probably won't change aperture that often in movie mode, but there's no good reason to force that jump to still image live view mode. It's an unintuitive design that will leave new D7200 users baffled, asking themselves "I'm in manual mode. Why on earth can't I change the aperture?"
Click to download the original DX-format 30p, 1.3x crop 60p or 1.3x crop 30p files. |
Good video quality at night, too
And that leaves just one more item on my video checklist for this Field Test: Low-light image quality. The clips above pretty much speak for themselves, but briefly, I thought video quality was pretty good even after dark under typical city street lighting. Enabling the 1.3x focal length crop did introduce a little bit more flickering around finer details, but noise levels were fairly low, and sharpness good.
It's time for some stills
With all of my video shooting out of the way, it was time for some stills. Actually, a little beyond time for them, as my decision to shoot an hour-long timelapse meant that I was rapidly running out of light. I decided to focus mainly on long exposures to make good of what remaining light I had, and then come back the following night for some high-sensitivity shooting.
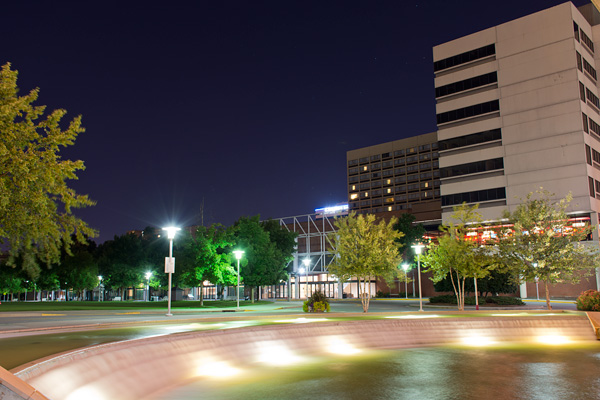
Fortunately, even though downtown Knoxville is pretty quiet on a Monday evening, there was plenty of motion nearby courtesy of the landscaping of World's Fair Park, which includes a large splash pad, lake with fountains and a simulated mountain stream. All of these struck me as interesting long-exposure subjects, so I started from where I'd shot my long-exposure scene by the splash pad, and worked my way down the park, setting up my tripod for shot after shot at base ISO and with the aperture stopped down some to help blur out all the moving water.
 |
Raw image converted to DNG, exposure and tone curve tweaked slightly. Click to see unedited original. |
The virtual horizon is accurate, but well-hidden
My very first shot at the splash pad was an early favorite, even if I forgot to reenable exposure bracketing after I got done with my movie shoot. (The time-lapse photography function can't be accessed if exposure bracketing is switched on, even though that function clearly has no relation to time-lapse shooting.)
It did teach me a lesson, though: Rely on the D7200's own built-in electronic level gauge, rather than the bubble level on my tripod head. The latter looked to be pretty-much perfectly centered, but the shot's clearly off by half a degree or so. Right out of the box, the level gauge on the D7200 is more accurate than my tripod, apparently. By default, the virtual horizon function is hidden away somewhat, though.
You have a choice of either shooting in live-view mode (where the horizon display is one of the optional overlays on the live view feed), or you can view it in the viewfinder. To do the latter, though, you have to enable it as the function assigned to either the function or preview buttons, through the custom settings menu. There's no way to enable a virtual horizon display on the main LCD when you're not in live view mode, unfortunately.
 |
Raw image converted to DNG, exposure and tone curve tweaked slightly. Click to see unedited original. |
Good results from the kit lens, although with some distortion
Moving on towards the World's Fair Park lake, I stopped for another shot that caught the brightly-lit cascade of water which is pumped back up from the end of the "stream" at the bottom of the park. Again, I've tweaked the exposure above a little to try and bring back some of the color to the sky, but you can see the unedited original in the gallery.
The Nikon D7200's kit lens did a pretty good job, I thought, picking up plenty of detail. And for this shot at least, I hit the sweet spot on distortion as well. (You'll notice more distortion in some of my other gallery shots.) Somewhere around the 22mm focal length used here, this optic switches from the barrel distortion exhibited at wide angle to the more complex pincushion / mustache distortion seen at focal lengths above 24mm. You'll find more on that in our review of the 18-140mm kit lens at our sister site, SLRgear.com.
 |
Raw image converted to DNG, exposure and tone curve tweaked slightly. Click to see unedited original. |
Twilight comes to its end
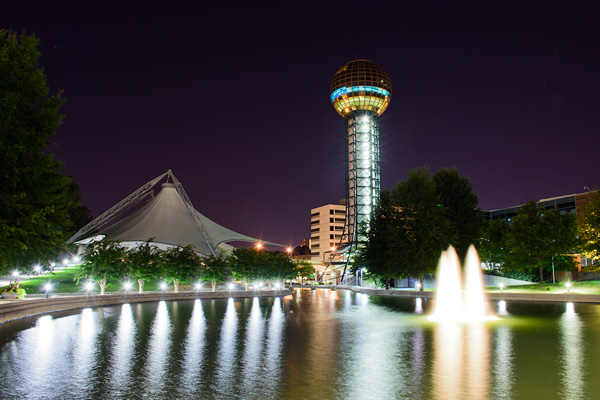
The long-exposure shot I really wanted to get, though, was one of the Sunsphere with a fountain in the foreground. I wanted to shoot it as a portrait-orientation shot, framing in fairly tightly, but I'd not thought about that when selecting my tripod. The video head was great for the panning night videos I needed to get, but it didn't allow for shooting in portrait orientation -- at least, not without mounting the camera sideways.
With my light fast disappearing, I didn't feel like fumbling to reconfigure everything, so I opted for the shot above with the amphitheater at left balancing out the fountain at right. As you can see in the original shot, the sky was almost black by this point. (Well, to the naked eye it was completely black, actually.) A long exposure and processing the raw file was enough to bring back at least some of the late twilight color, though.
 |
Raw image converted to DNG, exposure and tone curve tweaked slightly. Click to see unedited original. |
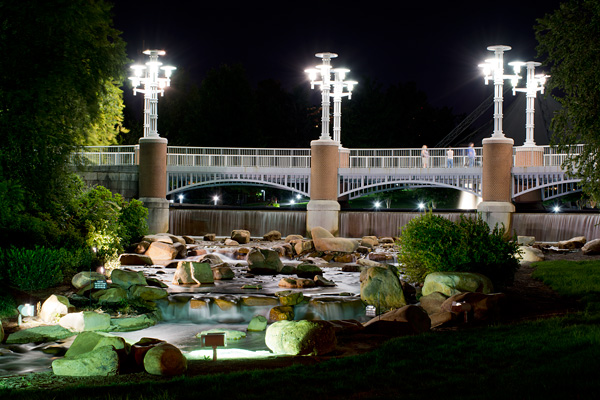
With the light now basically gone, I headed down to the main road at the bottom of the stream for one last shot, looking up towards one of the pedestrian bridges in the park itself. Here, you can see a bit more of that kit lens distortion which I was referring to earlier, at least if you look at the original image out of the camera. I'll admit that I've never put a spirit level on it, but that handrail doesn't wave up and down from one end to the other -- it's pretty much level. Still, for a reasonably affordable kit lens (it only adds $500 to the list price), this isn't too bad, and the distortion is relatively easily-tamed in Photoshop or your image editor of choice.
As it happened, some people happened onto the bridge right as I set up my shot. They stopped to admire the view, and I quickly tripped the shutter, hoping they'd stay still long enough to outlast the 10-second exposure I'd dialed in, plus a two-second self-timer to give the tripod a moment to settle. And at least one of them did. (Thank you, random stranger, whomever you are!) Not that they're really prominent enough in the shot to catch your attention, but I think their presence still adds a little something.
 |
|
Back once more for a final gallery shoot
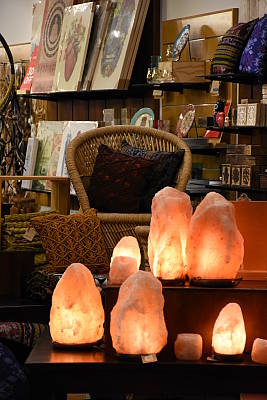
With the light gone and downtown so empty, I figured there wasn't too much point hanging around, so after a handful of high ISO shots, I headed back home. The following night, I returned for the rest of my gallery -- and do check the Nikon D7200 gallery, because you'll find a good couple of dozen high ISO shots at a wide range of sensitivities amongst its number. I've only room enough to sprinkle a handful through this page, so you'll miss out unless you follow the link...
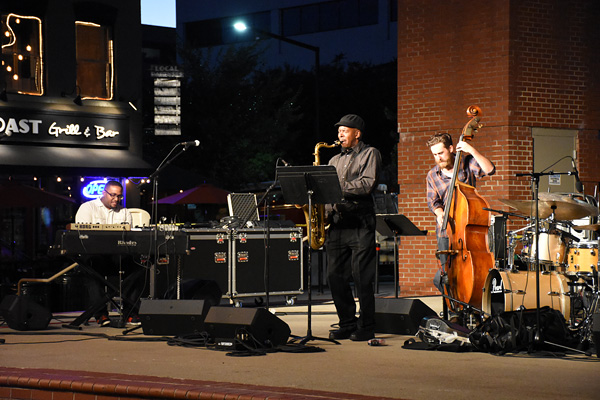
Returning on a Tuesday -- and starting from right at sunset -- Knoxville's Market Square was a lot busier, packed with locals watching a free live jazz show. I wanted to get a shot looking towards the crowd from behind the band, as you can get backstage of the pavilion pretty easily at these shows. With quite a bit of gear in the way, though, I had to get the camera pretty high above my head to frame the shot, and once again found myself wishing for an articulated LCD.
That meant I didn't get quite the framing I was looking for, as I could barely see the LCD screen. (In fact, I had to take the shot several times just to get one which was level.) That said, though, noise levels were pretty decent for a shot at ISO 9000. It never ceases to amaze me how far we've come -- and how much we take high ISO for granted -- since my film days...
 |
Raw image converted to DNG, exposure and white balance tweaked slightly. Click to see unedited original. |
Noise reduction can be slightly heavy-handed
While noise levels were good, I did think the default noise reduction was a bit on the heavy-handed side, though. And at higher sensitivities, color saturation was a bit on the low side. The white balance also struggled quite a bit with the harsh lighting used in Market Square, but that's true of pretty-much every camera I've shot there with, so don't hold it against the D7200 too much -- I certainly don't.
 |
Raw image converted to DNG, exposure and white balance tweaked slightly. Click to see unedited original. |
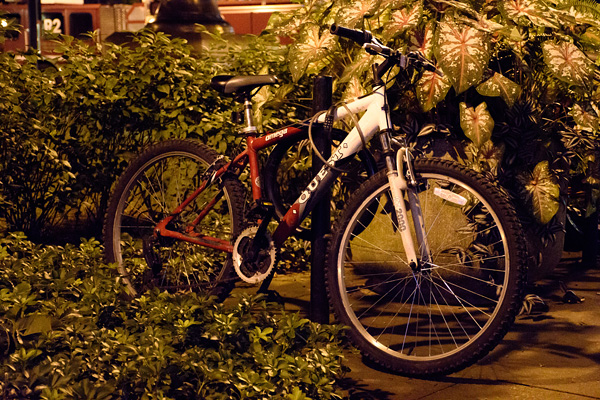
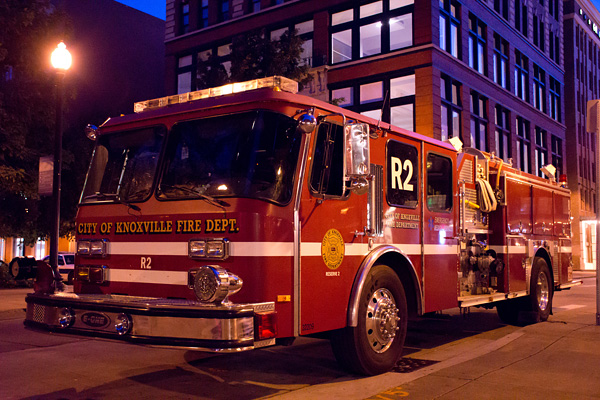
I found I was happier with the high ISO results if I worked from raw, though, and used less agressive noise reduction that I'd tweaked to the particular shot. Take, for example, the shot above of a fire engine alongside Market Square. In the image above, I've tweaked white balance and saturation from a DNG-converted raw, and manually tuned the noise reduction to my tastes.
 |
 |
|
|
Sure, there's more noise visible in the 100% crops above, but it's reasonably tight and film-like I think, and certainly within the realms of reason for a shot at ISO 12,800. And there's definitely noticeably more detail, especially in the fire hydrant and ladder pictures on the badge, as well as the smaller fonts towards the center of the badge.
You can get more detail out of raw images
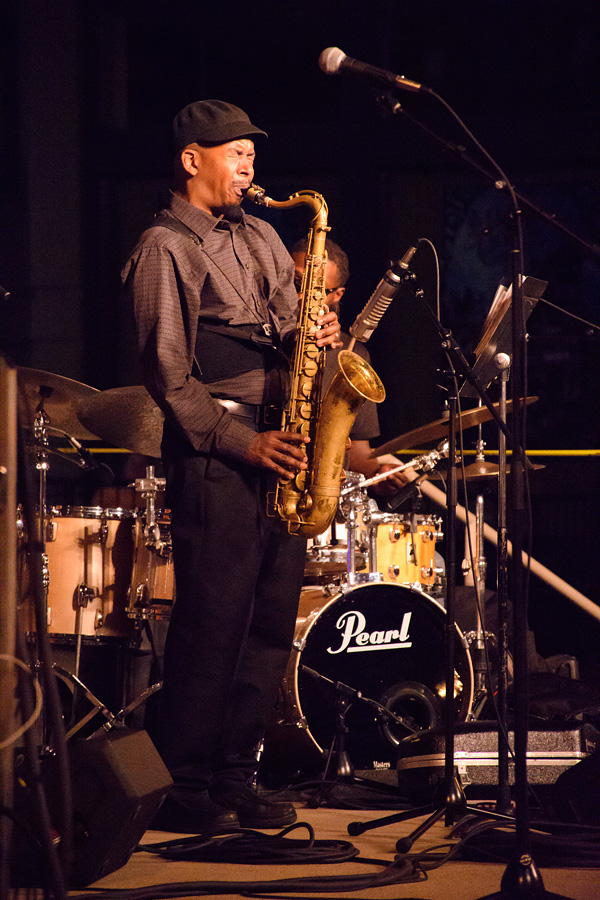
That difference stood out for me even more in the picture below, a shot of one of the jazz band members performing for the crowd. Here, I've also tweaked the tone curve a little, bringing back some of the blown highlights in the saxophonist's face. The biggest difference, though, is my handling of the noise. First, let's take a look at the full image...
 |
Raw image converted to DNG; exposure and white balance tweaked slightly. Click to see unedited original. |
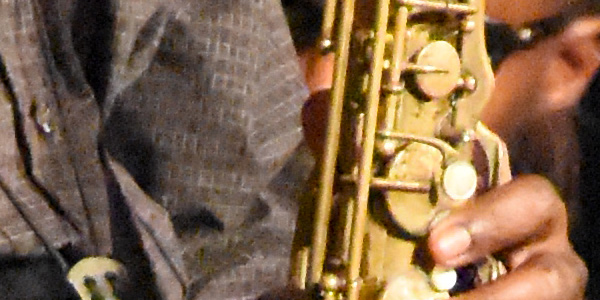
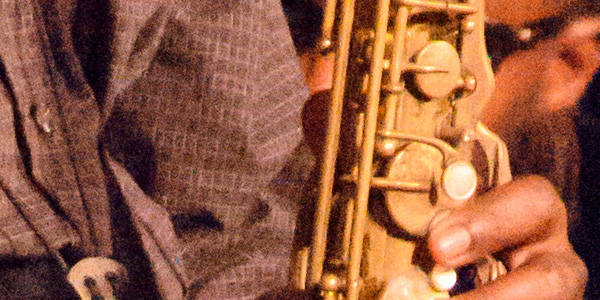
Here, there are a couple of crops I find particularly telling. The Nikon D7200's noise reduction has some difficulty with the fine pattern in the saxophonist's shirt, as you can see below:
 |
 |
|
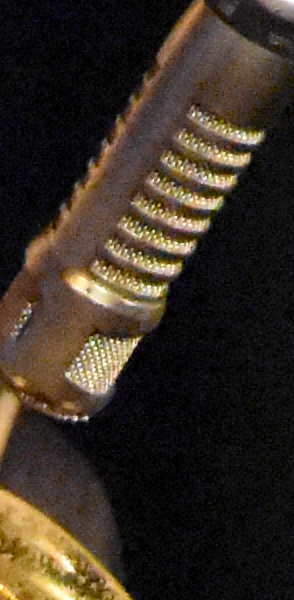
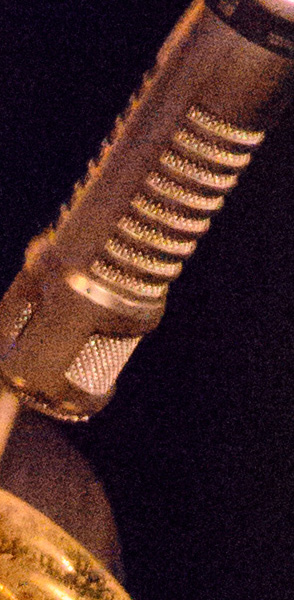
And another area where you can see a quite noticeable difference is in the microphone, where fine lines in the grilles are obscured by the D7200's noise-processing algorithms.
 |
 |
|
|
With all of this said, it's not unusual to find a bit more detail on offer in raw files, and whether it's actually useful will depend on the size at which you're printing or displaying, as well as your tolerance for a greater level of visible noise. I could certainly have dialed up the noise reduction a bit more, and there would still likely have been a bit more detail than in the out-of-camera JPEGs, but not as significant as the difference that we see here.
Closing thoughts
And that concludes my second and final field test with the Nikon D7200. I've had a lot of fun with this enthusiast-grade shooter, and while there are certainly some things I'd change -- key among them being the lack of an articulated LCD monitor and better Wi-Fi -- I think there's a whole lot to recommend it, especially if you're already a Nikonian shooting an entry-level or older enthusiast-grade camera and looking for a replacement with plenty of room to grow.
If you're primarily a video shooter, you'd probably do well to consider other options, but as a still camera, you're getting a whole lot for the Nikon D7200's reasonably affordable price-tag!
- Fujifilm GFX 50S Review
 Fujifilm X-T3 Review
 Olympus E-M5 III Review

Follow Imaging Resource