Panasonic GM1 Review - Field Test addendum
WiFi, crazy speed, handheld night shots
Posted: 02/12/2014
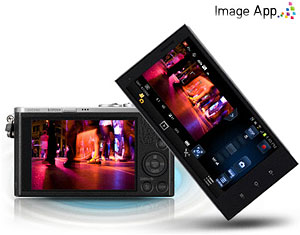
Wi-Fi. The GM1's Wi-Fi capabilities are quite robust and useful, not to mention fairly straight forward to setup, though it can be a little quirky. Like many other recent Wi-Fi-enabled cameras, the GM1 uses a companion app -- in this case called "Image App" -- on your smart device (iOS and Android only) not only for remote live view, sharing and remote control, but also for GPS location tagging, as the GM1 itself does not have a GPS module built in.
The process for setting this up was fairly straightforward: turn on Wi-Fi mode, which by default is conveniently assigned to the Fn1 button on the top of the camera, and the follow the on-screen instructions. You can connect directly to the GM1's own Wi-Fi network or connect through your home or office wireless network. Like with other cameras I've used and tested, setting up Wi-Fi is a bit of a back and forth process: enable Wi-Fi on the camera, go to smart device and change the Wi-Fi network to the camera's, then hope the camera sees the connection, close Settings and open Image App, then wait for the device to pair. (Note that the GM1 does not support NFC, but neither does my iPhone.) On my first try, everything worked perfectly, but later on, I ran into some inexplicable issue where my iPhone and the GM1 just didn't want to connect. After a couple tries, including a forced quit of the app and power cycle of the camera, the problem was resolved.
Once it's all good-to-go, the app works great and is very full-featured. Other than the inability to change exposure modes like P, A, S, or M, as those are manually controlled with a dial, you basically have full control over the camera via the app for both stills and video. You have a live view of the screen as well as the ability to change things like aperture, shutter speed, ISO and exposure compensation (depending on the exposure mode). You can also adjust the focus point simply by tapping on the area of the frame -- just like on the LCD of the GM1 -- and it even works during video recording! There's also a magnified view with focus peaking, when you adjust focus (peaking is not shown on the app during video recording, however).
The GPS tagging feature is a bit on the convoluted side, unfortunately. You'll need to start the app and enable GPS logging, then go take some photos (with the app or not -- works either way), then go back and connect the app to the camera, and use the app to send location data to the camera. Then, on the camera, go into the playback mode settings and choose "Location Logging" to apply the appropriate location data to this recent batch of images. Whew.
However, once the initial batch of images have been tagged with location data, and you go back to shooting photos, you can't add location data again to these newer photos without first reconnecting to the app to send new location data over to the camera. To me, that's all a bit too much hassle just to have some geotags added to my photos.
Overall, despite some quirks here and there with connecting the app to the camera and the strangely complicated GPS tagging process, the GM1's Wi-Fi capabilities are robust and very useful. Having the ability to remotely control such a tiny camera like this could make for some very interesting images and videos. The GM1 could be put in some very small or unique places that would be impossible for a larger DSLR or video camera.
Ludicrous Speed. For fans of fast action, the GM1 carries over the GX7's Super High Speed burst mode. In this setting, the camera will capture a blazingly-fast 40 frames per second! In-camera, the images are strung together into a frame-by-frame image sequence, but you can see the individual images when hooking the camera or memory card up to a computer. This mode certainly has its limitations: no continuous AF (your subject's distance better not change), no RAW, and only 4MP JPEG images. However, if you want to capture say a runner passing by, the pitcher at a baseball game or a racecar, enable Super High Speed burst mode and dial down your aperture for a nice deep depth of field and fire away. Also, the sound the GM1 makes in this mode is absolutely bonkers -- like a machine gun!
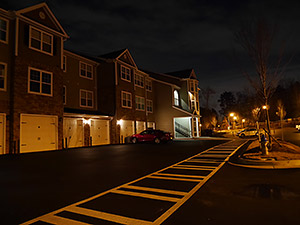
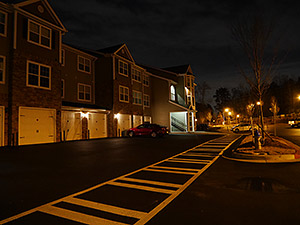
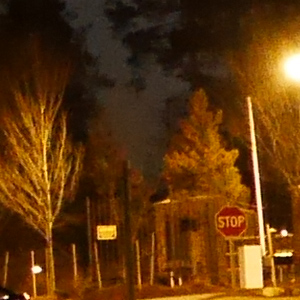
Handheld Nite Shot. A new feature for the Panasonic GM1 is a multi-shot low-light mode called Handheld Nite Shot, which combines a burst of 6 photos for a low-noise low-light shot without the need for a tripod. Typically, to shoot in very low-light situations, a longer shutter speed and a tripod are needed to get an acceptable exposure. Otherwise, you're left with cranking the ISO sensitivity up and the result is a noisier image. With Handheld Night Mode, the 6-shot burst is combined in-camera to reduce high ISO noise. Note: some cropping to the image will occur in the frame aligning process.
I tested this out by shooting a night scene in standard Program Auto mode (with a tripod) and comparing it to the Handheld Nite Shot scene mode, as well as the "iHandheld Nite Shot" option from the Intelligent Auto mode. (Based on a side-by-side look at Handheld Nite Shot vs iHandheld, my take is that it's the same algorithm and processing, but simply activated -- when enabled in the menu -- in Intelligent Auto mode when the camera determines you're trying to shoot a night scene.)
Check out the comparison photos in the table below:
Panasonic GM1 Handheld Nite Shot mode |
|
 |
 |
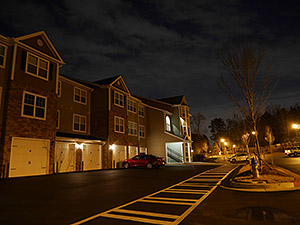
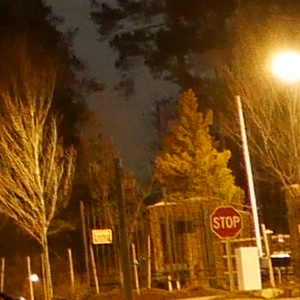
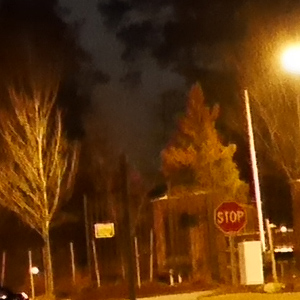
Program Auto (on tripod) |
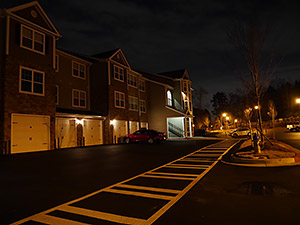
Handheld Nite Shot Scene Mode (handheld) |
 |
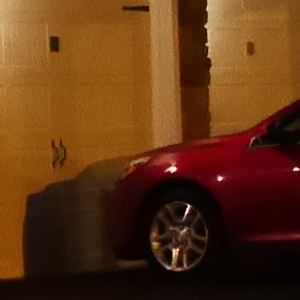 |
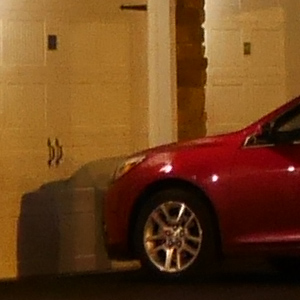
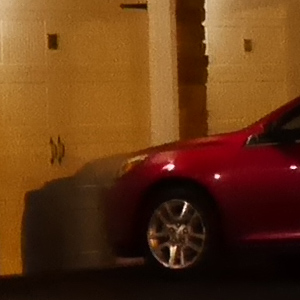
Program Auto (100% crop) |
Handheld Nite Shot (100% crop) |
 |
 |
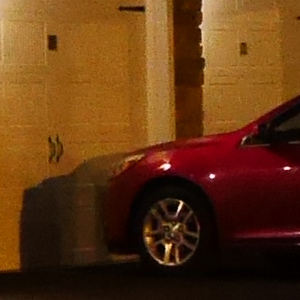
Program Auto (100% crop) |
Handheld Nite Shot (100% crop) |
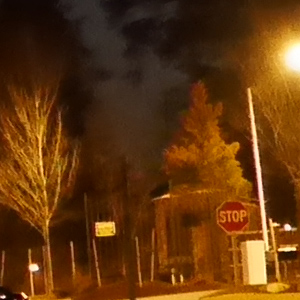
You can see that the standard Program Auto tripod shot produces noticeably more fine detail, as well as retaining more shadow detail compared to the Handheld Nite Shot. The GM1's Auto ISO system picked ISO 1600 in Program mode, whereas it chose a whopping ISO 5000 for the Handheld Nite Shot in order to avoid camera shake in such a dark scene. The lack of fine detail is further reduced due to the multi-shot nature of this mode. It happened to be a bit windy when I took this shot, so tree branches and leaves moved from shot-to-shot and were blurred somewhat in the multi-shot combining process. I found the 6-shot burst to be slower than I would have preferred, which I later found out was due to the camera defaulting to the Electronic Front Curtain shutter type. If there are moving objects in the scene while the 6 shots are being captured, there can be blurring when the camera combines each frame into a single image. Switching over to all-electronic shutter, I was able to get the full 10fps burst speed. However, in terms of reducing noise, the Handheld Nite Shot modes did great. Compared to the Program Auto shot above, you can see that the level of visible grain is quite similar despite one being at ISO 1600 and the other at ISO 5000. Even in the comparison below between a standard single-shot Intelligent Auto (ISO 3200) and multi-shot Intelligent Auto night mode image (ISO 6400), the single-shot image shows much more noise, although it also shows more fine detail. |
|
 |
 |
Intelligent Auto (iA) (iHandheld Nite Shot on, handheld) |
Intelligent Auto (iA) (iHandheld Nite Shot Off, handheld) |
 |
 |
iA (iHandheld Nite Shot on) - 100% crop |
iA (iHandheld Nite Shot off) - 100% crop |
 |
 |
iA (iHandheld Nite Shot on) - 100% crop |
iA (iHandheld Nite Shot off) - 100% crop |
Bottom line: if you find yourself out at night and the mood to snap a cool night landscape shot strikes you, but you forgot your tripod, the Handheld Nite Shot mode works well and produces very acceptable results. |
|
 Fujifilm GFX 50S Review
 Fujifilm X-T3 Review
 Olympus E-M5 III Review

Follow Imaging Resource