FOR STILLS & VIDEO
DFT's Film Stocks Brings
Analog Charm to Digital Images
By MIKE PASINI
Editor
The Imaging Resource Digital Photography Newsletter
Review Date: September 2012
If you'd like to apply a film look to your images to distinguish them from the perfection of digital captures (we say with tongue-in-cheek), you've got a lot of choices these days.
In addition to DxO FilmPack (which we recently reviewed), and AlienSkin Exposure 4 (which we are testing), Digital Film Tools has a product, Film Stocks, for either stills or video.
Digital Film Tools has won three Emmy Awards for its expertise in special effects in feature films, commercials and television shows but what its Film Stocks plug-in really wants to do is make your images winners.
We've had occasion to chat with President Marco Paolini at trade shows, getting demos on the company's inriguing products and making ourselves a note to review some of them. And we did recently review its iPad app Tiffen Photo fx Ultra, which we thoroughly enjoyed.
But before we installed its big brother Dfx, we had a more pressing creative task we thought Film Stocks might help with.
We've recently fallen in love with taking Micro Four-Thirds digital images with our old (30 years old) film lenses. And our latest crush is shooting with our venerable Vivitar Series I 70-210mm macro zoom mounted to on an Olympus E-PL1 micro 4/3 digicam using a Lensbaby Tilt Transformer.
There are two things we really like about this package.
First, the telephoto range is spectacular. The 2x crop factor of the E-PL1 means we're shooting with a 140-420mm zoom. And just to make the package sweeter, the E-PL1 has body-based image stabilization, so the Nikon-mount Vivitar enjoys something it never had on any of our Nikon bodies, film or digital.
Second, the Vivitar is a macro lens, too, focusing almost right to the front element or a few feet away, depending on the zoom barrel's position. So we can get some very intimate shots. Which are, again, aided by image stabilization.
The Tilt Transformer fits the Nikon-mount lens to the E-PL1 body. But it also tilts, shifting focus. For the most part, we leave it tightened down in the straight-ahead position, which does not shift focus. But focus is another option to consider with this arrangement.
We set the E-PL1 to Aperture Priority mode, let it meter the scene and set the shutter speed and focus on, well, focusing. The Vivitar doesn't automatically focus and it can be difficult to judge manual focus. Fortunately, there is no optical viewfinder on the E-PL1 to confuse us. We see what we're getting on the LCD or the EVF, depending on the situation. And the E-PL1 magnifies any part of the scene you point it to, which is a real aid in macro work.
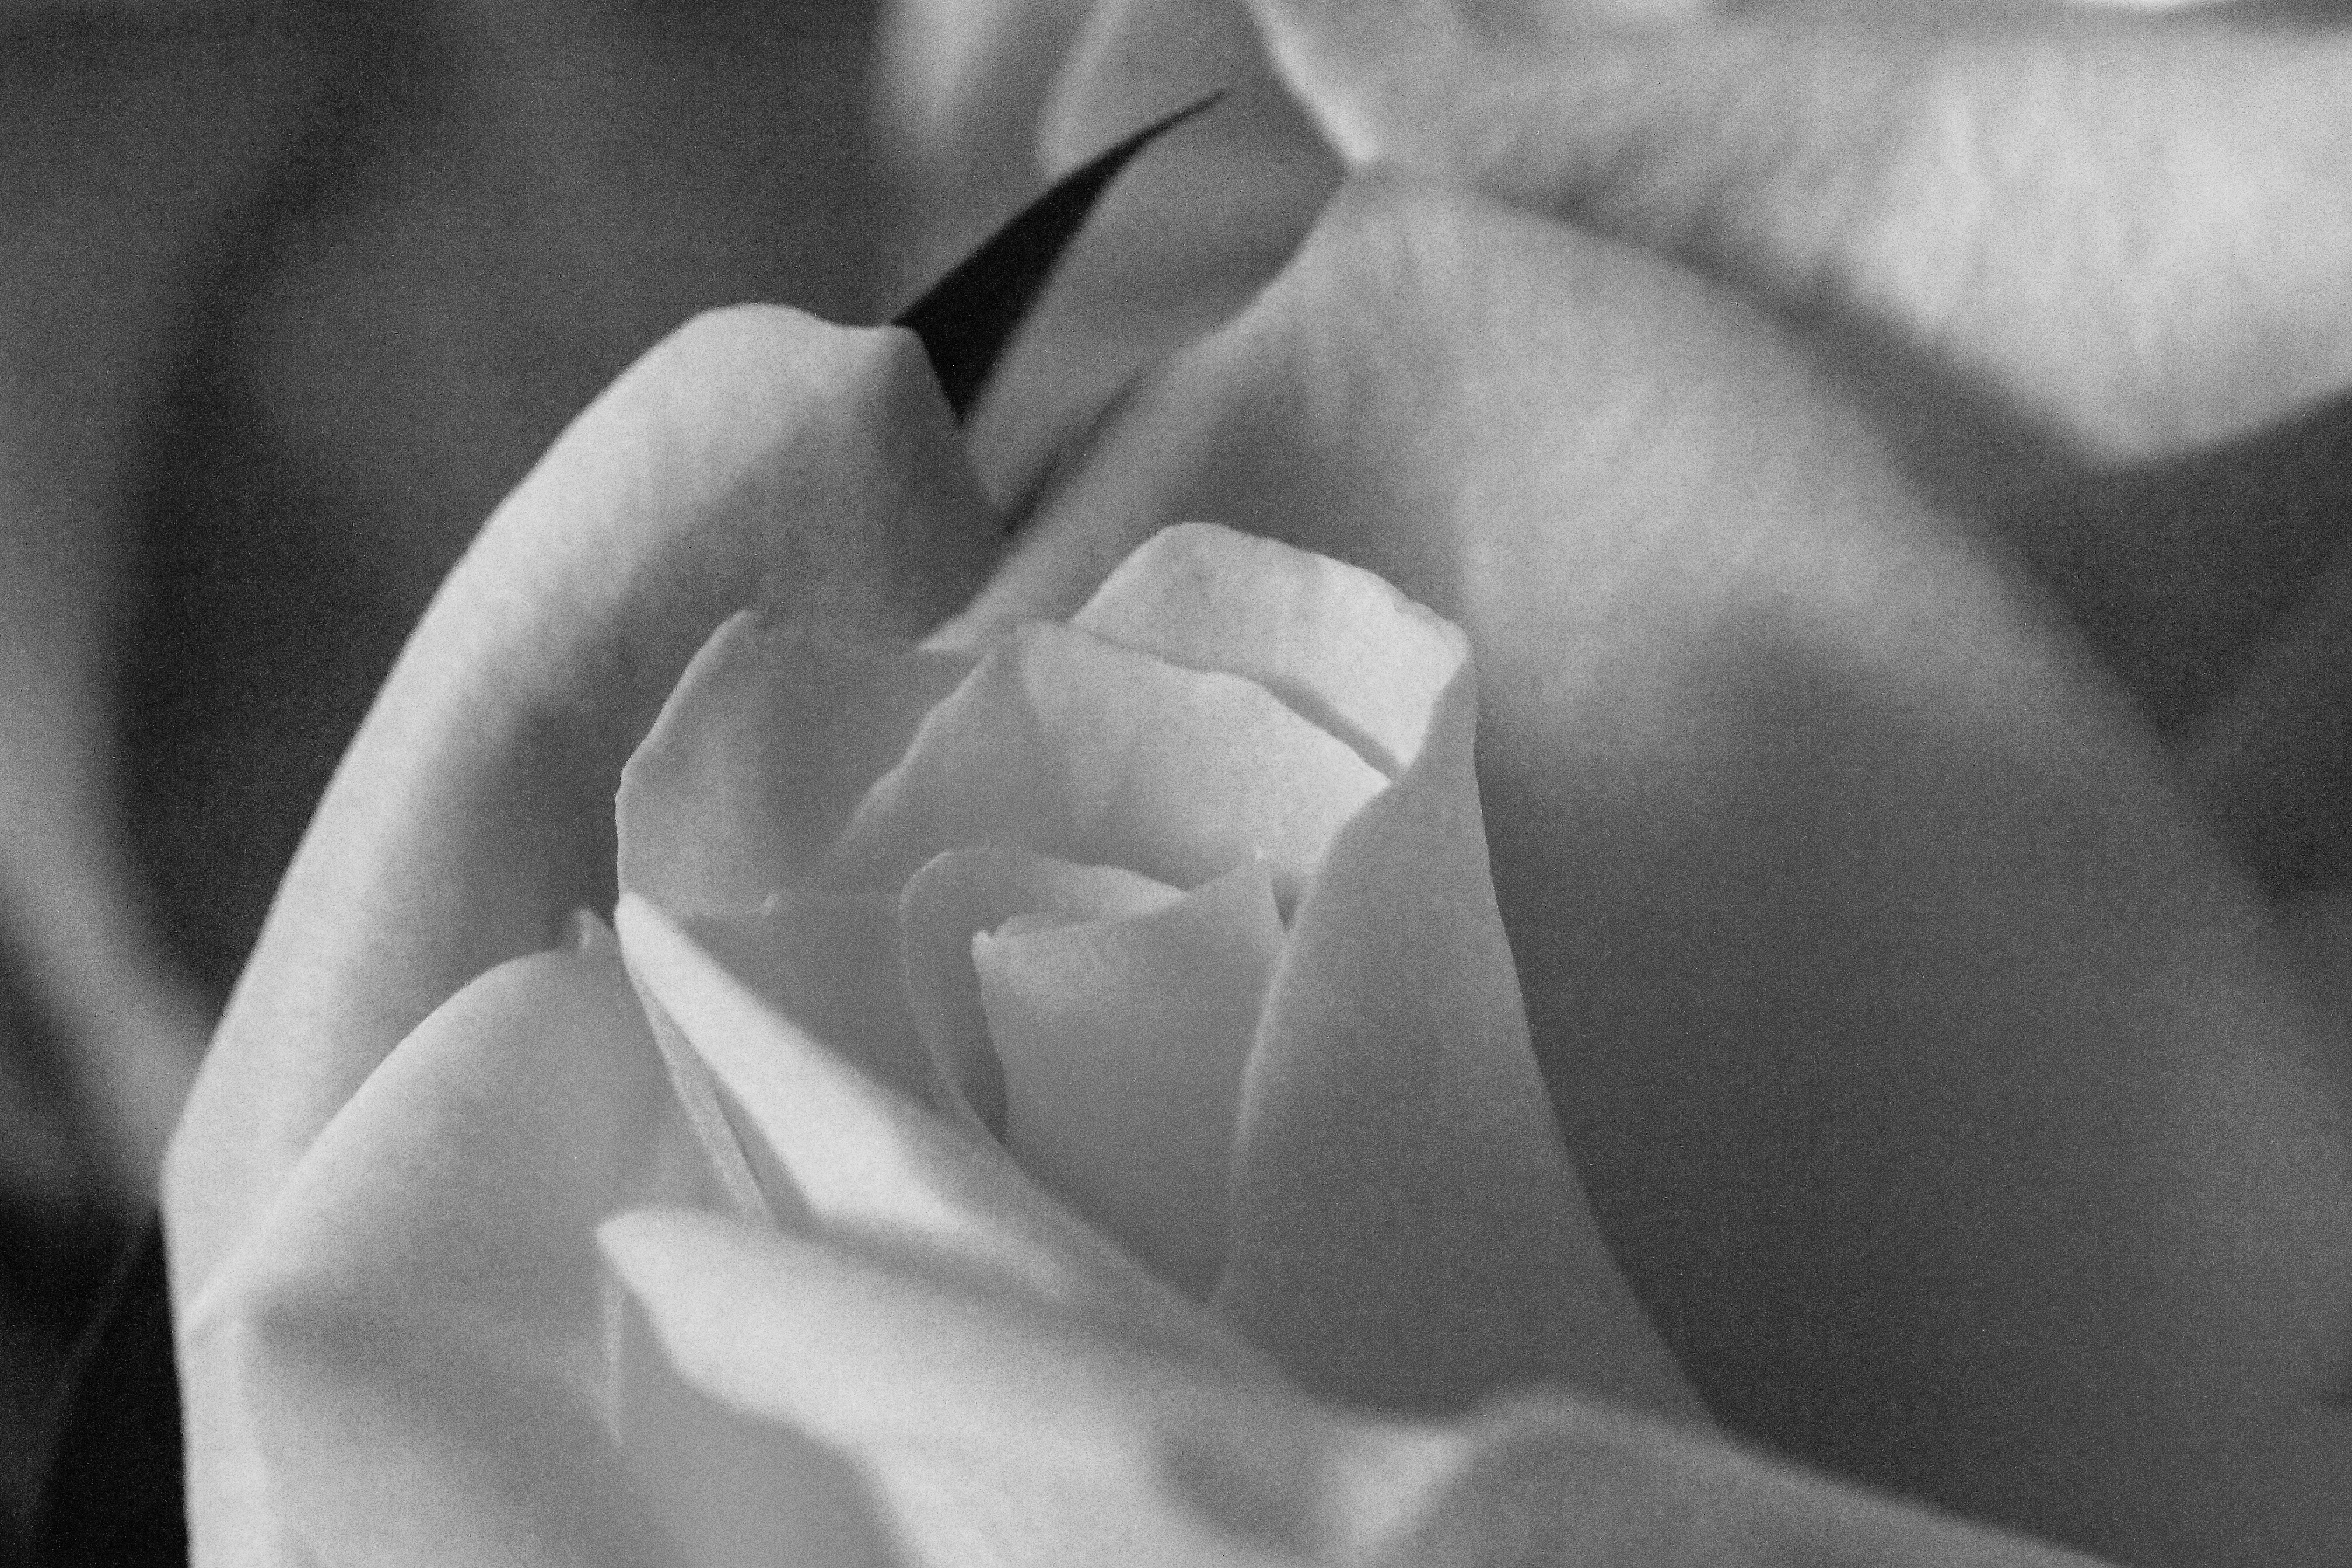
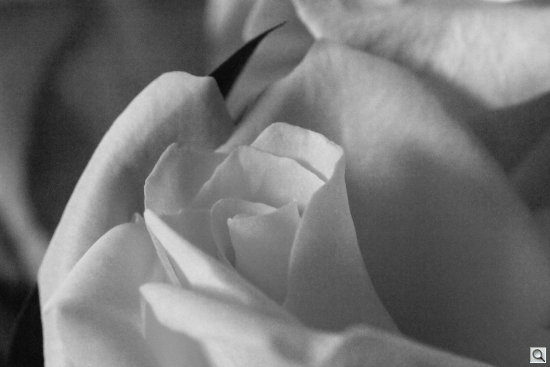
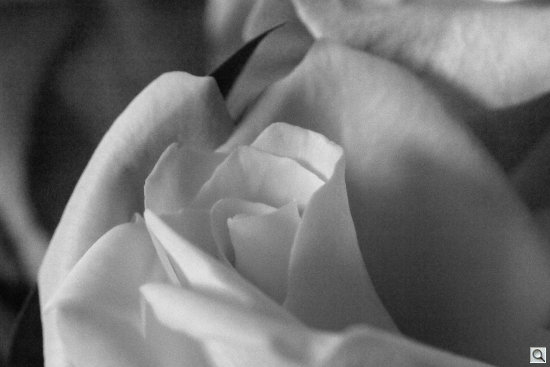
We shot the America's Cup World Series with this setup, relying on its telephoto reach. And we tapped into macro mode to shoot some flowers that were posing around here recently (one of which we've used for this review).
Then we asked ourselves a question. If it's a film-era lens, why don't we give the images a film-era look?
One reason that thought occurred to us was because we'd reviewed DxO's FilmPack 3, a collection of 60 emulsion renderings devised from film emulsion processed in Paris and New York labs. It's an impressive package.
And, as we noted above, Alien Skin's Exposure 4 also emulates films and historical processes. It even goes so far as to add dust and simulate other physical defects. Which was just a bit too far for this job.
DFT provides an interesting option, though, in Film Stocks, which simulates 288 still photographic film stocks, motion picture films stocks and historical photographic processes. And unlike the other products, these filters work on both stills and video, although video requires a more expensive license.
SYSTEM REQUIREMENTS | Back to Contents
For still photos, Film Stocks is compatible with:
- Adobe Photoshop CS3 and up
- Adobe Photoshop Elements 6 and up
- Apple Photoshop Lightroom 3 and up
- Apple Aperture 3 and up
For video:
- Adobe After Effects CS5 and up
- Adobe Premiere Pro CS5 and up
- Apple Final Cut Pro 6/7
- Apple Final Cut Pro X 10.0.4
- Apple Motion 5.0.3
- Avid Symphony, Media Composer, Newscutter, Xpress Pro
Macintosh system requirements are a multicore 64-bit Intel processor running Mac OSX 10.6.x through OSX 10.8.x.
Windows system requirements are Vista 64-bit or Windows 7 64-bit.
INSTALLATION | Back to Contents
With so many options, we probably shouldn't have been disappointed that the installer only looked in each application's plug-in folder rather than ask us to point to the system-wide plug-in folder we use.
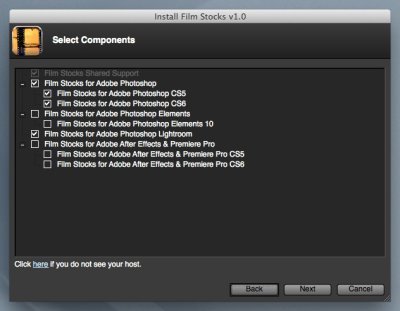
Install. No system-wide plug-in folder.
A system-wide plug-in folder makes it easy not only to share plug-ins efficiently between applications but it also eases the pain of updating a major application. You don't really want to have to install all your plug-ins again. With an independent folder, you just point the new installation to it and you're done (assuming the plug-ins remain compatible).
You can, of course, manually move the plug-in from the application folder to a system-wide folder, if you prefer. So this is just a little inconvenient, not impossible.
But the install otherwise went smoothly and quickly.
We should note that the latest Mac installer is compatible with Mountain Lion's Security & Privacy features for files downloaded from the Internet.
For Lightroom use, the installer automatically adds Film Stocks as an external editor. Settings are TIFF file format, sRGB color space, 8 o 16 bits bit depth with no compression.
Among the highlights of Film Stocks, DFT lists:
- 288 analog photographic film presets
- Select from Agfa, Fuji, Ilford, Kodak, Polaroid and Rollei color and black and white film stocks
- Choose from a wide range of historical photographic processes
- Get the skewed color look of cross processing
- Apply Lo-Fi photographic looks from Lomo and Holga toy cameras
- Age your images with the looks of faded films
- Create your own film stock presets
- Layering system for multiple film stock application (photo plug-in version only)
- Sophisticated but easy to use masking tools (photo plug-in version only)
- Add a vignette to any preset
- Modify images with presets or sliders
- Quickly search for presets
- 8/16 bit image processing
- Multi-processor acceleration
- One Film Stocks photo plug-in license will allow it to run in Adobe Photoshop, Adobe Photoshop Elements, Adobe Photoshop Lightroom and Apple Aperture if installed on the same machine.
- One Film Stocks video/film plug-in license will allow it to run in Adobe After Effects, Adobe Premiere Pro, Apple Final Cut Pro (including FCPX), Apple Motion 5 and Avid Editing Systems if installed on the same machine.
One thing not mentioned in the extensive documentation. A separate User Guide for the photo and video applications is available for download on the product download page. It's also installed with the plug-in.
THE INTERFACE | Back to Contents
The Film Stocks interface takes over your screen. It's got a lot to do.
There are five main panes to the Film Stocks window: Viewer, Filters, Presets, Parameters and Effect.
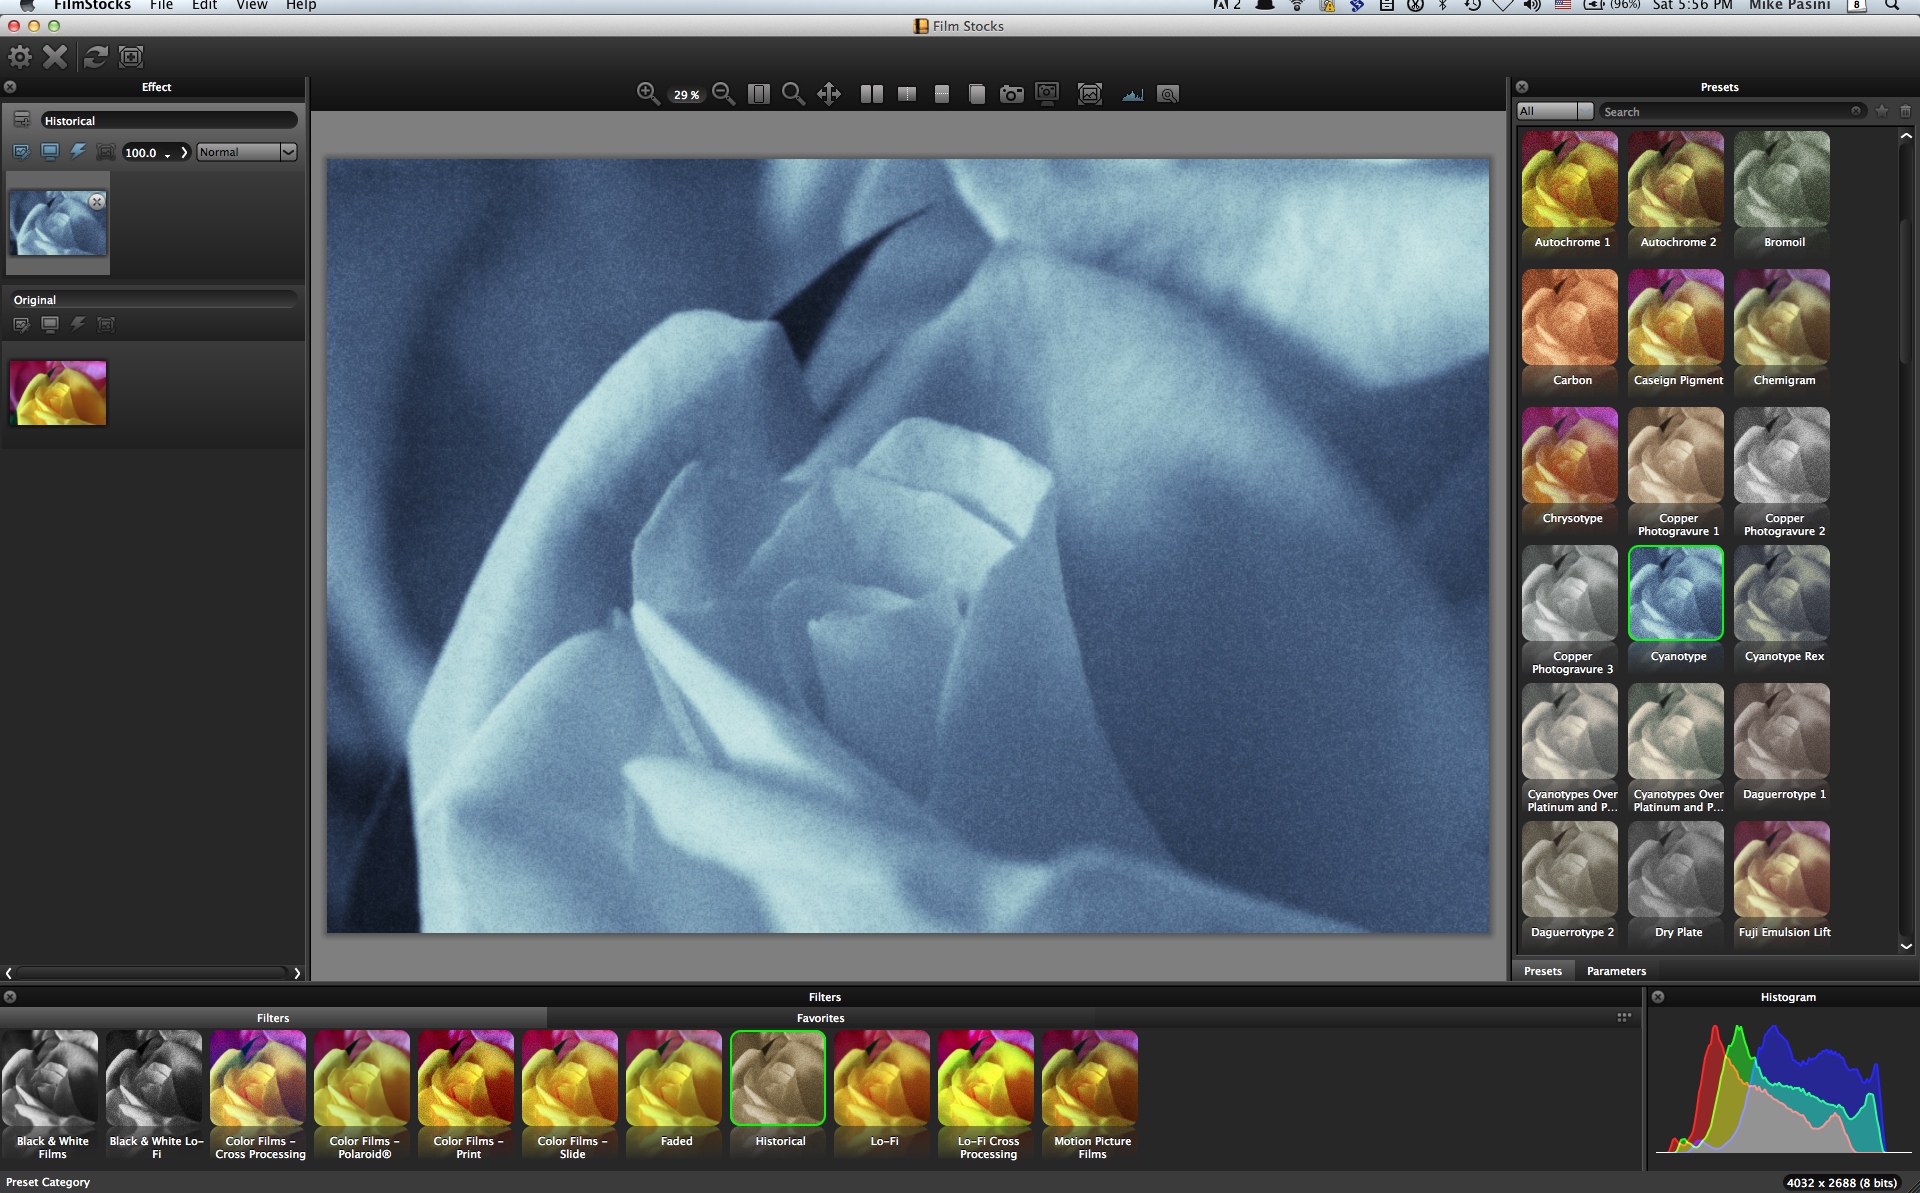
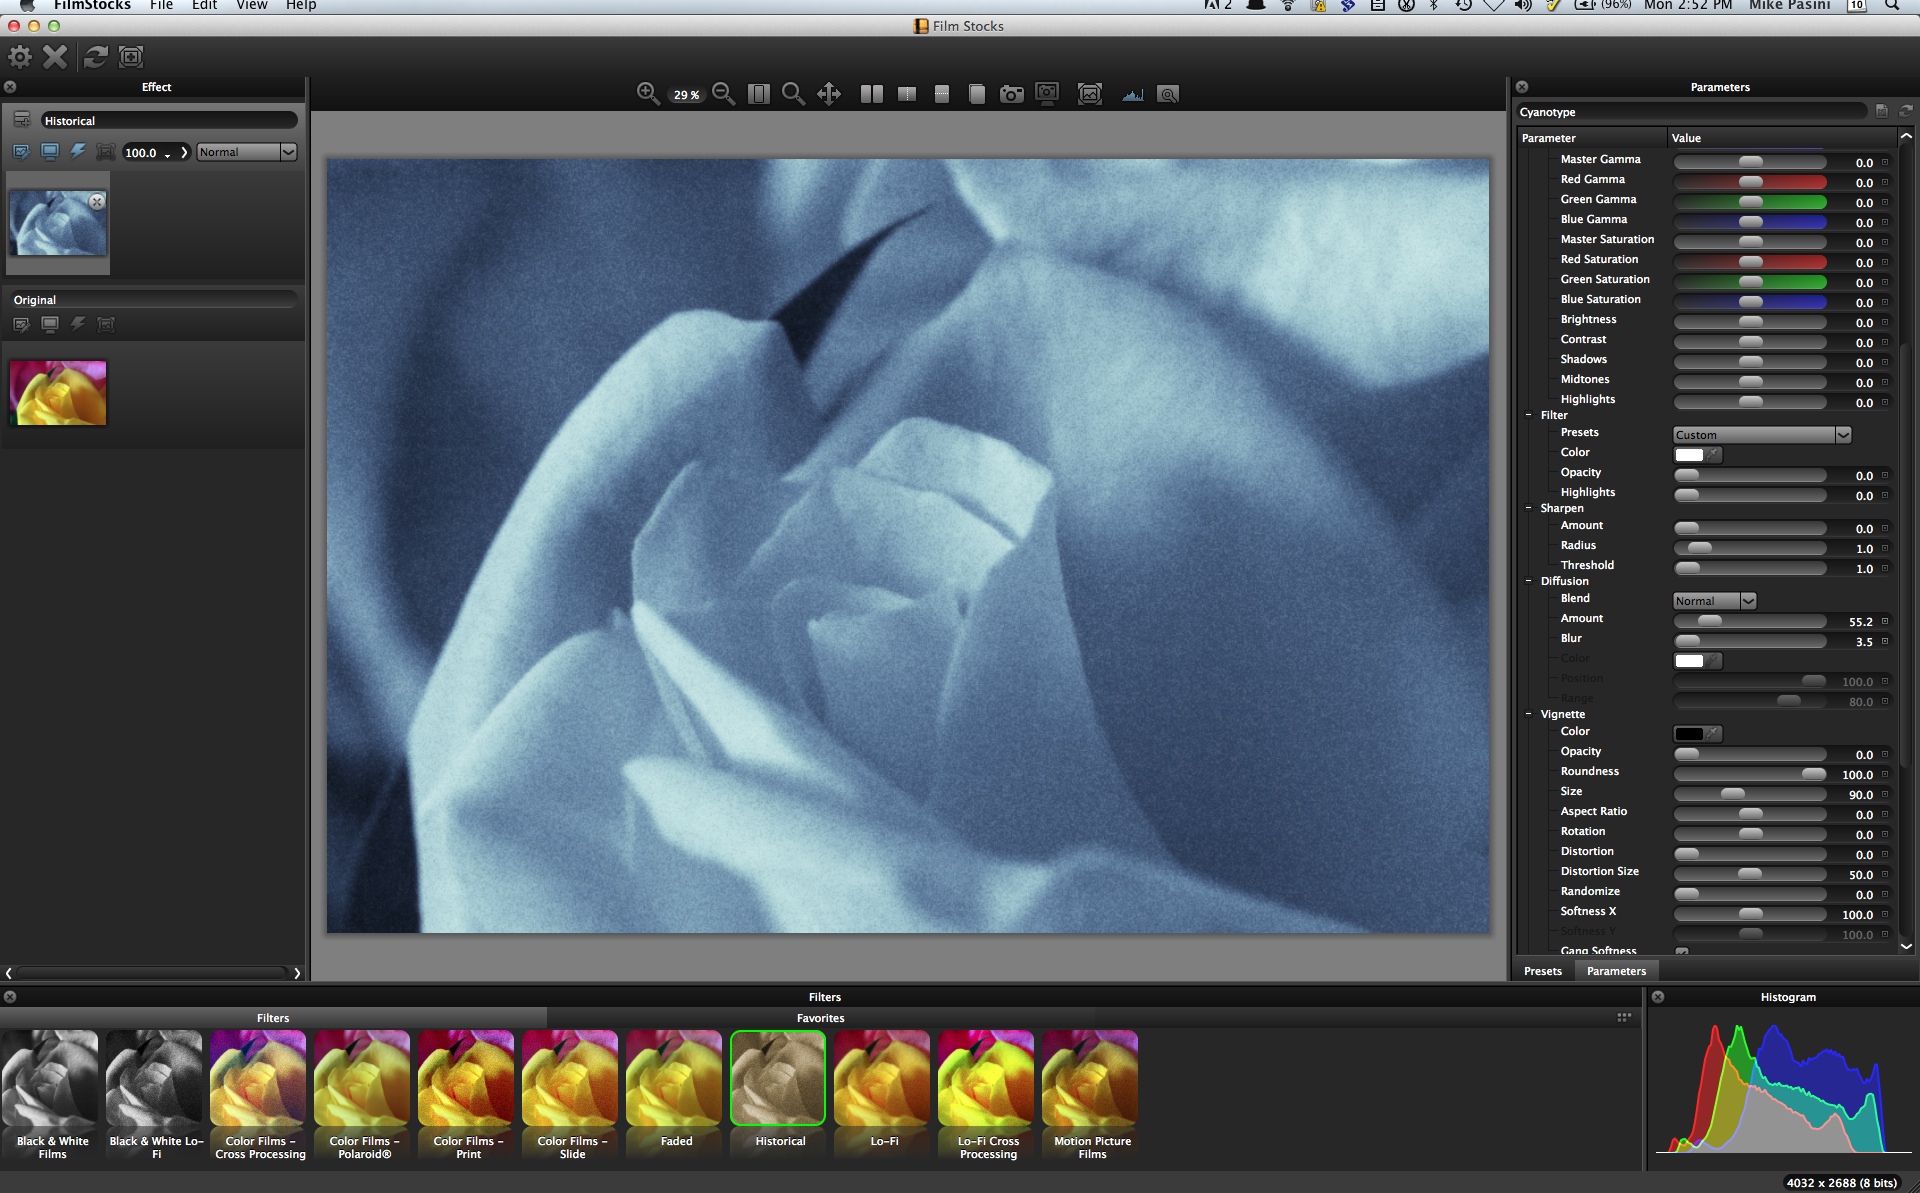
Interface. The Viewer, Filters (bottom with Histogram overlay), Presets (right), Parameters (not shown) and Effect (left). Here we've selected a Historical Filter with a Cyanotype Preset.
In the large Viewer window, you originally see your image as it comes from your host application. The Viewer has it's own toolbar to magnify/reduce the view, lay out comparison views and more.
To apply a look to the image, you start with the Filters window below the image, which contains 11 categories of filters: Black & White, Black & White Lo-Fi, Color Films: Cross Processing, Color Films: Polaroid, Color Films: Print and Color Films: Slide, Faded, Historical, Lo-Fi, Lo-Fi Cross Processing. Each option is illustrated with a representative rendering of your thumbnail.
Once you've selected a category, the Presets pane populates itself with thumbnails of your image in renderings that show each preset's effect. There's a Search field to narrow the options down as well as a popup menu to select All of them or Favorites or Custom selections. In addition, there are Toggle Favorite and Delete Preset buttons to manage the set.
At the bottom of the Presets pane are two tabs: Presets and Parameters. Click on Parameters to switch the pane to a list of sliders and controls to modify the preset you've chosen.
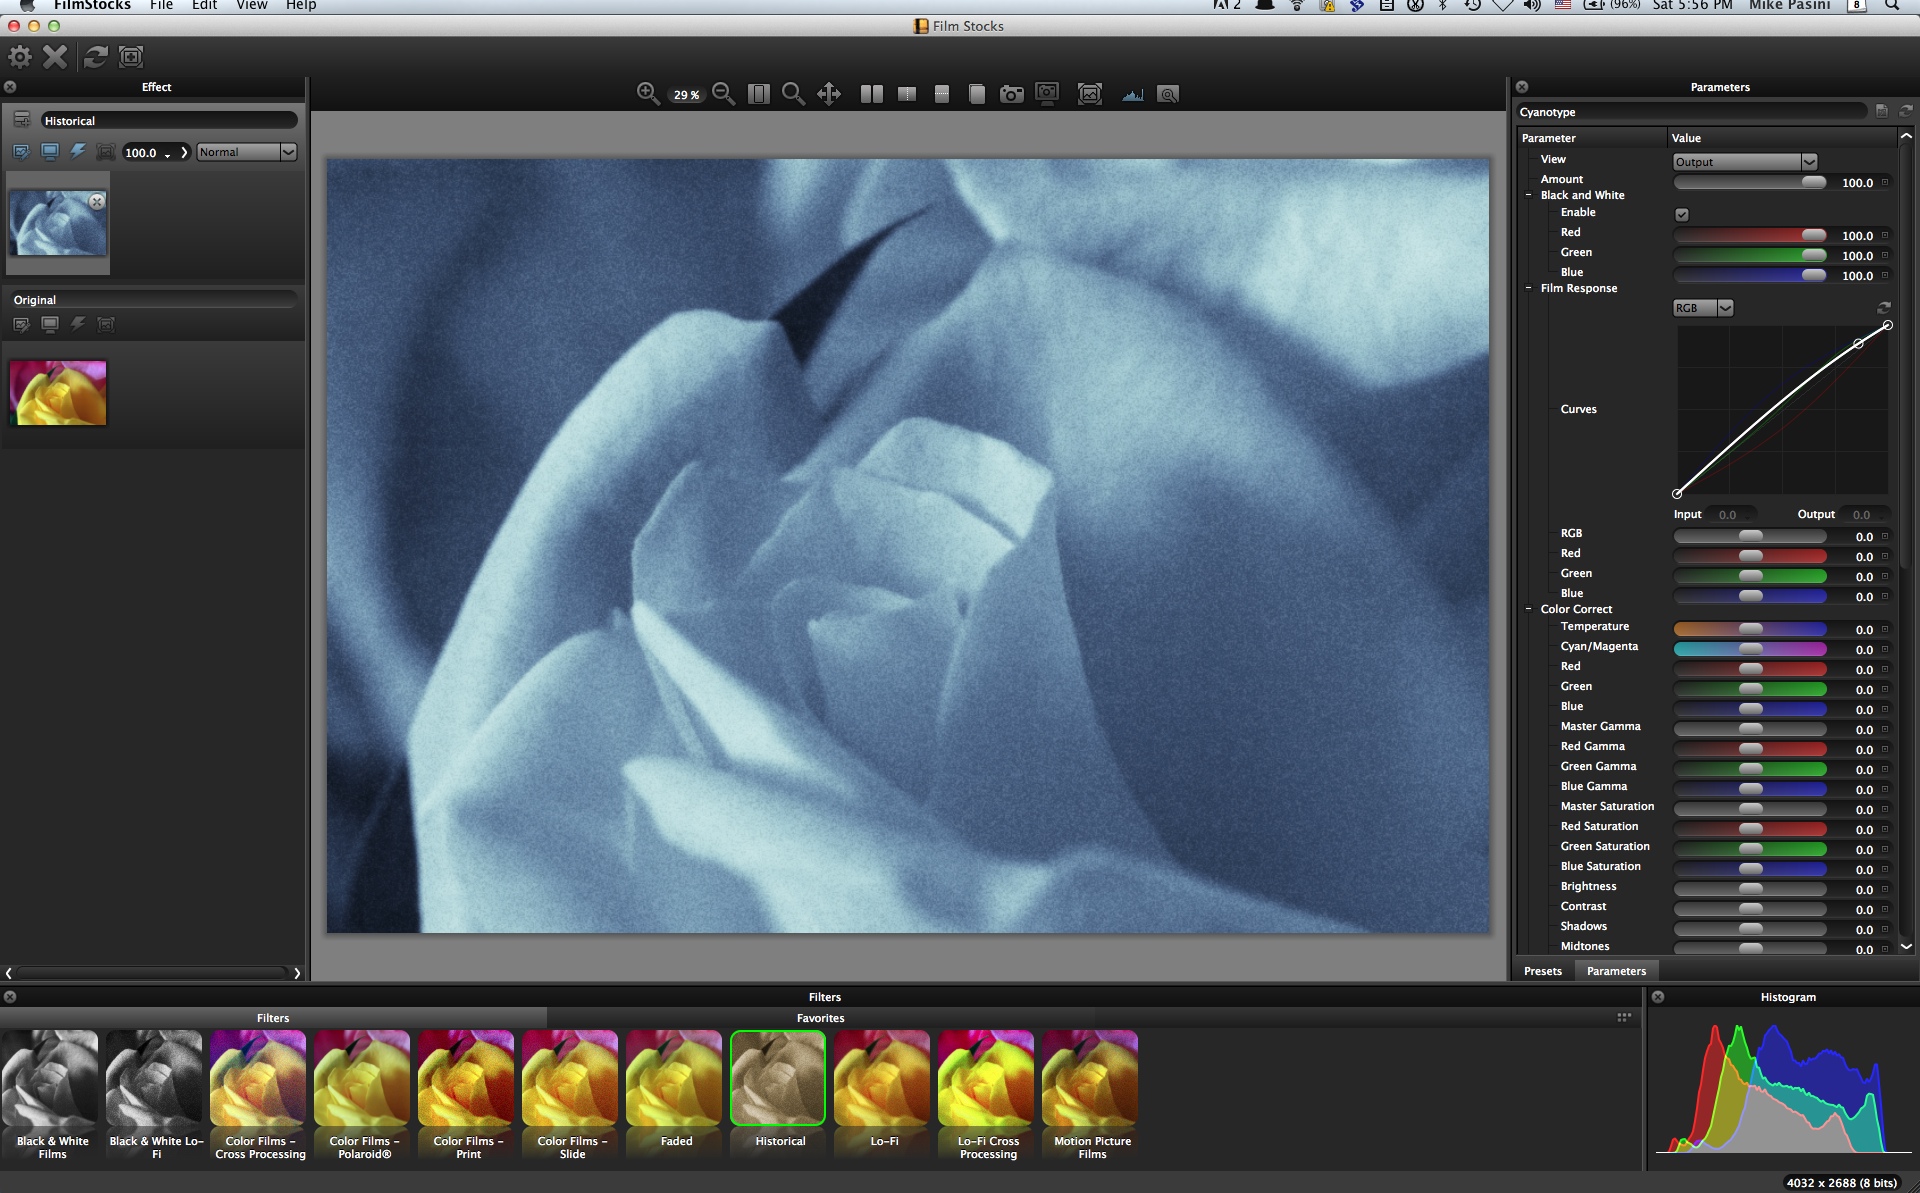
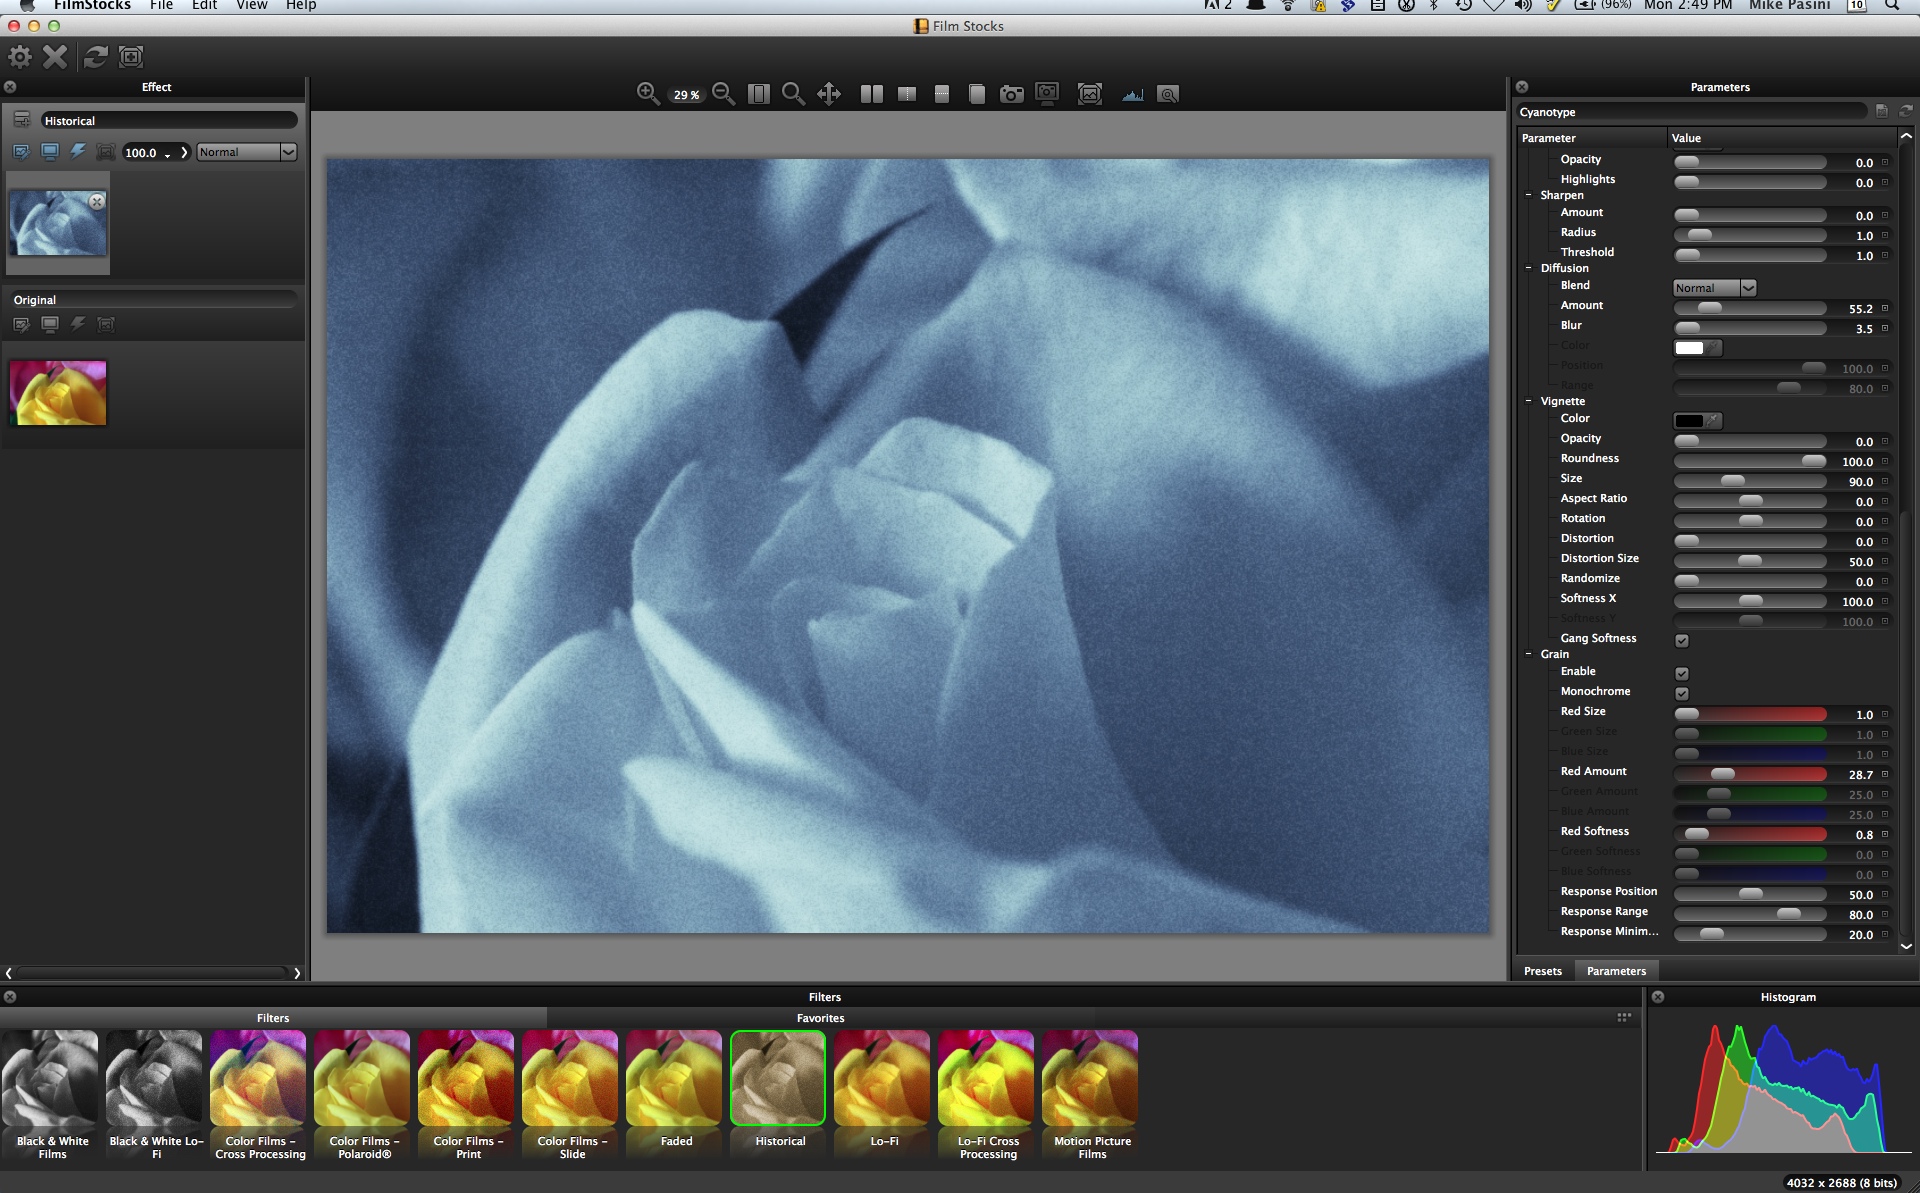
Parameters. There's a long list of controls on the right. The top photo shows some of them, the middle photo shows more, the bottom the rest.
Those modifications can be extensive. They include:
- Fading back the effect with the Amount slider
- Black and White (enable checkbox with Red, Green and Blue channel sliders)
- Film Response (Curves with Composite, Red, Green and Blue channels)
- Color Correct (temperature, cyan/magenta, red, green, blue, master gamma, red gamma, green gamma, blue gamma, master saturation, red saturation, green saturation, blue saturation, brightness, contrast, shadows, midtones, highlights)
- Filter (presets, color, opacity and highlights)
- Sharpen (amount, radius, threshold)
- Diffusion (blend, amount, blur, color, position, range)
- Vignette (color, opacity, roundness, size, aspect raio, rotation, distortion, distortion size, randomize, softness X, softness Y, gang softness)
- Grain (enable, monochrome, red size, green size, blue size, red amount, green amount, blue amount, red softness, green softness, blue softness, response position, response range, response minimum)
While you're fiddling with the Parameters, the Effect window shows that you're actually working on a layer with blending modes available. Blend modes, which are detailed in the User Guide but resemble their Photoshop counterparts, include Normal, Darken, Multiply, Color Burn, Linear Burn, Darker Color, Lighten, Add, Screen, Color Dodge, Linear Dodge (Add), Lighter Color, Overlay, Soft Light, Hard Light, Vivid Light, Linear Light, Pin Light, Difference, Exclusion, Subtract, Hue, Saturation and Color.

Parameters at Work. We add a vignette, change the color.
There's also a histogram display in the bottom right corner, which can be disabled if you're tempted by fate.
That's the gist of the interface. But there's a lot more to Film Stocks.
USING FILM STOCKS | Back to Contents
To explore that "lot more," we selected an image to process. And, as we outlined above, it was quick work to apply a film look to it.
But in the old days, starting with an emulsion wasn't the end of the print. If you did your own enlargement (largely black and white), you went into the darkroom (usually the bathroom), made a contact sheet, picked an image to work on and (you are here) made some magic.
That magic started with a grain focuser to make sure your enlargement was in focus. But then the fun began.
Masks. With Film Stocks that's also where the fun begins. You can take that emulsion effect on a wild ride. And you can start that ride with Film Stocks' masking options, which appear when you click the Add Mask button in the Toolbar.
We were not just impressed but amazed by the masking options. DFT sells them separately if you want to use them outside Film Stocks, but there they are in the plug-in for you to tap into. Four of them: EZ Mask, Gradient, Paint and Spot.
The first one we tried was EZ Mask. A button sets the paint tool to indicate what you want to have affected and another what you want to exclude. DFT recommends starting with the first, which paints broad green strokes, and drawing an inner outline around the object you want to extract. Then you can use the other tool to show what to exclude.
E Z M A S K
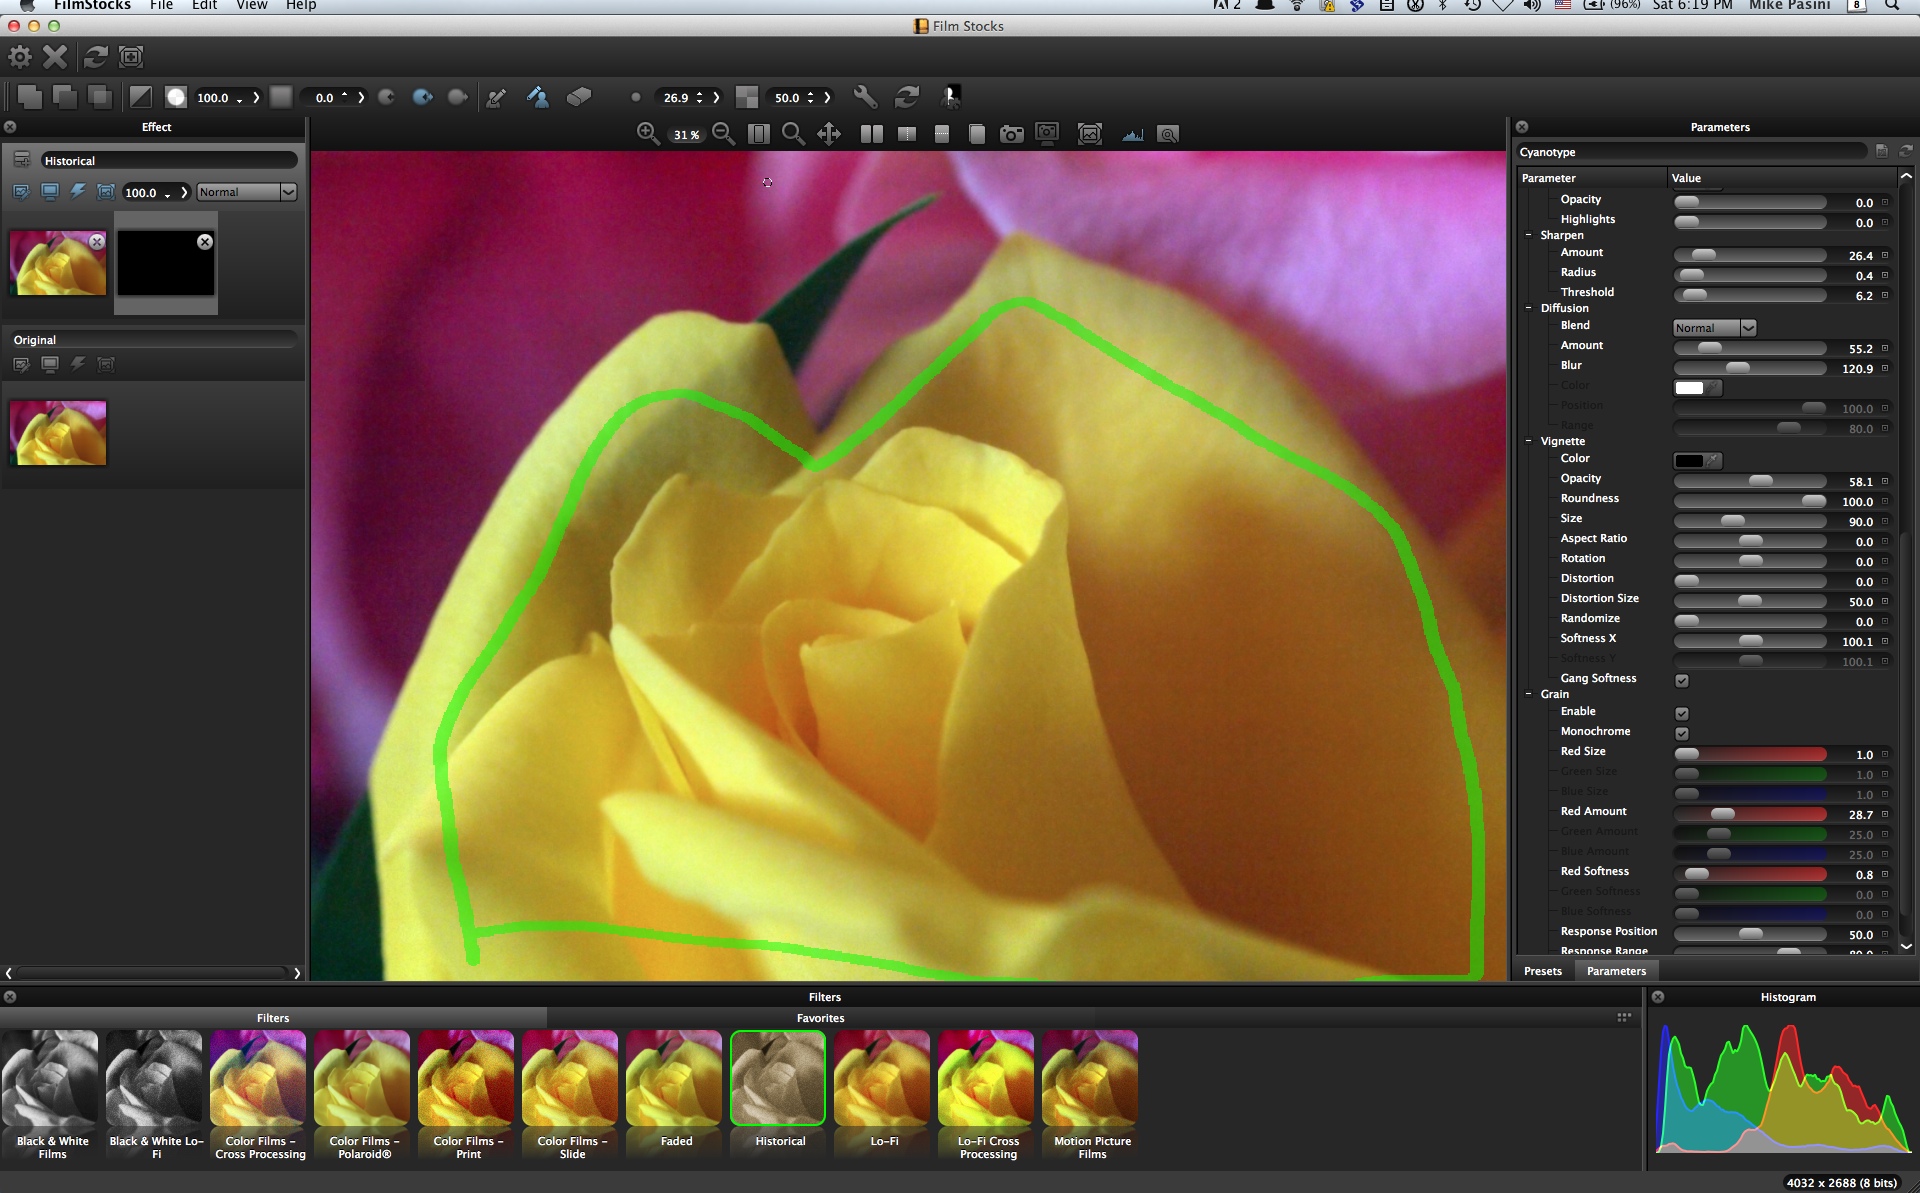
We begin by drawing a loop (in green) within what to include ...
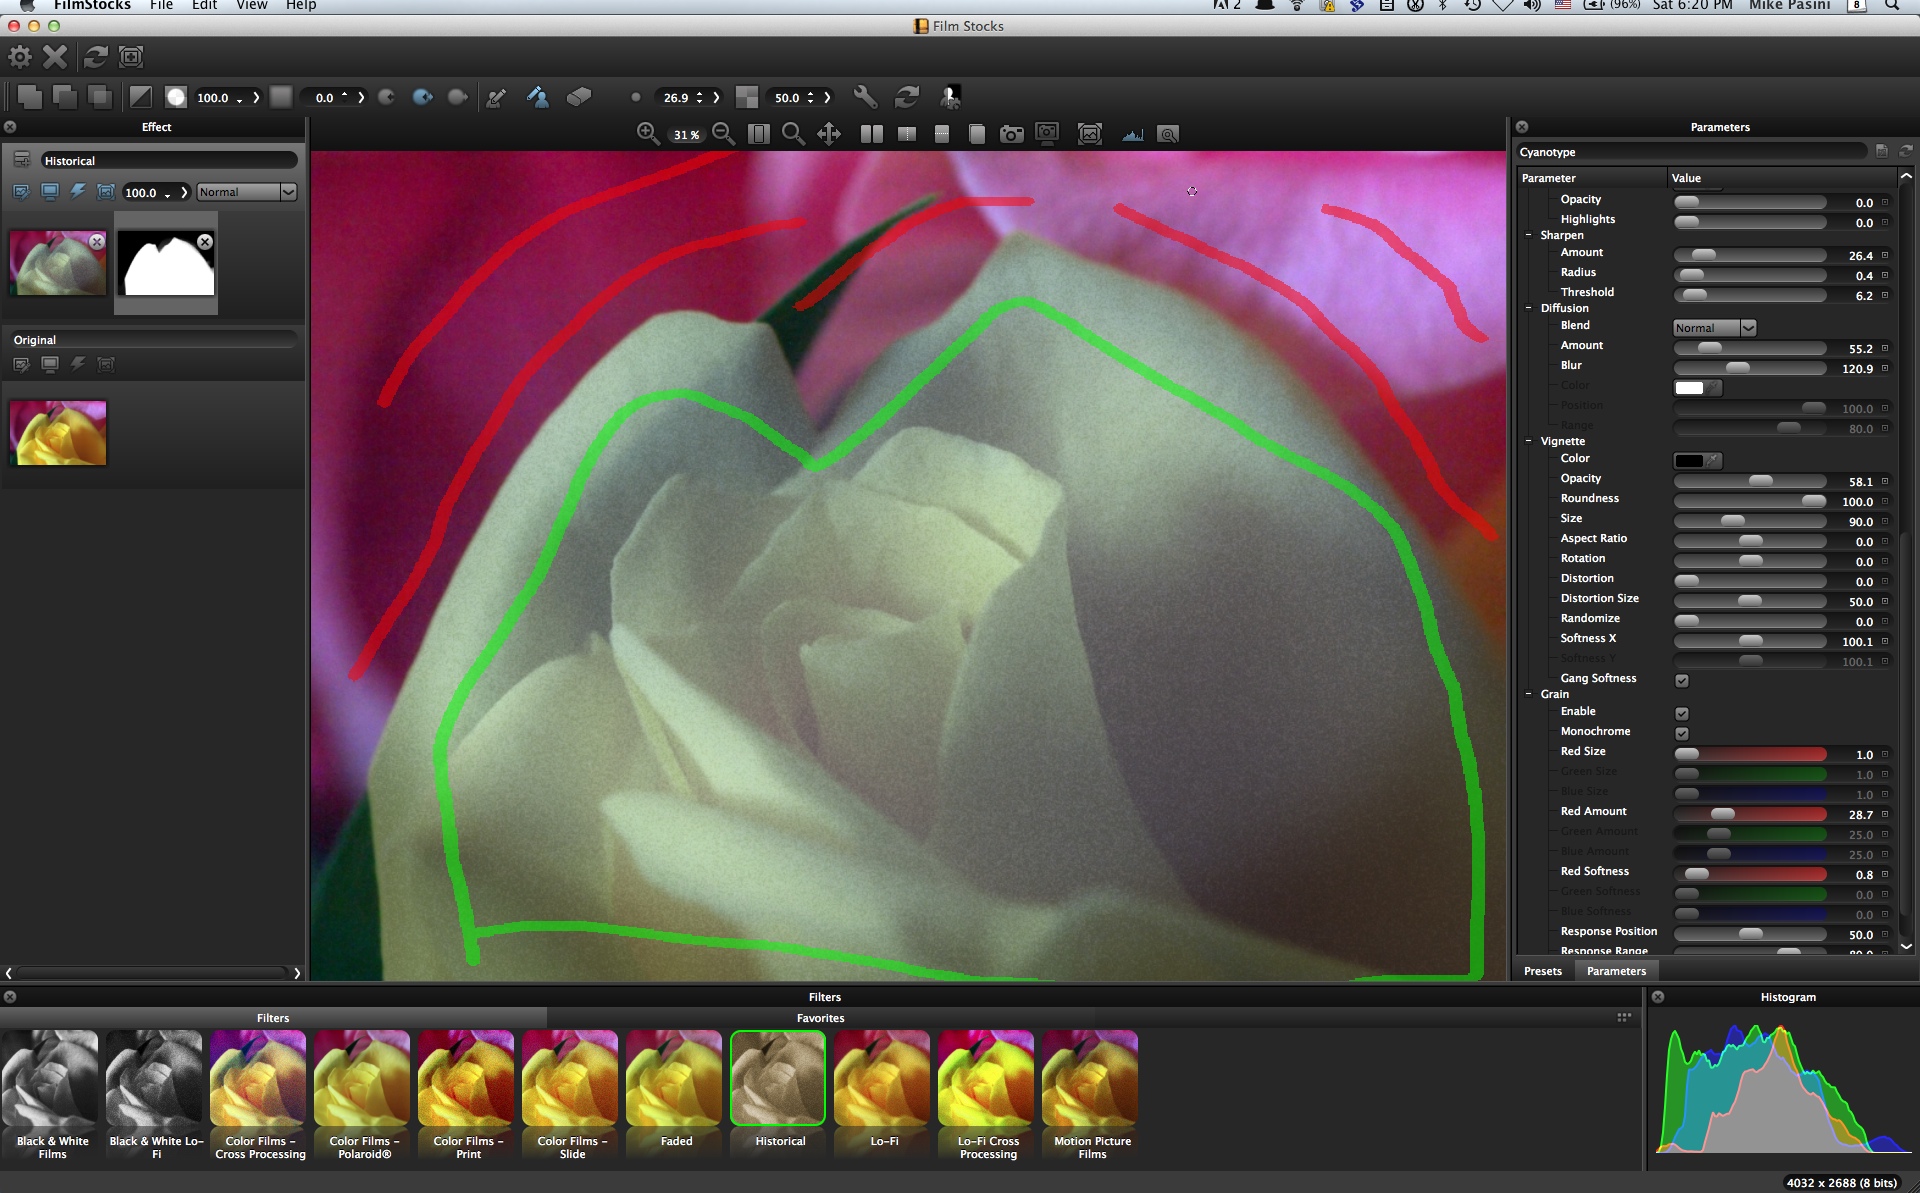
... then we change tools and mark what to exclude (in red strokes).
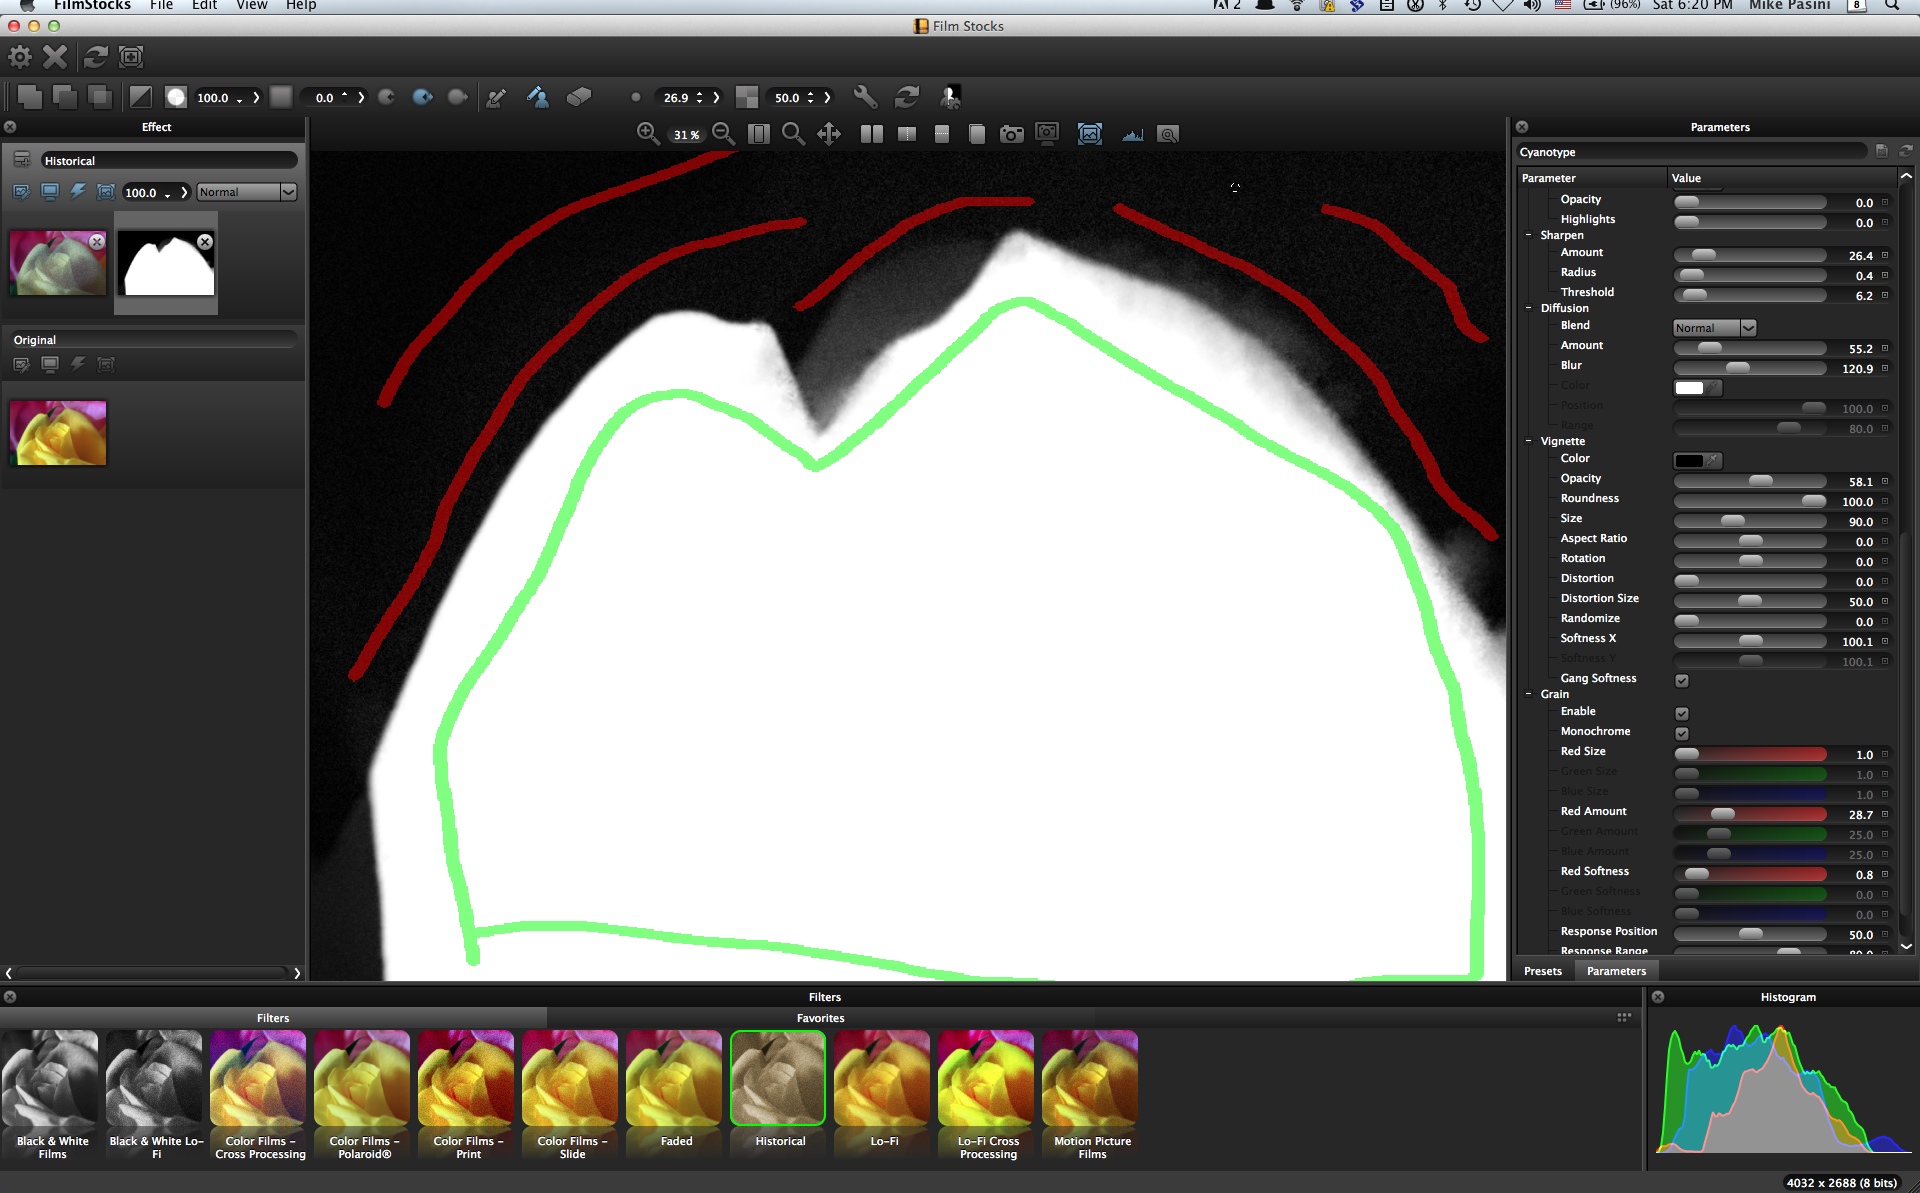
Here's what the mask actually looks like.
The nice thing about this is you don't have to be too precise. These are broad strokes, reminiscent of Photoshop Elements. But the result is a finely calculated mask. Our first attempt was gold.
The Gradient Mask tool is even simpler. The gradient determines how much of the affect is applied to the original image and you can move the control points to change the direction and size of the gradient.
The Paint mask applies the effect freeform. As you paint the mask, the effect is revealed. You can change the size of the brush and you can also adjust the brush softness and opacity.
Finally the Spot mask provides an inner and outer radius to adjust the extent of the effect on the image. In concert, these control the size and the softness of the spot's edge.
S P O T M A S K

The two circles of the spot mask, which we've inverted.
And yes, because Film Stocks itself provides layers, you can use more than one of these on an image.
Presets. There are quite a few presets to start with in Film Stocks but you can also save your own. This is particularly appreciated if you're creating a look for a publication, for example.
But the downside of that is managing all these presets. Fortunately, DFT has provided a couple of tools to help with that task.
The first is being able to tag a preset as a Favorite so you can sort it separately in the Presets windows. All you have to do is click the little star icon to toggle a preset as a Favorite. To sort by Favorites, just popup the Presets menu and select Favorites. Done.
Compare. One thing that was never easy to do in the darkroom was compare images. You had to make the prints, losing all your settings from the first print to make the second, before you could see what the difference might be.
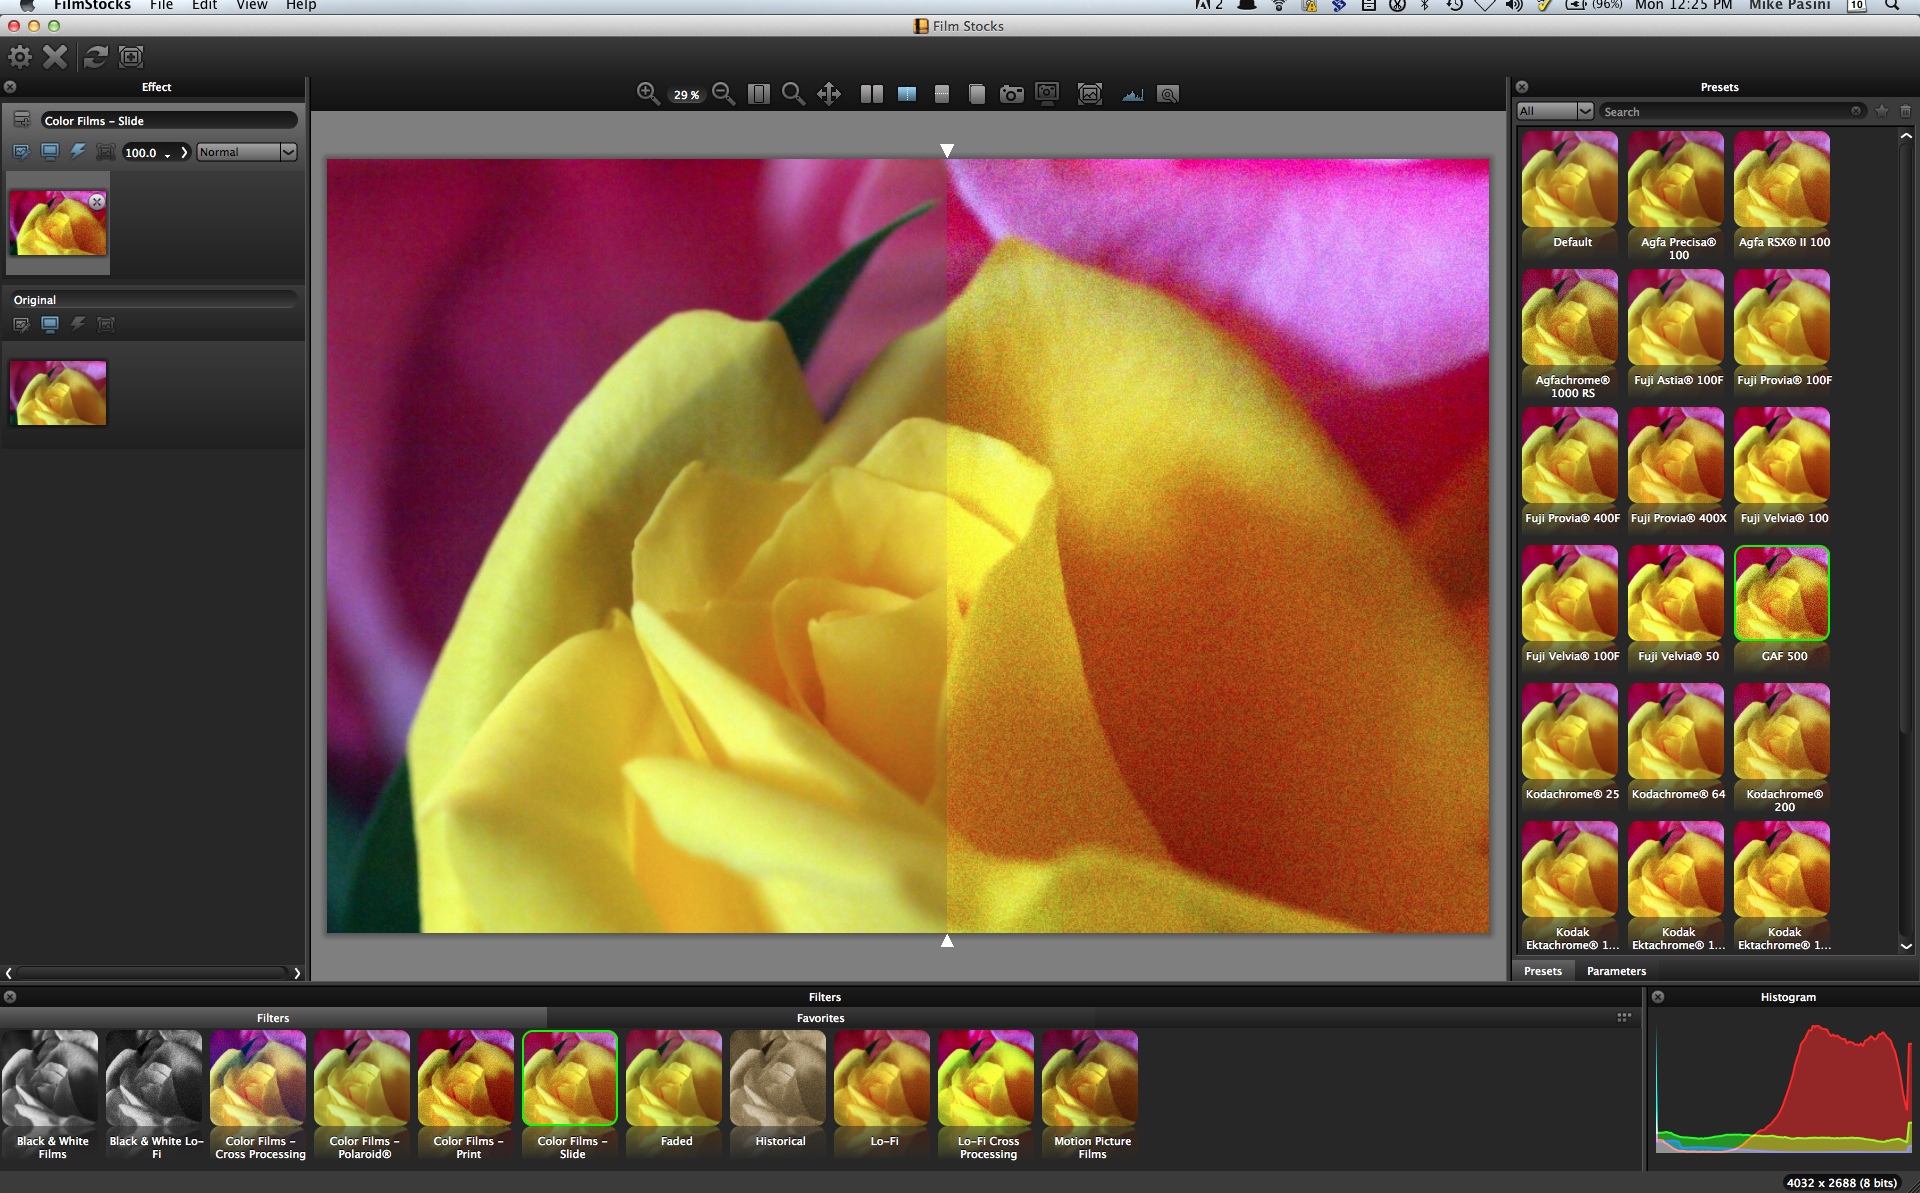
Compare. We split the image right down the middle.
Film Stocks lets you compare treatments side by side or even with a vertical or horizontal split (which treats half the image one way and half the other). You can even move the split line if halves isn't helpful. It's one of those very nice touches that shows you DFT has been around this block before you have.
We're frankly not sure what to make of this but running the same image through both DxO FilmPack 3 and Film Stocks 1.0 using both the Kodak Tri-X 400 and the Kodachrome 25 without any adjustments produced quite different images.
Using the Tri-X 400 filter, FilmPack produced an image with more contrast than Film Stocks, although the two images were quite similar. A 100 percent view shows more grain in the FilmPack image than the Film Stocks image.
T R I - X 4 0 0
Default settings for Tri-X 400 in both programs.
With the Kodachrome 25 filter, the FilmPack image was further from the original than the Film Stocks image, with a substantial change to saturation. Film Stocks seemed to leave that alone. The FilmPack image also showed more contrast in the reds than the Film Stocks image.
K O D A C H R O M E 2 5
Default settings for Kodachrome 25 in both programs.

So you have two different digital interpretations of what Kodachrome 25 looks like. Of the two (feel free to argue the point), we found the FilmPack images more accurate and the Film Stocks image more interpretive.
Take the treatment of grain on the Tri-X 400 images, for example. It is certainly visible, which it should be, but the difference in just how pronounced it is could easily be attributable to a different developer. So while grain is displayed differently by the two filters (at least at the default settings), it's credible in both.
Tri-X Grain. DFT (left) and DxO at 100 percent.
Processing is (or should be) less a factor when it comes to the Kodachrome filter. But here we're swayed by the changes FilmPack does make that Film Stocks does not.
While we're not sure how much to make of this, we do have to be wary of applying a digital cut-and-dried perspective to the analog world of film exposure and processing. Both of these programs provide adjustments to vary the effect, after all. So we're just looking at defaults here, not final results.
PRICING & AVAILABILITY | Back to Contents
Film Stocks for Photo is $95. Film Stocks for Video/Film is $195. Both are available directly from Digital Film Tools).
We've enjoyed toying with images from our old lenses with Film Stocks. The various filters and numerous presets provide a lot of non-digital looks that enhance the look the old lenses capture.
But we also enjoyed going a little further within the Film Stocks environment by using its sophisticated masking and layering. Those tools are available in our image editing software, of course, but they're pretty handy within the filter, too.
Finally, we're delighted to see these same effects available for video clips, if at a much higher price. It's nice to know you can maintain a look across different media.
Those three benefits make DFT Film Stocks a winner in our book.