Up your game: 7 top tips to be a better travel shooter
posted Thursday, September 29, 2016 at 12:04 PM EDT
Olympus Visionary and National Geographic photojournalist Jay Dickman has traveled all over the world during his 45+ year career, visiting more than 20 countries. No surprise, he knows how to "do" travel photography. Here are his top 7 tips to not only travel smarter, but bring back stunning photos.
7 key travel tips by a globetrotting pro
By Jay Dickman
1) Travel light
Right out the gate, I’ll say that one of the first rules of travel photography is “travel light.” Minimize the amount of gear you are carrying, not only will a huge bag and large cameras draw a lot of attention, but it may interfere with that connection you hope to make with your potential subject. The majority of my work is travel photography; last year I spent more time out of country than in. I primarily shoot with the E-M1, and M.7-14mm f2.8, M.Zuiko Digital ED 12-40mm f2.8 PRO and M.40-150mm f2.8 PRO lenses – all very weather-resistant, since weather can provide great shooting conditions if you are ready! (Editor's note: Olympus announced the E-M1 Mark II at Photokina, check out our hands-on coverage here.)
I always work with two cameras, using a BlackRapid “Duo” strap system, that distributes the weight evenly on my shoulders. By using this two-camera setup, I find that I’m actually minimizing what I’m carrying as I have ready two lenses to cover a range from wide to telephoto. This lets me concentrate on the subject, not the extra gear in my bag. What I love about my Olympus gear, it gets “out of the way” in the shooting process, becoming an extension of my eye.
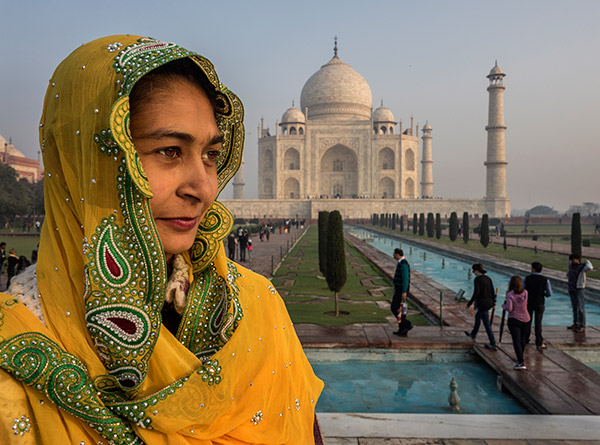
Olympus E-M1 with 12-40mm f/2.8 lens at 14mm (28mm equivalent), f/5.6, 1/320s, ISO 200.
Another reason I love my Olympus OM-Ds: the camera is small and unobtrusive. This is really important for that travel & location photographer, as I want to be as “invisible” as possible when shooting. Plus, being so small, I can carry my OM-D’s all day without breaking my back. What’s the best camera to have? The one that’s in your hands when needed.
If wandering with one camera, the E-M10 Mark II with the 12-40 Pro lens is an unbeatable combo. Very inconspicuous, and with a very workable zoom range, in addition to being quite fast, this package allows you to work so many situations involving street photography.
2) Prepare in advance
Make sure that you have all of the basics covered: batteries charged, memory card ready to go, formatted and the previous days’ shoot downloaded.
As a travel photographer, it’s important to have an understanding of the place in which I’m looking for images. When shooting a National Geographic story, about 80% of my assignment is spent with research, so when I’m finally in the field I’ll have a good sense of what’s going on, what is polite or rude, and foundation of the culture. I don't want to make avoidable errors that can cause problems, and the internet provides an amazing amount of information for a photographer.
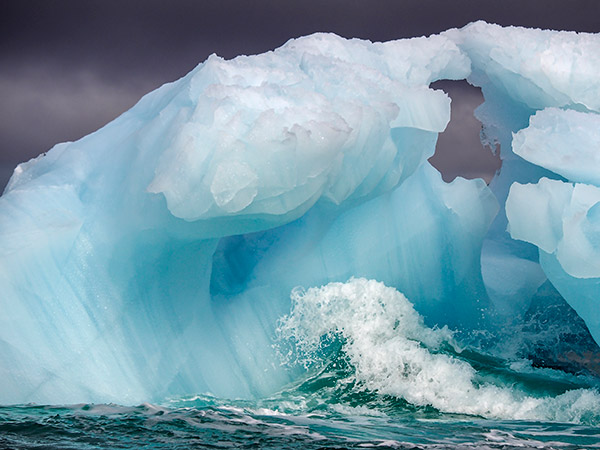
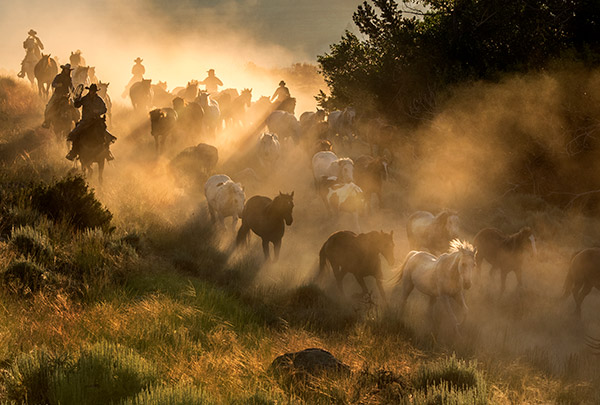
E-M1 with Olympus 50-200mm f/2.8-3.5 Zuiko lens at 169mm (339mm equivalent), f/5.6, 1/1600s, ISO 200.
3) Be the early bird
When photographing in small villages or towns, and wanting to photograph in the almost always rich area of plazas and town centers, get there early. Best to be part of the landscape when the place starts “waking up.” Walking in later as an outsider (and loaded with gear) may make you the center of attention, which is often the opposite of what you want to be.
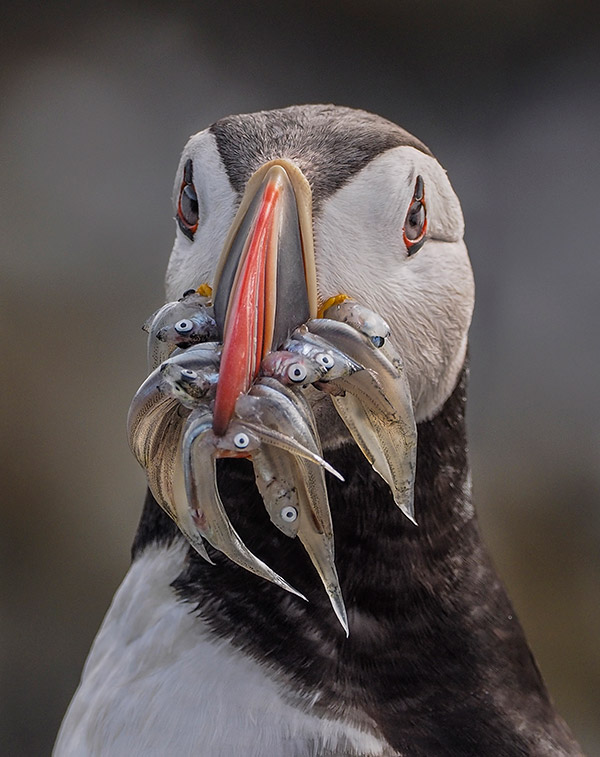
E-M1 with Olympus 300mm f/4.0 IS Pro lens and 1.4x teleconverter (841mm equivalent focal length), f/5.6, 1/800s, ISO 400.
4) Making eye contact
Often when photographing on the street, and you see a possible situation start to take form, frame the scene and let the subject walk into your viewfinder. If a great situation is happening, I usually shoot first then decide if I want to take it to the next level and approach my subject. Making eye contact is one of the first things I do here. You’ll know quickly if your attention is not welcome. I find that the eye contact is critical, as I can usually further the possibility of extending the shooting situation. You’ll learn, very quickly, when someone doesn’t want to be approached. Learn when to cut your losses and back away. I find that a genuine interest in the subject can go a long-ways, no matter who this may be. I’ve approached the beggars on the streets of third-world countries, as well as the very well to do in beautiful locations, and by dealing with that potential photo subject with dignity, you can really open the possibilities.
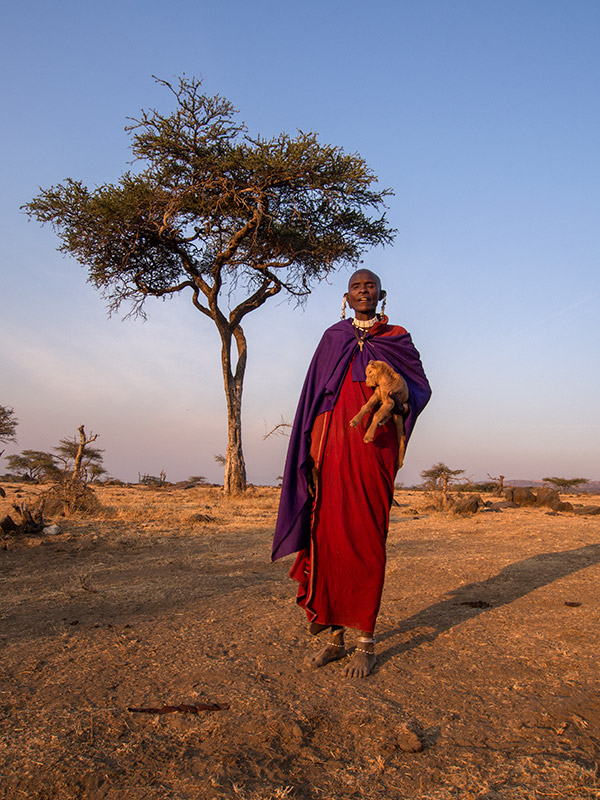
Olympus E-M5 with Olympus 9-18mm f/4.0-5.6 lens at 14mm (28mm equivalent), f/9, 1/100s, ISO 200.
5) Share your images
This simple, but often ignored process, can help create a bond between you and the subject. Someone who initially may be a bit unsure of your intent, may be coerced into giving you more time when seeing on the camera monitor what you are creating. And, try to obtain an address or email and send them copies of the images you’ve created of them.

E-M1 with 40-150mm f/2.8 lens at 79mm (158mm equivalent), f/3.2, 1/800s, ISO 200.
6) Always be ready
When shooting on the street or in public areas, have all your camera settings in place, nothing worse than that great moment presented to you when your gear isn’t ready. My thinking has always been that when the camera is slung on my body, a switch goes on in my head: I’m thinking and seeing photographically. In these situations, I’ll have the sleep mode set to 3 or 5 minutes, and if things are percolating, I’ll keep touching the shutter button to make sure the camera is awake and ready to shoot in an instant. I’ll also make sure I’m in the proper shooting mode, manual, shutter, program or aperture priority...this is up to you, and that my exposure is in a realistic range for the type of image I’m hoping to capture. On the streets, I’ll often use Shutter Priority, as I am concerned with motion and moment. Everyone has their favorites, and different situations will demand the appropriate mode.
E-M1 with 50-200mm f/2.8-3.5 lens at 59mm (118mm equivalent), f/5.0, 1/500s, ISO 200.
7) Know when to shoot and when to walk away
Very importantly, know when to back out or leave a scene or situation. Realistically, not every area in which you might like to photograph will be the safest place to take you and your valuable camera. And, learning to have your “radar” up in terms of safety is paramount. Also, not every situation that may be in front of the camera will be appropriate to photograph. For example, if I see kids whom I may want to photograph, the first thing I do is look for parents or someone obviously in charge. Be very careful photographing kids without permission, you could end up in trouble, with the parents or with the law. Learn the local mores and traditions, so you’ll know not to make a simple mistake that could be construed as improper or insulting.
My Olympus camera has given me the reason to approach many, many people in many different countries. This is common in my work, to see someone who looks interesting or is doing something interesting, and ask permission to photograph them. Don’t be disheartened if you get turned down…just move on, keep an eye out for that next interesting character, and try again. You will have success eventually. And, the friendships I’ve developed over the years strictly due to the camera number in the dozens. Isn’t this why we travel, to get under that “veneer” of tourism and be able to touch on something real? The camera can be your passport, your entrée, into this world.
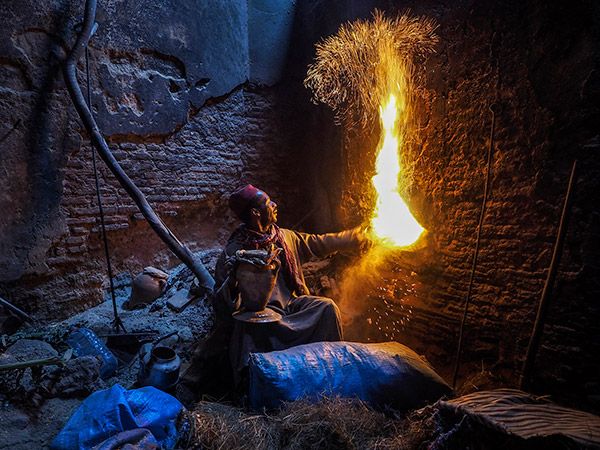
E-M1 with 12-40mm f/2.8 at 12mm (24mm equivalent), f/2.8, 1/40s, ISO 1600.
A big thank you to Jay for taking the time to share his excellent travel photography tips with us! To see more of Jay Dickman's work, visit his website. To learn more about the Olympus Visionary program, please see here.