Photo tips from a National Geographic photographer: Olympus’ Anywhere Classroom, Season 1
posted Monday, July 14, 2014 at 9:52 PM EDT
This is a sponsored post please see my notes at the bottom, and leave any feedback in the comments below - Thanks!

Olympus has been tapping members of their Visionary program of late, to share their experience with amateurs like us. We ran a piece with tips on photographing children written by Olympus Trailblazer Tracie Maglosky about a month back; this time, they've produced a set of three videos, launching their Anywhere Classroom series. In this first "season", National Geographic photographer, Pulitzer Prize winner and Olympus Visionary Jay Dickman shares some tips and inspiration on Landscape, Wildlife, and Nature photography. (You can read his Olympus profile page for more about his accomplishments and accolades.)
Jay is both inspirational and a genuinely nice guy: I've had the pleasure of meeting him personally on several occasions, and he's every bit as genial and eager to share his experience in real life as he appears here.
These are clearly Olympus branding videos, but there are also some solid tips and a lot of inspiration in them. I found them well worth watching, particularly for an amateur like myself. (The third was my personal favorite.)
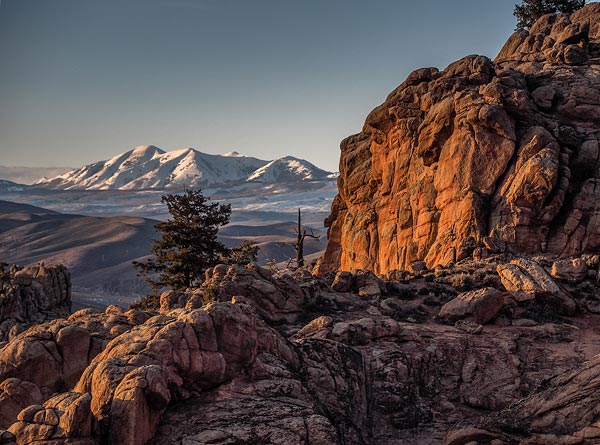
The first "class" covers landscape photography. There's of course the exhortation about waiting for the light to be right, but equally important are other tips about framing through the viewfinder. They made me think a little about how I go about framing a landscape shot, and will change that process for me a bit going forward.
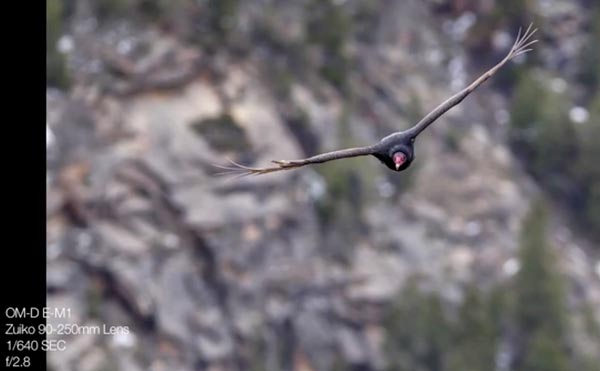
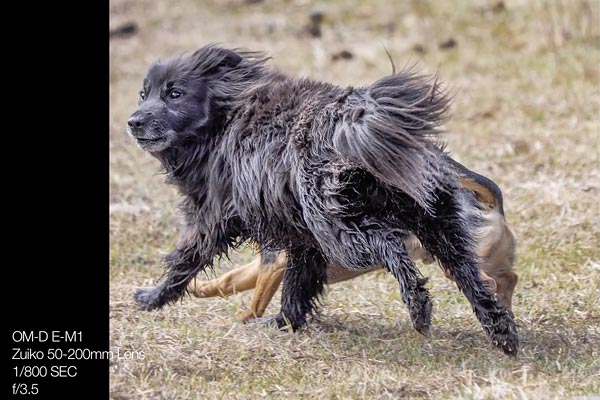
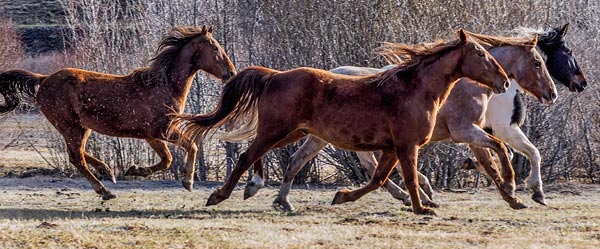
The second class is about wildlife photography. Besides the three most important components (patience, patience, patience), Jay talks about separating focus and shutter control. I've often heard more pro-oriented shooters talk about doing this, but seeing this video is the first time I've really thought about using the technique myself. A huge takeaway for me, though, was the idea of practicing tracking subjects before going on a trip likely to involve tracking action. It was a bit of a facepalm/smh moment for me (doh, practice, what a concept!), but Jay's advice to "photograph your own life" is another thing I'm likely to actually do now, having seen this video.
While I came away from the first two classes with some really useful tips, I found the third class the most inspirational, and think that in many ways, it will have the biggest impact on my personal shooting. Honestly, when I'm off on a trip, I tend to just concentrate on individual shots, and what looks good/interesting enough to be worth a photo. This wasn't the first time I'd heard someone talking about creating a narrative with your photos, but Jay's presentation got me thinking back to the trips that I was most pleased with the photos from. I realized that the photo trips I was happiest with were ones in which I'd unwittingly executed some of the steps of narrative creation that Jay talked about. Years later, I find I care much less about seeing particular pretty pictures that caught my eye than I do about the story of the trip, and the memories the photos evoke. If you decide you only have time for one of the videos in the series, this is the one I'd make time for.
When I was watching this video, I was struck by how much it reflected Jay's experience as both a Pulitzer-winning photojournalist and a National Geographic photographer. Both of those careers involve telling stories, but I realized that that's exactly what the most successful personal-memories photography is about as well. I really wish I'd seen this little tutorial years back, when our boys were younger, and we were doing family trips together; we'd have had a lot more well-documented and evocative family memories as a result. In the internet era, what better place to present a narrative than on your Facebook pages?
All in all, I found watching these videos a very worthwhile experience. Taken together, it's a total of about 16 minutes of video, but I'm glad watched all three in their entirety. Check them out; if you're like me, you'll find the photo-tip nuggets well worth the time spent. You can follow the links to the individual videos above, or visit Olympus' Anywhere Classroom mini-site directly for all three.
*Sponsored post
This is the first sponsored post we've run on the IR news pages, so it's a bit of an experiment; I'd be very interested to hear your feedback on it. (Note that we'll always identify any sponsored content here at IR.) We would have posted a brief news item on these videos anyway; the main difference here is that I wrote up what I liked about them with my notes and included some links to Olympus' site.
What do you think? Any feedback, about either this article or the videos themselves? Please share your thoughts below, and thanks in advance for the feedback!