A closer look at curves
posted Saturday, January 16, 2016 at 6:15 AM EDT
Earlier this week, we posted about DIY Photography's "How good are you with curves?" quiz. If you didn't do so well, you weren't alone. DIY Photography has now published explanations for each of the ten quiz questions and we wanted to share them here.
The article essentially serves as a "curves 101" course. Firstly, what does the curves adjustment layer in Photoshop actually do? Typically, it controls RGB channel brightness (or individual red, green, and blue channels). The X-axis is the input value axis and the Y-axis is the output value axis. Note that the bottom left is pure black and the top right is pure white. The curve in the panel maps the inputs to the outputs. To see more information on curves, be sure to check out the full article here.
Put another way, curves allow you to adjust individual points throughout an image's tonal range. The curve in the panel not only maps inputs to outputs, but it actually represents the image's tonality. In the context of a photograph, the lower left (black) represents shadows and the upper right (white) represents highlights. The steeper a section of the curve, the more contrast there is for that particular tonal range. Likewise, the flatter a section of the curve, the less contrast that there is. Check out this article by Adobe for additional help with using curves adjustments in Photoshop.
Color theory is also important when dealing with curves. Gray is made up of red, green, and blue. Suppose that you want to decrease the amount of blue in an image. You can reduce the blue channel curve, but this will make the image darker (remember, below the curve is darker and above the curve is brighter). Or, you can increase the red and green channel, which won't change the overall brightness of the image.
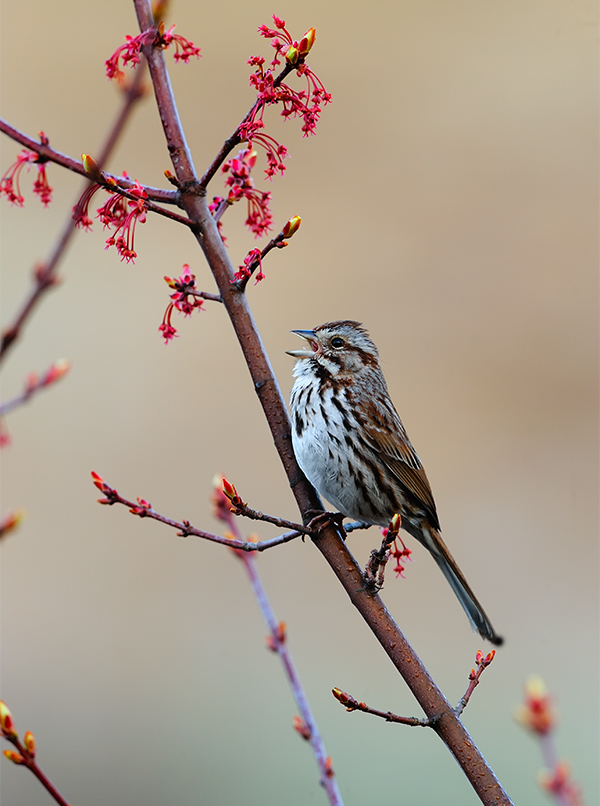
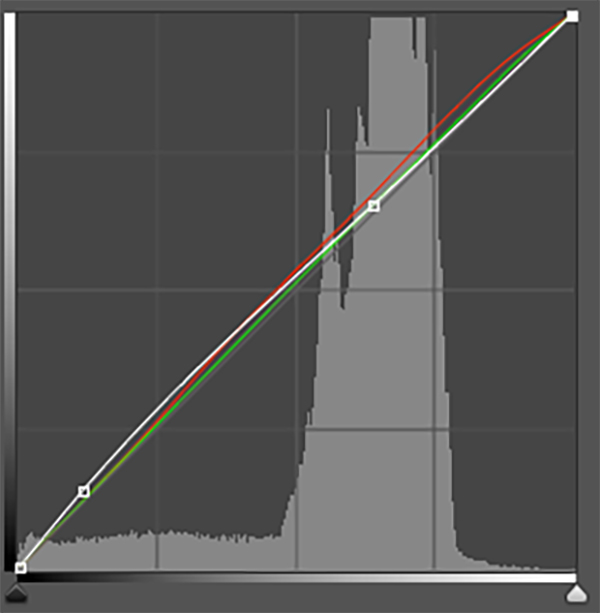
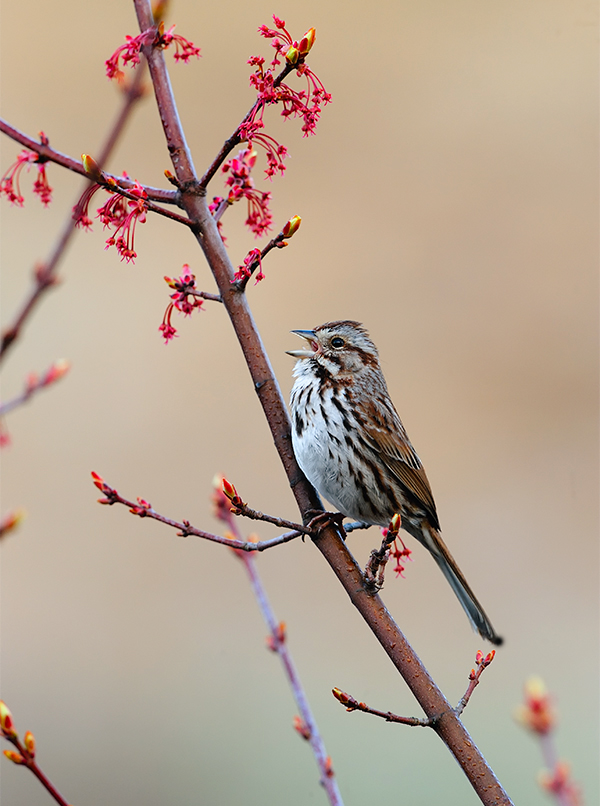
Alright, let's consider one of my images above. It looks okay, but it's a bit dark overall, so I'd like to increase the brightness, particularly in the shadows and midtones. That's a quick fix with curves, I can just move the RGB curve upwards in the shadow and midtone area of the curve (bottom left and middle). I'd also like to decrease the amount of blue in the image overall, but particularly in the highlights. Also a quick fix using curves. I just have to increase the amount of red and green in the brightest parts of the image by moving the individual red and green curves upwards in the top right portion of the curve. I could also have moved the blue channel curve down, but I found that made my image look too yellow (gray - blue = yellow).
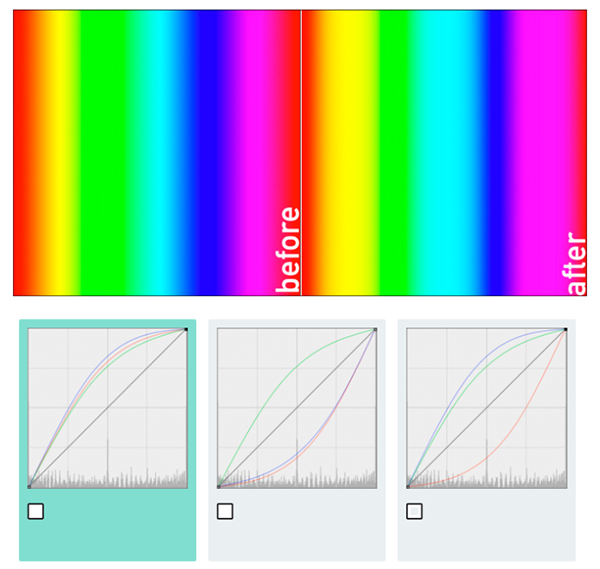
To understand more about curves and colors, let's look at question four from the quiz. What's happening from the first image to the second? Red is decreasing, yellow is increasing, green is decreasing, cyan is increasing, blue is decreasing, and magenta is increasing. Okay, so considering red, green, and blue curves, how would this be achieved? It is actually achieved by increasing red, green, and blue. This is because when you add more of each color at the midtones, the increased color leads to more color mixing rather than larger strips.
For explanations for all ten quiz questions and a lot of excellent information on curves, be sure to check out the article over at DIY Photography.
(Seen via DIY Photography)