Avoiding artifacts: Selectively sharpening in Photoshop with Jimmy McIntyre
posted Thursday, October 27, 2016 at 10:00 AM EDT

"Hi guys, Jimmy McIntyre here," is a phrase I hear a lot when trying to improve my photography because his videos are consistently excellent and educational. This time he's here to help with sharpening photos and ensuring that you don't experience the dreaded edging issues that occur when you have oversharpened an image.
Ideally, you want to bring out the most detail possible in your work, but you don't want to go too far and make it look unnatural. It can also be tricky to sharpen only the areas of the image worth sharpening. You don't want to sharpen a soft line that is meant to be soft, for example, and trying to do so will often result in artifact issues.
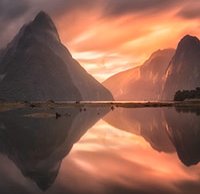
As is often the case, Jimmy has created a free Photoshop action for us to use, which you can download here, and he also shows us how to do it ourselves. Sharpening increases edge contrast, which causes black interior edging and white exterior edging in high-contrast areas, such as the edge of the mountain against the sky in the video below. To avoid this, we need to selectively avoid sharpening the edges in the image that don't need to be sharpened, particularly the largest edges as they are the ones that will pose the most visible issues during the sharpening process.
As you can see, the task is much simpler using the free action download, but it can be achieved quickly on your own as well. As McIntyre warns, this technique doesn't work for every scene, but it should work in many cases, particularly for landscape photographers.
If you're interested in sharpening images for web display rather than for large prints, check out Jimmy McIntyre's video below.
You can find more of Jimmy McIntyre's tips and tricks on his YouTube channel. You can download his very useful "Easy Panel" for Photoshop here.
(Seen via SLR Lounge)