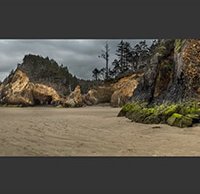
How to capture, stitch and post process HDR panoramas in Adobe Lightroom and Photoshop
posted Monday, January 9, 2017 at 3:00 PM EDT

Scott Kelby of KelbyOne wants to help you create better HDR panoramas in Adobe Lightroom. Of course, you need to make sure that you have good files to work with in Lightroom if you want to get good final results. When shooting images for an HDR panorama, you want to use your camera in a bracketed exposure mode. Scott shoots three images for every one frame, a normally-exposed shot and then two shots which are two stops over and under. Since we want to create a panorama, we must rotate our camera after capturing the bracketed exposure shots. Scott recommends that your images overlap one another by at least 20 percent.
In the video below, Kelby captured 18 total images. With three files combining into one final HDR image, that means his panorama will be comprised of six total frames. You want to combine the HDR images first before stitching the panorama. This is very easy to do in Lightroom. You select your images, go to Photo, Photo Merge and then HDR. After merging your HDR photos, you then want to stitch the panorama. This is done by selecting the images, going to the Photo menu and then selecting Photo Merge and Panorama.
To help deal with the gaps around the edges after the panorama merging process, Kelby likes to use the built-in Boundary Warp slider to eliminate any gaps. What about further editing? Scott Kelby made a second tutorial showing post processing for the HDR panorama image. For post-processing the image, Kelby utilizes both Lightroom and Photoshop, including Nik plug-ins for Photoshop.
For more from Scott Kelby, visit his website and KelbyOne.
(Seen via ISO 1200)