Try these super-useful Photoshop techniques to make your work stand out
posted Thursday, March 23, 2017 at 1:00 PM EDT
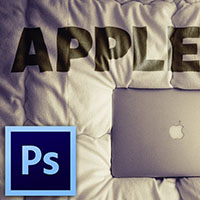
These two post-production techniques are examples of techniques that are easy to learn, yet bring considerably more "value" to your images. Firstly, have you ever wondered how graphic artists make text appear as though it was written on objects in Photoshop? The key to this is not just placing text over an object, but actually making that text interact with the object so that it appears to be part of it. The process in Photoshop involves using what is known as a "displacement map." I personally thought this technique was a lot harder than it actually is, as YouTube channel Cristi Kerekes of Eye Stocker shows how simple the process can be.
Here are the steps Kerekes goes through:
-
Create a displacement map in Photoshop. Use the Channels panel to locate the one with the most contrast. Duplicate that channel.
-
Photoshop will create a new document that represents the channel you duplicated. Next, gaussion blur the image enough to get rid of texture. Choose a low value. Save the document as a .psd.
-
Choose the text tool and select a 50% grey as the color.
-
Write the desired text in the desired font.
-
Right click on the text layer, and convert the text to smart object.
-
Next, go to Filter -> Distort -> Displace. The higher the value here, the more intense the effect. Here, the instructor used "7." Stretch to fit, and repeat edge pixels. Photoshop will ask you to select a file, which you will use as the one created earlier.
-
Make sure the text layer is selected, then change the blending mode to "Linear Burn."
-
You'll start to see it working! Next, to make the text less sharp to look more realistic, use Gaussion Blur again, and blur it to fit your desired level.
-
Right click on the text layer and pick "Blending options." Use the bottom two sliders to adjust the opacity of different contrast levels to what you think looks right.
-
Finally, adjust the text layer opacity to be a bit more realistic, probalby around 80% opacity.
You can always adjust the settings he chose for his specific image to better fit what your photo is, but these steps should provide an excellent framework for your individual image.
Secondly, you can easily get rid of the "dark circles" around a subject's eyes with a little Photoshop. Though there are several ways to achieve this, the way that Mathieu Stern is pretty rad: