AMBIENT LIGHT DETECTION TOO
hueyPRO -- Affordable Monitor Color Correction
By MIKE PASINI
Editor
The Imaging Resource Digital Photography Newsletter
Review Date: June 2007
Take a picture, any picture. When your camera captured that red in it, it recorded it as 180 Red, 64 Green and 64 Blue (on a scale of 0 to 255). Perfect, really.
But you don't know because when you display it on your monitor it looks a little orange. So you make a little adjustment but when you print it, you get something like purple instead of the red you see on your screen.
In fact, no matter what you do, you can't get it right. It just gets worse and worse, the more you work on it. Right?
Sure. Because you've put your faith in what you see on the monitor. And the monitor is, um, lying to you.
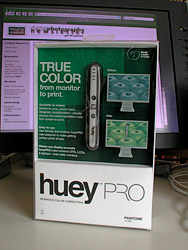
hueyPRO. In the box before it gets to work on that monitor.
Pantone has an inexpensive solution to this merry-go-round called the huey (a playful extension of the word "hue"). And they've recently bulked up the software with the new hueyPRO. We took the hueyPRO for a spin this week.
When we last wrote about monitor profiling (which is what this is called) in our May 13 issue, we talked about free eyeball calibration and device calibration, greatly favoring the use of a device. It's worth reading that piece for an overview of the whole process.
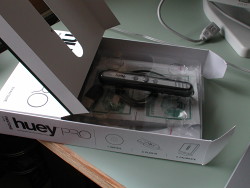
Flip Top. Complicated little box.
We've relied on a ColorVision Spyder to calibrate our monitors and we plan to review the Spyder2PRO with PrintFIX PRO shortly. The Spyder2PRO alone is more expensive than a hueyPRO. Here are the Amazon discount prices with links that support this site:
• ColorVision Spyder2PRO: $249 list, $179.99 at discount
• hueyPRO: $129.99 list, $92.99 at discount
How to decide?
If you do this for a living and print on art stock or use custom inks, investigate the ColorVision solution. In our experience, the Spyder2 Pro has produced the most consistent and accurate screen adjustments of any solution we've tried. Our Spyder created a profile with a slightly larger gamut (more blues) than our huey profile.
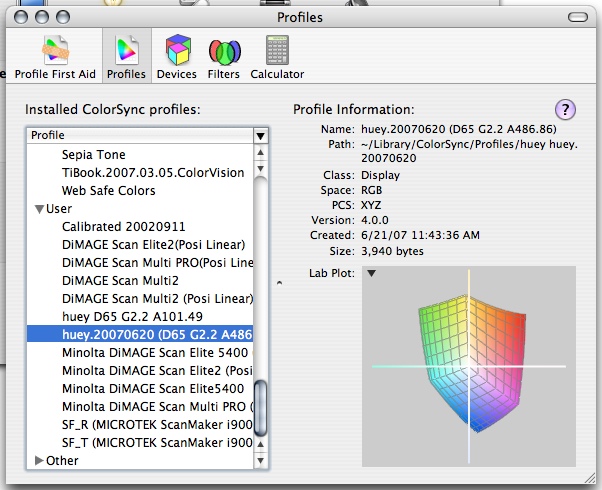
huey Profile. Compare the charts.
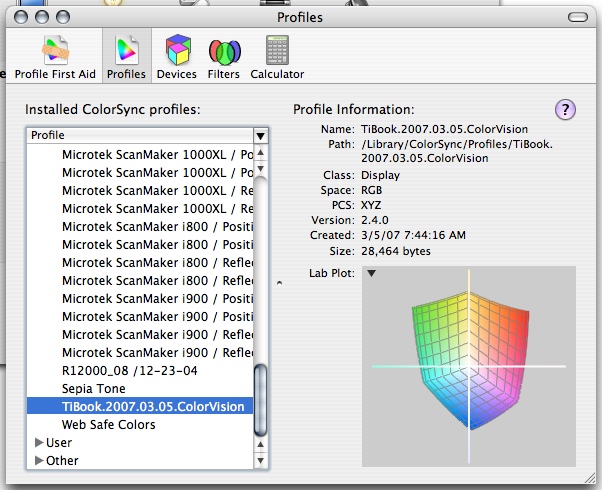
Spyder Profile. A bit wider.
If you use printer profiles from either your printer manufacturer or your paper mill and just want to profile your monitor, perhaps in a room not designed for photo retouching, consider the hueyPRO. It can calibrate two monitors and, according to Pantone, improves color accuracy over the huey, despite being the same hardware. Tests at the IR lab found the huey itself generally unsatisfatory as a calibration solution.
Any reasonably good hardware calibration solution is superior to eyeballing your monitor. And, it should be noted, none of these _monitor_ profiling solutions calibrates your _printer_. To get your printer to behave predictably, use those ICC profiles installed with the driver for the paper you're using.
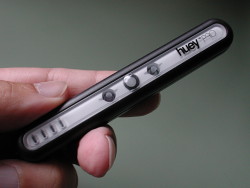
Front. Three inches long.
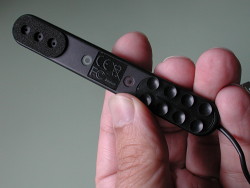
Back. Note the sensors at left and suction cups at right.
The hueyPRO distinguishes itself with the following features:
- It's quite small (the size of a marker) and weighs almost nothing so you can easily travel with it -- and unlike other devices, you might want to
- It detects changes in ambient light, adjusting the monitor at regular intervals (which is why you might want to travel with it)
- It can calibrate multiple monitors connected to the same computer
- Help is available for each step of the process
- Measurements are taken quickly so the process isn't time-consuming
- Personal preferences can be incorporated and changed on the fly
- The software is very easy to use
- It's a USB powered device
Calibrating with a huey is, in fact, quicker than with the Spyder. And the software doesn't begin by asking you tough questions like what you want to use for a target color temperature or gamma (which accounts for its reputation for simplicity), although the hueyPRO version doesn't handicap your options either. All of these devices are USB powered, but that's all you need to use a huey to monitor ambient light and adjust your display accordingly (so shadows don't get as washed out in a brighter room).
SYSTEM REQUIREMENTS | Back to Contents
System requirements are rather modest. The software runs on Windows 2000/XP and Mac OS X 10.3 or later. Vista is supported (64-bit version, too) but huey is not Vista certified.
A USB port is required, of course, but we were able to run the huey through a USB hub to a USB 1.0 port. So any USB configuration should work.
Included in the box are:
- The hueyPRO colorimeter
- Desktop cradle
- USB extension cable
- Klear Screen monitor cleaning packet with 4x4 micro-chamois cloth
- hueyPRO software CD
- hueyPRO quick start poster
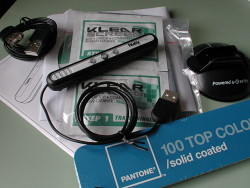
Contents. Everything you need.
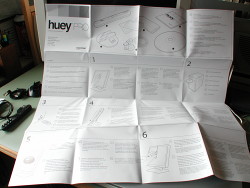
Poster. More languages than instructions.
For a limited time, Pantone is also including its Pantone 100 Top Colors solid coated book. The book shows RGB and the HTML values of the 100 most popular Pantone colors used in the graphics arts.
Opening the box can be quite a puzzle but we managed to figure it out. Remove the paper box from the plastic outer shell. Then open the top flap of the paper box to lift the front of the box up off the plastic enclosure. The plastic enclosure, which holds the huey and the other items, opens easily from the top. To extract the huey itself from the bubble, push the huey through the bubble rather than pull the huey out from the bubble. It's a delicate instrument with a very thin cable (don't pull on the cable).
INSTALLATION | Back to Contents
Pantone suggests you clean your monitor before starting. It even provides a Klear Screen monitor cleaning packet and a micro-chamois cloth to polish the monitor dry.
Clean Screen. Cleaning supplies included.
It's smart to do that, of course, but with the huey, which actually sticks to the monitor surface, it's essential. In fact, you may want to clean the small suction cups on the huey itself with the cleaning pad before you toss it.
If you're antsy about sticking anything on your monitor, we hear you. We avoid any contact at all and were a bit distressed to learn that the huey has suction cups and must be attached to the screen.
The Spyder simply lays on your LCD (suction cups hold it on a CRT), held in position by a counter weight. We usually just angle the screen well back on our laptops or lay our flat LCDs down to calibrate them with the Spyder. The counter weight can be more trouble than it's worth. But suction cups?
At PMA Sneak Peak a few months ago, we got a real lesson in suction cups from the huey demonstator. He slapped a huey on a laptop screen and ripped it off several times and let us examine the damage. None. The suction cups are quite soft and should not, if clean, mar the plastic on laptop screens. But still, be careful not to press hard. If your huey falls off (and it tends to), clean or wet it.
While the software CD with both Windows and Mac versions recommends dragging the application to your drive, it properly should mention to put it where you keep all your programs or applications. But it is a simple drag and drop installation.

CD. Just drag and drop.
Once the software is installed, you can plug in the huey. Pantone considerately provides a USB extension cable but the cord on the huey itself is quite long.
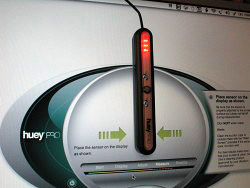
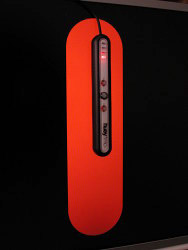
Mounted. The target is right under the huey.
Pantone recommends warming up your monitor 30 minutes before running the software to create a profile. That's good advice for a CRT and won't hurt an LCD. We've asked Pantone how the huey would do with the new LED-backlit screens in the MacBook Pro, but haven't heard yet.
Pantone also wisely recommends you avoid direct sunlight or room light shining on the monitor. Our previous article explains how to set up your room (and your apparel) for the best viewing conditions.
CREATING A PROFILE | Back to Contents
There are really just two steps to creating a profile with the huey. The first is cranking up the display so it can show what it can do. The second is measuring that optimized display to see how it compares with known values. The difference is recorded in a display profile.
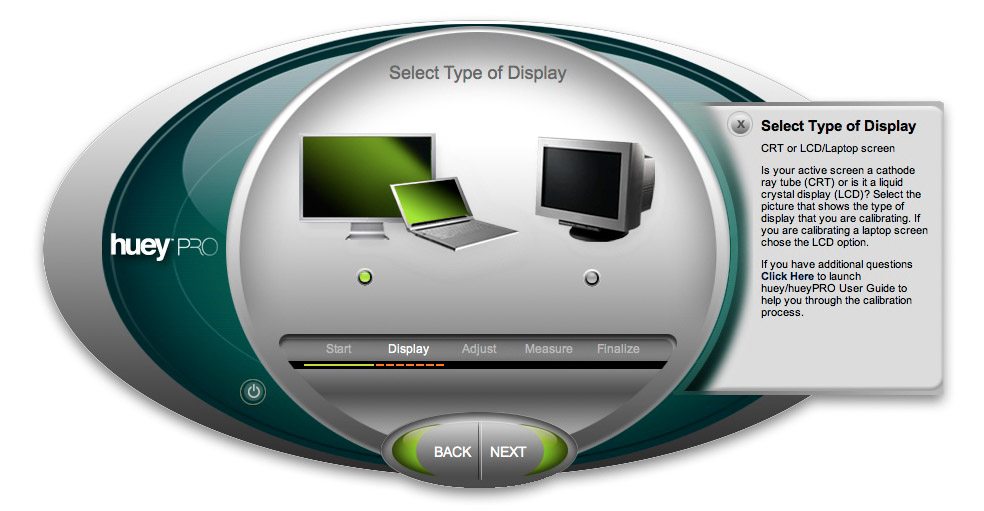
Select Monitor Type
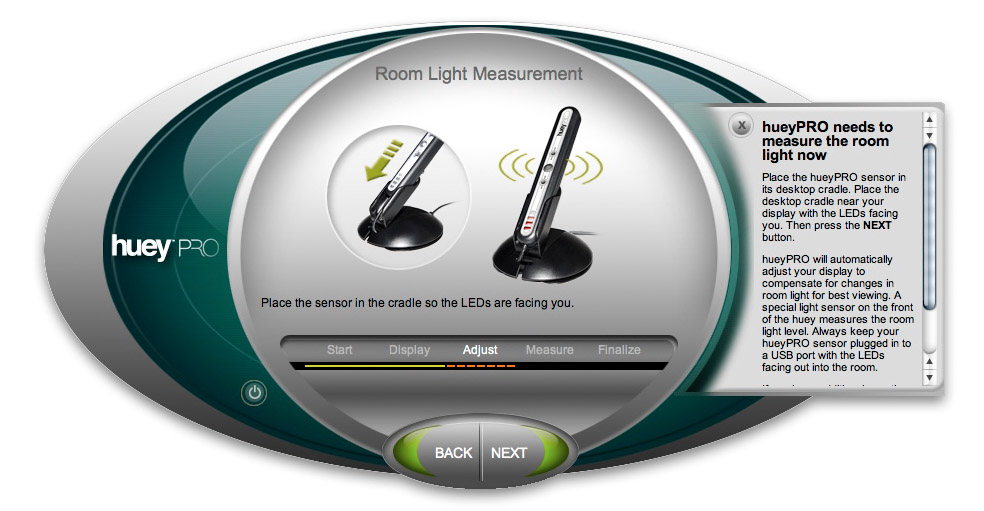
Measure Ambient Light
Measure Display
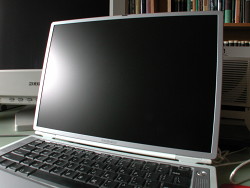
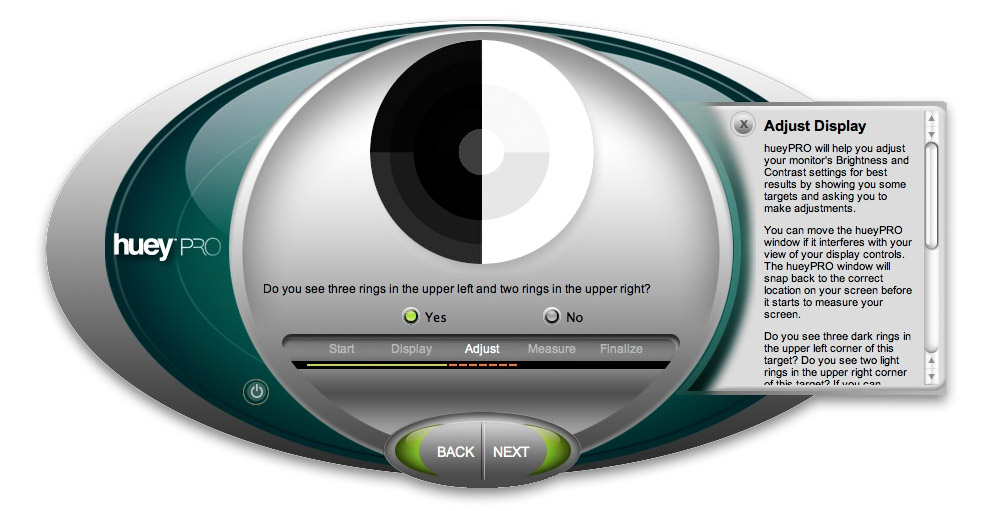
Step one is done visually by you using an onscreen target. The onscreen instructions explain how to set contrast and brightness after asking which kind of monitor (CRT or LCD) you are calibrating.
Whatever adjustments you can make, come as close to the targets as you can. We were never able to make sufficient adjustments manually to see the target correctly, but we've always run our LCDs at full brightness to see the maximum number of tones. No fear of blowing out highlights on our LCD.
Mount huey
Measure Monitor Output
Finished!
The next step requires the huey. A nice, clear target is displayed on your screen so you can just attach the huey over it. Our advice is to wait a minute or two before proceeding. We found the huey suction cups tend to give if not well attached within a minute or two. But after that, you can consider it secure.
There are actually red, green and blue sensors on the huey's belly and over the next two minutes a series of colors and tones are flashed at those sensors which measure their display.
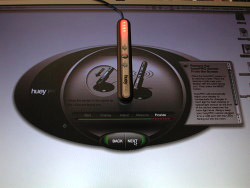
Once that's over, you can pop the huey into its desktop cradle by inserting the cable end first. Be careful not to snag the cable, which can be wrapped around the base (but give it some slack in case you flatten the sensor against the cradle accidentally).
The software asks you to name your profile. We recommend using the date for a quick reminder of when it was created. They tend to be created a lot earlier than you remember.
Finally the software asks the tough questions: which color temperature and gamma do you want to use? It provides three color temperatures: D50, D65 and D75, with D50 providing a warmer display and D75 a cooler one. It also provides three gammas: 1.8, 2.2 and 2.4, with 1.8 providing a lower contrast and 2.4 a higher contrast display. D65 is the ISO standard and 2.2 is the standard gamma these days, both of which the huey selects as the default. But don't worry, you can change these on the fly if they don't work out for you.
You then tell the software if you want the huey to monitor room light and when to remind you to recalibrate (or to turn that off). The preferences are saved with the color temperature and gamma settings you chose and are available instantly from the control panel running in the background.
USING THE HUEY | Back to Contents
To really appreciate what the huey has just done for you, you can toggle between using the monitor profile and not using it. The calibration software ends with this option but you can also do it any time from the control panel. Pop up an image full screen to help you see the difference.
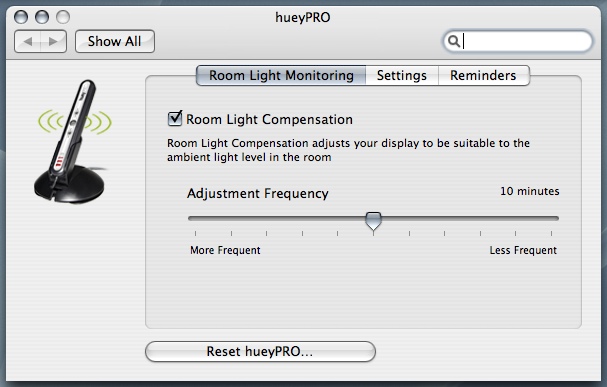
Room Light Monitoring Prefs
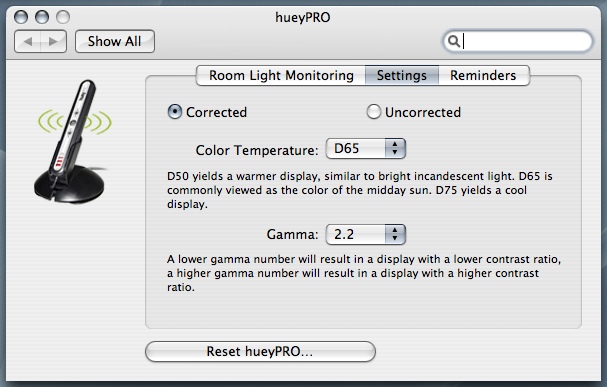
Color Temp & Gamma Prefs
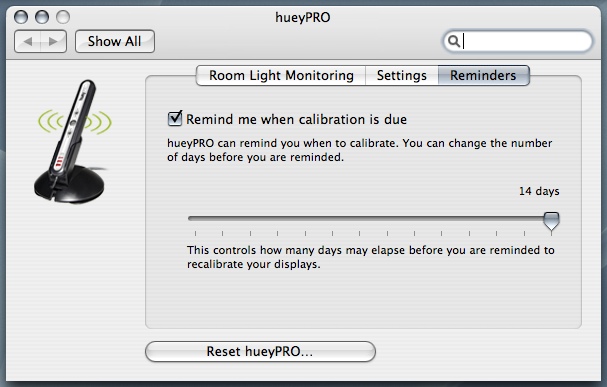
Reminders Prefs
Unlike most calibration devices, the huey has a job to do between calibrations. And that job is simply to monitor room light, adjusting the display when necessary.
It can do this on command or at regular intervals, which you can set as a software preference in the control panel.
Since it's so small (and, frankly, attractive), it's no trouble to leave it plugged in and mounted in its stand to watch as the light changes during the day. If it's doing it's job, you shouldn't notice. And we didn't. As we worked through the morning and the afternoon and late into the evening past the wee hours of the morning never taking a break except to reach for a dictionary or other professional aid, our monitor display remained constant.
We'll say again that while using a monitor profile is essential to appreciating what your camera or scanner has captured, it does not guarantee your prints will match what you see on your screen.
In fact, that's not really possible. Your screen creates color in quite a different way from your printer. The two aren't identical, but they are equivalent. What you really want to achieve is a credible likeness in print of what you see on the screen.
That's achieved first by profiling your monitor so it correctly reflects the data in your image and second by using the printer profile for your particular paper supplied by your printer manufacturer or the paper mill.
We would no more look at an monitor that hasn't been calibrated than believe the promises of a salesperson. But monitor profiling using a colorimeter has generally been both so expensive and so difficult that only a few people who appreciate it have done it.
The Pantone hueyPRO makes it affordable and easy to calibrate and profile your monitor, a good solution for the amateur photographer with multiple monitors who may not have the additional cash to go with a higher-end solution like the ColorVision Spyder2 Pro.
But stay tuned! The guys back at IR headquarters have been working on a comprehensive test and overview of a wide range of both monitor calibration solutions as well as reviews of several high-end LCD displays. Look for the fruits of this labor to begin making their way onto the site in the coming months.