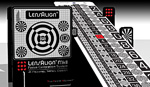
SMALLER, LESS EXPENSIVE LENSALIGN
LensAlign MkII --
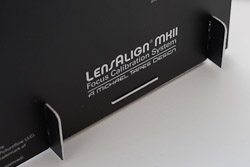
Perfecting Autofocus
By MIKE PASINI
Editor
The Imaging Resource Digital Photography Newsletter
Review Date: December 2010
Michael Tapes invented the simple device many photographers use to correct the back or front focusing errors made by their autofocus dSLRs. It was such a good idea that it spawned an imitator, Datacolor's $59 SpyderLensCal.
But Tapes isn't a tinkerer for nothing. While some of us prefer not to tinker with perfection, he never left the drawing table trying to improve on his first two designs, the LensAlign Pro and LensAlign Lite. By the time the SpyderLensCal was announced, he had already worked out his third LensAlign design.
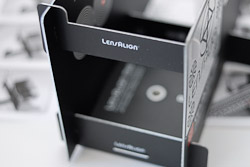
And that design is the LensAlign MkII, a $79.95 version that replaces the LensAlign Lite. For a limited time, he's shipping it with an $18.95 WhiBal G7 Photo Gray Keychain Card at no extra charge.
We found nothing lacking in either of its predecessors, so why the new version? Tapes explained on his blog:
"By simplifying the design and incorporating new precision manufacturing techniques, we were able to reduce the cost of the MkII, while maintaining the high quality standards of the original LensAlign Pro. As with the Pro version, the new MkII ensures absolute repeatability from one unit to another and from one focus calibration session to another.
WHIBAL G7
For a limited time, Tapes is offering the $18.95 WhiBal G7 Photo Gray Keychain Card at no extra charge when you order a LensAlign MkII. He sent three different sizes to us for evaluation: the 1x2-inch Keychain Card, the credit card size Pocket Card and the 7.5x10-inch Reference Card.

WhiBal G7. Reference Card with Pocket version on a lanyard and Keychain version on a clip.
The Keychain card gives up the black and white references but includes a scale and a clip. The other sizes all include the references and focus targets.
The G7 version is a significant revision to the previous G6 models we reviewed. Those were a rather thick plastic material designed with a luminance value greater than 18 percent gray with an L* value of about 70. The lighter gray takes advantage of the linear nature of a digital exposure, where most bits are devoted to the lighter tones.
The G6 cards could float and if you scratched them, they just revealed more of the same color.
Tapes measured each G6 WhiBal to guarantee it was within one percent of neutral (final G6 products were actually within half a percent). And that revealed that from batch to batch of the gray plastic, the number of rejects varied.
So he redesigned the cards using a new approach which allows more control over production, yielding thinner but more durable cards. In fact the new wallet-friendly Pocket card is the exact thickness and size of a credit card. While still water and scratch resistant, the G7 cards don't float. A compromise he was willing to make, Tapes told us. And they're a little brighter at about 80, again by design.
In addition to production run monitoring, Tapes still measures each one with a spectrophotometer calibrated and certified to NIST standards to guarantee they are within spec. And that spec is now within half a percent of neutral in both the a* and b* channels.
Just place one in your scene for a test shot and you'll have a neutral gray to set color plus a pure black and a pure white to evaluate tone.
As we noted in our review, the beauty of this calibrated gray card is that it isn't a camera setting you have to remember to reset.
"When I was designing LensAlign MkII, the ability to be packaged knocked down and shipped flat, was an important consideration. This allows a much smaller external package, supporting the requests from our LensAlign dealers, and reducing overseas shipping costs to our international customers by fitting into standard Flat Rate postal envelopes. Also the LensAlign MkII is able to easily travel when 'knocked down' to its individual parts. Assembly takes about two minutes, and requires no tools."
In fact, well after we'd written the review it occurred to us that storing the occasional-use tool might be an issue. They are bigger than a coffee cup with corners to boot. Being able to take it apart between lens purchases (or body purchases) is a nice enhancement.
KEY FEATURE | Back to Contents
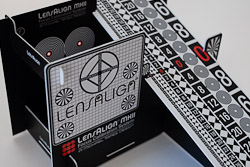
But the key feature of all LensAlign versions has been what Tapes calls their patent-pending True Parallel Alignment sighting system.
Aligning the target is critical to determining back or front focusing. If you've ever tried to squarely line up a photo in your viewfinder, you know it isn't easy.
To make it easy, Tapes has devised a couple of systems. The Pro model introduced a sighting system, a small hole on a front panel that indicated alignment when a red target on a back panel could be seen through it. The Lite model added a magnetic mirror that slapped onto the devices only panel for alignment and was removed prior to focusing on the panel's target.
The MkII uses the Pro's sighting system. Unlike the Lite, it has both front and rear panels in a four-piece rather than two-piece structure.
As easy as the mirror is, we preferred the sighting system. No one ever earned seven years bad luck dropping a sighting system.
THE PROBLEM | Back to Contents
So what's the problem the LensAlign is designed to measure?
First, it's important to understand the problem is not focus but autofocus. Half press the shutter button on your dSLR and your autofocus lens will hunt for focus automatically.
It may not quite get there, though.
If it falls short, focusing in front of the target, we call that front focusing. If it goes long, focusing behind the target, we call that back focusing.
While the difference may be minuscule, it tends to shift the field of focus off (cheating it back or forward). And in precise focusing especially wide open, it's a killer.
Detecting the problem is often more difficult than it may seem. You may confirm the autofocus point in the viewfinder or using software than can display the focus point on your image (typically supplied by the manufacturer) and notice that actual focus was either in front of or behind that point. In short, you have to look for it.
The cause of the problem may be in the camera body itself or in a particular lens. Many recent dSLRs provide a microadjustment for autofocus with two modes: a default that can be applied regardless of the lens mounted and another for just the particular lens mounted.
The number of lens corrections the camera can remember varies. Nikon stores 12 in the D300 and D700 but 20 in the D3/D3X. Canon stores 20 in the 1Ds Mark III, 1D Mark III, 5D Mark II and 50D. The Sony A900 stores 30.
THE PRODUCT | Back to Contents
But first you have to test your lens-camera setup to see if you have a problem. And that's where the LensAlign MkII comes in.
Tapes sent us a preproduction unit, made with a less precise manufacturing method than that used for the production units.
While the seven-piece unit can be put together in a couple of minutes and taken apart just as easily, Tapes said it wasn't designed to be broken down after each session. "We expect people to disassemble it when traveling. We have tested 50 assemblies and disassemblies on these preproduction units with no adverse affects. The design is such that we allow for some wear on the notch retainers without affecting performance."
According to the PDF, assembling is an eight-step procedure. We took photos for you, so it was more involved for us, but we were impressed that no single step was tricky.
|
LENSALIGN MKII: ASSEMBLY |
|
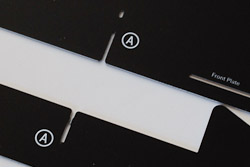
Tabs. Clearly marked (A) with a slot and two pins. Note the matching hole on the top A slot for the pins. |
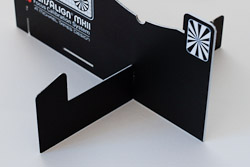
Right Stand. Up and running with bottom of both pieces flat on table surface. The finger supports the ruler. |
Left Stand. All flat to the surface. |
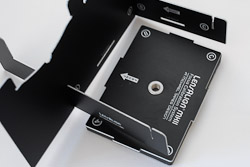
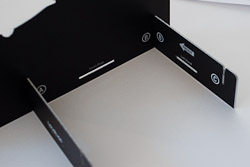
Base Assembly. Slots into three sides of MkII. |
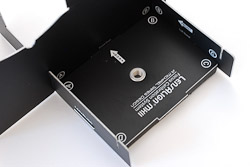
Base Assembly Fitted. Waiting for the rear plate. |
Rear Plate. Two stand slots and one base assembly slot. |
Top Strut. Just angle it in first. |
Top Strut Fitted. It's quite rigid. |

Ruler. Slip the left side of the ruler into the slots on the MkII. |

Ruler Slot. Right side of ruler when attached to right side slots. |
The mating slots use a clever design to lock them into place. If you've ever cut out paper figures and tried to get them to stand up with those half-moon stands, you know the problem. They fold closed or slip off.
The slot design uses a hole above the slot into which the mating piece slips a small nub. So it isn't just a slot but a slot with a small finger than snaps into a hole, too. Once you've seated a slot, only you can unseat it.
The pieces do lock flush to the edges, so you can snap down on a hard surface to align them. With the one exception of the back plate, which goes on only after the base plate is installed. The base plate raises the unit off the surface slightly.
We thought the top strut, which gives the unit its stability, would be a problem. The last piece almost always is. But we simply angled it in and snapped it into place on the rear plate. No problem at all.
Ready for Action. The assembled unit.
Fortunately Tapes designed the ruler to be flexible enough to give a bit during assembly. Start by aligning the left side notches in the MkII and then bend it slightly upward to get the right side notches to slip into the matching notches on the MkII. Easier done than said, in fact. Removal is just the reverse. Bend it upwards to release.
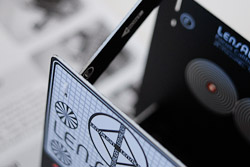
The ruler is double-sided with a dark pattern on one side and a light one on the other. Your preference.
Once seated, the ruler is supported at the quarter, mid-point and three-quarter point, keeping it straight and rigid.
Tapes sent us a base plate that will be pre-assembled on production units. It's aluminum with four feet embossed into it and a hole for the tripod mount. An adhesive holds it to the base assembly, which it fits perfectly.
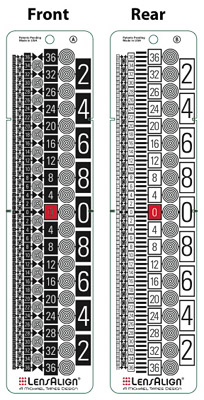
Ruler Design. A bit different from the preproduction model.
USING THE MKII | Back to Contents
Tapes doesn't just design the LensAlign products. He documents their use, too. And the PDF that explains how to use the MkII is very clearly illustrated. Here's the basic procedure, which simply refines alignment in several steps:
- Rough Setup. The camera and the MkII have to, eventually, be parallel to each other. That doesn't mean horizontal, however. So you can set them up on two tripods (the MkII has a steel tripod mount) or a table or any other arrangement that will let them face each other. Leave a little room behind the MkII, too. Then just make sure the large focus target (not the ruler) is around the center autofocus point in your camera's viewfinder.
- From Behind the MkII. Now it's time to get precise with the camera-MkII alignment by using the MkII's back-sighting feature. Tapes notes it's optional but it's also convenient. Just look through the rear of the MkII with your left eye where you see a Rear Sighting Port circled around a hole. You should be able to see a small fuzzy porthole through which your camera will appear. Adjust the MkII until the camera lens is centered in the fuzzy hole.
- From Behind the Camera. Go back to the camera and check that the MkII target is still in the center of your viewfinder. Now find the hole in the center of the front target through which you saw the camera lens when you were behind the MkII. Adjust the camera until the rear red sighting dot appears perfectly centered in the front sighting hole.
- Confirm. So far you've been doing your precision alignment using the viewfinder. But it's the sensor you really want aligned. So use Live View or an alignment test shot to find out exactly what the sensor sees, enlarging the sighting dot until you can see if it is indeed centered in the sighting hole.
Once aligned, you're ready to take your focus test shots.
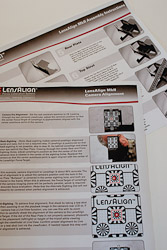
PDF Documentation. Clear, step-by-step instructions.
Take each test shot after throwing focus out and turning on autofocus. Snap the shot with a cable release or the timer to minimize camera shake. Then enlarge the LCD display to evaluate focus on the ruler.
If you have trouble seeing which line of the rule is sharpest, you can open the image in an image editor that has a Find Edges filter to make it easier to find the actual focus point.
Our previous reviews have more details on the process.
From a design perspective, we greatly prefer the LensAlign products to the Datacolor SpyderLensCal. Both the focus target and the ruler are much more detailed. And from a practical perspective, the LensAlign is much easier to align.
The real question is choosing between the Pro and MkII models. Tapes helpfully lists the differences between them.
We recommend the Pro for shops where it will be in constant use by more than one person and the MkII for individuals who need to occasionally test a new lens or set up a new body with their lens collection. In other words, the MkII is that good. And for those occasions when only the Pro will do, you can rent it from LensRentals.com.
Whichever you choose, you'll get a very clear picture of your setup's autofocusing behavior. And if your dSLR offers a microfocusing adjustment, you can easily correct for whatever fault you find. Highly recommended.