Up to Imaging Resource Cameras Page
Up to Imaging Resource Scanners Page
Up to Imaging Resource home page
This page has been formatted to facilitate printout of the review.
Use your browser's "Back" button to return to the previous page, or the links at the top and bottom of this page to navigate to related information. If you have difficulty fitting the text on this page onto your printer output, simply resize your browser window to a narrower width and print again.
![]() Back
to Full The Digital Darkroom! Tutorial
Back
to Full The Digital Darkroom! Tutorial
Up to Imaging Resource Cameras
Page
Up to Imaging Resource Scanners Page
Up to Imaging Resource home page
|
What is it?
In times past, printing your own photos meant having a "darkroom,"
along with a host of special (and expensive) equipment, noxious chemicals, and
large amounts of time. Recently, as computers have become more powerful, and
peripherals more advanced, it's become increasingly practical for "ordinary
folks" to manipulate images on their computers, and make good-looking prints
on low-cost inkjet printers.![]()
Now though, the prospect of manipulating images on home computers has
become far more than just "practical," and the introduction of true
photo-quality inkjet printers has made the output quality much more than just
"acceptable." Gone are the days when you needed to spend hours in
the dark to produce expensive photo prints with bad color: With the right computer
setup, you can achieve results significantly better than typical drugstore mini-lab
processing in literally minutes.![]()
In this article, we'll look at the various components of today's "digital
darkroom," the capabilities it gives you, and some important basics for
producing good-looking prints. Although we'll use Hewlett Packard's PhotoSmart
system as the basis for our discussion, the information here should be useful
regardless of the brand of equipment you choose.![]()
Why now? - Hewlett Packard's Leadership Role
While various companies have addressed individual components of the digital
darkroom, Hewlett Packard is unique in focusing on the entire process, and in
creating a comprehensive system that addresses all of the issues faced by a
photo enthusiast wanting to produce high-quality photo prints with their computer.![]()
HP's PhotoSmart system includes a digital camera, a combination film/print
scanner, a true photo-quality printer, and software that effectively and efficiently
ties all three components into a true digital darkroom. The result is a straightforward
and easy-to-use system, producing final output that's literally hard to tell
apart from conventional photo prints. (And that are almost certainly of higher
quality than what you're receiving from your current photofinishing outlet!)
While the elements required to bring this about have existed separately before,
HP is the first company to have brought everything together into a seamless
whole.![]()
Besides their products, HP has committed significant resources to helping
consumers (that's marketing-speak for "ordinary folks") be successful
in using their own "digital darkrooms." In addition to this article,
they also sponsor an entire site devoted to digital photography, with fresh
material uploaded weekly, at http://www.photosmart.com/ (Actually, you'll find
reams of useful material there, regardless of whether you own HP equipment or
not: Most of the tutorial information and tips are equally valid regardless
of the particular type of camera, scanner, or printer you happen to be using.
- Of course, HP hopes you'll recognize the obvious merits of their own offerings!)![]()
What can it do?
All this hyperbole about digital darkrooms is fine, you're probably saying,
but what is it actually good for? After all, the prints we all get at our local
photo or drugstore are pretty good: Do we really need a digital darkroom?![]()
 There
are probably three reasons someone might want a digital darkroom, and all involve
going beyond what the local mini-lab can offer you. There's no doubt that color
photofinishing is one of the great bargains of our time: Over the past twenty
years, film processing costs have stayed more or less constant, in the face
of continual inflation in just about every other consumer product or service.
Nonetheless, the mass-production, automated methods needed to achieve this remarkable
efficiency mean there's little opportunity to accommodate the unusual, let alone
provide for custom handling of individual images. How often have you gotten
back prints that were just a bit (or even more than a bit) lackluster? How often
have you wished you had a reprint or enlargement of a photo, but the hassle
of separating out the negative, marking it, bringing it to the photo outlet,
getting it back, and safely storing it away with it's siblings from the original
roll was enough of a hurdle that you just never got around to it? (Ever notice
how often the negatives from reprints don't make it back into the sleeve?) How
about just the difference a little custom cropping can make in your photos?
- So many shots can be immensely improved by just a little trimming, but so
few of us do it because of the risk of ruining the original, which would send
us back through the whole reprint hassle again.
There
are probably three reasons someone might want a digital darkroom, and all involve
going beyond what the local mini-lab can offer you. There's no doubt that color
photofinishing is one of the great bargains of our time: Over the past twenty
years, film processing costs have stayed more or less constant, in the face
of continual inflation in just about every other consumer product or service.
Nonetheless, the mass-production, automated methods needed to achieve this remarkable
efficiency mean there's little opportunity to accommodate the unusual, let alone
provide for custom handling of individual images. How often have you gotten
back prints that were just a bit (or even more than a bit) lackluster? How often
have you wished you had a reprint or enlargement of a photo, but the hassle
of separating out the negative, marking it, bringing it to the photo outlet,
getting it back, and safely storing it away with it's siblings from the original
roll was enough of a hurdle that you just never got around to it? (Ever notice
how often the negatives from reprints don't make it back into the sleeve?) How
about just the difference a little custom cropping can make in your photos?
- So many shots can be immensely improved by just a little trimming, but so
few of us do it because of the risk of ruining the original, which would send
us back through the whole reprint hassle again.![]()
 All
of these issues disappear when you can do your own photofinishing on your computer.
Not only that, but you can do things that are simply impossible with conventional
photo printing. Things like independent brightness and contrast adjustment that
we take for granted on the computer are virtually impossible with conventional
photo processing! (Before some of the cognoscenti out there catch us up on this,
let us be quick to point out that yes, you can achieve contrast control in color
printing through the use of custom-made "contrast masks." This is
so far outside the realm of ordinary photofinishing though, that we felt we
could safely ignore it.) When you toss in the ability to "clone" away
undesired elements in photos, and consider some of the cool projects you can
create (like personalized greeting cards, family photo calendars, etc.), there's
no comparison: The digital darkroom wins hands down!
All
of these issues disappear when you can do your own photofinishing on your computer.
Not only that, but you can do things that are simply impossible with conventional
photo printing. Things like independent brightness and contrast adjustment that
we take for granted on the computer are virtually impossible with conventional
photo processing! (Before some of the cognoscenti out there catch us up on this,
let us be quick to point out that yes, you can achieve contrast control in color
printing through the use of custom-made "contrast masks." This is
so far outside the realm of ordinary photofinishing though, that we felt we
could safely ignore it.) When you toss in the ability to "clone" away
undesired elements in photos, and consider some of the cool projects you can
create (like personalized greeting cards, family photo calendars, etc.), there's
no comparison: The digital darkroom wins hands down! ![]()
So where do you start in all of this? In the following sections, we're
going to look at each step of the process individually, starting with getting
the pictures into your computer, moving on to "fixing" them, and finishing
up with printing them on a photo-quality printer. By the time we're finished,
you should have a pretty good idea of what digital photography is all about,
and better yet, a solid head start toward getting great-looking prints.![]()
Begin at the beginning: Digital Cameras![]()
 The
first step to a digital darkroom is to get a digital version of a picture into
your computer, and the most direct way of doing this is with a digital camera.
We cover digital cameras at some length in other parts of this site (see our
Buyers Guide to Digital Cameras,
for instance), but we'll hit a few of the basics here for the sake of continuity
nonetheless.
The
first step to a digital darkroom is to get a digital version of a picture into
your computer, and the most direct way of doing this is with a digital camera.
We cover digital cameras at some length in other parts of this site (see our
Buyers Guide to Digital Cameras,
for instance), but we'll hit a few of the basics here for the sake of continuity
nonetheless.![]()
The easiest way for most people to visualize what a digital camera does
is to start by thinking of a TV set displaying a picture. Now, imagine that
we lay a fine grid over the face of the TV screen, and measure the color and
brightness of the image inside each square of the grid. The set of color &
brightness numbers we obtain this way is nothing less than a digital version
of the original image: If we can somehow get another TV screen to display these
same color & brightness values at every spot on the grid, we'll have reproduced
the original image.![]()
This is exactly what happens with a digital camera, and inside your computer.
The little squares of the grid are called "pixels," an abbreviation
for the scientific-sounding term "picture element." Inside a digital
camera is a sensor (much like the one inside a modern TV camera), with hundreds
of thousands of tiny light-sensitive cells arranged in a dense grid. The camera
lens focuses an image onto the sensor grid, each cell measures the light falling
on it, and the camera stores the color and brightness numbers from all the individual
sensor cells in a data file. Later, this file can be read by a computer, to
reconstruct the original image. ![]()
Obviously, a key factor in how accurately a digital camera can capture
an image is how fine a "grid" it uses to record the color and brightness
values: Changes in picture content that are smaller than a grid square (or pixel)
simply aren't seen. Thus, one measure of camera quality is how many pixels it
has on its sensor. Early digital cameras had only about 350,000 pixels, arranged
in a 640 x 480 grid. Since this is the same resolution as the original "Video
Graphic Adapter" computer displays, such cameras are frequently referred
to as having "VGA" resolution. More recent cameras far exceed this
resolution level.![]()
How much resolution do you need? To a great extent, that depends on what
you intend to do with the pictures. If you're mainly going to be viewing them
on a computer screen, and not cropping into the images significantly, VGA resolution
is probably plenty. On the other hand, if you want good-looking printed pictures,
you'll need considerably more. When you're shopping for a digital camera, you'll
frequently hear the term "megapixel" bandied about. "Megapixel"
is just an abbreviation for "a million pixels." As it turns out, a
million pixels is about what you need to achieve true photo quality, at least
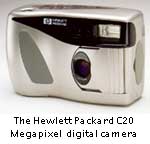
for print sizes up to about 5x7 inches. As it happens, Hp's C20 digital camera
has almost exactly a million pixels, with a pixel grid measuring 1152 x 872.![]()
There are a host of other characteristics to consider when buying a digital
camera: You'll want to consider issues such as viewfinder type and accuracy,
image quality, "white balance" capability, and of course ease of use.
For more information on how to evaluate these and other factors, see our "buyer's
guide to digital cameras," and check out the many camera
reviews on this site. (A good place to start would be with the review
for the HP C20.) More-technical readers may want to read a detailed discussion
of how we test the cameras we review, in "More than you wanted to know
about digital camera testing."![]()
As you'll see if you read the review
for the HP C20, we found it to be an excellent choice for people who want
to capture good-quality digital images with a minimum of muss or fuss. It scores
well in all the basic categories, and requires the absolute minimum of fiddling
to get usable pictures. The real bonus we found with it though, is the excellent
"Photo Finishing" software HP includes with it, which we'll discuss
at greater length below.![]()
"Converting" Photos: Digital Scanners![]()
 A
digital camera is fine if you're taking new pictures, but what about the hundreds
of pictures filling all those shoeboxes in the closet? Or, what if you like
the sense of permanence of film-plus-print that conventional photography offers,
not to mention the wide range of film types, and even interchangeable lenses
available with some cameras? Finally, film captures much more detail in a picture
than do current digital cameras: If you want to enlarge your photos much, you'll
need film originals to do so.
A
digital camera is fine if you're taking new pictures, but what about the hundreds
of pictures filling all those shoeboxes in the closet? Or, what if you like
the sense of permanence of film-plus-print that conventional photography offers,
not to mention the wide range of film types, and even interchangeable lenses
available with some cameras? Finally, film captures much more detail in a picture
than do current digital cameras: If you want to enlarge your photos much, you'll
need film originals to do so.![]()
The way to get conventional film or printed photos into your camera is
through a scanner. Scanners get their name from the way they convert the film
or print into digital data: A high-resolution line sensor (all its light-sensitive
cells are arranged in a line) moves or scans across the photo medium, measuring
all the color and brightness values one line at a time. Because they have the
luxury of doing the job one line at a time, even relatively inexpensive scanners
capture much more detail than do most digital cameras.![]()
Just as with digital cameras, the pixel resolution of a scanner is an
important characteristic when it comes to determining how accurately it can
reproduce a photograph. Scanners are a bit different case than digital cameras
though, when it comes to specifying resolution: The sensor in a digital camera
always sees the world through the same "window", and so always captures
the same number of pixels. By contrast, virtually every image a scanner captures
will be a different size, based on the dimensions of the original being scanned.
Rather than stating the maximum number of pixels scanners can capture, it is
much more common to refer to their resolution in terms of "pixels per inch"
(ppi) or "dots per inch" (dpi). Many scanners can capture more pixels
per inch along the direction the sensor head is moving than along the length
of the sensor itself. Thus, you'll frequently find scanners with resolutions
of "300 x 600 dpi" or "600 x 1200" dpi.![]()
So how many dpi do you need? The answer depends a great deal on what
you want to do with the device: If you only need to scan from conventional photographic
prints, 600 dpi is more than enough, and 300 dpi will be plenty for most applications.
This is because photographic prints themselves have a fairly limited resolution,
generally accepted to be something on the order of 200-400 dpi. On the other
hand, film is quite a different beast, and resolutions of 2000 dpi or greater
are required if you want to achieve the maximum possible enlargement.![]()
The huge difference in resolution requirements for film vs. prints is
why the scanner market is generally split into two segments: "Flatbed"
or "document" scanners are designed for scanning reflective media
(photo prints, printed pages, etc.), and "film" or "slide"
scanners are made to handle film. Aside from media handling, the biggest difference
between these two classes of scanners is the resolution they can achieve, with
film scanners typically offering much higher resolution over a smaller area.![]()
One of Hp's biggest achievements with their own PhotoSmart Scanner has
been to bridge the two worlds of photo and film scanning in a single unit: The
PhotoSmart Scanner can handle prints up to 5x7 inches, as well as both 35mm
negatives and slides! (We refer you to our review
of the PhotoSmart Scanner for more details.)![]()
Another important parameter, particularly for film/slide scanners is
something called "bit depth." In the case of slides especially, portions
of the image can be extremely dense optically, letting very little light through.
For the scanner, this means it must be able to measure very small amounts of
light accurately, while at the same time not losing detail in the brighter regions
as well.![]()
Computers keep track of numbers with "bits," short for "binary
digits." A bit can have values of only one or zero, but by stringing enough
of them together, any size number can be represented. The trick for a scanner
is to be able to measure with enough "bits" of accuracy to accurately
distinguish between of brightness in the deep shadows of an image, and yet have
enough range to handle the brightest highlights as well. You'll find scanners
referred to as 24, 30, or even 36-bit units. These figures refer to the total
number of bits the scanner can capture for all of its "color channels"
taken together. (Huh? "Color channels?" - This just refers to the
fact that scanners determine the color and brightness of an image by measuring
the amounts red, green, and blue light transmitted or reflected by it separately.
They thus are said to have separate red, green, and blue "color channels.")
The three common bit depths just mentioned correspond to 8, 10, or 12 bits of
accuracy for each color channel separately. Eight bits corresponds to 256 different
levels of brightness, 10 bits correspond to 1024 levels, and 12 bits to 4096
levels. The more bits, the more accurately the scanner can measure the reflected
or transmitted light, and the finer steps it can recognize. (As noted earlier,
having fine measurement steps is particularly important in shadow areas.)![]()
While many film scanners measure 8 bits per channel, this really isn't
adequate for darker images. The HP PhotoSmart measures 10 bits per channel,
and produces good results even on moderately dark slides. (Color negatives aren't
as dense as slides, so 10 bits is more than enough for most negatives you're
likely to encounter.) As to resolution, the PhotoSmart scanner scans prints
at a resolution of 300 dpi, and negatives and slides at 2400(!) dpi. In each
case, the available resolution comes close to the maximum available from the
medium itself. (Again, see our review of the PhotoSmart Scanner for more information.)![]()
We need to discuss one final issue about scanners; their interface to
the computer. On Windows PCs (the platform supported by the HP PhotoSmart system),
you can connect peripherals to the built-in "printer port," or via
an add-on "SCSI" interface card. Newer computer models now include
Universal Serial Bus or "USB" ports as well. The importance of the
interface type for a scanner has to do with how quickly each type of connection
can move data. The parallel port is the most common, and in the past has been
the easiest interface to use (although the new USB ports may be about to usurp
this position), but is also by far the slowest of the three. SCSI ports are
the fastest of the three types, but generally require adding an interface card
to your computer. USB ports are somewhere in the middle in terms of speed (although
quite a bit faster than parallel ports), but USB-based peripherals are only
just now (October 1998) beginning to appear on the market.![]()
The reason the computer connection is so important is that scanners have
to move a lot of data in the process of scanning a picture. If you only have
one or two prints to scan, you can probably afford to wait, but much more than
that and you're likely to become impatient. Full-resolution film scans could
take a painfully long time to complete with parallel-port-connected scanners.
While the prospect of adding a card to their CPU is enough to send most computer
users running in the other direction, this needn't be the case: Read the review
of the HP PhotoSmart Scanner for a humorous account of our own experiences.
(The short of it is that, once we gave up trying to be macho computer-guru types,
the installation was a complete breeze!) The benefit of a SCSI connection shouldn't
be underestimated: The PhotoSmart Scanner is quite responsive, thanks in large
part to its high-speed connection to the host computer.![]()
"Fixing" Pictures
As we mentioned at the outset, there's literally a world of things you can do
with your pictures, once you've got them into your computer. What we want to
focus on here though, are some of the basics of getting good-looking pictures.
There's lots of information and support available for creating photo projects
(see any of the many consumer-level imaging programs, including Microsoft's
excellent PictureIt, included in the box with both the HP C20 digital camera
and PhotoSmart Scanner), but very little on how to adjust your photos to correct
common problems of exposure or color balance. Fortunately, the basics of making
good-looking prints are pretty simple, and once learned, can be applied to any
subsequent projects you undertake.![]()
What goes wrong?
Think back to various photos you've gotten back from the photofinisher that
were less than you wanted them to be. What were the problems with them? If you
consider your various "photo failures" for a moment, you'll probably
find that they fall into a few basic categories: Exposure problems (overall
too bright or too dark), contrast problems (bright areas are too bright relative
to dark ones (common in flash photos), or the whole picture lacks contrast and
is "flat"), overall color-cast problems (common in indoor pictures
taken with daylight-balanced film), or problems with dull, lackluster color.
ALL of these problems can be corrected on the computer relatively easily. What
the computer won't do though, is turn you into a better photographer, or fix
blurry images caused by poor focus or camera shake.![]()
The big secret!
There's actually a single "secret formula" for successful computer
photo prints that works most of the time: "Let your black be black, and
your white be white." (Amen.) ![]()
What?! Is that all? Actually, it's a lot of it. A significant majority
of all bad-photo problems are the result of not properly utilizing the tonal
range of the paper and ink. If the darkest parts of your pictures don't go all
the way to the maximum density your printer is capable of, your images will
look washed out and pale. Likewise, if the lightest parts of your pictures don't
go all the way to the whitest white available, the photos will look dark and
"muddy." What's surprising to most people is the extent to which problems
of dull, "dirty" colors are also the fault of poor tonal adjustment.![]()
We keep throwing around the term "tonal" here, so it might
be good to briefly define what we mean when we're talking about tonal range
or tonal balance: In photographic terms, "tone" simply refers to the
lightness or darkness of an image or part of an image. As just noted, effective
use of tonal range is a big deal when it comes to getting good prints, largely
because the available tonal range of photo prints is so much less than that
of real scenes. Think about it: The lightest part of a photo print can't be
any brighter than the light that's reflecting off the underlying paper. Compare
that maximum brightness to the glare of full sunlight on a cloudless day! Much
of the art and magic of photography lies in intelligently compressing the incredible
range of brightness our eyes respond to in natural scenes into the range that
can be reproduced on paper.![]()
In computer terms, what this boils down to is making sure that the blackest
black in our images translates to red/green/blue values of 0, 0, 0, and that
the brightest white translates to 255, 255, 255. (255 is the highest "brightness"
number that can be stored in most computer files for each of the three RGB "primary"
colors.)![]()
In most PC imaging programs, you'll find adjustments for "brightness"
and "contrast," that help you stretch or compress the tonal range
as best suits each photo. These two controls sometimes work differently in different
programs, but the concept is the same: The "contrast" control affects
how the computer spreads out the range of brightness values from darkest to
lightest, while the "brightness" control moves the picture's total
range of tonal values up or down the scale.![]()
 In
Hp's Photo Finishing software, the brightness and contrast adjustments are made
in a way that's a little more suited to what you're actually trying to accomplish:
Rather than controls for "brightness" and "contrast," HP
provides three separate controls, to adjust the lightness or darkness of the
highlights, midtones, and shadows directly. These controls are shown at right
(ignore the "sharpness" adjustment for the moment, we'll get to that
later). Adjusting a picture's tonal balance with these controls is simplicity
itself: First adjust the midtone control until the overall "exposure"
of the image looks about right. Then, move the shadow and highlight sliders
(the sliders with the white and black centers) to adjust the extremes of the
picture appropriately. "Appropriately" in this case means setting
the darkest areas of the image so they're just lighter than absolutely black,
and setting the brightest areas of the image so they're just darker than absolutely
white. Once you've done this, the image should print pretty well. (The one quibble
we have with this setup is that we'd really like some sort of visual feedback
to tell when parts of the image get pushed all the way black or white: It can
be difficult to make fine judgment calls of this sort on-screen, particularly
given the variability of PC monitors. A visual indication that lets you know
when you're starting to lose highlights or shadows would be very handy, indeed.)
In
Hp's Photo Finishing software, the brightness and contrast adjustments are made
in a way that's a little more suited to what you're actually trying to accomplish:
Rather than controls for "brightness" and "contrast," HP
provides three separate controls, to adjust the lightness or darkness of the
highlights, midtones, and shadows directly. These controls are shown at right
(ignore the "sharpness" adjustment for the moment, we'll get to that
later). Adjusting a picture's tonal balance with these controls is simplicity
itself: First adjust the midtone control until the overall "exposure"
of the image looks about right. Then, move the shadow and highlight sliders
(the sliders with the white and black centers) to adjust the extremes of the
picture appropriately. "Appropriately" in this case means setting
the darkest areas of the image so they're just lighter than absolutely black,
and setting the brightest areas of the image so they're just darker than absolutely
white. Once you've done this, the image should print pretty well. (The one quibble
we have with this setup is that we'd really like some sort of visual feedback
to tell when parts of the image get pushed all the way black or white: It can
be difficult to make fine judgment calls of this sort on-screen, particularly
given the variability of PC monitors. A visual indication that lets you know
when you're starting to lose highlights or shadows would be very handy, indeed.)![]()
Although they're more properly the subjects of an entirely separate tutorial,
we feel we should at least mention professional applications like Photoshop
and Corel PhotoPaint as well, for readers with the budget (and motivation) to
afford them. Not delving into the details, we'll just encourage interested readers
play with the "levels" control in Photoshop, using the black- and
white-point sliders to adjust shadow and highlight settings. Note that you can
set white and black points for each of the color channels separately, to control
shadow and highlight color balance. For Mac users, see what happens when you
hold down the "option" key while moving the sliders. Finally, use
the "gamma" (center) slider to adjust overall tone.![]()
 Hue
(Color) and Saturation
Hue
(Color) and Saturation
Once you've got the tonal balance of your photo about right, the next step is
to adjust its color and saturation. In Hp's Photo Finishing software, color
balance is set very intuitively by moving a cursor dot around a large color
wheel: The cursor's position around the wheel sets the direction the color in
the picture is being adjusted, and the cursor's distance from the center sets
the amount of the adjustment.![]()
Besides the color-wheel adjustment, the color-adjustment panel also includes
an adjustment for "saturation." This is a term that's new for most
imaging beginners, but one that's pretty easy to understand as soon as you play
with the control a bit. "Saturation" refers to the "intensity"
of colors. Other terms people might use to describe saturation are "purity"
or "brightness." An intense, bright red is said to be highly saturated,
while a dull grayish-brown has low color saturation. If you understand what
a "pastel" color is, you already know what colors with low saturation
look like. Photos in need of a saturation boost are often ones which were overexposed
in the camera, or which were shot outside, under hazy conditions.![]()
The saturation slider is one you'll need to experiment with a bit to
learn how much to increase or decrease it for best results: It's definitely
a control for which a little bit goes a long way! A common mistake of beginners
is to focus on the bright colors in an image, and not realize what's happening
to the colors that really should appear as pastels. A good example of this is
Caucasian skin tones: A neophyte image-adjuster may boost the saturation in
an image to get rich, vibrant greens in foliage, but not notice that the subject's
face has also turned a ruddy shade of red.![]()
You'll probably notice saturation and contrast interacting quite a bit,
which is a natural consequence of the underlying color theory: Low-contrast
images tend to have less-saturated colors, while higher-contrast ones will naturally
be more saturated. Often, some back-and-forth will be necessary, moving between
the saturation adjustment and the tonal controls. If you get the tonal balance
right in the first place though, saturation adjustments should be minimal.![]()
Sharpness
We promised we'd come back to the "sharpness" adjustment from the
PhotoSmart software's "exposure" control panel, and now's the time.
Image "sharpening" is a subject that really deserves a whole separate
article, but a few basics here will help clear up the confusion that exists
around the subject.![]()
The first thing to note, and very forcefully at that, is that no adjustment
of "sharpness" controls in an imaging application can correct for
poor focus when the picture was originally taken! If the picture is out of focus,
it will stay out of focus, regardless of what you do.![]()
"Sharpening" in imaging applications should only be used to
compensate for the softening that naturally happens when an image is scanned
or printed. (Or for that matter, captured with a digital camera.) In the camera
or scanner, the pixels naturally average-out any picture detail within their
boundaries, amounting to a blurring of the photo. Likewise, when a photo is
printed, the printing process tends to reduce picture detail again. (More on
this later.)![]()
To correct for this input/output blurring, software like the PhotoSmart
Photo Finishing software includes a "sharpening" functions. This works
by slightly increasing the contrast anywhere there's an abrupt change from light
to dark or vice versa: Right along the dark side of an object's edge, the sharpening
software makes the image a little bit darker. Likewise, it makes just the edge
of the lighter side a bit lighter. The more-abrupt contrast change tricks our
eyes into seeing a "sharper" edge, even though no new information
has been added to the picture.![]()

As with so many things, a little sharpening is a good thing, but more isn't
necessarily better. You'll want to experiment with the sharpening control, to
see what settings work best with your own pictures. Two bits of guidance: First,
try less, rather than more - a little goes a long way. Second, increase the
amount on images that you've enlarged more, since the blurring effect of the
initial scan or digital photo will affect a larger area. In the PhotoSmart software,
the sharpening control starts out all the way to the left, at the "minus"
end of the scale. This is a little confusing, as it seems like this would be
decreasing the image sharpness, but in fact it just means that no sharpening
is being applied at all.![]()
Sharpening is easy to do in the computer, but very difficult or impossible
to do conventionally. With the right amount of sharpening, your digital prints
can actually look sharper than conventional photo enlargements. In fact, with
a good-quality photo printer (see below), and the right (small) amount of sharpening
applied to your images, people will almost always guess wrong when shown a conventional
photo next to the computer print and asked to tell which is which!![]()
Printing photos from your computer (finally!)
Since this currently (October, 1998) is the only place on the Imaging Resource
web site where we discuss photo printers, we'll spend a little more time on
background material here than we might otherwise. We'll begin with a brief discussion
of how inkjet printers work, explaining the differences between ordinary inkjets
and true photo quality units. From there, we'll cover issues that affect the
quality of the photos you print, talk about how permanent (or not) inkjet prints
are, and describe how to decide how large your image files need to be to get
the maximum print quality. Finally, we'll close with a discussion of the process
you have to go through to get your pictures onto paper: Hp's Photo Finishing
software really shines in this area!![]()
How Inkjet Printers Work
Not wanting to get too far into the inner workings of inkjet printers, all we
really need to know is that they work by spitting tiny drops of colored ink
onto the paper to create the final color image. The catch is that every drop
of ink is the same size, making it tricky to create a wide range of tones or
colors. What's more, most printers have only four colors to work with, the three
so-called "subtractive primaries" of cyan, magenta, yellow, plus black.
(Black isn't one of the primary colors: It's mostly there to save on the amounts
of the other three inks that are required in dark areas.)![]()
 It
may seem surprising that only four colors of ink are enough to create almost
any color possible, but that's why they're called primary colors: You can create
almost any other color, simply by blending various amounts of cyan, magenta,
and yellow. The reason this works actually has to do with the way our eyes see
colors: The right combination of primaries "tricks" us into seeing
a color that actually doesn't exist. The details of how this works are way beyond
this article, but fortunately aren't necessary to understand inkjet printers.
It
may seem surprising that only four colors of ink are enough to create almost
any color possible, but that's why they're called primary colors: You can create
almost any other color, simply by blending various amounts of cyan, magenta,
and yellow. The reason this works actually has to do with the way our eyes see
colors: The right combination of primaries "tricks" us into seeing
a color that actually doesn't exist. The details of how this works are way beyond
this article, but fortunately aren't necessary to understand inkjet printers.![]()
The ideal situation for a printer would be if it could mix together exactly
the right combination of colors for each spot on the picture, and then place
exactly the right amount of ink on the paper to achieve the proper degree of
lightness or darkness. Some very expensive printers (the so-called "continuous-tone"
ones) actually do this, but they cost far more than most home (and many professional)
users are willing to pay. Instead of mixing colors together before the ink hits
the paper, inkjet printers just lay down dots of the four colors of ink separately,
and rely on our eyes' tendency to blur small details together, "averaging"
the results. Thus, a group of tiny cyan dots mixed with tiny magenta dots appears
to be a continuous patch of blue when we look at it with our unaided eyes. (See
the image above right for an ultra close-up shot of an inkjet print showing
a blue sky reflecting on water. - See the mixture of blue and magenta dots?
Without a magnifying glass, the original print appears perfectly smooth.) ![]()
 So
where's the catch, and what's the big deal with "true photo quality"
printers? Well, the process we described above works fine, as long as the object
in the picture is dark enough for the dots of ink to be spaced fairly close
to each other. In very light areas of a picture though, the dots of ink have
to be spread so far apart that the image quality suffers. When the dots get
too scattered, our eyes start to see them as individual dots again. Also, if
the dots are far apart, any detail in the image that's finer than the dot spacing
is completely lost. (See the ultra close-up shot of a sandy beach in the sun
at right: There's lots of detail there, in the leaves of the foliage, and the
boundary between the sand and its reflection in the water, but there's no way
to see it when the printer's dots are so far apart, as with the "conventional"
inkjet printer.)
So
where's the catch, and what's the big deal with "true photo quality"
printers? Well, the process we described above works fine, as long as the object
in the picture is dark enough for the dots of ink to be spaced fairly close
to each other. In very light areas of a picture though, the dots of ink have
to be spread so far apart that the image quality suffers. When the dots get
too scattered, our eyes start to see them as individual dots again. Also, if
the dots are far apart, any detail in the image that's finer than the dot spacing
is completely lost. (See the ultra close-up shot of a sandy beach in the sun
at right: There's lots of detail there, in the leaves of the foliage, and the
boundary between the sand and its reflection in the water, but there's no way
to see it when the printer's dots are so far apart, as with the "conventional"
inkjet printer.)![]()
Another place this too-few-dots problem shows up is in colors where only
a small amount of one color must be added to another to create the correct shade.
This is a very common situation in Caucasian skin tones: Very small amounts
of cyan need to be added to the mostly magenta and yellow coloration to produce
the correct shade of light tan or brown. Because the cyan dots contrast so strongly
with the other colors, the result is a very grainy appearance. (See the illustration
a few paragraphs below, for an example of how this looks in practice.)![]()
Printer manufacturers deal with the problem of obtrusive dots in two
ways. First and foremost, they worked to reduce the minimum dot size as much
as possible, and many printers today have basic "dot pitches" of 1200
or even 1400 dots per inch. This works to a point, but there's still no getting
around the fact that the cyan and magenta inks are very dense, and the dots
are going to stand out whenever there are just a few of them scattered across
an area.![]()
 The
second solution to the "dots" problem is that which has led to "true
photo quality" printers, such as the HP PhotoSmart printer. What if the
ink colors didn't have to be so dark? If the cyan and magenta inks were lighter,
the individual dots would not only be less evident, but you could put more of
them into a given area when printing light colors. Of course, the moment you
lighten the cyan and magenta inks, you immediately have problems printing things
dark enough at the other end of the tonal scale. What to do? The solution is
simple, but requires more-complex printers: Use both light and dark ink for
the cyan and magenta, yielding a total of six ink colors: Cyan, light cyan,
magenta, light magenta, yellow, and black. This is exactly what true photo-quality
printers like the HP PhotoSmart do.
The
second solution to the "dots" problem is that which has led to "true
photo quality" printers, such as the HP PhotoSmart printer. What if the
ink colors didn't have to be so dark? If the cyan and magenta inks were lighter,
the individual dots would not only be less evident, but you could put more of
them into a given area when printing light colors. Of course, the moment you
lighten the cyan and magenta inks, you immediately have problems printing things
dark enough at the other end of the tonal scale. What to do? The solution is
simple, but requires more-complex printers: Use both light and dark ink for
the cyan and magenta, yielding a total of six ink colors: Cyan, light cyan,
magenta, light magenta, yellow, and black. This is exactly what true photo-quality
printers like the HP PhotoSmart do.![]()
So how well does this work? Amazingly well! Compare the two super-enlargements
above of a girl's face: Notice how much smoother her skin looks, and how much
less obtrusive the cyan dots are in the PhotoSmart printer's output! Viewed
at a normal distance, the output from a true photo-quality printer shows no
trace of ink dots, and really does look like an actual photographic print!![]()
The importance of paper
There's another aspect to true photo quality printing beyond just the ink colors,
and that's the paper you're printing on. Most people are aware of the importance
of using specially-coated "inkjet paper" with their printers, having
seen for themselves the poor results that typically result when standard copier
paper is run through an inkjet device. Many don't realize the dramatic difference
that photo-glossy paper can make in even conventional inkjet printers, let alone
photo-quality ones. Because matte-finish paper scatters light even in the dark
areas, it can cause blacks to appear washed-out. By comparison, the right glossy
paper can bring a richness and depth to your inkjet prints that's almost startling
the first time you see it.![]()
 Unfortunately,
the issue of paper isn't a simple one, because the interaction between the paper
and ink is so critical. Even minor differences in the coating formulation on
glossy photo paper can have an enormous impact on how the paper behaves in a
given printer. Paper that works beautifully in one printer may give spectacularly
awful results in another. With the right paper, the drops of ink will lay down
smoothly, and blend together into a rich, glossy finish that truly resembles
a photo print. On the other hand, the wrong paper can cause the ink to clump
up and separate, leaving a grainy, mottled finish. The pictures at left show
the same image printed by a single printer on two different types of paper.
After experimenting with a lot of different paper in various printers, we've
come to the conclusion that the best quality is usually found with the supplies
sold by the printer manufacturer. - Feel free to experiment with various third-party
papers, but if your experience is like ours, you may spend more "trying
out" packages of different paper than you'd ever save by finding a slightly
cheaper paper to use! (The HP PhotoSmart Printer is a bit more forgiving in
this respect than most units, but the HP-branded paper is the only type we've
found that produces prints with the perfectly smooth, glossy surface of a conventional
photo print.)
Unfortunately,
the issue of paper isn't a simple one, because the interaction between the paper
and ink is so critical. Even minor differences in the coating formulation on
glossy photo paper can have an enormous impact on how the paper behaves in a
given printer. Paper that works beautifully in one printer may give spectacularly
awful results in another. With the right paper, the drops of ink will lay down
smoothly, and blend together into a rich, glossy finish that truly resembles
a photo print. On the other hand, the wrong paper can cause the ink to clump
up and separate, leaving a grainy, mottled finish. The pictures at left show
the same image printed by a single printer on two different types of paper.
After experimenting with a lot of different paper in various printers, we've
come to the conclusion that the best quality is usually found with the supplies
sold by the printer manufacturer. - Feel free to experiment with various third-party
papers, but if your experience is like ours, you may spend more "trying
out" packages of different paper than you'd ever save by finding a slightly
cheaper paper to use! (The HP PhotoSmart Printer is a bit more forgiving in
this respect than most units, but the HP-branded paper is the only type we've
found that produces prints with the perfectly smooth, glossy surface of a conventional
photo print.)![]()
The importance of permanence
There's an important untold story with inkjet prints, and a reason you haven't
heard it before now: Most inkjet prints fade! Any guesses why printer manufacturers
haven't been quick to tell you this? If you expose the output from most inkjet
printers to bright light, they'll fade significantly in as little as a few months.
(Leave them lying in direct sun, and they'll fade in a few days.) For those
of us accustomed to treasuring photographs for years, this can come as a rude
awakening!![]()
Hewlett Packard has addressed the fading issue in the PhotoSmart printer
as well: While PhotoSmart output will eventually fade under sufficiently harsh
conditions, it will stand up to a LOT more light than the output from most inkjet
printers. At Hp's invitation, we tested this for ourselves. At a trade show
several months back, HP handed out press kits containing sample prints made
with their printer and a popular competitor. The challenge was simple: Let the
prints lie around in a normal environment for a few months, and compare how
they looked at the end of that time.![]()
Well, we have to say that the original print from the competitor didn't
look as good as that from the PhotoSmart "out of the box," and so
didn't trust our eyes to tell how much it had faded a few months later. We suspected
that most people looking at the two side-by-side would convince themselves that
the competing print was looking worse and worse over time ("Golly, that
other print sure does look washed out and yellow..."), even if there was
little actual change in the print. To avoid this pitfall, we took the two prints,
sandwiched them into a pad of writing paper, and left them lying about the (admittedly
fairly dim) office for about 4 months. The result? Not a bit of change in either
picture. On the other hand, this really wasn't a very challenging environment:
During the day, the single window was always shaded to prevent glare on the
computer screens, and the evening illumination could charitably be described
as "sepulchral". ![]()

In preparation for this article, we decided to push matters a bit, and subjected
the prints to much brighter light levels, placing the prints/pad combination
directly beneath a 40-watt fluorescent tube. This produced a level of visible
and UV light about equal to what you'd encounter near a window, from sun filtered
through curtains on a bright day. After only 7 days of this treatment (albeit
24 hours a day), the competitor's print was definitely much the worse for wear,
while the HP showed almost no change! We estimate this level of light was about
equivalent to placing the picture facing a window, for about a month of average
daylight. We scanned both photos at the same time on our flatbed scanner (so
nobody could accuse us of stacking the deck with different scanner settings),
and share the results with you here (see above). Pretty impressive, no? For
our money, we're pretty well convinced that prints made with the HP PhotoSmart
will last a lot longer than those from some other printers out there!![]()
Preparing to Print: Output Resolution
Actually, although we're addressing the issue at the very end of the "digital
darkroom" process, one of the first questions you have to ask yourself
when you're scanning a picture is "What size do I want to print this at,
and on what printer?" The reason this should be one of your first questions
is that you want to choose a scanning resolution to produce the right amount
of information in the file for the printer you have in mind. Up to a point,
higher resolution in scanning (or a higher-resolution digital camera) will produce
a sharper, more detailed printed output. Once you reach the limits of the printing
technology though, additional image resolution only slows down the whole process,
as the computer and printer have to deal with a lot of data that's really not
needed.![]()
In the following, we'll be talking a lot about "output resolution."
This is simply the number of image pixels per inch that result when the picture
is output to a hardcopy print. For instance, if we had a digital image with
dimensions of 1000 x 800 pixels, and we printed it at a size of 10 x 8 inches,
the output resolution would be 100 pixels per inch (ppi). (1000 pixels divided
by 10 inches = 100 ppi.) You'll see the importance of this concept as we go
along...![]()
Many digital photographers assume that their output resolution needs
to match the dpi rating of their printer: That is, that the file should be of
a size to result in 720 pixels per inch (ppi) on the paper if the printer they're
using is a 720 dpi device. Fortunately, this is not the case: The resulting
files would be so enormous as to choke even the fastest PC! In our earlier discussion,
we saw that an inkjet printer's random sprinkling of dots results in an actual
resolution far below the printer's dpi rating! The trick is to make the output
resolution of your images approximate your printer's usable resolution. - And
the art comes in figuring out what your printer's "usable resolution"
actually is.![]()
So how much resolution is enough? This is an open-ended question you'll
ultimately have to answer for yourself with a bit of trial and error. We can
give you some very rough rules of thumb though, as a starting point: For typical
4-color inkjet printers, try starting with an output resolution of about 1/5
to 1/6th the dpi rating of the printer. Thus, if you have a 720 dpi printer,
try an output resolution of 120 to 150 ppi. With higher-resolution conventional
inkjets, you'll benefit from going a little higher, but not proportionately,
as you reach a point of diminishing returns based on what your eye can actually
see. Somewhere around 300 ppi is a practical upper limit, regardless of what
the dpi rating of the printer is. True photo-quality printers don't need anywhere
near as high a dpi rating to produce smoothly gradated prints, but by the same
token, can utilize output resolutions closer to the printer dpi rating. The
HP PhotoSmart is actually about a 600 dpi printer (a little tricky to tell,
since the ink dots tend to overlap each other a bit, helping to produce the
very smooth gradations evident in its prints), and we found an output resolution
of 150 dpi looked quite good with it. Higher-resolution true photo-quality units
may be able to take advantage of higher output resolutions, but again, your
eyes really aren't going to see much of anything beyond 300 dpi.![]()
Here's a table of output resolutions by printer type and dpi rating that
may be useful as a starting point for finding the optimum pixels per inch number
to use with your own printer. (Note too, that these are pretty conservative
numbers: You'll most likely find that you can go to lower output resolutions
without significant image degradation. Our main point here is to keep people
from wasting time and disk space with unreasonably large file sizes.)![]()
|
||||||||||||||||||||||
![]()
Calculating Print Size/Scan Resolution
With the preceding information, we're now ready to understand how large
or small we can realistically print our digital camera images, or how many pixels
we need in our scans to produce a good print of a given size. If you're starting
out with a fixed image resolution (as would be the case with a digital camera),
just divide the pixel dimensions of the image by the recommended ppi number
from the table above. For instance, to find the print size for maximum image
quality when printing images from the HP C20 megapixel camera (1152 x 872 pixels)
on the HP PhotoSmart printer, we just divide the pixel counts by our recommended
maximum PPI of 150. This would lead us to a print size of 1152/150 = 7.6 inches
by 872/150 = 5.8 inches. Thus, the HP C20 should produce good-looking images
on the HP PhotoSmart printer at sizes up to about 5x7 inches. (As in fact it
does.) Larger than this, and you start to see the edges of pixels, although
you may decide this is perfectly OK for a picture to be displayed on the wall
and generally viewed from a moderate distance. ![]()

The flip side of this equation applies when you're scanning an image
with the intent to print it at some particular size: Suppose you want to scan
an image on the PhotoSmart Scanner to make an 8x10 print on the PhotoSmart printer
- How many pixels do you need in your scanned image? Just multiply the 8x10
dimensions of the final print by the 150 ppi "magic number" from the
table above, to find that you need 1200 x 1500 pixels in your scan.![]()
As it turns out, much of this discussion on resolution is superfluous
if you're using the PhotoSmart Scanner (PSS), since it lets you simply select
common print output sizes, and then chooses the appropriate scanning resolution
itself. Even if you are a PSS user, we think it's a good idea to understand
the basics of resolution for those times when you'll need to deal with an image
from some source other than the PSS.![]()
Photo Printing Workflow - Avoiding the "digital black hole"
With digital cameras, the task of getting images into your computer is trivially
easy, almost without regard to the type of camera you purchase. True, some incorporate
fancy software to ease the image-transfer process (as does the C20), but even
the worst are pretty fast. The real catch comes when it's time to actually do
something with the pictures you've taken: It's a genuine hassle most of the
time to sit down, tweak and crop the images, and feed them out to the printer.
Worse, unless you're printing full-sheet images, you often end up wasting expensive
inkjet paper printing the images out one at a time. The end result is often
that the images stay in the computer, rather than being shared with the family.
(My wife refers to this as the "digital black hole effect.") HP recognized
this problem, and developed the PhotoSmart Photo Finishing application; one
of the slickest solutions we've seen for getting images back out of the computer
in an efficient and painless manner. Hp's Photo Finishing software is bundled
with their C20 megapixel digital camera, and the PhotoSmart Scanner, but surprisingly
not with the PhotoSmart Printer itself(!) - To get this excellent software product,
you'll have to invest in at least one of the other components of the HP PhotoSmart
system besides the printer. (Although, as we note below, it will work with any
Windows-compatible printer, not just the PhotoSmart Printer.)![]()
The part of the process that's missing for most digital photographers
is called "photofinishing" in the conventional, film-based world:
The conversion of exposed images into presentable hard-copy prints. Face it,
while computers are wonderful, and email nearly universal, when it comes right
down to it, most people interact with their pictures as prints-on-paper. Photo
albums, framed prints hanging on walls, prints displayed on a mantelpiece or
other furniture at home, on a desk at the office, prints stuffed into a wallet
-- all of these common uses require print-on-paper. As digital photographers,
we have an array of wonderful inkjet printers (including the HP "PhotoSmart"
printer) available to create stunning prints from our digital photographs. In
most cases though, there are significant obstacles to actually making the prints.
Most applications only support one print per page of output paper. This isn't
much of an issue when you're dealing with plain copier paper, but with photo-quality
glossy paper running $0.50 to $1.00 (US) per sheet, it's prohibitively expensive
to routinely print out camerafuls of images. Programs exist that will gang-up
prints of a uniform size, to print multiples of 2, 3, 4, or more images per
page of output, but generally their capabilities are limited to printing the
same number of copies each image, all at the same size. Finally, if you want
to make individual adjustments to the images (for color, tone, cropping, etc.),
the process can become laborious in the extreme.![]()

Hp's PhotoSmart Photo Finishing application addresses all these issues
in a single, exceptionally easy-to-use, well-integrated program. To crank out
a batch of prints, simply point the application at a folder on your hard disk
(or at the camera itself) containing the images you're interested in. The program
will display thumbnails of all the images, allowing you to select the ones you're
interested in. All the images are displayed initially: Deselect the ones you're
not interested in by highlighting them and then click the "remove"
button. (They'll be removed from the active selection, but the original files
aren't deleted from the camera or hard drive.)![]()
Once you've selected the images you want, go to the "adjust"
menu to adjust either exposure or color settings. We won't describe these controls
further here, having covered them in detail earlier. One additional feature
though: In "adjust" mode, you can also type in a caption for each
image, if desired.![]()
Beyond image adjustment, there's the issue of arranging for multiple
copies of images, printed at various sizes, all the while trying to make the
most efficient usage of expensive paper and ink. This is where the PhotoSmart
software really shines: While in "adjust" or "print" mode,
each photo appears as a thumbnail in a scrolling list along the right-hand edge
of the screen. Under each is a popup menu showing the image size, and a control
to set the quantity of prints for that picture. The size menu initially defaults
to the image size in pixels, meaning the image will print at a default size
based on a "pixels per inch" setting you can adjust elsewhere in the
program. To change the size of the print, you simply click on the popup, and
choose from a range of pre-configured image sizes (which, again, are also user-configurable).
This combination of controls makes it easy to request multiple copies of different
images, with different sizes chosen for each image. (If you want different-sized
prints of a single image though, you'll need to set up each size as a separate
print job; only a minor effort.) For instance, you can ask for three 3 1/2 x
5 prints of image number 1, one 4x6 print of image number two, and so on.![]()
When you select an output size for an image, the cropping guides in the
preview window will automatically adjust themselves to the appropriate aspect
ratio (a fancy term for the ratio of length to width): Adjusting either the
crop height or width will adjust the other dimension in lock-step. You can also
slide the cropping area around on your image to achieve the best composition.
To handle images shot in "portrait" orientation, the software allows
you to rotate both the screen preview and the crop box orientation.![]()
When you're all done setting up your photos, the PhotoSmart Photo Finishing
software will take over the output process for you. There's one additional wrinkle
that HP threw in though, that makes the program especially valuable: The "Paper
Saver" option will automatically rotate and place your images on the final
output pages to optimize paper usage! This is really slick, and over time could
probably justify the purchase price of the entire camera or scanner system!
(We've probably spent 4 or 5 times the original printer cost on paper and ink
for our in-house inkjet.)![]()
We've heard comments from some experienced users that the HP software's
"user friendly" interface made them feel a bit like they were back
in grade school, but we found little in it to complain about. The only minor
deficiencies we found were the lack of any feedback as to portions of the image
being pushed to either solid white or solid black by the highlight and shadow
adjustment sliders, and the inability to specify multiple print sizes for a
single image. These are both fairly minor complaints though, and the overall
usefulness of the application can hardly be overemphasized. (One side note though:
The Photo Finishing software assembles the pages as a single large file for
each page. This means it likes a LOT of disk space to run with, on our system,
insisting on at least 65 megabytes of free disk space before it would consent
to operate. This may be a limitation for some folks with older systems, but
with hard drive prices as low as they are these days, it's pretty cheap to dramatically
upgrade your system's capacity.)![]()
Oh yes, one important closing note: While HP would certainly like to
see everyone buy their excellent PhotoSmart photo-quality inkjet printer, the
PhotoSmart Photofinishing software has no bias toward any particular output
device -- it will happily output images to any printer you can install normally
under Windows.![]()
Conclusion
With your own "digital darkroom," you can go far beyond all but the
best custom photofinishing, quickly and inexpensively. While there are many
different cameras, scanners, and printers on the market, Hewlett Packard has
drawn all three components together into a single integrated system. The result
is a truly unprecedented capability for amateur photographers.
Reader Comments!
See
what other Imaging Resource readers have to say about Digital Darkrooms,
or add comments of your own. (If you have some relevant experience, please share
it with others here! Agree, disagree, or just general observations... If
you have questions though, post them in the general
forum, so others can more easily see and answer them.)
 An
Imaging Resource
An
Imaging Resource