 The IR
Guide to Desktop Scanners
The IR
Guide to Desktop Scanners
By Kim BradyExecutive Editor
A few years ago, the average consumer wouldn't even consider buying a digital scanner. High prices and complicated user interfaces were a deterrent to anyone who wasn't professionally dependent on scanning technology. Today's scanners are not nearly as intimidating as their predecessors. Sophisticated software has automated many of the tasks that once bogged down the most astute graphics professionals. Now hook-up and start-up can be as simple as plugging in a USB cord and clicking on a software installer.
 |
|
|
So once you've decided to invest in a desktop scanner, where do you start? What do you look for in features and product quality? The following overview of scanner functions will help weed out the important information you'll need to guide you in your search. You'll have to familiarize yourself with a few acronyms and learn some key figures, but you'll find it a lot less complicated than you might have imagined. After you've absorbed the information below, go to our "Top Ten Features to Look For In a Digital Scanner", print it out, and take it shopping. It's guaranteed to make the search a whole lot easier.
How a Scanner Works
A scanner is a raster input device that "scans" photographs, artwork, or text documents with a light-sensitive sensor -- converting the varying levels of light (known as an analog signal) into an electrical signal for processing and transmission to a computer. Once it reaches the computer, the binary data (made up of a series of 0's and 1's) is reconstructed into a representation of the image and projected onto the computer's monitor, where it can be further manipulated by the user, transmitted over the Internet, or output to one of several digital output devices.
Most scanners use a charge coupled device (CCD) light-sensor, which is made up of thousands of tiny elements (pixels), to measure the amount of light being reflected off or transmitted through a scanned image. The information is converted into electrical impulses by a process known as analog-to-digital (A/D) conversion (a term frequently used in digital camera specifications). Other light sensors typically used in scanning devices include photomultiplier tubes (PMT), which are found in very high-end scanners used for professional graphic arts, and contact image sensors (CIS), a relatively new technology used in some very inexpensive, low-end consumer scanners. CIS modules are about 20 percent smaller than CCDs, consume less energy, and are much lower in cost. However, the trade-off is image resolution and quality, which does not compare to that of a CCD.
 |
|
|
All of the above elements contribute to the quality and performance of a digital scanner. The optical components can be very high quality -- color-corrected and coated for minimum diffusion -- or they can be made of plastic to cut costs. The A/D converter can be isolated and protected from electrical interference, or it can be positioned right next to the scanner's main circuitry, picking up on every bit of static and electrical noise.
The message here is that with scanners, as with every other product you buy, you get what you pay for. We suggest that you read up on the products you're considering, visit our web page to compare scans from different models (link to scanner image comparisons), and if possible, make sure you have a demonstration of the scanner to see what kind of quality and interface you can expect.
Resolution
 |
|
|
Most low- to mid-range scanners have scanning heads made up of a row of CCDs, each with 600 ppi, which represents the true optical resolution of the scanner. However, scanner manufacturers will frequently try to impress potential buyers by advertising very high interpolated resolutions, bumping the numbers up to 2,400, 4,800 or 9,600 ppi. Software-interpolated resolution averages the values of adjacent pixels and determines a "best-guess" value for new pixels that are added in-between the original scanned pixels, to beef up the file resolution. The image files produced by this method will be very large, but they will not be as sharp or as true-to-color as the original file.
Hardware interpolation involves bumping up the true optical resolution of the CCD by 2x to accommodate the rectangular shape of most source images. (CCD chips are primarily square-shaped sensors with the same number of elements, or pixels, along each side.) In hardware interpolation, the larger number actually refers to the number of steps the scanner's "stepper motor" can move the CCD up and down the long side of the scanner's platen. Therefore, if the stated optical resolution is 600 x 1,200 ppi, that means the 600-pixel CCD moves along the long axis of the scanner bed in 1/1,200-inch increments. In order to fill in the extra steps taken by the stepper motor, the scanner software has to create 600 additional pixels to fill out the long side. This is done with an integrated circuit chip that determines the "best-guess" value of the new pixels, and then inserts them between each row while the scan is in progress. Therefore, a scanner that is rated 600 x 1,200 ppi has a true optical resolution of 600 ppi on one side and an interpolated resolution of 1,200 ppi on the other.
While scanner resolution can be very complicated to the uninitiated shopper, you only really have to remember two things: 1) always look for the "optical" resolution when comparing scanners, and 2) the first (smaller) number stated in the optical resolution is the "true" resolution.
Bit-Depth
Bit-depth refers to the amount of information a scanner is capable of recording per pixel. A 1-bit scanner can only express one of two values per pixel: solid black or solid white. For a scanner to reproduce the gray values between black and white, it must be able to record at least 4 bits of data per pixel, which is equal to 16 possible combinations of black and white, or tones (4 x 4 = 16). To reproduce continuous-tone images, such as black-and-white photographs, a scanner must be able to record at least 8 bits per pixel, or 256 possible tones (16 x 16 = 256).
While an 8-bit scanner might be satisfactory for black-and-white images, you'll need three times as much information to record color images. For example, you'll need at least 8 bits for each of the three primary scanning colors -- red, green, and blue -- giving you a total of 24 bits per pixel (8 + 8 + 8 = 24). If you factor the total number of colors that can be recorded by a 24-bit scanner (2 to the 24th power), you'll come up with approximately 16.7 million colors, more than can be perceived by the human eye. Therefore, a 24-bit scanner is usually considered adequate (but minimum) for most color scanning.
Most scanners on the market offer 30- or 36-bit color, which is more color information than is considered necessary (and more information than most consumer imaging software programs can process). However, there are advantages to scanning images at a higher bit-depth, such as providing a larger pool of tonal information from which to draw. For example, a scanner's CCD rarely provides you with 100 percent high-quality data from a scan. Some of the data is going to be corrupted by noise or scanning artifacts. Scanning at a higher bit-depth enables the scanner software to choose the best 24 bits of color, and discard any unwanted pixels that might degrade the quality of the image. This is best done by the scanner software during the pre-scan phase of the operation.
Dynamic Range
This is a very important, but frequently ignored, measure of a scanner's quality. Dynamic range (also know as density range) is similar to bit-depth in that it measures the scanner's ability to record different tonal qualities. Based on a scale of 0.0 to 4.0, a dynamic range of 0.0 represents perfect white, while 4.0 represents perfect black. Everything in between represents graduated levels of gray.
Scanners that list a dynamic range rating on their packaging or specifications sheet are providing information on the maximum density range or shadow detail the scanner is capable of resolving. For example, a scanner with a 2.4 dynamic range has a relatively low rating, because it can only resolve a little more than half the total range of image detail available. Most mid-range scanners have a dynamic range of 2.8 to 3.2, while high-end scanners, or those suitable for professional applications, are 3.3 or higher.
If you plan to scan only color prints, you should look for a scanner that has a dynamic range of at least 2.7, and if you plan to scan color transparencies or slides, look for a dynamic range of at least 3.2. If the scanner does not list a dynamic range (and they often don't) you should ask the salesperson or scanner company to provide you with that information, because it can have a significant impact on the quality of scans the unit is capable of producing.
Software/User Interface
Other important, but often overlooked, features of a good scanner are the software that accompanies it and the practicality of the user interface. If you don't have a full range of "image-adjustment" functions in the scanner's capture software, you'll have to make adjustments to your files after the scan is complete, using a software program that may or may not be optimized for working with raw files from your particular scanner.
 |
|
|
A relatively new software feature, now available on some consumer and prosumer scanners, virtually eliminates dust and scratches during the scanning process. This process usually involves scanning an image twice: once with an infrared light, which detects only imperfections on the surface of the print or transparency, and a second scan using white light, which picks up all of the details in the image, including the imperfections. The software then compares the two scans and eliminates those artifacts that were recorded only with the infrared scan. This feature is particularly helpful when scanning transparency materials (which seem to attract dust like a magnet), but it can also be a lifesaver with old or scratched prints with damaged surface emulsions. (Of course, if a print is severely damaged, with large tears or cracks on the emulsion, the software can make only limited improvements, since the original picture information that was under the scratch area has been lost.)
The scanner's user interface is the layout and functionality of the scanner's controls and set-up menus. The standard by which we judge user interface is the simplicity and accessibility of individual controls. You don't want to have to spend hours figuring out how the scanner works. Funky icons and flashy menu boxes may be cute, but they're unnecessary, and can rob your computer of valuable RAM. Have the salesperson run through a scan and explain the user interface to you before you complete a sale. If you have a hard time following him, chances are you'll be spending more time than necessary scanning your images, once you get your new aquisition home.
Connectivity/Speed
There are three types of connections used to link a scanner to a computer: USB, SCSI, and parallel port. The Universal Serial Bus (USB) is an increasingly common interface for both Macintosh and Windows platforms. It's easy to install -- basically plug-and-play -- and it's hot-swappable, which means you can plug it in while your computer is running (not the case with SCSI or parallel ports). USB is also very fast at transmitting data (1.5MB per second), which is extremely important when it comes time to scan an image. Because of its increasingly popular use as a peripheral interface (keyboards, mouse, printers, and modems), USB is quickly replacing the old-faithful SCSI and parallel ports.
A Small Computer System Interface (SCSI, pronounced scuzzy) is the fastest of the three options, with an impressive 10MB per second data transfer rate; but it is only available as standard hardware on older Macintosh computers, and it can be relatively expensive and difficult to install. If you happen to have a SCSI port on your computer, and you find a scanner model that offers a SCSI connection, go for it. You won't be disappointed with the results.
Parallel ports are typically found on older Windows computers. They are slower than the other two connections, but probably fast enough for the average consumer's scanning needs. The parallel port is relatively easy to plug-and-play, but you have to power down the computer, and you are limited by the number of peripherals you can use on one parallel port. It is most often reserved for desktop printers, but you can probably get away with plugging both the scanner and printer into the same port using a bypass device. Don't plan on adding any other peripherals, though, or you'll be asking for trouble.
When you talk about connectivity, you also have to address the issue of compatibility. And if you've been researching many computer peripherals, you've probably run across the acronym TWAIN. The technicians who developed this technology (a consortium of representatives from Aldus, Caere, Eastman Kodak, Hewlett Packard, and Logitech) were obviously tired of coming up with meaningful names, so they picked TWAIN, which simply stands for "Technology Without an Interesting Name." It is a standard interface between raster input devices (like scanners) and software programs. TWAIN-compliant software and hardware is able to exchange files without importing and saving them into different programs -- making transmission of data extremely efficient. Look for TWAIN-compliant devices when you shop.
Connectivity is not the only speed issue involved in scanning. As you might expect, different kinds of scanners operate at different speeds (i.e. the amount of time it takes to scan the image and convert it to a digital file). Scan rates are reported in a variety of formats (if at all). Some scanners list scan rate or speed in milliseconds per line, others list seconds per print (which of course varies with print size and resolution), but the majority don't list anything at all. That is another item that you will have to research on your own, or as we post more scanner reviews, you will be able to obtain that information from the Imaging Resource website.
As a general rule, scanners that use a single-pass scanning technology are faster than scanners that do three passes (one each for red, green, and blue). But this brings up a whole other article possibility on "How Scanners Work," which we'll leave for a later date.
Scanner Types
There are three major types of scanners used for digital imaging. The most popular are flatbed scanners, which can also be used in a business environment for scanning documents if they have optical character recognition (OCR) software. Photo scanners are designed specifically for scanning prints, usually no larger than 5 x 7 inches. Slide or Film scanners are designed specifically for scanning film. They are usually dedicated to one size of transparency -- 35mm, 120cm, or sheet film. Many of the new flatbed scanners also include film adapters -- usually in multiple sizes. Be sure if you consider buying one of these models that you investigate the film scanning quality carefully, older models often had problems maintaining sharpness when using the film adapters.
Flatbed
 |
|
|
A flatbed scanner can be designed with one of several configurations. A light bar passing across the glass platen reflects an image off the document through a series of lenses, filters, and mirrors, and focuses it onto the scanner's CCD. Another method is to use three CCDs, one each for red, green, and blue, eliminating the need for three separate scans. Some color scanners, like the Epson ES300C, use three different colored lights, which flash in sequence as they travel down the platen. The HP ScanJet II uses a twin-lamp light bar, two sets of filters, and a CCD with three stripes of color to make a one-pass scan. It's difficult to say which process is better, since they each have their advantages and disadvantages. The best way to decide is to try them out.
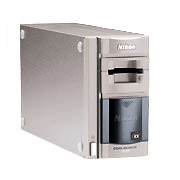
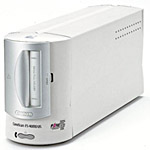
Film
Film scanners are more expensive than flatbeds, usually starting at $350 and higher. Designed for better quality scans, a film scanner differs from a print scanner in that it transmits light through the image rather than reflecting it off the surface of the print. By necessity, they have greater dynamic range than print scanners, and much higher optical resolutions, some as high as 2,400 ppi. The most obvious disadvantage is that they handle very limited materials. Some photographers have found it more advantageous to buy a flatbed scanner with a film adapter, than to buy a straight film scanner. While they don't deliver the same quality, it is often adequate for mid-range scanning needs.
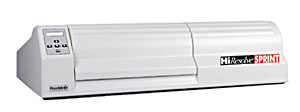
Photo
Photo scanners are made specifically for scanning prints. They have limited size parameters -- usually accepting photos up to 5 x 7 inches -- and provide much higher quality scans, using a technique that feeds the print over a roller and across the scanning elements, therefore eliminating the mirrors and lenses necessary in a flatbed scanner. Some models scan both prints and film, a good combo if you're looking for the increased resolution and dynamic range they provide.
Drum
Drum scanners are the Cadillacs of the digital scanner market. Starting at $10,000 and up, these units are designed for use in prepress environments, where high-quality off-set printing requires very detailed and high-resolution scans. Images are mounted on a glass cylinder, which rotates at very high speeds around the image sensor, centered inside the drum. Rather than CCDs, drum scanners use more sophisticated photomultiplier tubes (PMT) to gather and convert light beams into electronic signals. Drum scanners were the first scanners technology developed, and still dominate the high-end printing business.