 Qimage Pro gets a major overhaul
By
Mike Tomkins
(Monday, November 4, 2002 - 19:20 EST)
We just heard from Mike Chaney, author of the popular imaging utility Qimage Pro, who had news of a major update to the program.
Qimage Pro 2003 has a number of significant differences from the previous version, particularly to the user interface - all of which should make the program faster and easier to use, as well as even more powerful. Courtesy of the DDI Software website, changes from Qimage Pro 2002 include: - New user interface: The user interface controlling the main window of Qimage Pro has been completely redesigned to provide faster and simpler access to many functions. Here are just a few examples of the improvements to the UI:
- Quick sizes always open and ready to use: Nine of the most common print sizes plus custom sizes are available at all times and can be redefined by the user. Simple one click actions control the size and fitting of both new prints being added and existing prints on the page.
- Main window work areas: The main window is now devided into two major work areas: the thumbnail work area and the preview page work area. When print sizes and fitting are accessed, these functions affect the currently selected work area (identified by a blue border), allowing a single set of controls to perform multiple actions.
- Tool buttons: More logical layout of tool buttons and menu functions.
- Less steps: Perform the same actions as previous versions using less steps in many cases. For example, here is a comparison of the steps required to change the size of an existing print from 4x6 to 3x2:
Qimage Pro 2002 v2.48: - Highlight the selected print.
- Right click on the preview page.
- Select "New Print Size".
- Select "Quick Size".
- Double click the "3x2" size.
Qimage Pro 2003 v1.0: - Highlight the selected print.
- Click the 3x2 size button.
New functionality:
- We couldn't give Qimage Pro a facelift without adding new functionality as well. Below are some of the new features available in Qimage Pro 2003 v1.0:
- Optimal image placement: The old "Optimize" image placement has been replaced by a new method that we renamed "Optimal" placement. The first time you use Qimage Pro 2003, it will switch to optimal print placement mode by default. This mode is designed to minimize paper use by filling gaps in an optimal fashion. While previous versions would not always optimize space (depending on the layout), Qimage Pro 2003 will make better use of your expensive photo paper by filling gaps that older versions couldn't find. Coupled with the new "Sort Prints" feature (see below), this option makes the most of your paper and simplifies cutting of prints from the page. While this option is designed for users who ultimately wish to cut the photos from the page, older options such as "Center" or "Compact" placement can still be used to give you more control if you are creating album pages.
- Sort prints: Qimage Pro always maintains print order and will not move prints from page to page unless "Sort Prints" is used. The "Sort Prints" option sorts prints by size (largest to smallest) and also gives Qimage Pro permission to move prints (change the order they appear on the page) to fill gaps when using the "Optimal" placement mode. This feature serves two purposes: it arranges prints such that cutting is much easier and also arranges prints in an order that better utilizes space on the paper.
- Borders: The new border option allows you to define a border or "frame" around your prints. Simply enter the size of the border and an even border is created around the print. For example, if you choose a blue border of .25 inches on a 4x6 print, you'll get a 4x6 print with a .25 inch blue border. When using a white border, you can also check "Mark edges" at the bottom of the window so you will know where to cut.
- Create email/web size images: After adding images to the queue/document, you can click the "Create email/web size copies" function to create JPEG copies of the images in the queue. The default size of these copies will be 640 x 480, however, you can use any size you like. Images are stored in the same folder as the originals and will have a {Q-E} prefix. You can then simply browse to that folder and attach the {Q-E} copy to your email using your email software. Note that in a future version, we will "connect" Qimage Pro to your email client so that you can simply choose "Email a copy of this image".
- Quick access to common filters: Simply multi-select thumbnails or prints and then right click and select "Apply Predefined Filters". Example: Select a thumbnail, right click and select "Apply Predefined Filter" and open "Rotate 90 Clockwise". Then repeat and select "Black and White". The result is a black and white photo rotated 90 degrees.
- New custom size options: Use the "Custom" size button to select from a number of convenient sizing options: specific size, full page, by number, poster size, original size, etc.
- New "Page Sets" option: After clicking the "Custom" button, click "Page Set" to load a page of templates. This option can be used to create packages of prints. Some common packages are available that include a variety of sizes, but you can also create your own. See the help under "Learn by Example" for details.
| Qimage Pro 2002 and 2003 compared | 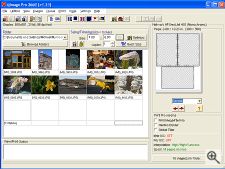 | 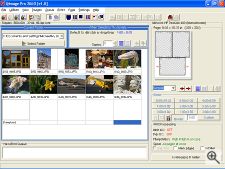 | | The old... | ...and the new |
|

