DOCUMENT SCANNER, FAX
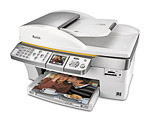
Kodak 5500 -- The Big Boy AiO
 By MIKE PASINI
Editor
The Imaging Resource Digital Photography Newsletter
Review Date: December 2007
Our diary of the Kodak EasyShare 5300 never did wrap itself up politely (http://www.imaging-resource.com/PRINT/K5300/K5300.HTM). Waiting for the Mac version of its firmware update, we returned the unit when the larger 5500 version with fax capability arrived. We didn't want to be outnumbered.
|
|
We're no fan of faxing. Low resolution faxes were the ban of our existence when we were producing a weekly newsmagazine (they all had to be keyboarded). And, as readers of the newsletter (http://www.imaging-resource.com/IRNEWS) can attest, we've never much liked an image where a thousand words could do anyway.
But we wondered if our peculiar experience with the 5300 was just an aberration or typical of the entire line. And the recently reduced $249.99 EasyShare 5500 provided a chance to find out.

The Box. Can't miss it.

The Tape. Remove it.
At the same time, we visited Kodak's Canal Ponds campus where the hardware and chemistry for the AiO series was developed. Dr. John Reczek and Cathie Burke told some very interesting stories about the evolution of their side of this monster.
And monster it is indeed. There's a great deal to admire about Kodak's AiO printers, which were finally released from their Best Buy distribution scheme. But there's also a great deal of frustration in actually using them. The problem is the firmware, which continues to defy us in small but ridiculous ways.
Let's look on the bright side first. We'll start with the specs, installation and move on to the juicy stuff.
SPECIFICATIONS | Back to Contents
Print performance specifications include:
- Black print speed: up to 32 ppm
- Color print speed: up to 30 ppm
- Best-quality photo speed: 28 sec/print, 4x6 in.
Printing features include:
- Borderless sizes supported: 3.5x5 in., 4x6, 4x8, 4x12, 5x7, 6x9, 8x10, A, A4
- Papers supported: plain paper, coated paper, photo paper, iron-on, transparency film, label media, greeting cards, 17 to 24 lb plain paper
- Auto-detect media: Kodak Photo Papers with custom backprint
- Image enhancement: Kodak Perfect Touch Technology
- Print functions: 100 percent, fit-to-page, fill-page, mirror, poster
- Display: 2.4 in. (6.1 cm) color graphics LCD
- Two-sided printing: duplex printing accessory included
Copying features include:
- Copy quantity: black & color, 1 to 99 copies
- Copy enlargement/reduction: 10 to 500 percent at 1 percent increments
- Special copy modes: fit-to-page; one-to-many; 2-to-1; 4-to-1; 2-on-1; 4-on-1; poster 2X, 3X, 4X (5X, PC only); borderless; mirror; duplex; iron-on
Scanning features include:
- Scanner type: CCD
- Maximum scan size: up to 8.5x11.7 in. via platen only; up to 8.5x14 in.
Paper trays specifications include:
- Paper capacity: main tray holds 100 sheets of 20 lb. plain paper and up to 20 sheets 10 mil photo paper; output tray holds 50 sheets of 20 lb. paper
- Main tray: 3.5x5 in. to 8.5x14 in.
- Photo tray: 3.5x5 in. to 4x6 in.
- Output tray: 3.5x5 in. to 8.5x14 in.
Ink tanks specifications include:
- Ink handling: 2-cartridge, 6-ink system
- Ink life: minimum 2 years life from manufacture; 6 months in product
Connectivity specifications include:
- Protocols supported: USB 2.0, USB 2.0 (Mass Storage & PTP), USB EKPTP, Bluetooth 1.2, PictBridge, DPOF, MIPC, PTP/IP
- Devices supported: USB PC/MACs, USB mass storage devices, PictBridge enabled digital still cameras, EKPTP cameras via camera dock or printer dock, and Bluetooth Technology enabled imaging devices
- Number of USB ports: 2 host ports, 1 device port
Software support specifications include:
- Application support: EasyShare Software or third party image management applications, registration, user-customized installation, OCR support for documents
- Media support: plain paper, photo paper, envelopes, greeting cards, transparencies, t-shirt transfer
- Scanner support: TWAIN and WIA import, preview window, scan-to-PC file or PC applications, including EasyShare Software, segmentation scanning
- File transfer support: automatic color, contrast, sharpness improvements upon transfer to PC
- Update support: software updates available through Web support
Physical specifications include:
- Power: US: 110-120 V AC, 60 Hz at ~2 A; WW: 110-240 V AC, 50-60 Hz; output: 36 V AC at 3 A (120 watt)
- Dimensions: [WxDxH]: 18.8x16.4x11.3 (with duplexer)
- Weight: 26.7 lbs.
Warranty specifications include:
- Product: one year from purchase (with proof of purchase) or 13 months from date of manufacture
- Printhead: one year from purchase (with proof of purchase) or 13 months from date of manufacture
- Ink Cartridges: 13 months from date of manufacture or until "replace cartridge" message, whichever comes first
The inside flap of the shipping box tells you how to get the printer out, a nice touch. There's a cardboard tray full of accessories to remove first. Then you lie the box down and slide the printer out.
A large installation poster in the accessory box headlined "Start Here" takes it from there, starting with the box contents.
Inside the box are:
- The EasyShare 5500 All-in-One printer
- Two sample paper packs (Kodak Ultra Premium Photo Paper in both 4x6 and 8.5x11 sizes)
- A printhead in a foil packet
- A black ink cartridge and a color ink cartridge in clear packages
- The power supply and adapter
- Duplexer two-side printing accessory
- Software CD and brochure
The control panel overlay was preinstalled.
The power supply is not just a brick, it's the size of a standard brick, the largest we've ever seen. Don't be alarmed.
You'll need to supply a couple of things yourself:
- A USB cable (none comes with the printer)
- Plain letter-sized paper
In addition, we always recommend visiting the company site to download the latest drivers.
INSTALLATION | Back to Contents
The installation poster warns not to connect a USB cable to the printer right away. If you just follow the instructions and don't improvise, you won't get in trouble. The installation proceeds from unpacking the printer to attaching the duplexer to loading paper to installing the printhead and inks to powering it up to connecting a fax line and calibrating it.

Opened. Scanner glass revealed.
Unpacking the Printer. After getting the nearly 30 lb. printer out of the box and slipping it out of its plastic bag, we found a convenient place to set it up.
You can use the printer like any printer connected to a computer, of course, but as an All-in-One printer, it can also be used without a computer. You can copy documents (including prints), make prints from cards in the card reader or thumb drives inserted in the USB port and PictBridge compatible printers cabled directly to the printer and send and receive faxes. So find a place convenient for a copier, fax and printer.
Movable parts are held in place during shipping with orange tape. It's easy to find (look on the back and inside, too) and remove it.
Installing the Control Panel. The right top side of the printer is the control panel, filled with the LCD and buttons. The language used to identify these controls depends on the control panel overlay, a large piece of hard plastic that slips over the control panel. It was already installed.

Installation Poster. Easy to follow.
Installing the Duplexer. Just remove the back panel and slip the duplexer's lower guide pins into the two trays made for them. Then rotate the duplexer up until it clicks into place.
Loading the Paper. Next we made the acquaintance of the non-removable paper tray with its built-in 4x6 tray. We lifted the lid of the 4x6 tray on the right side and slipped some sample Kodak Ultra paper in with the glossy side down. The 4x6 tray holds a maximum of 20 sheets.
To activate 4x6 printing, instead of letter-sized printing, you push the 4x6 tray in until it clicks into place. If the power is on (which it isn't when you first install paper), a green light on the side of the tray indicates the 4x6 tray is active.

Printhead. The right side is actually the bottom. We rotated it so you can see the electronics on the forward side.
Then we lowered the lid on the 4x6 tray to load the main tray with letter-sized plain paper, also facing down.
A small insert on the tray lid slides out as the output tray extender. Pull it out far enough and it flips open.
Installing the Printhead. While the lid on the scanner obviously is designed to open, so is the top couple of inches of the printer. Opening the printer access door, as it's called, reveals the printhead carriage. Remove the orange tape.
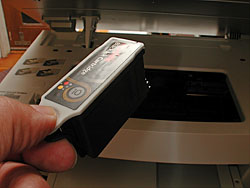
Black Cartridge. No shaking required.

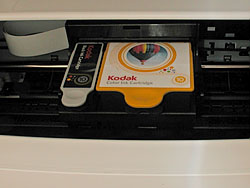
Color. Three color inks plus a photo black and a clear coat sealer.
There are nice little notches on all the packages so you know exactly where to tear them. We can't be the only people in the world who appreciate this little touch.
More importantly, the delicate parts of the printhead are protected by orange plastic. Follow the installation poster to remove each in order carefully. Then place the printhead into its carriage and press it firmly forward until it clicks into place.
You have to press pretty hard. Yes, you should feel as if you're about to break the printhead. But you won't. It will click sharply into place.
Installed. Both cartridges install with a snap.
We found out a minute later one reason such a firm connection has to be made. When you install the ink cartridges in the printhead you have to press down on them. Were it not for the click that grabs the printhead securely, pressing down on an ink cartridge would dislodge the printhead.
Installing the Ink Cartridges. Ink cartridges are protected by an orange plastic cradle that comes off with a little exertion. But they do slip easily into place. Or should we say "click" into place.
When Susan H. Tousi, Kodak research and development director for inkjet products, showed us in February how easily the cartridges install we nearly cried. Most printers (Canon being the exception to all of our complaints) make this ridiculously difficult. Tousi said she actually tested it with her mother. And it is easy to click a cartridge in.
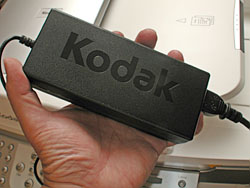
The Brick. It's huge. Hide it under a table.
Connect Power. The power brick connects to the wall and an adapter cable connects to the brick with a strange three-prong connector (no doubt a ground is the extra connection). The connection to the printer was strangely loose. We could wiggle the plug back and forth a little too freely for our taste. But the plug itself has a green LED to indicate it's working.
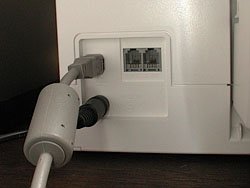
Connections. USB cable on top, power cable below with two jacks for the phone line and handset or answering machine.
Next we removed the plastic film from the LCD, cranked it up so we could see it and went through the prompts for language and location.
Connect the Fax Line. There are two telephone jacks (1-Line and 2-Ext) on the printer, so you can just plug the phone cord from the wall jack to the 1-Line jack on the printer or, if you use the same wall jack for your phone, also plug the phone into the printer's 2-Ext jack. The phone line will pass through to the phone for normal use.
You can set the number of rings required for the fax to answer on the printer itself in Menu, Fax Settings accessible from the LCD or in the AiO Home Center software.
|
AiO Home Center |
|
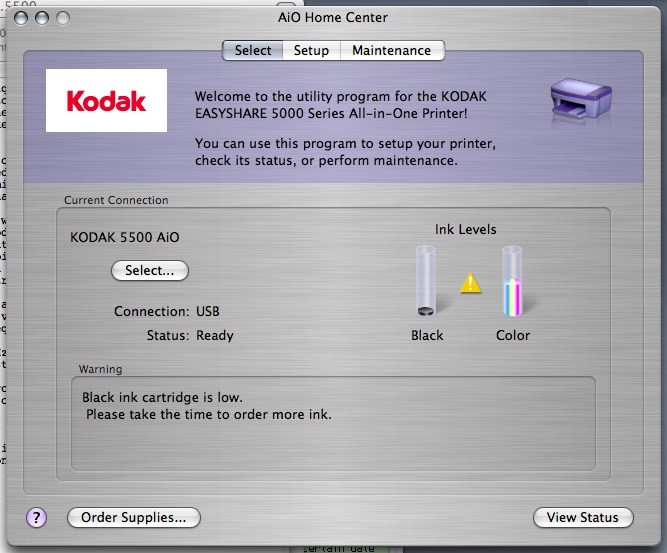
Select Tab. Select Printer, Connection Status, Ink Status. |
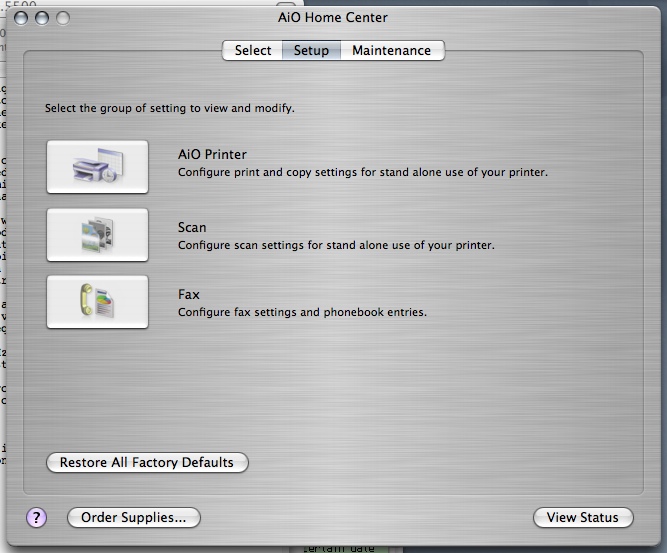
Setup Tab. Printer, Scanner and Fax settings. |

Maintenance Tab. About, Calibration and Cleaning. |
|
Calibrating the Printer. The LCD will tell you the printer has to be calibrated and what to do about it (press the Start button). Oddly, the calibration image is printed on 4x6 photo paper.
Once printed, you place it face down, aligned to the front right corner of the scanner glass, and lower the scanner lid. Then press Start again to scan the target and calibrate the scanner.
If you don't want to print 4x6 photos, lift the 4x6 tray lid and slide the tray out toward you. The green light we mentioned above will turn off.
Installing the Software. Apparently the CD itself has a Web install option to get the latest software directly from the Web. Do that. We were alerted to the new version and had previously downloaded it, so we installed from that disk image, which required a restart.
And that was all it took: 30 minutes (with pictures). And, surprisingly, there's no scanner lock to fiddle with either.
INK CARTRIDGE | Back to Contents
Before we had a chance to do any serious printing, however, we flew off to Rochester where we snuck around the labs to see what was going on. We ended our tour at Canal Ponds wearing safety goggles and walking through the custom cartridge assembly line with Diana, who put together a cartridge from scratch for us. It's an interesting process.
The various brews of ink formulations had to be packaged in cartridges for testing, of course, and this is where it happened. The custom built equipment, each module of which went through wooden prototypes before the final metal versions, was designed to build and fill the cartridge tanks.
It may not look like much from the outside, but the plastic wrapped cartridge is actually enclosed in Argon gas which is pumped into the bag with the full cartridge before it's sealed. The Argon gas blocks contaminants from entering and cushions the cartridge, which will last up to 18 months stored in the bag.
Under the paper label with the color information is a mylar label that seals the top of the gray vent cap's vent system. It takes both labels to seal against evaporation. The vent cap itself is welded to the black tank using high speed vibration that melts it on in a very precise operation.
Inside, the tank is filled by a large felt that absorbs the ink. No mystery there. Except it would seem to make it difficult to prep the ink by shaking the cartridge.
We asked Diana if she recommended the cartridge be shaken before it's installed (which we do with every cartridge anyway). You do have to shake non-stabilized inks, she said, but Kodak's inks are stable. You don't need to shake them.
Installing a Kodak ink cartridge in the printer is really one of the most pleasant experiences we've had. Just snap it in. It makes contact at six points to stabilize the cartridge as the printhead rapidly moves over the sheet.
But one of our pet peeves about the printhead installation process is just how hard you have to press the delicate printhead to get it seated in the printer. How come is that? Again, it's a hedge against the high velocity at which the head will be traveling. It's secure, no doubt about it.
Earlier Dr. John Reczek proudly showed off the pigment ink technology used in the new system. We've reported on this extensively, beginning with the product introduction announcements (http://www.imaging-resource.com/PRINT/KAO/KAO.htm), because it's really the key to the system. Without these inks, there wouldn't be a Kodak inkjet. So we'll summarize here.
They are pigments not dyes, to begin with. But they are unlike other pigments because they are quite small. Kodak drew on pigment grinding patents going back to its X-ray film emulsion technology to develop its miniscule 20 nanometer ink pigments with polymer binders. The X-ray project was an attempt to replace a dye interlayer designed to prevent color contamination that scattered too much light with a pigment layer that would scatter less light and therefore avoid losing sharpness.
The exceptionally small size of the pigments provides two key benefits, John told us. First, because they scatter less light, they provide a larger gamut than normal size pigments. Second, they increase printhead reliability, clogging the nozzles less frequently.
The color gamut issue is a confusing one. Kodak actually claims their pigment set has a larger gamut than dye-based ink sets, not just other pigments. But in our tests back at the bunker, Canon's dyes exceeded the Kodak pigment gamut, as we reported in our 5300 review (http://www.imaging-resource.com/PRINT/K5300/K5300.HTM). We asked John about that.
The Canon print, he pointed out, has the advantage of having been made with a high fidelity ink set. While the Kodak print relied on a set of just three color inks plus black, the Canon had the advantage of a set of eight inks. As a former pressman, I can vouch for that explanation. And in fact, when you compare the output of an HP three-ink print like those from the A626 we reviewed (http://www.imaging-resource.com/PRINT/HPA626/HPA626.HTM) to the Kodak prints, the Kodak has deeper shadows and more contrast. No doubt using a black ink helps Kodak here, too.
The smaller particles also improve gloss performance, John said. In fact, the clear ink in the color cartridge is not a gloss optimizer (as you might find in an Epson inkset). Instead, it's a polymer coating that is designed to seal the ink in the porous papers Kodak uses. Kodak's papers are not the swellable sheets typically used with dye-based inks to encapsulate the dye in a gelatin layer. They are porous sheets that suck in the liquid vehicle that delivers the pigments to the surface of the sheet. The clear coat seals those pigments on the paper and provides instant-dry handling. That slight tackiness you feel when you touch a print fresh from the printer is that coating. It extends over the full width of the image, we noted, regardless of the printed image size.
One of the more interesting stories in the development of Kodak's pigments involves what they early observed as a haze that would form over the image in some places. The effect was the result of subsequent drops of ink physically distorting the drops of ink that had been previously laid down on the sheet. Light was being scattered by the distortion, forming the haze.
Because Kodak developed every ingredient in the ink, it could optimize the formula to defeat this effect rather than merely find some compromise. There were many variables to working this out, John told us, including hue.
That prompted us to ask if the technology was restricted to a three-hue set of inks. Not at all, John answered enthusiastically, without giving any further details.
Anyone who has used an Epson pigment printer knows about clogged printheads. It's revealing that in our inconstant usage over several weeks, neither Kodak clogged.
THE PRINTHEAD | Back to Contents
Cathie Burke referred somewhat shyly to the Kodak printhead as "permanent." Nothing, of course, is permanent. But what Kodak has achieved in the printhead will pass for permanent.
Cathie explained that the Kodak drop ejector is designed so the heater will never be "attacked mechanically." To eject a drop, a heater in the firing chamber is pulsed on, forming a vapor bubble in the ink. As the bubble expands, surface tension pulls the ink into a droplet. After the heater is pulsed off, in many designs, the vapor bubble collapses onto the heater with significant force, and over time will damage the heater. In the Kodak design, the vapor bubble vents to the atmosphere, and the chamber refills with ink. Fire it as many times as you like, the heating element remains untouched.
That wasn't easy to achieve, she pointed out, even though Kodak had printhead technology from earlier projects. She credited the companies superb fluidic, electrical, and Micro Electro Mechanical Systems or MEMS simulation capabilities, which provide the ability to mimic the real world consequences of a design before it escapes the computer. That saves a lot of time, she said.
Early in development, she confided, they witnessed what seemed to be random early failures of some heating elements. Diagnosing the cause of the problem wasn't simple. But Kodak isn't your average home improvement show. It's more like a collaboration of crack CSI investigators with red ink on their gloves. They investigated the problem using microscopic images of cross sections of the printhead. And that revealed the cause of the problem. An otherwise undetectable variation on the surface over which the ink had to travel was the culprit.
Firing the printhead requires electricity and we were amused to learn how Kodak determined the power consumption had to be 35 volts. In some countries, Cathie said, special permits are required to operate equipment at voltages above 40. Keeping it at 35 volts meant it qualified as an appliance worldwide.
The printhead's quick-firing nozzles operate at 24 kHz, whereas the competition runs between six and 12 kHz. That delivers faster prints and consistent laydown.
But it also illustrates how Kodak's control of the entire design -- ejectors, ink, media -- lets them optimize instead of compromise. And from our chat with John and Cathie it was clear that's something they really love to do.
THE FIRMWARE | Back to Contents
As impressive as the Canal Ponds achievement is, however, we found ourselves again tripping over the firmware as we relied on the 5500 to do our daily printing for a few weeks.
Most of the trouble was simply a failure to recover from out of paper situations when used in standalone mode. You could, in fact, blame the ungenerous paper trays for all this. But we won't. Whatever size the tray is, you will run out of paper one time or another, no doubt in the middle of a print job. The AiO printers simply send you back to the drawing board, instead of picking up from where they left off.
Here's a simple example.
We had some images on an SD card that we wanted to print. About 18 or so. We popped the card in the reader and the printer LCD displayed the first one, just as we expected.
We could have printed a proofsheet and marked it up to make prints, but we thought we'd keep things simple. We scrolled through the images one by one, pressing the Up arrow key to select the ones we wanted to print. We didn't keep count.
Nor did we have any idea how many sheets of 4x6 paper were left in the paper tray, we should confess. So when we hit the Start button to being printing, we didn't think about running out of paper.
Which we did.
The LCD suggests you need more paper and to press OK when you've reloaded. We reloaded and pressed OK.
You'd expect that printer to pick up where it left off, printing the remaining images. But it didn't. Instead, the LCD simply showed us the first image on the card again. Nothing we selected was still selected.
This wouldn't be so annoying if you could put 50 sheets of paper in the paper tray. But you can't. So you are bound to run out of paper every now and then if you print a dozen or so images at a time.
You'd think a firmware update would resolve this. But none was available. We contacted Kodak's San Diego campus for help on this one but didn't hear back.
Firmware updates are downloaded to your computer and then sent to the printer. That would be fine if both Windows and Macintosh firmware updates were released simultaneously. But as we found with the 5300, that isn't the case. The Mac version of the updater simply wasn't released.
That seems peculiar to us since you can update a Kodak camera just by copying the new firmware to a memory card and inserting it into the camera. No computer connection to the camera is required (and hence no OS-dependent installer). The AiO devices all have card readers, so it shouldn't require anything more than that.
THE INTERFACE | Back to Contents
It's worth studying the 5500's interface. It's three sets of buttons that are deceptively simple:
- The Power button on the left is on the same panel as the fax buttons (including three dedicated dialing buttons).
- The main function buttons are just to the left of the LCD, with buttons dedicated to Copy, Photo, Scan and Fax options plus a Menu button. To the right of that cluster is a Rotate button, a Zoom lever and a Transfer button.
- To the right of the LCD is a big red Attention light that flashes when you're out of paper or ink or some other error occurs. It sits above the four arrow keys and the OK button. To the right of that are the small Cancel button and the large translucent Start button.

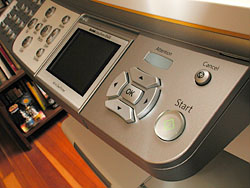
Control Panel. The left side (top) should look familiar to anyone who's used a fax machine. The OK and Start buttons (bottom) are confusing.
Even with the LCD there to help, there's almost no way to tell what these buttons do or how to escape trouble. Which button do you think you use to select an image displayed on the LCD for printing? The OK button? Nope. The Down arrow? You're guessing, but nope. It's the Up arrow. Is that intuitive? Nope. It's something you have to be told, something you have to remember.
The AiO devices really cry out for a simplified interface, say a touch interface backed up by a healthy help system.
USING THE 5500 | Back to Contents
We ran into a few other issues while using the 5500. A discussion of the most important ones follows.
Duplex Printing. The 5500 came with the duplex printing option, an accessory that replaces the back panel cover. While it does add an inch or so to the width of the printer, sitting under the overhang of the scanner bed, it isn't much.
You enable it through the printer driver. A Two-Sided option appears under Layout in Mac OS 10. By default, it's off. But you can select either long-edged or short-edged binding to enable it. Long-edged adds a margin along the long edge of the sheet, while short-edged adds one to the short edge.
In the Printer Options section of the driver, you can set a custom ink dry time of Normal, Medium, Long or Very Long. That's the time the duplexer waits before printing the second side of the sheet, giving the first side time to dry. That can be handy if you're printing pages that require heavy ink coverage. For straight black text, it wasn't necessary.
Faxing. Faxing has always been one of those things you can quite easily give up on an all-in-one device if your document flow is computer based. If you generate on your computer the documents you fax, you can use a built-in modem to fax them. And you get the benefit of access to your address book for sending those faxes. If you receive faxes, you can save a lot of paper by using fax software to receive them over the same modem.
|
Fax Settings |
|
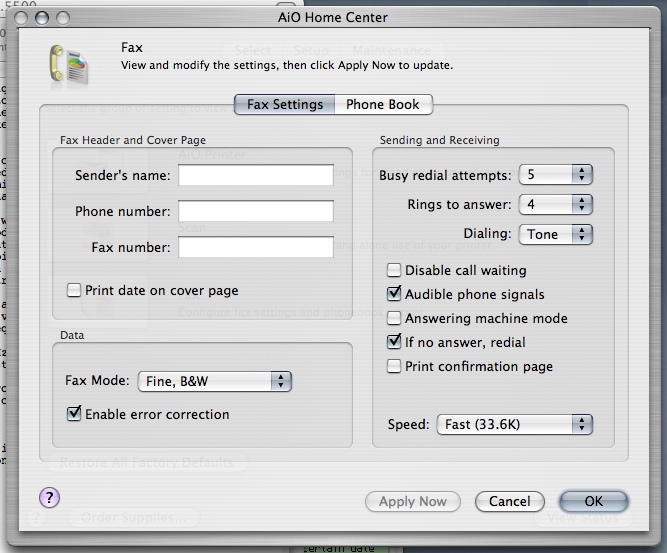
Fax Tab. Fax Header and Cover Page, Data options, Sending and Recieving. |
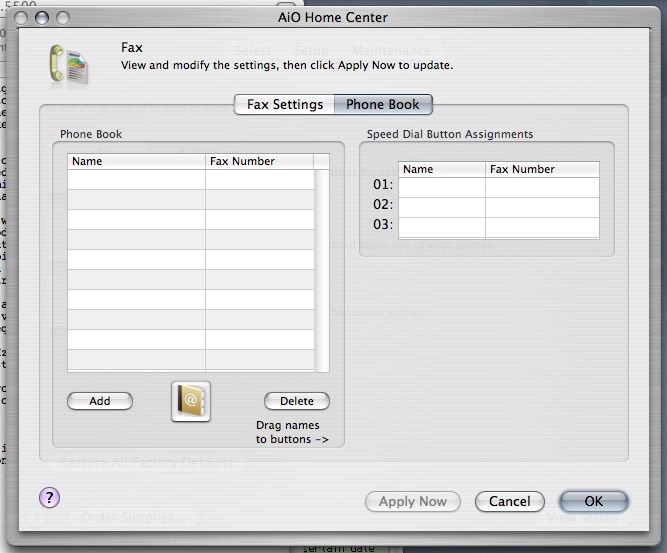
Phone Book Tab. Import your address book, define speed dial buttons. |
With all the Kodak film negatives imprisoned in shoe boxes throughout the world, it's surprising that Kodak opted to include a fax in their top of the line AiO rather than a negative scanner. Take a look at Canon's MP line if that's what you'd like.

Scanning to a Card. Looks right, but we never succeeded.
The one advantage to this decision is the multipage document feeder built into the 5500. If you have to scan a lot of text (it won't help with images), this could be a godsend. So the three of you out there scanning text should hop right on this.
You can manage the fax features of the 5500 from your computer, fortunately, using the AiO Home Center. That, too, gives you access to your address book.
Scanning. The quality of the scans was excellent. The scan dialog did confirm that the scanner's resolution maxes out at 1200 dpi, presumably optical, but that's all you really need for scanning reflective material. And that only for line copy, not images (which are quite happy at 300 dpi).
|
Scanning Settings |
|
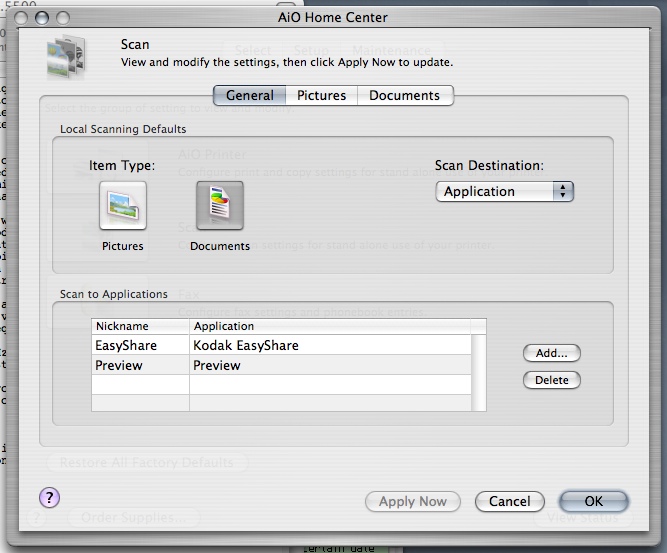
General Tab. Local Scanning Defaults, Scan to Applications list. |
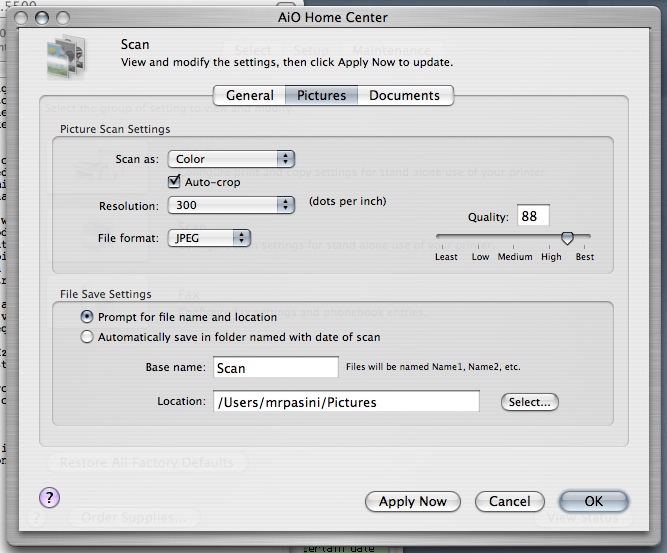
Pictures Tab. Resolutions, Format, File settings. |
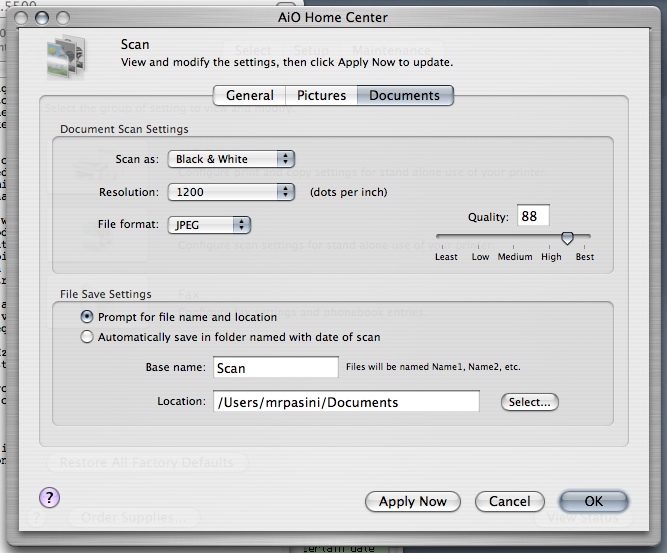
Documents Tab. Resolutions, Format, File settings. |
|
One interesting aspect of the 5500's CCD is that, while it takes a few seconds to warm up, it provides some depth of field. So if you're scanning an open book, for example, the letters on the curve into the gutter may actually be in focus.
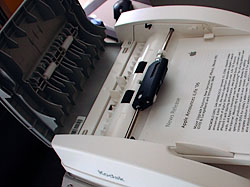
The ADF Revealed. Feed rollers and a paper detect finger under the sheets.
Scanning through the document feeder again stymied us. The 5500 did recognize when we had loaded the upper tray with a document, feeding the top sheet first. But writing to a memory card failed. The printer seemed to fail to pass the first sheet through the feed mechanism.
When we manually cleared the paper by pulling it out of the bottom of the mechanism, the printer reported a paper jam. We opened and shut the feeder panels but nothing we did was able to restore operation. Finally, we removed all the paper and the jam error message disappeared along with the blinking red light, but the printer itself was frozen. Neither the OK nor the Start button beeped when we pressed them. We had to pull the power plug out and restart the machine.
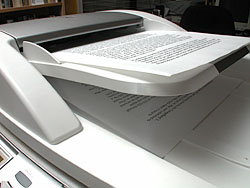
Jammed. Our paper jam.
So we tried it again.
The Scan menu on the LCD includes:
- Scan What: Document or Photo
- Scan To: Application, Memory Card or File
- Application: EasyShare or Preview on the Mac
- Save Settings: Yes or No
We decided to save to an Application (Preview) and pressed the Start button. On the computer, the AiO Scan application told us we shouldn't scan photo paper in the automatic document feeder, which it calls the ADF. We had loaded a two-page press release, not photo paper. When we told it to continue anyway, the printer reported a paper jam even though no paper had been pulled into the ADF.
After examining the feeder again, the printer froze, no buttons responding.
What, we wondered, if we really needed to scan this document? We put it on the glass and went through the Scan menu again with the same options.
This time a window appeared on our desktop telling up the 5000 Series was scanning from glass, which in fact it was. But Preview never launched and the scanner stopped scanning, although the scanner window on our desktop didn't update the situation. We manually launched Preview, but that didn't help either.
It shouldn't be this hard. And yet, it appeared not just hard but impossible.
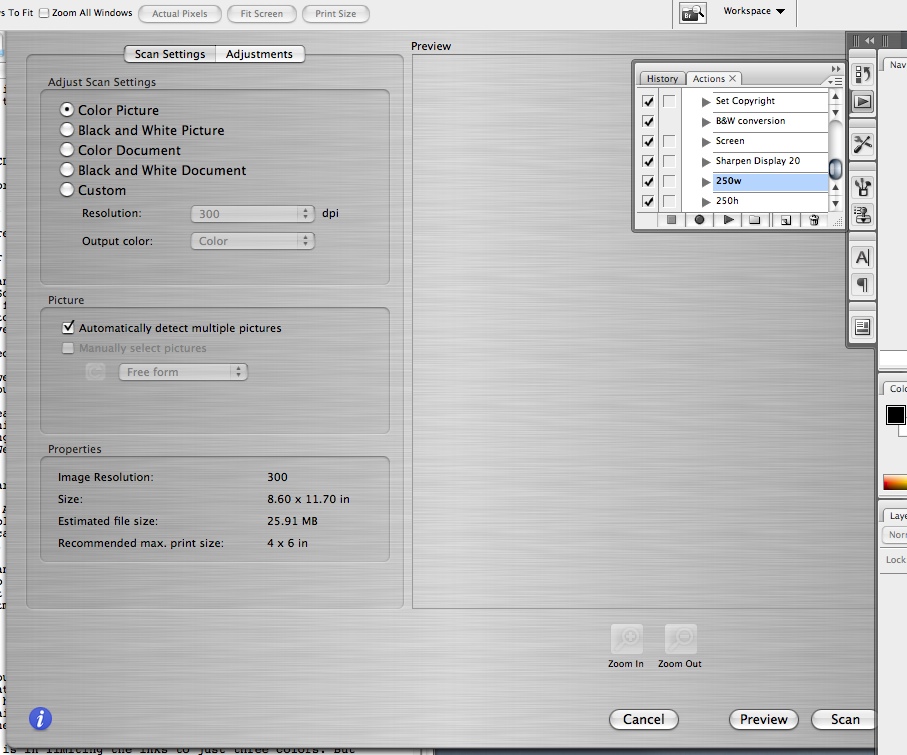
So we launched Kodak's AiO Home Center. The scanner setup page lets you add applications to the Application list on the scanner menu. We added Photoshop. You can also set the scan resolution and quality for images and documents. We confirmed the defaults.
We thought we'd try scanning from Photoshop itself, something we do with any scanner when we want to bring in an image. In this case, we just wanted a black and white document, but the AiO driver worked very well, presenting a quick preview and a quick bitmap scan from the glass.
How about loading the same page in the ADF? This actually worked from Photoshop, too. When we pressed Preview, an alert told us to remove all but the first page from the document feeder. When we pressed OK, the 5500 feed the sheet through the ADF and we got another alert suggesting we load all the pages in the ADF now. When we pressed OK, we saw our Preview.
When we pressed Scan, the scanner scanned the reloaded document. No jams.
We restarted the printer to see Photoshop added to our Applications options. And again we tried to scan from the ADF to Preview. Again, we were warned not to put photo paper in the ADF. And again, the printer froze.
Printing 4x6 Photos. Our failure to engage the ADF didn't deter us from a project that required printing a set of four Raw and JPEG images from Photoshop multiple times. These were destined to be mounted on Strathmore Photo Mount Cards, a heavy embossed card we use for family holiday cards.
|
Printer Settings |
|
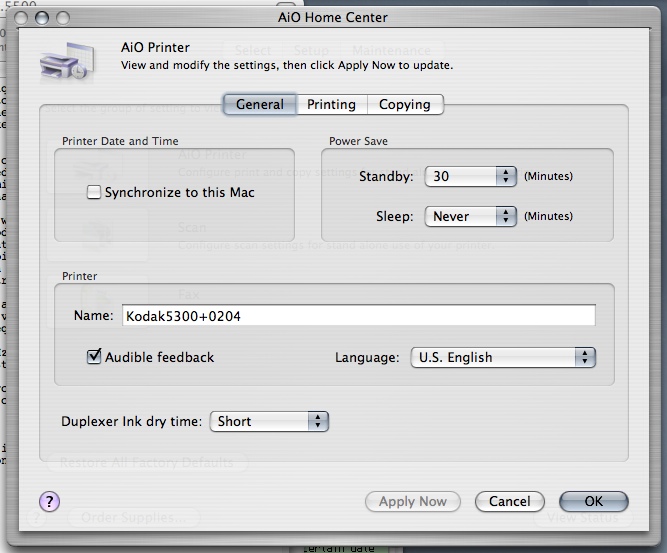
General Tab. Sync date/time, power settings, printer name, duplexer behavior. |
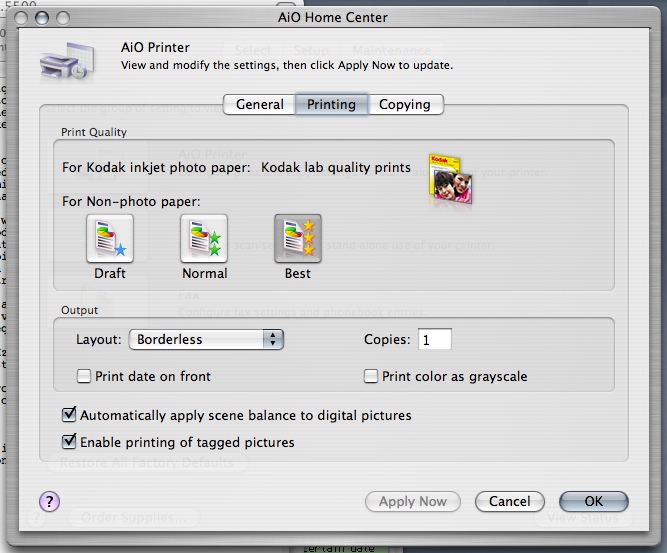
Printing Tab. Quality and Output settings (including scene balancing for digital pictures). |
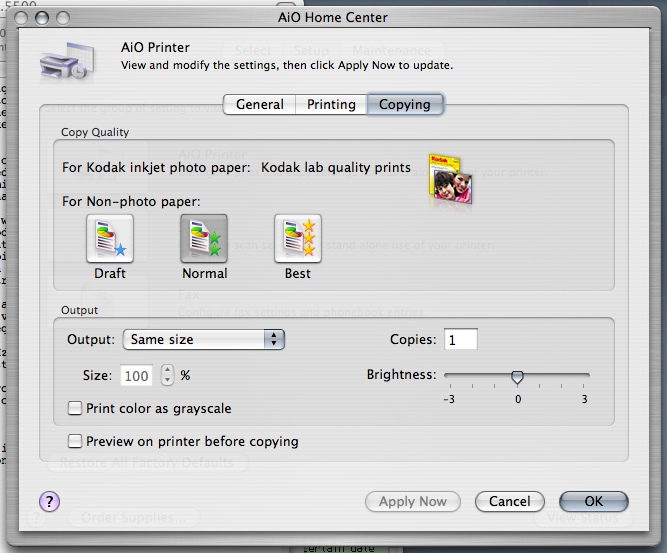
Copying Tab. Quality and Output settings. |
Photoshop Driver. Preview, Scan. |
We wanted to these prints to last and the Kodak pigment ink promised longevity. We also wanted to handle them quickly rather than have to let them sit around for a day or so. Kodak's porous paper made immediate handling feasible, although we did let them sit a while anyway.
The real question was whether we could achieve good color on the prints, especially for the Raw images. And we're happy to saw we did. There was very little fiddling in the print dialog boxes, too. We just changed the quantity. The printer knows its inks and reads the code printed on the back of the paper to optimize performance.
|
Printer Driver |
|
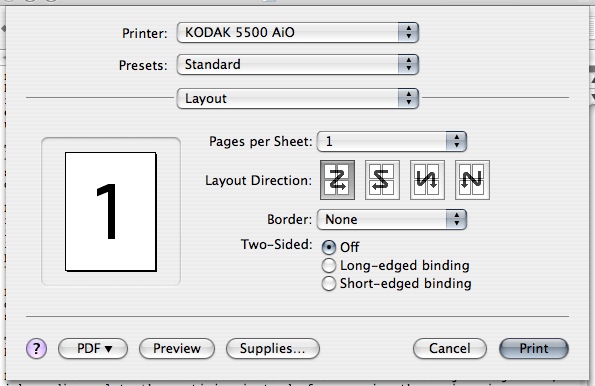
Layout. Standard. |
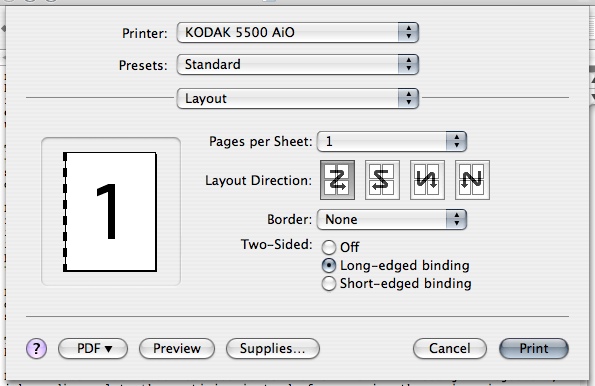
Layout. Long-edged binding illustrated. |
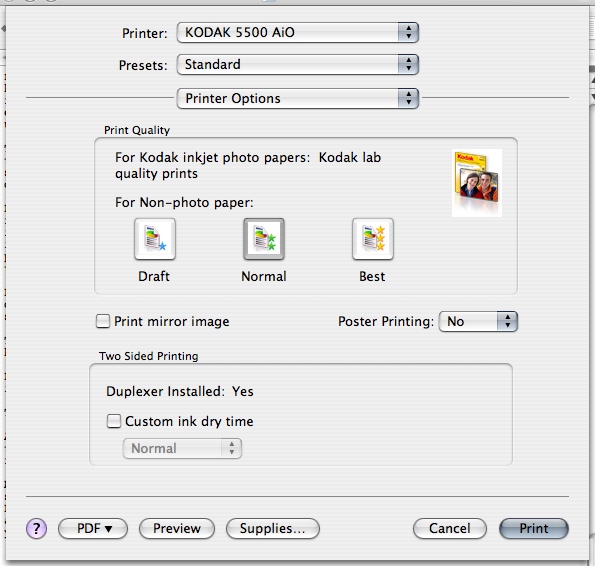
Printer Options. Quality and Two Sided settings. |
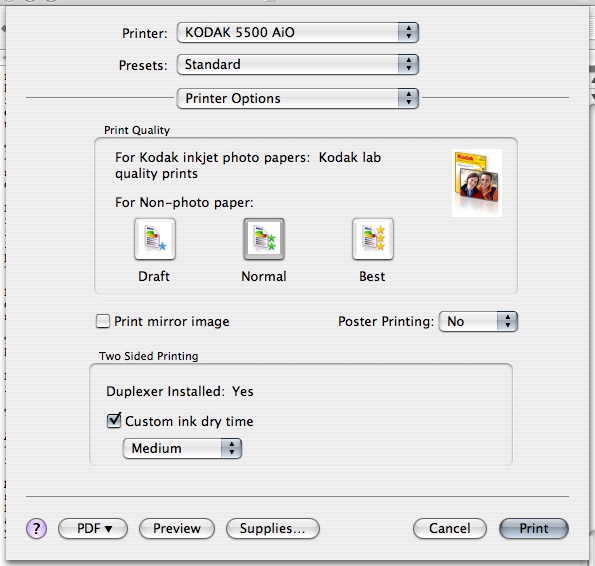
Printer Options. Custom ink dry time enabled. |
We never did conclude our 5300 diary, primarily because we never saw the Macintosh firmware updater. But we'll conclude our 5500 diary with the observation that Kodak has indeed found a way to deliver the least expensive home photo printing available with the best print longevity to boot but on a device whose firmware needs a lot more work.
Part of the cost trick is in limiting the inks to just three colors. But there's a lot of impressive science behind that accomplishment, including the extremely small size of the pigments themselves. Another part is the three grades of paper, which are bar coded on the back to tell the printer what weight and surface it's dealing with, a big boost in productivity.
Kodak's inkjet printers are not the least expensive ones in the store. But with the recent $50 price cut, they're much more competitive than they were. If you want to print a lot, it's worth spending $50 more for a Kodak inkjet. But only if you're content with consumer grade 4x6 prints. The three color ink set just isn't going to deliver the quality of an eight color ink set.
Firmware can be fixed with a download. The interface we find too complicated can't. That's no reason to pass on these printers if you do a lot of 4x6 printing from your computer. They do that inexpensively and well.