Back
to Full Sony MVC-CD300 Review
Back
to Full Sony MVC-CD300 ReviewGo to Sony MVC-CD300 Data Sheet
Go to Sony MVC-CD300 Pictures Page
Up to Imaging Resource Cameras Page
Use your browser's "Back" button to return to the previous page, or the links at the top and bottom of this page to navigate to related information. If you have difficulty fitting the text on this page onto your printer output, simply resize your browser window to a narrower width and print again.
Remember us when it's time to buy!
Dave here: Have our reviews been helpful to you? (Is this article you're reading right now useful?) Preparing this level of information on as many products as we do is incredibly hard work, not to mention expensive. Things on the Internet may look like they're free, but they're not. (As a lot of big dot.com companies are finding out these days.) Somewhere, somebody has to pay to produce worthwhile content. YOU can help us though, by remembering us when it comes time to make your purchase. Would you consider coming back to our site and clicking-through to one of our advertisers to make your purchase? Every dollar you spend with one of our advertisers helps us directly (in affiliate fees) or indirectly (the advertiser will keep renewing their ad contract with us). To make it easy for you to support us, here's a URL you can visit, to see all our current advertisers, with links to click on that will register your visit to them as having come from our site. It's up to you where you buy, but Mike, Mike, Kim, Yazmin, Marti and I would be really grateful if you'd help us out by choosing one of our advertisers to purchase from.
Thank you for your support!
Dave Etchells, Founder & Publisher
Visit our "Buy Now" Page:
https://www.imaging-resource.com/buynow.htm
Back
to Full Sony MVC-CD300 Review
Go to Sony MVC-CD300
Data Sheet
Go to Sony MVC-CD300
Pictures Page
Up to Imaging Resource Cameras
Page
Sony MVC-CD300Sony expands its CD-equipped camera line, adding erasability, buffer memory, a 3-megapixel CCD, and a more compact case! Review First Posted: 2/28/2001 |
|
 |
|
CD-RW provides 156 megabytes of write-once or rewritable storage! |
|
|
3.3 megapixel CCD delivers up to 2048 x 1536 pixel images | |
|
|
Surprisingly compact for a disc-media camera | |
|
|
Excellent image sharpness, color, and low light shooting capability |
Executive Overview
Building on the popularity of Sony's excellent line of Mavica digicams, the MVC-CD300 offers many of the same user interface designs we enjoyed on the DSC-S75, with the added convenience and capacity of the CD-R recording media that made the MVC-CD1000 so great. Much smaller than the floppy-based Mavica digicams, the CD300 is easy to tote in a small camera bag. An accompanying neck strap gives you the option of carrying the CD300 out and ready to shoot.
The CD300 doesn't offer an optical viewfinder, only a large color LCD monitor for image composition. When the LCD monitor is active, an information display reports the remaining battery power, CD-R capacity, flash status, and the number of available images, plus various exposure settings, such as aperture, shutter speed, exposure compensation, image size, and quality. The information display is enabled or disabled by pressing the Display button beneath the LCD monitor.
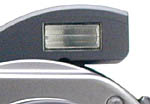
New on the CD300's LCD is a "sunlight assist" feature, which includes a small translucent window above the LCD that directs additional light behind the panel in bright conditions. This added illumination boosts the effective brightness of the LCD's backlight, making the display much more usable in direct sunlight and other very bright shooting conditions.
The CD300 is equipped with a 3x, 7- 21mm Carl Zeiss Vario-Sonnar lens (equivalent to a 34-102mm lens on a 35mm camera). Zeiss optics are noted for their quality and sharpness, making the lens a significant feature of the camera. Our assessment is that it performs better than the lenses on most digicams we've tested. The aperture can be manually or automatically adjusted from f/2.1 to f/8.0, and focus is automatically or manually controlled, with a distance readout display on the LCD monitor to assist with manual focus. A 2x digital telephoto function is available through the Setup menu, increasing the CD300's zoom capabilities to 6x (although digital magnification results in the usual decreased image resolution and quality). Macro performance is good, with macro focusing distances ranging from 1.62 inches (4cm) to 8.0 inches (20cm).
A significant feature of the CD300 is its user interface, an implementation of the greatly improved "Year 2001" interface design we first saw in the DSC-S75. This interface design uses a mode dial and expanded horizontal menu system on the LCD to greatly simplify the process of setting various camera options. There's also a small thumb-actuated command wheel for changing settings such as aperture and shutter speed without entering the main menu system. The net effect is a dramatic improvement in ergonomics and usability relative to Sony's earlier designs.
In addition to its fully Manual exposure mode, the CD300 provides Aperture Priority, Shutter Priority, Program AE, and Scene exposure modes. Aperture Priority allows you to select the working aperture -- from f/2.1 to f/8 -- while the camera chooses the best corresponding shutter speed. Shutter Priority allows you to select the shutter speed -- from 1/1,000 to eight seconds -- while the camera selects the appropriate aperture. Program AE places the camera in control of both aperture and shutter speed, while you control the remaining exposure parameters. The Scene exposure mode provides three preset shooting modes: Twilight, Landscape, and Portrait, which are designed to obtain the best exposure for specific shooting situations.
A Spot Metering option switches the exposure metering system to take readings from the very center of the image (a crosshair target appears in the center of the LCD monitor). White Balance options include Auto, Indoor, Outdoor, or One Push (the manual setting). Exposure Compensation is adjustable from -2 to +2 exposure equivalents (EV) in one-third-step increments. The camera's ISO setting offers Auto, 100, 200, or 400 equivalents, increasing performance in low-light shooting situations. The built-in, pop-up flash features Auto, Red-Eye Reduction, Forced, and Suppressed operating modes, with a variable flash intensity setting. As an added bonus, the CD300 offers an external flash socket and mounting shoe, which allow you to connect a more powerful flash to the camera. (Although the flash connector is a proprietary Sony design, restricting you to using only the Sony HVL-F1000 flash unit.) A Picture Effects menu captures images in Solarized, Sepia, Black & White, and Negative Art tones and a sharpness setting allows you to control the sharpness and softness of the image.
The CD300 offers the MPEG EX movie recording option, which provides for extended MPEG movie recording directly to the CD-R. The slower writing speed of the CD-RW drive (as compared to Memory Stick cards) means that the CD300's movie durations are still restricted by the size of its buffer memory, but the recording times are reasonably long. Maximum recording time at 320 x 240-pixel resolution is 60 seconds, or 360 seconds at 160 x 112 pixels. A Clip Motion option, available through the Setup menu, works like an animation sequence, allowing you to capture a series of up to 10 still images to be played back sequentially. Menu options for the Clip Menu mode include White Balance, Image Size, Flash Level, Picture Effects, and Sharpness adjustment.
The Record menu offers a list of Record mode options, including a TIFF mode for saving uncompressed images; a Text mode that captures images as black-and-white GIF files, perfect for snapping pictures of white boards and meeting notes; and a Voice recording mode, in which you can record sound clips up to 40-seconds long to accompany captured images (great for "labeling" or annotating shots you've taken). There's also an E-mail record mode that captures a smaller, 320 x 240-pixel image size that's easier for e-mail transmission. (This mode actually records two images: one in the 320 x 240-pixel format and another at whatever image size is selected through the Record menu.) An Exposure Bracketing mode captures three images at different EV levels, to achieve the best possible exposure. A Burst 3 mode captures three images in rapid succession (0.5-second intervals) with one press of the shutter button, plus a Normal setting.
Images can be saved as uncompressed TIFF, JPEGs, MPEGs, or GIFs depending on the Record mode, and are stored on the three-inch CD-R included with the camera. An NTSC video cable is also provided for connecting to a television set. (European models come equipped for PAL, but the camera itself can switch between the two standards via a Setup menu option.) A USB cable provides high-speed connection to PC or Macintosh computers. Software supplied with the CD300 includes MGI's PhotoSuite SE (Mac and Windows) and VideoWave SE (Windows only) for image downloading, image-correction capabilities, and a variety of creative templates for making greeting cards and calendars, as well as basic video editing utilities.
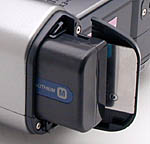
The CD300 uses an NP-FM50 InfoLITHIUM battery pack (M series), and comes with an AC adapter that doubles as a battery charger. We really like the InfoLITHIUM batteries because they communicate with the camera -- showing exactly how much battery power has been consumed, and reporting remaining battery capacity via a small readout on the LCD screen. This is really valuable in avoiding lost shots when your batteries die unexpectedly. Battery life is also excellent, among the best we've found. Despite the excellent battery life, our standard recommendation of keeping a second battery pack charged and ready to go still stands, especially when the AC adapter isn't convenient.
Like Sony's other Mavica cameras, the CD300 is enjoyable to use, and its user interface and function set have something for everyone. The full-featured exposure control options will satisfy the most advanced user, while its auto-everything "Program" exposure mode will meet the needs of the least-experienced novice. Best of all, you get increased image capacity with the CD-RW recording media. Great optics, a 3.3-megapixel CCD, and CD-RW image storage give the CD300 a strong edge in the digicam marketplace.
Design
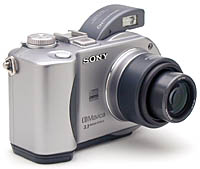
The Mavica MVC-CD300 features an updated user interface, introduced with the new Cyber-Shot DSC-S75 model (reviewed February 2001), plus CD-R image storage, a concept Sony pioneered with its MVC-CD1000 model almost a year ago. Conforming to the round, three-inch storage media, the MVC-CD300 body is smoother and more curved than other Mavica models, losing the boxy shape necessary to accommodate floppy disk media. Although it's still a handful, the CD300 is surprisingly compact given its large media size. At 5.70 x 3.74 x 3.66 inches (145 x 95 x 93mm), it doesn't offer pocket portability, but it does come with a neck strap and is easily carried in a small accessory camera bag (highly recommended to protect the camera). At 21.7 ounces (620 grams), including the battery, the CD300 is reasonably lightweight, with a hard, plastic body that gives it a strong, solid feel.
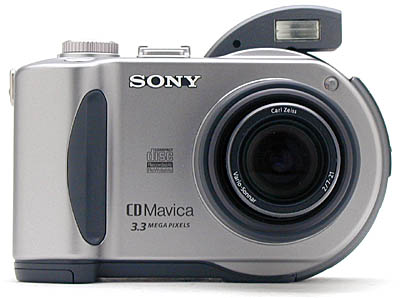
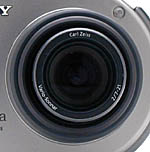
The telescoping Carl Zeiss lens dominates the left side of the camera's front panel, sharing its space with a small self-timer / autofocus assist lamp. A rubberized finger grip protrudes from the right front side, providing a comfortable hold for your right hand, which should fit comfortably around the curve of the understated hand grip. When the camera is powered on, the 7-21mm lens extends an additional 3/4 inch beyond the fixed lens barrel. When the camera is powered off, or the Mode dial is set on the Playback or Setup positions, the lens retracts into the barrel. A set of filter threads just inside the lip of the barrel accommodates Sony's line of accessory lens adapter kits.

The hand grip (right) side of the camera has only a neckstrap attachment eyelet, and the Command dial nearby, for adjusting exposure settings on the camera's LCD monitor.

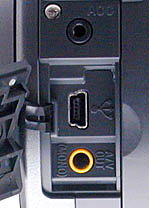
The left side of the camera has the second neckstrap eyelet on top, and a CD-R compartment "Open" lever, external flash connection jack, and connector compartment below. A small, plastic cover protects the connector compartment, which houses the USB and A/V Out connection jacks. The external flash connection jack, labeled "ACC," hosts Sony's HVL-F1000 flash unit, as well as a handful of Sony flash-related accessories.
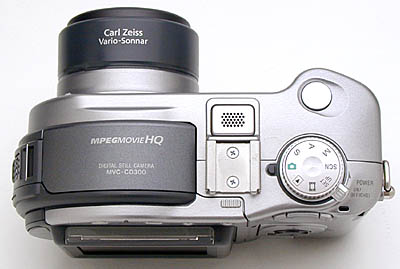
The CD300's top panel features an external flash "cold shoe" (no electrical contacts, it's intended for mounting only), a pop-up flash compartment, microphone, Shutter button, Mode dial, and power switch. There's also a small, green LED lamp next to the power switch that glows steadily whenever the camera is powered on. The pop-up flash unit curves ingeniously along the top of the CD-R compartment, extending its rounded shape.

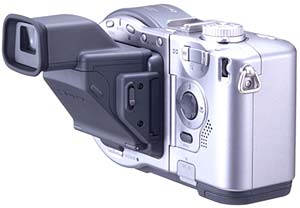
The remaining features and controls are on the CD300's back panel. These include the color LCD monitor, speaker, control buttons, and a DC In jack in the lower right corner. A small, orange LED above the LCD monitor lights when the flash is charging or when the camera is powered off and the battery is charging via the AC adapter. We appreciated the addition of a Command wheel on the S75 model (visible here in the extreme upper right-hand corner of the camera's back), and are glad to see it repeated on the CD300. This tiny wheel allows you to quickly change camera settings such as shutter speed and aperture, by pressing down and turning the dial, to scroll through selections in the LCD menu system. In addition to serving as a navigational tool in the LCD menu system, the four-way Arrow Rocker Pad controls several camera functions through its four arrow keys, including Flash mode, Macro, Self-timer, and Quick Review. We applaud Sony's decision to bring more feature controls to the back panel, including six dedicated buttons to control such features as Menu, Display, Exposure Compensation, Spot Metering, Focus mode, and AE lock.

The CD-R compartment takes up the entire left side of the back panel, with the compartment door holding several camera control buttons and the LCD monitor. The compartment door flips open when the release lever is opened, but does not deactivate the LCD monitor. Instead a message on the LCD monitor reads "Cover Open." A tiny, red LED lamp beneath the LCD monitor lights whenever the camera is accessing the CD-R. We also appreciated the small window over the CD-R compartment, which allows you to quickly check whether a CD is in the compartment, without having to open it.

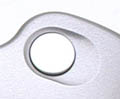
Finally, the CD300 features a fairly flat bottom panel with a battery compartment door and tripod mount. We were pleased to note that the distance between the compartment door and tripod mount is large enough to allow for quick battery changes while working with a tripod. A sliding, plastic door protects the battery slot, and a small button locks the battery into place and releases it when you're ready to recharge or replace the battery cell. The tripod mount itself is metal, a detail we always appreciate, especially on heavier models like the CD300. Also on the bottom panel (beneath the LCD monitor) is a tiny Reset button, which resets all the camera's settings to their factory defaults.
 Viewfinder
For composing images, the CD300 features a color LCD monitor that automatically activates when the camera is powered on. The Display button just below the LCD monitor controls both the information and image display. Pressing the button once activates the LCD backlight (if it was previously turned off), and turns on the information display. A second press cancels the information display, and the third press turns the backlight off again. (The LCD itself is always active.)
The LCD on the CD300 incorporates a "Solar Assist" (tm) feature, which we've seen on other manufacturers' cameras, and which was actually introduced by Sony fully three years ago, on the MVC-FD81 camera. It consists of a small translucent window at the top of the LCD (visible in the photo above as the very bright bar on top of the LCD), which lets in ambient light behind the LCD screen to boost the effective brightness of the backlight. This feature works only in very bright surrounding, and the effectiveness will vary, depending on the orientation of the camera relative to the primary light source. (It works best when the sun is directly overhead.) Overall, we found the "assist" window to be quite helpful when using the LCD outdoors on a sunny day, making the CD300's LCD one of the most usable we've encountered for outdoor shooting.
Just after the first version of this review "went to press", Sony emailed to inform us of yet another innovation they have slated for the CD200/300: A clip-on eyelevel viewfinder/magnifier. Called the DSAC-MVC, this gadget has a complete optical system in it, including a diopter adjustment, and purportedly provides enough magnification of the high-quality TFT LCD that it's quite usable for manual focusing. Estimated selling price is $79.95 US, and it should be available here by sometime in May, 2001. (At the same time as the cameras.)
In Record mode, the LCD monitor's information display reports a bounty of information, including image resolution, JPEG compression level, number of remaining images (plus available CD-R space), exposure compensation, f/stop, shutter speed, flash mode, and an excellent feature unique to Sony cameras -- the number of minutes remaining on the battery! In Automatic and Scene modes, a half press of the shutter button is necessary to display the current shutter speed and aperture settings, and in some capture modes, only applicable readings will be displayed.
We liked the Manual Focus display, which eschews the usual focus bar and instead reports the current distance setting in a single, numeric reading, which can be changed by turning the Command wheel (when the focus distance is highlighted on the LCD screen). The ability to set lens focus to a specific (numeric) distance can be invaluable when setting up for shots in low-light conditions. We also noticed that when you manually adjust the focus, the LCD monitor snaps into focus as soon as you select the right distance. (We first noticed this on the DSC-S75 camera.) We're not sure how Sony managed to make focus changes so dramatically visible on the LCD, but whatever they did seems to work well, and makes the Manual Focus option much more useful than those we've seen on other cameras.
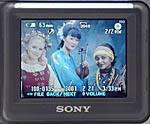
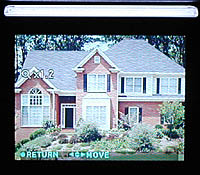
In Playback mode, the LCD monitor offers an Index display mode as well as a 1.1 - 5x Playback Zoom, which enlarges captured images for closer inspection. Once enlarged, the Arrow buttons enable you to scroll around inside the image. The Display button controls the information and image display in Playback mode, cycling through three modes: No display, image with information, and image without information. The Playback image information includes the file type (movie or still), image size, where the image falls in the Playback index, remaining CD-R capacity, file name, date and time the image was taken, and the remaining battery power. The CD300 provides an LCD brightness adjustment through its Setup menu, which changes the display to Bright, Normal, or Dark, depending on the shooting situation.
 Optics
The CD300 is equipped with the same 3x, 7-21mm Carl Zeiss Vario-Sonnar lens (equivalent to a 34-102mm lens on a 35mm camera) that we liked on the earlier Cyber-Shot S75 model (and the S70 before that). This lens produces unusually sharp images from corner to corner, noticeably crisper than what we've seen from many other digicams. The lens is protected by a removable, spring-lock lens cap, which comes with an easy-to-thread lens-strap opening and a small tether strap to keep it from getting lost.
In Aperture Priority and Manual modes, the aperture is manually adjustable from f/2.0 to f/8.0, in nine steps. Shutter speed is adjustable from 1/1,000 to eight seconds, with more than 40 steps in between. Macro mode is engaged by pressing the right Arrow button, which changes the focus range to 1.62 inches (4cm) to 8 inches (20cm), when the lens is set at its shortest (wide-angle) focal length.
Focus can be controlled either automatically or manually, with a focal range from 9.87 inches (25cm) to infinity. Pressing the Focus button in the top left section of the camera's back panel cycles between Manual and Auto Focus control. In Auto focus mode, a central focus bracket appears in the center of the LCD display to help you line up shots. When Manual control is selected, you make adjustments by turning the same Command wheel used for aperture and shutter speed selection. As you turn the wheel, the focus distance is displayed on the LCD monitor next to the Command wheel arrow, which is a great help when shooting in low-light conditions. Also helpful in limited lighting is the AF assist light, selected via the Setup menu, which helps the camera make adjustments in Auto Focus mode. We were very impressed with the results from the AF assist light, as it focused flawlessly under the darkest shooting situations.
The lens also features filter threads to accommodate a variety of Sony lens conversion kits. These kits rely on a barrel adapter that screws onto the camera's body threads, providing a set of fixed filter threads ahead of the furthest extension of the telescoping lens assembly. The adapter by itself can also be used to attach non-Sony accessory lenses, such as macro adapters, etc. When working with a Sony lens conversion kit, you need to inform the camera (via the Setup menu) that the lens is attached, so the camera's autofocus can allow for the additional optical element. (We don't have a thread size spec from Sony for this camera, but the body threads appear to be a bit larger in diameter than those on the S70/75. This may just be an illusion caused by the different lens barrel configuration. Check with your dealer to insure lens-kit compatibility between models.)
The 2x Digital Zoom function is enabled through the camera's Setup menu, effectively increasing the CD300's zoom capabilities to 6x. When engaged, Digital Zoom takes over once you've zoomed past the normal telephoto range (the LCD display must be on). You can see the change from optical to digital zoom by observing the marker in the zoom range indicator on the LCD panel. As always, we warn readers that digital telephoto is not the same as optical zoom and that it causes noticeable deterioration in image quality by adding excess noise and possible softening the image.
Exposure
Exposure control on the CD300 is just as straightforward and uncomplicated as on the S75 model. A Mode dial on top of the camera lets you quickly select major camera operating modes, including full program, aperture priority, shutter priority, and full manual exposure modes. Additional control buttons on the back panel let you change basic exposure settings, such as metering options, exposure compensation, and AE Lock with a single button-push. Finally, a small Command wheel (on the right side of the camera back) simplifies exposure adjustment even more, by allowing you to change exposure compensation, manual focus, aperture, and shutter speed, simply by pressing in to highlight the function, and turning it to make adjustments.
Four main exposure modes offer varying levels of control: Program, Shutter Priority, Aperture Priority, and Manual. In Program mode, the camera controls the basic exposure, but allows you to determine all other variables, such as ISO, white balance, and flash. Shutter Priority enables you to set the shutter speed from 1/1,000 to eight seconds, while the camera controls the lens aperture. Alternately, Aperture Priority mode allows you to set the lens aperture from f/2.1 to f/8.0 while the camera sets the appropriate shutter speed. In both Aperture and Shutter Priority modes, the shutter and aperture values will flash in the LCD panel (when the shutter button is pressed halfway) if the camera disagrees with the chosen settings. This gives you an opportunity to adjust the exposure without wasting a shot.
We were glad to see a Manual exposure mode included on the CD300, providing complete control over aperture settings, shutter speed, ISO, white balance, and metering. In Manual mode, the camera reports the amount of under- or overexposure with an EV value in the LCD monitor, just above the aperture and shutter speed settings. If the camera disagrees with the shutter and aperture values, the EV value will flash in the LCD panel (when the shutter button is pressed halfway), allowing you to change the settings. In all three adjustable modes (Aperture Priority, Shutter Priority, and Manual), the command wheel adjusts the aperture or shutter speed settings.
arrow on the LCD screen points to one adjustable setting, such as aperture, shutter, or exposure compensation. Pressing in on the wheel highlights that setting in yellow, allowing you to make adjustments by simply turning the wheel. Pressing on the wheel a second time removes the yellow highlight, so that you can move the yellow arrow to a new adjustable setting. Where we got into trouble with the Command wheel was apparently in pressing it too quickly in some modes, which resulted in a failure to recognize the actuation, and made it seem like nothing was happening. (It may be that there's a "debounce" delay on the pressure switch for the wheel, producing a "dead" interval after each actuation.) Whatever the case, once we started operating the control in a more deliberate manner, we had no further trouble. In Automatic exposure mode, the only adjustable setting you can access via the wheel is exposure compensation
In addition to the four main exposure modes, there are three preset Scene modes that adjust the camera for shooting in specific situations: Twilight, Landscape, and Portrait. Twilight mode adjusts the exposure to capture a bright subject in dark surroundings (neon lights would be a good example), without washing out the color. Because Twilight mode usually employs a slower shutter speed, a tripod is recommended to prevent blurring from camera movement. Landscape mode uses a smaller aperture setting to keep both the background and foreground in sharp focus, allowing you to capture broad vistas of scenery. Portrait mode uses a larger lens aperture setting to decrease the depth of field, keeping the subject in sharp focus, with the background slightly blurred.
For normal exposures, the CD300 uses an "averaged" metering system, meaning that the camera averages exposure readings throughout the image to determine the best overall exposure. For high-contrast subjects, a Spot Metering option (controlled by a button on the back panel) takes the exposure reading from the very center of the frame. A center crosshair target appears on the LCD monitor (inside the focus brackets), to show the location of the spot exposure reading. For metering off-center subjects, you can take your reading of the subject you want metered, then use the AE Lock button on the back panel to lock the exposure reading. Once exposure is locked, you can recompose the image and release the shutter.
Exposure compensation can be manually adjusted from -2 to +2 exposure equivalents (EV) in one-third-step increments, in all exposure modes except Manual. The camera's light sensitivity can be set through the Record menu to Auto, or 100, 200, or 400 ISO equivalents, increasing the camera's low-light shooting capabilities with higher ISO settings. White Balance (WB) can also be controlled in all exposure modes, with available settings of Auto, Indoors, Outdoors, and One-Push (manual setting). The "One-Push" white balance mode is the "manual" white balance option found on many higher-end digicams today. One-Push allows you to set the camera's white balance by pointing it at a white card and telling it to use that color as a reference. As with many other Sony cameras, the CD300 offers a Picture Effects menu, providing a little in-camera creativity. Settings like Solarize, Black & White, Sepia, and Negative Art can add interest to your images by altering color or reversing the highlights and shadows.
The CD300 also offers a menu selection for adjusting image sharpening in-camera, providing a range of sharpness values from -2 to +2 in arbitrary units. The default value of zero is fine for most uses, but you might want to boost the sharpness a bit if your shots will be printed on a low-quality inkjet printer. On the other hand, the lowest sharpness setting may be useful for images that you plan to manipulate in Photoshop or any other image editing application. In these programs, you typically want to apply sharpening at the end of the manipulation process. Finally, a 10-second self-timer can be activated by pressing the down Arrow button on the back panel. Once the shutter button has been fully depressed, the small LED lamp on the front of the camera counts down the seconds until the shutter is released (a green dot in the LCD monitor flashes as well). You can cancel the timer by pressing the down Arrow button again.
When you have images stored on the CD-R, the left arrow key on the Arrow rocker button (back panel) activates a quick review of the previously captured image, and offers a delete option for removing the image. Pressing the arrow key a second time returns you to the normal image display screen, as does pressing the shutter button halfway.
 Flash
Flash
The built-in, pop-up flash on the CD300 has three settings that are activated by pressing the Flash button on the Arrow rocker pad: Auto, Forced, and Suppressed. Auto puts the camera in charge of whether or not the flash fires, based on existing light levels. Forced Flash means that the flash always fires, regardless of light level, and Suppressed Flash prevents the flash from firing, regardless of light levels. The flash is released from its compartment once the shutter button is halfway pressed in either Auto or Forced modes. A Red-Eye Reduction mode is activated through the Setup menu, and works with both Auto and Forced flash modes. Red-Eye Reduction fires a small pre-flash to reduce the occurrence of red-eye effect in people pictures.
You can adjust the flash intensity to High, Normal, or Low through the Record menu. This option makes the flash more accommodating to varying light levels or different subjects. We liked the fact that we could adjust exposure for the flash and ambient lighting separately, a feature that makes it easier to achieve more balanced exposures. In Normal mode, flash range extends from 12 inches to 9.75 feet (0.3 to 3.0 meters).
An external flash sync socket is located on the left side of the camera, directly above the digital and video jack compartment. A "cold" shoe mount on top of the camera eliminates the need for a flash bracket. The only complaint we have here is that the external flash connection is only compatible with Sony's HVL-F1000 accessory flash, instead of the normal range of standard external flash units. This would be fine if an adapter were available to connect conventional strobes to the camera, but as far as we know, no such adapter exists, nor does Sony have plans to market one. While it's true that a third-party "dumb" flash unit would lose all the exposure-control benefits offered by Sony's own units, we suspect that many purchasers of the CD300 will already own a strobe unit as part of their film-based kit, and would like the option of using it with the CD300, even with restricted functionality.
Movie and Sound Recording
In any of the CD300's still capture modes, you can record short sound clips to accompany images. This option is available through the Record menu by selecting the Voice record mode. You can record up to 40 seconds of sound for each image by holding down the shutter button. By pressing and releasing the shutter button quickly, you can record for only five seconds.
The Movie mode is accessed on the Mode dial on top of the camera by selecting the film frame icon. You can record moving images with sound at either High Quality (HQ) 320 pixels, or standard quality 320 x 240 and 160 x 112 pixels. Standard quality resolution sizes record movies in the MPEG EX format, which offers longer recording times. The MPEG EX mode on the CD300 doesn't offer the virtually unlimited recording time found on the S75 though, because the CD-RW drive write speed isn't as fast as Sony's Memory Stick flash media cards. Still, the recording times are longer than we're accustomed to seeing on competing cameras, with maximum durations of 60 seconds at 320 x 240-pixel resolution, or 360 seconds at 160 x 112 pixels. At the 320 x 240 and 160 x 112 pixel settings, the MPEG EX format records at eight frames per second, with an audio sampling rate of 4 KHz. The 320 HQ setting captures 16 frames per second, uses less image compression, and increases the audio sampling rate to 10 KHz. Additionally, movies captured in the 320 HQ setting play back full screen in Playback mode, as opposed to the smaller display shown with the MPEG EX settings.
Clip Motion
This is a slick little feature that we really enjoy, which first appeared on the Sony DSC-P1, and now seems to be a pretty standard option on all the latest Sony models. The Clip Motion capture mode turns the CD300 into an animation camera, recording up to 10 frames of still images, which are combined into a single GIF file for animated playback. Frames can be captured at any time interval, with successive presses of the shutter button. When you've captured as many photos as you need, you just press the center of the Arrow rocker pad to tell the camera to finish the sequence. Available image sizes are Normal (160 x 120 pixels) and Mobile (80 x 72 pixels), and the number of actual captured frames may vary with image size and available CD space. (You have a maximum of 10, but could be constrained to fewer if your memory is very full.) Files are saved in GIF format, and are played back with (approximate) 0.5-second intervals between frames. Unlike Movie mode, flash is available with Clip Motion.
Special Record Modes
Like the S75, the CD300 gives you several recording format options for still images. Through the Record menu, you can select TIFF for uncompressed images, Text, Voice (mentioned above), E-mail, Exposure Bracketing, Burst 3, or Normal modes. E-mail mode records a smaller (320 x 240-pixel) image size that's small enough to be easily sent to friends and family by e-mail. The e-mail image is recorded in addition to the image size selected through the Record menu's Image Size option. (The TIFF option likewise records a maximum-resolution TIFF image in addition to a JPEG at whatever size and quality setting you've selected.) The Text mode records a black-and-white GIF file that is perfect for taking pictures of white boards, flip charts, or meeting notes. Burst 3 mode allows you to take a maximum of three frames in rapid succession, at 0.5 second intervals. Actual frame rates will vary with the image resolution and amount of information to be recorded. In Exposure Bracketing mode, the camera takes a series of three images at different exposure readings: one at the normal meter reading, and two more at different EV settings. The exposure variance between shots is set through the Setup menu, through the "Bracket Step" option, with settings of +/- 1.0, 0.7, and 0.3 EV.
Shutter Lag/Cycle Times
When you press the shutter release on a camera, there's usually a lag time before the shutter actually fires. This time is to allow the autofocus and autoexposure mechanisms time to do their work, and can amount to a fairly long delay in some situations. Since this number is almost never reported on, and can significantly affect the picture taking experience, we now routinely measure it using an Imaging Resource proprietary test system.
|
|
||
|
|
|
|
| Power On -> First shot |
|
Slower than average. The longer time is for a new disc, the shorter one if the disc hasn't been changed since the camera was last turned on.
|
| Shutdown |
|
About average
|
| Play to Record, first shot |
|
Time until first shot is captured, from "instant review" mode or normal playback mode. Quite fast.
|
| Record to play (max/min res) |
3.28/5.58 |
Images appear quickly as a low res version, then "fill-in" within a few seconds. Quite a bit slower than average, due to the relatively slow CD data rate.
|
| Shutter lag, full autofocus |
|
About average. |
| Shutter lag, manual focus |
|
A bit slower than average. |
| Shutter lag, prefocus |
|
A little better than average
|
| Cycle Time, max/min resolution |
2.7-4.9 (range) |
A bit faster than average for first two shots, then slower than average. Top numbers are for large/fine files, bottom for small/normal. Cycle time varies greatly for small files. |
| Cycle time, continuous mode |
|
Moderately fast, burst of only three frames though. (Max/min res are the same.) |
Shutter lag on the MVC-CD300 is about average among cameras we've tested, at 0.83 seconds for full autofocus, or 0.20 seconds when the camera is prefocused. Manual focus is a bit slower than average, at 0.68 seconds.
One change in the CD300 vs the earlier CD1000 is that the CD300 now has some RAM buffer memory, to reduce the wait time between shots while the camera writes to the disc. After the first shot, you can snap another in as little as three seconds, a pretty fast cycle time, even among higher-end digicams. There's only one frame's worth of buffer memory though: After the first two shots, you'll find yourself waiting about 7.1 seconds on average to snap the next one. Cycle time when shooting low-resolution files is much faster on average, but shows an odd variability, with cycle times ranging from 2.7 to 4.9 seconds. We think this could be caused by the buffer memory filling and emptying as you continue shooting: Only occasionally does it fill nearly all the way, resulting in the 4.9 second figure, while most of the time it's ready for the next shot in only 2.7 seconds.
Like other models in the Mavica series, the CD300 starts up from power-off fairly slowly, because the camera has to check the disc to see how much space is left, and where the next image should be stored. The camera obviously has a trick or two up its sleeve in this area though: If you load a new disc (or just open and shut the back door with the power off), the camera somehow knows it has to scan the entire disc to determine space and where the next picture will go. This takes 18.2 seconds. If you just shut the CD300 down without removing the disc though, the next time it starts up, it seems to recognized the disc, and startup time is reduced to only 6.5 seconds. Shutdown time is about average for a camera with a telescoping lens.
Other than the long startup and record-to-playback times, we found the CD300 to be a pretty responsive camera: We actually were very surprised to find that it only had a one-image buffer memory, since we almost never ran up against buffer memory limitations in our (admittedly leisurely) shooting with it.
Operation and User Interface
As we discussed in the Design section of this review, the CD300 offers the same new and improved user interface that debuted on the CyberShot DSC-S75 model. Additional external camera controls reduce the reliance on the LCD menu system and greatly simplify overall camera operation. The ready access to exposure controls and other camera functions, and the less complicated LCD menu system, mean that you spend less time scrolling through LCD menu screens and options. Though the LCD menu is still required for some settings, overall camera operation is much faster and easier. The Command wheel allows you to adjust the exposure compensation, aperture, and shutter speed settings quickly. The Mode dial and the method by which some functions were assigned to the four-way Arrow key pad (very clearly marked we might add), provide even swifter operation. The revamped control system struck us as being very well thought out, and very conducive to fluid use of the camera as a photographic tool.
Control Enumeration
Shutter Button: Located on the right side of the top panel, this button sets focus and exposure when pressed halfway. Fully depressing the button fires the shutter. When the Quick Review (the shot just taken) is displayed on the screen, a half press of the shutter button returns the LCD to the normal image display. When the Self-timer is enabled, fully depressing the shutter button kicks off the 10-second countdown.

Mode Dial: Stacked on top of the Power Switch, this dial controls the camera's operating modes. Options include Program (camera symbol), Shutter Priority (S), Aperture Priority (A), Manual (M), Scene (SCN), Setup, Movie (film frame), and Playback modes.
![]()
Command Wheel: Located on the top right side of the camera's back panel, this wheel controls aperture and shutter speed settings in Shutter Priority, Aperture Priority, and Manual modes. When Manual Focus is enabled, turning the wheel adjusts focus and displays the focus distance on the LCD monitor. When the Exposure Compensation adjustment is activated, turning the wheel adjusts the exposure from -2 to +2 exposure equivalents (EV) in one-third-step increments.
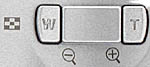
Zoom Buttons: To the left of the Command wheel, the Zoom buttons control the optical and digital zoom (when enabled) in any capture mode. In Playback mode, the wide angle button activates the Index Display mode, while the telephoto button controls the Playback Zoom up to 5x (the wide angle button also zooms back out). Once in Index Display mode, pressing the wide-angle side again displays the image information for the highlighted thumbnail, including exposure information.

Four-Way Arrow Rocker Pad (also: Flash, Quick Review, Macro, and Self-Timer Buttons): Situated just below the zoom buttons, this button serves a variety of functions. On its surface, the pad features four arrows, one pointing in each direction. When any settings menu is engaged, these arrows navigate through the menu options. Once an option is selected, you confirm the selection by pressing on the center of the button. (You will hear a dual tone when you press the center, as opposed to the single tone you hear when you press an arrow.) In Playback mode, the right and left arrows scroll through captured images, while the up and down arrows control the playback volume. If a movie file is displayed, pressing the center of the button triggers the movie playback. When Playback zoom is enabled, pressing the center of the button returns the LCD to the normal 1x image display.
In addition to menu scroll functions, the Arrow Pad also controls certain exposure and camera settings. The Up Arrow button is marked with a flash symbol, and cycles between the Auto, Forced, and Suppressed Flash modes (in all capture modes except Movie). The Right Arrow button, marked with the macro flower symbol, enables and disables the camera's Macro mode. The Down Arrow controls the Self-timer mode, cycling between Normal and Self-timer capture modes. Finally, the Left Arrow activates and deactivates the Quick Review function, which displays the most recently captured image on the LCD screen.

Menu Button: Located directly below the Arrow Rocker Pad, on the left side, this button activates and deactivates the settings menus in any camera mode except Setup (which automatically displays the menu upon entering the mode).
![]()
Display Button: Just beneath the LCD monitor, the Display button controls the LCD display in all camera modes except Setup. Pressing the Display button sequentially cycles through three modes: No display; image and information display; and image display only.

Focus Button: Located over the top left corner of the LCD monitor, the Focus button cycles between Automatic and Manual focus modes.

Exposure Compensation Button: Directly to the right of the Focus button, the Exposure Compensation button (+/-) activates the exposure compensation adjustment, which is changed by turning the Command wheel.
![]()
Spot Metering Button: To the right of the Exposure Compensation button, the Spot Metering button ( [•] ) switches between Spot and Normal (averaged) metering modes. When Spot Metering is enabled, a crosshair target appears in the center of the LCD screen.
![]()
AE Lock Button: Just over the top right corner of the LCD monitor, the AE Lock button locks an exposure reading until the shutter button is fully depressed.
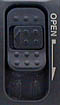
Open CD-R Compartment Button: Resting on the side of the CD-R compartment, just above the external flash connection jack, this sliding button opens the CD-R compartment door.
Camera Modes and Menus
![]() Program AE: Noted on the Mode dial with the green camera symbol, Program mode places the camera in control of both the aperture and shutter speed settings, allowing you to set the remaining exposure variables (White Balance, ISO, Exposure Compensation, Image Size, Picture Quality, Flash, and Normal or Spot Metering).
Program AE: Noted on the Mode dial with the green camera symbol, Program mode places the camera in control of both the aperture and shutter speed settings, allowing you to set the remaining exposure variables (White Balance, ISO, Exposure Compensation, Image Size, Picture Quality, Flash, and Normal or Spot Metering).
![]() Shutter Priority: In Shutter Priority mode, you set the shutter speed (from 1/1,000 to eight seconds), while the camera selects the best corresponding aperture. All other exposure variables can also be adjusted.
Shutter Priority: In Shutter Priority mode, you set the shutter speed (from 1/1,000 to eight seconds), while the camera selects the best corresponding aperture. All other exposure variables can also be adjusted.
![]() Aperture Priority: In Aperture Priority mode, you set the desired lens aperture (from f/2.1 to f/8.0) while the camera selects the best corresponding shutter speed. All other exposure variables can also be adjusted.
Aperture Priority: In Aperture Priority mode, you set the desired lens aperture (from f/2.1 to f/8.0) while the camera selects the best corresponding shutter speed. All other exposure variables can also be adjusted.
![]() Manual: Manual exposure mode offers full user control over exposure, including aperture and shutter speed settings. All exposure variables except for exposure compensation are available in this mode.
Manual: Manual exposure mode offers full user control over exposure, including aperture and shutter speed settings. All exposure variables except for exposure compensation are available in this mode.
![]() Scene: Scene mode provides access to three preset shooting modes: Twilight, Landscape, and Portrait. The actual scenes are changed through the Setup menu (in Setup mode). Twilight mode uses a slow shutter speed to accommodate darker shooting situations. If used with a flash, this becomes a slow sync mode, capturing the illuminated subjects in the foreground with the flash, and using the longer shutter speed to record ambient light from the background. Landscape mode uses a small aperture opening to keep both the foreground and background settings in focus. The Portrait mode uses a large aperture opening to decrease the depth of field, thereby keeping the subject in sharp focus and slightly blurring the background. Most exposure variables, except for aperture and shutter speed settings, are available in the Scene modes.
Scene: Scene mode provides access to three preset shooting modes: Twilight, Landscape, and Portrait. The actual scenes are changed through the Setup menu (in Setup mode). Twilight mode uses a slow shutter speed to accommodate darker shooting situations. If used with a flash, this becomes a slow sync mode, capturing the illuminated subjects in the foreground with the flash, and using the longer shutter speed to record ambient light from the background. Landscape mode uses a small aperture opening to keep both the foreground and background settings in focus. The Portrait mode uses a large aperture opening to decrease the depth of field, thereby keeping the subject in sharp focus and slightly blurring the background. Most exposure variables, except for aperture and shutter speed settings, are available in the Scene modes.
![]() Setup: Setup mode lets you change basic camera settings.
Setup: Setup mode lets you change basic camera settings.
![]() Movie: Movie mode, marked on the mode dial with a film strip symbol, captures MPEG movies with sound. Most exposure variables are available, except for flash and ISO. If the Clip Motion option is selected from the Setup menu, Movie mode will capture up to 10 frames of still images at a time, to be played back in succession to create an animated effect.
Movie: Movie mode, marked on the mode dial with a film strip symbol, captures MPEG movies with sound. Most exposure variables are available, except for flash and ISO. If the Clip Motion option is selected from the Setup menu, Movie mode will capture up to 10 frames of still images at a time, to be played back in succession to create an animated effect.
![]() Playback: Captured images and movies can be reviewed and played back in this mode. Images can also be erased, write-protected, copied, resized, set up for printing on a DPOF device, or played back in a slide show. A rudimentary editing function (Divide) allows you to chop up movie files into smaller segments.
Playback: Captured images and movies can be reviewed and played back in this mode. Images can also be erased, write-protected, copied, resized, set up for printing on a DPOF device, or played back in a slide show. A rudimentary editing function (Divide) allows you to chop up movie files into smaller segments.
Record Menu: The Record menu is accessible in all capture modes by pressing the Menu button, however, not all menu options are available in all capture modes.
 White Balance: Adjusts the camera's white balance to accommodate a variety of light sources. Options include: One Push (manual setting), Auto, Indoors, and Outdoors.
Setup Menu: The four-panel setup menu is automatically displayed on the LCD monitor upon entering Setup mode:
 Finalize: Finalizes the CD-R or CD-RW, making it readable to a computer's CD-ROM drive.
Playback Menu: As with the Record menu, the Playback menu is accessed by pressing the Menu button when in Playback mode. The following options are available:
 Delete: Deletes the current image, with an option to cancel.
 Image Storage and Interface
|
Resolution/Quality (CD-R disc) |
|
|
|
|
| Highest Resolution 2048x1536 | Images | 11 | 79 | 142 |
| Approx. Compression |
1:1 | 5:1 | 9:1 | |
| High Resolution 1600x1200 | Images | 12 |
|
229 |
| Approx. Compression |
1:1 |
|
9:1 | |
| Standard Resolution 1280x960 | Images |
|
|
|
| Approx. Compression |
|
|
|
|
| Low Resolution 640x480 | Images |
|
|
|
| Approx. Compression |
|
|
|
|
Notes for Mac owners: In order to avoid a 1MB limit on writeable file size, Sony had to go with the Level 3 ISO CD standard, which supports larger data sizes in packet-writing mode. This means that Macs need a UDF format extension to be able to read the resulting discs. NOTE that the "UDF Volume Access" extension that ships with OS9 is apparently not adequate to the task. Although Apple's UDF Volume Access claims support for Version 1.5 of the UDF ("Universal Disk Format (tm)") specification, the Adaptec UDF Volume Access Version 1.04 extension is apparently required to read the version of the UDF format used by the Mavica MVC-CD300. We can, however attest to the fact that the iMac supports both the 80mm disc size, as well as the Adaptec Volume Access extension, as we were able to successfully read "finalized" CDs from the MVC-CD300 on our slot-loading iMac. (A 400MHz DV model, running Mac OS 9.0.4.)
 Video Out
Both United States and Japanese models of the CD300 come equipped with an NTSC video cable for connection to a television set. (We assume that European models come with a PAL cable, since there is a PAL setting on the camera.) Once connected to the TV, you can review images and movies or record them to video tape.
 Power
Power
The CD300 is powered by an NP-FM50 InfoLITHIUM battery pack (M series) and comes with an AC adapter which doubles as an in-camera battery charger. The InfoLITHIUM battery packs exchange information with the camera, reporting approximately how many minutes of battery life are left. This information is displayed on the LCD monitor with a small battery graphic. The AC adapter plugs into a small socket on the camera's back panel (lower right corner). It can run the camera without a battery inserted, or charge the battery when the camera isn't in use.
The Li-Ion battery packs used in Sony cameras prevent us from making our usual power measurements, but the good news is that the InfoLITHIUM system reports projected camera runtime while the battery is being used in the camera. The following runtimes were reported by the CD300 with a freshly charged battery, in Capture and Playback modes. (Note that the runtime with the LCD backlight turned off will doubtless be longer than what is indicated on the LCD monitor, but we can't tell what that time is, since the time-remaining readout is only shown on the LCD screen.) While these are some of the best runtime numbers we've seen among digicams we've tested, we still always recommend users purchase and pack along a second battery. (Another advantage of the Li-Ion technology used in the InfoLITHIUM batteries is that they don't "self-discharge" like conventional NiMH rechargeable cells do, and so can hold their charge for months on the shelf or in your camera bag.)
The communication between the InfoLITHIUM battery pack and the camera preclude our normal camera power measurements, so we're reduced to simply reporting the time-remaining numbers for a fully charged battery in capture and playback modes. Battery life on the CD300 is notably long, but we still strongly recommend purchasing a second battery to carry as a spare.
|
|
|
| Capture Mode, w/LCD |
|
| Image Playback |
|
Included Software
The Sony Mavica-CD300 comes with a software CD loaded with MGI PhotoSuite SE and MGI VideoWave III SE. Two versions of MGI PhotoSuite are included on the CD. Version 8.1 is compatible with Windows 95/98/98Se/Me/2000/NT4.0; Version 1.1 is compatible with Macintosh OS 7.6.1 to 9.0. Unfortunately for Mac users, VideoWave III SE is compatible with Windows systems only (the same versions as PhotoSuite). MGI PhotoSuite SE retrieves images from the camera in a very organized manner, allowing you to view them with a slide show or in album format, and then set them up for printing. In addition to traditional photo editing and manipulation tools, PhotoSuite offers a variety of templates to help you turn your images into mock magazine covers, sports cards, greeting cards, and calendars. Combined with the camera's Picture Effects menu options, MGI PhotoSuite SE allows you to get really creative with your images. MGI's VideoWave III SE provides minor video editing and enhancement tools, allowing you to cut out frames, add music, and apply creative effects.
In the Box
Included in the box are the following items:
Test Results
In keeping with our standard policy, our comments here are rather condensed, summarizing our key findings: For a full commentary on each of the test images, see the MVC-CD300's "pictures" page.
As with all Imaging Resource camera tests, we encourage you to let your own eyes be the judge of how well the devices performed. Explore the images on the pictures page, to see how well the CD300 performed, and how its images compare to other cameras you may be considering buying.
Overall, the CD300's white balance system did an excellent job. The daylight white balance setting produced the most accurate results in our outdoor shots, though it resulted in a slightly warm image (the skin tones looked best with daylight, despite the warm cast). The manual setting produced great results in our difficult Indoor Portrait without Flash shot, providing a nice color balance without any color casts from the incandescent lighting. Overall color looked very nice, with great accuracy and saturation in most of our test shots. The large color blocks of our Davebox test target were almost perfectly accurate, and the camera does a very nice job of distinguishing the difference between the red and magenta color blocks on the middle, horizontal color chart (a common problem area for many digicams), even reproducing the black separator line. Tonal handling was also very good, with the variations of the Q60 chart clearly visible up to the "B" range. Red values had a tendency to be a little bright, particularly in the red flowers of the bouquet in the Outdoor and Indoor portraits. Overall though, the CD300 produced very nice color throughout our testing.
Given that it uses the same lens as the DSC-S70 and DSC-S75, it should come as no surprise that the CD300 turned in a really exceptional performance on the resolution test. We "called" the CD300's resolution as 900-950 lines per picture height in the horizontal direction, and 850-900 in the vertical, with detail visible vertically well beyond 900 lines, and horizontally to well beyond 1000. As with the earlier S70, and S75, the CD300 seems to show resolution beyond what should be theoretically possible, according to the Nyquist theorem and the CCD's pixel count. We attributed this to the camera's excellent suppression of artifacts, both in chrominance (color) and luminance (brightness) domains. There is in fact some aliasing visible beginning around 750 lines vertically (where theory says the limit should be), but it's so well controlled as to be almost invisible. Overall, a really remarkable performance, another triumph for Sony's excellent optics and signal processing.
The CD300 performs very well in the macro category, capturing a minimum area of just 2.63 x 1.97 inches (66.78 x 50.09mm). Detail and resolution both look excellent, and color balance is very nice as well. We observed a moderate amount of barrel distortion from the wide angle setting of the lens, as well as a little corner softness (mostly visible in the three pence piece). The gray background shows very low noise. The CD300's built-in flash has some trouble throttling down for the macro area at the closest approach, and the large lens barrel cast a shadow across the lower half of the target. A good performance overall, but plan on using an external flash for real closeup shots.
The CD300 does a great job in the low-light category, as we were able to obtain bright, clear images at light levels as low as 1/16 of a foot-candle (2.7 lux), at the ISO 200 and 400 settings. At ISO 100, the image was reasonably bright and clear at 1/8 of a foot-candle (5.5 lux). Images were usable as low as 1/16 of a foot-candle (0.67 lux) at all three ISO settings, though with slight magenta casts. Noise level was highest, but still only moderate, with the ISO 400 images, with moderately low levels at the other two ISO settings. To put the CD300's low-light performance into perspective, an average city night scene under modern street lighting corresponds to a light level of about one foot-candle, so the camera should be able to handle most dark shooting situations.
The CD300 delivered an excellent performance throughout our testing, capturing great detail and color and producing good image quality across the board. The CD300's super sharp Carl Zeiss lens produces great clarity and crisp details, and the 3.3 megapixel CCD delivers wonderful resolution. The camera's macro and low light capabilities provide even greater exposure flexibility. After examining all the test images, we have to say we're very pleased with the CD300's performance, and it's clearly in the first rank of three megapixel cameras we've tested to date. (This is being written in late February, 2001.)
Conclusion
Last year the Mavica MVC-CD1000 made waves as the first CD-based digital camera on the market. The large amount of inexpensive storage provided by its CD-R drive made it ideal for extended photo excursions, while preserving the trademark "universal media" appeal of the Mavica line. With the addition of CD-RW capability, this year's CD300 (and its little brother, the CD200) eliminates some of the digicam community's perceived limitations to the CD Recordable technology. Other improvements include higher resolution (in the CD300 model), a greatly improved user interface, and buffer memory to greatly reduce the shot-to-shot cycle time. In the process, Sony has also significantly reduced the cost of entry into CD-based digital photography. With the CD300's increased capabilities and decreased cost and size, we predict it will be a popular model for the 2001 summer vacation season. Highly recommended!
<<MVC-CD300 Sample Images | Additional Resources and Other Links>>
Reader Comments!
Questions, comments or controversy on this product? Click
this link to see what other Imaging Resource readers have had to say about
the Sony MVC-CD300, or add comments of your own!