Back
to Full Sony MVC-CD350 Review
Back
to Full Sony MVC-CD350 ReviewGo to Sony MVC-CD350 Data Sheet
Go to Sony MVC-CD350 Pictures Page
Up to Imaging Resource Cameras Page
Use your browser's "Back" button to return to the previous page, or the links at the top and bottom of this page to navigate to related information. If you have difficulty fitting the text on this page onto your printer output, simply resize your browser window to a narrower width and print again.
Remember us when it's time to buy!
Dave here: Have our reviews been helpful to you? (Is this article you're reading right now useful?) Preparing this level of information on as many products as we do is incredibly hard work, not to mention expensive. Things on the Internet may look like they're free, but they're not. (As a lot of big dot.com companies are finding out these days.) Somewhere, somebody has to pay to produce worthwhile content. YOU can help us though, by remembering us when it comes time to make your purchase. Would you consider coming back to our site and clicking-through to one of our advertisers to make your purchase? Every dollar you spend with one of our advertisers helps us directly (in affiliate fees) or indirectly (the advertiser will keep renewing their ad contract with us). To make it easy for you to support us, here's a URL you can visit, to see all our current advertisers, with links to click on that will register your visit to them as having come from our site. It's up to you where you buy, but Mike, Mike, Kim, Yazmin, Marti and I would be really grateful if you'd help us out by choosing one of our advertisers to purchase from.
Thank you for your support!
Dave Etchells, Founder & Publisher
Visit our "Buy Now" Page:
https://www.imaging-resource.com/buynow.htm
Back
to Full Sony MVC-CD350 Review
Go to Sony MVC-CD350
Data Sheet
Go to Sony MVC-CD350
Pictures Page
Up to Imaging Resource Cameras
Page
Sony MVC-CD350Sony updates its CD-based digicam line with a new 3 megapixel model. Review First Posted: 06/18/2003 |
|
 |
|
CD-RW provides 156 megabytes of write-once or rewritable storage! |
| |
3.3 megapixel CCD delivers up to 2048 x 1536 pixel images | |
| |
Surprisingly compact for a disc-media camera | |
| |
Excellent image sharpness, color, and low light shooting capability |
Manufacturer Overview
The year 2003 brings important new capabilities to Sony's revolutionary CD-Mavica digital camera line, which first began in late Spring 2000 with the introduction of the Mavica CD1000. Storing their images on CD-R (and now CD-RW) discs, the CD-Mavicas are a logical extension to Sony's original and enormously popular floppy-disk-based Mavica design. With each 80mm CD-R/RW disc storing 156 MB of data for well under a dollar at retail, the CD-Mavicas make nearly perfect traveling companions, since you can fit gigabytes of permanent storage into less space than that occupied by one paperback novel.
The improvements in this year's CD-Mavica lineup are less sweeping than those implemented in 2002, but the CD500 continues the tradition of the CD400 before it, of offering true "enthusiast" features in a CD-based digicam.
With introductory list prices of $599 and $899 for the MVC-CD350 and CD500 respectively,
the new models once again bring CD-R(W) technology further down market, competing
with conventional digicams at fairly modest price premiums. Of course, all the
whizzy CD technology would be meaningless if the cameras didn't perform up to
par with other non-CD models on the market. Fortunately (for Sony and our readers
alike), my tests indicate that the new cameras perform very well indeed, on
a par with the top models in their respective resolution categories. Given the
low cost of the (high capacity) media and their relatively compact sizes, these
new cameras could be the ideal "vacation cameras," perfectly suited
for extended trips without a computer to offload images. - The long battery
life afforded by Sony's InfoLithium battery technology is also most welcome
on extended outings. If you're planning a long trip, you'd do well to seriously
consider one of these new CD-Mavica cameras!
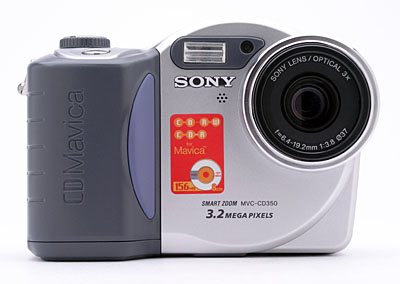
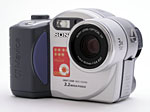
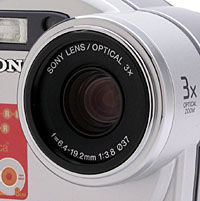
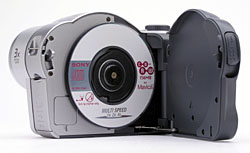
The non-telescoping lens dominates the left side of the camera's front panel,
sharing its space with a small self-timer / autofocus assist lamp. Just below
the lamp is the microphone grille. A rubberized finger grip protrudes from the
right front side, providing a comfortable hold for your right hand, which should
fit comfortably around the curve of the understated hand grip. When the camera
is powered on, the 6.4-19.2mm lens does not extend beyond the lens barrel. A
set of filter threads just inside the lip of the barrel accommodates Sony's
line of accessory lens adapter kits.
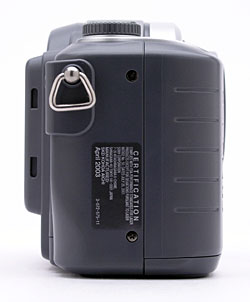
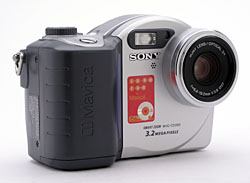
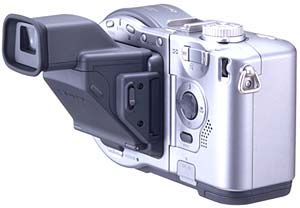
The hand grip (right) side of the camera has only a neckstrap attachment eyelet.
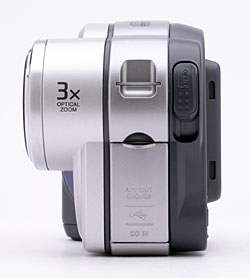
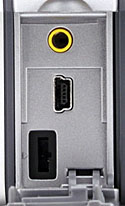
The left side of the camera has the second neckstrap eyelet on top, an "Open"
lever for the CD-R compartment, and connector compartment. A small, plastic
cover protects the connector compartment, which houses the USB, A/V Out, and
DC In connection jacks.
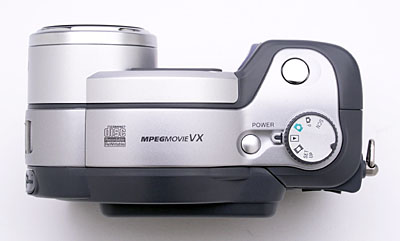
The CD350's top panel contains the Shutter button, Mode dial, and Power button.
There's also a small, green LED lamp next to the power switch that glows steadily
whenever the camera is powered on.
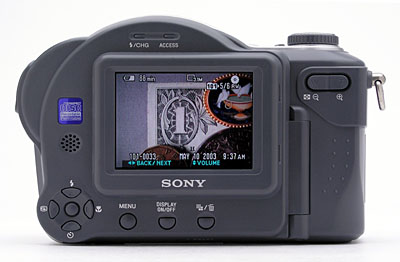
The remaining features and controls are on the CD350's back panel. These include
the color LCD monitor, with the speaker alongside and control buttons below.
A small, red LED above the LCD monitor indicates when the disc is being accessed.
To its left is a small orange LED that indicates when the flash is charging
or when the camera is powered off and the battery is charging via the AC adapter.
In addition to serving as a navigational tool in the LCD menu system, the four-way
Arrow Rocker Pad controls several camera functions through its four arrow keys,
including Flash mode, Macro, Self-timer, and Quick Review. Three dedicated buttons
control such features as Menu, Display, and Image Size / Trash. At the top right,
the Zoom / Index button controls the zoom setting in Record mode and displays
an Index of images and magnifies displayed images in Playback mode.
The CD-R compartment takes up the entire left side of the back panel, with the rear surface of the compartment door holding several camera control buttons and the LCD monitor. The compartment door flips open when the release lever is opened, but does not deactivate the LCD monitor. Instead a message on the LCD monitor reads "Cover Open." A tiny, red LED lamp above the LCD monitor lights whenever the camera is accessing the CD-R.
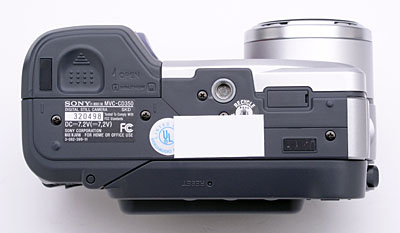
Finally, the CD350 features a fairly flat bottom panel with a battery compartment
door and tripod mount. Depending on the tripod mount you might use, there's
not quite enough distance between the compartment door and tripod mount is large
enough to allow for quick battery changes while working with a tripod. A sliding,
plastic door protects the battery slot, and a small button locks the battery
into place and releases it when you're ready to recharge or replace the battery
cell. The tripod mount itself is metal, a detail we always appreciate, especially
on heavier models like the CD350. Also on the bottom panel (beneath the LCD
monitor) is a tiny Reset button, which resets all the camera's settings to their
factory defaults.
 For
composing images, the CD350 features a color LCD monitor that automatically activates
when the camera is powered on. The Display button just below the LCD monitor controls
both the information and image display. Pressing the button once cancels the information
display, and the next press turns the information display on again. (The LCD itself
is always active.)
For
composing images, the CD350 features a color LCD monitor that automatically activates
when the camera is powered on. The Display button just below the LCD monitor controls
both the information and image display. Pressing the button once cancels the information
display, and the next press turns the information display on again. (The LCD itself
is always active.)
Sony also sells a clip-on eyelevel viewfinder/magnifier. Called the DSAC-MVC,
this gadget has a complete optical system in it, including a diopter adjustment,
and purportedly provides enough magnification of the high-quality TFT LCD that
it's quite usable for manual focusing. The MVC sells for $79.95 U.S., and is
available online from www.sonystyle.com,
if you can't find it at your local dealer.
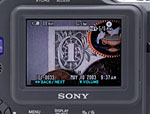
 In
Record mode, the LCD monitor's information display reports a bounty of information,
including image resolution, JPEG compression level, number of remaining images
(plus available CD-R space), exposure compensation, f/stop, shutter speed, flash
mode, and an excellent feature unique to Sony cameras -- the number of minutes
remaining on the battery! In Automatic and Scene modes, a half press of the
shutter button is necessary to display the current shutter speed and aperture
settings, and in some capture modes, only applicable readings will be displayed.
In
Record mode, the LCD monitor's information display reports a bounty of information,
including image resolution, JPEG compression level, number of remaining images
(plus available CD-R space), exposure compensation, f/stop, shutter speed, flash
mode, and an excellent feature unique to Sony cameras -- the number of minutes
remaining on the battery! In Automatic and Scene modes, a half press of the
shutter button is necessary to display the current shutter speed and aperture
settings, and in some capture modes, only applicable readings will be displayed.
 In
Playback mode, the LCD monitor offers an Index display mode as well as a 1.1
- 5x Playback Zoom, which enlarges captured images for closer inspection. Once
enlarged, the Arrow buttons enable you to scroll around inside the image. The
Display button controls the information and image display in Playback mode,
cycling through two modes: Image with information, and image without information.
The Playback image information includes the file type (movie or still), image
size, where the image falls in the Playback index, remaining CD-R capacity,
file name, date and time the image was taken, and the remaining battery power.
Pressing the W side of the zoom control displays a thumbnail index of shots
stored on the disc, and pressing it a second time takes you to a double-screen
display of specific exposure information about the current image. (Sorry, I
missed shooting these, so they're not in the animated screen shot above right.)
The CD350 provides an LCD brightness adjustment through its Setup menu, which
changes the display to Bright, Normal, or Dark, depending on the shooting situation.
In
Playback mode, the LCD monitor offers an Index display mode as well as a 1.1
- 5x Playback Zoom, which enlarges captured images for closer inspection. Once
enlarged, the Arrow buttons enable you to scroll around inside the image. The
Display button controls the information and image display in Playback mode,
cycling through two modes: Image with information, and image without information.
The Playback image information includes the file type (movie or still), image
size, where the image falls in the Playback index, remaining CD-R capacity,
file name, date and time the image was taken, and the remaining battery power.
Pressing the W side of the zoom control displays a thumbnail index of shots
stored on the disc, and pressing it a second time takes you to a double-screen
display of specific exposure information about the current image. (Sorry, I
missed shooting these, so they're not in the animated screen shot above right.)
The CD350 provides an LCD brightness adjustment through its Setup menu, which
changes the display to Bright, Normal, or Dark, depending on the shooting situation.
| Free Photo Lessons | |
|
| Free Photo Lessons | |
|
In addition to the aforementioned main exposure modes (Auto and Program), there
are seven preset Scene modes that adjust the camera for shooting in specific
situations: Twilight, Twilight Portrait, Landscape, Soft Snap, Snow, Beach,
and High-speed Shutter mode. Twilight mode adjusts the exposure to capture a
bright subject in dark surroundings (neon lights would be a good example), without
washing out the color. Because Twilight mode usually employs a slower shutter
speed, a tripod is recommended to prevent blurring from camera movement. Twilight
Portrait uses Twilight settings but also fires the flash to capture portraits
in dark settings. Landscape mode uses a smaller aperture setting to keep both
the background and foreground in sharp focus, allowing you to capture broad
vistas of scenery. Soft Snap lets you shoot skin colors in brighter and warmer
tones, adding a soft focus effect to minimize wrinkles and blemishes. Snow mode
preserves color in snowscapes, recording clear and sharp images. Beach mode
does the same for seascapes, preserving the blue of the water. High-speed Shutter
mode uses a fast shutter speed to stop motion in bright settings.
For normal exposures, the CD350 uses a "multipoint" metering system,
meaning that the camera takes multiple exposure readings throughout the image
to determine the best overall exposure. For high-contrast subjects, a Spot Metering
option (controlled by a button on the back panel) takes the exposure reading
from the very center of the frame. A center crosshair target appears on the
LCD monitor (inside the focus brackets), to show the location of the spot exposure
reading. For metering off-center subjects, you can take your reading of the
subject you want metered, then use the AE Lock feature by half-pressing the
shutter button to lock the exposure reading. Once exposure is locked, you can
recompose the image and release the shutter.
Exposure compensation can be manually adjusted from -2 to +2 exposure equivalents
(EV) in one-third-step increments. The camera's light sensitivity can be set
through the Record menu to Auto, or 100, 200, or 400 ISO equivalents, increasing
the camera's low-light shooting capabilities with higher ISO settings. White
Balance (WB) can also be controlled in all exposure modes, with available settings
of Auto, Daylight, Cloudy, Fluorescent, Incandescent, and Flash. As with many
other Sony cameras, the CD350 offers a Picture Effects menu, providing a little
in-camera creativity. Settings like Solarize, Black & White, Sepia, and
Negative Art can add interest to your images by altering color or reversing
the highlights and shadows.
The CD350 also offers a menu selection for adjusting image sharpening in-camera,
providing normal, plus, and minus settings. Normal is fine for most uses, but
you might want to boost the sharpness if your shots will be printed on a low-quality
inkjet printer. On the other hand, the lower sharpness setting may be useful
for images that you plan to manipulate in Photoshop or any other image editing
application. In these programs, you typically want to apply sharpening at the
end of the manipulation process. There are similar settings for Saturation (color
intensity) and Contrast. - Given that I found the default contrast of the camera
a little high, the low contrast option should come in handy.
Finally, a 10-second self-timer can be activated by pressing the down Arrow
button on the back panel. Once the shutter button has been fully depressed,
the small LED lamp on the front of the camera counts down the seconds until
the shutter is released (a green dot in the LCD monitor flashes as well). You
can cancel the timer by pressing the down Arrow button again.
When you have images stored on the CD-R/RW, the left arrow key on the Arrow
rocker button (back panel) activates a quick review of the previously captured
image, and offers a delete option for removing the image. Pressing the arrow
key a second time returns you to the normal image display screen, as does pressing
the shutter button halfway.
Flash
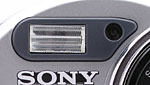 The built-in flash on the CD350 has four settings that are activated by pressing
the Flash button on the Arrow rocker pad: Auto, Forced, Slow Synchro, and Suppressed.
Auto puts the camera in charge of whether or not the flash fires, based on existing
light levels. Forced Flash means that the flash always fires, regardless of
light level. Slow Synchro fires the flash like Forced by slows the shutter speed
to capture more of the background. Suppressed Flash prevents the flash from
firing, regardless of light levels. A Red-Eye Reduction mode is activated through
the Setup menu. Red-Eye Reduction fires a small pre-flash to reduce the occurrence
of red-eye effect in people pictures.
The built-in flash on the CD350 has four settings that are activated by pressing
the Flash button on the Arrow rocker pad: Auto, Forced, Slow Synchro, and Suppressed.
Auto puts the camera in charge of whether or not the flash fires, based on existing
light levels. Forced Flash means that the flash always fires, regardless of
light level. Slow Synchro fires the flash like Forced by slows the shutter speed
to capture more of the background. Suppressed Flash prevents the flash from
firing, regardless of light levels. A Red-Eye Reduction mode is activated through
the Setup menu. Red-Eye Reduction fires a small pre-flash to reduce the occurrence
of red-eye effect in people pictures.
You can adjust the flash intensity to High, Normal, or Low through the Record
menu. This option makes the flash more accommodating to varying light levels
or different subjects. We liked the fact that we could adjust exposure for the
flash and ambient lighting separately, a feature that makes it easier to achieve
more balanced exposures. In Normal mode, flash range extends from 31.5 inches
to 8.2 feet (0.8 to 2.5 meters).
Movie and Sound Recording
In any of the CD350's still capture modes, you can record short sound clips
to accompany images. This option is available through the Record menu by selecting
the Voice Record mode. You can record up to 40 seconds of sound for each image
by holding down the shutter button. By pressing and releasing the shutter button
quickly, you can record for only five seconds.
The Movie mode is accessed on the Mode dial on top of the camera by selecting
the film frame icon. You can record moving images with sound at either 640
x 480-pixel VGA resolution or 160 x 112-pixel "email" resolution.
Standard quality resolution sizes record movies in the MPEG VX format. Sony's
advanced MPEG VX technology means that the CD350's movie durations are limited
only by the available space on the CD-R/RW discs. (That is, there are no arbitrary
limits imposed by buffer memory limits.) At 640x480 resolution, maximum recording
time is 5 minutes, 51 seconds, while at 160x112 pixels, movies can run as long
as 89 minutes and 11 seconds. This is pretty impressive, as only a very few
digicams currently on the market support full VGA-resolution movie recording..
(Sony is very careful to not bill the CD Mavicas as "camcorders,"
and for good reason when you compare their capabilities with "real"
camcorder models. Still, this enormously extended recording capability is pretty
unique.)
Another notable feature of the CD350's movie recording capability is that you're able to use the optical zoom lens while recording movies. Most digicams with audio capability don't let you adjust the zoom setting while recording is in process, to prevent noise from the lens motor from interfering with the sound track. The CD350's lens motor is quiet enough that Sony left the zoom enabled during movie recording. - Not to say everything is perfect though: In very quiet environments, the CD350's microphone can easily pick up the lens motor noise, as well as the soft noises of the CD drive's operation.
Clip Motion
This is a slick little feature that I really enjoy, which first appeared a couple
of years ago on the Sony DSC-P1, and now seems to be a pretty standard option
on all the latest Sony models. The Clip Motion capture mode turns the CD350
into an animation camera, recording up to 10 frames of still images, which are
combined into a single GIF file for animated playback. Frames can be captured
at any time interval, with successive presses of the shutter button. When you've
captured as many photos as you need, you just press the center of the Arrow
rocker pad to tell the camera to finish the sequence, and it merges all the
images into one animated GIF file. Available image sizes are Normal (160 x 120
pixels) and Mobile (120 x 108 pixels), and the number of actual captured frames
may vary with image size (Mobile is restricted to two frames) and available
CD space. (You have a maximum of 10, but could be constrained to fewer if your
memory is very full.) Files are saved in GIF format, and are played back with
(approximate) 0.5-second intervals between frames. Unlike Movie mode, flash
is available with Clip Motion. (Note though, that the GIF format only permits
256 colors, far less than millions the camera normally captures.)
MultiBurst
MultiBurst is a newer recording option I first noticed on last year's DSC-P51
and DSC-P71 Cyber-Shot models. The mode captures an extremely rapid burst of
images, stored as a single 1280x960 frame on the camera, which are played back
as a single movie (giving a slow-motion effect). You can select between Fine
and Normal quality settings, and available frame intervals include 1/7.5, 1/15,
or 1/30 second. When viewed on a computer though, the images simply appear as
a single 1280x960 image with the individual frames arranged as 16 small sub-images
within it. MultiBurst is a great tool for doing short-duration time/motion studies.
(Think golf- or tennis-swing analysis.)
Special Record Modes
The CD350 gives you several recording format options for still images. Through
the Record menu, you can select TIFF for uncompressed images, Voice (mentioned
above), E-mail, Burst 2, or Normal modes. E-mail mode records a smaller (320
x 240-pixel) image size that takes less time to transmit to friends and
family by e-mail. The e-mail image is recorded in addition to the image size
selected through the Record menu's Image Size option. (The TIFF option likewise
records a maximum-resolution TIFF image in addition to a JPEG at whatever size
and quality setting you've selected.) Burst 2 mode allows you to take a maximum
of two frames in rapid succession, at 0.5 second intervals. Since Burst 2 mode
images are captured directly to buffer memory, the frame rate is independent
of image resolution or the amount of information to be recorded, but the tradeoff
is that only two frames can be recorded without pausing.
Shutter Lag/Cycle Times
When you press the shutter release on a camera, there's usually a lag time before
the shutter actually fires. This time is to allow the autofocus and autoexposure
mechanisms time to do their work, and can amount to a fairly long delay in some
situations. Since this number is almost never reported on, and can significantly
affect the picture taking experience, we now routinely measure it using an Imaging
Resource proprietary test system.
NOTE: My qualitative characterizations of camera performance below (that is, "reasonably
fast," "about average," etc.) are meant to be relative to
other cameras of similar price and general capabilities. Thus, the same
shutter lag that's "very fast" for a low-end consumer camera might
be characterized as "quite slow" if I encountered it on a professional
model. The comments are also intended as only a quick reference: If performance
specs are critical for you, rely on the absolute numbers to compare cameras,
rather than my purely qualitative comments.
|
|
||
| |
|
|
| Power On -> First shot | |
Highly
variable. The longer time is for a new disc, the shorter one if the
disc hasn't been changed since the camera was last turned on, and
there are few files on it. Takes longer for more files on an unknown
disc, fastest for empty disc that was in the camera before it was
turned off. |
| Shutdown | |
Fairly
fast, assuming it isn't writing to the disc. Can take up to 33.4 seconds
if you just snapped a series of shots that filled the buffer, and
up to 64 seconds if you just shot a TIFF-mode image. |
| Play to Record, first shot | |
Time
until first shot is captured, from "instant review" mode
or normal playback mode. Very fast. |
| Record to play (max/min res) | 3.28/4.16 |
Images
appear quickly as a low res version, then "fill-in" within
a few seconds. First time in each set is for camera sitting idle in
record mode to start with. Second time is for immediate switch to
playback mode after snapping a photo. Quite a bit slower than average,
due to the relatively slow CD data rate. |
| Shutter lag, full autofocus | |
VERY (!) fast, particularly at wide angle lens setting. Even telephoto is faster than most camera's wide-angle performance. Great for sports! |
| Shutter lag, manual focus | |
A bit faster than average. |
| Shutter lag, prefocus | |
Very
fast. |
| Cycle Time, max/min resolution | 1.54 |
Quite fast for first 6 shots in large/fine mode, then drops to 5.2 seconds per shot. In VGA/normal, cycle time is 1.54 seconds for a very large number of shots. |
| Cycle time, TIFF mode | 61.6 | Quite slow. |
| Cycle time, continuous mode ("Burst 2") |
|
Moderately fast, burst of only two frames though. (Max/min res performance is the same.) |
Shutter lag on the CD350 is among the very best of any camera I've tested,
an amazing 0.33 seconds with the lens set to its wide-angle position. Even at
telephoto, the CD350's autofocus is faster than that of most cameras with the
lens set to wide-angle. Manual focus speed is a bit faster than average, but
prefocus time is blazing. (Great for sports.)
Cycle times are quite good also, and the CD350 has a 6-frame buffer for shots
in large/fine mode. It's odd though, that the camera can only grab two frames
in succession in continuous mode. (Which Sony calls "Burst 2.")
Like other models in the Mavica series, the CD350 starts up from power-off fairly
slowly, because the camera has to check the disc to see how much space is left,
and where the next image should be stored. The camera obviously has a trick
or two up its sleeve in this area although: If you load a new disc (or just
open and shut the back door with the power off), the camera somehow knows it
has to scan the entire disc to determine space and where the next picture will
go. This takes 22 seconds. If you just shut the CD350 down without removing
the disc although, the next time it starts up, it seems to recognized the disc,
and startup time is reduced to only 2.4 seconds. Shutdown time is about average,
unless the camera is in the process of writing to the CD, in which case, it
can take anywhere from a few seconds to a full minute for the camera to fully
shut down after you hit the power switch..
Other than the long startup and record-to-playback times, the CD350 is a surprisingly
responsive camera: In fact, it has about the fastest shutter response of any
consumer-level camera I've tested to date.
Operation and User Interface
As I mentioned in the Design section of this review, the CD350 offers the same
new and improved user interface that we've seen on other 2003-model Sony digicams.
Additional external camera controls reduce the reliance on the LCD menu system
and help simplify overall camera operation. The ready access to exposure controls
and other camera functions, and the uncomplicated LCD menu system, mean that
you spend less time scrolling through LCD menu screens and options. The Mode
dial and the method by which some functions were assigned to the four-way Arrow
key pad (very clearly marked I might add), also speed operation.
Control Enumeration

Shutter Button: Located on the right side of the top panel, this button
sets focus and exposure when pressed halfway. Fully depressing the button fires
the shutter. When the Quick Review (the shot just taken) is displayed on the
screen, a half press of the shutter button returns the LCD to the normal image
display. When the Self-timer is enabled, fully depressing the shutter button
kicks off the 10-second countdown.
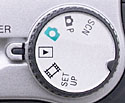
Mode Dial: This dial controls the camera's operating modes. Options include
Scene (SCN), Program (black camera symbol with "P"), Auto (green camera
symbol), Playback, Movie (film frame), and Setup modes.

Power Button: Just to the left of the Mode Dial, this button turns the
camera on or off.
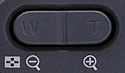
Zoom Lever: In the top right corner of the back of the camera, the Zoom
lever control the optical and digital zoom (when enabled) in any capture mode.
In Playback mode, the wide angle side activates the Index Display mode, while
the telephoto side controls the Playback Zoom up to 5x (the wide angle button
also zooms back out). Once in Index Display mode, pressing the wide-angle side
again displays the image information for the highlighted thumbnail, including
exposure information.
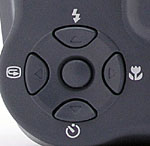
Four-Way Arrow Rocker Pad (also: Flash, Quick Review, Macro, and Self-Timer
Buttons): Situated in the bottom left corner of the back of the camera,
this button serves a variety of functions. On its surface, the pad features
four arrows, one pointing in each direction. When any settings menu is engaged,
these arrows navigate through the menu options. Once an option is selected,
you confirm the selection by pressing on the center of the button. (You will
hear a dual tone when you press the center, as opposed to the single tone you
hear when you press an arrow.) In Playback mode, the right and left arrows scroll
through captured images, while the up and down arrows control the playback volume.
If a movie file is displayed, pressing the center of the button triggers the
movie playback. When Playback zoom is enabled, pressing the center of the button
returns the LCD to the normal 1x image display.
In addition to menu scroll functions, the Arrow Pad also controls certain exposure
and camera settings. The Up Arrow button is marked with a flash symbol, and
cycles between the Auto, Forced, Slow Synchro, and Suppressed Flash modes (in
all capture modes except Movie). The Right Arrow button, marked with the macro
flower symbol, enables and disables the camera's Macro mode. The Down Arrow
controls the Self-timer mode, cycling between Normal and Self-timer capture
modes. Finally, the Left Arrow activates and deactivates the Quick Review function,
which displays the most recently captured image on the LCD screen.

Menu Button: Located to the right of the Arrow Rocker Pad and below the
LCD, this button activates and deactivates the settings menus in any camera
mode except Setup (which automatically displays the menu upon entering the mode).

Display Button: Just beneath the LCD monitor, the Display button controls
the LCD display in all camera modes except Setup. Pressing the Display button
sequentially cycles through two modes: image with information display or image
display only.

Image Size / Trash Button: This is a new addition to Sony's 2003-model
cameras, moving the image size selection off the LCD menu system and onto the
camera's back panel for faster access. Directly to the right of the Exposure
Compensation button, the Exposure Image Size / Trash button permits selection
of available image resolutions in Record mode or deletes images in Playback
mode.

Open CD-R Compartment Button: Resting on the side of the CD-R compartment,
this sliding button opens the CD-R compartment door.
Camera Modes and Menus
![]() Program AE:
Noted on the Mode dial with the green camera symbol, Auto mode places the
camera in control of both the aperture and shutter speed settings, letting you
set the some exposure variables (Image Size, and Flash).
Program AE:
Noted on the Mode dial with the green camera symbol, Auto mode places the
camera in control of both the aperture and shutter speed settings, letting you
set the some exposure variables (Image Size, and Flash).
![]() Program :
Marked on the Mode dial with "P", Program mode lets you select combinations
of aperture and shutter speed settings, as well as the remaining exposure variables
(White Balance, ISO, Exposure Compensation, Focus, Image Size, Picture
Quality, Flash, and Normal or Spot Metering).
Program :
Marked on the Mode dial with "P", Program mode lets you select combinations
of aperture and shutter speed settings, as well as the remaining exposure variables
(White Balance, ISO, Exposure Compensation, Focus, Image Size, Picture
Quality, Flash, and Normal or Spot Metering).
![]() Scene: Scene
mode provides access to seven preset Scene modes that adjust the camera
for shooting in specific situations: Twilight, Twilight Portrait, Landscape,
Soft Snap, Snow, Beach, and High-speed Shutter mode. Twilight mode adjusts the
exposure to capture a bright subject in dark surroundings (neon lights would
be a good example), without washing out the color. Because Twilight mode usually
employs a slower shutter speed, a tripod is recommended to prevent blurring
from camera movement. Twilight Portrait uses Twilight settings but also fires
the flash to capture portraits in dark settings. Landscape mode uses a smaller
aperture setting to keep both the background and foreground in sharp focus,
allowing you to capture broad vistas of scenery. Soft Snap lets you shoot skin
colors in brighter and warmer tones, adding a soft focus effect to minimize
wrinkles and blemishes. Snow mode preserves color in snowscapes, recording clear
and sharp images. Beach mode does the same for seascapes, preserving the blue
of the water. High-speed Shutter mode uses a fast shutter speed to stop motion
in bright settings.
Scene: Scene
mode provides access to seven preset Scene modes that adjust the camera
for shooting in specific situations: Twilight, Twilight Portrait, Landscape,
Soft Snap, Snow, Beach, and High-speed Shutter mode. Twilight mode adjusts the
exposure to capture a bright subject in dark surroundings (neon lights would
be a good example), without washing out the color. Because Twilight mode usually
employs a slower shutter speed, a tripod is recommended to prevent blurring
from camera movement. Twilight Portrait uses Twilight settings but also fires
the flash to capture portraits in dark settings. Landscape mode uses a smaller
aperture setting to keep both the background and foreground in sharp focus,
allowing you to capture broad vistas of scenery. Soft Snap lets you shoot skin
colors in brighter and warmer tones, adding a soft focus effect to minimize
wrinkles and blemishes. Snow mode preserves color in snowscapes, recording clear
and sharp images. Beach mode does the same for seascapes, preserving the blue
of the water. High-speed Shutter mode uses a fast shutter speed to stop motion
in bright settings.
![]() Setup: Setup
mode lets you change basic camera settings.
Setup: Setup
mode lets you change basic camera settings.
![]() Movie:
Movie mode, marked on the mode dial with a film strip symbol, captures MPEG
movies with sound. Most exposure variables are available, except for flash and
ISO. If the Clip Motion option is selected from the Setup menu, Movie mode will
capture up to 10 frames of still images, and combine them into a single animated
GIF file. When Multi Burst is selected in the Setup menu, the camera records
a rapid burst of frames, saved in a single image frame but played back on the
camera as a slow motion animation.
Movie:
Movie mode, marked on the mode dial with a film strip symbol, captures MPEG
movies with sound. Most exposure variables are available, except for flash and
ISO. If the Clip Motion option is selected from the Setup menu, Movie mode will
capture up to 10 frames of still images, and combine them into a single animated
GIF file. When Multi Burst is selected in the Setup menu, the camera records
a rapid burst of frames, saved in a single image frame but played back on the
camera as a slow motion animation.
![]() Playback:
Captured images and movies can be reviewed and played back in this mode. Images
can also be erased, write-protected, copied, resized, set up for printing on
a DPOF device, or played back in a slide show.
Playback:
Captured images and movies can be reviewed and played back in this mode. Images
can also be erased, write-protected, copied, resized, set up for printing on
a DPOF device, or played back in a slide show.
Record Menu: The Record menu is accessible in all capture modes by pressing
the Menu button, however, not all menu options are available in all capture
modes.
 Metering
Mode: Selects Multi or Spot metering mode.
Metering
Mode: Selects Multi or Spot metering mode.
Setup Menu: The five-panel setup menu is automatically displayed on the
LCD monitor upon entering Setup mode:
 Moving
Image: Establishes the recording mode to be used when the mode dial is
set to the Movie position: MPEG Movie or Clip Motion.
Moving
Image: Establishes the recording mode to be used when the mode dial is
set to the Movie position: MPEG Movie or Clip Motion.
 Finalize:
Finalizes the CD-R or CD-RW, making it readable to a computer's CD-ROM drive.
Finalize:
Finalizes the CD-R or CD-RW, making it readable to a computer's CD-ROM drive.
 File
Number: Determines the file number sequence. Normal resets the file numbering
with each new CD-R inserted into the memory slot. Series continues file numbering
from one CD-R to the next.
File
Number: Determines the file number sequence. Normal resets the file numbering
with each new CD-R inserted into the memory slot. Series continues file numbering
from one CD-R to the next.
 LCD
Brightness: Adjusts the LCD's brightness level (really more of a contrast
adjustment) to Bright, Normal, or Dark.
LCD
Brightness: Adjusts the LCD's brightness level (really more of a contrast
adjustment) to Bright, Normal, or Dark.
 Video
Out: Sets the A/V Out signal to NTSC or PAL timing.
Video
Out: Sets the A/V Out signal to NTSC or PAL timing.
Playback Menu: As with the Record menu, the Playback menu is accessed
by pressing the Menu button when in Playback mode. The following options are
available:
 Folder:
Selects the folder whose images you want to play back.
Folder:
Selects the folder whose images you want to play back.
Image Storage and Interface
 The CD350
records still images and movies to a three-inch (80mm) CD-R or CD-RW disc. This
virtually eliminates the hassle of downloading files from the camera to your
computer. Instead of messing around with cables and driver software, you simply
take the CD from the camera and slide it into your computer's CD-ROM drive.
An adapter is provided for those computers that don't accept the three-inch
CD format. (This should be rare although, since the 80mm CD form factor was
part of the original CD specification, so most computers should accept them.)
There's also a USB connection and cable supplied with the camera (the USB port
is in the connector compartment on the lens side of the camera). The USB connection
lets you connect the camera as a disk drive to Windows computer (Windows 98,
98se, Me, and 2000 Professional are supported) or a Macintosh running OS X.
The USB connection apparently does not support the Mac OS however.
The CD350
records still images and movies to a three-inch (80mm) CD-R or CD-RW disc. This
virtually eliminates the hassle of downloading files from the camera to your
computer. Instead of messing around with cables and driver software, you simply
take the CD from the camera and slide it into your computer's CD-ROM drive.
An adapter is provided for those computers that don't accept the three-inch
CD format. (This should be rare although, since the 80mm CD form factor was
part of the original CD specification, so most computers should accept them.)
There's also a USB connection and cable supplied with the camera (the USB port
is in the connector compartment on the lens side of the camera). The USB connection
lets you connect the camera as a disk drive to Windows computer (Windows 98,
98se, Me, and 2000 Professional are supported) or a Macintosh running OS X.
The USB connection apparently does not support the Mac OS however.
A small CD icon on the camera's LCD display lets you know how much of the disc
is full and how many images are available, depending on the current resolution
and quality settings. An "R" or "RW" below the icon lets
you know what sort of disc is currently loaded in the camera. In Movie mode,
the LCD reports the available recording time at the current movie quality setting.
The CD350 allows you to protect individual images on the disc from accidental
erasure or alteration through the Playback menu. The freedom of a CD-R drive
has many advantages over saving images to floppies (as on some Mavica models),
the main one being the greatly increased amount of storage space -- 156MB.
It's important to note that there's a key limitation in Sony's CD-RW implementation,
in that it's a sequential rewritable device, not a random
access one. The reason for this is that the head movement and data clock
synchronization requirements, which are dictated by true random access operation,
would result in performance (write-time) tradeoffs that are unacceptable for
digital camera applications. Thus, the "RW" aspect of the CD350's
discs has some constraints on it. Foremost is the sequential operation, which
means that you can only delete the last image recorded. That is, you can't open
up more space on a disc by going back and deleting images shot earlier in the
session. You can delete multiple images, but only one at a time, starting
with the most recent and working backward. The huge benefit of CD-RW although,
is that you can "unfinalize" and "format" discs, which (respectively)
helps you save disk space when moving back and forth between camera and computer,
and lets you reuse discs by wiping out all the previously captured images.
A brief note here, in response to some questions I've received about the earlier
CD Mavicas: This issue of what constitutes "erasing" of an image and
what images you can actually erase seems to be the cause of a lot of
confusion. Several people have pointed out that the camera lets them "erase"
images other than the last one shot, and in fact that they can do this on CD-R
discs as well as CD-RW ones. You can always "erase" any image on either
a CD-R or CD-RW disc, but you won't see a corresponding increase in storage
capacity reflective of the space that the deleted image occupied. This is because
"erasing" any image other than the last one shot (or any image
on a CD-R disc) doesn't actually wipe out the image data from the disc, but
instead merely deletes the file listing in the disc's directory so that the
"erased" image data can no longer be accessed. You can only truly
erase the last image data written to the disc, and then only on CD-RW media.
There's another generic limitation of CD-RW technology to be aware of, which
is that the signal level delivered to the CD-ROM drive by CD-RW discs is quite
a bit lower than that from normal CD-ROMs or CD-R write-once discs. Thus, some
older CD-ROM drives may have trouble reading the CD-RW discs. As far as I know,
any CD-ROM drive manufactured in the last three or four years should be able
to read a CD-RW disc with no problem, but if you encounter difficulties, try
a different CD-ROM drive before assuming it's a problem with the CD-RW disc
or the CD350 itself. (Mac owners see the note below
though.)
Using the CD-Rs in the camera is relatively simple. Whenever a new disc is
inserted, the camera will tell you that it needs to be initialized. Not being
a CD maven, I suspect (but am not sure) that this involves writing the "lead
in" area for the next session, a roughly 9MB area reserved for the table
of contents information for the upcoming session. Initializing the disc appears
to be a more critical operation than normal CD-R recording, as the camera asks
you to place it on a level surface and avoid vibration during the process. Once
a disc has been initialized, operation of the CD350 is the same as for any other
Sony camera, regardless of media.
When you're done with a set of shots and want to set up the CD-R to be read
in a conventional CD-ROM drive, you must "Finalize" the session. The
camera leads you through this process using menu screens similar to those used
for the initialization process. Finalizing also appears to be a more critical
procedure than normal image writing, since the camera again asks you to rest
it on a flat surface while it's being carried out. My guess is that this process
writes the lead out for that session, and goes back to fill-in the session's
Table of Contents in the lead-in area. The first lead-out on a disc occupies
about 13MB of space, subsequent ones require about 4MB. The space taken by finalizing
and reinitializing a disc leads to one of the major benefits of CD-RW technology
over CD-R. With CD-R, every time you finalize and reinitialize a disc, you lose
about 13MB of storage space. With CD-RW discs, you can "unfinalize"
a disc, recover that space, and allow the camera to write new images to it.
Additionally, unfinalizing a CD-RW doesn't erase any files. To completely erase
all images on a CD-RW, the CD500 offers a Format option through the Setup menu,
which also requires the camera to rest on a level surface with no vibrations.
The Format function takes several minutes to complete. It's my guess that the
camera is actually rewriting the entire disc, restoring it to a completely blank,
initialized state. NOTE that unfinalizing and formatting are only possible with
CD-RW discs, not ordinary CD-Rs.
In addition to finalizing a disc, the Playback settings menu allows you to write-protect,
delete (sequentially), resize, or rotate individual images. When an image is
resized, the original version is left where it is on the CD, and a new copy
is appended to the end of the list of images, resized to the dimensions you
selected. Rotation is much more confusing. The original image actually remains
in place (even on a CD-RW disc), and a new, rotated version is recorded. The
camera edits the directory structure of the disc though, so the new rotated
version appears in the same place as the original, in the list of images
as you step through them sequentially, or view them as thumbnails. Although
the original image is still physically recorded on the disc, it is no longer
accessible to either the camera or a computer. (I'm not sure, but some data-recovery
programs may be able to retrieve "overwritten" or "deleted"
files like this from the CD-R/RW discs.)
You can also designate whether the camera numbers each image sequentially (from
one CD to the next), or restarts file numbering with each new CD, by making
a change in the Setup menu. The camera's Digital Print Option Format (DPOF)
compatibility allows you to mark specific images for printing. Through the Setup
menu you can decide whether or not to print the date and/or time on each image
as well.
Image Size options include 2,048 x 1,536, 2,048 x 1,536 (3:2 ratio), 1,632 x
1,224, 1,280 x 960, 640 x 480, and 320 x 240 pixels (E-Mail recording option).
Movie file sizes are 640x480 (VGA), and 160 x 112 pixels for MPEG Movies,
or 160 x 120 and 120 x 108 pixels pixels for Clip Motion files. In addition
to the uncompressed TIFF file format, the CD350 offers both Fine and Standard
JPEG compression levels, and a GIF option for Text and Clip Motion recording
modes.
The table below shows the approximate still image capacities and compression
ratios for the CD-R disc (main resolution sizes):
| Resolution/Quality (CD-R disc) |
|
|
|
|
| Highest Resolution 2048x1536 | Images | 11 | 81 | 145 |
| Approx. Compression |
1:1 | 5:1 | 9:1 | |
| High Resolution 1632x1224 | Images | 12 | |
234 |
| Approx. Compression |
1:1 | |
9:1 | |
| Standard Resolution 1280x960 | Images | |
|
|
| Approx. Compression |
|
|
|
|
| VGA Resolution 640x480 | Images | |
|
|
| Approx. Compression |
|
|
|
|
A note about media: Whenever you put a non-Sony CD-R or -RW into the CD350, it flashes the message "Mavica DISC RECOMMENDED" on the LCD as it starts up. For the record, non-Sony CD-Rs seemed to work just fine in my test unit, but prior conversations with Sony technical staff revealed that inexpensive third-party discs sometimes have problems with concentricity between the center hole and the data tracks, which can cause read/write problems. I never encountered this while working with third-party media in various Sony CD Mavicas, but did actually have a problem with expanded-capacity media in the CD400 sample I used for my review of that model. Expanded-capacity CD-R media has been commonplace with full-sized CDs for some years now: The standard spec for full-sized CDs is a capacity of roughly 650 megabytes, but 700 megabyte (and larger) discs are now quite common. In the same fashion, while the "official" spec for 80mm media is a capacity of 156 MB, you can find third-party discs on the market with capacities of 185 MB or more. This is an appreciable increase in capacity, to the extent that you might be tempted to give it a try. If you do, I'd advise checking it out carefully before you entrust your precious photos to it. I was using a 185 MB disc in the CD400 during some of my test shooting, and ended up needing to reshoot a series of test photos. The problem was that, while the camera appeared to recognize and utilize the expanded capacity, after finalizing the disc, I was unable to retrieve the last dozen or so shots I'd recorded on it. It's possible that I might be able to access those photos via the USB port, but I never had time yet to wrestle with the software on my balky main Windows PC. Even if it does work in that scenario, I'd still advise against using expanded-capacity media as an inherently risky proposition.
Notes for Mac owners: In order to avoid a 1MB
limit on writeable file size, Sony had to go with the Level 3 ISO CD standard,
which supports larger data sizes in packet-writing mode. This means that Macs
need a UDF format extension to be able to read the resulting discs. NOTE that
the "UDF Volume Access" extension that shipped with Mac OS9 is apparently
not adequate to the task. Although Apple's UDF Volume Access claims support
for Version 1.5 of the UDF ("Universal Disk Format (tm)") specification,
Roxio's UDF
Volume Access "init" is apparently required to read the version
of the UDF format used by the Mavica CD350. I can, however attest to the fact
that the iMac supports both the 80mm disc size, as well as the Roxio Volume
Access extension, as I was able to successfully read "finalized" CDs
from the CD500 on our slot-loading iMac. (A 400MHz DV model, running Mac OS
9.0.4.)
For Mac OS X users unfortunately, the situation is somewhat worse: As noted
earlier in this review, Macs running OS X can import images via the USB connection
into either Image Capture or iPhoto, although I wasn't able to get my G4 PowerMac
running OS X 10.2 to properly recognize the camera with iPhoto 2.0. (It worked
fine using Image Capture 2.0, but the application took a *long* time (a couple
of minutes I think, although I didn't time it) to recognize the camera. Unfortunately,
there's no equivalent to the UDF Volume Access init for Mac OS X, so the only
way to read the discs is to use the camera as a USB-connected CD drive: The
Mac's own CD-ROM isn't capable of recognizing the finalized CDs created by the
CD350.
Video Out
 Both United States
and Japanese models of the CD350 come equipped with an NTSC video cable for
connection to a television set. (We assume that European models come with a
PAL cable, since there is a PAL setting on the camera.) Once connected to the
TV, you can review images and movies or record them to video tape.
Both United States
and Japanese models of the CD350 come equipped with an NTSC video cable for
connection to a television set. (We assume that European models come with a
PAL cable, since there is a PAL setting on the camera.) Once connected to the
TV, you can review images and movies or record them to video tape.
Power
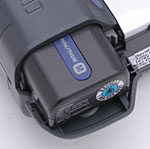 The CD350 is powered
by an NP-FM50 InfoLITHIUM battery pack (M series) and comes with an AC adapter
which doubles as an in-camera battery charger. The InfoLITHIUM battery packs
exchange information with the camera, reporting approximately how many minutes
of battery life are left. This information is displayed on the LCD monitor with
a small battery graphic. The AC adapter plugs into a small socket on the camera's
back panel (lower right corner). It can run the camera without a battery inserted,
or charge the battery when the camera isn't in use.
The CD350 is powered
by an NP-FM50 InfoLITHIUM battery pack (M series) and comes with an AC adapter
which doubles as an in-camera battery charger. The InfoLITHIUM battery packs
exchange information with the camera, reporting approximately how many minutes
of battery life are left. This information is displayed on the LCD monitor with
a small battery graphic. The AC adapter plugs into a small socket on the camera's
back panel (lower right corner). It can run the camera without a battery inserted,
or charge the battery when the camera isn't in use.
The Li-Ion battery packs used in Sony cameras prevent me from making my usual
power measurements, but the good news is that the InfoLITHIUM system reports
projected camera runtime while the battery is being used in the camera. The
following runtimes were reported by the CD350 with a freshly charged battery,
in Capture and Playback modes. (Note that the runtime with the LCD backlight
turned off will doubtless be longer than what is indicated on the LCD monitor,
but I can't tell what that time is, since the time-remaining readout is only
shown on the LCD screen.) While these are some of the best runtime numbers we've
seen among digicams we've tested, we still always recommend you purchase and
pack along a second battery. (Another advantage of the Li-Ion technology used
in the InfoLITHIUM batteries is that they don't "self-discharge" like
conventional NiMH rechargeable cells do, and so can hold their charge for months
on the shelf or in your camera bag.)
The communication between the InfoLITHIUM battery pack and the camera preclude
our normal camera power measurements, so we're reduced to simply reporting the
time-remaining numbers for a fully charged battery in capture and playback modes.
Battery life on the CD350 is notably long, but I still strongly recommend purchasing
a second battery to carry as a spare.
| |
|
| Capture Mode, w/LCD | |
| Image Playback | |
Included Software
The Sony Mavica-CD350 comes with a software CD loaded with Pixela ImageMixer
1.5, and PTP manager (Picture Transfer Protocol, a protocol used by Windows
XP). Pixela ImageMixer runs under Windows 98/Me/2000/XP and Mac OS 8.51-9.2.
(NOTE: In order to read the CD500's discs on the Mac OS 9, you do need a special
software
"init" in your system folder, available from Roxio (formerly Adaptec
Corporation). Click here
to get the "UDF" init.)
In the Box
Included in the box are the following items:
Test Results
In keeping with my standard test policy, the comments given here summarize only my key findings. For a full commentary on each of the test images, see the Sony Mavica MVC-CD350's "pictures" page.
As with all Imaging Resource product tests, I encourage you to let your own eyes be the judge of how well the camera performed. Explore the images on the pictures page, to see how the CD350's images compare to other cameras you may be considering.
Conclusion
| Free Photo Lessons | |
|
<<CD-350 Sample Images | Additional Resources and Other Links>>
Reader Comments!
Questions, comments or controversy on this product? Click
this link to see what other Imaging Resource readers have had to say about
the Sony MVC-CD350, or add comments of your own!