Back
to Full Nikon D2X Review
Back
to Full Nikon D2X ReviewGo to Nikon D2X Data Sheet
Go to Nikon D2X Pictures Page
Up to Imaging Resource Cameras Page
Use your browser's "Back" button to return to the previous page, or the links at the top and bottom of this page to navigate to related information. If you have difficulty fitting the text on this page onto your printer output, simply resize your browser window to a narrower width and print again.
Remember us when it's time to buy!
Dave here: Have our reviews been helpful to you? (Is this article you're reading right now useful?) Preparing this level of information on as many products as we do is incredibly hard work, not to mention expensive. Things on the Internet may look like they're free, but they're not. (As a lot of big dot.com companies are finding out these days.) Somewhere, somebody has to pay to produce worthwhile content. YOU can help us though, by remembering us when it comes time to make your purchase. Would you consider coming back to our site and clicking-through to one of our advertisers to make your purchase? Every dollar you spend with one of our advertisers helps us directly (in affiliate fees) or indirectly (the advertiser will keep renewing their ad contract with us). To make it easy for you to support us, here's a URL you can visit, to see all our current advertisers, with links to click on that will register your visit to them as having come from our site. It's up to you where you buy, but Mike, Mike, Kim, Yazmin, Marti and I would be really grateful if you'd help us out by choosing one of our advertisers to purchase from.
Thank you for your support!
Dave Etchells, Founder & Publisher
Visit our "Buy Now" Page:
https://www.imaging-resource.com/buynow.htm
Back
to Full Nikon D2X Review
Go to Nikon D2X
Data Sheet
Go to Nikon D2X
Pictures Page
Up to Imaging Resource Cameras
Page
Nikon D2XNikon introduces a 12.2 megapixel hybrid pro SLR that can be either high resolution or high speed as the job requires. Review First Posted: 04/14/2005, Updated: 06/10/2005 |
|
 |
|
True Nikon pro SLR compatible with most Nikon F-mount lenses. |
| |
12.2-megapixel CMOS, 4,288 x 2,848-pixel images | |
| |
ISO from 100 to 800 ("ISO Boost" to 1,600 and 3,200) | |
| |
Very fast shutter response and cycle times. | |
| |
Faster wireless image transfer capability with optional 802.11g transmitter accessory. |
Manufacturer Overview
The new Nikon D2X is the latest addition to one of the world's most famous camera lines. The new D2X updates the D1X model that hit the market in mid-2001. As you might expect, there's been a lot of development in the intervening three years between the two camera's respective releases, and the Nikon D2X is solid evidence that its maker is still very much a force to contend with in the professional SLR marketplace. While carrying a host of significant improvements and feature enhancements over its predecessor, resolution and shooting speed are probably the two features that will attract most photographers to the Nikon D2X. In its full-resolution mode, the D2X can capture five 12.2 megapixel (4,288 x 2,848) frames per second, a very respectable rate, at a very respectable resolution. Its unique "Speed Crop" mode reduces resolution to 6.8 megapixels (3,126 x 2,316) but boosts the frame rate to a blazing 8 frames/second, the equal of any other camera on the market, at least as of its release in late Spring 2005. This is an obvious shot across the bow of arch rival Canon, as the Nikon D2X in Speed Crop mode equals the speed of the flagship Canon EOS-1D Mark II, with better buffer depth and buffer clearing speed, and with only an ~8% reduction in linear resolution.
All in all, the Nikon D2X is an impressive camera, with high resolution, excellent shooting speed, excellent color, exceptional dynamic range, and the "cameraness" that Nikon is so justifiably proud of. Its unique dual-mode combination of high resolution (with respectable speed) and high speed (with respectable resolution) promise to make it a near-universal SLR, meeting the needs of studio and sports shooters in a single chassis. Read on for all the details, but if you're a professional shooter using Nikon gear, this is clearly a camera you've been waiting for.
Highlights
User Report
By Shawn Barnett
True to the pro tradition of SLR design, the Nikon D2X is big and heavy. A joint in my thumb was quickly complaining about the weight as I walked about town taking Gallery shots. This is no D70, the D2X's comparatively light and well-balanced sibling. Not that it's terribly unbalanced, it was just a noticeable difference. Very much like its D1x predecessor and the D2H in construction and design, the D2X has an excellent grip both front and back, and an almost equally robust vertical grip. I love the cut of the main grip, with an indent running along the length, offering a place for the pads of the fingers to get a good purchase. This is missing from the vertical grip, however.

Control buttons on the back are big and well-marked, quite a bit larger, more plentiful, and easier to manipulate than on the previous D1x. I prefer Nikon's simpler menu system to other pro cameras on the market, and the menu system on the D2X is both easier to navigate and more attractive than the menu systems on previous Nikon d-SLRs. It is a straightforward menu system whose use is immediately obvious to any computer or digital camera user, and doesn't require too many special button combinations to execute. Exceptions to this rule are applied well, as in the case of the Format function, which requires the user to press the Enter button instead of the usual right arrow button to perform this critical action. I'm also a fan of Nikon's button-based Format option. Just hold down the Delete and Mode buttons for a set amount of time and the camera formats the card.
Also, if you need to quickly return most settings to default, you can do so with another button combination: hold down the ISO and WB buttons on the back for more than two seconds and the Focus area, Exposure mode, Flexible program, Exposure Compensation, AE hold, Aperture lock, Shutter-speed lock, Bracketing, and Flash sync mode are all reset to default values. Image quality, size, white balance, and ISO are also reset. Custom Settings are not reset. You'll want to go back through all the items that are reset to make sure you're happy in almost all auto modes with Normal compression instead of Fine. But it's a good way to get back to some known state in a complex camera like the Nikon D2X.
The Nikon D2X LCD is a big 2.5 inch TFT design that's very sharp and clear, with a few more pixels than past models, making image review and menu item selection that much easier. What's even better is that big bright optical viewfinder with a very high eyepoint, great for eyeglass wearers. A switch to the viewfinder's upper left closes a pretty impressive two-stage door from behind the viewfinder glass to keep out stray light during long exposures on a tripod.
Nikon includes a translucent plastic stand-off LCD cover with the D2X, presumably to protect the LCD surface from scratches. I've frankly never understood its utility. I have never scratched an LCD glass on the back of a digital SLR, but I've fogged up this silly cover often enough from a mere breath while looking through the optical viewfinder that I've taken to tossing it on a desk or stowing it permanently in a camera bag. Others have told me they've scratched plenty of LCDs on shirt buttons and zippers, so I suppose there's a purpose; I just don't use camera straps, and I tend to hold my camera in the right hand by the grip or in the left around the lens barrel, away from buttons and zippers. Thankfully, this cover is removeable: the first feature I use when handed a Nikon digital SLR.
While it's easy to get lost and forget about an important setting on a camera like this, I found it relatively easy to get back to proper settings, despite the many options on the D2X. - Its user interface is intuitive, and presents a very shallow learning curve despite the fact that I'm more accustomed to shooting Canon SLRs. Switching AF points on the Nikon D2X, for example, is as easy as assuring you're in single point AF mode, pressing the shutter halfway, and using the Multi Controller to move the point around. You can use the illuminated red brackets in the viewfinder, but I more often use the graphic in the top status LCD. ISO, Quality, and White Balance are easily set with a button press and a turn of the Main command dial; and these settings have their own LCD for easy confirmation.
Though the news has been out on the Nikon D2X since mid-September of 2004, I should mention a few items that stood out. By far the biggest deal with the D2X is its dual-resolution nature. It can be used as either a high resolution 12.21 megapixel SLR capable of around 20 JPEG shots at five frames per second, or change to a 6.87 megapixel speed demon that can deliver up to 34 JPEGs at eight frames per second. That's a far more versatile camera than Nikon has ever offered.
Initially, I found this dual-resolution feature a little perplexing, and wondered how much sense it made in the marketplace. Now that I've had hands on with the camera, I think it's such a good idea that I can't help but wonder who would buy the recently announced 4 megapixel Nikon D2Hs, whose only major apparent advantage is its buffer depth. Otherwise, it too is capable of eight frames per second, but offers only 4 megapixel images. (Albeit with a lower focal-length multiplication factor and a full-frame viewfinder.) With a few exceptions, the experienced photographer waits for the right moment to get the shot, rather than relying on the motor drive to accidentally capture the peak. In most instances where high speed continuous shooting does help, the Nikon D2X should be able to capture the critical action in far less than the High-speed Crop mode's 4.25 second runtime. Though it'll cost a bit more than the D2Hs, the D2X will be a better choice for most photographers in need of a high resolution, high speed digital SLR. What the D2Hs might offer in addition to speed and buffer depth will have to wait until we receive one for review. High-ISO image quality is an obvious area where there could be a difference between the two cameras, where the significantly larger pixels of the D2Hs might help quite a bit; but our test results reveal that the D2X delivers some excellent, relatively low-noise images.
Nevertheless, I like not only the bright viewfinder and clear, bright LED focus indicators on the Nikon D2X (which I think are abysmal on the D70), but I also like their method of telling the user when High-speed crop mode is active. Four corner brackets light up each time the shutter is pressed, and a small crop icon flashes in the status display. Lines run between these illuminated corners to more clearly indicate the capture area, but users can also replace the default focusing screen with another that only shows the corner brackets. That would be less distracting, but the lines are fine enough that I think most users won't care.
One minor usability note that I've seen affect others is that while holding the camera in the normal grip mode, you'll sometimes notice strange things happening to your settings, and sometimes you'll even fire off a shot without having your finger on the shutter release. This happens on the D2X if you have the vertical shutter release and secondary Sub-command dial unlocked. I've not experienced this with Canon pro cameras, because the vertical shutter release is just a little further down, and mounted on an angled surface.
Rumored to be a Sony part, the other big news here is Nikon's use of a CMOS image sensor in the D2X. Like many other recent digital SLRs, the sensor is APS-size (23.7 x 15.7mm), giving the lenses a 1.5x multiplier when in full 12.21 megapixel mode, but a 2x multiplier when in Hi-speed Crop mode.
If first impressions still hold value, the Nikon D2X seems likely to be a winner. Frankly, before shooting with the D2X, I was concerned about Nikon's position in the high-end camera market. The D70 was a great camera for consumers, and a fine answer to competitors' offerings, but in the pro arena they've clearly lagged in the last year or two. I think the D2X brings them right back into contention with a pro camera that's not only rugged, good looking, and high quality, but that excels where it counts: image quality.
Design
 With the established reputations of Nikon's pro digital SLRs resting securely behind it, the D2X continues the high quality and performance that demanding pros expect. Offering the same exceptional exposure control and a range of features embodying the ultimate in flexibility and control, the D2X maintains the same functional design as Nikon's film-based pro SLR line. I've mentioned the Nikon-coined term "cameraness" before, which describes the combination of features, functionality, and above all, user interface design that defines how a camera operates as a photographic tool. Key to Nikon's strategy is that their digital SLRs embody the same "cameraness" as their film models, so practicing pros can switch back and forth between film and digital bodies without having to stop and adjust their shooting style or practices. Like the previous models, the D2X fulfills this goal admirably, with an operational design that will be immediately familiar to users of the Nikon F5. Though sophisticated, the D2X's user interface is clean, straightforward, and quick to navigate, with a no-frills, four-page menu system, plus the addition of a "Recent Settings" tab. (We've both really enjoyed working with the Nikon D2X, finding it surprisingly capable and well built; worthy of the name stamped into the metal over the lens.)
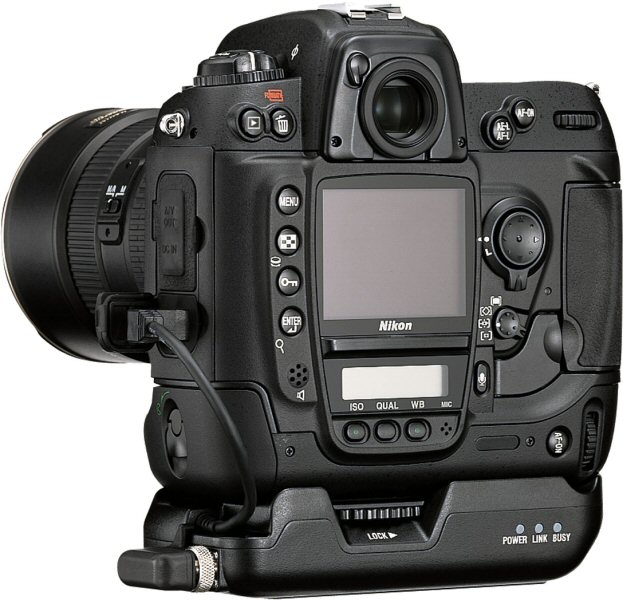
While the camera bodies may look very similar, the D2X sports a number of new upgrades and features over the previous D1X model. For starters, the D2X has a slightly different control layout, and a couple of new buttons to handle previous menu options. Internally, the D2X offers a 12.2-megapixel CMOS image sensor for higher resolution images than Nikon has yet offered. The sensor can also operate in High speed crop mode, allowing capture of up to 8 frames per second. It also has a large LCD monitor for better menu and image review, a Voice Memo mode, and an Anti-Dust option. One of the most interesting capabilities of the D2X is only available via a separate accessory: the wireless transmitter, now upgraded to 802.11g. With the WT-2A wireless transmitter attached (as shown above), you can wirelessly send image files from the camera to a computer, or even out over the Internet.
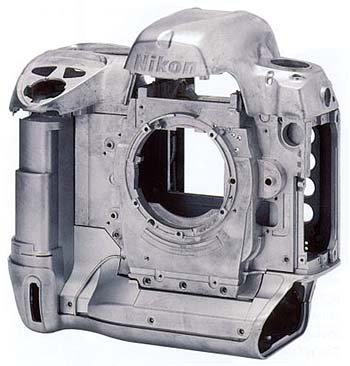
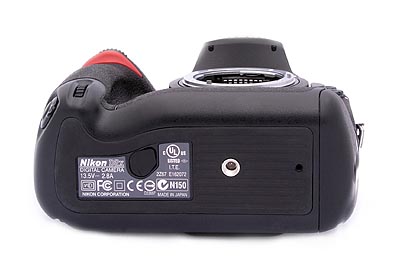
Measuring 6.2 x 5.9 x 3.4 inches (158 x 150 x 86 millimeters), the physical dimensions of the D2X are practically identical to those of the D1, D1X, D1H, and D2H models. Weighing in at a hefty two pounds, 12.8 ounces (1,270 grams) excluding the lens and flash unit, but including batteries and memory card, the D2X is a definite handful, but nonetheless falls about the middle of the range for pro digital SLRs. Thanks to a cast-alloy body (see the photo above), the D2X carries forward the "built like a tank" ruggedness of previous Nikon Pro SLRs.

Introduced with the D2H, and continued in the D2X is a much more complete system of environmental seals on the body than we've seen on Nikon cameras before, as shown above. The result is a camera that's by no means waterproof, but one that's at least highly resistant to water and dust. We were able to test this live while shooting at a local race track, and Nikon personnel were completely unconcerned to have us go out into the rain to shoot with the D2X and some very expensive lenses.
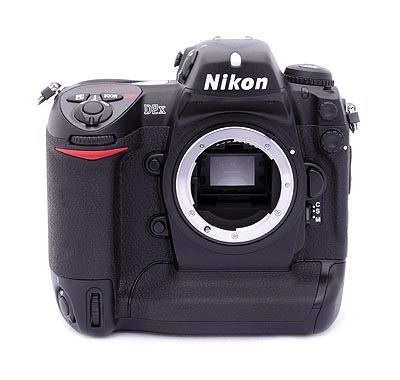
The front of the camera features a standard Nikon F lens mount, complete with AF coupling and AF contacts. As with Nikon's other Digital SLRs, the D2X body contains the necessary contacts to support Nikon's latest AF-S "silent wave" autofocus lenses, and also supports Nikon's designed-for-digital DX-series lenses. There's also a Depth of Field Preview button, a programmable Function button, Sub-Command dial, sync terminal for an external flash, 10-pin remote terminal, Lens Release button, Focus Mode Selector dial, ambient light sensor, self-timer lamp, and secondary Sub-Command dial. A substantial hand grip on the right side of the camera features a rubbery covering that provides a very secure finger grip. A thick rib running along the bottom of the body provides a hand grip when the camera is rotated for vertical-format shots, covered with the same textured, rubbery surface.
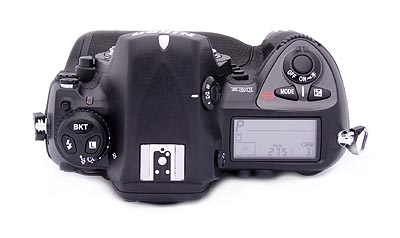
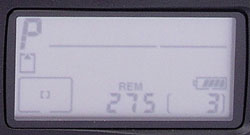 The top of the Nikon D2X features the Power switch, Shutter button, Mode and Exposure Compensation buttons, and a large status display panel that reports most of the camera's settings without forcing you to resort to the rear-panel's color LCD screen. The images inset right include a photo of this display panel as it appears on the camera, as well as a graphic illustration showing all segments activated simultaneously.
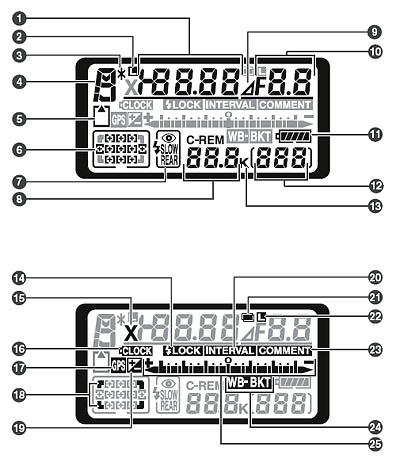
1 |
Shutter speed | 11 |
Battery indicator |
| Exposure compensation value | 12 |
Frame count | |
| Number of shots in bracketing sequence | 13 |
"K" (appears when memory remains for over 1000 exposures) | |
| Number of intervals for interval timer photography | 14 |
FV lock indicator | |
| Focal length (non-CPU lens) | 15 |
Sync indicator | |
| Sensitivity (ISO equivalency) | 16 |
Clock battery indicator | |
| "Busy" indicator | 17 |
GPS connection indicator | |
2 |
Shutter-speed lock icon | 18 |
High-speed crop indicator |
3 |
Flexible program indicator | 19 |
Exposure compensation indicator |
4 |
Exposure mode | 20 |
Interval timer indicator |
5 |
Memory card indicator | 21 |
Multiple exposure indicator |
6 |
Focus area | 22 |
Aperture lock icon |
| AF-area mode | 23 |
Image comment indicator | |
7 |
Flash sync mode | 24 |
Exposure bracketing indicator |
8 |
Number of exposures remaining | White-balance bracketing indicator | |
| Number of shots remaining before memory buffer fills | 25 |
Electronic analog exposure display | |
9 |
Aperture stop indicator | Exposure compensation | |
10 |
Aperture (f/-number) | Bracketing progress indicator | |
| Aperture (number of stops) | PC mode Indicator | ||
| Bracketing increment | |||
| Number of shots per interval | |||
| Maximum aperture (non-CPU lens) | |||
| PC mode indicator |
Also on top of the D2X is a diopter adjustment dial for the optical viewfinder and Metering dial (both on right side of the hot-shoe mount, when viewing the camera from the rear). On the other side of the hot-shoe mount are the Mode dial (with lock button), as well as the Flash Sync Mode, Bracketing, and Command Lock buttons. The top hot-shoe accommodates a variety of Nikon Speedlight external flash units. The hot shoe has the standard trigger terminal in the center, as well as three other contacts for interfacing to Nikon's dedicated speedlights.

On the right side of the D2X, a second Shutter Release button makes vertical shooting much easier. A locking dial surrounds the button to prevent accidental triggering. Also on this side of the camera is one of the eyelets for attaching the neck strap.
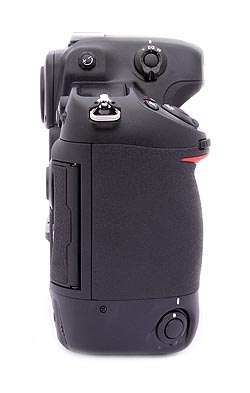
The opposite side of the D2X features the battery and connector compartments, and the second neck strap eyelet. Both connector compartments are covered by rubbery flaps that remain tethered to the camera when opened, and fit snugly into place. The top compartment houses the AV Out and DC In jacks, with the USB 2.0 jack in the compartment below. A rotating latch locks the battery compartment cover in place. The cover is actually a separate piece from the camera, removing completely to expose the battery chamber. When a battery is inserted, the compartment cover locks onto the battery, but can be released by pressing a tiny button just inside the outer lip.
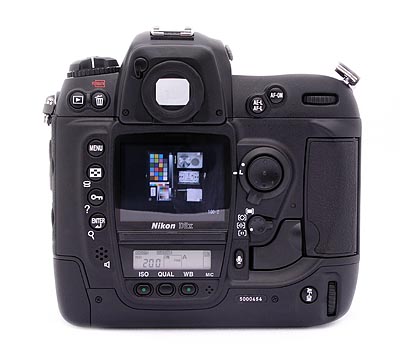
The back panel of the D2X holds the remaining camera controls, which are extensive. The large, bright 2.5" LCD screen features a removable protective cover which pops on and off. The protective cover is a helpful accessory for those who use camera straps, as the LCD projects out from the back of the camera further than any other feature, and so could be subject to abrasion, sliding back and forth across your jacket or shirt front when the camera is hanging from its neck strap (it does fog up, though). The protective cover is transparent, making it possible to see and navigate the LCD menu system without removing it. A light-tight shutter can be flipped closed across the viewfinder eyepiece, preventing stray light from affecting exposures when the camera is used on a tripod. This shutter is opened and closed by a small lever at the top left of the eyepiece. Across the top are several command buttons, including the Playback, Delete, AE/AF Lock, and AF-On buttons, in addition to the Main command dial. The LCD monitor panel rests in the left center of the back panel, along with a Five-Way Arrow Rocker, or MultiSelector pad. A dial surrounds the MultiSelector to turn it on or off (Lock). A card slot cover release button (beneath a small, plastic flap) is located to the left of the CompactFlash door, whose slot supports Type-I and II CompactFlash cards, as well as MicroDrives. Card activity is indicated courtesy of a small LED just above the release button, and to the left of the CompactFlash card slot, on the back of the camera. Lining the left side of the LCD monitor is another set of control buttons, including the Menu, Thumbnail, Protect, and Enter buttons.
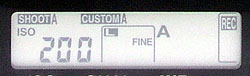 A small rear control panel beneath the LCD monitor works in conjunction with a series of buttons below it, which include Sensitivity, Quality / Size, and White Balance buttons. (As before, the images at right show a photo of the D2X's display panel as it appears on the camera, as well as a schematic illustration with all segments activated.)

1 |
Custom settings bank | 6 |
"K" (appears when memory remains for over 1000 exposures) |
2 |
"Remaining" indicator | Color temperature indicator | |
3 |
Shooting menu settings bank | 7 |
Image quality |
4 |
Sensitivity (ISO) indicator | 8 |
Image size |
| Auto sensitivity indicator | 9 |
White-blance bracketing indicator | |
5 |
Sensitivity | 10 |
Voice memo recording indicator (shooting mode) |
| Sensitivity (high gain) | 11 |
Voice memo status indicator | |
| Number of exposures remaining | 12 |
Voice memo recording mode | |
| Length of voice memo | 13 |
White balance mode | |
| White balance fine-tuning | |||
| Color temperature | |||
| PC mode indicator |
The AF Area mode selector and Voice Memo button of the D2X are next to the lower right corner of the LCD monitor, and a secondary AF-On button and Command dial for vertical shooting are in the lower right corner of the rear panel. Finally, a small speaker just to the left of the small status display panel plays back voice memos recorded via the small microphone to the right of the White Balance button.
The very flat bottom of the camera has only the metal tripod mount and the connector jack for the optional wireless transmitter accessory. I appreciate the fact that neither the batteries nor the CompactFlash slot on the Nikon D2X are accessed from the bottom of the camera, which lets you change the batteries and memory card without dismounting from a tripod. The large surface area of the camera's bottom combines with the high-friction rubberized surface to produce a very stable mounting surface for use with a tripod. The central position of the tripod mount with respect to the depth of the camera body, and the center-line of the lens, will help both with mounting stability and to reduce parallax error when shooting panoramas.
Viewfinder
 The Nikon D2X is equipped with an optical viewfinder that works through the lens (the LCD monitor is for image playback and accessing the menu system only, and as with other digital SLRs cannot be used for image preview / framing). The optical viewfinder eyepiece features a diopter adjustment knob on the side of the prism housing, and a sliding protective shutter than can be moved in and out of place manually via a small lever. The internal metal shutter helps avoid exposure errors due to light entering the rear element of the viewfinder during long exposures on a tripod. Nikon states that the optical viewfinder provides about 100 percent frame coverage, which agrees quite well with my own measurements. (I measured viewfinder coverage at almost exactly 100 percent.) The D2X's illuminated display inside the viewfinder provides a bit more information than the previous D1X, with a center-weighted metering circle, 11 sets of focus brackets, focus indicator, metering, bracketing indication, battery level, FV lock, sync indicator, AE lock, shutter speed, shutter speed lock, aperture, aperture lock, aperture stop indicator, exposure mode and compensation, frame counter, flash-ready indicator, electronic analog exposure display, voice memo status, white balance mode and bracketing, image size and quality, and ISO sensitivity.
 While the 2.5-inch LCD panel on the Nikon D2X isn't usable as a viewfinder, it does provide a great deal of information about your pictures after you've shot them. A variety of playback options are available, ranging from a 9-image thumbnail display, through several full-sized image modes, to a zoomed playback option with variable magnification. The screen shot at right shows several of the information displays that are available.
 Of the various screens, one of the more interesting options on the Nikon D2X is the histogram screen, shown at right. Histogram displays are common on professional digicams, regarded as almost mandatory by many pros for evaluating exposure levels. A histogram is simply a graph of how many pixels there are in the image at each brightness level. The brightness is the horizontal axis, running from black at the left to white at the right. The height of the graph shows the relative number of pixels having each brightness level. This sort of display is very handy for determining under- or overexposure. Ideally, the histogram would stretch across the entire width of the display, using the full range of brightness values available. An underexposed image will have a histogram with all the data lumped on the left-hand side, with nothing reaching all the way to the right. Likewise, an overexposed image will have all the data lumped on the right hand side.
 New to the D2X is an RGB histogram mode, which shows four separate, smaller histograms, with separate plots for the Red, Green, and Blue color channels, as well as overall luminance, shown in yellow. When in this mode, the thumbnail image will blink wherever highlights are blown out, and you can select the color channel that the blink warning is associated with by holding down the Index button and pressing the left or right arrows on the multi-controller.
A histogram display is very helpful in telling whether you've got the exposure right, but to my mind isn't adequate by itself. With digital cameras, it's very important not to blow-out the highlights in a picture (they're similar to slide film in that respect), since once you hit the maximum brightness, the image just saturates, and any highlight detail will be lost. A histogram display does a pretty good job of telling you how the image as a whole is doing, but what if there are just a few critical areas that you're worried about for the highlights? If only a small percentage of the total frame is involved, it won't account for many pixels. That means any peak at the "white" end of the histogram graph would be pretty small, and easy to miss (or just plain invisible). What to do? The folks at Nikon recognized this problem, and provided another special display mode on the D2X that they simply call "highlights," accessible via the Playback settings menu, under "Display Mode." This mode blinks any highlights that are saturated in any of the color channels. It does this by taking the nearly-white areas on the LCD and toggling them between white and black.
| Luminance | Red |
 |
 |
 |
 |
| Green | Blue |
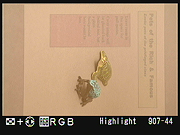
Nikon took the blinking highlights display one big step further in the D2X though, by letting you examine the state of highlights in the individual Red, Green, and Blue color channels independently. Along the bottom of the Highlights display on the D2X are four indicators labeled RGB, R, G, and B. You can select between them with the left/right arrows on the Multi Controller, while holding down the Index button on the left side of the LCD display. When RGB is selected, the blinking highlights correspond to areas of the image that are approaching saturation in two or more color channels at once. When either R, G, or B is selected though, the highlights only blink where the corresponding color channel is blown out. This is an important addition, because highly saturated colors can often blow out a single color channel without triggering a conventional luminance-only highlight warning display. Saturating a single color channel results in loss of shape and detail in brightly colored objects, so it's important to know when it might be happening. (I've often seen this happen on brightly colored fabrics, where the texture of the fabric can be lost in brightly lit areas.) The group of screen shots above shows the behavior of the separate color channels on an overexposed shot of three colored pens. Pretty slick!
 In addition to the histogram, highlights, and information screens, the D2X also features a focus information screen, which highlights in red the AF area used for the shot. This can be helpful for checking to see that the camera's AF system locked onto the portion of the subject you were most interested in.
 Like the D2H before it, the D2X offers a good playback zoom feature. Pressing the Enter button while an image is displayed enters Playback Zoom mode. To control zoom, you then hold down the Index button while turning the Command dial. As you do this, a red rectangle with blue corners appears on the screen to mark the area of the subject to be viewed. You can move this box around the screen with the Multi Controller's arrows. When you release the Index button, the selected portion of the image appears full-screen. The ability to magnify an image lets you see critical details that are indiscernible in the basic LCD image. Also in Playback mode, the D2X's LCD monitor can display as many as four or nine thumbnail-sized images at once, when the Index button is held down while rotating the Sub-Command dial.
Image Overlay
One of the more unique features of the Nikon D2X is its "Image Overlay" mode. This mode lets you overlay two NEF (RAW-format) images in the camera, creating a composite image from the two. My initial reaction to this was "so what?" But once I thought just a little, I realized it could be incredibly useful to commercial shooters.
How often have you needed to shoot a photo for use on a magazine cover, or the title page of an article, and needed to leave space around the subject for overlaid text or graphics? This is a very common requirement, and one that can be difficult to deal with. More often than not, you end up leaving much more space around the subject than you need to, wasting pixels and producing a poor composition. Alternately, you may not leave enough space, leading to a chewing-out by the art director and costly retouching work to extend the background. And what do you do if you're faced with an "almost" situation, one in which you're not sure whether there's enough space in the needed areas? Do you take the shot and hope for the best, or keep looking for something else that fits better?
The Image Overlay function in the Nikon D2X neatly addresses this problem. You can shoot a template of the desired layout, showing areas that need to be reserved for text and graphics, and then overlay it with shots you take in the field, to see if the subject is positioned properly, and whether you've intruded on any of the "forbidden" areas with critical subject detail or distracting elements.
To illustrate this, I made a simple template for the fictitious publication "Pets of the Rich and Famous," and captured a series of screen shots that step through the process.
 |
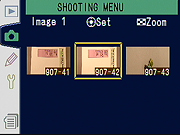 |
| Here's the first screen of the Overlay function. The first step is to choose a photo for Image 1. (Note that this only works for images stored in the NEF format.) | Choose an image by scrolling back and forth in this screen, and press the center of the multi-controller to select the currently highlighted image. Here, I just shot a printout on a piece of paper, with spaces marked for a headline and left-column pull quotes. |
 |
 |
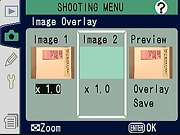
| Here we are back at the main screen, with Image 1 selected, ready to select Image 2.
This leads to an identical image-selection screen to that seen above. |
With both images chosen, the Preview image on the right shows the composite image.
This shot also illustrates a handy feature, whereby the "gain" or brightness of the images can be adjusted, to improve legibility. Here, I've reduced the gain of the template to 0.2, to keep it from washing out the subject. |
 |
 |
| Once you like what you see, you can preview the result full-screen by selecting "Overlay" in the right-hand Preview pane shown earlier. The "Save" option writes the result to the memory card as a separate image file.
(One tip: Making the "safe" areas for your subject black on the template will make it easier to see the subject and "forbidden" areas together, as you won't have to dial down the gain on the template as far.) |
Once you've saved the results of an Image Overlay operation to a separate file, you can view it like any other image on the memory card, zooming in to check fine alignment.
If you include the actual words and graphics to be used on the final page, you can check the precise alignment between elements. (Going far beyond simply staying within a designated rectangular "safe" area.) |
Optics
| Free Photo Lessons | |
|
 In this section, I usually discuss the lens characteristics of the camera I'm describing. In the case of the D2X, you can attach pretty much any lens you want, as long as it uses the Nikon F mount. The D2X features the standard F mount, with both mechanical AF coupling for older lenses, and AF electrical contacts for the latest AF-IF or AF-S Nikkor lenses with internal focus motors. With very few exceptions, you can use the D2X with any F Mount Nikkor lens ever made. (A short list of incompatible lenses and accessories is included at the back of the manual. Apart from relatively ancient "non-AI" lenses, most are older types of perspective-correction lenses, a few small-aperture telephoto zoom lenses, and some serial number ranges of reflex telephoto lenses.)
| |
|
| Type G or D AF Nikkor
Lenses (except IX models), AF-S and AF-I Nikkor |
|
| PC Micro Nikkor 85mm F/2.8 D | |
| AF-S, AF-I Teleconverter | |
| Other AF Nikkor Lenses (Excluding lenses for F3AF) |
|
| AI-P Lenses | |
| Other Lenses (Non-CPU) | |
Given that the optical characteristics will depend entirely on the lens attached, I'll instead concentrate here on the focusing options and modes. There's a lot to talk about here, given the exceptional control and flexibility afforded by the D2X's autofocus systems. The Nikon D2X allows you to take advantage of auto or manual focus via a small dial on the front of the camera, right next to the lens. Setting the switch to "M" puts the camera into manual focus mode, "S" places it in Single Servo AF (focus priority), and "C" puts it into Continuous Servo AF (release priority). Single Servo simply means that the camera sets focus only once, when the Shutter button is first pressed halfway, and is best for still objects. Continuous Servo means that the camera continuously adjusts the focus, as long as the Shutter button is halfway pressed, and is best for moving objects.

1 |
8-mm (0.31") reference circle for center-weighted metering | 16 |
"K" (appears when memory remains for over 1000 exposures) |
2 |
Focus brackets (focus areas) | 17 |
Flash-ready indicator |
| Spot metering targets | 18 |
Battery indicator | |
3 |
High-speed crop | 19 |
FV lock indicator |
4 |
Focus indicator | 20 |
Sync indicator |
5 |
Metering | 21 |
Aperture stop indicator |
6 |
Bracketing indicator | 22 |
Electronic analog exposure display |
7 |
Autoexposure (AE) lock | 23 |
Voice memo status indicator |
8 |
High-speed crop indicator | 24 |
White-balance bracketing indicator |
9 |
Shutter-speed lock icon | 25 |
White-balance mode |
10 |
Shutter speed | 26 |
Image size |
11 |
Aperture lock icon | 27 |
Image quality |
12 |
Aperture (f/-number) | 28 |
Sensitivity (ISO) indicator |
| Aperture (number of stops) | Auto sensitivity indicator | ||
13 |
Exposure mode | 29 |
Sensitivity (ISO equivalency) |
14 |
Exposure compensation indicator | ||
15 |
Frame count | ||
| Number of exposures remaining | |||
| Number of shots remaining before memory buffer fills | |||
| Exposure compensation value | |||
| PC mode indicator |
You also have the freedom of setting the autofocus area on the D2X. A dial on the camera's rear panel selects between Single Area, Dynamic Area, Group Dynamic Area, and Dynamic Area with Closest Subject Priority modes. Single Area AF simply means that the camera judges focus based on one part of the subject, while Dynamic AF employs all 11 of the autofocus brackets, or areas. (Both modes allow the user to manually select the main AF area.) The camera first focuses on the subject in the central focus area. Whenever the subject moves to a different AF area, the camera also shifts the focus to "follow" the subject. This is great for irregularly moving subjects. Group Dynamic AF mode is a new feature on the D2X, and lets you manually select a group of five AF points in any section of the frame, from which the camera automatically focuses based on the portion of the subject closest to one of the selected points. This is good for moving subjects that remain within the same general area of the frame. Finally, the Dynamic Area with Closest Subject Priority option means that the camera first focuses on the closest object that falls into one of the 11 focus areas and then tracks it as it moves. (Note that no focus area brackets are illuminated in the viewfinder with this mode and that this mode doesn't work well with telephoto lenses or poorly lit subjects, according to Nikon). In Single Area and Dynamic Area AF modes, you can change the main focus area by unlocking the focus area selector (the Multi Selector pad on the back panel) and then shifting the focus area using the up, down, right, or left arrow keys. Then, simply lock the focus area selection by sliding the switch back into place. By default, the Nikon D2X does not "wrap" the focus area selector as you scroll between focus areas. Through the Custom Settings menu, you can opt for a "Wrap" function, which hunts for the next area from top to bottom or left to right. What this means is that if you continue to press the right arrow key when the right focus area is selected, the selection will jump to the left focus area next, rather than remaining on the right most focus area setting.
There are two methods for using the AF Lock function on the D2X. The first is to place the central subject in the selected focus area, halfway press the Shutter button, then realign the composition and fire the shutter. Alternatively, when using Single Servo AF, you can press the AF-L/AE-L button to lock focus (and exposure, unless set for focus only in the Custom Settings menu). Keeping this button pressed will lock focus and/or exposure, even if the Shutter button is released. This allows you to recompose the photograph without keeping your finger on the Shutter button, but on the AE-L/AF-L button instead. (Thereby resulting in less chance that you'll accidentally fire the shutter when you don't intend to.) The AF-On buttons on the rear panel set focus without needing to half-press the Shutter button. The purpose of the AF-On buttons is to allow you to lock focus independently of exposure, if the AE-L/AF-L button has been set to lock exposure only. Thus, you can lock the focus for one section of the frame, and the exposure for another.
Shooting very fast-moving subjects at close range with the Nikon D2X, I found that the camera offered the best AF tracking response if I kept it in Single-Area AF mode. Dynamic Area and Group Dynamic Area AF both seemed to slow the AF response somewhat. (Not that these other focus modes were particularly slow: The subject in question was a motorcycle at a range of 50-100 feet, approaching at ~80-90 mph, captured with a Nikkor 200mm f/2.0 lens.)
Sensor Cleaning!
Everyone understands that lenses sometimes get dust on them and need to be cleaned, and there are a lot of lens-cleaning cloths, solutions and other accessories on the market that work well. BUT, what do you do when your sensor gets dusty? Dust specks on the sensor tend to show up when shooting at very small apertures, appearing as dark blobs on your images. They're distracting at best, a terrible nuisance at worst, if you end up having to retouch every image to rid of them.
Most of us are naturally leery about the idea of poking around inside the delicate innards of our d-SLRs to wrestle with recalcitrant dust specks. Gently blowing the sensor surface (actually, the surface of the anti-aliasing filter) with compressed air gets rid of some dust, but there's invariably a lot that just stays stuck, no matter what. So what do you do?
If you've got dust specks on your sensor (and sooner or later you will), you're going to need to clean it. There are a lot of products out there intended to address this need, but a distressing number of them work poorly (if at all), and many are grossly overpriced. Advertising hype is rampant, with bogus pseudo-scientific jargon and absurd product claims run rampant. And prices - Did I mention prices? How about $100 for a simple synthetic-bristle brush?
So how do you know what product to use?
We don't pretend to have used everything currently on the market, but can tell you about one solution that worked very well for us. The "Copper Hill" cleaning method is straightforward and safe, and in our routine usage here at Imaging Resource, highly effective. Better yet, the products sold by Copper Hill Imaging are very reasonably priced. Best of all, Nicholas R (proprietor of Copper Hill) has put together an amazingly detailed tutorial on sensor cleaning, free for all.
Sensor cleaning is one of the last things people think about when buying a d-SLR, but it's vital to capturing the best possible images. Take our advice and order a cleaning kit from Copper Hill right along with your d-SLR, so you'll have it close at hand when you need it: You'll be glad you did!
(Other than a few backlinks on their site, we receive no promotional consideration from Copper Hill. We just think their sensor cleaning products are among the best on the market, and like their way of doing business. - We think you will too. Check them out.)
Exposure
| Free Photo Lessons | |
|
| Camera Display--> | -3 | -2 | -1 | 0 | 1 | 2 | 3 |
| Direct Sunlight | 5,600 | 5,400 | 5,300 | 5,200 | 5,000 | 4,900 | 4,800 |
| Shade | 9,200 | 8,800 | 8,400 | 8,000 | 7,500 | 7,100 | 6,700 |
| Cloudy | 6,600 | 6,400 | 6,200 | 6,000 | 5,800 | 5,600 | 5,400 |
| Incandescent | 3,300 | 3,200 | 3,100 | 3,000 | 2,900 | 2,800 | 2,700 |
| Fluorescent | 7,200 | 6,500 | 5,000 | 4,200 | 3,700 | 3,000 | 2,700 |
| Flash | 6,000 | 5,800 | 5,600 | 5,400 | 5,200 | 5,000 | 4,800 |
Three metering options are available on the D2X: 3D Color Matrix, Center-Weighted, and Spot. The 3D Color Matrix setting uses a 1,005-pixel CCD sensor (separate from the main image sensor) to meter exposure based on several areas in the frame (useful when brightly colored or very dark subjects occupy a significant portion of the frame). This is the same 3D Color Matrix metering system used on the Nikon F5 and the previous D1, D1X, and D1H models. Center-Weighted metering measures light from the entire frame but places the greatest emphasis on a circular area in the center. (You can adjust the size of the area through a Custom Settings menu option.) Spot metering is pretty self-explanatory, taking a reading from the dead center of the image (best when using the AE Lock function). The D2X has a nifty trick with spot focus though. With D-type lenses, and in the proper focus-area mode, the spot metering actually centers on the focus area selected, giving you the option for off-center spot metering. You can also link the spot with the center of the Group Dynamic Area setting.
![]() Exposure compensation on the D2X is adjustable from -5 to +5 exposure equivalents (EV) in one-third step increments, and is controllable in all exposure modes. (Through the Custom Settings menu, you can also opt for one-half or one full step size.) The Auto Bracketing feature on the Nikon D2X takes as many as nine shots of the same subject with varying exposure values determined by either the photographer in Manual mode or by the camera in all other modes. Exposure settings for bracketing can vary from -2 to +2 EV (values are added to the already chosen exposure compensation value), with step sizes of one-third, one-half, or one EV unit, and the bracketing biased toward either underexposure, overexposure, or centered around the main exposure value. Through the Custom Settings menu, you can designate whether the bracketing sequence adjusts the exposure, the flash, both flash and exposure, or white balance (described above). For an exposure series, the camera doesn't automatically snap a series of images with one press of the Shutter button. Instead, the exposure varies with each subsequent press of the Shutter button, and an indicator on the top status display panel reports where you are in the sequence. By pressing the Bracket button and rotating the Command dial, you can set the number of images you'll capture in the series. Pressing the Bracket button while turning the Sub-Command dial sets the exposure increment each shot will vary by.
Exposure compensation on the D2X is adjustable from -5 to +5 exposure equivalents (EV) in one-third step increments, and is controllable in all exposure modes. (Through the Custom Settings menu, you can also opt for one-half or one full step size.) The Auto Bracketing feature on the Nikon D2X takes as many as nine shots of the same subject with varying exposure values determined by either the photographer in Manual mode or by the camera in all other modes. Exposure settings for bracketing can vary from -2 to +2 EV (values are added to the already chosen exposure compensation value), with step sizes of one-third, one-half, or one EV unit, and the bracketing biased toward either underexposure, overexposure, or centered around the main exposure value. Through the Custom Settings menu, you can designate whether the bracketing sequence adjusts the exposure, the flash, both flash and exposure, or white balance (described above). For an exposure series, the camera doesn't automatically snap a series of images with one press of the Shutter button. Instead, the exposure varies with each subsequent press of the Shutter button, and an indicator on the top status display panel reports where you are in the sequence. By pressing the Bracket button and rotating the Command dial, you can set the number of images you'll capture in the series. Pressing the Bracket button while turning the Sub-Command dial sets the exposure increment each shot will vary by.
On a more mundane level, the D2X has a self-timer feature that allows you to set the time interval anywhere from two to 20 seconds, activated by fully pressing the Shutter button.
An interesting feature on the Nikon D2X is the Mirror-Up Mode, accessed on the Drive dial. Mirror-Up raises the mirror with the first press of the Shutter button, then captures the exposure with a second press. The mirror is lowered automatically after the exposure. (Obviously meant for times when the camera is on a tripod.) This mode allows you to take images without worrying about extended shutter delay from an arbitrary anti-vibration delay or any vibration from the mirror.
The D2X also offers image Sharpness, Tone Compensation (Contrast), Color Mode, and Hue Adjustment options. The Sharpness setting includes Medium Low and Medium High options in addition to the standard Auto, Normal, Low, High, and None settings. As with previous camera models, the Tone Compensation option’s Custom setting allows you to download a custom tone curve from your computer. (If no curve is downloaded, the Custom setting defaults to the Normal setting.) The Hue adjustment offers arbitrary adjustments from -9 to +9 degrees, set in three-degree increments. Raising the Hue setting in the positive direction results in a stronger yellow cast in the image, causing blues to shift toward neutral. Alternatively, lowering the Hue setting to negative values introduces a blue cast, which consequently shifts a yellow cast toward neutral. The Color Mode option allows you to capture images in sRGB I or II, or Adobe RGB color. The first sRGB setting is calibrated for portraits, while the second is better for nature and landscape shots.
When reviewing images on the Nikon D2X's LCD monitor, you can pull up a histogram and a highlight function to give you a complete readout on the exposure. This is a useful tool to examine your exposure in the camera instead of waiting to download images and then deciding to reshoot.
Continuous Shooting Mode
The D2X offers Low and High Speed Continuous Shooting modes, for capturing a rapid series of images. In Low Speed Continuous Shooting, the camera records from approximately one to four frames per second, for as long as the Shutter button is held down (this increases to 1-7 frames per second in High-speed crop mode is set). The actual frame rate and the number of shots in the series is determined through the Custom Settings menu. High Speed Continuous Shooting captures at a much faster rate, approximately eight frames per second. Once the designated frame limit is reached, the camera won't record any more photographs until at least one of the images is transferred from the buffer memory to the memory card.
Voice Memo Mode
A Voice Memo recording option lets you record short sound clips up to 60 seconds to accompany captured images. You can set the D2X to automatically record voice memos after capture, or opt to manually record memos by pressing and holding the Microphone button on the rear panel. This can either be done immediately after capturing a photo, or while reviewing images.
Interval Shooting Mode
Another feature on the Nikon D2X that first appeared on the D2H is Interval Shooting mode, which facilitates time-lapse photography by taking a series of images at preset intervals. You can set the starting and ending times for the series, as well as the amount of time between shots and the total number of shots to be captured. This is a good way to capture a timeline of slower events, such as clouds passing across the sky, tidal changes, a flower opening, etc.
Flash

 Like most professional SLRs, the D2X doesn't carry a built-in flash, but rather is designed to work with external strobe systems, or Nikon Speedlights. The camera features an external flash hot-shoe on its top panel, as well as a secondary PC Sync socket on the front of the camera. The Flash button on top of the camera accesses the five sync modes, which include Front Curtain Sync, Slow Sync, Rear Curtain Sync / Slow Rear Curtain Sync (Aperture Priority and Program modes), Red-Eye Reduction, and Red-Eye Reduction with Slow Sync. Just as these modes sound, the camera times the flash exposure with either the opening or closing of the shutter. Red-Eye Reduction simply means that a small pre-flash fires before the full-strength flash to eliminate the effects of Red-Eye in portraits. The Slow Sync setting times the flash with a slower shutter speed, which in turn allows more ambient light into the frame.
The SB-800 Speedlight
By far the most advanced integrated flash system announced by Nikon (or anyone else, for that matter) to date, the SB-800 features "i-TTL" wireless through-the-lens flash exposure control when used with the D2X. - While the SB-800 can be used with other Nikon cameras, many of its groundbreaking features are only available when coupled with the D2X or D2H. (Although we can expect that this is a new standard for Nikon Speedlights, so future camera bodies will doubtless also support the full range of SB-800 features). See the video of how we used SB-800 and SB-600 flashes in combination with two light boxes to capture images of the many new cameras at PMA 2005.
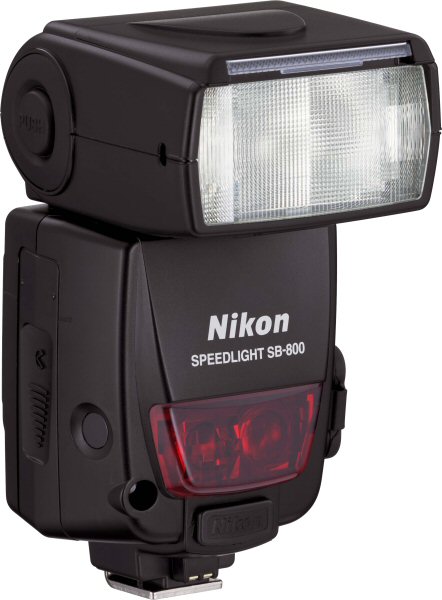
The Nikon SB-800 AF offers a range of new features, including an advanced wireless control system by which multiple SB-800 speedlights can be controlled from a single master unit, with full wireless control over relative exposure levels between units, and full "i-TTL" through-the-lens metering. Other new features include a new Auto FP high-speed sync, flash color information communication for improved color accuracy, a flash value ("FV") exposure lock, and a new wide-area AF-assist illuminator that's tailor-made for the D2X's 11-area Multi-Cam 2000 AF sensor unit.
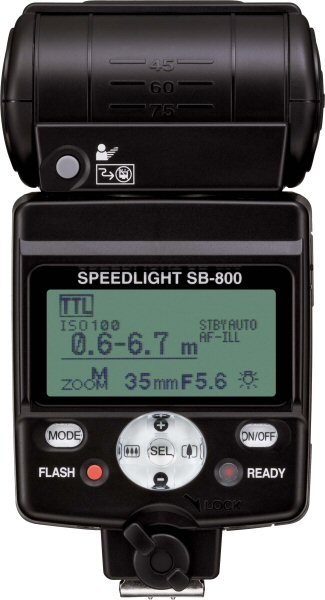
One of the most technologically impressive aspects of the SB-800 AF is its use of Nikon's Advanced Data Communication system, which uses rapid pulses of the flash units during the pre-flash metering period to pass setup and exposure information between multiple units. With this system, you can control four independent sets of SB-800 speedlights wirelessly from the camera itself. The four groups consist of the speedlight attached to the camera (the master), and three separate sets of remote units, each of which can consist of any number of SB-800 units for the ultimate in lighting flexibility. Settings for each group of speedlights are made via the control panel and large LCD panel on the Master unit attached to the camera. It deserves repeating that all speedlights in all groups can operate in i-TTL mode for completely automatic flash exposures, including relative exposure differences dialed-in for each group from the Master controller. (You can also run different groups in different flash modes if you'd like, setting two groups to i-TTL, and another to Manual mode, for instance.)
When you press the shutter button, the Master fires each group of speedlights in turn, collecting exposure information via the camera's TTL metering system. This exposure information is then integrated by the D2X, power levels are set for all groups, and the shutter and speedlights are fired for the exposure itself. If it sounds like there's a lot going on, it's because there is, but the whole process takes only as much time as does the normal pre-exposure metering flash from a conventional "smart" strobe unit.
It's hard to overstate how effortless the SB-800 makes multi-flash lashups. If you've ever had to climb up and down a ladder or crawl behind a set a few dozen times to get flash levels set properly, you'll immediately understand the benefit of being able to set the exposure levels for up to 3 groups of remote strobes, without leaving the camera.
Wireless TTL multi-flash functionality is only part of the story though, as the SB-800 offers a range of other new features as well. Here's a list, copied from Nikon's marketing materials:
It's no stretch to say that the SB-800 is by far the most impressive flash system I've seen to date. It makes wireless, TTL-metered, multi-flash photography not only possible but easy. I expect Nikon will sell SB-800DXs by the thousands.
Shutter Lag / Cycle Times
When you press the shutter release on a camera, there's usually a lag time or delay before the shutter actually fires. This corresponds to the time required for the autofocus and autoexposure mechanisms time to do their work, and can amount to a fairly long delay in some situations. Since this number is rarely reported on (and even more rarely reported accurately), and can significantly affect the picture taking experience, I routinely measure both shutter delay and shot to shot cycle times for all cameras I test, using a test system I designed and built for the purpose. (Crystal-controlled, with a resolution of 0.001 second.) Here are the numbers I collected for the Nikon D2X:
|
| ||
|
|
(secs) |
|
| Power On -> First shot |
|
Almost immediate. (Really fast.) |
| Shutdown |
|
First time is simple shutdown, second time is worst-case buffer-clearing time. That's a long time to clear the buffer, but corresponds to clearing thirteen 12.2 megapixel RAW files and writing them to the card. |
| Play to Record, first shot |
|
Time until first shot is captured. Barely noticeable. (Really fast.) |
| Record to play |
(roughly) 0.25 / 0.1 |
First time is that required to display a large/fine file immediately after capture, second time is that needed to display a large/fine file that has already been processed and stored on the memory card. Both times are very fast. |
| Shutter lag, full autofocus |
|
Time to capture with review turned on. Fast but not by comparison with many d-SLRs. |
| Shutter lag, full autofocus |
|
Time to capture with review turned off. Very fast by any measure. |
|
Shutter lag, continuous autofocus |
|
Time to capture with review turned off. Very fast. |
| Shutter lag, manual focus |
|
Time to capture with review turned off. Very fast. |
| Shutter lag, prefocus |
0.044 |
Time to capture, after half-pressing shutter button. Very fast. |
| Cycle Time, max/min resolution JPEGs |
0.23 / 0.22 |
First number is for large/fine files, second number is time for lowest resolution images. Times are averages. Shoots 20 frames this fast in large/fine mode, then slows to about .77 seconds per shot.
In lowest res, shoots about 40 frames before starting to stutter just a little. (Buffer capacity in low res is shown as 20 frames on the viewfinder display, but shots clear the buffer almost as fast as you can trip the shutter button.) Buffer takes 12 seconds to clear in large/fine mode, 3 seconds in small/basic mode. Turning on High ISO noise reduction reduces buffer depth to 18 frames, increases buffer clearing time to 19 seconds for large/fine JPEGs. Buffer depth is halved if long exposure noise reduction is enabled, even if you're using fast shutter speeds. Very fast. Times measured with a Lexar 80x CF card. Generous buffer depth, good clearing time given the image size. |
| Cycle Time, continuous low mode, max/min resolution JPEGs | 0.25 (3.98 fps) |
Speed can be set from 1 to 7 frames/second in this mode, these results are for a setting of 4fps. Shoots at the same speed for large/fine images or lowest resolution images. Times are averages.
Shoots 20 frames regardless of image size/quality, or the shooting speed that's selected. When buffer is full, shooting stops until you release and re-press the shutter button. Depending on how much of the buffer has emptied, you'll get anywhere from one to 20 new frames before pausing again. Worst case, repeatedly pressing the shutter button when the buffer is totally full is about 1.06 seconds per shot. Buffer clears in 20 seconds for large/fine JPEGs. Setting noise reduction to High decreases buffer depth to 18 frames, increases clearing times to 22 seconds. Buffer depth is halved if long exposure noise reduction is enabled, even if you're using fast shutter speeds. In lowest res, shoots 20 frames this fast, buffer clears in 1.3 seconds. Times measured with Lexar 80x CF card. Good buffer depth, good clearing time for the image size. |
| Cycle Time, continuous low mode, RAW / RAW+JPEG | 0.25 (3.98 fps) |
Speed can be set from 1 to 7 frames/second in this mode, these results are for a setting of 4fps. Shoots at the same speed for RAW files or RAW + large/fine JPEG files. Times are averages.
Buffer depth is 17 frames for RAW, 16 frames for RAW+JPEG. Buffer depth is halved if long exposure noise reduction is enabled, even if you're using fast shutter speeds. When buffer is full, shooting stops until you release and re-press the shutter button. Depending on how much of the buffer has emptied, you'll get anywhere from one to 17 new frames before pausing again. Worst case, repeatedly pressing the shutter button when the buffer is totally full is about 1.8 seconds per shot for RAW files, or 6.8 seconds per shot for RAW+JPEG files. Buffer clears in 43.5 seconds for RAW shots, in 63 seconds for RAW+JPEG images. Times measured with Lexar 80x CF card. Buffer depth is OK, but not especially impressive for this level of camera. Buffer clearing time is quite good for the image size. |
| Cycle Time, continuous high mode, max/min resolution | 0.19 (5.3 fps) |
Shoots at the same speed for large/fine images or lowest resolution images. Times are averages. Shoots a burst of 20 images this fast in either mode.
Buffer clears in 25.5 seconds for large/fine images, 1.3 seconds for small/basic. Enabling high-ISO noise reduction cuts buffer depth to 20 frames, but buffer clearing for large/fine images also decreases slightly to 22 seconds. Buffer depth is halved if long exposure noise reduction is enabled, even if you're using fast shutter speeds. Times measured with Lexar 80x CF card. Good speed, buffer depth is good, buffer clearing speed is good, considering the image size. |
| Cycle Time, continuous high mode, RAW / RAW+JPEG | 0.19 (5.3 fps) |
Shoots at the same speed for RAW files or RAW + large/fine JPEG files. Times are averages. Shoots this fast for 17 RAW images or 16 RAW+JPEG. Buffer clears in 47 seconds for RAW shots, in 65 seconds for RAW+JPEG images.
High ISO noise reduction cuts buffer depth to 16 frames in either mode, clearing time drops to 42 seconds for RAW+JPEG. Buffer depth is halved if long exposure noise reduction is enabled, even if you're using fast shutter speeds. Times measured with Lexar 80x CF card. Decent speed, and buffer depth. Buffer clearing speed is good, at ~3.3 seconds/frame for RAW+JPEG, 2.8 sec/frame for RAW only. |
| Cycle Time, continuous low mode, max/min resolution, Speed Crop | 0.14 (7.1 fps) |
Speed can be set from 1 to 7 frames/second in this mode, these results are for a setting of 7fps. Shoots at the same speed for large/fine images or lowest resolution images. Times are averages.
Shoots 34 frames this fast in large/fine mode (6.8 megapixels in Speed Crop mode). Buffer clears in 24 seconds for large/fine, less than 0.5 second for small/basic files. Buffer depth is halved if long exposure noise reduction is enabled, even if you're using fast shutter speeds. Times measured with Lexar 80x CF card. Very good buffer depth in this mode, good buffer clearing speed. |
| Cycle Time, continuous low mode, RAW / RAW+JPEG, Speed Crop | 0.14 (7.1 fps) |
Speed can be set from 1 to 7 frames/second in this mode, these results are for a setting of 7fps. Shoots at the same speed for RAW files or RAW + large/fine JPEG files. Times are averages.
Shoots this fast for 29 RAW frames, 27 RAW+JPEG. Buffer depth is halved if long exposure noise reduction is enabled, even if you're using fast shutter speeds. Buffer clears in 42 seconds for RAW shots, in 60 seconds for RAW+JPEG images. Times measured with Lexar 80x CF card. Very good buffer depth in this mode, good buffer clearing speed. |
| Cycle Time, continuous high mode, max/min resolution, Speed Crop | 0.12 (8.0 fps) |
Shoots at the same speed for large/fine images or lowest resolution images. Times are averages.
Shoots a burst of 34 images this fast in either mode. Buffer depth is halved if long exposure noise reduction is enabled, even if you're using fast shutter speeds. Buffer clears in 26 seconds for large/fine images, 3.7 for small/basic ones. High ISO noise reduction reduces buffer depth to 32 frames, clearing times goes to 21.6 seconds for large/fine. Times measured with Lexar 80x CF card. Very good buffer depth in this mode, good buffer clearing speed. |
| Cycle Time, continuous high mode, RAW / RAW+JPEG, Speed Crop | 0.13 (8.0 fps) |
Shoots at the same speed for RAW files or RAW + large/fine JPEG files. Times are averages.
Shoots this fast for 29 RAW frames, 27 RAW+JPEG. Buffer depth is halved if long exposure noise reduction is enabled, even if you're using fast shutter speeds. Buffer clears in 46 seconds for RAW shots, in 60 seconds for RAW+JPEG images. Times measured with Lexar 80x CF card. Very good buffer depth in this mode, good buffer clearing speed. |
Very fast shutter response, very good cycle times, good buffer capacity, very good buffer clearing speed. By any measure, the Nikon D2X is a fast camera. Provided you leave its Review function off, shutter lag is only 44 msec (0.044 sec) in most any operating mode. With Review enabled, the shutter delay increases to 0.163 sec. Shot to shot cycle times are very good as well, at 0.22 - 0.23 second in single-shot mode when the review function is disabled. In continuous-high mode, cycle time is 5.3 frames/second when shooting at the camera's full 12.2 megapixel resolution, or 8.0 frames/second in its "Speed Crop" mode, which yields 6.8 megapixel files. Buffer depth is quite good, at ~16 RAW or 20 JPEG frames in full resolution mode, or 29 RAW and 34 JPEG frames in "Speed Crop" mode. Buffer clearing times are also very good, at just over one second/frame for full-res JPEG files, and 2.8 second/frame for full-res RAW files. Clearing speeds increase to 0.7 sec/frame and 1.6 sec/frame respectively for Speed Crop images. At 3.3 second/frame, the clearing speed for full-resolution 12.2 megapixel RAW+JPEG images is particularly impressive given the high resolution of the files. (For comparison, the Canon EOS-1D Mark II clears its buffer at rate of about 4.1 seconds/frame, and its frames are only about 66% the size of the D2X's.)
There's a very important note to make about buffer capacity and noise reduction settings in the D2X though: Buffer depth is halved if long-exposure noise reduction is enabled, even if you're using fast shutter speeds. Apparently the D2X's processor reserves buffer space for dark frames if its long-exposure noise reduction option is enabled, regardless of the shutter speed actually in use. You should therefore leave the long-exposure noise reduction option off unless you're actually going to be needing it.
By any measure, the Nikon D2X is a very fast camera with excellent buffer depth. Compared to its most obvious competitor, the Canon EOS-1D Mark II, the D2X has a JPEG buffer capacity of roughly 20 full-resolution files vs 33 or so, but its RAW and RAW+JPEG capacity is close to the same. (17 full-resolution RAW frames vs 19 for the 1D Mark II.) Given the difference in resolution between the two cameras though, a more fair comparison might be between the 1D Mark II and the D2X's "Speed Crop" mode. With image dimensions of 3,126 x 2,136, the linear dimensions of the D2X's Speed Crop images are only about 8% smaller than those of the 1D Mark II, an almost insignificant difference in resolution. On that basis, the two cameras are in almost a dead heat for JPEG buffer capacity, and the D2X actually wins handily in the RAW category, with a capacity of 27 frames to the 1D Mark II's 19. The D2X also clears its buffer more quickly as well, writing its 27 RAW images to disk in about the same time as it takes the 1D Mark II to write its 19. All in all, a very solid performance from the D2X.
Operation and User Interface
Though some of the control buttons have moved around and a few new ones have been added, I found the user interface on the Nikon D2X surprisingly straightforward and simple to use, even more so than I did the earlier D2H model. The LCD menu is a five-tab system that divides up functions between Playback, Camera, Custom Settings, and Set-up, with the addition of a Recent Settings menu. This simply lists all of the latest menu items you've accessed for quick changes. While many of the camera's options can be accessed via the excellent "plain English" menu system, all the most common shooting controls are available via the camera's external buttons and knobs. You can also program the operation of some of the buttons, to configure the camera for your particular shooting requirements. As I noted earlier, Nikon makes a big deal of their digital SLR's "cameraness," defined as how well/easily they function as cameras.
Control Enumeration

Depth of Field Preview Button: Located on the front of the camera, on the top left side (viewed from the front) next to the lens, this button allows you to check the depth of field for the current aperture setting by looking through the viewfinder, which provides an approximate idea of the depth of field. Note that since less light can enter through the smaller aperture, the viewfinder becomes correspondingly dimmer while the Depth of Field Preview button is pressed.

Function Button: Beneath the Depth of Field Preview button, this button can be programmed through the Custom Settings menu to work with the Main command dial to control one of many exposure options, including Flash Value Lock, Flash Value Lock / Lens Data, One Stop Speed / Aperture, AE Lock / AF Lock, Flash Off, Bracketing Burst, Matrix Metering, Center-Weighted Metering, Spot Metering, and High-speed crop.

Lens Release Button: Also on the front of the camera, on the right side next to the lens, this button releases the lens from its mount when pressed.

Focus Mode Selector Switch: Beneath the Lens Release button,
this switch sets the focus mode to Manual, Single Servo AF, or Continuous
Servo AF.
![]()
Sub-Command Dial: Positioned at the top front of the hand grip, just
beneath the Power switch, this dial is used for selecting secondary values
in many operating modes and menus. The dial also adjusts the aperture in
Aperture Priority and Manual exposure modes, and selects from a range of
equivalent exposure settings in Flexible Program mode.

Power Switch: Encircling the Shutter button on the top right of the
camera, this switch turns the camera on and off. By turning it slightly past
the "On" position to the "Light Bulb" icon, it also turns
on the backlights for both status display panels (on top and on the back
panel) when shooting in dark situations. The switch is spring-loaded to return
itself to the "On" position after turning on the backlights, which
will remain on while the exposure meter is active (that is, for a few seconds
after a half-press of the shutter button), or until the shutter is released.
Shutter Button (see image above): In the center of the Power switch,
on the top of the camera, this button sets exposure and focus when halfway
pressed and fires the shutter when fully pressed.
![]()
Exposure Compensation Button: Directly behind the Shutter button on the top of the camera, this button sets the Exposure Compensation from –5 to +5 exposure equivalents (EV) in one-third, one-half, or one-step increments when pressed while turning the Main command dial.
![]()
Exposure Mode / Format Button: Just to the left of the Exposure Compensation button, pressing this button while turning the Main command dial sets the exposure mode (Program AE, Manual, Aperture Priority, or Shutter Speed Priority). In any mode, pressing this button simultaneously with the Erase button (also labeled Format) for two seconds, then releasing both buttons momentarily and re-pressing them formats the memory card.
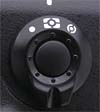
Metering Selector: To the left of the Exposure Mode / Format button
on top of the camera (actually on the side of the bulky flash hot-shoe mount),
this selector ring surrounds a small black button. Pressing the button and
turning the ring allows you to select between Spot, Center-Weighted, and
Color Matrix / 3D Color Matrix metering options.

Diopter Adjustment Knob: Directly behind the metering selector, this
knob adjusts the optical viewfinder to accommodate eyeglass wearers. (Range
is -3 to +1 DP.)
![]()
Mode Dial Lock Release: On the top left side of the camera (when looking
at the back), next to the Mode dial, this button releases the Mode dial to
select the camera mode.

Mode Dial: Underneath a set of control buttons on the left side of
the top panel, this notched dial selects between Single Frame, Continuous
Low-Speed Shooting, Continuous High-Speed Shooting, Self-Timer, and Mirror-Up
modes.
Auto Bracketing Button: (See photo of Mode dial above. The Auto Bracket button is the one labeled "BKT".) Positioned on the top of the Mode dial and next to the Flash and Command Lock buttons, this button turns on the Auto Bracketing function and sets the number of frames when pressed while turning the Main command dial. Pressing this button and turning the Sub-Command dial sets the exposure or white balance step size (in EV for exposure, or Mireds for white balance).
Flash Sync Mode Button: (See photo of Mode dial above. Flash sync button is the one with a lightning bolt icon on it.) Behind the Auto Bracketing button, this button cycles between the five flash sync modes (Front-Curtain Sync, Slow-Sync, Rear-Curtain Sync / Slow Rear Curtain Sync, Red-Eye Reduction, and Red-Eye Reduction with Slow-Sync) when held down while turning the Main command dial.
Command Lock Button: (See photo of Mode dial above. Command
Lock is the button with the L inside a white square.) This button locks either
the aperture or shutter speed setting in Aperture Priority and Shutter Priority
exposure modes, when pressed while turning the Sub-Command dial. You can
also lock one value or the other in Manual exposure mode.
![]()
Playback Button: Situated at the top left side of the back panel,
this button activates the LCD monitor and displays the most recently-captured
image.
![]()
Erase / Format Button: To the right of the Playback button, this button
deletes individual images. When pressed in conjunction with the Mode button
for two seconds, then released and both buttons pressed once more, this button
formats the CompactFlash card.

Eyepiece Shutter Lever: Nestled above the left side of the optical
viewfinder, this lever opens and closes the shutter that covers the viewfinder
eyepiece for accurate exposures when using a tripod. (e.g., when your eye
isn't blocking light from entering the rear element of the viewfinder.)

AE/AF Lock Button: Located on the top right side of the back panel,
this button locks the exposure and/or focus when pressed (can be set through
the Custom Settings menu to lock one or the other, or both).
AF-On Button: (see image above) To the right of the AE/AF Lock button,
this button sets the autofocus when pressed (performs the same function as
halfway pressing the Shutter button).
![]()
Main command Dial: The final control on the top right of the back
panel, this dial is used to select various camera settings when turned in
conjunction with a number of control buttons. In Aperture Priority and Shutter
Speed Priority modes, this dial sets either the aperture or shutter speed
settings. In Manual exposure mode, the dial sets the shutter speed.
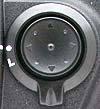
MultiSelector: Beneath the Command dial, on the right side of the back panel, this rocker button with its associated locking switch controls the autofocus area in Record mode. The switch unlocks the autofocus area and the four arrow buttons let you decide where to set the main autofocus area (by choosing one of the 11 brackets displayed in the viewfinder). In Playback mode, the rocker toggle button's up and down arrows scroll through captured images while the right and left arrow buttons cycle through various information displays for each image. The arrow buttons also navigate through the LCD menu system, and pressing down on the center of the MultiSelector confirms some selections, and re-centers the AF point.

AF Area Mode Selector: Below the Five-Way Arrow Rocker pad, this selector sets the AF area mode to Single Area, Dynamic Area, Group Dynamic, or Dynamic Area AF with Closest Subject Priority.
![]()
 Voice
Memo Button: Below the lower left corner of the LCD monitor, this
button lets you record as many as 60 seconds of sound to accompany a captured
image. The camera records as long as the button is held down.
Voice
Memo Button: Below the lower left corner of the LCD monitor, this
button lets you record as many as 60 seconds of sound to accompany a captured
image. The camera records as long as the button is held down.

Menu Button: The first button in a series lining the left side of
the LCD monitor, this button calls up the LCD menu system.


Protect Button: Below the Index button, this button write-protects
individual images from accidental deletion (except through card formatting).
Pressing this button also removes protection.

Enter / Playback Zoom Button: The final button in the series on the left side of the LCD monitor, this button confirms menu settings in any menu. When a captured image is displayed on the LCD monitor, this button enlarges the image when pressed while turning the Sub-Command dial. Pressing this button while turning the Main command dial shows the full frame with an outline box indicating the area that was enlarged. (You can use the Five-Way Arrow pad to move the selection area and then zoom back in.)

ISO Button: The first button in a series lining the lower side of a
smaller status display panel (directly beneath the LCD monitor), this button
changes the camera’s sensitivity setting (ISO equivalent) when pressed
while turning the Command dial.

Quality Button: To the right of the ISO button, this button
sets the image resolution and quality. Pressing this button and turning the
Command dial adjusts the quality setting, while turning the Sub-Command dial
adjusts the resolution.

White Balance Button: Directly to the right of the Quality button, this button selects the White Balance setting when pressed while turning the Main command dial. Options are Auto, Incandescent, Fluorescent, Direct Sunlight, Flash, Cloudy, Shade, Color Temperature, and Preset (which allows you to manually adjust the white value by using a white card or object as a reference point). All white balance settings (except Color Temperature and Preset) can be adjusted from -3 to +3 by turning the Sub-Command dial (on the front of the hand grip) while holding down the White Balance button
Card Slot Release Button: Hidden beneath a plastic flap on the back panel, just below the Five-Way Arrow Rocker pad, this button releases the CompactFlash card slot cover so that the card can be removed.

Vertical AF-ON Button: Hidden on the bottom right of the back panel,
this button serves the same purpose as the main AF-ON button, but is used
when shooting vertically.
Vertical Command Dial: (see image above) Directly beside the vertical AF-ON button on the lower right corner of the back panel, this dial serves the same purpose as the Main command dial but is used when shooting vertically.
Vertical Sub-Command Dial: Just beneath the Vertical shutter release button, this dial stands in for the primary Sub-command dial when shooting vertically.

Vertical Shutter Release Button and Lock: Located on the bottom of
the right side of the camera (when looking at the back panel), this locking
Shutter button can be used when shooting vertically. The rotating lock ring
keeps it from accidentally firing when shooting normally.
Camera Modes and Menus
Playback Mode: Accessed by pressing the Playback button, this mode allows you to review captured images, as well as delete or protect them and set them up for printing.
Record Mode: The camera is automatically in Record mode whenever it's powered on (when reviewing images, touching the shutter button immediately readies the camera to shoot a photo). The following exposure modes are available here (accessed by pressing the Mode button and turning the main Command dial):
LCD Menu System: The following menus are available in any camera mode, and are called up by pressing the Menu button.
Playback Menu:
 Delete: Deletes selected images or all images from the memory card.
Shooting Menu:
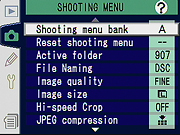 Shooting Menu Bank: Lets you select from four banks of shooting menu options, meaning you can create up to four custom user settings. You can also choose to rename a menu bank for easy identification. Menu bank names are alphanumeric, allow upper and lower case characters, and can be up to 20 characters long.
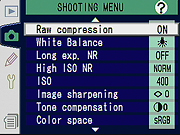 RAW Compression: Determines whether RAW files are compressed when captured. (Default is uncompressed.)
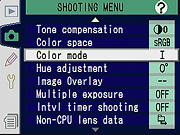 Color Mode: Selects color modes I, II, or III. Mode I (the default) is intended for Portrait shots, and mode III mode is for nature or landscape shots. Mode II is intended for images that will be extensively processed or retouched. A departure from earlier Nikon D-series cameras is that Modes I and III may now be chosen for either sRGB or Adobe RGB color spaces. (Previously, these color modes were only available in sRGB.) Mode II remains available only when Adobe RGB is set as the current color space.
Custom Settings Menu:
Each option accesses a sub-menu of color-coded and numbered options pertaining to a specific subject. The initial screen (shown at right) provides an index into the various groups of sub-menus. Once you're into the second level of the menu system though, you can scroll smoothly through all the entries, regardless of what group they belong to. The color-coding seen in the index screen carries through to the various individual options, making it easy to know where you are in the menu structure at all times. In the description of the various functions below, I've inserted a screen shot corresponding to each of the major menu sections.
 Bank Select: Custom settings can be stored in any of four different banks, this option selects the bank for which Custom Settings are to be adjusted.
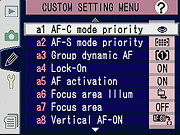 a1 - AF-C Mode Priority: In AF-C mode, give priority to Release Button or Focus. Designates whether photos can be taken whenever the Shutter button is pressed (Release Priority) or when the image is in focus (Focus setting).
 b1 - ISO Auto: Activates the Auto ISO option, which disables the HI-1 and HI-2 ISO boost modes. If the camera can't achieve proper exposure at the ISO you've selected, it will automatically shift it within the range of 100-800.
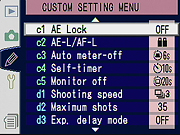 c1 - AE Lock: Controls whether exposure is locked by a press of the AE-L/AF-L button or by either the AE-L/AF-L or Shutter buttons.
 d1 - Shooting Speed: Controls the shooting speed for Low-Speed Continuous Shooting mode. Choices are 1, 2, 3, 4, 5, 6, or 7 frames per second.
 e1 - Flash Sync Speed: Controls the flash sync speed setting, from 1/250 to 1/60. Also enables auto FP high-speed sync with the SB-800 Speedlight, using the "1/250 (auto FP)" setting.
 f1 - Center Button: Determines what functions are available by pressing the center of the Five-Way Arrow pad. Options are divided into Shooting Mode and Playback Mode groups. In Shooting Mode, choices are Center AF Area, Illuminate AF Area, and Not Used. In Playback mode, options are Thumbnail On/Off, Histogram On/Off, and Zoom On/Off.
Setup Menu:
 Format: Formats the memory card, erasing all images on the card, even write-protected ones.
 Voice Memo: Determines whether Voice Memo recording automatically starts after each image, or only when the Voice Memo button is pressed.
Image Storage and Interface
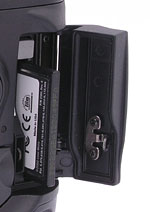 The Nikon D2X uses CompactFlash memory cards for image storage, accommodating Type I and II sizes, as well as Microdrives. The D2X does not come with a memory card, so plan on purchasing one (or several) separately. As with the earlier D-series SLRs from Nikon, I was pleased by the easy accessibility of the CompactFlash slot, letting me quickly change the card while the camera was mounted on a tripod. The D2X utilizes a folder arrangement that allows users to organize images in the camera and a sequential frame counter option to avoid problems with overwriting files when copying them to the computer. It also supports the FAT32 file system, and so supports the use of CF cards larger than 2GB. (Verified by formatting and using a 4GB Lexar card in the camera.)
Captured images can be individually write-protected via the Protect button on the rear panel. Write-protected files are only immune to accidental deletion, not card reformatting. As noted earlier, the camera operates in either normal or "Speed Crop" modes, the latter of which uses only the central 6.8 megapixels of the sensor. There are accordingly two complete sets of image size options, depending on the mode you're operating in. In normal mode, images are saved at sizes of 4,288 x 2,848, 3,216 x 2,136, or 2,144 x 1,424 pixels. In Speed Crop mode, the size options change to 3,216 x 2,136, 2,400 x 1,600, and 1,064 x 1,600 pixels. In either mode, file formats include several levels of compressed JPEG files as well as RGB TIFF and RAW data modes. The "raw" file format stores the data exactly as it comes from the CCD array, either compressed or uncompressed. Since the "raw" format is proprietary though, it can only be processed by programs that specifically support it (unlike JPEG files which almost any program will accept). Nikon provides its own PictureProject software which has basic raw conversion capabilities, and offers the more advanced "Nikon Capture" software as an added-cost option. Eric Hyman's Bibble currently (v4.2.2) supports the Nikon D2X, and it's likely that Mike Chaney's Qimage will do so in future versions since it currently supports other Nikon cameras. Finally, commercial software like Phase One's Capture One (C1) and Adobe's Photoshop CS that supports other Nikon RAW files may also support the D2X in future versions. (Phase One has announced that Capture One will support the D2X in its next release, v3.7, and Adobe has stated that their Camera Raw filter will support the D2X in early May, 2005.) One note: It's not clear whether the compressed RAW format uses a lossless compression, as is most often the case for such formats. The manual for the D2X says that the compressed NEF format reduces file size "... by about 40-50% with almost no effect on image quality." - The use of the word "almost" suggests that the compression may not be entirely lossless. Note though, that the raw CCD data takes less than half the space of an RGB TIFF image, even when it isn't compressed.
Below are the approximate number of images and their compression ratios for a 256MB CompactFlash card in the D2X, that really being about the smallest card size I can see anyone using with this camera. (Think about it, 100 images is only about 12 seconds at 8 frames per second.)
|
Resolution/Quality 256 MB Memory Card | Fine | Normal |
|
(NEF) |
| |
| 4288 x 2848 | Images (Avg size) |
23 11.1 MB |
46 5.6 MB | 90 2.8 MB | 12 21.3 MB | 6 39.4 MB |
| Approx. Compression |
3:1 | 7:1 | 13:1 | 2:1 | - | |
| 3216 x 2136 |
Images (Avg size) |
40 6.3 MB |
79 3.2 MB |
156 1.6 MB |
- | - |
| Approx. Compression |
3:1 | 6:1 | 13:1 | - | - | |
| 2144 x 1424 | Images (Avg size) |
90 2.8 MB | 177 1.4 MB | 325 786 KB | - | - |
| Approx. Compression |
3:1 | 6:1 | 12:1 | - | - | |
| 3216 x 2136 speed crop |
Images (Avg size) |
40 6.3 MB |
79 3.2 MB |
156 1.6 MB |
21 11.9 MB |
11 22.3 MB |
| Approx. Compression |
3:1 | 6:1 | 13:1 | 2:1 | - | |
| 2400 x 1600 speed crop |
Images (Avg size) |
72 3.6 MB | 139 1.8 MB | 260 983 KB | - | - |
| Approx. Compression |
3:1 | 6:1 | 12:1 | - | - | |
| 1600 x 1064 speed crop | Images (Avg size) |
156 1.6 MB | 300 852 KB |
550 465 KB | - | - |
| Approx. Compression |
3:1 | 6:1 | 11:1 | - | - | |
The D2X also offers a RAW + JPEG recording mode, but I haven't shown the sizes above, as the space used will just be the combination of that required for the RAW and JPEG files of each corresponding size/quality. A welcome addition to the D2X is its ability to save JPEG files of either Fine, Normal, or Basic quality in its RAW + JPEG mode.
The Nikon D2X connects to a host computer via a USB 2.0 interface. Downloading files from a Lexar 80x CF card in the D2X to my Sony desktop running Windows XP (Pentium IV, 2.4 GHz), I clocked it at 3397 KBytes/second, an absolutely blazing pace. (Cameras with slow USB interfaces run as low as 300 KB/s, cameras with fast v1.1 interfaces run as high as 600 KB/s. Cameras with USB v2.0 interfaces run as fast as several megabytes/second, the D2X is about as fast as I've seen.)
WiFi Connection
Nikon has had a WiFi (802.11b) connectivity option available for their high-end digital SLRs for a while now, in the form of the WT-1A Wireless Transmitter. They recently announced a significantly upgraded version though, in the form of the WT-2A, which currently only works with the D2X. Besides the higher transfer rates of the 802.11g protocol (backwards compatible with 802.11b), the new transmitter supports PTP-IP connections as well as the FTP protocol supported by the WT-1A. Provision has also been made for connecting to secure WiFi networks using the WEP protocol, and the new unit can also operate in "ad hoc" mode and respond to DHCP servers for IP address assignment, for much easier connection. For the truly paranoid, the WT-2A also supports TKIP (Temporal Key Integrity Protocol), which rotates security keys on a periodic basis, to prevent the link encryption from being cracked via brute force hacks.
A big plus for the new WT-2A is that its support for PTP/IP permits not only simplified setup and connection, but allows Nikon Capture 4.2 to control the camera wirelessly. This means you can control any aspect of the camera that could be managed over a wired connection via a wireless link. (Fantastic news for many event, sports, and nature photographers.)
We had an opportunity to work with the Nikon D2X and WT-2A at a Nikon rollout event for the camera, and found that the combination worked very smoothly. We didn't time the data transfers, but our impression was that large/fine JPEG images took on the order of 5-6 seconds to come across the link. Even studio photographers should find the combination of D2X, WT-2A, and Nikon Capture singularly useful, as it permits previewing each image on a computer monitor's screen in Nikon Capture as you shoot them. - We saw the value of this in a lighting workshop conducted by the inimitable Joe McNally, where we could effortlessly check light levels, color balance, and focus on the computer screen nearly in real-time. (Joe pointed out a huge benefit of this arrangement for commercial photographers, in that it provides a way to get the Art Director clear of the action while you're shooting, ensconced safely in a remote corner of the studio with their latte, a computer screen, and an assistant trained in extreme patience. ;-)
Returning to our own studio after the rollout event, we unfortunately ran out of time on our loan period for the camera before we had a chance to set up a WiFi connection using our own computers and WiFi network. As a result, I don't have any screen shots of a live connection between the D2X and a computer to show you, nor exact timing numbers for file transfers, but I did collect a representative smattering of the menu screens that control the WiFi connection from the camera's side.
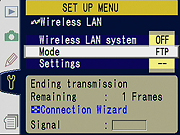 |
Here's the first menu screen for the wireless connection, accessed from the D2X's Setup menu. Here you can turn the WT-2A on or off, set the transfer mode to either FTP (shown) or PTP/IP, or step into the settings menu to configure network protocols and operating modes of the camera/transmitter combination. There's also a connection wizard available to help in setting up the WiFi connection. (It's still decidedly non-trivial, but light years ahead of the user interface on the original WT-1A.) |
 |
This is the main wireless LAN settings screen. Options here include a sub-menu for network settings, an option for "pairing" to establish a link to a specific host computer running Nikon's Wireless Connecting Utility, and options to set when and how the camera will transfer images.
Auto Send does just what you'd expect, transmitting each image as it's captured. (An alternative is to select individual images after reviewing them on the camera's LCD screen, and then transmitting only those.) Other options include whether to delete the images from the local memory card after transmission (sounds like a bad idea to me), send the files as JPEG or RAW+JPEG, to select the folder on the CF card for transmission, and to deselect all images currently queued for transmission. |
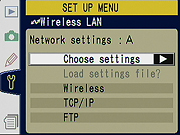 |
This is the main screen for Wireless LAN setup. Sub-menus from here let you configure network, TCP/IP, and FTP settings. |
 |
The first of two screens for network setup. You can set the SSID of the network you want to attach to via an alphanumeric "typewriter" screen (painfully slow to use, but you thankfully shouldn't need to use it very often). You can also select Ad hoc or Enterprise communications modes. Ad hoc supports direct peer-to-peer wireless connections, but is only available with the 802.11b standard. The faster 802.11g standard supports full connection via an access point. The second LAN screen lets you choose encryption method and set or edit the encryption key. |
 |
Here's the first of three screens for configuring the TCP/IP interface. You can obtain an IP address automatically from a DHCP server, or set the address and mask manually, as well as the address of a DNS server, if one is to be used. |
 |
Here's the first of four FTP setup screens, if you intend to transfer files that way, rather than via PTP/IP. (PTP/IP is used to connect to Nikon Capture, but FTP is a better way to go if you're moving large numbers of files and want more control over the transfer and the ability to keep backup copies of the images on your memory card. This screen sets the IP address, port, and transfer mode for the FTP server. Subsequent screens specify the login name and password, home folder for incoming files, and proxy server, if one is to be used. |
There's quite a bit more we could talk about regarding wireless transfers with the D2X and WT-2A, it's really deserving of an entire review in and of itself. The foregoing should whet your appetite, and give technically oriented readers a bit of an idea of how the WT-2A works, and what sorts of connections and environments it can support.
IMPORTANT SECURITY NOTE
While wireless connections offer incredible flexibility and open new opportunities for shooting and workflow, they can also carry some risk. FTP transfers involve transmitting the user name and password for the FTP logon over the wireless link. If you're not using WEP security, that means that your account information is being broadcast "in the clear," an open invitation for any hacker with a WiFi packet sniffer to gain access to your server. If you intend to transfer files from the D2X wirelessly using FTP, we strongly encourage you to only do so via a secure network. - And note too, that most public networks with password-protected logons only protect the network, not your computer or the server on the other end of the connection. Once someone gains access to the network, they can still sniff your packets, even if the network is protected against access by people without the network key. Also, even with WEP-protected WiFi connections, once the signal passes out of the WiFi realm and into the world of wired connections, FTP user names and passwords are once again "in the clear," subject to being sniffed out by people with malicious intent. If you do need to use FTP transfers in any public environment (sporting events, trade shows, etc.), at the very least, change the FTP password on a daily basis, and make sure that the account used to perform the FTP transfers has maximally restrictive privileges on the server.
Video Out
The D2X comes with an A/V cable for connection to a television set or VCR, and the video signal can be set to NTSC or PAL (at a slightly reduced resolution) through the LCD menu. This allows images to be played back on the TV screen and recorded to video tape, with all the menu options available.
Power
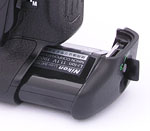 The Nikon D2X uses an EN-EL4 lithium-ion battery pack (11.1 volts, 1900mAh that communicates a variety of information to the camera. Both a battery and charger come with the camera. You can also purchase an EH-6 AC adapter separately (100-240 V AC) which is useful for saving battery power when working in the studio, or performing mundane tasks such as reviewing or downloading large numbers of images. An indicator on the status display panel lets you know approximately how much battery power is left and if no segments appear in the indicator at all, the battery is completely exhausted. (You can also view battery details through the Set-Up menu.)
The D2X can also be run on AC power through a DC IN terminal located under a rubber cover on the left side of the camera. The battery pack is held in the camera by a latching cover that's normally attached to the battery itself, but which can be removed, making the battery fit into an equipment bag pocket more easily. In addition to the primary battery pack, there's also a small Lithium coin cell located in the top of the main battery compartment. (The coin cell apparently does nothing more than provide backup power to preserve camera settings and date/time data when the main battery is removed, so it should last more or less indefinitely.)
Because the Nikon D2X uses a custom external power connector, we couldn't conduct the direct power-consumption measurements on it that we normally do. That said though, the D2X's battery life throughout our testing was exceptionally good. Battery life with SLRs is a little hard to peg, because it's going to vary all over the place, depending on what lens is in use, how much the lens' focus motor is used, how much the rear-panel LCD is used, whether you're writing JPEGs or NEF raw-format files (RAW and TIFF files take more power, probably just because they keep the CF card circuitry humming longer for each file), use long shutter speeds (holding the shutter open consumes power), or use the optional WiFi transmitters. In the manual, Nikon offers two different battery-life projections, based on two different scenarios, with claimed battery life ranging from 850 to 2600 shots. We didn't conduct any formal test, but easily got a thousand or more shots per charge in our own usage.
Included Software
The D2X ships with the Nikon's PictureProject software, which provides basic manipulation and cataloging capabilities for images captured by the camera, and which can interpret the raw CCD format "NEF" files. A much more advanced package called Nikon Capture is available separately, which offers comprehensive capabilities for RAW-file manipulation as well as camera control. For other options, readers may want to check out various third-party software for RAW file manipulation and conversion. Eric Hyman's Bibble currently (v4.2.2) supports the D2X, and it's likely that Mike Chaney's Qimage will do so in future versions since it currently supports other Nikon cameras. Finally, commercial software like Phase One's Capture One (C1) and Adobe's Photoshop CS that supports other Nikon RAW files may also support the D2X in future versions. (Phase One has announced that Capture One will support the D2X in its next release, v3.7, and Adobe has stated that their Camera Raw filter will support the D2X in early May, 2005.)
In the Box
Included in the box with the Nikon D2X are the following items:
(Note that included items may vary by country or region.)
Test Results
In keeping with my standard test policy, the comments given here summarize only my key findings.
For a more complete commentary on each of the test images, see the Nikon D2X's "pictures" page.
For an even more detailed scrutiny of the D2x's imaging performance, see the D2x In-Depth Image Analysis page.
As with all Imaging Resource product tests, I encourage you to let your own eyes be the judge of how well the camera performed. Explore the images on the pictures page or in our D2X Photo Gallery, to see how the D2X's images compare to other cameras you may be considering.
Not sure which camera to buy? Let your eyes be the ultimate judge! Visit our Comparometer(tm) to compare images from the D2X with those from other cameras you may be considering. The proof is in the pictures, so let your own eyes decide which you like best!
Conclusion
| Free Photo Lessons | |
|
Reader Comments!
Questions, comments or controversy on this product? Click
this link to see what other Imaging Resource readers have had to say about
the Nikon D2X, or add comments of your own!