Minolta Dimage 7HiMinolta updates their revolutionary five-megapixel electronic SLR with an external flash sync connection, faster continuous mode, an "extra fine" JPEG option, and increased color space flexibility.<<Executive Overview :(Previous) | (Next): Viewfinder>> Page 3:DesignReview First Posted: 10/15/2002 |
Design
Released as an update to the well-received Minolta Dimage 7i, the Dimage 7Hi looks very similar externally, though now with an all-black body. The Dimage 7Hi continues with the true 5.0-megapixel CCD, exceptional 7x optical zoom lens, fine-grained image controls, and optional fully manual exposure control present on the Dimage 7i model, but adds a handful of key improvements of interest to studio shooters and professional or semi-professional users.
The Dimage 7Hi is similar in design to a traditional 35mm SLR, but an elongated lens barrel on the left side of the camera gives the camera more of a "T" shape, extending behind and in front of the body and hand grip on the right. The D7Hi's rather bulky body measures a substantial 4.61 x 3.56 x 4.43 inches (117 x 90.5 x 112.5 millimeters) with the lens at its shortest position, but the combination of magnesium alloy chassis and (mostly) plastic body panels make it surprisingly lightweight for its size (approximately 18.7 ounces, or 530 grams without the batteries or CompactFlash card). An accessory camera bag would certainly be the preferred method of carrying and storing the Dimage 7Hi, but the positions of the eyelets for the included neck strap at least let the camera hang level when it's suspended from them. (This last being a detail I wish more camera manufacturers paid attention to.)
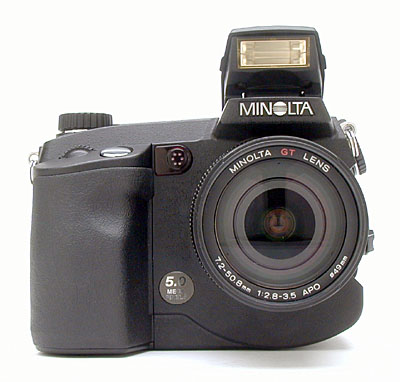
The camera's front panel houses the Minolta GT 7x Zoom lens, Self-Timer light, microphone, and the front of the pop-up flash compartment. Encircling the lens are two adjustment rings: a rubberized grip on the front end for actuating the zoom lens, and a ribbed Manual Focus ring at the base of the lens. A set of 49mm filter threads on the inside lip of the zoom lens accommodates filters and conversion kit accessories. A pair of tabs on the outside edge of the lens serve as a mount for the accessory lens hood. Also visible from the front of the camera are the Shutter button and Selector wheel, located at the top of the hand grip. An indentation at the top of the hand grip comfortably cradles your middle finger as it curls around the grip. Additionally, a rubbery coating overlays the hand grip providing more friction for a more secure grasp.
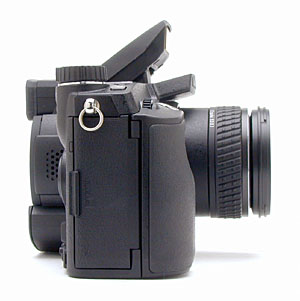
The right side of the camera holds the CompactFlash memory card slot, covered by a hinged plastic door. A diagram on the inside of the compartment door illustrates the proper method of inserting the memory card, and a small black latch on the right ejects the card from the camera (the latch must be unfolded from the bottom into a vertical position and then pressed to eject the card). Next to the eject button is a USB jack for direct connection to a computer. On the outside of the CompactFlash compartment, a tiny red light (near the top left corner of the compartment door) indicates when the camera is accessing the memory card. (Do not open the compartment door when this light is on, to avoid corrupting data on your memory card.) At the top of the right panel is one of the two neck strap attachment eyelets. Also visible from this angle is the camera's speaker, on the side of the LCD monitor.
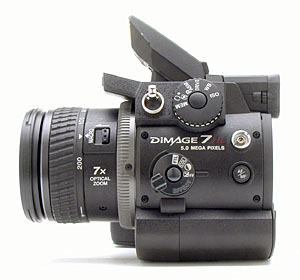
The left side of the camera features a host of controls, including the Function dial, flash sync terminal, Effects dial, Auto/Manual Focus button, and Macro switch (on the side of the lens). The Function dial, located at the top of the panel, controls the Memory settings, Metering mode, Exposure mode, Drive mode (Self-Timer, Continuous Shooting, etc.), White Balance, and ISO. The Effects button lets you adjust Contrast, Exposure Compensation, Color Saturation, and effects Filters in conveniently small increments. Both dials have buttons in the center that activate whatever function you've selected with that dial. The Focus button simply switches back and forth between Auto and Manual focus modes. A Macro switch on the lens barrel activates the Macro shooting mode, when the lens is set to either of its two macro-compatible zoom positions (a small range of telephoto focal lengths or full wide angle). The second neck strap attachment eyelet is at the top next to the Function dial. Also visible on this side, at the edge of the electronic viewfinder eyepiece, is the diopter adjustment dial, which adjusts the viewfinder display to accommodate eyeglass wearers.
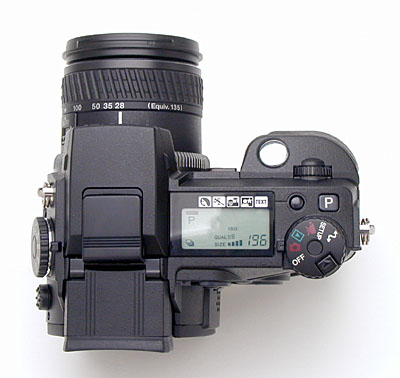
The top panel accommodates the pop-up flash compartment, with two small tabs on either side with which to open the flash, and an external flash hot shoe on top, protected by a sliding plastic cover that is completely removable from the camera body. The hot shoe employs a custom electrode setup and mounting bracket for Minolta accessory flash units, and so isn't compatible with standard hot-shoe flashes. In addition, there are a number of controls that access various camera functions, including the Mode Dial / Main Power switch, a Shutter button, a Setting Selector wheel, and a small Data Panel display that shows battery status, camera settings, and the number of images remaining. Finally, a Subject Program button (directly adjacent to the Data panel) selects one of five specialized shooting presets: Portrait, Sports Action, Sunset, Night Portrait, and Text.
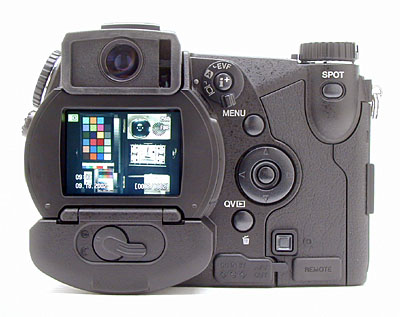
The remaining controls are on the camera's back panel, along with the electronic viewfinder eyepiece, LCD monitor, and battery compartment. The Dimage 7Hi's impressive electronic viewfinder (EVF) features a reflective, ferroelectric display that translates into a very clear and bright viewfinder display. The viewfinder also tilts upward almost 90 degrees, offering a variety of viewing angles. When the camera is set to the Auto Display mode, an infrared sensor on the right side of the viewfinder eyepiece senses when your eye is near the viewfinder and automatically activates the EVF display. Control buttons on the back panel include the Display Mode switch (near the viewfinder eyepiece), which lets you choose between EVF and LCD display, or Auto switching between the two; an Information (i+) button in the center of the Display mode switch, used for changing viewfinder information overlays and alternating between full-image and index displays in Playback mode; a Menu button, a Four-Way controller for scrolling through and selecting menu options, a Quickview / Delete button; a Digital Zoom button near the bottom of the back panel; and a Spot (AE lock) button located just below the Mode Dial in the upper right corner. Along the bottom edge are two sets of body openings, covered by flexible plastic flaps that fit snugly into place. The left houses the DC In and Video Out jacks, and the right accepts the Remote control connector plug (for the optional remote control unit). The battery compartment is just beneath the LCD monitor, and has a latch to keep the door closed. Most importantly, back-panel access lets you quickly change batteries while the camera is mounted on a tripod (many digicams put the battery compartment on the bottom panel, too close to the tripod mount). The battery compartment door is quite stiff, requiring a good bit of pressure to close it enough to flip the latch closed. From my own battery testing though, I've learned that loose battery contacts can waste a lot of battery power. Consequently, I'm pleased whenever I see a battery compartment design that applies plenty of pressure to the contacts.
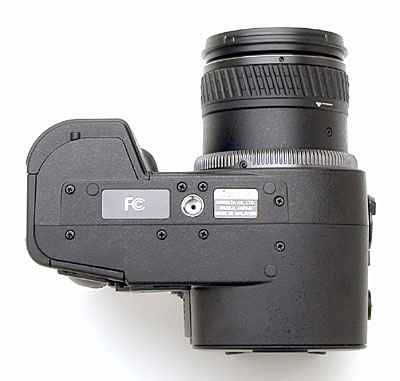
Despite the slight curve of the battery compartment beneath the lens, the camera's
bottom panel is fairly flat. A metal, threaded tripod mount is located in the
front center of the back panel, just slightly to one side of the center of gravity.
(It's also well to one side of the center axis of the lens, a minor issue when
shooting successive images for panorama-stitching.) I was pleased to see plenty
of flat space around the tripod socket, making for more stable support of the
camera when it's so mounted.
Reader Comments! --> Visit our discussion forum for the Minolta Dimage 7Hi!

Follow Imaging Resource: