|
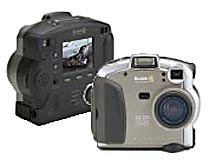
Kodak, DC220 Digital Camera A million pixels plus powerful "Digita" scripting! |
 |
|
1,152 x 864 pixel resolution |
|
|
2X optical zoom, + 2X digital | |
|
|
Optical and LCD viewfinder | |
|
|
Removable CompactFlash memory (8MB incl) | |
|
|
Serial, IrDA, USB bus high-speed computer I/F | |
|
|
Powerful "Digita" scripting for custom
apps |
Kodak has long been a leader in digital imaging, having created some of
the very first all-digital cameras as long ago as 1991. With the DC220, they
extend the success of their earlier DC210, offering essentially the same sensor
and optical package, but extending its capabilities significantly through the
addition of FlashPoint's
"scriptable" Digita operating system and increased exposure flexibility.![]()
With deep roots in conventional photography,
Kodak's digital cameras have reflected a clear sense that what people want to do
with digital cameras is take pictures. With the DC220, they also seem to be
offering more opportunities for third parties to integrate the camera into
customized applications and workflows. As of this writing (September, 1998),
details on the Digita programming language built into the camera are beginning
to become more widely available, so most of our focus in this review will be
upon the DC220's picture-taking abilities. (Check the links at the bottom of the
review though, for sites with more info on scripting.)![]()
Kodak rates the DC220 as suitable for producing
prints up to about 5x7 inches (about 13x18 cm). While the output results will
obviously depend heavily on the printer involved, we tend to agree with Kodak's
assessment. (In fact, the output on lower-quality "business-grade" inkjet
printers will probably look fine a bit larger than Kodak's suggested
limit.)![]()
First Impressions
The DC220 follows the
design style established by the earlier DC210, but in size and layout is more of
a departure from the appearance of film-based point & shoots. It does still
look more like a camera than a computer peripheral, preserving the visual
familiarity of the DC210. The DC220 is clearly not intended to be a "pocket"
camera though, weighing in at a hefty 1.2 pounds (525g) without its four AA-cell
batteries installed, and measuring 4.6 x 2.2 x 4.2 inches (118 x 57 x 106
mm.)![]()
Viewfinder
There's
been a debate in the marketplace for some time now, over how best to handle the
viewfinder function for digital cameras: LCD panels provide a "real-time" and
generally accurate view of what the sensor is actually seeing, while optical
viewfinders don't wash out in bright sunlight or gobble battery power.
Increasingly, this quandary is being resolved by providing both, allowing the
user to choose either, depending on the particulars of the shooting situation.
Following this trend, the DC220 has both an optical viewfinder and 2-inch LCD
panel, which can be turned on when the camera is in capture mode, to "preview"
images before they're captured. At other times, the LCD is used for reviewing
previously-captured photos, or to display menus used for setting camera status.
Like all current-technology LCDs though, the view panel in the DC220 is
power-hungry: Either get some good-quality rechargeable batteries, or limit your
LCD usage!![]()
The optical
viewfinder of the DC220 is clear and bright, and varies its focal length to
track the operation of the zoom lens. It is about typically accurate for digital
camera viewfinders, showing 91% of the CCD frame at the wide angle end of the
zoom range, dropping to 87% at the telephoto end. Our test sample's viewfinder
was slightly biased toward the right-hand side of the scene, meaning that the
camera actually captured more subject area on the left side of the subject than
on the right. The viewfinder has a moderately high "eyepoint," making it usable
for eyeglass wearers, although no diopter adjustment is provided to compensate
for impaired vision directly. The viewfinder also has the desirable
characteristic of being relatively insensitive to lateral eye position: The view
doesn't change at all if your eye happens to be off-center in any direction.
Finally, addressing a complaint we had with the DC210, the viewfinder and LCD
panel are placed such that most folks' noses won't smudge the LCD while they're
looking through the viewfinder.![]()
We've
found the LCD viewfinders on Kodak cameras to be significantly more accurate
than those on most digital point & shoots, and the DC220 continues this
welcome tradition: When operating in viewfinder mode, the '220s LCD is
absolutely accurate, and can be relied upon to display exactly what the CCD will
capture, at within the limits of the 2" LCD. The 220's big brother (the DC260)
has a notably slow refresh rate on its LCD, but we found no such behavior from
the DC220. While not the very fastest screen refresh we've seen, it was very
usable.![]()
Optics
As we noted in our opening
overview, the DC220 appears to use the same lens and sensor as the earlier
DC210. (At least, the specifications and appearance are identical.) The lens is
a fixed-focus zoom design, with the focal length varying from 29-58mm. This is
range runs a bit more toward the wide-angle end than most cameras, a feature
that may be of interest to real-estate folks and others concerned about
capturing a larger view of their subjects. The lens focus range is from 39
inches (1.0 m) in normal mode at the telephoto end of its range, and from 19.8
inches (0.5 m) in normal mode at the wide-angle end. The macro mode provides an
8 inch (20 cm) focus distance. The lens aperture ranges from f/4.0 to f/13.5 at
the wide-angle setting, and from f/4.7 to f/16.0 at the telephoto end of the
zoom range.![]()
Digital
Zoom
The DC220 (along with its "big brother" the DC260) marks Kodak's
first excursion into the realm of "digital zoom" technology, whereby the camera
manipulates the image digitally to increase the apparent zoom ratio. This can be
a confusing term, given that two very different methods are used to implement it
in various cameras. At its simplest, some cameras "zoom" simply by chopping-out
the central portion of the image, and presenting it as a finished file of
smaller size. The DC220 takes the more aggressive approach of having the camera
actually interpolate data from the central portion of the CCD array to produce a
full-sized, albeit "softer" image. (No new information is being produced in the
image, what's there is just being interpolated further.) Kodak's implementation
in the DC220 goes most of the competition one better though: Rather than simply
an on/off 2x zoom, the '260 digital zoom operates smoothly across a 1:2 range,
in a manner more akin to optical zooms. The digital zoom only takes effect when
the LCD viewfinder is turned on, since that's the only way you can tell what
area is being captured. With the LCD viewfinder enabled, the digital zoom picks
up smoothly once you reach the end of the optical zoom range, giving much more
control over framing than the simple on/off digital zoom approach. With Kodak's
smooth digital zoom, you also needn't trade off any more resolution than needed
to make your shot. In practice, we frequently found ourselves wishing for a way
to selectively turn off the digital zoom, to avoid any loss of detail due to
interpolation. While you can do this quite simply by turning off the LCD panel
(which disables the digital zoom function), it would have been nice if we could
have disabled the digital zoom function while leaving the LCD powered up.![]()
Exposure
Kodak rates the DC220 at an
equivalent ISO speed of 140, and available lens apertures range from f/4.0 to
f/13.5 at the maximum wide-angle setting, to f/4.7-f16 at maximum telephoto. The
autoexposure system provides exposure times ranging from 1/2 to 1/360 seconds,
although a special time-exposure mode lets you manually set exposure times from
1/2 to 4 seconds, in 1/2-second increments. (This time-exposure feature is
fairly unique: Until now, noise in the CCD sensors prevented exposures this
long, and Kodak deserves commendation for bringing this capability to relatively
inexpensive digital cameras.) Based on its published specs, the DC220 should be
able to handle light levels ranging from EV 1.5 to EV 17.5, an incredible range,
although the upper end of the range is a little low for very brightly-lit
outdoor scenes (white sand at the beach on a sunny day, etc).![]()
Following longstanding Kodak tradition, the DC220
provides a welcome +/- 2f-stop (+/- 2 EV unit) exposure override capability in
1/2 stop increments, easily accessible via the top-panel buttons adjacent to the
LCD screen. This does much to increase the usefulness of the camera, allowing
the operator to adjust the exposure to compensate for backlighting, or light
subjects against dark backgrounds. A 10-second self-timer feature lets the
photographer get in the picture with the subjects.![]()
IMPORTANT NOTE: As CCD quality has
improved, long exposure times have become practical for inexpensive digital
cameras. Kodak has taken advantage of this with the 1/2 second maximum
autoexposure time on the DC-220. (Not to mention a 4-second time exposure!)
Other cameras with similar slow-shutter capability already on the market have in
some cases been criticized for poor autofocus performance in low light
situations. We suspect that much of the problem stems from users trying to
hand-hold the cameras during very long exposures. An experienced pro might be
able to hold a camera steady for an eighth of a second or so, but nobody is
going to get sharp pictures hand-holding a camera for a quarter-second exposure!
Take our advice, and use a tripod when the light is dim! Above all, don't blame
Kodak for fuzzy exposures in low light: They should be hailed for expanding the
range of situations in which digital cameras can effectively be used. (Flame
off...)![]()
The built-in flash has an effective range of 1.0
to 9.8 feet ( 0.3 to 3.0 m). Its five operating modes include auto, red-eye
reduction, fill (in which the flash always fires, regardless of the overall
scene brightness), fill with red-eye, and off. In our testing, the flash
performed well within its specified range, and was also able to throttle-down
effectively for "macro" work, at the 8-inch minimum focusing distance. (This
last has been a rarity for point & shoot cameras in the past, as they tended
to badly wash-out closeup shots when the flash was used.)![]()
Operation and User Interface
The user
interface and operation of the DC220 is easily one of its most distinguishing
characteristics, and probably the feature most likely to spark debate as well.
As the one of the first two cameras incorporating the "Digita" camera operating
system and scripting language (the other being its big brother the DC260), the
DC220 opens up new capabilities for modifying the camera's behavior to suit
specific applications and worfklows. Kodak has always maintained an excellent
interface for third-party developers, but the release of the Digita operating
system extends this further than has ever been the case before. (There are
already some neat third-party scripts showing up on the 'web - check the links
at the bottom of this review!)![]()
As
the DC220 has acquired more computer-like capabilities though, it has also
acquired some computer-like behavior: Like a computer, the '220 now needs to
"boot up" prior to use, in order to set up and initialize the various elements
of its operating system. This process takes on the order of 15 seconds, meaning
you can't just whip the camera out to snap a quick picture - its use requires
some forethought. Likewise, the camera can take a few seconds to shut down,
ranging from 5 seconds if it has been sitting idle for a while, up to 40 seconds
if you've just taken a couple of pictures that need to be processed before
power-off. ![]()
The ability of the
DC220 to process images "in the background" is a both wonderful and vexing
feature. On the one hand, it allows you to take two maximum-resolution images
(or 6 "standard" resolution ones) with essentially NO delay separating them. On
the other hand, the camera will then be unavailable to take the next shot for a
variable time after that: The camera indicates when it is busy processing prior
images and not ready to acquire another by flashing the green LED next to the
viewfinder. The indication of when it has completely finished all pending
processing is more subtle: With the LCD viewfinder powered up, a small
thermometer bar display shows current memory status: Its normal "as empty as I
get" position is about mid-way up the scale. When the memory status hits that
level, you have full memory available for capturing new pictures. We don't want
to complain too much about the uncertainty we felt over the camera's memory
status, as the ability to take two images with no delay at all is very useful.
Overall, we'll take the uncertainty as to the timing of the third and fourth
shots, in exchange for the ability to get the first two off very quickly.![]()
As you doubtless gathered from
our earlier comments, the DC220 is a very flexible device with many options
(time exposure, time-lapse photography, etc). It should come as no surprise
then, that the user interface needs a fair number of screens and menu options to
manage all this functionality. Kodak has created a very clear series of screens
and menus to control the camera, but the result is still a "deep" interface that
can take a little while to navigate. Fortunately, the most-frequently accessed
controls can be reached through the top-panel LCD and pushbuttons, which provide
a much shorter route to the desired functions. (Top-panel controls available in
capture mode include flash functions, +/- EV compensation,
still/burst/time-lapse enabling, compression level selection, and self-timer
enabling.)![]()
Camera setup is
effected through a combination of a back-panel mode-select rotary switch, a
4-way rocker button located inside of the mode-select ring, "display" and "menu"
buttons to the left of the LCD panel, and three unlabeled "soft buttons"
arranged along the bottom of the LCD. Extensive use is made of the LCD panel for
displaying menus and option choices, which are then selected through a
combination of the various buttons and controls.![]()
Overall operation of the DC220 is divided into
four modes, of which only 3 actually affect camera operation. The four modes,
selected by a back-panel rotary switch, are Capture, Review, Connect, and Info.
These are fairly self-explanatory, except perhaps "Info" mode. Presently,
selecting "Info" displays a screen on the LCD panel showing the camera's
firmware version, and directing you to a web location (www.kodak.com/go/dc220)
for the "latest info". We suspect this Info screen may be used to greater effect
with the Digita scripting system, as a place to put other script-driven menus,
etc.![]()
Setup controls (Back-panel
menus)
Camera setup is controlled via the back-panel controls. Pressing
the "Menu" button brings up a scrolling list of menus, each with several
choices. We'll step through these menus in the order they're presented on the
camera. In general, you move between menus by using the "<" and ">" keys,
and select items within the menu by using the "v" and "^" keys to highlight the
appropriate entry, and then pressing the "Select" soft key to choose that menu
option. Within the sub-menus, the "v" and "^" keys generally move you between
options, and the "<" and ">" keys select settings for each option.![]()
Picture
Type
The Picture Type menu has three sub-options, labeled "Still,"
"Burst," and "Timelapse." The Still option screen allows you to choose the pixel
dimensions of the image to be captured (1,152x864, or 640x480 pixels), as well
as the default compression setting (Good, Better, or Best). The compression
setting can be overridden by the top-panel picture-taking controls, and may also
be set via the Capture Mode screen, while picture size is available only through
the back-panel Still or Capture Mode screens, and not via the top-panel
controls.![]()
Burst Mode
Burst mode
allows the camera to take a number of images in rapid sequence, to the limit of
the camera's temporary buffer memory. In the case of the highest-resolution
images, "bursts" are limited to two images, while up to eight 640x480 images can
be captured in a single burst exposure. Settings available on the Burst screen
include the resolution images are to be captured in, the number of frames per
second to be captured (ranging from 12 fps to 0.1 fps), and the number of images
per burst. (Note that the image size selected and amount of available memory can
restrict both the maximum capture rate and the number of images that can be
acquired.)![]()
Timelapse Mode
The
Timelapse menu option lets you configure the camera to capture images over
extended periods of time. You can specify between-shot intervals in 16 steps,
ranging from one minute to 24 hours. (For longer-interval exposures, the camera
will appear to power-down between shots, but will wake back up again when its
time for the next frame.) As a side note, this is a pretty cool feature - if you
can put the camera down for a few minutes, time-lapse photos of clouds racing
across the sky are great for drawing oohs and aahs from friends. (You'll need
some sort of a basic animation package to string the raw pictures together into
a "movie" though...)![]()
Album
Settings (not on 220)
The CF storage cards used by the DC220 are
available with very large capacities (as much as 48 megabytes at this writing,
in mid-1998). This means you could potentially have hundreds of images in the
camera's memory. If you needed to navigate through this many images, the simple
"filmstrip" interface could become a bit unwieldy. The upscale DC260 provides an
"Albums" option to deal with images in groups, but Kodak left this feature off
the DC220, doubtless as a way to further differentiate between the two. It would
be nice to have some sort of more-rapid preview function available in its
absence (like a 4- or 9-image thumbnail view, as provided by some cameras), but
we never found this to be an impediment, at least when working within the
constraints of the included 8 MB memory card.![]()
Script Setting
The Script menu provides access
to scripts written in the Digita programming language that have previously been
created on a host computer and downloaded to the camera. As we write this (July,
1998), information on scripting in Digita's FlashPoint language was just
starting to be found on the web - check the links below, and/or sign up for
Kodak's software developer kit for the camera. To demonstrate the usefulness,
Kodak has begun pre-loading several scripts on the shipping units of the camera,
including ones for automatic bracketing, and a cute one called "One More
Picture", that automatically calculates the picture quality and compresson
settings needed to squeeze one more picture into the space available on the
memory card.![]()
White Balance
Settings
The DC220 provides for a variety of lighting conditions, via
its white-balance settings. Options include Auto, Daylight, Fluorescent,
Tungsten, and None. In automatic mode, the camera attempts to remove any color
cast in the image automatically. As with any digital camera, the automatic
function can be a little hit or miss, in that the camera doesn't know what it's
looking at: If a scene is composed only of varying shades of red, the automatic
white balance will try to subtract-out most of the red, leaving the colors dull
and lifeless. Most of the time, auto white balance is quite effective, so you
may not need to use the other settings. In practice, we found that the "manual"
settings tended to leave a little of the color cast of the lighting in the shot
(perhaps deliberately, to preserve some of the original picture's mood). This
was particularly evident with the tungsten setting, so it is possible we were
simply seeing the difference between common household lighting (typically a
color temperature of ~2700K), and professional tungsten lighting (with a color
temperature of 3200K). We were a little puzzled by the "none" setting, as it
isn't clear what the camera would be assuming as a light source if not one of
the three standard light sources. For what it's worth, images shot with the
"none" setting came out a little warmer-looking than those taken with the
"daylight" option, making it more suited to open shade or overcast skies.![]()
Watermark
Both the 220 and its big brother the
260 provide a unique customization option, that of "watermarking" images. In
most cases (and all the time with the 220), these watermarks will simply consist
of either the date and/or time, or a text message. This information can be
positioned anywhere in the picture area by specifying offsets from the upper
left-hand corner, and can have any of a variety of text and background colors
(including transparent/no background). Date and time stamping is nothing new
(although usually the location within the frame is fixed), but the DC220 goes
one better, allowing you to create a watermark of your logo or other graphic
information that can be applied to every picture, the same as the text or date
message. Logo watermarks are applied using special ".lgo" formatted files, which
must be uploaded from the host computer. Kodak provides a utility for converting
standard PNG (portable network graphics) files to the .lgo format, although we
didn't explore this option as part of this review. We can imaging the logo
watermark capability being used by realtors and others wishing to "brand" their
images to indicate origin.![]()
Advanced Exposure Modes
Settings
As we discussed earlier, the DC220 supports an "advanced
exposure mode": Long Time Exposure, allowing exposure times from 0.5 to 4.0
seconds. (On the DC260, this menu also includes settings for the external flash
option.)![]()
Preferences
The preferences menu
system allows you to set a variety of camera defaults, including the date/time,
camera name, and several Capture Preferences. Capture Preferences include the
file type used to store images (JPEG or FlashPix), the duration of the
"Quickview" image review after each image is captured, whether the auto-rotate
function is enabled, whether system sounds are enabled (the little clicks and
beeps associated with camera operation, menu selection, etc), and the duration
of the sleep timeout. (Timeout values of up to 5 minutes can be selected from
the on-camera menu system. Different intervals can be set for AC power through
the host computer software, up to 10 minutes - strangely, no provision is made
for continuous operation, even under AC power.)![]()
Picture-Taking Controls (top panel)
When you're
actually taking pictures with the camera, you probably don't want to be bothered
fiddling with complicated back-panel controls, menus, and buttons. Recognizing
this, Kodak has made the most important picture-taking controls accessible via a
top-panel LCD display and three buttons. Functions controlled from here include
flash, exposure compensation, picture type (still, burst, or time-lapse), and
quality (compression level). You cycle through icons representing each of these
by pressing the "Scroll" button, and choose settings for each by pressing the
"Select" button until the correct value appears. As an aid to interpreting the
icon meanings, the LCD display has an alphanumeric region built into it that
shows English-language translations of the current icon setting. For
convenience, the top-panel options are arranged in approximately the order of
likelihood you'd need to access them, with flash settings given highest
priority, followed closely by exposure compensation. The third top-panel button,
located to the right of the LCD display, turns the camera's self-timer function
on or off.![]()
Review Mode
Compared to
camera setup, Review mode operation is fairly simple. In Review mode, the camera
initially displays the most recently-taken picture on the screen, along with the
consecutive frame number, date and time of capture, type of image (single vs.
burst), and a "delete" label assigning that function to the leftmost soft key.
Initially, the image is displayed at lower resolution, gradually filling-in a
higher-resolution view over the course of about 10 seconds for
maximum-resolution images. You can step forward or back through images stored on
the CF card by using the "<" or ">" directions on the rocker-switch,
without waiting for the high-resolution image to display. (It takes 1-2 seconds
to move between successive images.) When the camera has completed "drawing" the
high-res image, the word "Magnify" appears over the middle soft key. Pressing
this key will zoom the image up so that its pixels are at 100% size relative to
those of the display screen. You can then scroll your viewing window smoothly
around the larger image file by using the rocker-switch like a joystick.
Pressing the center soft key reduces the image back to its normal size.
Individual images can be deleted at any time with the Delete soft key.![]()
You can move rapidly through all the images in
the camera's memory by pressing and holding the "Display" key for two seconds.
This displays a "filmstrip" of 3 consecutive images along the top of the LCD
screen, with the center one highlighted and also displayed as a slightly larger
thumbnail below. The rightmost soft keys are labeled "Delete" and either "Mark"
or "Unmark" depending on the status of the current image. In this mode, you can
scroll between images very rapidly (at about two images per second), and mark or
unmark selected ones for deletion. Pressing the "Delete" button then clears all
selected images. Alternatively, you can use this mode to quickly locate a
specific image to view in greater detail. Once an image appears as the current
selection, you can view it full-sized by pressing the "Display" key again, and
(if desired), choosing the Magnify function.![]()
Review Mode Menu Options
When in review mode, the
back-panel menu system on the DC220 offers 2 menus for setting configuration
options: Review Preferences, and Camera to Camera. ![]()
Review Preferences
Several
options are controlled via the Review Preferences menu. The Overlay entry allows
you to turn the soft key labels on or off. (While turning the overlay off lets
you see more of the picture, it could make operation a bit confusing.) This
function will be very useful for slideshow presentations, where the normal
overlay information would be distracting.![]()
The Slideshow sub-menu lets you set the duration individual
images are to be shown for, whether attached sounds are played during a show,
and whether the show is "looped" to provide continuous playback.![]()
Of the two remaining sub-menus, "Video" lets you
choose NTSC or PAL output, and "Play Settings" lets you control how rapidly
Burst, Timelapse, and Album pictures are played during full-screen display.
(Similar to the interval adjustment for slideshows, but applied only to the
specific picture types mentioned.) The Play Settings mode lets you specify
playback intervals as short as 1 second per image, but we were never able to get
the camera to move the images around that quickly. We thought at first this
might be an effect of displaying the images on the built-in LCD screen (slower
due to re-sampling needed to fit the image onto the small screen), but the
result was the same on an external NTSC monitor: Several seconds per frame was
the fastest it would play back. (Note again that ours was a "beta" unit, so the
production models may be able to play back faster.)![]()
Camera to Camera
We're not sure
just where you'd use this feature, but the DC220's IrDA port allows you to
"connect" two cameras together & transfer images between them! Use the
Camera to Camera menu on both to set one to "send" and one to "receive", point
them facing each other, and let 'em rip. - Any files you've "marked for action"
on the sending unit will be transmitted to the receiving one. ![]()
Connect Mode
To download images from
the camera via the serial port, USB, or IrDA ports, you must turn the camera on
and put it into "connect" mode. In this mode, all on-camera controls other than
the power and mode-select switches are disabled, and the camera is placed under
the full control of the host PC. As with many current-generation digital
cameras, the DC220 can be completely controlled from the PC via the computer
connection. (More on host connections in the next section following.) From a
user interface standpoint, all that need be done to connect the camera is to
plug it into the computer, power it up, and set the back-panel mode dial to
"Connect."![]()
Image Storage and
Interface
The DC220 has no "hardwired" permanent memory, relying
instead on removable "Kodak Picture Cards," which are tiny (1 3/8 x 1 5/8 inch)
(35 x 41 mm) flash memory cards conforming to the CompactFlash (CF) standard. An
8-megabyte (MB) Picture Card ships with the camera, and additional cards ranging
in size from 2 MB to 48 MB(!) can readily be purchased on the open market. A
standard PC Card adapter lets you read images directly from the Picture Cards
into computers equipped with PCMCIA slots or PC card readers (see the notes
below on "finished file format"). Depending on the image size and quality
setting chosen, an 8 MB card will store anywhere from 26-120 pictures. We've
found removable storage a very nice camera feature, as it allows longer sojourns
away from the computer. Given the current low cost of memory, we heartily
recommend a second memory card as an accessory for digital cameras that support
removable storage. ![]()
The DC220 ships standard with interface software and
cables for Windows '95/98 systems: Macintosh users will either need a
CompactFlash card reader, or an accessory software/cable kit sold by Kodak. (A
USB-based kit for the new Apple iMac is also available.) All of our testing here
was performed with a Pentium 233MMX computer running Windows '98. ![]()
Standard
RS-232 serial port technology is beginning to show its age badly in digital
camera applications, simply taking too long to move the 200-600 Kbyte files that
have become common. Recognizing this, the DC220 also includes USB and IrDA ports
for much higher-speed data transfer. Support for both USB and IrDA is rather
spotty under Windows '95, but should improve dramatically under Windows '98. In
our case, our much-modified, elderly Pentium 233 machine lacks any IrDA
capability at all, and its grafted-on USB ports were misbehaving when we had the
DC220 in-house for testing. We fortunately got the USB working when we received
our production-model DC260, and so report on those results here. (The operating
system and computer interface of the 220 and 260 are identical.)![]()
This was our first experience with a
USB-connected still camera, and it was a real eye-opener to the potential of
USB! Data transfers that would have taken minutes via the serial port literally
took only seconds with USB! (A note in passing: Our computer (and we suspect
most others) has two USB ports on it. They are NOT equivalent: The Kodak driver
software would only recognize the camera when it was plugged into port "0". -
Hopefully this may save some of our readers a bit of fumbling that we needlessly
went through.)![]()
Assuming you have a
machine that's fully Windows98/USB equipped and compliant, the Kodak driver
software works quite intuitively: With the camera set to "connect" mode via the
back-panel rotary switch, the computer will automatically recognize it as soon
as it's plugged into USB port 0. What's more, Kodak's "mounter" software makes
the camera appear to Windows as a storage device, allowing you to just drag and
drop images from it into hard drive folders via Windows Explorer. ![]()
As we mentioned, data transfer
speed was very impressive, after having become accustomed to the leisurely pace
(we're being polite) of serial connections: A single 444K image file transferred
to the computer in only 6.6 second! Twenty files occupying about 3.1 megabytes
of space took 83 seconds to transfer. Mathematically-inclined readers will
doubtless note the discrepancy between these two sets of figures: The 3.1
megabytes as 20 files took much longer, proportionately, than the single 444K
file. It turns out that the camera/driver/Windows takes a 2-3 seconds to get
started at the beginning of each file transfer. Thus, if you have many small
files, you'll end up with a slower overall transfer rate than you would with a
few larger files. Regardless, the transfer rate and convenience of the USB
connection are fantastic!![]()
We did
notice a few quirks with the mounter software and Windows however: When you
first connect the camera to the computer, it takes six or seven seconds for
Windows to recognize it, establish the connection, and mount the camera on the
desktop. Unfortunately, it appears that virtually any change in the Explorer
display (clicking up to a higher level in the folder hierarchy, for instance)
causes Windows to repeat this process twice, resulting in a delay of nearly 12
seconds. We found this rather annoying in practice, and soon learned to plug the
camera in, quickly transfer the images with a minimum of fiddling around in
Explorer, then disconnect it again.![]()
Another minor inconvenience is that the mounter
program is read-only: It won't let you write files to the camera's memory card.
This means you can't delete images from the camera memory, and prevents you from
right-clicking on images in the camera, to "move" rather than "copy" them to
your hard drive. Likewise, it also means that you can't use the mounter to load
scripts onto the camera - You need to rely on a CF card adapter in your computer
for this.![]()
If your computer has either a PC Card
(also called PCMCIA) slot, or a PC Card reader, you'll really appreciate the
"Finished File Format" feature of the DC220: Files are stored on the Picture
Cards in the final format needed by your computer. This means that when you plug
a Picture Card (in the optional PC Card adapter) into your computer, you can
immediately read, view, or copy the images on it either from the computer's
desktop, or directly from within your favorite image-handling software. This is
a welcome departure from Kodak's previous use of proprietary file formats for
removable camera storage, ending with the DC120: A many-minute serial-cable
transfer takes literally seconds with the Picture Card plugged directly into
your computer! Given the large file sizes the DC220 can produce, we strongly
recommend purchasing the optional PC-card adapter, and equipping your computer
with a PC Card reader if it doesn't already have one.![]()
Video Out
The DC220 can also display
on-board images directly on TV monitors, supporting both American (NTSC) and
European (PAL) signal formats. This makes the camera a very useful presentation
tool, particularly when equipped with a higher-capacity storage card. Some
cameras support playback of images modified in the computer to add titles or
other markings, but others do not. As noted above in the "interface" section,
the DC220 does not allow bidirectional image transfer. We did experiment some
with copying images from other sources onto the Picture Card though, directly
via a CF adapter in our laptop. What we found was that the DC220 can readily
display unmodified images shot with some other cameras (we tried a couple of
images from the Nikon CP900, the file size of which doesn't even match any of
the DC220's normal modes), but not images we saved from Photoshop. Having thus
proved that neither exact file dimensions or file-naming protocols are
important, we suspect the issue has to do with strict adherence to the EXIF JPEG
standard, which Photoshop 4.0 may not provide. If we develop additional
information (or if a reader emails us with it), we'll add it here for general
edification. Bottom line: The DC220 can display images from other sources: They
only need to be in the correct format.![]()
By
the way, don't think the video-out capability is restricted to business uses! --
A slide show of a business trip can do a lot to help reconnect the harried
business traveler to his or her family upon their return. Even better, "real
time" slide shows of family get-togethers can be great fun as well. Overall, you
may find yourself getting more use out of the TV output than you initially
think...![]()
Sound Recording
That's right - sound!
The DC220 contains both a microphone and speaker, so you can attach sound
directly to any image file. You can record sound for a picture anytime the
picture is being displayed: Either during the "review" display in capture mode,
or while viewing the image in review mode. To record, you press the small black
"record" button on the left-hand side of the camera back, and speak in a normal
tone of voice. You can review what you've recorded, and either save it or delete
it and record a new copy. Once saved, sounds stay with the picture files, unless
you explicitly delete them. Images displayed during a slide show will play their
sound clip as well. The manual makes no mention of how long a sound clip can be
attached to each image: In our experimentation, we could record a maximum length
of 45 seconds, quite a bit of talking!![]()
When downloading files to the computer, attached sound data can
be saved to disk as separate .wav files, either with the same name as the main
picture, or under a different name altogether. ![]()
Power
Power for the DC220 is provided
by 4 internal AA batteries, or by an optional AC adapter than can significantly
extend battery life if you're doing a lot of downloads via the serial port. As
we mentioned earlier, LCD panels on digital cameras can really "eat" batteries,
and the DC220's is no exception. If you plan to use the LCD very much, we highly
recommend the optional NiMH rechargeable battery/charger accessory kit (Kodak
part number 807-6341). Note that while Kodak doesn't specifically prohibit any
battery type in their documentation, the do particularly caution against
operating the unit with the LCD panel on for more than 30 minutes when using
Lithium batteries, because they could "heat up significantly." (You'd better
believe it!) Although Lithium batteries have very high power capacities, we
don't recommend them in high-power cameras like the DC220. - Save yourself a lot
of grief, and buy a couple of sets of good NiMH batteries and a quality charger.
![]()
Included
Software
When we received our production test unit of the DC260,
we also got a look at Kodak's software bundle that ships with the DC220 as well.
It's a pretty complete package, including Kodak's own all-around
consumer-imaging behemoth "PictureEasy", as well as the PhotoDeluxe image-editor
and PageMill web-page creation programs from Adobe. The Adobe programs are
common enough in the marketplace that we won't spend our time here discussing
them: See Adobe's web site for details. Besides the application software,
Windows users will find the "mounter" application described earlier for Windows
95/98 and NT, that allows the camera to appear on the Windows desktop as if it
were a disk drive. Also included is a TWAIN acquire module to interface the
camera to any TWAIN-compliant software.![]()
Kodak's PictureEasy is the third version of their
all-in-one imaging program, intended to provide a single application from which
to acquire, adjust, organize, print, and even email your pictures. Given all its
capabilities, it should come as no surprise that it needs a substantial
"footprint" on your computer's hard drive, about 70 megabytes(!).![]()
Given its ambitious
objectives, Kodak has done a creditable job of delivering the desired level of
capability and integration in PictureEasy, although even novice users are likely
to want more in the way of image manipulation than PictureEasy 3.0 provides.
(Hence, undoubtedly, Kodak's inclusion of PhotoDeluxe.) The one area we find to
fault PictureEasy on though, is its speed: Even fairly simple operations seemed
to take a long time to execute, and the program seems to need to pause and
"re-think" what it's doing after every step. Some operations, such as assembling
pages of photos to go to the printer, could benefit from some re-architecting:
We found ourselves waiting a long time for the program to process the images and
show us how they were laid out on the page. Why couldn't it quickly give us a
low-res "proxy" to check the layout, and then build the pages in the background?
(In fairness to the program though, it does seem to cache the low-res thumbnail
once it's initially processed an image, and subsequent usage of the same image
proceeds much more quickly.)![]()
We do feel that our reaction to the software should be moderated
and disclaimed somewhat, given our "power user" comfort and familiarity with
higher-end imaging programs like Photoshop: For most novice users (and
particularly those with newer Pentium-II machines), the program's easy-to-use
interface should more than balance any slowness of operation.![]()
Test Results
In every Imaging Resource
product review, we encourage you to let your own eyes be the judge of how well
the devices performed: Explore the links at the bottom of this page, to see how
well the DC220 performed, and how its images compare to other cameras you may be
considering buying. You're also welcome to download the images (for personal use
only) to see how they look when output on your own printer.![]()
Overall, the DC220 produced very pleasing
pictures, with the excellent, highly-saturated color rendition we've come to
expect from Kodak. (Even though it apparently uses the same sensor as the
earlier DC210, the DC220 produced images which were sharper and had less image
noise than its predecessor.)![]()
Detail and resolution were quite good,
approximately 700 line pairs per picture height both vertically and horizontally
with the ISO 12233 (formerly referred to here as the "WG-18") test target. Like
the '210 though, the fixed-focus zoom lens optics on the '220 was sharpest at
middle distances, going somewhat soft at infinity. Also, in common with its "big
brother" the DC260, the '220 appears to flatten detail somewhat in areas of
subtle contrast, apparently due to a somewhat aggressive use of image
compression.![]()
Viewfinder and flash accuracy in the
DC220 were both excellent. The optical viewfinder follows common practice of
showing slightly less that 100% of the final scene, in this case about 11% less
vertically and horizontally. As we've found with other Kodak cameras we've
tested though, the LCD viewfinder is deadly accurate, showing exactly what the
CCD is looking at. (Surprisingly, this is a rarity among digital point &
shoots.)![]()
The DC220 does moderately well
in macro mode, capturing an area of 4.1 x 5.5 inches (10.5 x 14 cm) at its fixed
macro focus distance of 8 inches (20cm). While we didn't post an image showing
it, the flash works fairly well this close also, "throttling back" effectively
enough to keep it from washing out the highlights.![]()
We
found that the DC220 has a good tonal range, preserving highlight details very
well, while still doing a good job in the shadows. (We did notice significantly
increased compression artifacts in the extreme shadows though.)![]()
Overall, as we noted at the outset, the DC220
produces very attractive pictures, and achieves a slight but noticeable
improvement over the earlier DC210 in most image-quality parameters.![]()
Conclusion
With the inclusion of
FlashPoint's Digita architecture and scripting language, Kodak's DC220 opens new
possibilities and applications in the upper mid-range of the digital point &
shoot world. The computer-like capabilities it incorporates give it unique power
for vertical applications (such as real estate and insurance claims handling),
but at some penalty in shot-to-shot cycle times and startup/shutdown speed. As
we write this, users are already beginning to experiment with Digita scripts to
add useful capabilities and explore "hidden" camera features: We expect to see
much more of this in the near future. Overall, the DC220 extends the
functionality of the predecessor DC210 in interesting and useful ways, while
leveraging the sensor and lens technology Kodak had already developed for the
earlier camera. Image quality and resolution are very similar to the DC210: If
all you need is a basic digicam, the 210 will work well. On the other hand, if
you want to get into a scriptable "Digita" platform cheaply (or, want the high
speed afforded by a USB connection), the DC220 is the camera for you.![]()
Reader Comments!
See what other Imaging
Resource readers have had to say about the DC220, or add comments of
your own. (Read what's here, then add your
own!)
Reader Sample
Images!
Do you have a DC220 camera? If you'll post an
album of your samples on one of the photo-sharing services and email us at [email protected], we'll
list the album here for others to see!
View the test images from the DC220
View the DC220 data sheet

Follow Imaging Resource: