Canon EOS-1D Mark IICanon doubles the resolution of their speed demon SLR, while actually increasing its speed and cutting image noise. Amazing!<<Executive Overview :(Previous) | (Next): Viewfinder>> Page 4:DesignReview First Posted: 01/27/2005 |
Design
 The Canon EOS-1D Mark II
has just about all of the excellent features of the original EOS-1D, including
dust and water sealing around all moving parts exposed to the outside (one must
use an L glass lens with a rubber seal to get weather sealing around the lens
opening, however), but ups the ante with a large, 8.2-megapixel CMOS sensor.
Weighing in at a hefty 55.3 ounces (1,569 grams) with the battery and memory
card installed (but no lens attached), the Canon EOS-1D Mark II is more than
a handful. Its magnesium-alloy body is exceptionally tough and durable, ready
for heavy use. Like the previous 1D, size and portability weren't top design
considerations, as the camera is clearly intended for the serious photographer.
Instead, Canon opted for maximum speed, ruggedness, and compatibility with the
EOS-1v film camera and previous 1D and 1Ds models. The EOS-1D Mark II measures
a whopping (by consumer digicam standards) 6.1 x 6.2 x 3.1 inches (156 x 157.6
x 79.9mm ), and definitely requires a two-handed grip.
The Canon EOS-1D Mark II
has just about all of the excellent features of the original EOS-1D, including
dust and water sealing around all moving parts exposed to the outside (one must
use an L glass lens with a rubber seal to get weather sealing around the lens
opening, however), but ups the ante with a large, 8.2-megapixel CMOS sensor.
Weighing in at a hefty 55.3 ounces (1,569 grams) with the battery and memory
card installed (but no lens attached), the Canon EOS-1D Mark II is more than
a handful. Its magnesium-alloy body is exceptionally tough and durable, ready
for heavy use. Like the previous 1D, size and portability weren't top design
considerations, as the camera is clearly intended for the serious photographer.
Instead, Canon opted for maximum speed, ruggedness, and compatibility with the
EOS-1v film camera and previous 1D and 1Ds models. The EOS-1D Mark II measures
a whopping (by consumer digicam standards) 6.1 x 6.2 x 3.1 inches (156 x 157.6
x 79.9mm ), and definitely requires a two-handed grip.
Like the 1D, the Mark II's resemblance to the film-based EOS-1v (introduced a year earlier than the 1D) is more than close -- the cameras are virtually identical. All of the conventional controls (AF, Mode, Drive, ISO, Exposure Compensation, etc.) are exactly the same, except for the obvious differences, such as those digital controls on the Mark II that simply don't apply to a film camera, and the lack of a film compartment door -- but everything that can be the same is. This extends even to the Custom Function options. If you're comfortable using an EOS-1v, you'll be able to transition to the 1D or Mark II with almost no learning curve, and switching rapidly back and forth between them should involve no confusion.
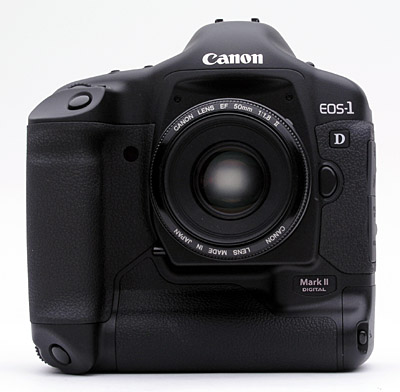
The front of the Canon EOS-1D Mark II is simple in design, featuring just the lens mount and a few controls. A small release button on the left side of the lens (when holding the camera from the rear) releases the lens from its mount, allowing you to remove it completely with a turn to the right. The large, bulky hand grip is big enough to provide a secure hold on the camera, even with a lens attached. A smaller ridge runs along the bottom, serving as the vertical handgrip and battery compartment, with a secondary Shutter button and Command dial, for use when holding the camera vertically. Also visible from the front of the camera is the main Shutter button, mounted at a sloping angle from the top panel, as well as the front of the battery compartment. Almost hidden between the lens mount and hand grip is the self-timer lamp, behind a dark window. Finally, the Depth of Field Preview button can be seen on the right side of the lens mount (on the left in the image above).
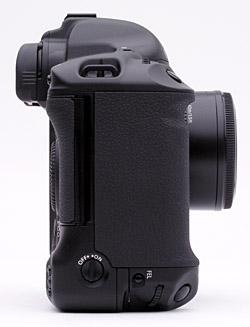
On the right side of the camera (as viewed from behind) is an On/Off switch that activates the secondary camera controls; the secondary Flash Exposure Lock button; the secondary Main Dial; and the secondary Shutter button. Also on this side of the camera is one of the hefty neck strap attachment eyelets.
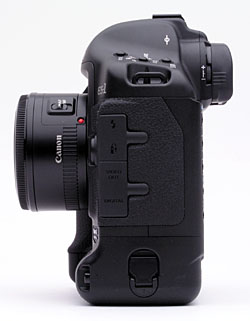
Lining the opposite side of the camera are the Flash PC socket, Remote Control, Video Out, and Digital input jacks (USB and IEEE-1394 Firewire), each covered by a flexible synthetic rubber flap that swings around out of the way for easier access. At the bottom are the battery compartment and its release controls -- a rotating lock and a release button, both of which must be activated to open the compartment door. Though I found this system a little difficult to operate at times, it does ensure that the battery stays in place, and won't accidentally end up on the ground.
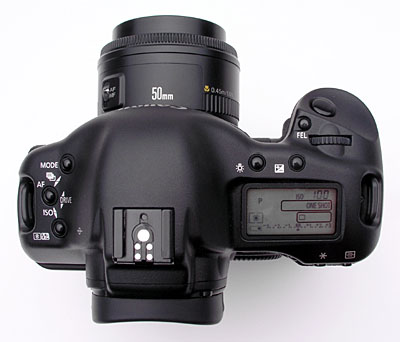
The Canon EOS-1D Mark II's top panel holds several camera controls, including the Mode, AF, Drive, ISO, Metering/Flash Exposure Compensation, LCD Illumination, Exposure Compensation, Flash Exposure Lock, and Shutter buttons. The small Command Dial located just behind the Shutter button, is used to adjust camera settings. (The Main Dial is used by itself to set aperture and shutter speed in some modes, or works with many of the plethora other buttons to engage the actual setting changes.) The external flash hot shoe crowns the camera's top panel, and a small, black-and-white LCD monitor reports camera information such as battery power, exposure mode, aperture, shutter speed, and exposure compensation, among others.
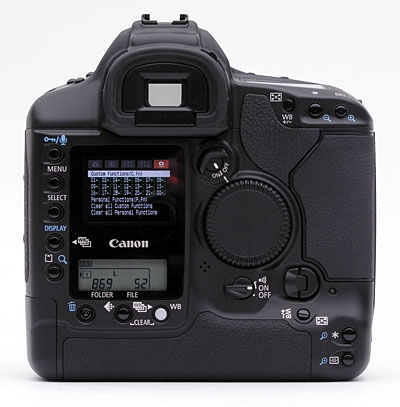
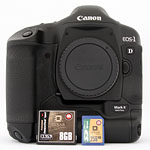
The remaining camera controls are located on the back panel, along with the LCD monitor and optical viewfinder eyepiece. A diopter adjustment dial and the optical viewfinder eyepiece shutter lever flank the eyepiece on either side. A removable soft rubber eyecup (included in the box with the Mark II) can be attached to improve viewing in strong ambient lighting. In the center of the back panel is the large Quick Control dial, which also selects camera settings when turned on (a small switch above the dial turns it on or off). While it does work in conjunction with some of the camera's buttons, the Quick Control dial primarily serves as part of the user interface for the LCD menu system. Camera controls on the back panel include the Assist, AE Lock, AF Point Selection, Sound/Protect, Menu, Select, Display, Memory Card/Magnify, Erase, Image Size Selection, and White Balance buttons. In the lower right corner are the secondary Assist, AE Lock, and AF Point Selection buttons, for use when holding the camera vertically. The 2.0-inch LCD monitor displays image playback and menu screens, and a secondary, black-and-white LCD data readout just below it reports more camera information. Also on the back panel is the dual memory card slot whose door is released by turning the small release key just below it.
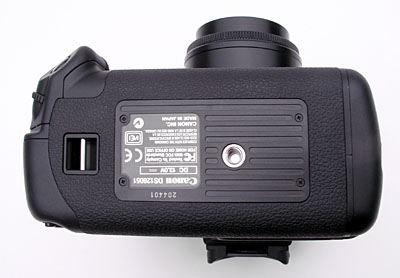
The bottom panel of the Canon EOS-1D Mark II holds only a tripod socket and a secondary neck strap attachment eyelet (presumably for attaching the neck strap for vertical shooting). The tripod mount is directly below the centerline of the lens, designed to reduce parallax errors between shots when panning.
Reader Comments! --> Visit our discussion forum for the Canon EOS-1D Mark II!

Follow Imaging Resource: