Olympus E-P2 Noise Reduction
The Olympus E-P2 offers four levels of noise-reduction, which gives good control in choosing how you want to make the trade-off between subject detail and noise level. The E-P2 applies NR to its JPEGs at all ISOs, so we've included crops at all ISOs in the tables below. The combination of shooting with NR turned down to the lowest setting and using a good noise-filtering program after the fact can produce very clean images with lots of fine detail in them. RAW images with no NR or sharpening are also shown for comparison.
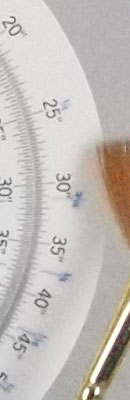
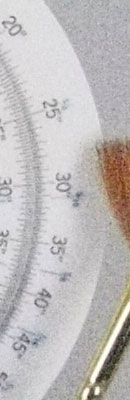
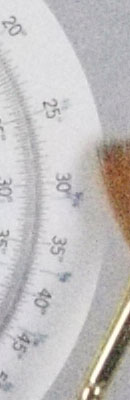
See for yourself how the noise reduction works under daylight-balanced lighting. Click on any of the crops below to see the corresponding full-sized image.
| Noise Reduction Comparison In-camera JPEGs Daylight-balanced illumination |
||||
|
NR = Off
|
NR = Low
|
NR = Standard
|
NR = High
|
|
| I S O 1 0 0 |
 |
 |
 |
 |
 |
 |
 |
 |
|
 |
 |
 |
 |
|
|
NR = Off
|
NR = Low
|
NR = Standard
|
NR = High
|
|
| I S O 2 0 0 |
 |
 |
 |
 |
 |
 |
 |
 |
|
 |
 |
 |
 |
|
|
NR = Off
|
NR = Low
|
NR = Standard
|
NR = High
|
|
| I S O 4 0 0 |
 |
 |
 |
 |
 |
 |
 |
 |
|
 |
 |
 |
 |
|
|
NR = Off
|
NR = Low
|
NR = Standard
|
NR = High
|
|
| I S O 8 0 0 |
 |
 |
 |
 |
 |
 |
 |
 |
|
 |
 |
 |
 |
|
|
NR = Off
|
NR = Low
|
NR = Standard
|
NR = High
|
|
| I S O 1 6 0 0 |
 |
 |
 |
 |
 |
 |
 |
 |
|
 |
 |
 |
 |
|
|
NR = Off
|
NR = Low
|
NR = Standard
|
NR = High
|
|
| I S O 3 2 0 0 |
 |
 |
 |
 |
 |
 |
 |
 |
|
 |
 |
 |
 |
|
|
|
NR = Off
|
NR = Low
|
NR = Standard
|
NR = High
|
|
I
S O 6 4 0 0 |
 |
 |
 |
 |
 |
 |
 |
 |
|
 |
 |
 |
 |
|
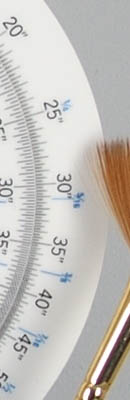
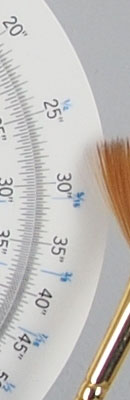
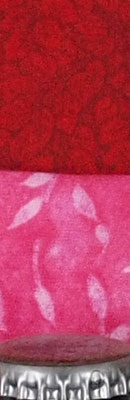
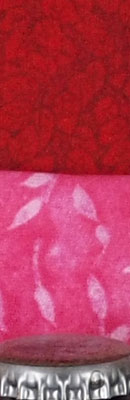
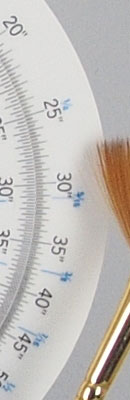
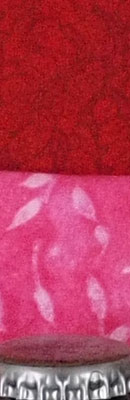
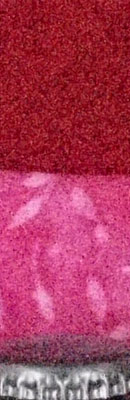
The above crops show the effects of the four available noise reduction settings, under the studio HMI lighting we use to simulate daylight. To our eyes, the default (Standard) level of noise reduction strikes a pretty good balance between noise and subtle subject detail, although the red fabric swatch presents a real challenge, as it does for virtually all cameras we test. Cranking the noise reduction setting up to High produces very smooth-looking images, while still maintaining good detail in areas of high local contrast (as seen in the circular scale), but a lot of detail is lost in areas of subtle contrast (the red fabric swatch is a particularly challenging subject, and the detail loss there is worse than you'd find in most real-world examples). At the other end of the scale, the Off noise reduction setting leaves a lot of noise in the image, but also leaves the subject detail largely undisturbed: Use this setting if you have good third-party noise reduction software; with appropriate processing, the result could be quite good. You should be able to do even better working from the RAW files.
But how does the Olympus E-P2 compare to other compact Micro Four Thirds models? See the following table which compares at the default Noise Reduction setting at ISO 800 and above.
| High ISO Comparison with Olympus E-PL1, Olympus E-P1 and Panasonic GF1 (In-camera JPEGs, all default NR) Daylight-balanced illumination |
||||
|
Olympus E-P2
|
Olympus E-PL1
|
Olympus E-P1
|
Panasonic GF1
|
|
| I S O 8 0 0 |
|
 |
 |
 |
|
 |
 |
 |
|
|
 |
 |
 |
|
|
Olympus E-P2
|
Olympus E-PL1
|
Olympus E-P1
|
Panasonic GF1
|
|
| I S O 1 6 0 0 |
|
 |
 |
 |
|
 |
 |
 |
|
|
 |
 |
 |
|
|
Olympus E-P2
|
Olympus E-PL1
|
Olympus E-P1
|
Panasonic GF1
|
|
| I S O 3 2 0 0 |
|
 |
 |
 |
|
 |
 |
 |
|
|
 |
 |
 |
|
|
Olympus E-P2
|
Olympus E-PL1
|
Olympus E-P1
|
Panasonic GF1
|
|
| I S O 6 4 0 0 |
|
 |
N/A
ISO 6400 not supported |
|
|
 |
N/A
ISO 6400 not supported |
||
|
 |
N/A
ISO 6400 not supported |
||
To our eyes the newest Micro Four Thirds model, the Olympus E-PL1, has the cleanest looking images of the group, though E-P2 isn't far behind. The E-P1 looks a touch noisier, but also leaves more detail in the red fabric. You can really see a difference in Panasonic's approach to noise reduction. It leaves more detail in the red fabric, at least at moderate ISOs, but also shows more chroma noise. Each camera manufacturer makes somewhat different trade-offs between noise and image detail, compounded by the number of different NR settings each offers. Be sure check out our RAW crops, to see how sensor output compares without NR or other in-camera processing.
 Fujifilm GFX 50S Review
 Fujifilm X-T3 Review
 Olympus E-M5 III Review

Follow Imaging Resource