Konica Minolta Maxxum 5DQuickly on the heels of its first dSLR, Konica Minolta shrinks the form factor and the price without losing in-camera image stabilization.<<Optics :(Previous) | (Next): Shutter Lag/Cycle Times>> Page 6:Exposure, Drive Modes & FlashReview First Posted: 10/31/2005 |
Exposure
| Free Photo Lessons | |
|
In straight Auto mode, the camera controls everything about the exposure, except for flash, zoom, and focus. Program AE mode keeps the camera in charge of the exposure, while you have control over all other exposure options. While in Program AE mode, you can rotate the control dial with or without holding the Exposure Compensation button to scroll through a range of equivalent exposure settings. Thus, you can bias your exposure toward a faster shutter speed or greater depth of field as circumstances dictate. Aperture Priority mode lets you select the lens aperture setting, while the camera selects the most appropriate corresponding shutter speed. In Shutter Priority mode, the user selects the shutter speed, from 1/4,000 to 30 seconds, while the camera chooses the best corresponding aperture setting. Switching to Manual mode gives you control over both shutter speed and aperture, with a Bulb setting available for longer exposures. Exposure time in Bulb mode is determined by how long you hold down the Shutter button. There doesn't appear to be any limit to the duration of Bulb exposures, but it appears that the dark-frame subtraction will only compensate for exposures up to 30 seconds long. (I strongly recommend use of the optional wired remote in Bulb mode, as the pressure of your finger on the Shutter button is bound to jiggle the camera somewhat, blurring the image.)
The five Scene modes, which Konica Minolta calls"Digital Subject Programs" are Portrait, Sports Action, Landscape, Sunset, and Night Portrait. Each optimizes the camera's exposure, white balance, and image processing systems for the particular program.
Portrait biases toward wider apertures to defocus the background while capturing warm, soft skin tones. Sports Action maximizes shutter speeds with Continuous Autofocus and Continuous Advance Drive modes. Landscape produces sharp, colorful shots of outdoor scenery. Sunset handles the rich warm palettes of sunsets. Night Portrait balances ambient light with flash.
A Depth of Field Preview button on the front of the camera lets you view a scene through the viewfinder with the aperture stopped down, previewing the depth of field before actually capturing the image.
The 5D offers three metering modes: Multi-segment, Center-Weighted and Spot. The default metering mode is a 14-segment honeycomb pattern system, which takes readings throughout the image to determine exposure. Center-Weighted gives precedence to the center of the image while reading the whole frame. Spot metering options are also available via the Metering Mode dial on the rear panel. Spot metering, useful for high-contrast subjects, bases the exposure reading on the very center of the image, letting you set the exposure based on a small portion of your subject. You can also lock an exposure reading by pressing the AE Lock button on the back panel. Halfway pressing the Shutter button also locks exposure and focus, but only in autofocus mode.
The 5D's light sensitivity can be set to ISO equivalents of 100, 200, 400, 800, 1,600, or 3,200 setting, or left in Auto mode for the camera to adjust as it sees fit. A Noise Reduction option is available for longer exposures and higher ISO settings, and greatly reduces the amount of image noise that would otherwise result. Exposure compensation is adjustable from -2 to +2 exposure equivalents (EV) in one-third-step increments by turning the Control dial while pressing the Exposure Compensation button, which displays the scale and setting on the LCD monitor. There is no EV dial. An Auto Exposure Bracketing option can snap three shots in rapid succession, varying the exposure between each in steps of 0.3 or 0.7 EV units. You can also bracket the exposures using the flash. The 5D's Drive mode dial offers Auto Exposure Bracketing for either Single Advance or Continuous Advance drive settings.
The 5D offers convenient control over white balance, color rendition, and tonal range. You adjust white balance by first turning the White Balance dial to one of its four options: Auto, Preset, Custom, or Color Temperature. Auto lets the camera choose the white balance itself. Preset lets you set the white balance to a specific light source. Options include Daylight, Shade, Cloudy, Tungsten, Fluorescent, and Flash. Custom allows you to calibrate the camera to a specific lighting situation by pointing to a white or neutral object. Color Temperature lets you select a specific color temperature in degrees Kelvin.
The Digital Effects Control, available when you press the Function button in a recording mode, offers control over image contrast, saturation, and sharpness in five steps from -2 to +2 arbitrary units. The Color Mode option of the Digital Effects Control, available in P, A, S, and M exposure modes, sRGB color space options of Natural (faithful color reproduction), Natural Plus (increased contrast and sharpness), Portrait (optimized skin tones), Landscape (optimized daytime outdoor scenery), Sunset (optimized landscapes at dusk or dawn), Night view (optimized for nighttime scenery without flash), Night Portrait (nighttime scenery with flash), and Black & White (monochrome). Two non-sRGB options are also available: Adobe RGB and Embedded Adobe RGB (in which the color space is embedded in the image data). Adobe RGB has a larger color gamut than sRGB. Embedded Adobe RGB files are written to the CompactFlash card with a .JPE extension. Adobe RGB images without an embedded profile are written with a file prefix of _ICT rather than the normal PICT.
Drive Modes
The Maxxum 5D's Drive Mode button on the top panel accesses a range of shooting modes, including Single Frame Advance, Continuous Advance, 10-second Self-timer, Two-second Self-timer modes, Single Frame Bracketing, and Continuous Advance Bracketing. Both of the bracketing modes access the camera's Auto Exposure Bracketing system. In Continuous Advance mode, the 5D captures a rapid series of images, with a maximum frame rate of three frames per second. Actual frame rates will vary, depending on the image size and quality settings, as will the total number of images in the series, due to the amount of memory card space.
The two Self-Timer modes lock the mirror up, then fire the shutter a short delay after the Shutter button is pressed. The shorter, two-second delay is very handy when you need to prop the camera on something to take a photo in dim lighting, and don't want the pressure of your finger on the shutter button to jiggle the camera. The 10-second delay is long enough that you can run around to get into the photo yourself. An LED lamp on the front of the Maxxum 5D blinks and the camera beeps as the 10-second Self-Timer is counting down, the blink and beeps becoming faster in the last few seconds. (No indication is given for the shorter countdown.) As with many other functions on the 7D, I liked being able to choose between the 2- and 10-second delay settings without having to delve into a menu screen.
Flash
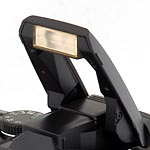 The 5D features a built-in, swing-up flash, which operates in either Fill-Flash, Red-Eye Reduction, Rear Flash sync, or Wireless modes. (I call it a swing-up flash because it doesn't pop up automatically when needed, and also doesn't manually pop up at the press of a button under spring pressure, which would be more convenient when you're in a hurry.) To release the flash from its compartment, pull on the two small tabs on either side of the casing to lift up the flash head. Close it again by simply pushing the flash head back down. The Flash mode is changed through the Record settings menu. In Fill-Flash mode, the flash fires with every exposure, regardless of lighting conditions. Red-Eye Reduction fires a series of small pre-flashes before firing the flash at full power for the exposure itself. This makes your subjects' pupils contract and reduces the occurrence of the Red-Eye effect. The Rear Flash Sync mode fires the flash at the end of the shutter time, rather than the beginning. If you have moving objects in a relatively brightly lit environment, this will produce a sharp image of your subject, with a "motion trail" following behind it. The flash is in the Off position when it's closed. The Wireless mode lets the camera work with wireless remote flash units, with four channels available through the settings menu, so different camera/flash setups working in the same area won't interfere with each other. (Konica Minolta makes two flash units that support the 7D's wireless capability, the Program/Maxxum 5600HS [D] and 3600HS [D].)
In Program AE, Full Auto, and Aperture Priority exposure modes, pressing and holding the AE Lock button activates a Slow-Sync mode setting, which balances the flash exposure with the ambient lighting. The exposure is based on the ambient light, and the flash power is based on the aperture setting. Results with indoor and outdoor shots that include light fixtures can be dramatic and pleasing.
The 5D offers two methods of flash metering. Its default mode is called ADI, which stands for Advanced Distance Integration. In this mode, it bases its flash exposure on the lens aperture and distance feedback from the autofocus system, as well as on the light reflected back from a pre-flash. By determining how far away the target subject is, the camera knows how much flash power is required to illuminate it, and so is less likely to be fooled by subjects that are unusually light or dark overall. Alternatively, the Pre-Flash TTL (through the lens) method bases the exposure determination solely on a small metering flash before the main exposure. Used in conjunction with the spot autofocus option mentioned earlier, the ADI flash metering should be more accurate with small subjects against a different colored background than the pre-flash method.
The 5D also has a top-mounted hot shoe for attaching an external flash unit. The shoe design and contact arrangement are set up for Konica Minolta's own dedicated flash units, but I imagine that compatible models are available from the major third-party flash manufacturers (Sunpak et. al.). Konica Minolta's own Maxxum/Program Flash models 2500(D), 3600HS(D), and 5600HS(D) work with the 5D, and two macro flashes (Macro Twin Flash 2400 and Macro Ring Flash 1200) will work with an accessory macro flash controller. The 5D is compatible with the High Speed Sync (HSS) function of the Maxxum/Program Flash 5600HS(D) and 3600HS(D) units, meaning the camera can use its full range of shutter speeds up to 1/4,000 second.
There is no external flash sync terminal (the so-called "PC" style connector) for third-party flash units. Nor can the flash be throttled down, as on the 7D.
Reader Comments! --> Visit our discussion forum for the Konica Minolta Maxxum 5D!

Follow Imaging Resource: